Archive for the ‘Main Dishes’ Category

Parmesan Risotto With Roasted Shrimp

Monday, February 1st, 2016

Parmesan Risotto With Roasted Shrimp from MomAdvice.com

Valentine’s Day is just around the corner and for many years I have chosen to honor this occasion with a special dish for my man. Battling crowded restaurants is one of the least romantic ways to spend this holiday so instead we choose to eat a special dinner at home.  In years past, I focused my efforts on mastering a restaurant-worthy filet, a skill I never thought I could nail. This year, I wanted to challenge myself to make a great risotto for our feast. Mastering risotto has been on my wish list of cooking skills because it is the dish I always order when dining out. Risotto is pricey for such a humble dish when dining out, but one bite has always made it worth it for me. Risotto is gluten-free comfort food at its finest and a beautiful dish to prepare for your favorite Valentine this year.

Rice Select Arborio Rice

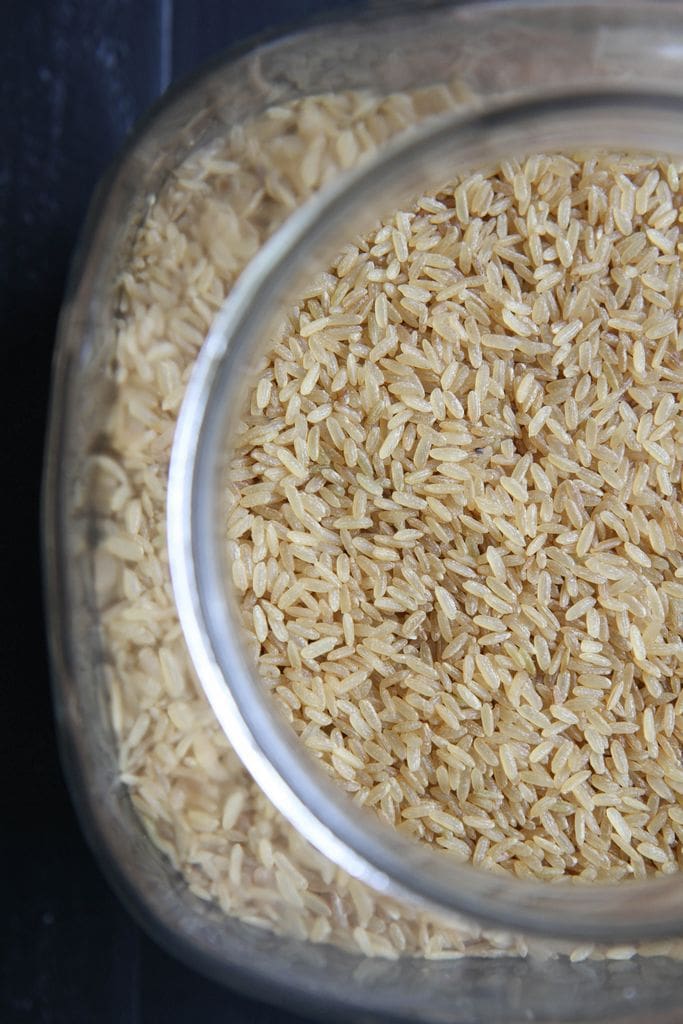
When you head to the grocery store, you are looking for Arborio Rice. This is the exact brand I used and it was perfection. Can I be honest and say it was sitting in my pantry for months because I lost my nerve to make risotto? That is the truth! Arborio rice is an Italian short-grain rice. It is named after the town of Arborio, in the Po Valley, where it is grown. When cooked, the rounded grains are firm, creamy, and chewy, due to their higher amylopectin starch content. It creates a deliciously starchy and creamy dish that compliments other flavors that are added to it and it is the rice that is most commonly used to create risotto.

Parmesan Risotto With Roasted Shrimp from MomAdvice.com

Have you had risotto before? If you haven’t yet, you are in for a real treat! It has a reputation for being a fussy dish, but really this dish takes just thirty minutes or less. In fact, I remember watching risotto preparation for the first time on a Rachael Ray 30 Minute Meal show. What makes risotto so delicious is actually you stirring the dish throughout that thirty minutes to release those starches in the rice that helps to create that creamy comforting flavor. The privilege of being the stirrer is having another hand to do the wine sipping as the dish pulls together. It’s a great reason to volunteer for the job, in my opinion.

For a first risotto these simple flavors are so easy to pull together. The shrimp dressed simply in paprika adds a beautiful smoky flavor on top of these creamy bowls of risotto. I have found that the wine, parmesan cheese, and frozen shrimp are all very affordable at ALDI.  That isn’t sponsored talk, I’m just a true store enthusiast!

For frugal girls like myself, I have even found that the risotto reheats well with the addition of a little stock to bring it back together on the stovetop. If you prefer though you can also transform the leftovers into risotto cakes, which I have found makes a delicious addition on top of a spinach salad!

Parmesan Risotto With Roasted Shrimp from MomAdvice.com

Parmesan Risotto With Roasted Shrimp
Prep time:
Cook time:
Total time:
Serves: 6 servings
Risotto is an elegantly comforting gluten-free dish that is perfect for a slowed down feast or to celebrate any of life’s occasions. Be sure to read the tips for ideas on what to do with leftover risotto.
Ingredients
  • 1 pound medium shrimp
  • 1 tablespoon olive oil
  • 1/2 teaspoon paprika
  • Salt and freshly ground black pepper
  • 8 cups chicken broth
  • 2 tablespoons unsalted butter
  • 1 small white onion, diced
  • 4 cloves garlic, minced
  • 2 cups arborio rice
  • 1/2 cup white wine
  • 1 1/2 cups grated Parmesan cheese
  • 1 cup finely chopped Italian parsley, divided
Instructions
  1. Heat the oven to 400°F. Rinse the shrimp and pat them very dry. Toss them with olive oil and then the paprika and a generous quantity of salt and pepper. Spread them in a baking dish and return them to the refrigerator.
  2. Warm the broth in a saucepan set over low heat.
  3. In a separate Dutch oven or wide, deep sauté pan, melt the butter over medium heat. Add the onion and garlic, and cook until they are soft and beginning to brown around the edges, 2 to 3 minutes. Add the rice and stir thoroughly to make sure it is coated with the butter and onions. Cook the rice for an additional 1 to 2 minutes.
  4. Deglaze the pan with the white wine, stirring and scraping the pan until the wine has evaporated.
  5. Begin incrementally adding the warm broth one ladle at a time, stirring frequently. Wait to add another ladle until the liquid has been almost completely absorbed by the rice. This gradual addition of liquid is key to getting the rice to release its starch and create its own delicious sauce. It is important to take your time with this to achieve the creamy texture you are after. If the broth is evaporating very quickly, or the rice is boiling hard, turn the heat down so you just see a gentle simmer. Expect this stage to take about 18 minutes, and to add most of the broth.
  6. Begin tasting the rice after about 13 minutes to gauge how far it has cooked. The risotto is ready when the rice is still a bit chewy, and the dish has the consistency of thick porridge.
  7. In the last 5 minutes of cooking the risotto, put the pan of prepared shrimp in the oven. Bake for 5 minutes or until the shrimp are pink.
  8. When the risotto is ready, turn off the heat and stir in the Parmesan and about 1/2 cup chopped parsley. Taste and add salt and pepper as needed.
  9. Serve immediately, spreading risotto in pasta bowls and topping with shrimp and a sprinkle of chopped parsley.

 Recipe Slightly Adapted From The Kitchen.

Do you have a tried and true risotto recipe or technique? Feel free to share it in our comments below!

This post contains affiliate links. I only recommend what I love- pinky promise! 

Pin It

Lemon Paprika Chicken

Monday, January 4th, 2016

Lemon Paprika Chicken from MomAdvice.com.

I’m back!! The holiday break was so good for my family and my soul. I trust that you all had a wonderful holiday season too!  It always surprises me how good a break is for getting my creative wheels turning again. I found myself back in the kitchen again over this break and enjoying a slowed down supper or two with my family. I found myself with piles of cookbooks from the library and a new desire to create in my kitchen again.

Our MomAdvice Hangout group has been a really great place to chat with you all about what you are looking for in the upcoming year especially when it comes to food. Two things really stood out to me. 1) You struggle with keeping the grocery budgets down and the eating out to a minimum (ME TOO!) and 2) You are hoping to be inspired to get in the kitchen with a better plan in place (ME TOO!)

With that in mind, today’s meal is for a lemon paprika chicken that our whole family absolutely loved thanks to its light and lively lemon sauce that will be making its way into our weekly rotation.

The reason I really loved it though was that ALDI had marked down their meat that day and I was able to purchase eight chicken thighs for about $4.19. That was enough to feed my family of 4 and have a couple of lunches for another day in our refrigerator. With the accompaniment of a simple potato side (coming soon!), we had the makings for a truly affordable meal.

Lemon Paprika Chicken from MomAdvice.com.

I have always thought chicken breasts were best, but the chicken thigh meat has become our new family favorite after finally mastering the technique of getting a perfect thigh thanks to the inspiration from Damn Delicious in her Garlic Brown Sugar Chicken. Why is meat we haven’t worked with before so intimidating? With all the tools I have at my fingertips, I can admit that I was scared of chicken thighs until I tried her roasting technique and now we eat chicken thighs weekly.

Her technique of browning the meat in butter yields a crispy skin and then throwing it in the oven to roast creates a chicken that is bursting with flavor. While the chicken roasts, I typically add a rotation of other roasted veggies on a cookie sheet or add a quick steam bag of baby peas and a jar of applesauce for times when the cupboard is more lean. These have become my go-to when entertaining and are always a hit with dinner guests.

If you haven’t given the chicken thigh a chance before, you are missing out on the big M word (I will not say it, I won’t…you know that word.). White meat can be very dry and lacking in flavor, this is the opposite of that and I will let you think on that word that I am referencing now.

Once you master that technique the possibilities with a pan sauce are endless and I have made these so often now that it takes me just a few minutes to pull everything together and I have the kitchen cleaned by the time the chicken is done roasting. A one pan dish that is affordable and yields great leftovers? Sign me up!

Lemon Paprika Chicken from MomAdvice.com.

My husband hates a heavy-handed lemon taste, but agreed that this was just the right amount of citrus in this recipe. The lemon not only adds depth to the flavoring, but it helps to tenderize the meat. The smoky paprika adds an additional layer of flavoring that perfectly compliments this sauce. I love that these humble ingredients can bring such a complex and balanced flavor to the chicken. Humble, affordable, and impressive…that’s a winner in our book.

I hope this dish inspires you to give that chicken thigh a try because it will save you a lot of money if you have been buying chicken breasts and I often find these marked down at our store. Bone-in is my personal preference for the word that shall not be said.

These reheat beautifully too so be sure to pack a few away in microwavable containers to keep the cost of lunches down!

Lemon Paprika Chicken from MomAdvice.com.

Lemon Paprika Chicken
Prep time:
Cook time:
Total time:
Serves: 4-6 servings
An easy one-pot dish that makes a great weeknight meal or is impressive enough to entertain your dinner guests with!
Ingredients
  • 6-8 bone-in chicken thighs
  • 3 tablespoons olive oil
  • Salt and fresh ground pepper, to taste
  • 2 teaspoons paprika
  • 1 teaspoon dried thyme
  • Zest & juice of one lemon
  • 2 tablespoons butter
  • 4 garlic cloves, minced, divided
  • 1 cup white wine
  • 2 tablespoons chopped fresh parsley
Instructions
  1. Preheat your oven to 400 degrees.
  2. In a mixing bowl mix together olive oil, salt, pepper, paprika, thyme, lemon zest, lemon juice, and two minced garlic cloves.
  3. In a resealable bag, pour these ingredients into the bag with the chicken thighs, rubbing the mixture evenly over all the chicken. Refrigerate for two hours.
  4. Heat 2 tablespoons of butter in a skillet.
  5. Add chicken and, cooking over medium heat, brown the chicken on both sides; about 3 minutes per side.
  6. Remove chicken from skillet and set aside.
  7. Add remaining minced garlic to the skillet and cook, stirring frequently, for one minute. Do not burn the garlic. Carefully whisk in wine to the skillet and cook for one more minute.
  8. Transfer chicken back to skillet and roast uncovered in the oven for 25-30 minutes or until done.
  9. Serve chicken with the wine sauce spooned over it and garnished with additional parsley.

 Adapted from Diethood


Pin It

Bacon, Apple, & Cornbread Gluten-Free Stuffing

Wednesday, November 25th, 2015

  Bacon, Apple, & Cornbread Gluten-Free Stuffing from MomAdvice.com.

This is a sponsored post written by me on behalf of Tyson Foods, Inc. All opinions are entirely my own. 

I don’t think any holiday meal is complete without a good stuffing. Being gluten-free can be a challenge around the holidays, trying to recreate those comforting holiday dishes, but without the gluten. Today I wanted to show you a delicious Bacon, Apple, & Cornbread Stuffing that you can make for the holidays with a few delicious ingredients at Walmart that you will never guess is gluten-free and so affordable to make too!

Bacon, Apple, & Cornbread Gluten-Free Stuffing from MomAdvice.com.

The star of today’s ingredient line-up is definitely this Wright® Bacon! I love that this thick bacon is naturally hickory smoked which adds a rich depth to your stuffing. This grocery staple can be found in the refrigerated section of Walmart.

Rounding out our ingredient list are sweet apples, savory celery, onions, Great Value Brand chicken broth, a gluten free-cornbread mix, fresh thyme, fresh sage, and just a pinch of cayenne pepper to add a kick to this dish. I love that these ingredients are all available at one store, even my gluten-free cornbread mix, leaving me more time for making those family holiday memories!

Bacon, Apple, & Cornbread Gluten-Free Stuffing from MomAdvice.com.

Confession time! I was really nervous about creating this dish for you. This was actually my first time baking any gluten-free bread so I was really nervous about the texture of this bread, but even more nervous that the bread wouldn’t stand up to cubing. I am so happy to say that it actually cubed up and toasted beautifully in my oven for this dish.  I would recommend baking it the day before and cubing it the next day to help it keep its shape and prevent any crumbling. In 15-18 minutes you have your base for a beautiful bowl of stuffing.

Bacon, Apple, & Cornbread Gluten-Free Stuffing from MomAdvice.com.

Great stuffing is all about the layering of flavors and this one has them all. From the sweetness of the apples to the savory of the celery and onions to the deliciously salty and chewy bacon to the kick of spices from the cayenne, each bite is like a little holiday symphony in your mouth.

Bacon, Apple, & Cornbread Gluten-Free Stuffing from MomAdvice.com.

I would definitely say that this dish takes my holidays from good to great. You can find this and so many other great recipes over at the Joy to the Meal site to help inspire you in the kitchen. I hope you can experience a few #joy2themeal dishes at your table and I hope this recipe helps you to be brave and tackle your own gluten-free stuffing for the holidays!

Bacon, Apple, & Cornbread Gluten-Free Stuffing from MomAdvice.com.

Bacon, Apple, & Cornbread Gluten-Free Stuffing
Prep time:
Cook time:
Total time:
Serves: 6 servings
It’s hard to believe that this stuffing is gluten-free thanks to the richness of the bacon & cornbread. I hope you love this dish as much as our family does this holiday season!
Ingredients
  • 1 package of prepared Gluten-Free Cornbread Mix (12 ounces), prepared one day prior
  • 10 oz Wright® Brand Bacon, chopped, 1/4-inch pieces
  • 1 onion, chopped finely
  • 2 ribs celery, chopped
  • 2 Fuji apples, peeled, cored, chopped
  • 2 tablespoons of thyme, removed from stem and chopped finely
  • 2 tablespoons of sage, leaves removed and chopped finely
  • 1 cup Great Value Brand Chicken Broth
  • 1/4 tsp cayenne
Instructions
  1. Preheat your oven to 400 degrees.
  2. Cube your prepared gluten-free cornbread and spread on a rimmed cookie sheet. Bake for 15-18 minutes until cubes are lightly toasted. Reduce the heat on your oven to 375 degrees.
  3. Fry bacon until crisp, remove with a slotted spoon to a plate layered in paper towels. Drain the fat from your pan, reserving three tablespoons to sauté your veggies.
  4. To the pan, add your onion and celery and sauté these until golden about 6-8 minutes. Add apples, thyme, sage, and cayenne pepper. Cook until apples soften, about 4-5 minutes.
  5. Toss cooked apples & veggies in a large bowl with cornbread cubes, broth and cooked bacon. Mix well.
  6. Bake at 375° in a buttered dish covered with foil for 40 minutes, remove foil and bake until top turns golden, about 15 minutes more.


Pin It

Make-Ahead Tutorial: How to Make Perfect Brown Rice In Your Rice Cooker

Monday, October 12th, 2015

How to Make Perfect Brown Rice In Your Rice Cooker from MomAdvice.com

I have all the secrets to a perfect batch of brown rice thanks to all of my failed attempts at yielding a great batch over the years. We have had crunchy brown rice, dry brown rice, mushy brown rice, and everything in between. For many years, I baked my brown rice (thank you, Alton Brown) before discovering the world’s most awesome gadget (used a minimum of twice a week!) called a rice cooker!

Today I want to share with you the secret to my brown rice succes.  For me, it is one part rice selection (no affiliation with them, I swear!) one part liquid ratios and one part rice cooker fuzzy logic that works. Intrigued? I hope so!

How to Make Perfect Brown Rice In Your Rice Cooker from MomAdvice.com

Brown rice is something I really rely upon to round out my meals because I am gluten-free.  I use it to make taco bowls, in lieu of making gluten-free pastas, and I toss veggies and meat with it to make hearty bowls for filling lunches.  Although I adore quinoa, I still find that this sticks to my ribs a little better so it has become a go-to side for our family.

What Brand Do I Swear By For Consistent Brown Rice Results?

The only brand I use is the Uncle Ben’s Whole Grain Brown Rice (the packaging looks just like this!) It delivers consistent cooking results for me and comes out perfectly every time. When people tell me that they don’t enjoy the texture of brown rice or their kids turn their noses up to it, I tell them to buy this brand because once this is prepared it has more of the texture of white rice than any other that we have tried and my kids prefer it over white rice. 

How to Make Perfect Brown Rice In Your Rice Cooker from MomAdvice.com

What is the Liquid Ratio for Brown Rice?

Brown rice is not a 1:1 ratio like white rice, it requires a bit more liquid to deliver consistently good results. For every one cup of rice, you need 1 1/4 cups of liquid for a long grain brown rice (this is the ratio I use for that brand I shared). For a short-grain rice, you actually need 1 1/2 cups of liquid for every one cup of rice. I also add a pat of butter as well to help round out the flavoring.

I rely upon chicken stock for my liquid, but you can use water, beef stock, or veggie broth too. If you are trying to save a little bit, cut the stock you choose in half with water or you can just use water if you do not want a richer flavor to your rice.

How to Make Perfect Brown Rice In Your Rice Cooker from MomAdvice.com

Rice Cooker- Perfect Rice Every Time

Five years ago,  I bought this rice cooker for about $20 and I have been using it two to three times a week ever since.  It provides consistently great brown rice, white rice, steamed vegetables, and even rice cooker quinoa for our family with very little work on my part. It does take up valuable space in my kitchen, but it has earned its rights to the space by saving me a lot of time hovering over pots!

My rice cooker has no fancy settings, I just push down the switch and it figures it all out for me.  When it is done, the switch flips up and a loud beep lets you know that the rice is done. That’s it. It’s basically a set it and forget it appliance that delivers consistent results for our family.

How to Make Perfect Brown Rice In Your Rice Cooker from MomAdvice.com

Now you know all my secrets! Do you have any of your own tips for perfect brown rice? Let me know in the comments below! I love hearing everyone’s strategies!

This post contains affiliate links! 

Pin It

Gluten-Free Meatball Sub Game Day Appetizer

Monday, October 5th, 2015

Gluten-Free Meatball Sub Game Day Appetizer from MomAdvice.com

*This post is sponsored by Walmart. Thank you for supporting the companies that support this site!

Gluten-free and game day parties? Oof. Not fun, friends, not fun at all! I have learned a lot about social engagements like this though and know the best defense to any social gathering is to carry around my own dishes and drinks so I never go hungry or thirsty again. You will rarely see this girl without her own food!

Game day food is delightfully rich and comforting which is why I love it so darn much.  Today I wanted to create an appetizer that echoed those feelings of comfort and what could be more comforting than a pile of homemade meatballs? This meatball sub appetizer is gluten-free, but I promise you would never know it. It’s got everything I love in a meatball sub simply minus the bread.

Gluten-Free Meatball Sub Game Day Appetizer from MomAdvice.com

I’ve made meatballs a lot over the years (here is one of our favorite dinner dishes that we created together using my standard meatball recipe), but this was my first time trying to create a meatball without the addition of breadcrumbs or panko. With a blend of turkey sausage and ground turkey, I then mixed in fresh parsley, parmesan cheese, a little tomato sauce, and two eggs to bind it all together. I have a cookie dough scoop that I used to make sure all the meatballs were roughly the same size (and so they would fit on my toothpick).

These meatballs are a little more delicate without the breadcrumb binder so I baked them on a parchment-lined cookie sheet so that they would lift easily and not fall apart. Not only does this help the meatball hold its shape, but it also helps cut down your kitchen clean-up time. I would call that a game day win!

Gluten-Free Meatball Sub Game Day Appetizer from MomAdvice.com

Canned crushed tomatoes, garlic, salt, and a dash of sugar yield a vibrant sauce to nestle this appetizer in. I have tried a million different brands of canned crushed tomatoes over the years and I swear by the Great Value brand ones at Walmart. I don’t know why, but it always yields the best pizza sauce for me! I try not to use anything else.

What’s Your Favorite Game Time Recipe?

Are you feeling inspired? Do you have an incredible dish that everyone looks forward to on game days? Walmart happens to be running a GameTime Recipe contest and would love for you to post a photo of your favorite game time recipe on Instagram or Twitter using #WalmartMVPContest. By doing this, you will be entered to win a trip to LA to go to the YouTube studios to have a pre-Superbowl party and create content with some big YouTube stars. How cool is that? Read here for all the official rules! Need some inspiration? Check out all of the great GameTime Recipes that have been posted!
In the meantime, I hope you will enjoy this gluten-free game time creation I have created for you!
Gluten-Free Meatball Sub Game Day Appetizer from MomAdvice.com

Gluten-Free Meatball Sub Game Day Appetizer from MomAdvice.com

Gluten-Free Meatball Sub Game Day Appetizer from MomAdvice.com

Gluten-Free Meatball Sub Game Day Appetizer
Prep time:
Cook time:
Total time:
Serves: 33 meatballs
Ingredients
  • 1 pound ground turkey
  • 1 pound Italian turkey sausage
  • 1/4 cup Parmesan cheese
  • 1/4 cup parsley
  • 1/4 cup tomato sauce
  • 2 eggs
  • Salt and pepper
  • 2 packages baby mozzarella balls (over in the specialty cheese cooler by the deli)
  • 1 can crushed tomatoes
  • 2 tablespoons olive oil
  • 2 teaspoons minced garlic
  • 1 teaspoon sugar
  • 1 teaspoon salt
  • toothpicks
Instructions
  1. In a medium bowl, stir together the ground turkey, parsley, eggs, Parmesan cheese, garlic, salt & pepper, and tomato sauce. Stir gently to combine.
  2. Make your meatballs the standard size and place them on a parchment-lined baking sheet.
  3. Bake at 400 degrees for ten to fifteen minutes (this size took 12 minutes).
  4. Meanwhile, in a pot heat olive oil and add your minced garlic, cooking for just one minute.
  5. Add your crushed tomatoes, the remainder of your small can of tomato sauce, sugar, and salt. Allow this to simmer for ten minutes.
  6. Once the meatballs are done, ladle the sauce into a deep dish or bowl. Skewer one mozzarella ball and one meatball on a toothpick and nestle in the sauce. Serve hot.

As a participant in the Walmart Moms Program, I’ve received product samples and compensation for my time and efforts in creating this post. All thoughts and opinions are my own.


The MomAdvice Make Ahead (Week 2)

Monday, September 21st, 2015

The MomAdvice Make Ahead Meal Ideas

The first week of my make-ahead feasting went so well that we didn’t even eat out once last week despite a grueling activity schedule! I will be sharing make-ahead tutorials as I have lots of techniques to share with you about how we are accomplishing our make-ahead feasts! Today you can catch my tips for hard boiled eggs in the oven!

Since we have another crazy week (who doesn’t it?), I wanted to share what is in our fridge this week.  I hope this can help inspire you for making ahead a few dishes for your week too.

The MomAdvice Make-Ahead

Fresh Berries (Strawberries & Blueberries)

Chopped Broccoli (to be made into this easy Microwave Lemon Broccoli  for a side)

2 Pounds Taco Meat

4 Cups Brown Rice (for taco bowls)

Chopped Lettuce (for tacos/taco bowls)

2 Italian Meatloaves (Prepared minus the breadcrumbs to make it gluten free. I popped one in the freezer for another week!)

Gluten-Free Orange Chicken (I cooked the chicken and have the sauce set aside in a separate container for warming)

3 pounds Roasted Chicken, sliced (for wraps & salads this week)

2 dozen Hard-Boiled Eggs Prepared in the Oven

Chopped Carrots & Celery (I store these in water)

Green Smoothie Packets (I use this recipe and froze the strawberries, bananas, and spinach in packets for the morning)

The MomAdvice Make Ahead Meal Ideas

No more cooking for this girl ALL WEEK- YAY!! Happy Monday, friends!! xo

Hard Boiled Eggs In The Oven Recipe

Monday, September 21st, 2015

Hard Boiled Eggs In The Oven Recipe Header

Want hard boiled eggs fast? Try this oven method for baking eggs for deviled eggs, Easter eggs, egg salad, or a simple protein-packed snack. Make perfect hard boiled eggs fast with this smart Alton Brown approved method.

Have you ever prepared hard boiled eggs in the oven?

I had seen the tutorials floating around Pinterest, but I gave this method a spin while meal prepping for our busy week.

These are the perfect hard boiled eggs for an afternoon snack or for a quick lunch with chopped veggies and I can’t wait to show you how easy this method is.

Although I rely usually on my Instant Pot, you are limited to just a dozen at a time.

It does seem kind of crazy to bake your eggs, but this is a great way to make a lot of eggs for your week or for your Easter egg decorating.

Hard Boiled Eggs In The Oven Recipe Placed in Muffin Tin

Make Hard Boiled Eggs in the Oven Recipe

Here is the thing, results seem to vary on success with baking your hard boiled eggs in the oven and it’s a good idea to give these a test run in your oven with just a couple of eggs rather than wasting an entire dozen. 

What Can Improve My Experience Baking Hard Boiled Eggs?

Hard Boiled Eggs In The Oven Recipe

Get an Oven Thermometer

I am telling you that one of the best gadgets you can buy, if you are not getting consistently good results with baking in your oven, is an inexpensive oven thermometer.

I have had ovens, in apartment rentals, that were fifty degrees off or more. I could have saved myself a lot of tears and burnt dishes if I would have known that this cheap little gadget could improve the results in my cooking in a dramatic way.

Try Different Temperatures

Once you know that your oven temperature is correct (or how to gauge it if isn’t) try baking the eggs at 325 degrees first.

If your eggs are not to your liking, increase the temperature to 350 degrees.

Hard Boiled Eggs In The Oven Recipe in Ice Water

Stop the Brown Spots

Brown spots can develop on your egg from resting in the muffin tins, particularly with a dark muffin tin like the one I am showing in this picture.

Although the spots don’t really bug me, you can prevent them by using a silicone muffin pan, baking in a mini muffin tin, or lining your muffin tin with liners, tin foil.

Wildly I have also heard that cotton pads/balls can offer a buffer between your egg and the bottom of the pan. Alton Brown, in fact, actually recommends placing the eggs directly on your oven racks and skipping the muffin tin altogether.

I’d love to hear your thoughts on that one and if you have any success with it.

Make Peeling Easier

Did you know that fresh eggs can actually be more difficult to peel? We have discovered peeling the eggs is so much easier with eggs that have been in our fridge at least a week.

Hard Boiled Eggs In The Oven Recipe Storing

How Should I Store My Eggs?

Once you have your week’s worth of eggs, how the heck do you store them?

I read a lot of advice on this one when we prepared our eggs!

Ideally, you want to keep these in their shell since it acts a barrier to bacteria and it helps them last longer too.

Within the shell, you can eat these safely for up to seven days (although they never last that long in our house!!).

Hard Boiled Eggs In The Oven Recipe Finished Yolks

 Peeled hard-boiled eggs can be stored in the refrigerator in a bowl of cold water to cover for about five days (change the water daily) or in a sealed container without water (cover the eggs with damp paper towels) for the same length of time.

We store ours in their shell since I am worried about the bacteria factor.

I also ended up stumbling on this egg storage method for our fridge so we started doing that instead.

How Do I Cook Hard Boiled Eggs on the Stove Top If I Don’t Love the Oven Method?

My mom was always a big fan of this stovetop method and I love that you don’t need a gadget to make it happen!

Place eggs in a large pot of water and cover them with an inch of water (cold). cover the pan with a lid and listen for boiling water. When the water has come to a boil, let it boil over high heat for 6-7 minutes. Remove these with a slotted spoon and give them the same ice water bath treatment as you do for the oven method.

Hard Boiled Eggs In The Oven Recipe
 
Recipe Type: Breakfast
Author: MomAdvice.com
Prep time:
Cook time:
Total time:
Serves: 12 or more servings
Want hard boiled eggs fast? Try this oven method for baking eggs for deviled eggs, Easter eggs, egg salad, or a simple protein-packed snack. Make perfect hard boiled eggs fast with this smart Alton Brown approved method. This quick method is perfect for big-batch make-ahead preparation of hard boiled eggs. Be sure to read the post for additional tips for success.
Ingredients
  • 1 dozen eggs or more (preferably, older eggs that have been in your fridge for one week or more)
Instructions
  1. Preheat oven to 325 degrees
  2. Put 1 egg in each of 12 muffin cups.
  3. Bake in preheated oven for 25-30 minutes.
  4. Plunge baked eggs in a large bowl of ice water until cooled completely, about 10 minutes.
  5. Remove the room temperature eggs with a slotted spoon and store in your refrigerator for up to a week.


As an Amazon Associate I earn from qualifying purchases.

Love these tips? Here are a few other great make-ahead meal prep ideas for your week!

How to Make Perfect Brown Rice in Your Rice Cooker from MomAdvice.com how to make perfect brown rice in your rice cooker

How to Make Quinoa in the Rice Cooker how to make quinoa in your rice cooker

Roast Frozen Chicken in Bulk roast frozen chicken in bulk for your week

Instant Pot Shredded Chicken from MomAdvice.com instant pot shredded chicken for all your recipes

Happy cooking, friends!

Make Hard Boiled Eggs in the Oven Recipe Header


Pin It

Make-Ahead Breakfast Burritos

Friday, September 11th, 2015


Make ahead  and freeze these breakfast burritos from MomAdvice.com


Here’s one of our favorite breakfasts that helps our mornings run smoother – easy burritos that can be pulled from the freezer whenever you need them. It doesn’t hurt that they’re delicious and customizable, too!


Make-Ahead Breakfast Burritos

Back-to-School requires a lot of planning and getting back on track with a healthy breakfast is one thing I want to work on this year.

Today I wanted to show you a recipe for Make-Ahead Breakfast Burritos that can be made ahead and also created for your gluten-free or dairy-free family members.  

One batch of these freezer breakfast burritos can yield 15-18 burritos, depending on how you stuff  ’em, and they are filled with everything your kids need to start their day on the right foot.

I am partnering with Walmart on this back-to-school idea today so you can snag all the supplies you need right at their store.


Make-Ahead Breakfast Burritos


What I love about these burritos is that they are not only filled with fresh whole foods, but also that they are inexpensive to create.

With kitchen staples like eggs, cheese, potatoes, and tortillas, it is likely you already have a few things on hand for this back-to-school breakfast.

Create an assembly line of ingredients in the kitchen and have your kids jump in on the fun.


The potatoes are tossed in paprika and garlic powder for a tasty topping to the eggs.

I love a little Italian turkey sausage, red peppers, and cheddar or colby cheese for these burritos.

You can create your own flavor combinations or consider clearing out items from the fridge and making a unique combination all your own.


Make-Ahead Breakfast Burritos


Be careful to not overstuff the burritos so they can be wrapped easily and place them on a parchment-lined cookie sheet to place in the freezer until frozen.

Once these are frozen you can tuck them in a freezer bag and just grab them when you need them.

Do you know how to wrap a burrito?

 If not, I love this tutorial for perfectly wrapped breakfast burritos!


Make-Ahead Breakfast Burritos


With one kid in middle school (GASP!) and a daughter who prefers not to eat in the morning, I am hoping that these burritos will be the perfect way to get them motivated to eat a healthy breakfast.

Just grab one from the freezer and wrap it in a dampened paper towel for the microwave for three minutes (flip it halfway through).

Wrap in foil and let them eat them on the way to the bus or in route to school.  

These also make a great after school snack,  after sports activities, or an impromptu dinner with their pals while doing homework.

To make them dairy-free substitute the cream with almond milk (which is what we did) and add a vegan cheese to them or leave them cheeseless.

For a gluten-free burritos, Walmart offers this option in their stores.

We hope you love this delicious breakfast as much as we did.

We have already started raiding our make-ahead breakfast burritos for quick lunches this week.

I am shocked how beautifully these reheat and taste.

There are no excuses why you can’t tackle a healthy breakfast.

Be sure to check out my recipe for Slow Cooked Honey Crisp Apple Oatmeal for another fun breakfast treat!


Make-Ahead Breakfast Burritos

Make-Ahead Breakfast Burritos
 
Recipe Type: Breakfast
Prep time:
Cook time:
Total time:
Serves: 18
A make-ahead breakfast burrito that you can tuck in your freezer for a healthy breakfast, snack or meal.
Ingredients
  • 2 tablespoons olive oil
  • coarse salt and freshly ground pepper
  • 3 large russet potatoes, peeled and diced
  • 1 teaspoon garlic powder
  • 1/2 teaspoon paprika
  • salt & pepper
  • 1 lb Italian Turkey Sausage
  • 1 dozen eggs
  • 2 tablespoons cream (or milk substitute)
  • 1 red bell pepper, cored and diced
  • 1/2 pound cheese of your choice (or vegan cheese)
  • 18 tortillas, soft-taco size (8-inch), whole-wheat, flour, or gluten-free tortillas
Instructions
  1. To roast potatoes, preheat your oven to 475 degrees. Line a cookie sheet with parchment paper. Drizzle diced potatoes with oil and season with salt, pepper, paprika, and garlic powder. Toss the potatoes together to evenly coat in oil and seasonings, and spread out into a single layer on the parchment. Roast until browned on the bottom and tender, about 20-25 minutes.
  2. Brown your sausage. Once it is cooked through, set aside in a large bowl, leaving about a 2 tablespoons of drippings in the pan for the eggs.
  3. In a medium bowl, whisk the eggs with the cream (or milk substitute) and pour into the sausage skillet. Cook over medium heat until just set, stirring as needed. season with salt and pepper and stir to combine, and transfer to the bowl with sausage.
  4. In the same skillet, cook your red peppers over medium heat until fragrant and softened, about 10 minutes.
  5. Make an assembly line- tortilla, cheese, followed by a small handful of potatoes and a scoop of the egg/sausage mixture. Roll the tortilla up.
  6. For freezing, place burritos on a wax- or parchment-lined baking sheet and place in the freezer until firm, at least an hour. Transfer to large freezer bags and keep frozen for up to one month.
  7. For reheating, place a frozen burrito in a dampened paper towel and microwave for three minutes, turning halfway through.
 
Recipe Adapted From: Dinners For Winners


Easy freezer recipe for breakfast burritos from MomAdvice.com


Make ahead and freeze this easy breakfast burritos from MomAdvice.com


walmart_mom_disclaimer


Meal Prep: Breakfast Sandwiches Recipe from MomAdvice.com

Make Ahead and Freeze Breakfast Sandwiches


DIY Breakfast Caddy

DIY Breakfast Caddy


Applesauce Cinnamon Breakfast Muffins

Honey Sweetened Applesauce Cinnamon Breakfast Muffins


Quinoa Berry Breakfast Bowls

Quinoa Berry Breakfast Bowls

Pin It

5 Quick Fix Dinner Ideas with Jessica Fisher

Monday, August 31st, 2015

Jessica Fisher is the force behind both Life As Mom and Good Cheap Eats, where she shares budget-friendly, family-centered recipes and ideas. She has been a friend of mine for many years and I so admire all the work she does to create family meals on a budget! I’m so excited to have her contribute to our Meal Planning M Challenge with some great dinner ideas straight from her new cookbook!

5 Quick Fix Dinner Ideas from Jessica Fisher on MomAdvice.com

What to Do When You Don’t Know What’s for Dinner?

It’s happened to all of us: 5 pm rolls around, tummies start to rumble, and you find yourself staring into the vast cavern of your refrigerator, wondering what’s for dinner. Your impulse might be to say, “There’s nothing to eat. Let’s go out.”

For most of us, this isn’t entirely true. There’s nothing easy to make to eat, but there’s probably actual food in the house. So, what do you do? Do you give in to the impulse and pay for overpriced burgers and fries? Or do you exert yourself, as Jane Austen would say, and cook something up?

I’m going to make the case for the latter and go so far as to say, “Suck it up, Buttercup. You can do this in 30 minutes or less.”

Dinner doesn’t have to be complicated — or longer than your favorite TV show. If Agent Coulson and his team can catch the bad guys and acquire major super powers in 60 minutes, you can make dinner in half that time.

Consider these 5 quick fix dinner ideas that taste great and won’t break the bank:

Beans and rice – A rice cooker can produce perfect rice in 20 minutes. Opening a couple cans of beans, shredding cheese, and mixing up some salsa might take you another ten. Between the two of you, you’ve got the makings for a great supper that’s filling as well as economical. This Chicken-Cilantro mixture will be the piece de resistance.

Lotsa pasta – Pasta is the go-to choice at my house. My kids can smell boiling noodles from a mile away. They’d be satisfied with butter and parmesan, but in just a few minutes, I can whip up a broccoli cream sauce that they gobble down with gusto.

French Bread Pizza from Good Cheap Eats

Piece’a pizza – It might take an hour or two to proof traditional pizza dough, but we can have a great pizza dinner without the wait. Using French bread, pita bread, lavash, or tortillas for the base, I can create custom pies in just a few minutes.

Wrap it up – Keep tortillas on hand for quick sandwiches and burritos. Frozen chicken tenders cook quickly; just pull as many as you need from the bag. Throw on some shredded cheese and vegetables, and drizzle with your favorite sauces. Or go meatless with something like these Green Chile Burritos.

Cobb Salad from Good Cheap Eats

Salad’s on – I’ve got an 11-year old boy who will eat Caesar Salad until the cows come home. If I keep those ingredients on hand, I’ve always got a dinner he loves. Explore the world of salads and find those that really make your heart happy. Cobb? Tostada? Pasta? Cole slaw? Use those as your go-to’s, stocking those ingredients as pantry staples. Add a cooked meat for the carnivores in your midst. You’ll eat fresh in no time at all.

Need more inspiration for a quick fix?

Good Cheap Eats by Jessica Fisher

I spent a year researching how to make dinner quick, easy, and healthy. My findings are stuffed into Good Cheap Eats Dinner in 30 Minutes (or Less!).

My new cookbook provides over 200 recipes that feature real food, real quick. With over 100 time-saving tips, you’ll eat for a day (or a month), as well as learn how to adapt your own kitchen skills to economizing time and money.

Dinner time doesn’t have to be complicated, expensive, or stressful. You’ve got the skills; you just need to know how to use them to your advantage. You can totally do this!

What’s YOUR favorite quick fix?


*this post may contain affiliate links- I only recommend what I love though.

Pin It

21 Easy Slow Cooker Meals

Thursday, August 13th, 2015

Slow cooker meals are always a cornerstone of our family’s meal plans since it’s so convenient to have dinner cooking while you’re away (or breakfast cooking while you sleep!). Which makes it perfect to republish this article full of slow cooker meal ideas for our Focus on Meal Planning M Challenge. I hope you enjoy seeing these recipes again!

21 Easy Slow Cooker Meals from MomAdvice.com

I have a confession to make. I am addicted to my slow cooker! And so I’m sharing 21 of our favorite slow-cooker meal recipes that you can create and enjoy all month long. These recipes are a few of our tried and trues over the years on MomAdvice and will make your week go oh-so-much smoother!

I believe that the slow cooker can be every mother’s (or father’s!) best friend. What could be easier than throwing in a few ingredients, plugging it in, and then going about your day, without the worries of needing to figure out what everyone is going to eat for dinner?

Ninja Cooker

Truth be told, I have moved up in the slow cooking world and am now madly in love with my Ninja Cooker. I use it almost daily and love that I don’t have to dirty my stove or skillets to brown my meat anymore. I would definitely add that one to your next holiday wish list! You can read more of my thoughts on that over here.

In honor of this kitchen gadget, I have put together a month’s worth of meals using your slow cooker. Each of these meals will have a recipe and tips for making your dinner hour go more smoothly. Keep in mind that many of the recipes accommodate six to eight people so you may be able to cover (at least) a month’s worth of meals.

Slow Cooker Honey Bourbon Chicken Wings

Slow Cooker Honey Bourbon Wings


Side Ideas- Fresh veggies & blue cheese dressing for dipping, steamed broccoli, and fresh fruit.

Slow Cooker Stuffed Green Pepper Soup

Stuffed Green Pepper Soup

Side Ideas- Pumpkin Cornbread Muffins & Salad

 Sticky Chicken Recipe

1 tbsp salt

2 tsp paprika

2 tsp dried oregano leaves

2 tsp dried thyme leaves

1 tsp pepper

1 tsp garlic salt

3 lb roasting chicken

1 cup chopped onion

In a small bowl, combine all ingredients except chicken and onion. Rub herb mixture inside and outside of chicken. Place in food storage bag; seal bag. Refrigerate overnight. Remove chicken from bag; stuff with onion. Place in crockpot on low 6-8 hours; high 2-4 hours. Chicken juices should run clear and chicken reaches 180*. Let stand 15 minutes before carving.

Side Ideas- Mashed Potatoes & Corn

Pot Roast Italiano

Pot Roast Italiano


Side IdeasRoasted Green Beans & Orzo Pasta
Tortellini & Turkey Divine

 Tortellini & Turkey Divine

1 1/2 pounds Italian sausage turkey

2 clove garlic– minced

2 small onions– chopped

2 cans whole peeled tomatoes- 16 ounce cans

1 1/4 cups dry red wine

5 cups beef broth

1/2 teaspoon dried basil

1/2 teaspoon dried oregano

2 zucchini- sliced

1 green bell pepper- chopped

3 tablespoons chopped fresh parsley

1 package cheese-filled tortellini


In a large pot, cook sausage over medium heat until brown. Remove with a slotted spoon, and drain on paper towels. Drain fat from pan, reserving 3 tablespoons. Cook garlic and onion in reserved fat for 2 to 3 minutes. Stir in tomatoes, wine, broth, basil, and oregano. Transfer to a slow cooker, and stir in sausage, zucchini, bell pepper, and parsley. Cover, and cook on Low for 4 to 6 hours. Bring a pot of lightly salted water to a boil. Cook pasta in boiling water until al dente, about 7 minutes. Drain water, and add pasta to the slow cooker. Simmer for a few minutes, and season with salt and pepper before serving.

Side Ideas- Salad & Fresh Fruit

Slow Cooked Italian Beef

Italian Beef Sandwiches

Side Ideas- Oven Fries & Apple Slices

Sloppy Joes

 Side Ideas- Tortilla Chips & Carrot Sticks

Pumpkin Chili

Pumpkin Chili

Side Ideas- Pumpkin Cornbread Muffins & Fresh Fruit

Slow Cooker Beef Stew

Slow Cooker Beef Stew

2 pounds beef stew meat – cubed

2.5 cups carrots

2.5 cups potatoes

1 cup celery

1 can diced tomatoes – with the juice poured in

1 can beef broth

1 cup water

1 tsp ground mustard

3 sprigs rosemary

Put beef in a zipper bag with a 1/4 cup of flour and toss to coat. Brown the meat in a skillet and place on the bottom of the crock pot. Coarsely chop vegetables and place on top of the meat. Pour in the can of diced tomatoes with juice, can of beef broth, water, and ground mustard. Place sprigs of rosemary on top and cook on high for four hours or on low for six to eight hours.

Side Ideas-  Make your own salad bar!

Slow Cooked Apple Oatmeal

Slow Cooked Honeycrisp Apple Oatmeal


Side Ideas-  Create your own oatmeal toppings bar and serve with green smoothies.

3-Ingredient Chicken Tacos

3-Ingredient Slow Cooked Chicken Tacos

1 package taco seasoning mix

1 cup chicken broth

1 pound chicken breasts – boneless & skinless frozen chicken breasts

Dissolve taco seasoning into chicken broth. Place chicken breasts in slow cooker and pour broth over them. Cook on LOW for 5 hours. With two forks, shred the chicken meat into bite-size pieces. Serve with your favorite taco toppings.

Side Ideas- Roasted Corn Salsa With Tortilla Chips

Slow Cooker Spaghetti Sauce

Slow Cooker Spaghetti Sauce

1 package Italian Turkey Sausage – mild

2 cans crushed tomatoes

1 can petite diced tomatoes

1 can tomato paste

½ cup beef broth

Brown the turkey sausage in a large skillet. Place cooked sausage in the bottom of the slow cooker. Pour over the sausage all of the other ingredients, including any of your own Italian seasonings. Cook sauce on low for six hours or on high for three to four hours. Serve over your favorite pasta.

Pulled Pork Stuffed Sweet Potatoes

Pulled Pork Stuffed Sweet Potatoes


Side Ideas- Lemony Spinach & Tomato Quinoa Salad & Carrot Sticks

Mongolian Beef

 Mongolian Beef 


Note- to make this in your slow cooker, brown the beef and then heat all the ingredients together on LOW for four hours.

Side Ideas- Brown Rice & Steamed Broccoli

Slow Cooker Chicken BBQ Sandwiches


Side Ideas- Shoestring Oven Fries & Carrot Sticks

Taco Soup

1 pound ground turkey

1 can chili beans with liquid

1 can kidney beans with liquid

1 can whole kernel corn with liquid

2 cans diced tomatoes

1 can tomato sauce

2 cups water

1 package taco seasoning mix

In a medium skillet, cook the ground beef until browned over medium heat. Drain & set aside. Place the ground beef, chili beans, kidney beans, corn, tomato sauce, water, diced tomatoes, & taco seasoning mix in a slow cooker. Mix to blend and cook on Low setting for eight hours.

Side Ideas-  Roasted Corn Salsa With Tortilla Chips

Chicken Italiano

Chicken Italiano


Side Ideas- Spaghetti & a DIY Salad Bar

 Breakfast Casserole

Note- I recommend doing this one using this technique to prevent burning and even cooking.

1 pound turkey sausage – sweet or spicy

1 teaspoon mustard powder

1/2 teaspoon salt

4 eggs, beaten

2 cups milk

6 slices white bread – toasted and cut into cubes

8 ounces shredded Cheddar cheese

Crumble sausage and cook thoroughly. Drain meat. In a large bowl, mix all ingredients together evenly. Place the casserole in the fridge overnight. In the morning put in the slow cooker for four hours on high or six hours on low.

Side Ideas- Fresh Fruit & Grapefruit Halves

Gluten-Free Orange Chicken

Orange Chicken


Note to make this in your slow cooker, brown the chicken and then heat all the ingredients together on LOW for two-four hours.

Side Ideas- Brown Rice & Steamed Broccoli

Chicken Lasagna Florentine

2 cans cream of chicken soup – (10-3/4-oz) reduced-fat, reduced-sodium, undiluted

1 package frozen chopped spinach, thawed, and squeezed dry (10 ounces)

9 oz chicken – diced cooked chicken (two small or one large boneless skinless chicken breast)

8 oz sour cream – low-fat

1 cup milk

2 oz grated parmesan – (1/2 cup)

1/3 cup onion – chopped

1/2 tsp salt

1/4 tsp black pepper

1/8 tsp ground nutmeg

9 uncooked lasagna noodles

1 cup mozzarella cheese – (4 oz) shredded part-skim

Combine first 10 ingredients in large bowl.

Spread about 1/4 cup sauce in bottom of a 5-quart slow cooker coated with cooking spray. Add 3 uncooked lasagna noodles, breaking noodles in half as necessary to fit slow cooker. Spread one-third of chicken mixture over noodles, sprinkle with 1/3 cup mozzarella. Layer 3 more noodles, half of remaining chicken mixture, and 1/3 cup mozzarella. Top with remaining noodles and chicken mixture; sprinkle with remaining 1/3 cup mozzarella cheese.

Cover with lid; cook on high-heat setting 1 hour. Reduce to low-heat setting; cook 5 hours or until pasta is done.

Side Ideas- Roasted Green Beans & Grapes


Slow Cooker Lemon Chicken

3 pound chicken – whole or pieces

1 tsp dried oregano

½ teaspoon dried rosemary

garlic cloves – minced

2 tablespoons butter

¼ cup sherry wine or chicken broth

¼ cup lemon juice

Wash chicken; pat dry; season chicken generously with salt and pepper; sprinkle half of oregano, rosemary and garlic inside cavity of chicken; melt butter in frying pan and brown chicken; transfer to slow cooker or crockpot; sprinkle with remaining oregano, rosemary and garlic; add sherry to frying pan and stir to loosen brown bits; pour into slow cooker. Cover, cook on low for 7 hours; add lemon juice and cook 1 more hour (total of 8); transfer chicken to cutting board; skim fat from juices and serve over chicken.

Side Ideas- Have two slow cookers? Try our easy Slow Cooker Mashed Potatoes!

Feel free to share your favorite slow cooker recipes below! I’d love to add them to our list!

This post contains affiliate links.