Archive for the ‘Desserts’ Category

Einkorn Flour Naturally Sweetened Pumpkin Bars

Monday, February 24th, 2014

From our food contributor, Diana Bauman.

Can I just say that I am humbled that Diana, from My Humble Kitchen, agreed to share her voice on our site? Diana’s food background is so much more diverse than my own and she knows about foods I have never even heard of. Not only that, but her recipes are so very nourishing to our bodies. I cannot wait to learn more about food from her.

Naturally Sweetened, Einkorn Pumpkin Bars | momadvice.com

Hello – what a blessing to be here as part of the MomAdvice contributing team! I’m excited to get to know you all a bit better and feel privileged to be able to share my food recipes with you.

I’m a real foodie at heart… built on grace.  As much as I enjoy serving up my family savory meals using vegetables from my gardens, I also enjoy baking sweet treats made with nourishing ingredients and natural sweeteners.

Naturally Sweetened, Einkorn Pumpkin Bars | momadvice.com

I know Amy has turned to a gluten-free lifestyle, so I thought I’d introduce all of you to an ancient grain that has 3 times less gluten than our modern hybridized wheat of today.

It’s called einkorn. It’s the first grain to have been domesticated from the wild. Its never been hybridized so it was fascinating to me when I found out that many people with a gluten intolerance can tolerate this ancient grain. It still has gluten so if you have celiacs disease, then this is still off limits.

In my research, I’ve also found out that einkorn is more nutritious than modern varieties of wheat. It’s high in thiamin, protein, fiber, and a number of b vitamins. It also contains a significant amount of the the powerful antioxidant, lutein. As compared to modern varieties of wheat, it’s higher in protein and has a lower percentage of nutrient loss during processing.

Since einkorn has a lot less gluten, baking with it can be a bit tricky if grinding your own wheat berries at home; however, I’ve found incredible success using organic high extraction einkorn flour that’s already been milled.

In using einkorn flour, so far, I’ve had great success – all of my baked goods have turned out lovely. I’ve also enjoyed that I’ve been able to substitute it 1:1.

Naturally Sweetened, Einkorn Pumpkin Bars | momadvice.com

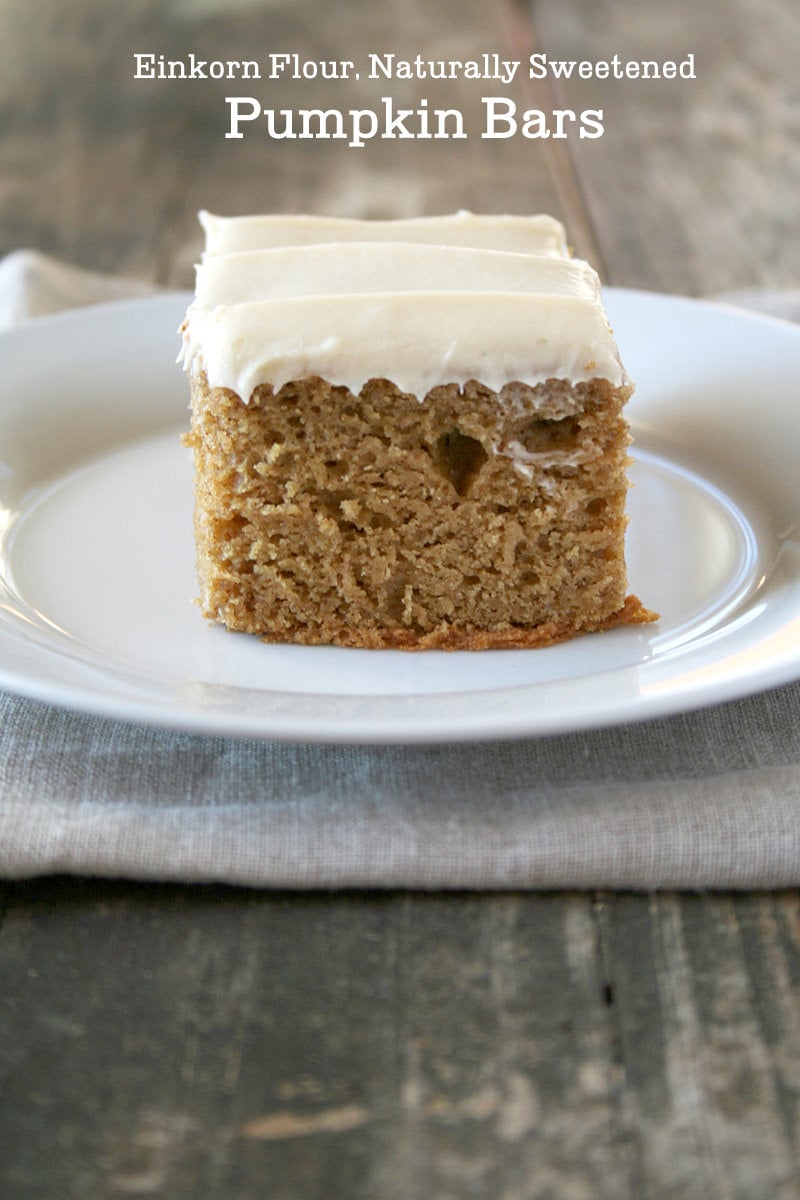
To share with all of you, I decided to roast the last of my pumpkins I had stored in my basement and make a batch of naturally sweetened pumpkin bars.

Who says pumpkin bars are just for the fall, right?

No pumpkin? No worries… if you don’t have any pumpkins in your basement or can’t find any at your local grocery store, feel free to use an organic canned variety.

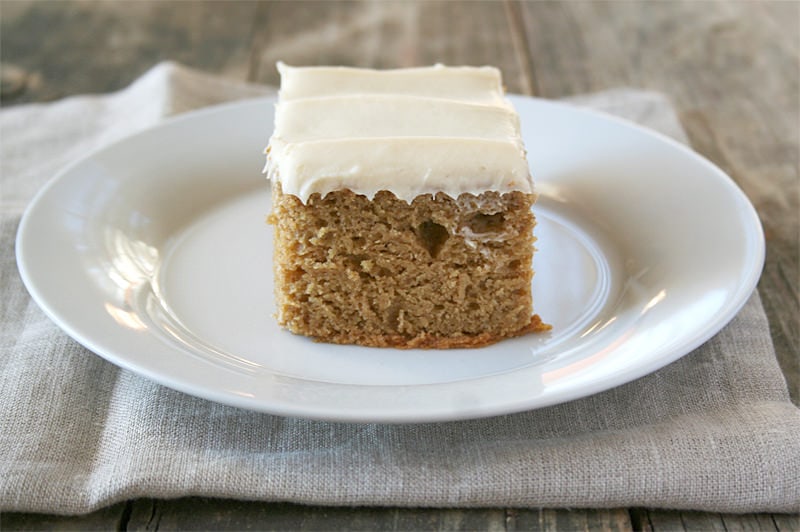
My husband loves it when I surprise him with a batch of pumpkin bars. I sweeten them with honey. The flavors are gently sweetened and allow the flavor of the roasted pumpkin to shine through. The use of the honey makes this an incredibly moist bar that your family will love.

For the cream cheese icing, I add 3 tbls of maple syrup allowing me to cut down on the organic powdered sugar. You’ll never notice the difference.

Naturally Sweetened, Einkorn Pumpkin Bars | momadvice.com

Now, let me ask you, what can be better than a nourishing dessert?

Naturally Sweetened, Einkorn Pumpkin Bars
Recipe Type: Dessert
Cuisine: American
Author: Diana Bauman
Serves: 8-10
Einkorn pumpkin bars are a completely nourishing dessert make with the ancient grain einkorn and gently sweetened with honey.
Ingredients
  • For the Pumpkin Bars
  • 2 cups einkorn flour
  • 2 tsp baking powder
  • 2 tsp ground cinnamon
  • 1 tsp ground all spice
  • 1 tsp baking soda
  • 4 eggs
  • 1 cup honey
  • 1 cup butter, melted
  • 1 1/2 cups pumpkin puree
  • For the Cream Cheese Frosting
  • 8-ounce package cream cheese, softened
  • 1/2 cup butter, softened
  • 1 tsp pure vanilla extract
  • 3 tbls pure maple syrup
  • 1 cup organic powdered sugar
Instructions
Pumpkin Bars
  1. Preheat the oven to 350F.
  2. Butter and flour a 9″ x 13″ baking pan.
  3. In a large bowl, whisk together the einkorn flour, baking powder, cinnamon, all spice, and baking soda; set aside.
  4. In the bowl of a stand mixer fitted with the paddle attachment, mix together the eggs, honey, butter, and pumpkin puree over low speed. A 3 on my KitchenAid.
  5. /4 cup at a time, add the dry ingredients until just combined. Do not overmix.
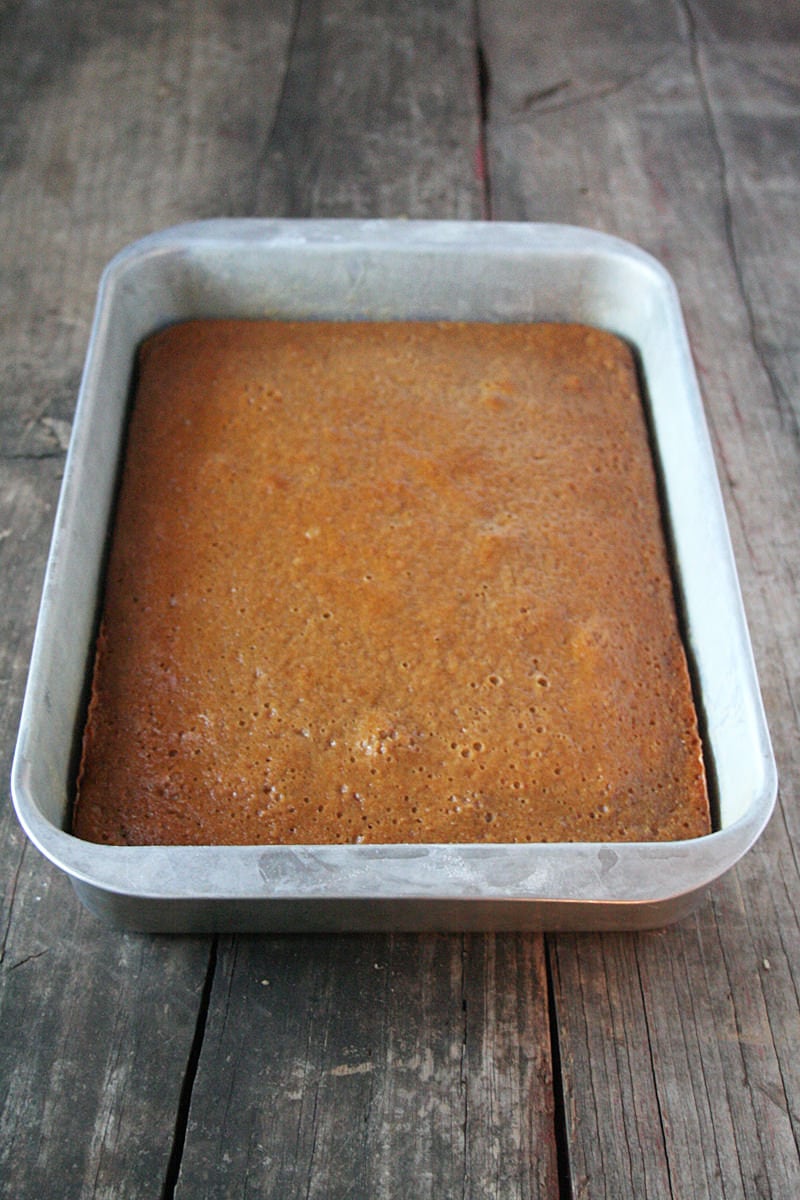
  6. Pour the batter into the prepared 9″ x 13″ pan and bake for 22-25 minutes or until a toothpick inserted into the middle comes out clean.
  7. Transfer to a wire rack and allow to cool completely.
Cream Cheese Frosting
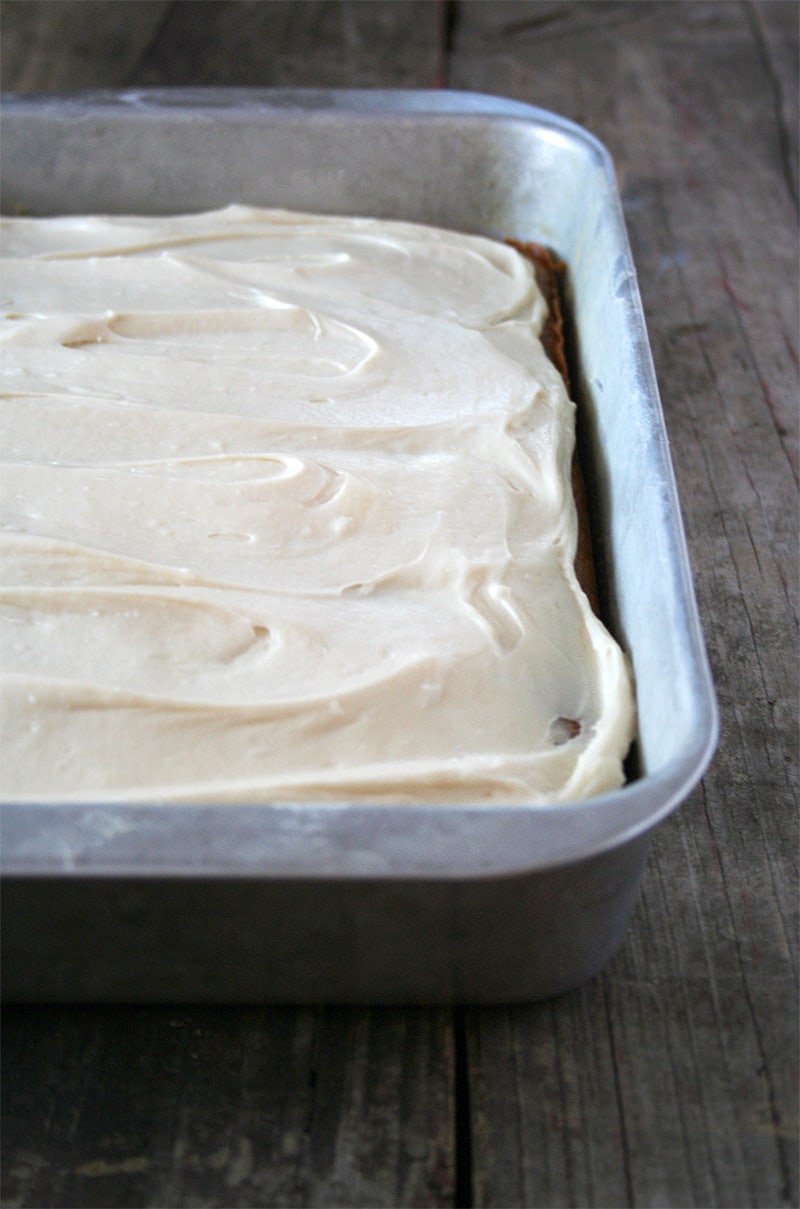
  1. In the bowl of a stand mixer fitted with the paddle attachment, add the cream cheese and butter. Mix together over medium speed until smooth.
  2. Add the vanilla extract, maple syrup, and powdered sugar. Mix on low until mixed through then raise the speed to medium to cream together.
  3. Spread on cooled pumpkin bars.
3.2.2265

I’m sure that once you try your hand at baking with einkorn or natural sweeteners, you’ll feel great serving your family some sweet treats every now and then.

So, what are your favorite sweet treats to eat during this time of year?

Coconut Lime Raised Doughnut Recipe

Monday, February 3rd, 2014

From our food contributor, Shaina Olmanson.

Can I say that you are in for one of the biggest treats ever? Shaina, from Food For My Family, is one of my foodie idols and I cannot believe she is going to be sharing her voice here on MomAdvice as a regular contributor! Her photos are always a delight for the eyes and her whole foods philosophy on a budget is just why I selected her to share with you.  

Coconut Lime Raised Doughnut #recipe via MomAdvice.com

I can count on one hand the number of times we’ve gone out for doughnuts in any given year. It’s a once-in-a-while treat, a special outing. There’s something about walking into a doughnut shop, the bell on the door tinkling after you. In a case behind the glass you find soft fried dough rolled in sugar crystals or glazed with a sparkling gleam, the warm air carried under your nose with the distinct softness of melting sugar and browning dough.

Doughnuts are winter foods, best consumed when frosty air is blowing outside. A doughnut and a cup of coffee or cocoa somehow makes the world feel warmer, the walls lean in a bit tighter to hug you in the center of this pocket of comfort you’ve created.

It was this idea, this contentedness that I chased on a day off school with my kids. Doughnuts are all about waiting and patience, but the payoff at the end is worth every second it takes to get there.

Coconut Lime Raised Doughnut #recipe via MomAdvice.com

We gathered in the kitchen, all arms and hands and bodies huddled around the mixer, each measuring and dumping one ingredient after another to form the dough, soft and supple. In our hands we worked it before tucking it away as they went to play. Soon it was time for the shaping, and with a special cutter in hand, they each formed the rings and placed them on a baking sheet so we could again wait as they puffed in their warmed-oven home.

When the time came, in a bit of oil we fried each one to a golden perfection, our home instantly mirroring that doughnut shop smell. Small fingers ran through sugar as doughnut holes were rolled until coated. We stirred together glazes and dipped them in before sprinkling them with all manner of pantry goodies, licking the drips from fingertips.

Tips for doughnuts with your kids:

  • Have them measure and mix.
  • Teach little arms how to knead.
  • Rolling balls and cutting doughnuts is a fun and exciting job.
  • Leave the frying to the big kids and the adults.
  • Decorating is definitely a kid-approved job.
  • Eating is a family affair.

Coconut Lime Raised Doughnut #recipe via MomAdvice.com

These doughnuts are dipped in a lime-kissed glaze and covered in crisp coconut flakes. You can simply roll slightly cooled doughnuts in granulated sugar for a more classic take, or you could get fancy and make filled doughnuts and long johns with this same dough recipe.

Coconut Lime Raised Doughnut Recipe
Recipe Type: breakfast, dessert
Author: Shaina Olmanson
Serves: 10
Raised doughnuts with a lime-kissed glaze, sprinkled with coconut flakes.
Ingredients
  • 5 tablespoons water
  • 1/3 cup buttermilk, room temperature
  • 1 egg, room temperature
  • 5 tablespoons melted butter
  • 1 teaspoon vanilla extract
  • 4 cups all-purpose or einkorn flour
  • 1/4 cup granulated sugar
  • 1 teaspoon salt
  • 2 1/4 teaspoons yeast
  • 16 ounces organic palm oil or other oil for frying
  • 1 cup powdered sugar
  • 2-3 teaspoons lime juice
  • 1/2 cup unsweetened coconut flakes
Instructions
  1. In a large bowl or the bowl of a stand mixer, combine the water, buttermilk, egg, melted butter, and the vanilla. Beat until well mixed.
  2. Add in the flour, sugar, salt, and yeast, and mix with your hands or using a dough hook on the stand mixer until a soft dough forms. Remove the dough from the bowl and knead 10 – 11 times for the dough to come together.
  3. Return the dough in the bowl and cover with a towel or piece of plastic wrap. Place the bowl in a warm place to rise until the dough is doubled. Cut 20 or so 4-5″ squares of parchment paper while you wait.
  4. Once the dough has doubled, remove it from the bowl and roll it to about 1 1/2″ thick. Cut 3-4″ rings from the dough. Place each ring on a small square of parchment. Place the dough rings on baking sheets and cover loosely. Place doughnuts holes 3-4 on each piece of parchment.
  5. Once all the doughnuts have been cut and covered, let them rise for at least one hour until they have puffed considerably.
  6. In a high-sided, heavy-bottomed pan heat the oil to 350º F. Once the oil is hot, add in the doughnuts, about four at a time. Fry for 2-3 minutes per side, until golden brown.
  7. Remove the doughnuts to a baking rack to drain and cool slightly.
  8. In a shallow bowl, mix together the powdered sugar and the lime juice, starting with 2 teaspoons until a thick but still fluid consistency is reached. Dip the top of each doughnut into the glaze. Immediately sprinkle with coconut flakes and allow to set.

Coconut Lime Raised Doughnut #recipe via MomAdvice.com

Pin It

Winter Activity Idea: Baking With Kids

Thursday, January 16th, 2014

Tips & Tricks for Cooking With Your Kids

Today is my 36th birthday and someone special wanted to bake me cupcakes for my special day. We decided to test-drive the new Betty Crocker Gluten-Free Cake Mixes and wanted to offer some pointers for getting your kids in the kitchen… so they can bake your birthday cake.

Aren’t I a smart mom?

Walmart asked me to share a beloved winter activity with you that we do with our kids. Of course, one of my favorite activities in the winter is baking. What I appreciate most about my kids is their enthusiasm for learning and helping in my kitchen.

Cooking together can teach your kids so much. Here are just a few lessons we worked on while baking a cake together.

Tips & Tricks for Cooking With Your Kids

Cooking Together Builds Reading Skills

One of the best parts about having your kids help you in the kitchen is that they can practice their reading skills. With picture tutorials on the back of many box mixes, it can help beginning readers navigate the ingredient list and list of supplies needed to cook.

Tips & Tricks for Cooking With Your Kids

Cooking Together Builds Math Skills

Cooking with your kids isn’t only helpful in just the reading department.  In fact, the biggest challenge for me as a chef involves all that math that goes into recipes. For young kids, understanding fractions and measurements of the ingredients can be tricky, but can offer an important lesson.

Don’t just have them do the measuring, but explain all those different spoon sizes or read the packaging of the butter to have them figure out how much a 1/2 cup equals.

Tips & Tricks for Cooking With Your Kids

Tips & Tricks for Cooking With Your Kids

Cooking Together Can Lead to Independence

One of the hardest things I have found about being a parent is having the patience to let them do it themselves. It is the same patience that I needed when teaching them to tie their shoes, to clean up after themselves, and to help in the kitchen. Yes, it is so much faster for me to just do it myself, BUT when they become adults, how will they ever know how to do anything if their mama always did it for them?

Instead of using things like stand mixers and big appliances to get the jobs done in the kitchen, invest in the time of having them mix and beat things by hand or with hand mixers. Allow extra time when cooking with your children to give them time to figure things out themselves and to create it on their own.


Tips & Tricks for Cooking With Your Kids Tips & Tricks for Cooking With Your Kids

Cooking Together Can Build Confidence

When we eat the food our  kids make we do a lot of oohing and ahhing over it. Really take in the details of their work and compliment them on their presentation and flavors of their dish.

We have always tried to do this with our kids and I get such a kick out of them when I hear them mimicking back to me what a great job I have done on dishes or on the flavors of the foods I put together for them.

 Betty Crocker Gluten-Free Cake Mix Betty Crocker Gluten-Free Cake Mix Betty Crocker Gluten-Free Cake Mix

For those that asked about this Betty Crocker gluten-free cake mix, I will be honest, and say that it really hit the spot. We baked these at 325 degrees for about 20 minutes and the cake was surprisingly light and resembled a sponge cake texture. The cake mix yielded 12 cupcakes and the cost on the mix was just $4.58.

When I shared about it on Facebook, friends chimed in with recommendations like adding a pudding mix to the cake or even a little extra vanilla, to boost the flavor. I am definitely going to have to try these additions! Layered with a thick layer of chocolate frosting though, and my daughter’s signature sprinkles, this cake was truly delicious.

If you are hosting a birthday party or need to bring in a gluten-free treat to school, I would highly recommend this cake mix for a fast and easy treat. The only difference  between making this and traditional boxed cake mixes is adding softened butter versus the oil.

Burkina Faso Fundraiser

On a personal note, I also wanted to thank you all for helping me celebrate my birthday this year by funding our wells for Burkina Faso. At this point, I am the proud owner of ONE WELL of clean water, which will give water to ONE THOUSAND people, through your donations. I am also almost halfway to my SECOND WELL. Can you believe that? In just three short days, we have collected almost $3,000 dollars! 

burkina_faso_collage_2

We still need to collect $1,000 for our second well. You can donate as little as $2 towards our cause. Here are four things you could “give up,” this week to help me give clean water to women & children. Just think of the lives you can help me save this week!

Thank you for celebrating my birthday with me!! It has been the best year yet!


walmart_mom_disclaimer


Pin It

Chocolate Chiffon Cake with Peppermint Frosting

Monday, January 13th, 2014

Chocolate Chiffon Cake with Peppermint Frosting

In honor of MomAdvice.com’s tenth birthday, I wanted to share this recipe for an easy chocolate chiffon cake made with peppermint buttercream frosting, perfect for celebrating our special day with you. This chocolate chiffon cake is made from a cake mix and the homemade peppermint buttercream frosting is the perfect use of any leftover holiday candy canes you might have in your home.

10 Year Celebration

Since this is my own birthday week, we decided to devote this week towards celebrating this incredible milestone. Tomorrow I will be revealing our best giveaway yet and I will be calling upon you to help me fulfill our site’s birthday wish. I can’t even believe that the site has now been around a decade! Someone pinch me please!

In the meantime, let’s talk about making a birthday cake for our celebration.

Chocolate Chiffon Cake with Peppermint Frosting

Truth be told, this is my sweet little girl’s birthday pick this year. It is a family tradition that the birthday child gets to pick their birthday cake each year from my big stack of cookbooks. She had her heart set on a chocolate chiffon cake, but the one that was featured in the cookbook was a bundt cake and I knew she was looking for that traditional layered cake that makes all parties special.

I did some web searching and figured out how to make this into a layered cake and then frosted it with a beautiful peppermint buttercream frosting to finish it off. We had to tint it pink though…this is after all, Emily’s birthday.

Chocolate Chiffon Cake with Peppermint Frosting

I am a very humble cake decorator so I relied upon a few yarn pom poms on skewers to create a little cake banner over her cake. Peppermint candies crushed on top also act as a great eye distractor from my sad frosting skills.

Hey, a mom can’t be great at everything


Chocolate Chiffon Cake with Peppermint Frosting Chocolate Chiffon Cake with Peppermint Frosting Chocolate Chiffon Cake with Peppermint Frosting Chocolate Chiffon Cake with Peppermint Frosting

We popped our cake in a cake carrier and transported it to Grand Rapids, Michigan where we took a family holiday in lieu of gifts this year. We got to celebrate Emily (just the four of us) and enjoyed several days of seeing the sites while enjoying a cozy cabin away from it all. I made my daughter’s birthday dinner request (a giant helping of Weeknight Chicken Lo Mein) and a  delicious slice of birthday cake was enjoyed by all. And I do mean ALL.

My husband, who seems to hate cake for some reason, wanted a second slice and the whole family agreed that this was the perfect birthday cake. The cake tastes so light and airy and the buttercream had just a hint of mint that added a creamy finish to the top of the slice.  It was the perfect ending to a perfect evening celebrating.

Now that we have covered the cake, tomorrow we will be covering the GIFTS.

Please come back tomorrow to see our big surprise!

Here’s a hint… this gift will help a thousand people! ONE THOUSAND PEOPLE.  Have I grabbed your interest yet?

See you tomorrow for the big reveal! 

Chocolate Chiffon Cake with Peppermint Frosting
Recipe Type: Dessert
Author: Adapted from Chocolate from the Cake Mix Doctor
Prep time:
Cook time:
Total time:
Serves: 16
A beautiful chiffon cake made from a boxed cake mix and laced with peppermint icing for the perfect duo of chocolate & mint.
Ingredients
  • 5 large egg whites
  • 1/2 teaspoon cream of tartar
  • 1 package (18.25 ounces) devil’s food cake mix
  • 3/4 cup water
  • 1/2 cup canola oil
  • 3 large egg yolks
  • 2 teaspoons pure vanilla extract
  • 8 tablespoons (1 stick) butter, at room temperature
  • 1/2 teaspoon pure peppermint extract
  • 3 1/2 cups sifted confectioner’s sugar
  • 3-4 tablespoons milk
  • 1/2 cup crushed peppermint candies
Instructions
  1. Preheat oven to 325 degrees. Set aside two greased 8″ cake pans.
  2. Place the egg whites & cream of tartar in a mixing bowl. Beat with your mixer on high speed until stiff peaks form (approximately 2-3 minutes). Set aside.
  3. Place the cake mix, water, oil, egg yolks, and vanilla in a large mixing bowl. Beat these until incorporated.
  4. Turn the egg whites out on top of the batter and fold it in until the mixture is light, but well combined.
  5. Bake the cakes until they spring back when lightly touched with your fingers, approximately 45-50 minutes.
  6. Invert them immediately and allow the cakes to cool for one hour upside down.
  7. Remove them from the cake pan and place them right side up again.
  8. Place the butter, peppermint extract, and 1 cup of the confectioners’ sugar in a large mixing bowl.
  9. Blend to incorporate and slowly add in the remaining sugar and remaining milk. If the frosting seems too stiff, add in an additional tablespoon of milk.
  10. Decorate with crushed peppermint candies on top.


Pin It

Simplifying the Holiday Parade of Activities

Wednesday, December 18th, 2013

*This post is sponsored by Ritz Crackers

Each year, I find myself coming to the topic of simplifying the holidays.  Don’t we just all wish this time of year was a little easier?  Despite my best efforts to simplify, it can feel impossible in the midst of the kid’s holiday programs, get togethers, shopping, wrapping, sending of cards, gift-giving, & holiday baking.

I don’t want to brag, but this year we really did achieve that simple holiday we have been longing for and I am partnering with Ritz to share how you can avoid the parade of endless holiday to-do’s and instead embrace a simpler holiday.

 Simplifying the Holiday Parade of Activities

Simplify the Giving of Holiday Cards


I love, love, love having pictures that I am in and having someone else take them for me, but we lost track of time and weren’t able to book our usual family session. Instead of not sending cards, I set my camera up on a tripod and we took our family shot by setting the timer on our camera and having me jump into the family picture.   By getting everything set up in advance before my family came outside, we were able to get our picture in a mere five minutes.  Before everyone had their coats off, I had our photos edited and cards in the mail. The best part is that we have moved our family session to the Spring, a time of year we decided was much less chaotic, and will really enjoy it all a little bit more.

I will admit that I was also was more laid back about how we did our cards this year and enlisted one of my favorite helpers to assist me in this year’s mailing. Not only was she excellent at adding our stamps and sealing the envelopes, but she also kept me on track because she was waiting for me to get those addresses on so she could do her part with them.  It gave us time to chat while we were doing them and ended up being fun instead of a holiday chore this year.

 Easy No-Bake Mint Thin Recipe from MomAdvice.com.

Simplify the Holiday Baking


This year we decided to skip the big baking day and make easy treats instead. Although I usually love holiday baking, this year I focused more on creating knitted gifts than my typical holiday treat box. Fortunately, we found a fun holiday treat that we could make that didn’t require a bit of baking, but was just as delicious. On the Ritz Holiday Parade site, we found an easy recipe for Mint Thins to create together that tasted just like one of our favorite cookie treats, but were made with Ritz Crackers, chocolate, and crushed candy canes.

 Easy No-Bake Mint Thin Recipe from MomAdvice.com.

Easy No-Bake Mint Thin Recipe from MomAdvice.com.

It just goes to show that making holiday treats doesn’t have to be an elaborate baking day. My kids loved helping to crush (and eat!) the candy canes for our cookies and we enjoyed eating these while watching, “A Christmas Story,” this year. Yet another simple and easy tradition is born!

 Simplifying the Holiday Parade of Activities

Simplify the Gift Giving


I often talk about our commitment to do the Four Gift Rule, but this year we took it a step further and asked the kids if they would like to skip the presents and just take a family adventure together. We gave them lots of options for places we could take a mini-vacation to and they chose a trip to Grand Rapids, Michigan for our holiday getaway. We are so excited to take in all of the museums, holiday lights, ice skating, and see the sites of the city.

If your kids are struggling to come up with gifts this year or your home is overrun with just too much stuff, consider creating your very own, “Choose Your Own Adventure,” vacation in lieu of gifts. Not only did I have a lot less to buy this year, but I also get to spend four days with my family making incredible memories that I hope they will remember forever.

Start planning and dreaming ahead for next year though because those vacation rentals do go quickly!

 Ritz Parade Float

Focus On the Fun


Ritz wants to bring back the fun for the holidays and this year they have created a fun interactive Ritz Parade where you can visit the site and build your very own float. You can add up to twelve items on your float from toys, characters, celebrations, and banners. The pieces can be scaled to your desired size and placed anywhere on your float. Once it is complete, you can share your holiday float with others. It’s a fun little interactive tool that you can use to keep the kids busy while you are putting those last minute touches on those holiday festivities. Since we adopted a cat this year, we loved making a float of her for our holiday parade. I am sure this illustrates just how special she has become to all of us!

In addition, the Ritz parade allows consumers to unlock deals to help decrease the stress of gift buying! You can check out all the deals here!

For a little added holiday fun, check out how Ritz surprised shoppers with a fun rap. Get it? Rapping Wrappers!!


Happy Holidays, friends!

 Easy No-Bake Mint Thin Recipe from MomAdvice.com.

Easy Mint Thin Cookies
Recipe Type: Dessert
Author: Amy Clark
Prep time:
Total time:
Serves: 12
Looking for a quick holiday treat to share that doesn’t require any baking? You must try these delicious Mint Thin “Cookies.” You won’t believe how good or easy these are to make (and eat!)
Ingredients
  • 2 pkg. (4 oz. each) semi-sweet baking chocolate, melted, slightly cooled
  • 1/4 tsp. peppermint extract
  • 36 RITZ Crackers
  • 1 candy cane (6 inch), crushed
Instructions
  1. Mix chocolate and extract.
  2. Dip crackers in chocolate mixture, turning to completely coat each cracker. Carefully scrape off excess chocolate.
  3. Place crackers in single layer on waxed paper-covered baking sheets; sprinkle with crushed candy.
  4. Refrigerate thirty minutes or until chocolate is firm.


This post is sponsored by Ritz Crackers. I’ve received compensation for my time and effort in creating this post. All thoughts and opinions are my own.

Pin It

Chocolate Snickerdoodle Cake

Tuesday, July 9th, 2013

Chocolate Snickerdoodle Cake
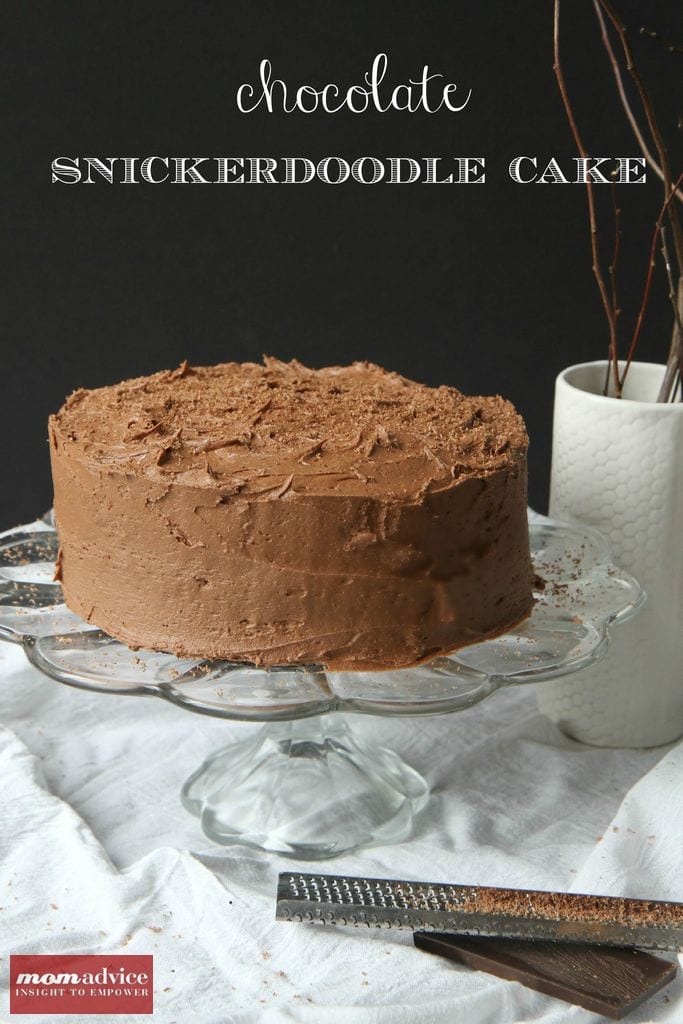
If there is one flavor we love around here it is snickerdoodle. Today I wanted to share an easy recipe for a chocolate snickerdoodle cake that you will flip for. This chocolate snickerdoodle cake is coated in a delicious chocolate cream cheese frosting and adorned in a dusting of dark chocolate candy that adds that perfect finishing touch.

Chocolate Snickerdoodle Cake
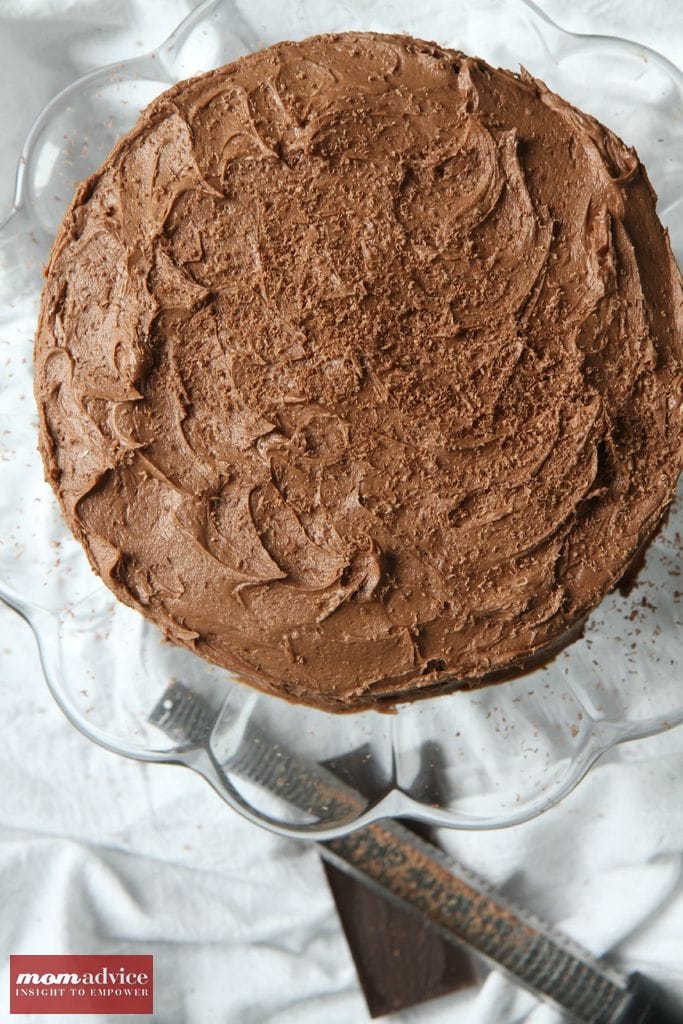
This week we celebrated my son’s 11th birthday. In lieu of an elaborate themed dinner and event, he had a sleepover with his best friend and we invited our family over for this cake and for a red, white, & blue trifle to celebrate.

I am the worst cake decorator known to man and produce some of the ugliest, most lopsided, and crumbiest looking cakes ever. I finally found the trick for me was to buy two 8″ Wilton pans (affiliate)  (instead of those 9″ pans that produced flat layers for me) and a good spatula (affiliate). This cake was put together in an hour and the prettiest cake I’ve ever made (if I do say so myself!). It is amazing what a little investment in tools can produce.

Chocolate Snickerdoodle Cake
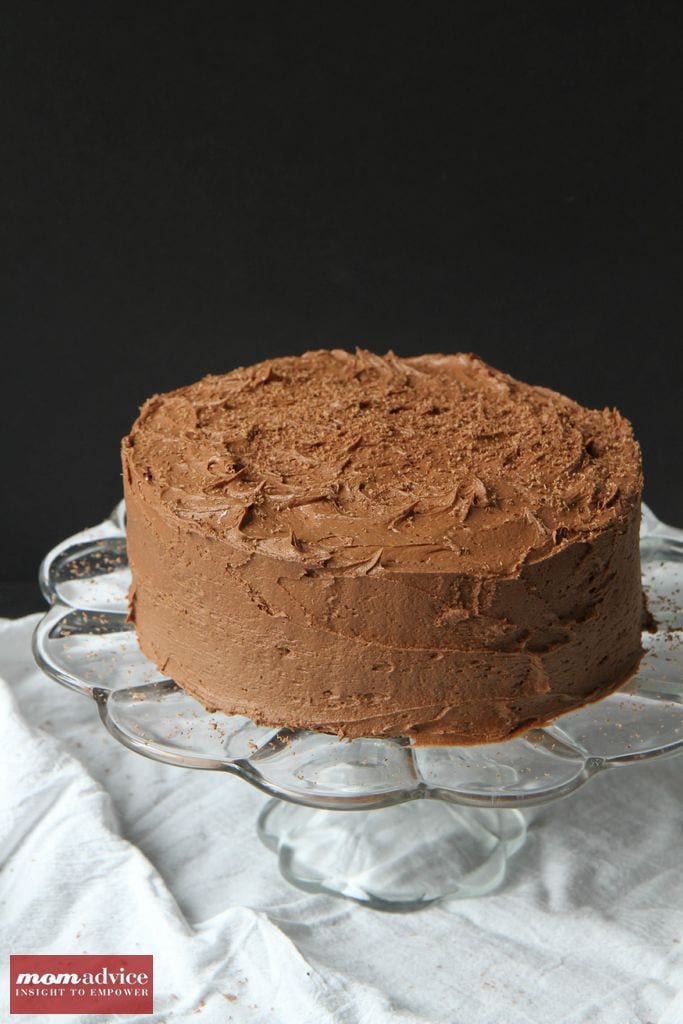
As is tradition, the birthday kid gets to pick their cake from my cookbooks every year. When Ethan selected this cake, I just knew it would be a hit. This cake is moist, rich, and laced in cinnamon. What makes the cake really taste delightful though is the light cream cheese frosting that it is coated in.

Chocolate Snickerdoodle Cake

Chocolate Snickerdoodle Cake
Recipe Type: Dessert
Author: Adapted from Chocolate from Cake Mix Doctor
Prep time:
Cook time:
Total time:
A rich chocolate cake laced with that snickerdoodle cinnamon flavor that our family loves!
Ingredients
  • 1 package (18.25 ounces) plain dark chocolate fudge cake mix
  • 3/4 cup skim milk
  • 3/4 cup canola oil
  • 3 large eggs
  • 2 teaspoons ground cinnamon
  • 1 teaspoon vanilla extract
  • For frosting: 1 package low-fat cream cheese (8 ounces), at room temperature
  • 8 tablespoons (1 stick) butter, at room temperature
  • 1/2 cup unsweetened cocoa powder
  • 2 teaspoon ground cinnamon
  • 1 teaspoon vanilla extract
  • 3 1/2 cups confectioners’s sugar
  • Dark chocolate candy bar for grating on top (optional)
Instructions
  1. Preheat oven to 350 degrees. Grease two 8″ pans and set aside.
  2. Place the cake mix, oil, eggs, cinnamon, and vanilla in a large mixing bowl and blend for three minutes, or until well-blended.
  3. Pour evenly into two pans, smoothing with spatula.
  4. Bake for 28-32 minutes or until the cake springs back when lightly pressed with your finger. Remove and allow to cool for ten minutes. Remove from pans & then cool for another 30 minutes.
  5. Place the cream cheese & butter in a mix bowl. Blend until combined. Add sifted cocoa powder, cinnamon, and confectioners sugar, and finally vanilla. Blend until combined and icing looks fluffy. Add an additional 1/4-1/2 cup confectioners’ sugar if needed.
  6. Ice cake and dust with dark chocolate candy bar shavings to finish.

Adapted from Chocolate from the Cake Mix Doctor (affiliate)

Pin It

Summer Party Fun: How to Host a S’more Toppings Bar Party

Wednesday, July 3rd, 2013

How to Host a S'more Toppings Bar Party from MomAdvice.com.

If there is one thing we love about summer, it is our s’mores. Today I wanted to showcase a s’more toppings bar that you can create for a summer party and share some unexpected s’more flavor combinations you can try on your s’more toppings bar.

Walmart challenged me to create a summer party that anyone could replicate with just $25 in supplies. I wanted to host an evening for my girlfriends with a s’more toppings bar.

I love that this idea is easy, requires no cooking, and you can even encourage each of your friends to bring their own favorite topping or a drink to share. I displayed my toppings in inexpensive ice cream bowls that you can find over in the seasonal section of the store for a buck each!

S’more Toppings Bar Ideas & Combinations


Marshmallow, Strawberries, & Nutella

Marshmallow, Strawberries, & Dark Chocolate

Marshmallow, Strawberries, With Dark Chocolate & Sea Salt Bars

Marshmallow, Bananas, & Nutella

Marshmallow, Strawberry, Banana, & Nutella

Marshmallow & Reese’s Cups

Flavored Marshmallows (Butterscotch, Vanilla & Chocolate Swirl, or Key Lime)

Andes Mints With Marshmallow

Lemon Curd & Marshmallows (hellooo, lemon meringue pie!!)

Marshmallow, Apple Slices, & Cinnamon

Marshmallow, Biscoff Spread, & Apples

Marshmallow & Biscoff Spread

Chocolate Graham Crackers, Marshmallow, & Strawberries

How to Host a S'more Toppings Bar Party from MomAdvice.com.

It was such a fun night and everyone walked away with a new favorite s’more combination.  If you have a load of toppings, you can write titles next to them or give your guests a helpful cheat sheet of suggestions to put together after roasting their marshmallows. Kraft paper can be found over in the shipping & home office supplies section of the store along with Sharpie pens for writing your own cheat sheet of notes.

How to Host a S'more Toppings Bar Party from MomAdvice.com.

How to Host a S'more Toppings Bar Party from MomAdvice.com.

How to Host a S'more Toppings Bar Party from MomAdvice.com.
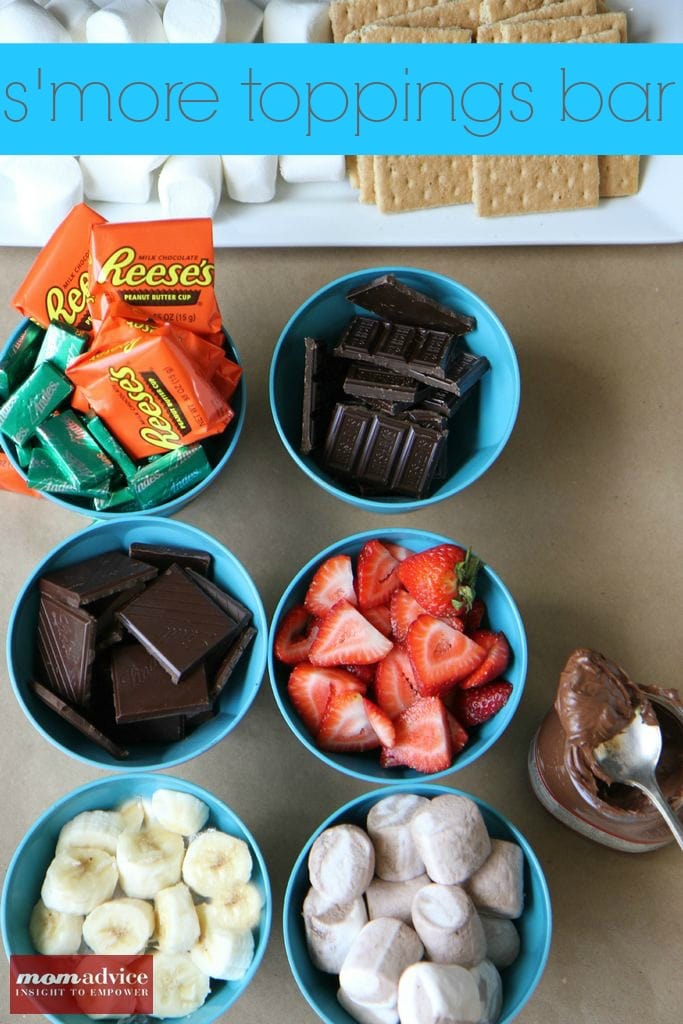
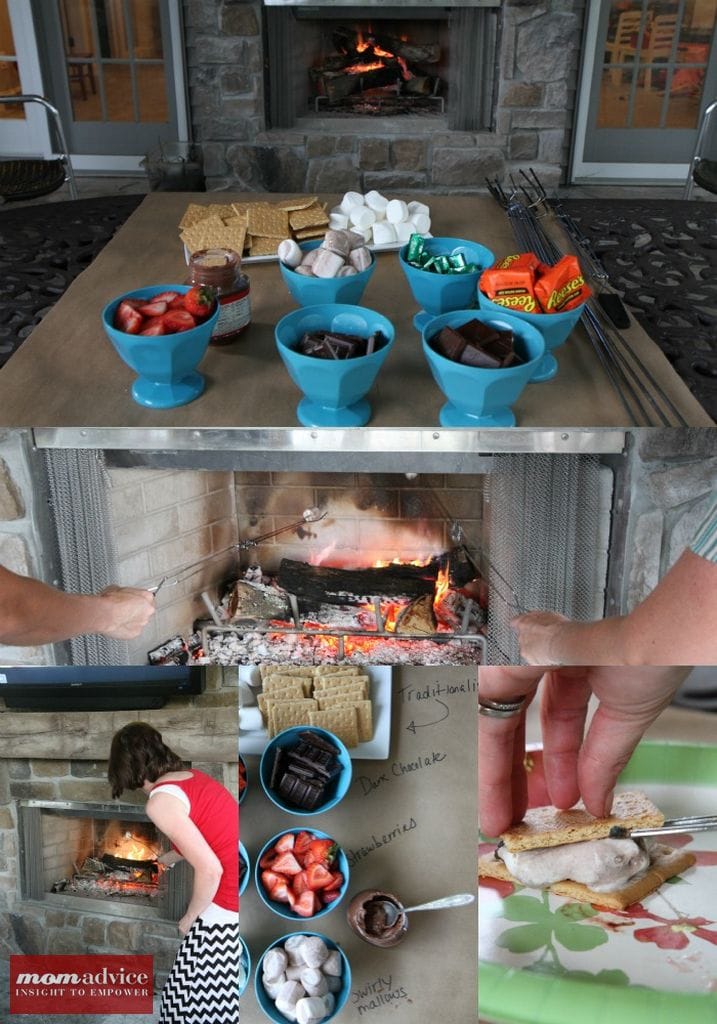
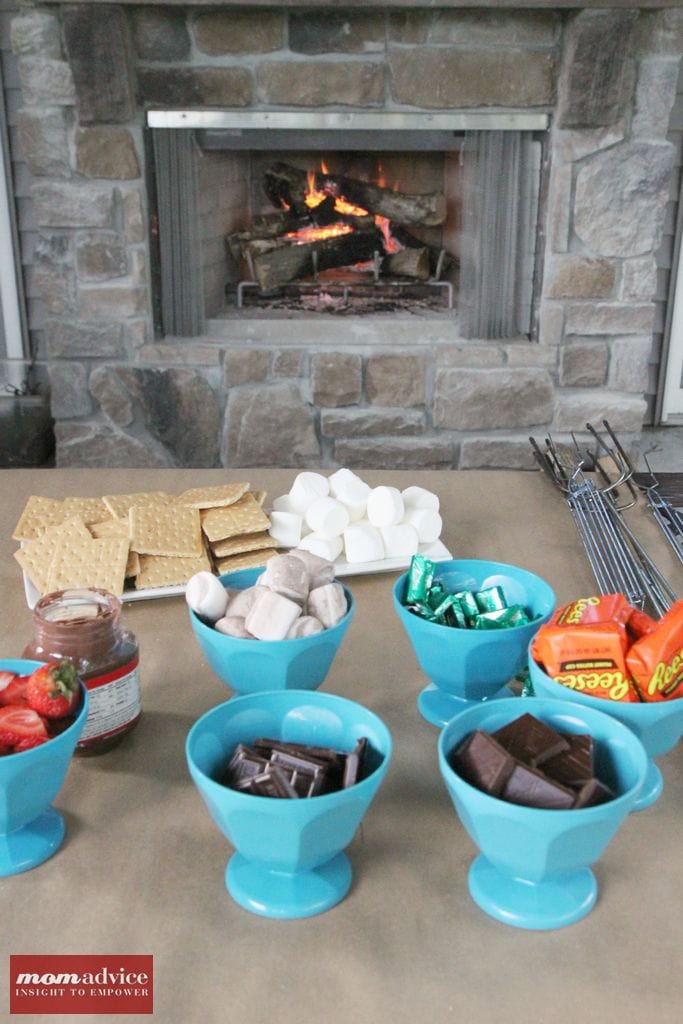
I had planned to host this at my own home, but a powerful gust of storms moved in and left us without power for several days. My dear friend graciously stepped up to the plate to host the evening and allowed me to setup my s’more topping bar at her house.

How awesome is this setup? I know, SO awesome!

I am so thankful for great friends, great times, and great food! I hope this inspires you for a get together with your own friends this summer or even a fun birthday party idea in the summer months!

This s’mores party was such a hit and I can’t wait to do it again and to do something this fantastic for less than $25? Absolutely priceless!

walmart_mom_disclaimer

What is your favorite s’more combination?

Pin It

Fresh Peach Sorbet

Monday, July 1st, 2013

Fresh Peach Sorbet
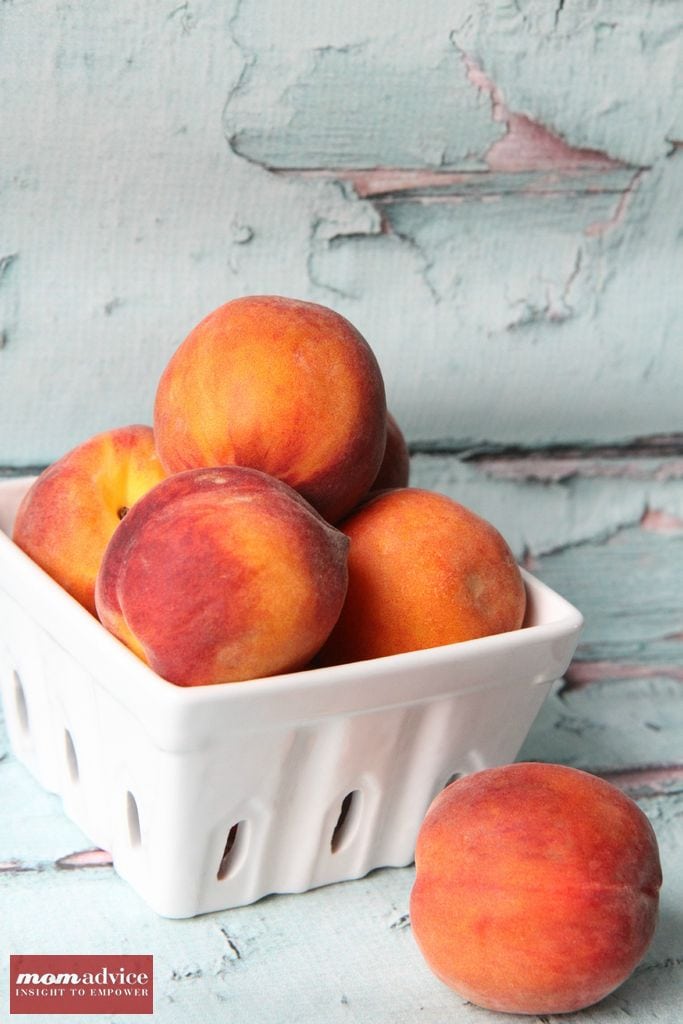
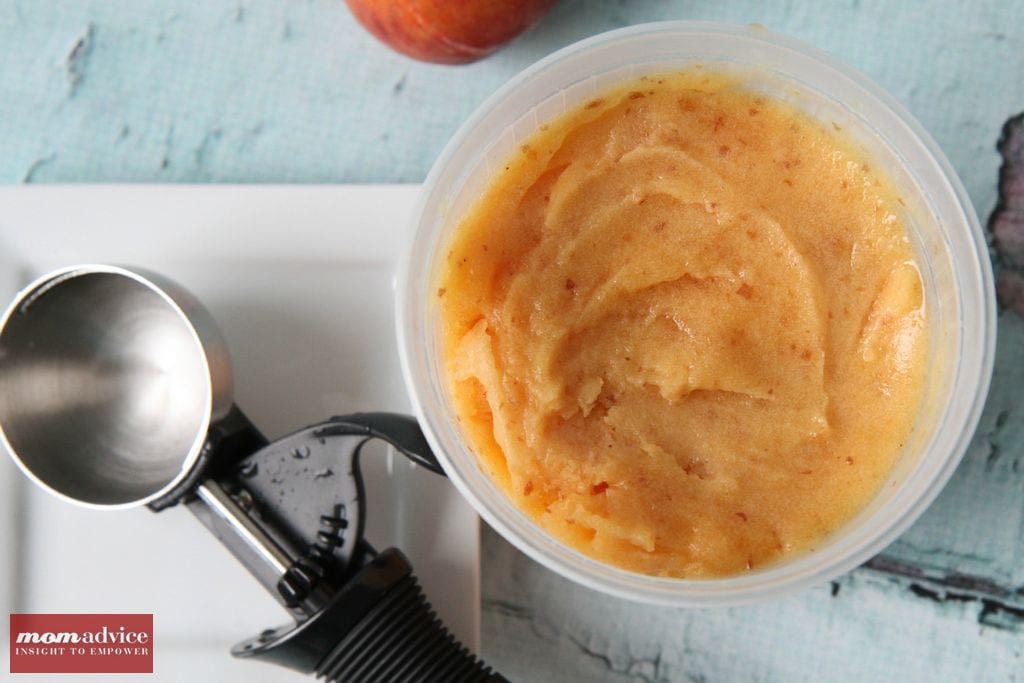
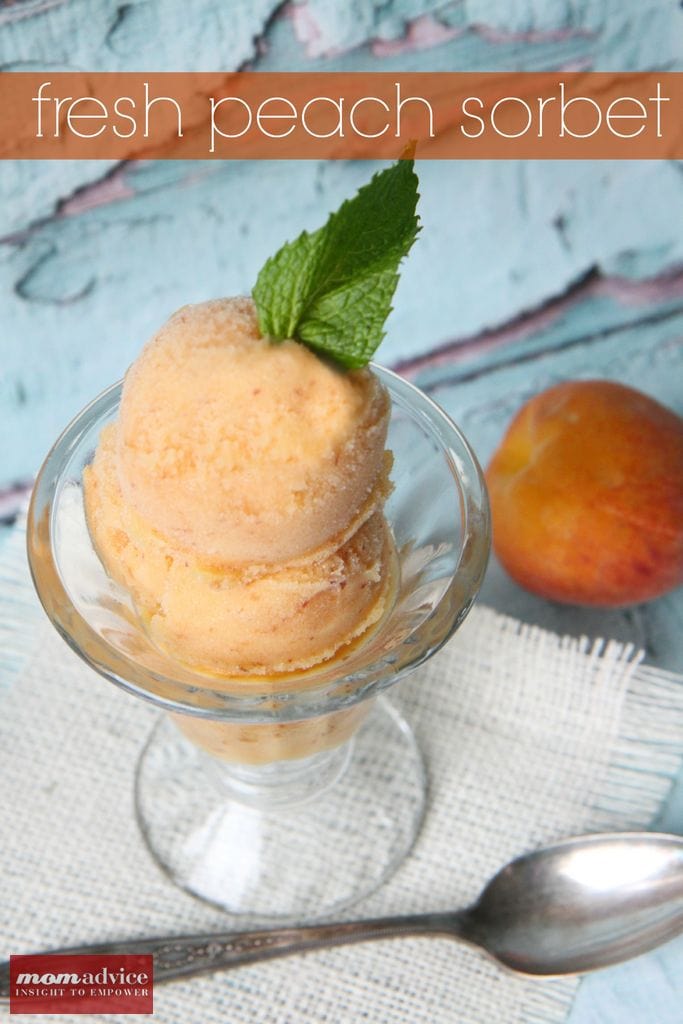
Peach season is upon us and what could be better than putting those fresh peaches to work in a peach sorbet. This homemade peach sorbet tastes rich and creamy, but is dairy-free and packed with fresh fruit, for the perfect summer treat!

Fresh Peach Sorbet

I was a kid that grew up on the good old-fashioned canned peaches and humbly admit that I had never eaten a fresh peach until this year. Once I tasted how delicious a fresh peach peach was, I realized just what I had been missing all of these years.

Each month, Walmart is challenging  me to use one of their produce items a new way and to share some easy tips for selecting your produce. Have you seen my past projects? I bet you would love our Baked Strawberry Doughnuts and Blueberry Sangria Lemonade that I created with some of the past produce picks.

Fresh Peach Sorbet

How Do I Pick the Perfect Peach?

Look for peaches that have a slight give when pressed, but try to avoid peaches that are heavily bruised. When examining the stem end, they should have a yellow, amber, or golden hue, but not a greenish tinge.

If you have peaches that you’d like to ripen further, leave them at room temperature in a dry area. Check them daily to see if they have reached the desired ripeness and upon reaching that, refrigerate them. Refrigeration helps to stop that ripening process so even those super ripe peaches will last a couple of days longer in your refrigerator.

This month marks one year that I have started my journey on a dairy-free diet. It’s been one of the hardest things I have done, but one of the most beneficial to my health. There are few things that I can’t replicate or substitute, and the only true challenges that present themselves are when I am not at home and able to control what is being served.

Although I have never been a big ice cream eater, sometimes I crave that ice cold treat in the summer. I decided to create this peach sorbet as a special treat for myself. I love this recipe for a lot of reasons; it is jam-packed with fresh fruit, it doesn’t even require you to peel a peach, it has no dairy, and it tastes like summer in a dish.

What’s not to love?

Fresh Peach Sorbet

Why Is There Alcohol in Your Sorbet?

If you don’t want your ice cream or sorbets to freeze as hard as a rock, you can add a little alcohol to your ice cream or sorbet recipes to keep the ice cream softer and easier to scoop. I promise that you won’t even taste it.

Alcohol basically acts as an anti-freeze agent in your ice cream and a little bit will go a long way in your recipes (only 1-3 tablespoons necessary per batch). To read more about the science behind alcohol in your ice creams or sorbets, check out this awesome post from David Lebovitz that explains it a bit more.

If you don’t keep alcohol in your home, try purchasing those mini bottles of alcohol for your homemade ice cream batches. I promise, you will thank me when you don’t have to wait an hour for the ice cream to thaw so you can scoop it!

Why Don’t You Peel the Peaches for the Sorbet?

Why make more work for yourself? Your food processor will do a great job of breaking the skin down in your sorbet and you won’t even taste it. I think it adds some pretty flecks of color throughout the batch and it is less work for you! That is what makes this recipe such a winner with this fruit!

Fresh Peach Sorbet

Fresh Peach Sorbet
Recipe Type: Dessert
Author: Amy Allen Clark
Prep time:
Cook time:
Total time:
Serves: 4
An easy dairy-free sorbet packed with fresh peaches for a fun summertime treat! Low in calories, rich in fresh fruit, and easy to make!
Ingredients
  • 1 cup sugar
  • 1/2 cup water
  • 2 pounds fresh peaches (any variety)
  • 2 tablespoons fresh lemon juice
  • 1 teaspoon lightly beaten egg white
  • 1 tablespoon vodka
Instructions
  1. In a small heavy saucepan heat sugar and water, stirring until sugar is dissolved. Cool syrup.
  2. Cut and pit your peaches, leaving skins intact.
  3. Add the peaches to your food processor and purée until smooth.
  4. Transfer the mixture to a bowl and add syrup and lemon juice.
  5. Chill the mixture until cold.
  6. Stir in egg white and vodka.
  7. Add the mixture to your ice cream maker and run as directed (I churned mine for about 15 minutes).
  8. Serve sorbet immediately or transfer to an airtight container and put in freezer to harden for a few hours.

walmart_mom_disclaimer


Pin It

A Monster of a Father’s Day Gift: Monster Cookie Bars & Monster Printable Cards For Dad

Monday, June 3rd, 2013

Monster Cookie Bars & Printables from MomAdvice.com.
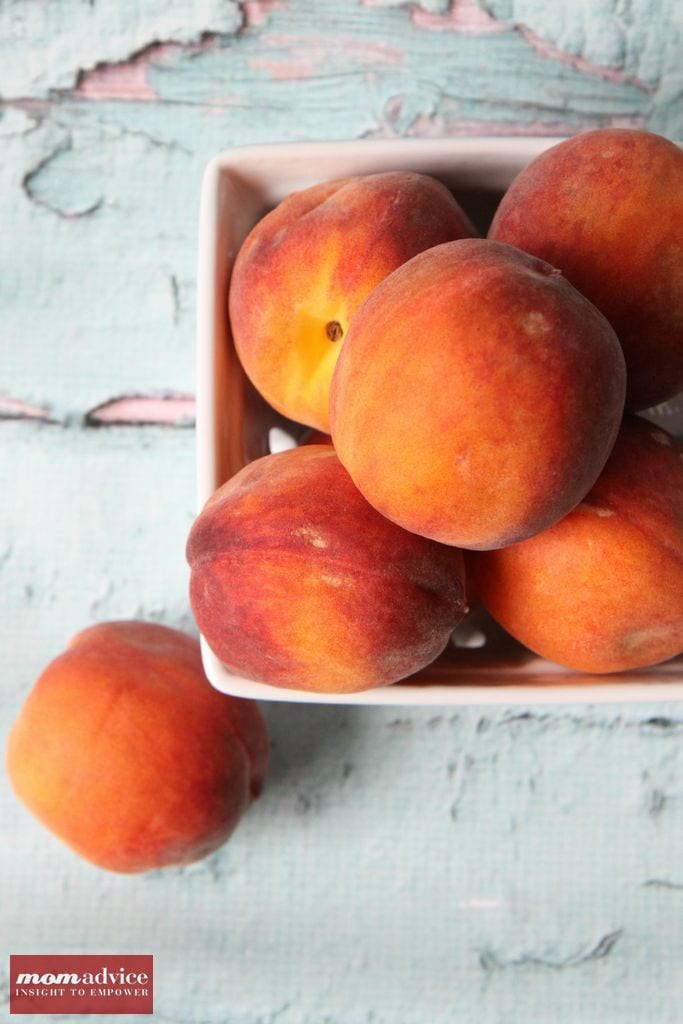
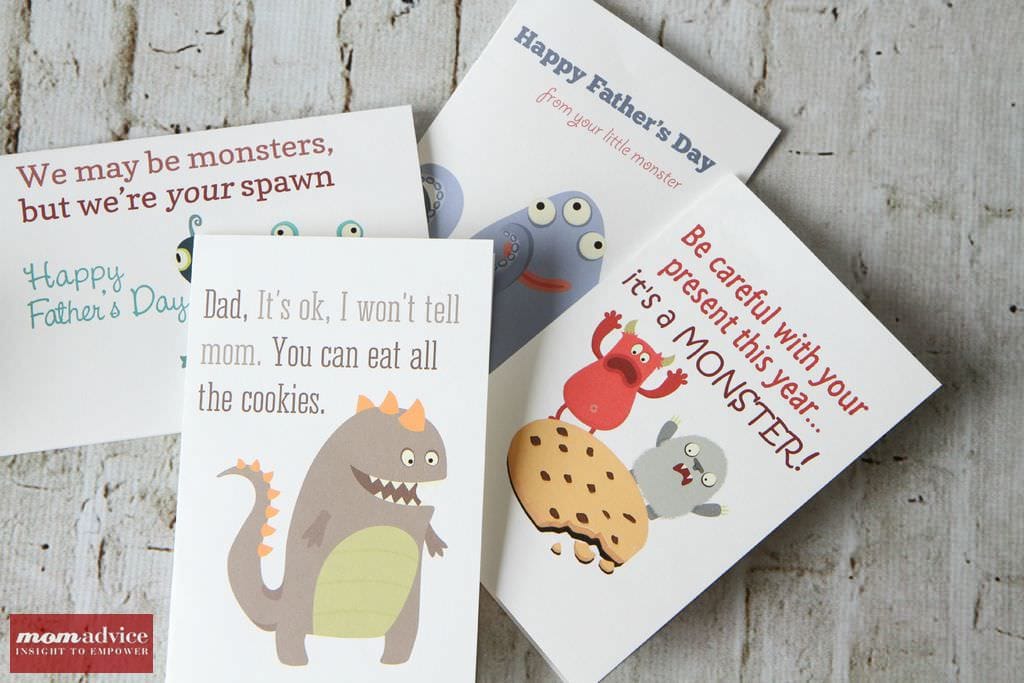
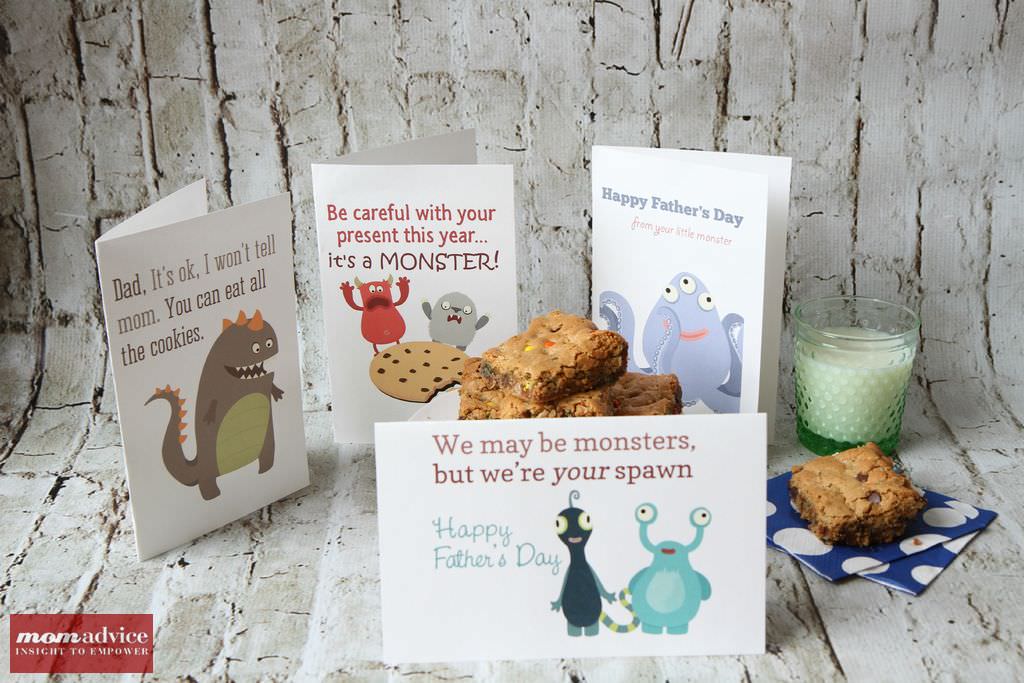
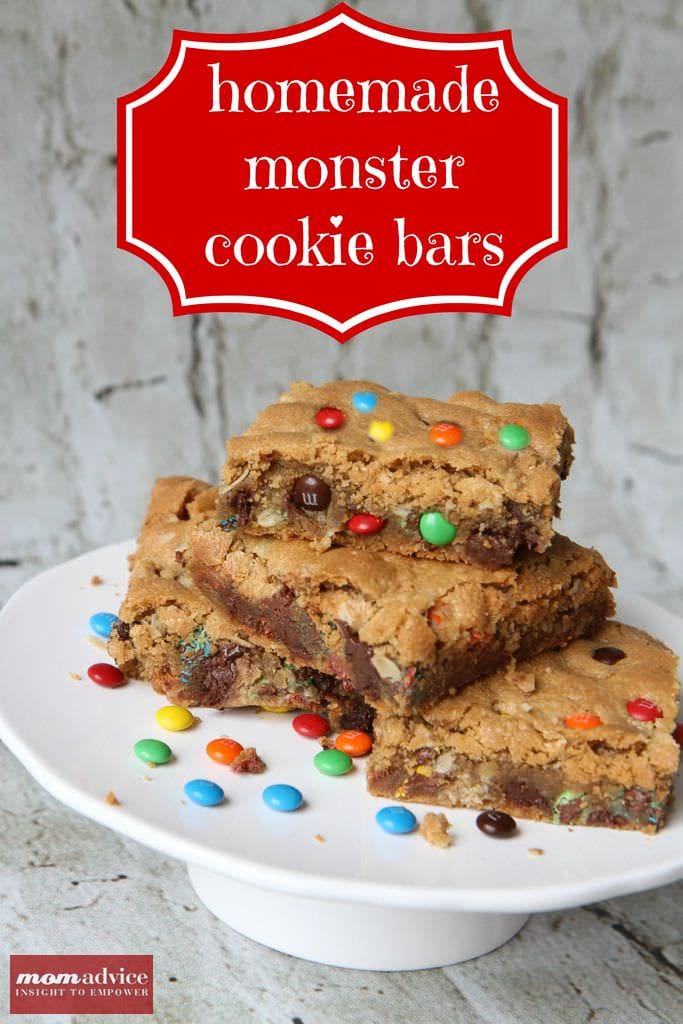
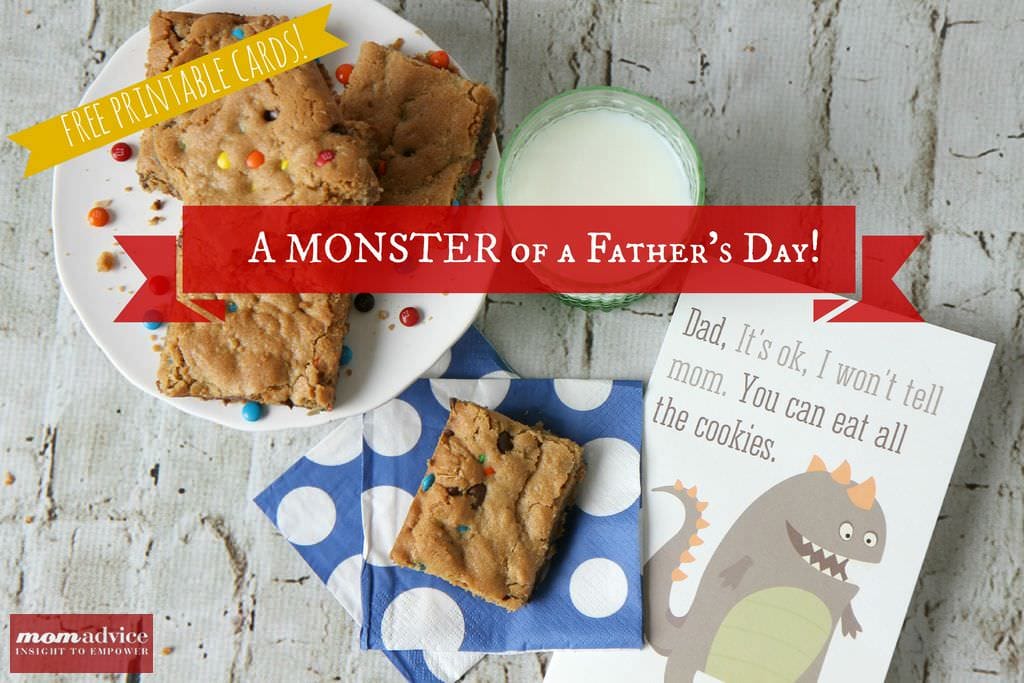
Father’s Day is just around the corner & today we wanted to share a monster of a Father’s Day gift with a cute spin on the monster theme with easy monster cookie bars and printable monster cards for a special Dad in your life.
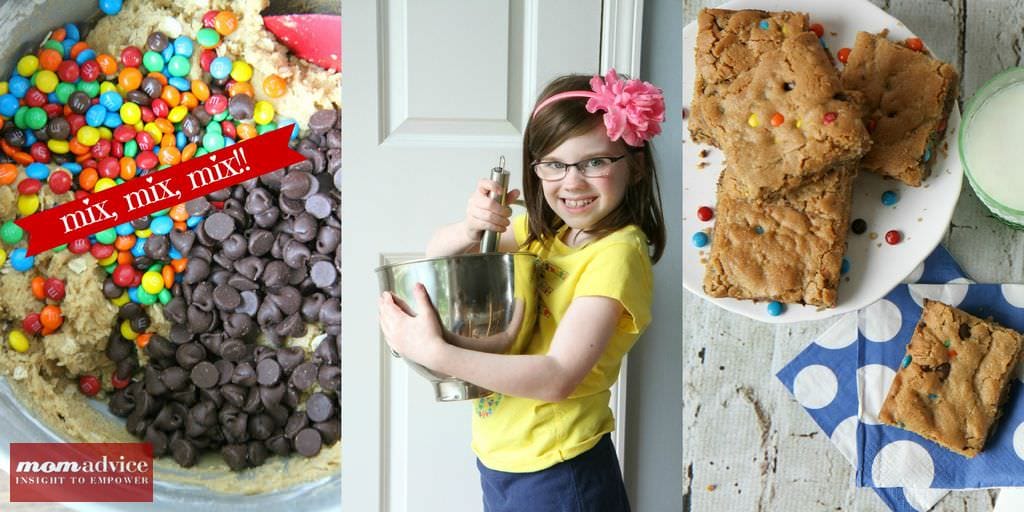
Monster Cookie Bars & Printables from MomAdvice.com.

This week’s challenge from Walmart was to create an inexpensive Father’s Day gift that would wow your Dad. Well, if your dad is anything like our Dad, he is certainly wowed with homemade treats and funny cards with a great sense of humor. Our idea was to mix up a batch of thick and delicious Monster Cookie Bars made with rolled oats, peanut butter, mini M&M’s (found over in their candy aisle), and chocolate chips.

Monster Cookies can be a bit of a monster to create as a drop cookie because of their monster size. I choose to echo the words of an amazing woman I once heard speak these wise words…

“Ain’t nobody got time for that.”

Wise, right?

Bar cookies get a big fist pump from this busy mom and if a celebration requires a cookie, I often rely on these chocolate chip cookie bars to get us through whatever baking requirements are made for those occasions. These Monster Cookie Bars are equally delicious and offer that crusty exterior with that soft interior that makes, in my humble opinion, the perfect cookie.

Monster Cookie Bars & Printables from MomAdvice.com.

Monster Cookie Bars & Printables from MomAdvice.com.Monster Cookie Bars & Printables from MomAdvice.com.

What Father’s Day would be complete without a card to accompany your sweet gift? We are so excited to debut these adorable Monster cards that you can print out to attach with your Monster Cookie Bars for your favorite Dad. We have included three fun printable cards for Father’s Day and then 1 that could be used for any occasion to accompany your sweet treat. Print these printables out on white card stock  and you will be all set for this Father’s Day!

Monster Cookie Bars & Printables from MomAdvice.com.Monster Cookie Bars & Printables from MomAdvice.com.


Printable Monster Cards from MomAdvice.com.

Download Your FREE Monster Card Printables HERE:

Happy Father’s Day From Your Monster FREE printable card

Your Gift is a Monster! FREE printable card

Eat All the Cookies FREE printable card

We Are Your Spawn FREE printable card

Monster Cookie Bars & Printables from MomAdvice.com.

I can admit that this family has had Monsters on our brain after getting a sneak peek at the Monsters University movie that is set to hit theaters on June 21st. While our family was at the Disney Social Media Moms conference, we got an exclusive sneak peek at the film. It is FANTASTIC, and dare I say it, even funnier than the first one. I have no doubt that your family will love it!

Our Monster Cookie Bars would really pull together a fun family night out to see this fantastic film and you can find loads of fun Monsters supplies in the party favors aisle of your Walmart store including fun cups, plates, and other party favors for an inexpensive night to enjoy while tackling your summer bucket list or our 100 Days of Summer Pinterest Board.

Now that you have the printables, here is the deliciously easy and tasty recipe for these Monster Cookie Bars. We recommend preparing these in a metal 9×13 pan for best results!

Monster Cookie Bars & Printables from MomAdvice.com.

Monster Cookie Bars
Recipe Type: Dessert
Author: Adapted from The BakerMama
Prep time:
Cook time:
Total time:
Serves: 15
Monster cookies made easy in a bar cookie. Be sure to pair these easy cookies with our free Monster printables.
Ingredients
  • 1-1/2 cups all-purpose flour
  • 1 teaspoon baking soda
  • 1 teaspoon salt
  • 1/2 cup (1 stick) unsalted butter, softened
  • 1-1/2 cups creamy peanut buter
  • 1 cup brown sugar
  • 1 cup granulated sugar
  • 2 teaspoons vanilla extract
  • 2 eggs
  • 1 cup rolled oats
  • 1 cup semi-sweet chocolate chips
  • 1 cup mini M&M’s (approximately half a bag)
Instructions
  1. Preheat oven to 350°F. Grease a 9×13 pan with nonstick spray.
  2. In a medium bowl, whisk together the flour, baking soda, and salt. Set aside.
  3. In a separate bowl, beat together the butter and peanut butter until smooth. Add the sugars and beat until blended. Add the vanilla and eggs and mix until light and fluffy.
  4. Gradually add the flour mixture until just combined.
  5. Mix in oats until well combined.
  6. Stir in chocolate chips and mini M&M’s
  7. Press dough evenly into prepared baking dish. Bake for 30-35 minutes or until lightly golden brown and set in the middle. Let cool completely in baking dish then cut into bars. Store in an airtight container.

 Happy Father’s Day to all of our Dad readers (I know you’re out there!) and here’s hoping you get spoiled by a few of your favorite monsters!

Be sure to check back this week for more great Father’s Day gifts on a budget!


walmart_mom_disclaimer

Pin It

Baked French Breakfast Donuts

Monday, March 11th, 2013

Baked donuts have become a special food tradition in our house. These French Breakfast Donuts are the new family favorite though because they come closest to resembling those delicious fried donuts that we love so much from the doughnut shops. Do you have a doughnut pan?  You should put it to work with this delicious recipe.

I have heard often from people that they are disappointed in the flavor of baked donuts. I think it is important to go into baking donuts know that they will most definitely not take like a fried doughnut, but taste more like a muffin with a fun doughnut shape.

Since we have started eating baked doughnuts, my kids don’t really like the doughnuts from the doughnut shop which I find WEIRD because no kid should not love a doughnut from a doughnut shop. That being said, not to lead you astray that my kids are so healthy,  I think they just like that they can consume more of these baked doughnuts than they can of the fried version.

Have you sampled any of our doughnut recipes around here? We have a doughnut for every season in life. We have snickerdoodle doughnuts, fluffy cake doughnuts, apple pie doughnuts, rich chocolate doughnuts,  lemon blueberry doughnuts, pumpkin doughnuts, and even gingerbread doughnuts.

When I say I have a doughnut for every season, I mean it!

I find doughnuts enjoyed in another room in our house are always a hit. One day over our winter break, I laid out a tablecloth and served doughnuts on a breakfast tray with mason jars of orange juice for an unexpected morning treat. The kids were thrilled to get to take over our room AND eat doughnuts. You gotta love a cheap thrill like this!

These French Breakfast Donuts are light, fluffy, and laced with nutmeg. After they are baked, they are dunked in butter and coated with cinnamon and sugar.

They are so delicious that I guarantee that you won’t be able to eat just one!

Baked French Breakfast Donuts
Recipe Type: Breakfast
Author: Adapted from Cooks.com.
Prep time: 5 mins
Cook time: 20 mins
Total time: 25 mins
Serves: 6
A baked doughnut that actually tastes like a doughnut. If you don’t have a doughnut pan, these can easily be made in a muffin tin as well!
Ingredients
  • 5 tablespoons unsalted butter, room temperature
  • 1/2 cup sugar
  • 1 egg, beaten
  • 1 1/2 cups flour
  • 2 1/4 teaspoons baking powder
  • 1/4 teaspoons salt
  • 1/2 teaspoon nutmeg
  • 1/2 cup milk
  • 3 tablespoons unsalted butter, melted
  • 1/2 cup sugar
  • 1 tablespoon cinnamon
Instructions
  1. Preheat oven to 350 degrees. Coat doughnut pan generously with nonstick cooking spray. Set aside.
  2. Cream together butter and sugar until fluffy. Add egg; mix well.
  3. Sift flour, baking powder, salt and nutmeg together. Add dry ingredients alternately with milk.
  4. Fill doughnut tins half full. Bake 15-20 minutes. Take out of pan immediately and swirl tops into melted butter, then sugar and cinnamon mixture.
  5. Makes 6-7 doughnuts.

Adapted from Cooks.com.

Are you a baked doughnut fan? Share your recipes or tips for great baked doughnuts here!

Pin It