Archive for the ‘Desserts’ Category

Eating Well During the Holidays: Light Cranberry Bar Recipe

Monday, November 24th, 2014

*This post is sponsored by Celestial Seasonings. All thoughts and opinions are my own.

I am very passionate about good nutrition and a healthy lifestyle. You may not know that I actually went to school to study to be a dietician so I could help others eat and live better too. Although I never dreamed this would be my job, I am thankful for that background when putting together recipes for our site. I have come a long way over the years toward living a healthier lifestyle. I actually starting eating better because my body was indicating to me that something just wasn’t right after discovering I have a sensitivity to gluten. The other reason is how much better I feel when I eat well and exercise.

Today I am partnering with Celestial Seasoning Tea to share some ways that I try to stay on track for the holidays. You may not have considered tea a delicious (and healthy!) holiday indulgence, but they actually have 8 holiday offerings that include my new favorite Sweet Harvest Pumpkin Black Tea, Cranberry Vanilla Wonderland Herbal Tea, and Caramel Apple Dream that would all be lovely offerings for a post Thanksgiving feast treat.

Looking to stay on track for the holidays? Try these ideas!

Eating Well During the Holidays

Get in a Good Walk Before or After Your Feast

As you know I am absolutely obsessed with my Fitbit and we even shared a great way you can glam it up for the holidays.  Tracking my steps each day has been a great reminder to keep active and moving throughout the day. Whether you have a Fitbit, a pedometer, or use an app on your cell phone, try making a step goal for the day and get your steps in before or after your holiday feasts.

Many gyms offer a modified schedule for holidays for die-hard exercise enthusiasts (or just those of us who want to indulge in an extra slice or two of pie). Consider tackling a class in the morning, challenging your family to a game of flag football after your feast, or taking a family walk together after your dessert.
Eating Well During the Holidays

Eat Before You Eat

Since I have to be careful about what I eat for dietary reasons, I often eat before I head to a gathering because I know that many of the foods offered will leave me sick and feeling lethargic.  Consider indulging in a healthy meal or snack before heading out to your holiday gatherings that will help fill you up on the good stuff and give your stomach less room to indulge.

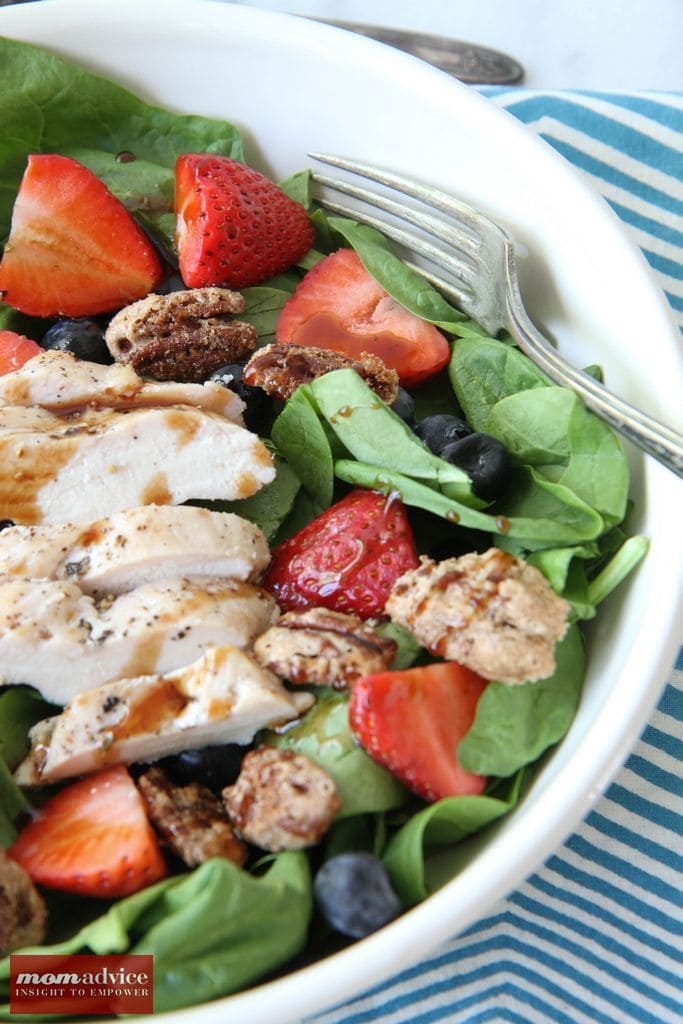
I like to keep a bag of spinach and roasted chicken or roasted turkey in my fridge for a quick salad with a few vegetable or fruit additions from the crisper drawer. Having a few items like these on hand during the holiday season will help you to eat healthy between the rush of holiday errands and gatherings. I have never regretted the time spent chopping and preparing my DIY salad bar for busy weeks.

Offer To Bring a Dish

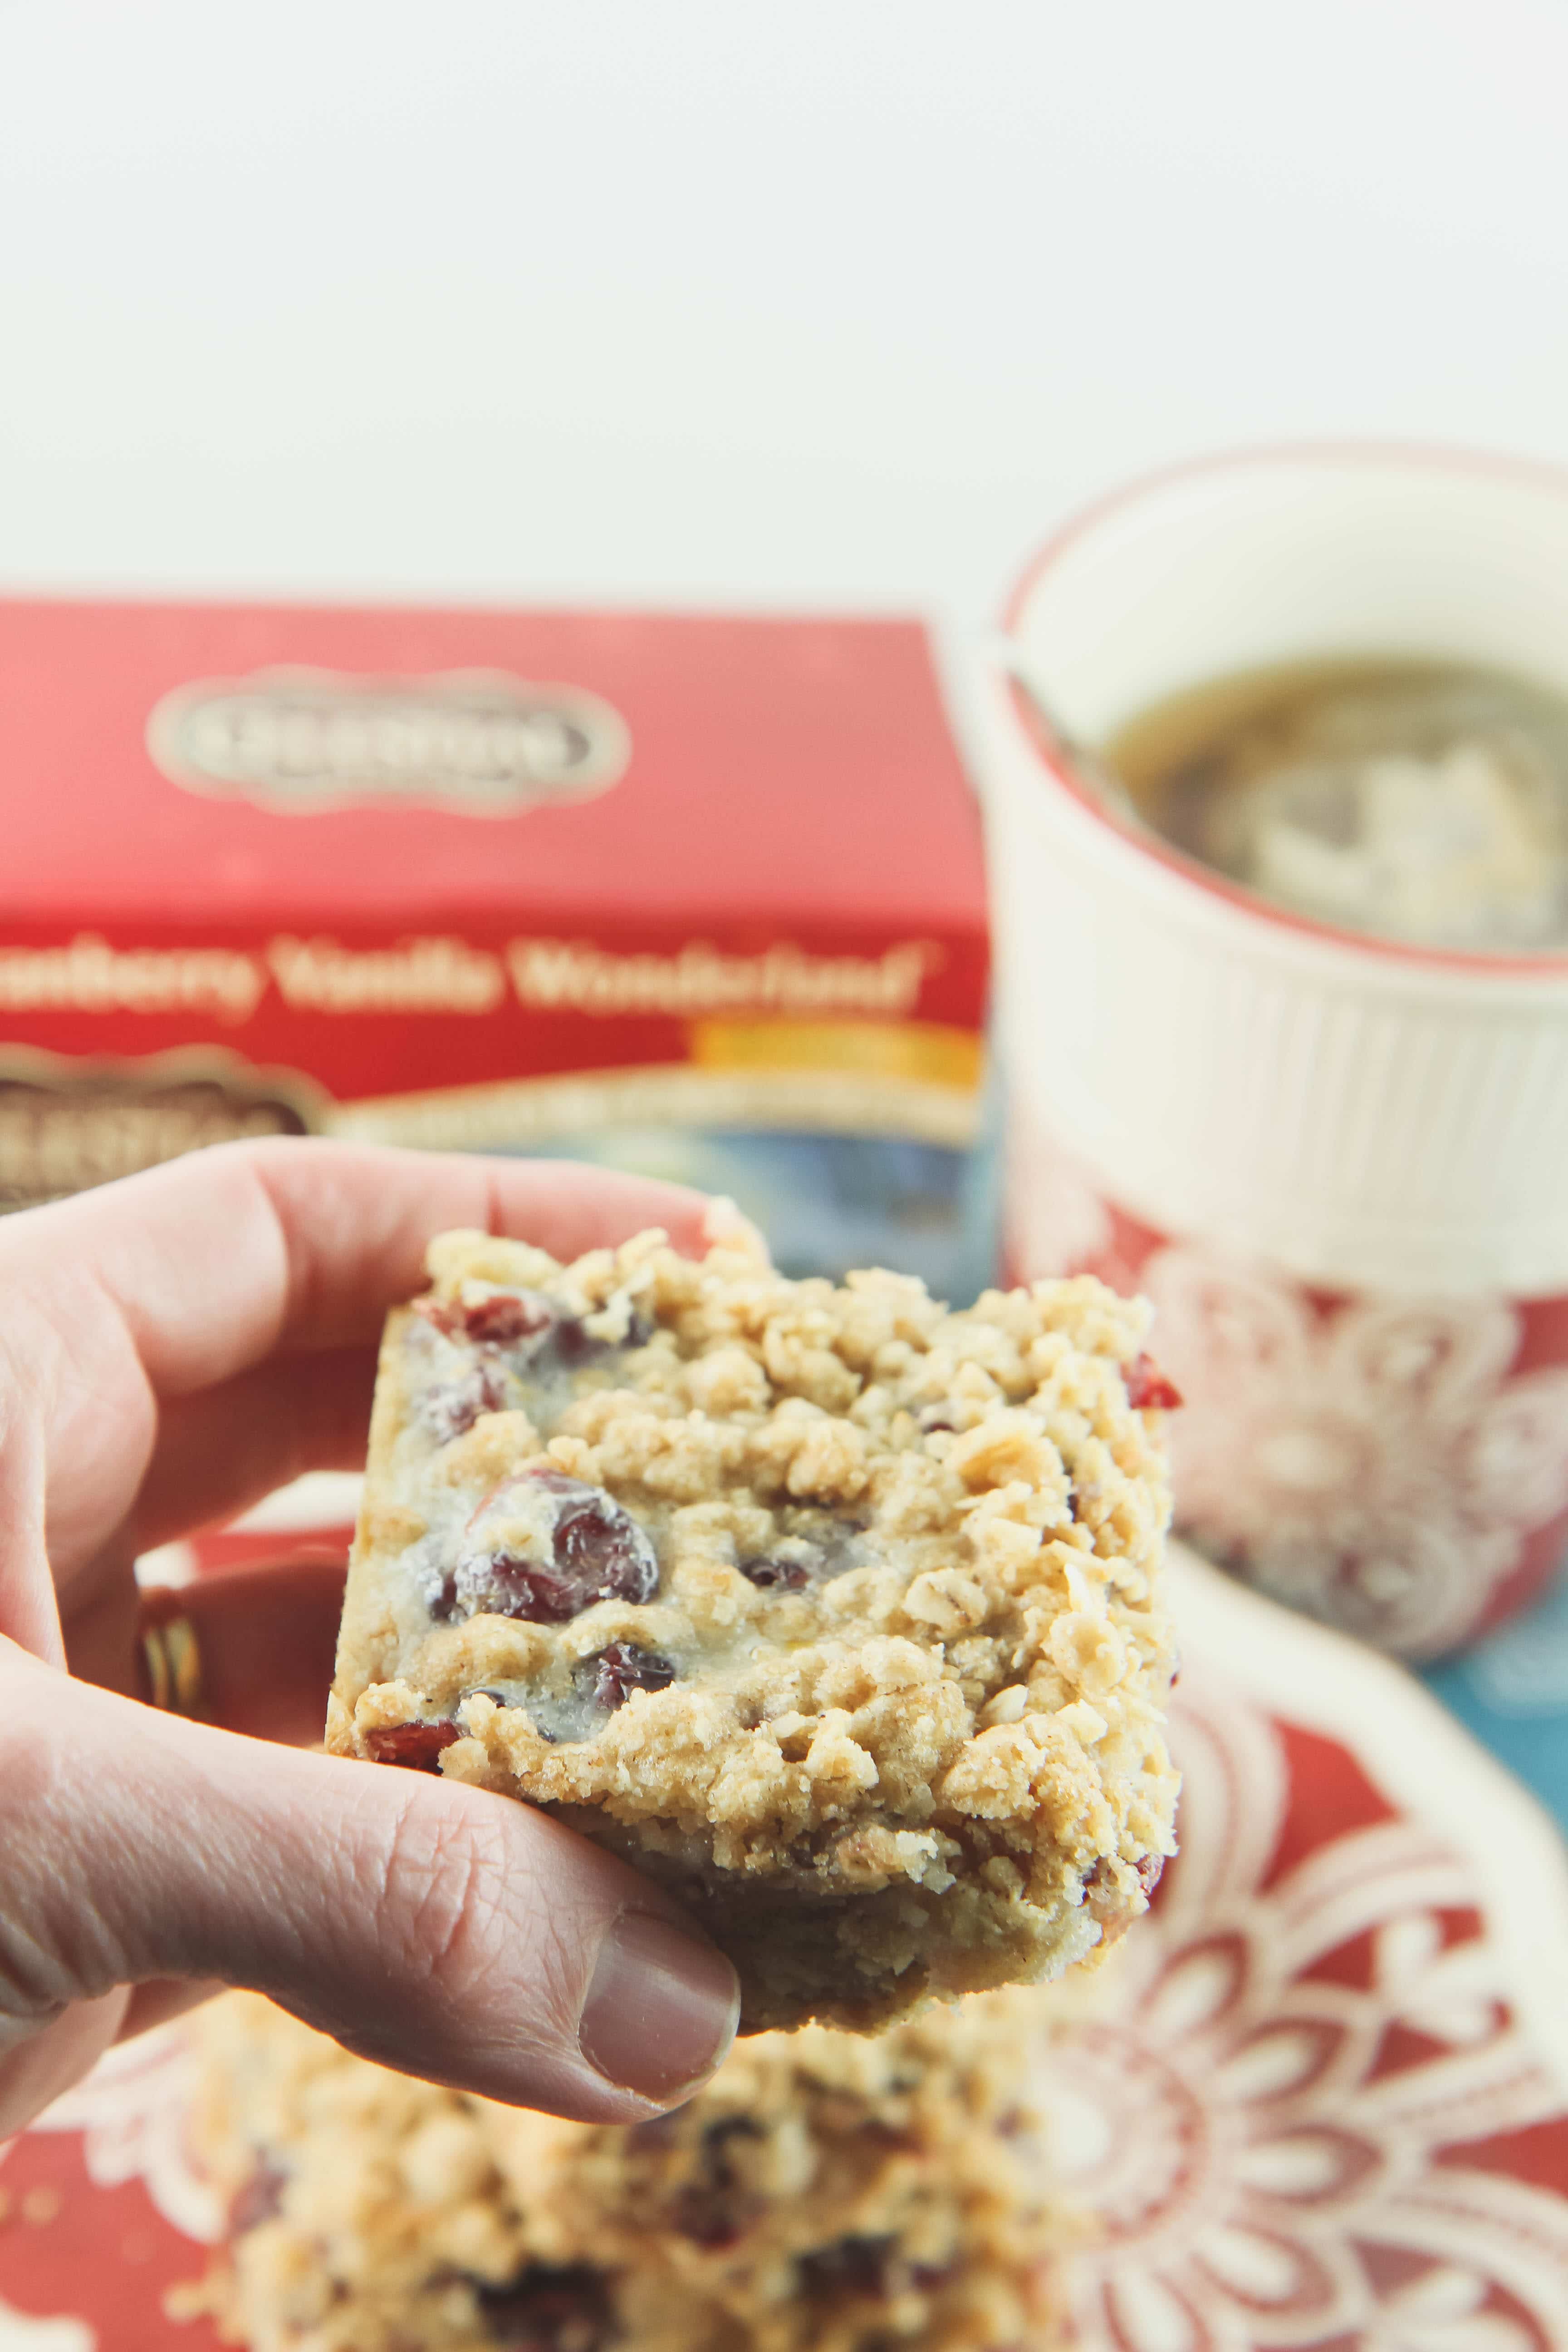
I always offer to bring a dish to family gatherings that I know that I can eat and snack on. Opt for healthy options like a vegetable tray for snacking with a low-calorie dip or a fruit salad that can be a dessert replacement. Consider a lightened up holiday recipe as a dish to bring like these delicious Cranberry-Oatmeal Bars that can be enjoyed without the guilt.

Instead of coffee drowning in creamer opt to enjoy this sweet dessert with a tea that compliments it well. For these bars, I recommend the Cranberry Vanilla Wonderland Herbal Tea or, another one of my personal favorites, Gingerbread Spice.
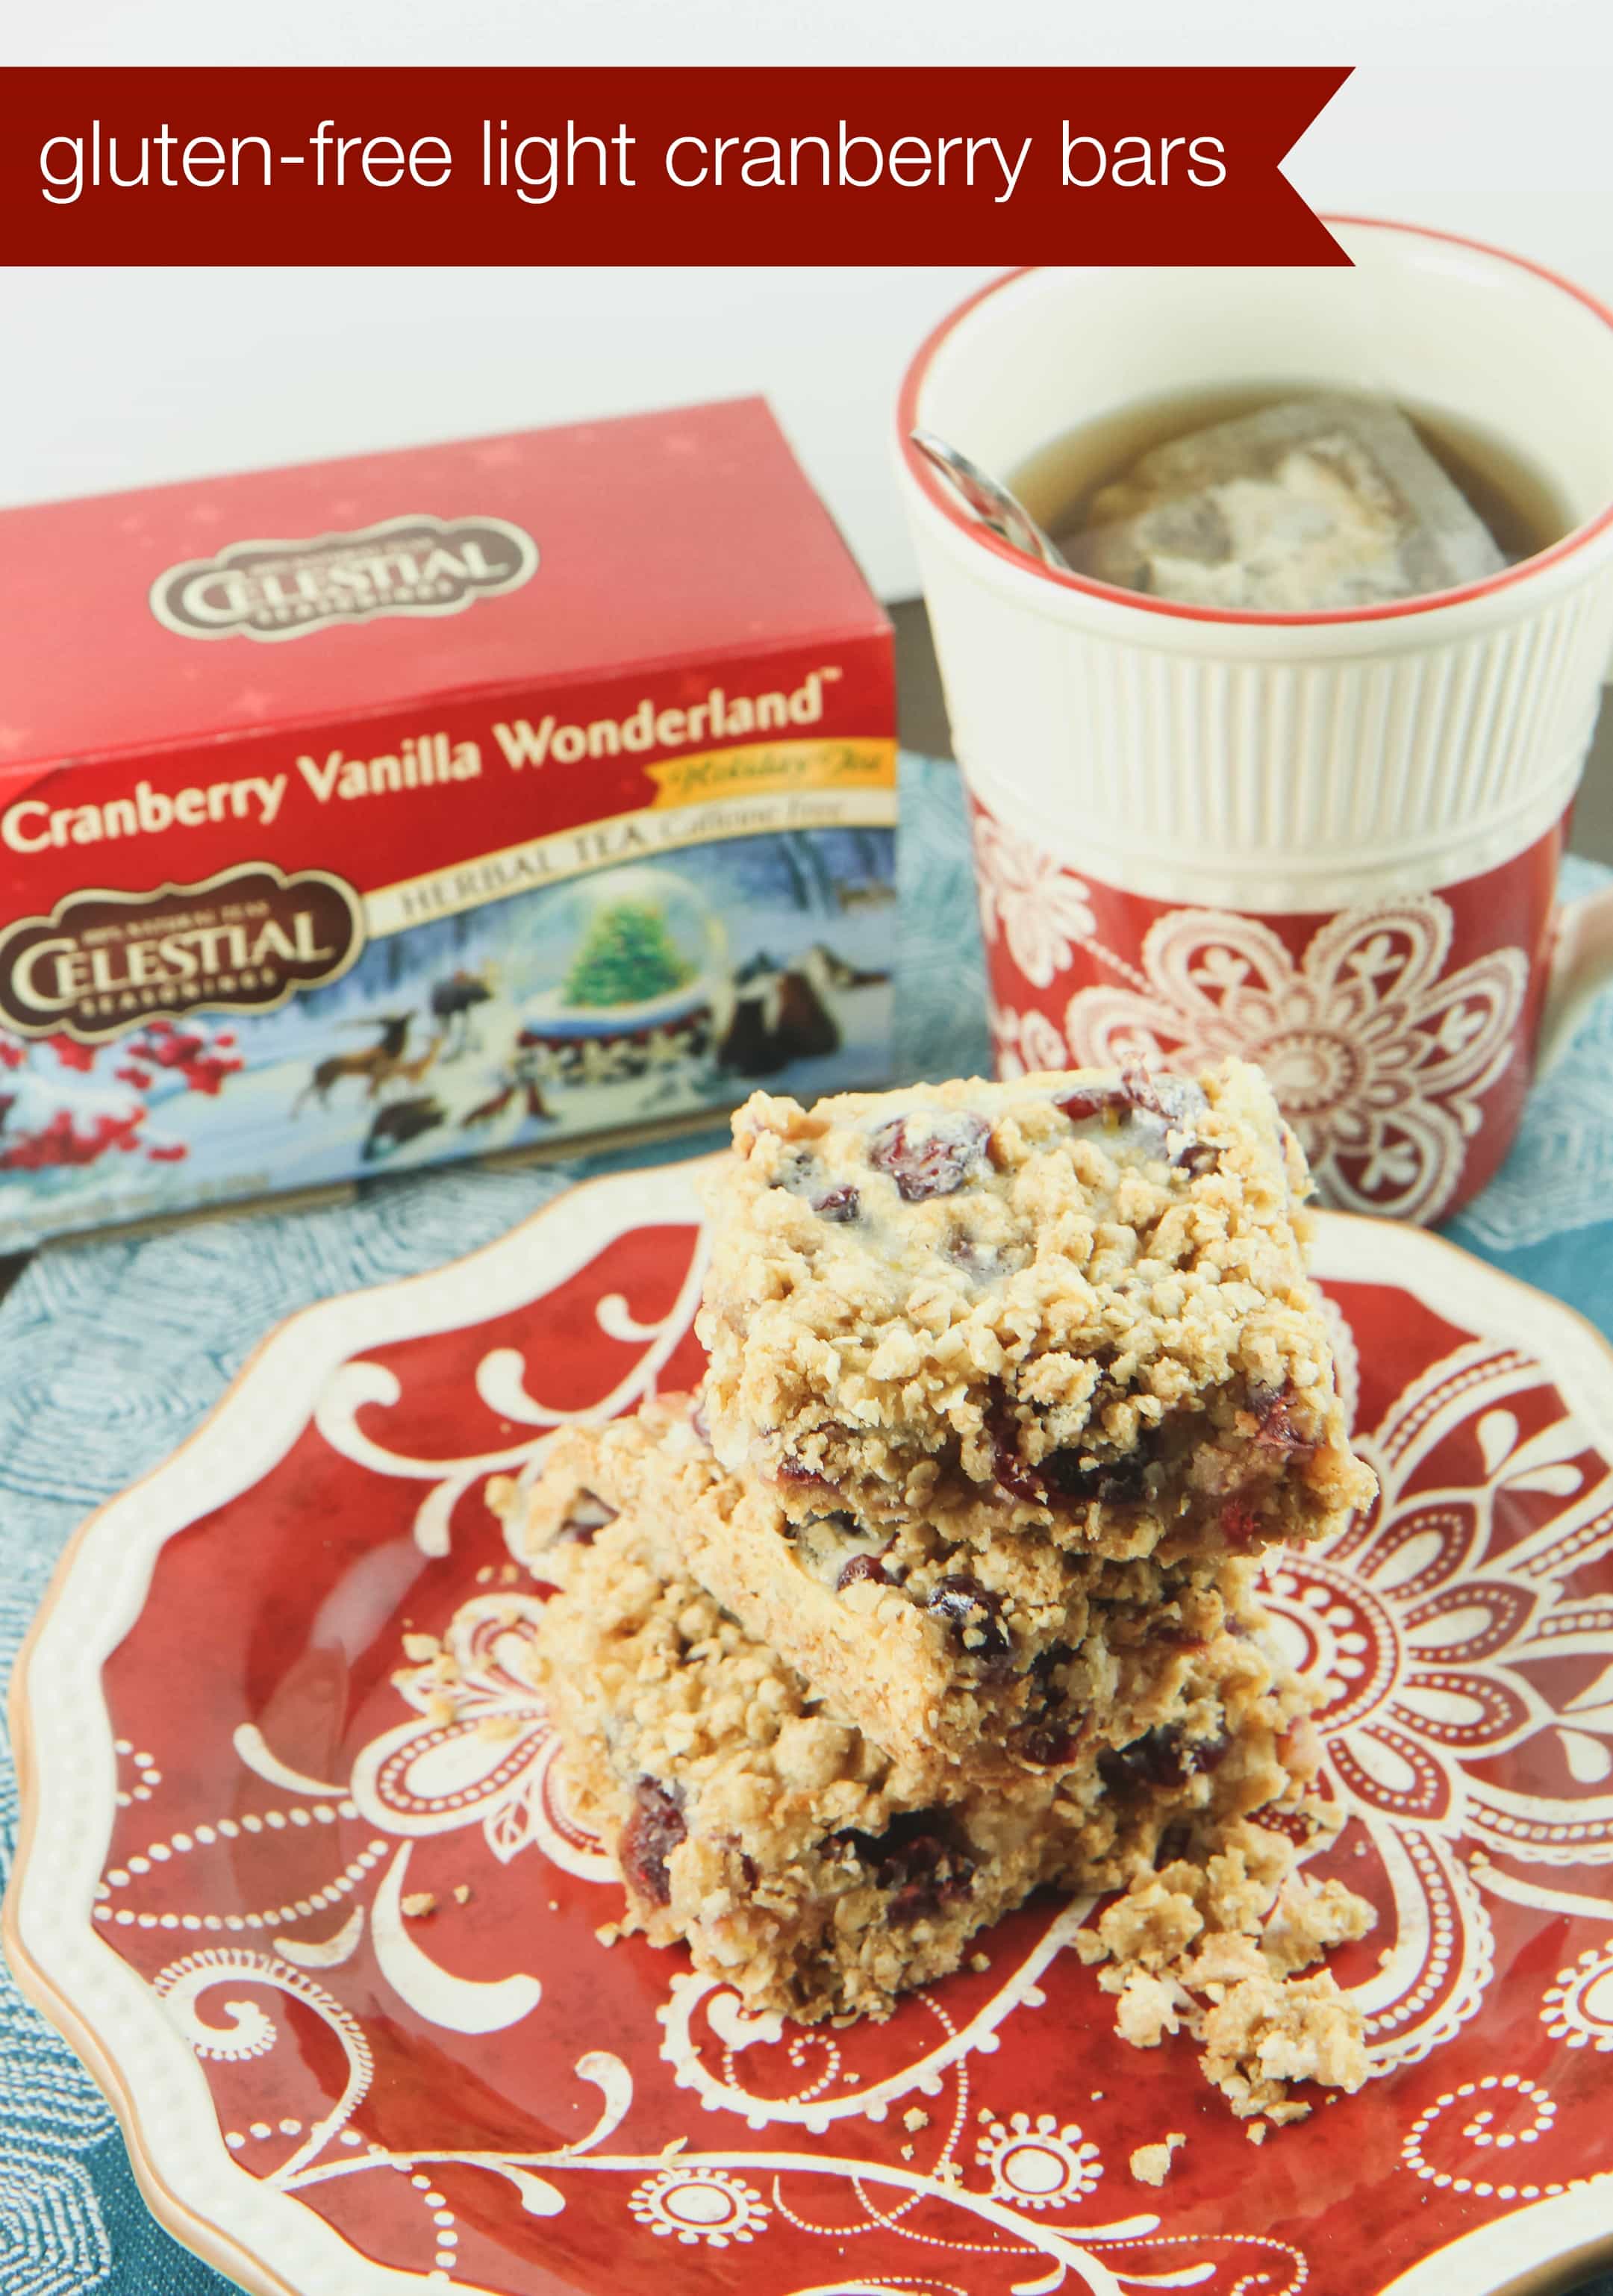
Light Gluten-Free Cranberry Bars

Indulge Moderately

Even I can’t shy away from the dessert table around the holidays, but there are definitely fun, light desserts you can share in lieu of the calorie-laden pie.  To inspire you, here is a delicious Cranberry-Oatmeal Bar you can make for a sweet treat to enjoy with your cup of tea. May I recommend the Celestial Seasonings Cranberry Vanilla Wonderland Herbal Tea as an accompaniment?  It is a perfect pairing!  The best part, each bar is only 133 calories and has just 4.6 grams of fat.

Light Gluten-Free Cranberry Bars

Eating Well During the Holidays: Light Cranberry Bar Recipe
Author: Adapted from Cooking Light Magazine
Prep time:
Cook time:
Total time:
Serves: 24
A lighter dessert option for the holiday season best paired with a cup of tea.
Ingredients
  • 1 cup gluten-free flour
  • 1 cup gluten-free quick-cooking oats
  • 1/2 cup packed brown sugar $
  • 1/4 teaspoon salt
  • 1/4 teaspoon baking soda
  • 1/4 teaspoon ground cinnamon
  • 6 tablespoons butter, melted
  • 3 tablespoons orange juice
  • Cooking spray
  • FILLING: 1 1/3 cups dried cranberries (about 6 ounces) $
  • 3/4 cup sour cream
  • 1/2 cup granulated sugar
  • 2 tablespoons all-purpose flour
  • 1 teaspoon vanilla extract
  • 1/2 teaspoon grated orange rind
  • 1 large egg white, lightly beaten
Instructions
  1. Preheat oven to 325°.
  2. To prepare crust, weigh or lightly spoon flour into a dry measuring cup; level with a knife. Combine flour and next 5 ingredients (through cinnamon) in a medium bowl, stirring well with a whisk. Drizzle butter and juice over flour mixture, stirring until moistened (mixture will be crumbly). Reserve 1/2 cup oat mixture. Press remaining oat mixture into the bottom of an 11 x 7-inch baking dish coated with cooking spray using the bottom of a measuring cup to create a cohesive crust.
  3. To prepare filling, combine cranberries, sour cream, granulated sugar, and remaining ingredients in a medium bowl, stirring well. Spread cranberry mixture over prepared crust; sprinkle reserved oat mixture evenly over filling.
  4. Bake at 325° for 40 minutes or until edges are golden. Cool completely in pan on a wire rack.


*This post is sponsored by Celestial Seasonings. All thoughts and opinions are my own.

Tracking Pixel

Pin It

Gluten-Free Lemon Chiffon Cake

Tuesday, July 29th, 2014

Gluten-Free Lemon Chiffon Cake

For our family, birthdays are all about the cake and my son’s 12th birthday was just the reason to try out a new recipe. After browsing through the cookbooks, which is the birthday child’s honorary ritual and right, he decided to repeat his choice last year with another chocolate snickerdoodle cake. I rounded out our birthday dessert table with a gluten-free lemon chiffon cake so that I could enjoy a slice of cake with the family too. I would say that this cake was just as much of a hit as the the chocolate cake and tempted me everytime I opened the fridge.

“Just one more slice,” it screamed.

I would grab a fork and nip off a bit and eat it while still standing at the fridge.

Don’t judge.

I am not much of a sweets gal, but this cake was so light and lovely that I couldn’t stop eating it.

Gluten-Free Lemon Chiffon Cake Chiffon cakes are my favorite cakes because they are so light. Much like an angel food cake, they are created with egg whites which really helps with the density of the gluten-free cakes. The cake is so delicate though that I ended up wrapping the cooled cakes in saran wrap and a layer of foil and freezing them overnight so they would not tear or fall apart when I frosted the cake. I highly recommend doing that too.  I still rely upon these two 8″ Wilton pans (affiliate)  (instead of those 9″ pans that produced flat layers for me) and a good spatula (affiliate) for all my cakes. With this cake, in particular, you want to make sure you don’t produce thin cake layers that crumble when pulled from the pan.

Smoothed between the layers is a delicious lemon curd (I used this recipe!) which sounds wildly impressive, but is so easy to make that you will wonder why you never tried making it before. My children fought over who could enjoy the last of the lemon curd that was in the jar.

I broke it up by telling them that since they were going to fight about it, I was going to eat it.

That’s the kind of mom I am, a true problem-solver.

Gluten-Free Lemon Chiffon Cake

The cake is then frosted with a whipped cream frosting that has the lemon curd whipped through it.

I mean, seriously. It’s as if this cake fulfilled all my food dreams.

12

Happy 12th birthday to my beautiful boy. I think this is the happiest of his birthdays and it was because there was no fuss and no elaborate themes. We had just got back from vacation, I had a millionty projects for work, and our shed was in the process of being finished.  There was no time for an elaborate birthday. It ended up being the best birthday yet.

Just friends, a takeout pizza, and some cake.

Why have I been stressing about this birthday party every year?

The smile says it all- simple is better.

I hope you can give this recipe a try. If you gluten-free cakes aren’t your thing, definitely try this Cream Cheese Pound Cake With Homemade Lemon Curd– it’s a winner too!

Gluten-Free Lemon Chiffon Cake
Recipe Type: Dessert
Prep time:
Cook time:
Total time:
Serves: 8
A beautiful lemon chiffon cake with lemon curd between the layers topped with a whipped topping laced with more lemon curd. It is the perfect summer dessert!
Ingredients
  • Vegetable oil spray, for misting the pans
  • 2 teaspoons rice flour, for dusting the pans
  • 1 extra large or 2 small lemons
  • 3 large eggs (room temperature)
  • 1 package (15 ounces) yellow gluten-free cake mix
  • 1/4 cup granulated sugar
  • 2/3 cup orange juice (fresh or from a carton)
  • 1/2 cup vegetable oil
  • For the filling and lemon whipped cream frosting: 1 jar (10 ounces) gluten-free lemon curd (or prepare the homemade version- link above)
  • 1 cup heavy (whipping) cream, chilled
  • 1 tablespoon confectioners’ sugar
Instructions
  1. Preheat the oven to 350°F. Lightly mist two 9-inch round cake pans with vegetable oil spray, then dust with the rice flour. Shake out the excess rice flour and set the pans aside.
  2. Zest a lemon and measure out two teaspoons for the cake batter and place it in a large mixing bowl. Cut the lemon in half and squeeze the juice through a fine sieve, discarding the seeds. Measure 1/4 cup of lemon juice, pour it into the mixing bowl with the zest, and set the bowl aside.
  3. Separate the eggs, placing the whites in another large mixing bowl and the yolks in the mixing bowl with the lemon zest and juice. Beat the whites with an electric mixer on high speed until stiff peaks form, 3 to 4 minutes. Set the beaten egg whites aside.
  4. Place the cake mix, sugar, orange juice, and oil in the bowl with the egg yolks and lemon and beat with an electric mixer and beat until mixed.
  5. Using a rubber spatula, gently fold the egg whites into the batter until no traces of whites remain and the batter has lightened.
  6. Divide the batter evenly between the 2 prepared cake pans, smoothing the tops with the rubber spatula. Place the pans in the oven side by side. Place a large mixing bowl and electric mixer beaters in the refrigerator to chill.
  7. Bake the cake layers until they are golden brown and the tops spring back when lightly pressed with a finger, 18-22 minutes. Allow them to cool on a wire rack.
  8. Freeze the layers wrapped in saran wrap & foil overnight to produce a sturdy base for icing.
  9. Meanwhile, make the filling and frosting. Measure 2/3 cup of lemon curd for the filling and set it aside in a small microwave-safe glass bowl. Pour the cream into the chilled mixing bowl. Using the refrigerated mixer beaters, beat the cream with an electric mixer on high speed until stiff peaks form, 3 minutes. Fold in the confectioners’ sugar and 1/4 cup lemon curd. Beat again at low speed until the lemon curd is incorporated, 30 seconds. Refrigerate the frosting until ready to use.
  10. Remove the layers from the freezer. To assemble the cake, place the glass bowl with the lemon curd for the filling into the microwave on high power for 10 seconds to warm it. Transfer one cake layer, right side up, to a serving plate. Spread the top with the warmed lemon curd. Place the second layer, right side up, on top of the first and frost the top and side of the cake with the lemon whipped cream frosting. Refrigerate the cake until time to serve.

Adapted from The Cake Mix Doctor Bakes Gluten-Free (affiliate)

Pin It

Roasted Plum & Cinnamon Ice Cream

Tuesday, July 1st, 2014

Roasted Plum & Cinnamon Ice Cream

With summer in full swing, I thought I would share another yummy frozen treat that you can create with  fresh fruit. If last week’s 3-ingredient Watermelon Granita was just too light for you, you will love the bold and rich flavors of this Roasted Plum & Cinnamon Ice Cream. Today I am sharing this delicious homemade ice cream that you can create with just a few ingredients and a basic ice cream maker. Of course, if you don’t have an ice cream maker, no worries! Check out this technique for making ice cream without an ice cream maker and use that this summer.

I partnered with Walmart on this project. Each month they give me a produce challenge and it constantly pushes me out of my box to try cooking with produce items that I am less familiar with and to invent new flavor combinations.

Roasted Plum & Cinnamon Ice Cream

Have you ever cooked with plums? Confession time. I had not. Plums have never been on my radar before, but I thought I might try incorporating them into a fruit ice cream. They remind me a lot of peaches, although a bit more tart, and the flesh reminds a bit of a grape.  When selecting plums at the market,  look for ones that yield to gentle pressure and that are slightly soft at their tip. While you can also purchase plums that are firm and ripen them at home, avoid those that are excessively hard as they will be immature and will probably not develop a good taste and texture profile. When making this ice cream, it is better to go for a fruit that is a bit more ripe to add to the sweetness and also make it easy to remove the pit. Just as a reminder though, if you are unhappy with your purchase for any reason, Walmart does offer a 100% freshness guarantee on all of their produce.

Plums that are not yet ripe can be left at room temperature. As this fruit tends to mature quickly, check on them in the next day or two to ensure that they do not become overripe. Once they are ripe, plums can be stored in the refrigerator for a few days.

Roasted Plum & Cinnamon Ice Cream

Roasted Plum & Cinnamon Ice Cream

The roasting of the plums is a bit torturous because the house smells heavenly.The worst part is that then you have to scrape all of that heaven into your blender and then wait a whole day before you can churn it into ice cream. To help with these difficulties, be sure to make an extra pan of these and eat them with a pint of vanilla ice cream from the freezer. You will thank me later.

Roasted Plum & Cinnamon Ice Cream

The beautiful hue of this ice cream is all naturally made. The skin give this ice cream it’s pinkish-purplish hue that happens to be my daughter’s favorite color. I loved this color so much that I decided to make this post dark and moody like these plums. The richness of the fruit deserved a little of the dark treatment on the shots. I hope you love them as much as I do. I admit that experimenting with light while photographing a frozen treat might have not been my smartest moment. In the end though, I loved how these turned out and am thankful that I have a creative platform where I can practice my techniques.

I hope you can treat yourself to this rich, slightly sweet, slightly tart, and fully roasted flavor of this Plum & Cinnamon Ice Cream for a summer treat this year! If you are looking for more ideas to try with fresh produce this summer? Be sure to check out my Baked Strawberry Doughnuts, my Blueberry Sangria Lemonade, my Grilled Tomato Bread With Prosciutto, my Fresh Peach Sorbet, our Slow Cooker Honey Crisp Apple Oatmeal, my 3-ingredient Watermelon Granita,  and my fresh Gluten-Free Orange Chicken for some fun ways to incorporate fresh produce in your family’s diet!

Roasted Plum & Cinnamon Ice Cream

Roasted Plum & Cinnamon Ice Cream
Prep time:
Cook time:
Total time:
Serves: 4
Plums are roasted in cinnamon & sugar and then blended into cream to make a rich ice cream for the summer months.
Ingredients
  • 2 pounds ripe plums, halved and pitted
  • 2 tablespoons dark brown sugar
  • 1 teaspoon freshly ground cinnamon (or more, depending on your taste)
  • Pinch salt
  • 2 cups heavy cream
  • 3/4 cup cane sugar
  • 2 tablespoons honey
  • 1 teaspoon vanilla extract
Instructions
  1. Preheat the oven to 400 degrees F. Place the plums in a 9×13″ baking dish.
  2. Sprinkle plums with dark brown sugar, cinnamon, and a few pinches of salt.
  3. Roast the plums for 20-25 minutes until they are fork tender. Remove from the oven and allow to cool for about 5 minutes.
  4. Add 2 cups heavy cream, sugar, honey and vanilla extract to a saucepan. Heat until sugar is dissolved, about 2-3 minutes.
  5. Add a 1/4 cup of cream mixture ( to the jar of a blender, along with the roasted plums and their juices. Blend until very smooth, about 1 minute. If you have a high-speed blender, your pulp should be fully blended. If not, you can pour the mixture through a sieve to make sure you get rid of any pieces.
  6. Add the remaining milk to the bowl and mix until thoroughly combined. Cover the bowl with plastic wrap and refrigerate until very cold, at least 4 hours of overnight.
  7. Churn the mixture in the bowl of your ice cream maker, according to your ice cream maker’s instructions. Serve immediately for soft serve or alternatively transfer to a freezer-safe container and freeze overnight.

Adapted Slightly from A Cozy Kitchen.

walmart_mom_disclaimer

Pin It

Raspberry White Chocolate Sorbet

Tuesday, June 24th, 2014

From our food contributor, Shaina Olmanson.

Raspberry White Chocolate Sorbet Recipe on MomAdvice.com

Every summer I feel as though I time my family activities by the season of berries that’s ripe for the pickin’. There are trips to the strawberry fields, where our knees become encrusted with the straw that is used to mulch between the rows. There are blueberry picking adventures, the sun beating down on us as we pull handfuls of bulbous berries into small buckets.

The raspberries, though, they happen in our own backyard. The far corner in the back of the yard is devoted to the thorny canes, poking up and often trying to run into other parts of the yard. They start the spring off looking like nothing more than bare twigs, and by June they’re full of leaves and flowers and then bright red berries.

Raspberry White Chocolate Sorbet Recipe on MomAdvice.com

We pick bowl fulls for breakfast, adding a few to our morning yogurt, stirring them into our oatmeal. We drop them into sparkling juices to toast special occasions. My kids, barefoot and still dripping from the pool, hover over the prickly branches, sacrificing themselves for a few of the tart treats. But when the summer sun is hot and unforgiving, the best way to enjoy them is to gather up as many as you can and blend them into a cold, sweet cup of summer.

Raspberry White Chocolate Sorbet Recipe on MomAdvice.com

Recipe Notes:

I love raspberry and white chocolate together, and while you can use any white chocolate you desire, a good quality one will definitely go father here. It’s worth it for the small amount you use. I used a Lindt Lindor Truffle Bar, which has a firm white chocolate outside and a softer, as the name suggests, truffled center, and I love that it doesn’t get too hard when frozen.

Yes, I realize this has an ice cream maker in the recipe. If you don’t have one, sorbet is a hard thing to master. The ice cream maker helps it freeze evenly and quickly, which gives you that smooth texture that you think of when you think sorbet. However, if you don’t have one, don’t despair. Put the mix in a zip-top bag, and massage the bag every half hour or so in the freezer. This will help it to freeze evenly, and you’ll get a delicious frozen treat.

The vodka helps the mix from freezing solid. If you are opposed to any alcohol in your sorbet, try adding a tablespoon of honey or golden syrup instead.

Raspberry White Chocolate Sorbet
Recipe Type: Dessert
Author: Shaina Olmanson
Prep time: 5 mins
Cook time: 10 mins
Total time: 15 mins
Serves: 6
Ingredients
  • 2 cups water
  • 1 1/2 cups sugar
  • 6 cups frozen raspberries
  • 1 teaspoon vanilla extract
  • 2 teaspoons vodka
  • 1 cup white chocolate, chopped
Instructions
  1. In a heavy-bottomed saucepan, combine the water and sugar. Bring to a boil, stirring occasionally, then reduce heat to low and continue to simmer for five minutes . Remove from heat, pour into a heat-proof bowl, and refrigerate until chilled.
  2. Once the syrup is chilled, combine the raspberries, vanilla, and vodka in a food processor. Blend until smooth.
  3. Press the mixture through a sieve to remove pulp and seeds. Process the mixture in an ice cream maker, adding in the white chocolate at the end. Transfer to a container and freeze.
3.2.2704


Pin It

3-Ingredient Watermelon Granita

Monday, June 23rd, 2014

3-Ingredient Watermelon Granita from MomAdvice.com

I don’t know of anything more delicious than fresh fruit in the summertime.

Today I am sharing an EASY 3-ingredient watermelon granita you can prepare with just fresh watermelon, lime juice, and a little sugar.  

It is one of those dishes you will love for an effortless weeknight treat or a fun dish to entertain with for the 4th of July weekend!

Each month Walmart challenges me to find a new way to use their fresh produce and this month’s challenge just-so-happens to be one of my favorite fruits…WATERMELON.

Hello, summer!

Seedless Watermelon


I woke up early one morning to make this dish and here is my early morning watermelon shot for you as the sun had not even risen.

I tend to operate best first thing after I have had my coffee. I’m sure you can relate (*ahem*).

I chose a seedless watermelon for this dish because trying to pick out seeds to prepare your granita is far too time-consuming for a busy mom especially when she has a full summer day of kids.

If you have a high- powered blender it is possible to pulverise them, but I save my blender the work and choose the seedless variety to make it easy on all parties involved.


How to Pick the Perfect Watermelon

There are three easy steps to selecting the perfect watermelon.

1. Lift Your Watermelon– Does it feel heavy? You want a watermelon that feels weighted and not light.

2. Check for the Yellow Dot– Watermelons have a yellow spot on them where they have rested and grown on the ground. You want to find one that has a creamy yellow spot on it because that showcases that it is a lovely ripe melon.

3. Thump It– Have you seen people thump their watermelons at the grocery store and wondered what that was all about? Sometimes I don’t think they even know why they do it.  You are listening for a sound that indicates a great melon. It should have a deep hollow sound, but if it is too ripe or underripe, it will have a dull sound.

4. Dissatisfied? Bring it Back– I didn’t tell you there was a fourth step, but if you should pick the wrong watermelon, Walmart will graciously give you a refund on it since they have a 100% freshness guarantee on their produce. Basically, it makes the process of selection foolproof, especially if that thumping bit gets confusing.

3-Ingredient Watermelon Granita from MomAdvice.com


What is a Granita?

The word granita sounds awfully fancy to this Midwest girl’s ears, but it is actually not fancy at all.

A granita is a semi-frozen dessert traditionally made from sugar, water and various flavorings that originated in Sicily.

It’s a little like sorbet a little like Italian ice, but uniquely its own person with a texture that is a tin bit coarser.  

Since the watermelon is in season and often on sale this time of year, I decided to use it to make the granita. 

All you do for this recipe is give it a whirl through your blender.

After blending your cubed watermelon, fresh lime juice, and sugar, pour it into a 9×13″ dish and slide it in your freezer.

Every half hour or so, take a peek and give it a scrape with a fork to move things around.

Keep doing this every once in awhile and then after about three-four hours of freezing time, your dessert should be ready for serving.


3-Ingredient Watermelon Granita from MomAdvice.com

3-Ingredient Watermelon Granita from MomAdvice.com


I wish there was more to tell you about this dish, but it really is as easy as that.

It’s a frugal way to incorporate more fresh fruit and is best served with lots of spoons on a hot summer’s day!

Looking for more ideas to try with fresh produce this summer? Be sure to check out my Baked Strawberry Doughnuts, my Blueberry Sangria Lemonade, my Grilled Tomato Bread With Prosciutto, my Fresh Peach Sorbet, our Slow Cooker Honey Crisp Apple Oatmeal, and my fresh Gluten-Free Orange Chicken for some fun ways to incorporate fresh produce in your family’s diet!

For more watermelon ideas, check out this Watermelon-Strawberry Smoothie from Mommy’s Kitchen & this Watermelon Margarita from Presley’s Pantry. Oh, yum!


3-Ingredient Watermelon Granita

6-8 cups cubed seedless watermelon
1/3 cup sugar
Juice of 2 limes
Add your cubed watermelon, sugar, and lime juice to your blender. Blend until smooth. Pour it all into a 9×13 metal pan and freeze for one hour. Using a fork, scrape to loosen the granita. Freeze for another hour and repeat. After it has been frozen for three hours, scrape it once more and then serve in a hollowed watermelon or in cups.


Watermelon Granita from MomAdvice.com


walmart_mom_disclaimer


Watermelon Granita from MomAdvice.com

Pin It

Strawberry Swirl Cheesecake Bars

Monday, May 5th, 2014

From our food contributor, Shaina Olmanson.

Strawberry Swirl Cheesecake Bar #recipe via MomAdvice.com
Strawberry season where I live comes late. We wait until June, patiently watching as the tufts of green leaves poke through the dirt and then expand. Little white flowers with soft petals and fuzzy yellow centers come next, singing in the May breeze.

When the berries finally arrive there is a fevered rush to fill as many flats as possible with sun-warmed berries. I enlist my kids as field workers, promising them they can eat the literal fruits of their labor. We spend early mornings on our knees between the rows of fragrant plants, lifting leaves to find the glistening reward beneath.

As we carry our prizes home, I make lists of all the things to do with them. I clean and freeze as many as possible for use in smoothies. I make a few jars of jam to get us through the next year. Sometimes I make a few varieties, combining spring berry and rhubarb or vanilla beans before tucking them away on a shelf. I stuff several heaping cups of berries in between pastry crust and freeze those, too, to be pulled out after the berries are long gone. Plenty are eaten straight from the flat, still warm from being on the plant in the sun. Still others get made into sauce or baked into doughnuts or stirred into muffin mix.
Strawberry Swirl Cheesecake Bar #recipe via MomAdvice.com

Before I know it, strawberry season has come and gone, and I am left waiting for it to appear again. The fleeting weeks in June that always signaled the true beginning of my Midwestern summer.

Cheesecake is a family favorite, requested for birthdays and family gatherings. Here it gets a bit of swirl treatment over the top and is baked into bars. Cheesecake bars are great for swirling strawberries because the low profile means more berry-to-cheese ratios without having to add it directly to the center, and this dessert that usually requires a fork becomes finger food at backyard barbecues.

Strawberry Swirl Cheesecake Bars
Recipe Type: Dessert
Author: Shaina Olmanson
Serves: 20
Ingredients
  • [i]For the crust: [/i]
  • 3 cups graham cracker crumbs
  • 1/4 cup granulated sugar
  • 1 stick butter, melted
  • [i]For the cheesecake:[/i]
  • 4 8-ounce packages cream cheese, softened
  • 1 2/3 cups sugar
  • 1/4 cup arrowroot
  • 1 tablespoon vanilla extract
  • 2 large eggs
  • 1/2 cup cream
  • [i]For the strawberry swirl:[/i]
  • 2 cups sliced strawberries
  • 1/4 cup sugar
  • 2 tablespoons water
Instructions
  1. Preheat your oven to 350ºF.
  2. In a medium bowl, mix together the graham cracker crumbs and the granulated sugar. Add in the melted butter and stir to combine until all the crumbs are coated and moist.
  3. Pour the crumbs into a 9×13″ cake pan. Using your hand or the bottom of a flat-bottomed glass, press the crumbs tightly into the pan to cover the bottom evenly.
  4. In a stand mixer fitted with a paddle attachment, mix the cream cheese until smooth. Beat in the sugar and arrowroot powder until thick and creamy. Then add the vanilla and eggs, beating after each egg until incorporated. Stir in the cream.
  5. Pour the mix into the crust and use a spatula to spread it evenly.
  6. In a medium saucepan, mix together the strawberries, sugar, and water. Simmer over medium-high heat until thick and syrupy. Using an immersion blender, blend until smooth. Spoon tablespoons of strawberry syrup over the cheesecake topping. Using a long skewer or a thin knife, run it through the cake to create swirls. You can make a pattern or swirl it randomly.
  7. Place a baking pan with 2 cups of water in the oven under the cheesecake to create steam. Bake for 55 minutes or until cooked through but still slightly wobbly. Turn the oven off, prop the door open, and allow it to cool slowly.
  8. Transfer the cooled cheesecake from the oven to the refrigerator. Refrigerate for at least 4 hours before serving.


Pin It

5 Gluten-Free Treats, Perfect for Easter

Tuesday, April 8th, 2014
5 Gluten-Free Treats,  Perfect for Easter
Happy Spring, MomAdvice readers! My name is Sarah and I’m the baker/blogger over at Sarah Bakes Gluten Free Treats. I have loved baking for as long as I can remember and for the past 3 years, I have been baking 100% gluten free. My husband has celiac disease and both my son and I have a gluten allergy. Most of my baking is also dairy and egg free. It was quite the adventure, learning how to transition over to gluten free baking. Now I have a passion for sharing delicious gluten free recipes with others so that they can also have the confidence to bake again!
April is one of my most favorite months. Beautiful spring weather, flowers are in bloom and most importantly…Easter! Such a joyous holiday, celebrating with family and friends. We always gather around a good meal (total feast) and enjoy plenty of satisfying sweets. Always too many desserts!

I’m sharing a few of my favorite gluten free treats with you today! All of these goodies would be a lovely addition to your Easter gathering. They also egg and dairy free too (vegan), which is great for those with multiple food allergies. Each recipe features Sarah’s gluten free flour blend, a staple in my pantry. Perfect for all of your gluten free baking needs!

  Gluten Free Vegan Chocolate Cupcakes

Gluten Free Vegan Chocolate Cupcakes

Every celebration becomes that much more fantastic when cupcakes are involved! These chocolate cupcakes are simply delicious. Moist chocolate cake, topped with a creamy dairy free chocolate buttercream. Those colorful sprinkles are a must!


Gluten Free Vegan Mini Lemon Blueberry Cakes

Gluten Free Vegan Mini Lemon Blueberry Cakes

Anything in miniature size is my favorite. That’s one reason to love these mini lemon blueberry cakes. Bursting with blueberries and drizzled with a simple glaze. The fresh lemon zest gives this cake a beautiful brightness.

  Gluten Free Vegan Apple Cinnamon Coffee Cake

Gluten Free Vegan Apple Cinnamon Coffee Cake

Wouldn’t this apple cinnamon coffee cake be a delight to serve at your Easter brunch? Vanilla cake, topped with sliced apples and covered in cinnamon crumb topping. Everyone will be asking for a second slice.

  Gluten Free Vegan Raspberry Hand Pies

Gluten Free Vegan Raspberry Hand Pies

I remember the first time I made these raspberry hand pies. It took me right back to my childhood. Eating those “home run” pies that we would get from the local market down the street. This homemade version is even more delicious and let’s not forget…it’s pie you can eat with your hands!

  Gluten Free Vegan Soft Frosted Sugar Cookies

Gluten Free Vegan Soft Frosted Sugar Cookies

Every kid loves a good frosted sugar cookie. This gluten free version is just about as yummy as you can get. Let the kids help with the decorating and get creative. They may end up eating more frosting and sprinkles along the way, but that’s the best part!

  Sarah Bakes Gluten Free Treats- Sarah Hornacek

You can check out more of Sarah’s recipes at Sarah Bakes Gluten Free Treats. You can also follow her on facebooktwitterpinterest, and instagram. Happy baking!

Pin It

Gluten-Free Snickerdoodle Cake

Tuesday, March 18th, 2014

Gluten-Free Snickerdoodle Cake from MomAdvice.com.
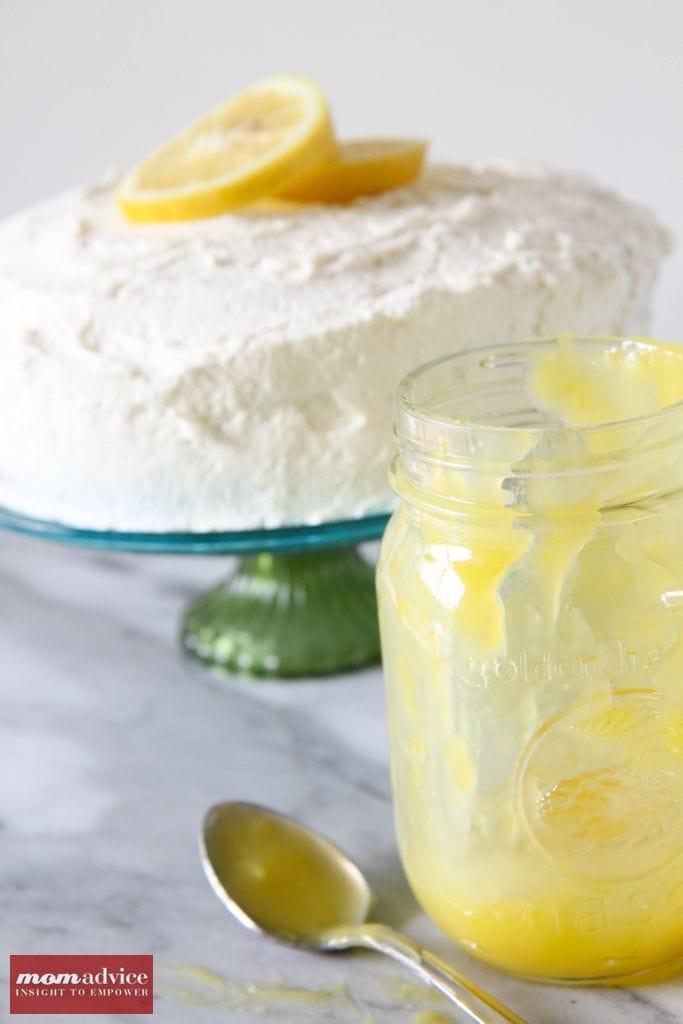
Semi homemade cakes have become a speciality of mine for birthdays. Today’s gluten-free snickerdoodle cake offered the perfect celebration cake for my husband’s birthday this year and I loved that it tastes just as heavenly as our usual snickerdoodle cake and our chocolate snickerdoodle cake that I had made before going gluten-free.

Before going gluten-free I relied heavily on cake mixes for making all of our cakes (something that I mention as a pantry necessity in my book), and that ease of pre-mixed ingredients is exactly the tradition that I have continued as I have started baking cakes that are gluten-free. As we demonstrated, cooking with cake mixes is easy enough that your child can bake it for you, the cake mix can be transformed into delicious sugar cookies, and you can even put a rainbow in the center, if you want.

Ed Emberley drawing books Ed Emberley drawing books Ed Emberley drawing books

As we have gotten older, we need less and less. Frankly, if we really want something, we usually just go and buy it for ourselves. Special & thoughtful gifts seem harder to come by, but I was determined to make this guy’s day special.

His favorite books as a child were Ed Emberley’s drawing books. While these books have been reissued, my husband more than anything wanted the original books that he had loved as a kid. I found the three of his favorites and wrapped them in ribbon to give him for his birthday. I could not wait to see his face.

Unbeknownst to me,one of the books contained Ed Emberley’s autograph, which my husband said was the best gift he had ever received. What a happy surprise that was.

If your spouse had a series of books or a book that was their childhood favorite, imagine what a joy it is to see that original again.

Gluten-Free Snickerdoodle Cake from MomAdvice.com

To top the night off, we celebrated with a slice of this cake. While I find gluten-free cakes to be a little on the dry side, we have found that a little pudding mix really helps this cake… and a thick layer of homemade cinnamon buttercream doesn’t hurt either.

The cake is laced with cinnamon, as is the frosting, and the base is made from a simply yellow cake mix. Any gluten-free brand should work beautifully in this cake.

Happiest of birthdays to the love of my life. I still shake my head that I have been present for his birthday since he was just sixteen. A million moments shared, and I pray for millions more with my best friend!

Gluten-Free Snickerdoodle Cake
Author: Amy Clark
Prep time:
Cook time:
Total time:
Serves: 8
An easy gluten-free cake made from a packaged yellow cake mix. It’s the perfect cake to celebrate with!
Ingredients
  • 1 package (15 ounces) yellow gluten-free cake mix
  • 1/4 cup (half of a 3.4 ounce package) vanilla instant pudding
  • 2 teaspoons ground cinnamon
  • 3/4 cup milk
  • 8 tablespoons (1 stick) unsalted butter, melted
  • 3 large eggs
  • 2 teaspoons pure vanilla extract
  • For frosting: 1 stick butter, softened
  • 3¾ cup confectioners sugar
  • 3-4 Tablespoons milk
  • 1 teaspoon vanilla extract
  • 1 Tablespoon ground cinnamon
Instructions
  1. Preheat oven to 350 degrees and lightly grease two 9-inch round cake pans.
  2. Place the cake mix, pudding mix, cinnamon, milk, melted butter, eggs, and vanilla in an electric mixer and beat until incorporated.
  3. Divide batter evenly between two pans and place in oven side-by-side.
  4. Bake for 18-22 minutes. Allow to cool.
  5. For the icing, beat butter until fluffy. Add all other ingredients.
  6. To assemble cake, place one layer on your cake stand. Spread the top with the cinnamon frosting.
  7. Place the next layer on top and cover the top and sides with frosting.

*this post contains affiliate links.

What is one of your favorite birthday gifts you have ever received?

Pin It

Gluten-Free Rainbow Bundt Cake

Thursday, March 6th, 2014

Gluten-Free Rainbow Bundt Cake from MomAdvice.com.

I am so excited to share a delicious Gluten-Free Rainbow Bundt Cake recipe that you can make using a simple boxed mix, a little food coloring, and a few odds & ends from your pantry. This Rainbow Cake is made in a tube pan, versus a layered cake, and is a fun addition to your St. Patrick’s Day spread.

Walmart challenged me to share a St. Patrick’s Day project that you could create out of items from their store. You may remember my rainbow cakes in a jar that I created a couple of years ago. Now that I am eating gluten-free, I wanted to replicate the idea of a rainbow cake, but I wanted to do it in one pan and I wanted to make it a quicker process by using a cake mix.

Gluten-Free Rainbow Bundt Cake from MomAdvice.com. Gluten-Free Rainbow Bundt Cake from MomAdvice.com.

To make a vibrantly colored cake, I want to point out that it is really important to use good icing colors to achieve your rainbow cake colors. Over by the party supplies, you will find professional cake decorating supplies at Walmart. You want to purchase the Wilton Icing Colors. These concentrated gels offer a much brighter color than what you will find over in the baking section of the grocery section. I just use a toothpick to dip in the gel and then swirl it through my cake batter. You may need to do this a couple of times to achieve this level of brightness, but it still will take a lot less than the other brands of food coloring.

Gluten-Free Rainbow Bundt Cake from MomAdvice.com. Gluten-Free Rainbow Bundt Cake from MomAdvice.com.

When I decided I wanted to make this cake, I went through tons of tons of cake recipes to figure out how to layer the batter. My inspiration for creating my rainbow arch was from not martha and her Leprechaun Trap Cake that she created a few years ago. Her arch is so much more beautiful than mine. I highly encourage you to read her tutorial for a perfect arch and read mine for a just meh arch. That being said, do prepare this in a tube pan versus a bundt pan to achieve the best arch. 

Do you have a digital scale? I highly recommend purchasing one because it will make projects like this a million times easier. I have had mine for many years and I use it for both weighing packages and as a food scale! Be sure to tare it with the bowl on top to begin your measurements each time.

I used the measurements outlined by not martha for measurements for my batter:

  • 6 ounces – red
  • 5 ounces – orange
  • 4 ounces – yellow
  • 3 ounces – green
  • 2 ounces – blue
  • 1 ounce – purple
  • The remainder of the rest of the batter, leave it white.

To scoop batter into the bowls, I relied upon an ice cream scoop to scoop it into the bowls on the scale. To make pouring the batter easier, place the cake batter in a baggie in a tall glass and hang the opening over the sides of your glass. Pour your batter in and then seal the baggie. Just snip a corner of the baggie to begin pouring your batter into the pan.

Gluten-Free Rainbow Bundt Cake from MomAdvice.com.

Gluten-free cakes tend to be more delicate so you definitely want to let this fully cool before trying to work with it. The side that has all the beautiful vibrant colors is not the top of the cake. It is the bottom of the cake. I accidentally iced this side so don’t make my mistake. If you find that your cake is puffy on the bottom, use a serrated knife to even it up a bit so your cake is not lopsided.

Gluten-Free Rainbow Bundt Cake from MomAdvice.com. Gluten-Free Rainbow Bundt Cake from MomAdvice.com. Gluten-Free Rainbow Bundt Cake from MomAdvice.com.

I posted a picture of this cake as I was glazing it on Instagram. To quote myself, “I never go easy on the sprinkles. I consider them the jazz hands on my desserts.”

Who quotes themselves? Sorry about that!

Glaze and sprinkle this cake liberally!

Gluten-Free Rainbow Bundt Cake from MomAdvice.com. Gluten-Free Rainbow Bundt Cake from MomAdvice.com.

I was disappointed that I had iced the wrong side and that my purple didn’t get perfectly centered. I think it is one of those cakes that might take a little more practice. My friends didn’t seem to notice or mind my errors though because this was one yummy cake! I doubt your kids would notice or care either. It might be a fun one to try together!

I hope you love it as much as we did and I hope this tutorial helps you while you make your own gluten-free rainbow cake!

Gluten-Free Rainbow Bundt Cake
Author: Adapted from Not Martha
Prep time:
Cook time:
Total time:
Serves: 8
A gluten-free rainbow cake perfect for celebrating St. Patrick’s Day
Ingredients
  • 1 Hodgson Mill Gluten-Free Yellow Cake Mix (over by the gluten-free ingredients in the candy aisle of your store, not in the baking aisle)
  • 1/2 cup butter softened
  • 2 large eggs, room temperature
  • 1 cup buttermilk
  • 2 teaspoons vanilla extract
  • 1 package of Wilton Gel Food Colorings
  • 1 1/2 cups confectioners’ sugar
  • 2 1/2 teaspoons milk (or milk substitute)
  • 1/8 teaspoon salt
  • 1/4 teaspoon vanilla extract
  • 1 teaspoon butter
  • Rainbow Sprinkles
Instructions
  1. Preheat oven to 350 degrees. Grease a tube pan liberally with cooking spray.
  2. In a mixing bowl, cream butter until soft. Add cake mix and blend completely.
  3. Add eggs, buttermilk, and vanilla extract and beat until completely blended. The batter will be thick.
  4. Divide your batter into eight bowls using the measurements in this post and tint accordingly.
  5. First pour the larger amount of white batter into the pan. Then pour the red batter in, making it a wide ring of batter. Then pour the orange over that, keeping it inside the red. Pour in each color, creating smaller and smaller rings.
  6. Bake at 350 degrees for 40-50 minutes, testing with a toothpick to check when the cake is done.
  7. Once the cake is cooled, prepare your icing.
  8. Melt the butter and add to rest of ingredients. Mix until creamy.
  9. Spoon the glaze over your cake and finish with rainbow sprinkles.

Enjoy this tasty treat with a DIY Shamrock Shake and our free St. Patrick’s Day straw printable!

walmart_mom_disclaimer


Pin It

DIY Shamrock Shake Recipe (And Free Straw Printables)

Thursday, February 27th, 2014

DIY Shamrock Shake Recipe (And Free Straw Printables)

DIY Shamrock Shake Recipe (And Free Straw Printables)

DIY Shamrock Shake Recipe (And Free Straw Printables)

St. Patrick’s Day is just around the corner!  This holiday makes me want to indulge in one of my all-time favorite treats… the oh-so-delicious Shamrock Shake. You don’t have to swing by your local fast food joint to indulge though because I have the recipe to this one and you can indulge in it for a fun family night treat any night of the week.

To grab the recipe for these easy DIY Shamrock Shakes, head on over to the Kenmore Blog to read all about these delicious treat.

Don’t forget to grab your free St. Patrick’s Day straw printables! Happy St. Patrick’s Day, friends!

Pin It