Warm Up Your Belly

October 11th, 2007

It is officially fall because I have finally made my homemade cocoa mix for the season. My cocoa machine had a nice little break while my blender worked overtime this summer. His days were numbered and yesterday’s cool weather was just the excuse to start making my cocoa mix. Marshmallows topped our mugs to the brim and we enjoyed a sweet treat on yesterday’s cool afternoon.

The yummy warm comfort foods and drinks are something I look forward to all year long. Who can resist a big bowl of soup and a grilled cheese for dipping?

Speaking of these comfort foods, we have been missing our yummy bowls of clam chowder since we had moved back to the Midwest. No one does it better than Boston and we seemed to always be craving a bowl of this yummy goodness, but couldn’t seem to replicate it. I was determined to find a recipe to feed our cravings this year and lucky for me, I stumbled upon this chowder recipe that fit the bill perfectly.

This recipe for chowder is delicious. Rich, but not too rich. Chunky, but not too chunky. It is just an absolute bowl full of perfection. There are other chowder recipes out there, but I think this one will be in heavy rotation in our house. The kids won’t eat it, but that won’t stop my husband & I from enjoying it!
I did make some minor changes to the recipe- I omitted the heavy cream and replaced that with half & half. I also omitted the dill in the recipe because I didn’t have any on hand.

Determined to perfect my grilled cheese too, I also tried this delicious recipe for baking your grilled cheese in the oven instead of making it in the pan. Since I am doing grilled cheese in mass quantities, I thought this would be a great solution for us to all have our grilled cheese sandwiches at the same time, instead of doing my batches in stages. Technically not a grilled cheese, this “toasted cheese” is delightful! No soggy centers and perfectly crunchy! Just keep your eyes on them while they cook. The bread does have a tendency to get a tad too toasty, if left unattended!

I hope you can try some of these delicious recipes to warm your belly.

Sound Off: What are your favorite dishes when the weather turns cool?
Be a Wrap Superstar: Wallpaper That Gift, Yo!

October 10th, 2007
I was asked to speak to my mom’s group this week on how to celebrate Christmas on a budget. Since I do those Tuesday morning show segments, I figured it would be in my best interest to make some pretty props to go along with my morning discussions (and that could double for my mom’s group discussion).

How about serving triple duty and sharing them on my blog here too? Why not!

I have several ideas for thinking outside of the box when it comes to wrapping your gifts. Sure, I could go to the store and get a giant roll of wrapping paper, but what is the fun in that? Some of the most fun is in the inventing of new ways to wrap those gifts under the tree.

The gifts might not all match, they may not be overly red and green, they also aren’t going to be uniform, but at least each gift will have their own original style.

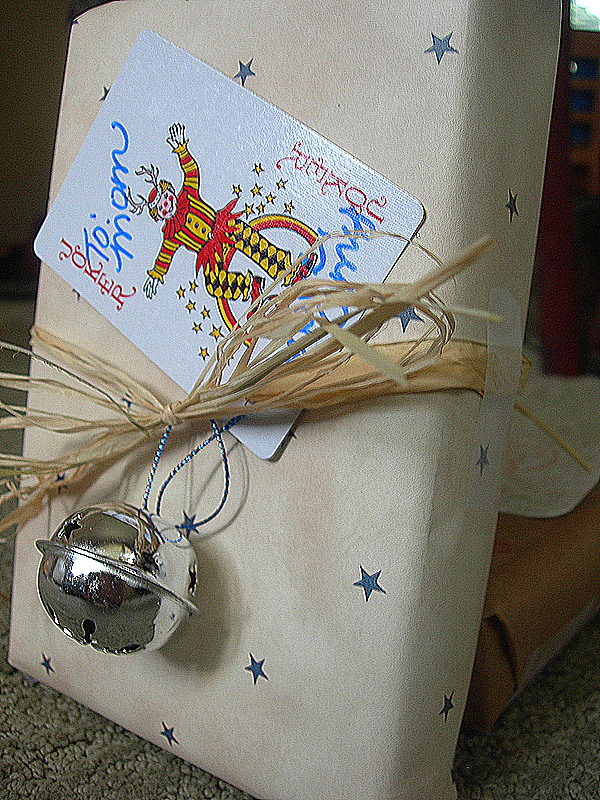
Today’s gift wrapping idea is to check your local thrift store for wallpaper to wrap your gifts. I frequently find gigantic rolls for only $1. Try to pick a design that can be used for the holidays, but also can double for those other special occasions where a gift is needed.

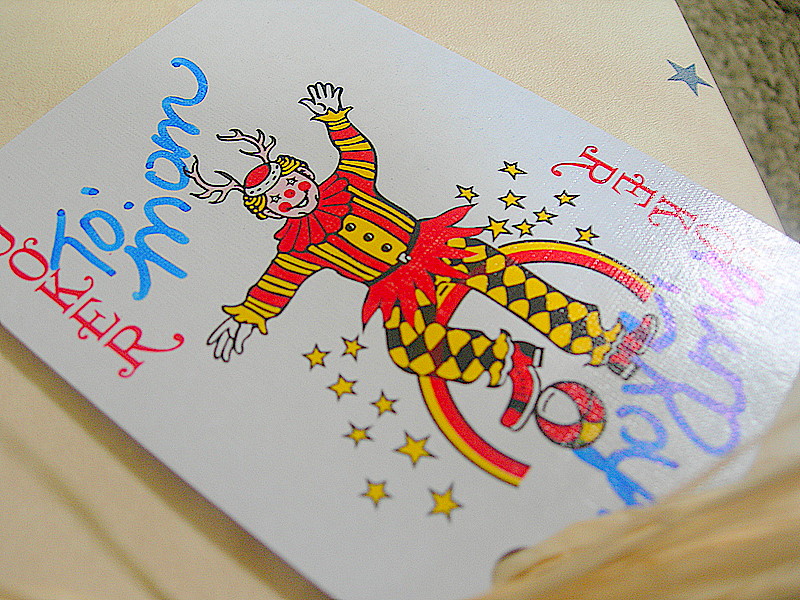
This gift is not only covered in wallpaper, but the gift tag is made from a deck of cards. Is your dad a prankster? Give him the Joker! Is your brother the jack-of-all-trades? A Jack! Does your mom think she is the queen of the castle? Give that woman the Queen!
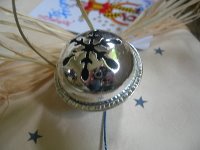
Tie it off with a little holiday cheer and embellish your gifts with a little ornament or something holiday-ish. I love those ornaments for those teeny trees to put on my gifts or I love to add big old jingle bells to make my present a little more festive.
I hope you enjoyed my quick tutorial on being a wrap superstar. I will discuss another idea next week!!

***For more great ideas today, visit Rocks In My Dryer for Works-For-Me Wednesday!***

Sound Off: Are you a wrap superstar? What are some things you use to wrap your gifts?

Frugal Hacks: More on Hosting the Unexpected Guest

October 9th, 2007


Well, I got a great response from last week’s column about hosting the unexpected guest. I am not sure if it is because people love cleaning tips or if they just love talking about what a pain it is when people just drop in.

I got a great question though on what one can cook for their unexpected dinner guests so that helped to inspire this week’s post.

I hope you can swing by Frugal Hacks and check it out! Take a browse around while you are over there. There is a lot of great information and I love the collaborative efforts of the writers in supplying great family-focused content and practical information on frugality.

Is there anything else you would like for me to write about on the subject of entertaining on a budget?

Interview with THE Jessica Seinfeld

October 9th, 2007

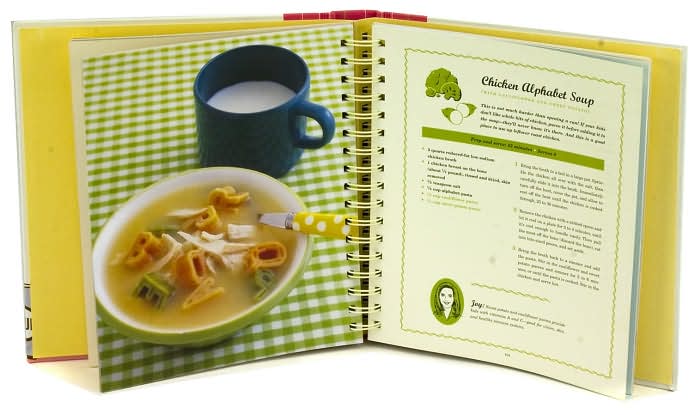
I shared in an entry last week, my true love for the new cookbook, “Deceptively Delicious” by Jessica Seinfeld. You may have doubted my opinion on how awesome it really is, but now Oprah has given her golden seal of approval and this little seal gives Mrs. Seinfeld an instant hit on the bestseller list. Jessica appeared yesterday on Oprah’s show and discussed her recipes and ideas for getting her children to eat healthy.

Last week, I had discussed interviewing Jessica with her publisher, Harper Collins. When I saw she was on the show yesterday, I was really worried that she might become too busy to share with me her experience with writing the book. Who can compete with a successful interview on Oprah?

Lucky for me, Jessica is truly a class act and had emailed me the answers to all my questions this morning. I was so incredibly excited and I hope that you will enjoy this interview with her as much as I enjoyed asking all of my questions.

Question & Answers with Jessica Seinfeld

Pardon if I gush a bit, but I adore your new book! Is this something that you have wanted to do for a long time? What/who inspired you to create this book?

I wish I could say there was a thoughtful and grand plan behind this book! The truth is that it came from desperation. Hiding vegetables in my children’s food was the only way I could get through mealtimes without arguments and stress. My children were certainly the motivation – their refusal to eat vegetables was the problem that had to be solved – but my inspiration was my own mother and grandmother. They were both working mothers who managed to put home cooked meals on the table every night. They taught me how to cut corners, prepare efficient and healthy meals in under 20 minutes, which is now the model I replicate in my own home. Now it’s a way of life.

Has healthy eating always been important to you or was this a new lifestyle change since children?

I grew up with a very health conscious mother, who has shopped at farm stands and food co-ops since I can remember. Eating healthy foods has always been second nature to me – it’s how I was raised. But I’m also desperately concerned about what I read about child obesity and related diseases and illnesses in this country. I became determined not only to not take care of my own kids, but to try to be part of a broader solution to a growing problem.

What is your biggest challenge with getting your children to eat healthy? How did you overcome this challenge?

The biggest problem I face daily is the prevalence of junk food that seems to follow all kids everywhere they go. I have to be vigilant and firm, but it’s hard to compete sometimes. Even if you can manage to avoid fast food and get to the grocery store, many supermarkets try to rope you into buying foods that have no nutritional value.

There’s a few things I do to try to cope.

– I won’t bring home food I don’t want my children to eat – chips, candy, sugared drinks. It sounds obvious, but the habits I set at home tend to get followed by my kids when they’re at school or playing with friends.

– I bake healthy treats. I’m not anti-treats – in fact, I have a sweet-tooth. But there’s no reason why great tasting cookies and brownies can’t be laden with things that are good for kids.

– I try to be smarter than the supermarket marketing executives. I shop carefully, read labels, and look for whole grains and non-processed food.

– Puree, puree, puree.

As a mom who is on the go a lot, what are some of your suggestions for getting your kids to eat healthy when you are running from activity to activity?

I try to always keep my purse stocked with food that’s healthy and balanced and never get stuck with hungry kids and limited options. That’s when bad food decisions get made. Being a mobile health-food store has it’s down side, of course – the crushed-up oat bran pretzels and string cheese wrappers at the bottom of my purse don’t exactly make me so fabulous – but at least I know my kids are getting a good snack.

If you could pick one thing that you want moms to walk away with, from reading your book, what would it be?

What you feed your kids matters. Don’t give up on yourself or them. You can have peaceful, healthy and delicious meals, and you can also never say, “eat your vegetables” again. With an ounce of preparation and the will to change, anyone can do it.

Eat Your Heart Out Martha: Sugar & Spice Nuts

October 9th, 2007
Christmas is coming, Christmas is coming! It is time to take your inner-Martha to new levels! Get out your crafting tools and let’s get to work on some gifts, ladies!

I am going to try and share a gift each week of things that you can make for all those special people on your list. These ideas will be budget-friendly and EASY! I am far from crafty, so if you see a craft here, you know your child can probably do it!

I would also like to say that my instructions are written exactly like I would hope someone would explain the idea to me. I hate when I read instructions and they omit the basic steps for accomplishing something. I am a novice so I offer up novice instructions.

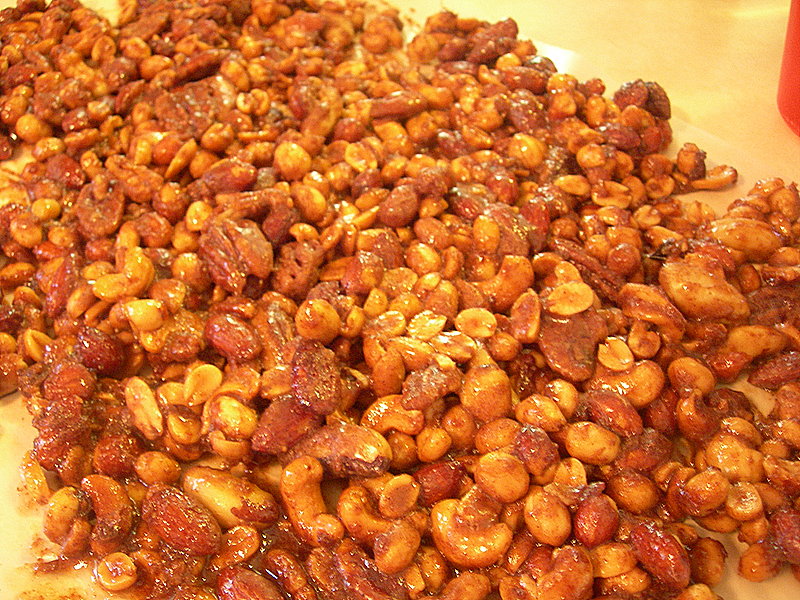
Today we are going to make some Sugar & Spice Nuts. These nuts taste like a little bit of heaven! My husband hates mixed nuts and couldn’t stop eating these. That truly says a lot!

These are very easy to make, but should be made when it is not humid out. I made these on a hot ninety degree day and it took an entire night for them to dry. Never. Again.

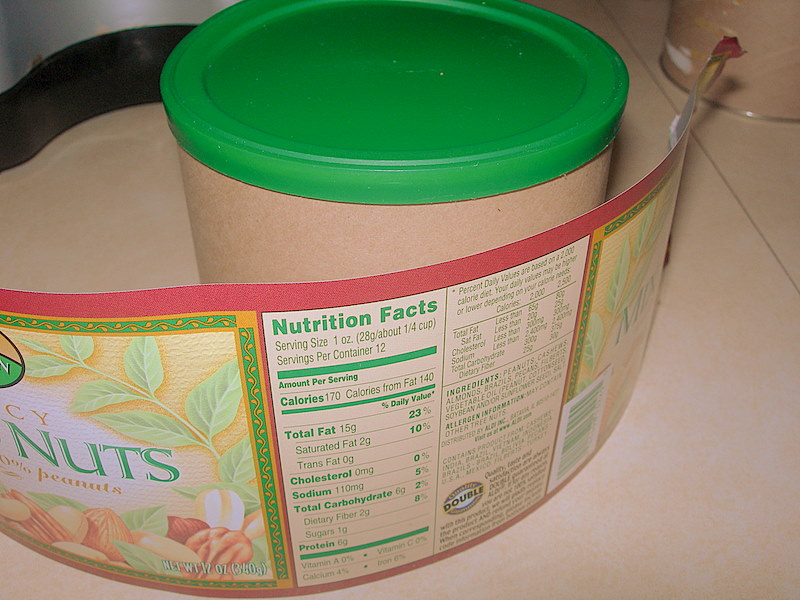
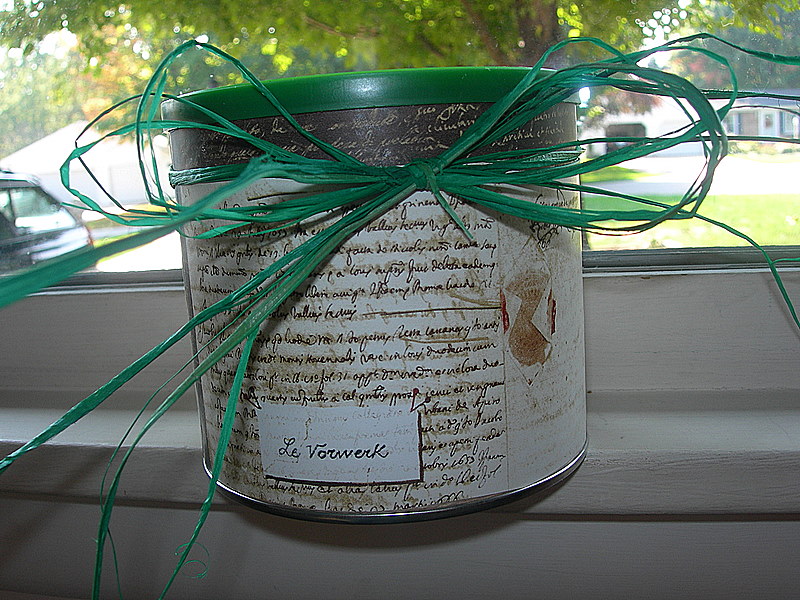
I bought a can of mixed nuts from Aldi that were less than $2. I then took the label off (very carefully) so that I can use this label as a template for my new label.

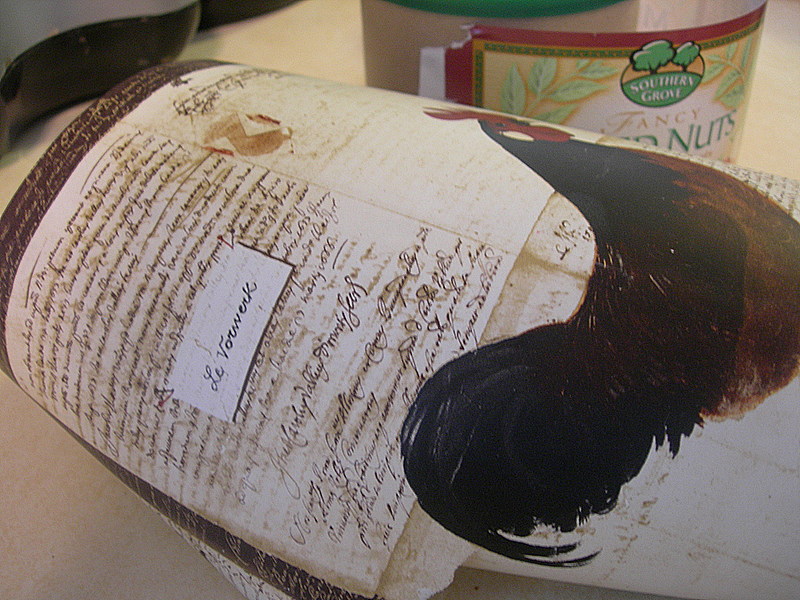
The new label can be made out of anything, but I had some wallpaper border that I had bought from our thrift store that I thought would be perfect for this occasion. The border was just wide enough and it was more durable than wrapping paper or other types of paper that I would normally use. It had pretty French writing on it so I just cut that portion off and left the roosters for another project. Too bad I don’t know French…maybe someone knows what this says? Hopefully something beautiful and meaningful, but if not…oh well! A whole roll of this stuff only cost me a quarter so that was a double bonus! Take that old label and use that as your template and trace it onto your paper (whatever type you chose!)

Now, take a glue stick and put glue all over the back of the paper. Wrap your new paper around your canister and make sure that the bottom is all lined up, nice and neatly!

Finally, you can tie a bow around your beautiful masterpiece and make your yummy Sugar & Spice Nuts. Follow this recipe for making the nuts and prepare them exactly as instructed.
When your nuts are completely dry, break them apart and place them back in the tin. I also added a piece of wax paper to line the interior of the canister so that they wouldn’t stick to the bottom or the sides of the can.

This would make the perfect gift for: Postal workers, beauticians, coworkers, bosses, teachers, the person-who-has everything, and as a pretty hostess gift!

WSBT-TV: Tips for Staying Warm in Cool Weather

October 9th, 2007

Well, you are going to get a glimpse inside our home since this morning’s segment was taped at our house. The segment that aired today discussed ways that you can keep your home warm without raising your heating bills. Lucky for me, my segment timed perfectly with our weather cooling down or I think this one would have been a dud! According to this week’s weather forecast, my tips might be put to good use this week out here in the Midwest.

For additional tips on getting your house ready for the cool weather, be sure to visit my article on Winterizing Your Home.

Sound Off: What do you do to get ready for the winter weather? What is your average heating bill in the winter months?

Best Birthday Cupcakes in the World

October 8th, 2007

My sister-in-law’s boyfriend celebrated his birthday Friday night. To help out with the evening’s festivities, I offered to make the cupcakes for his special day. I found a recipe in my favorite cupcake book, “Cupcakes from the Cake Doctor” and picked her “Best Birthday Cupcakes” recipe.

These cupcakes are as close to a bakery cupcake as I will probably ever make. They are light and sweet, but not too sweet. They have a great consistency and are perfectly moist and sturdy enough to hold up to a good dose of yummy frosting.

I will probably never search for the perfect birthday cupcake again after sampling these. I paired the cupcake with her Chocolate Syrup Frosting which was the perfect way to top this delicious cake.

No more searching, ladies! This is THE cupcake for every celebration. Enjoy!!

The Best Birthday Cupcakes

24 paper liners

1 package plain butter recipe golden cake mix (I subbed with white and loved it!)

1 package (8 ounces) reduced-fat cream cheese, at room temperature

1/2 cup sugar

1/2 cup water

1/2 cup vegetable oil

4 large eggs

1 tablespoon pure vanilla extract

Chocolate Syrup Frosting (recipe to follow)

Colored sprinkles or candy cake decorations for garnish

Place a rack in the center of the oven and preheat to 350 degrees. Line cupcake cups with liners. Set the pans aside. Place the cake mix, cream cheese, sugar, water, oil, eggs, and vanilla in a large mixing bowl. Blend on low speed with an electric mixer for 30 seconds, until the ingredients are well blended then stop the machine and scrape down the sides. Increase the mixer to medium speed and beat for 1 1/2 minutes to 2 minutes more, scraping down the sides again if needed. The batter should be smooth and thickened. Spoon or scoop 1/4 cup batter into each lined cupcake cup, filling it two thirds of the way full (You should get between 22-24 cupcakes). Place the pans in the oven. Bake the cupcakes until they are golden and spring back when lightly pressed with your finger, 24-27 minutes. Remove pans from oven and place them on wire racks to cool for five minutes. Run a dinner knife around the edges of the cupcake liners, lift the cupcakes up from the bottoms of the cups using the end of the knife, and pick them out of the cups carefully with your fingertips. Place them on a wire rack to cool fifteen minutes before frosting. Meanwhile prepare your frosting…
Chocolate Syrup Frosting

1 stick butter, at room temperature

1/2 cup unsweetened cocoa powder

1/2 cup chocolate syrup

3 cups confectioner’s sugar, sifted

1 tablespoon milk

1 teaspoon vanilla extract

Place the butter, cocoa powder, and chocolate syrup in a large mixing bowl. Blend with an electric mixer on low speed until just combined (about 30 seconds). Stop the machine and add the sugar, milk, and vanilla. Blend with the mixer on low speed until the sugar is incorporated, 1 minute. Increase the speed to medium and beat until light and fluffy, 1 minute more. Use to frost your cupcakes.

Pretty Menu Plans

October 7th, 2007

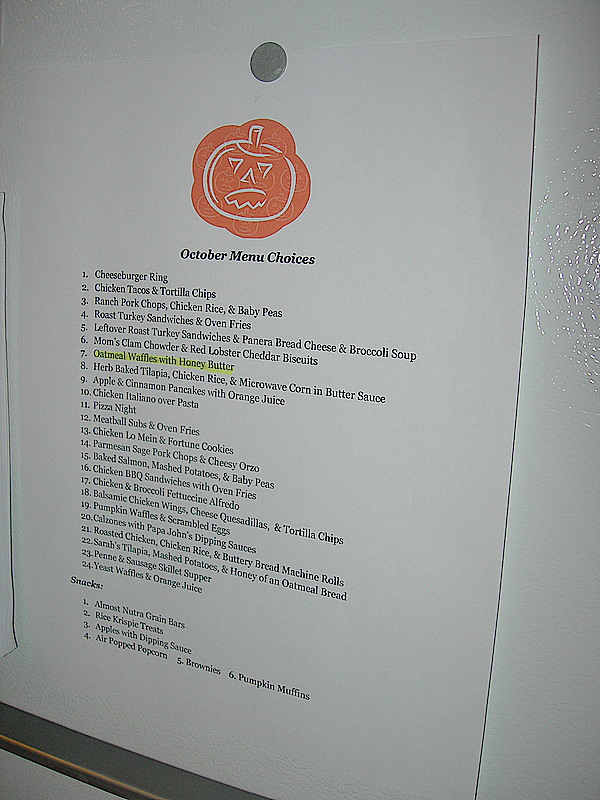
I thought I would take the plunge and do a big day of grocery shopping for our entire month. This took a couple days of planning and picking our menus for the month. I really thought it would be a great idea until I actually got to the store and realized that loading and unloading my groceries was a little like a complicated game of Tetris. Nothing fit in the cart and nothing fit in my car. The only thing motivating me was the knowledge that I would not have to do this again for another twenty-nine days. I used to only shop once a month, but had gotten into the habit of shopping every two weeks with my husband’s past pay schedule. The new payment schedule motivated me to just go ahead and get it done all in one trip. Am I crazy? Maybe a little bit!

Inspired by my dear friend Monica, I decided to pretty up my menu plan this month. I found a cute pumpkin to add to my planner and now my menu plan looks organized and cute too!

As we have been going through the meals, I have just been highlighting them to remind me what meals we have left to eat and I can see what we have already eaten. I incorporated lots of new dishes and several of our old favorites this month. I am hoping I will have lots more recipes to share and that I can keep us on budget with our dining out category.

Sound Off: How often do you grocery shop? Why did you choose this schedule for shopping?

Make Your Own Flavored Creamers: Mint Truffle Creamer

October 7th, 2007

Flavored creamers are such a sweet treat to a great cup of coffee. I love to add a little cream to my cup of coffee in the morning, but the cost factor prevents me from indulging the way that I would really like to. Aldi carries a great fat free version of French Vanilla, which I have found is much more affordable than the creamers in the regular supermarket, but I would love to have a little more variation in my cup.

My new quest became figuring out how to make my own flavored creamers. I am not a big fan of powdered creamer so finding a recipe for a homemade version seemed almost impossible. Most recipes that I have found came in powdered form, but I wasn’t willing to give up on figuring out how to make my own liquid creamer.

I finally happened upon a recipe and adapted it to fit my taste. Once I finish my first bottle of this creamer, I will start testing some other recipes, but this was a great start towards achieving the yummy flavor I love.

Although you don’t get the same mouth-feel as you do with store-bought versions, you do achieve the great flavor that you are looking for from these (for a fraction of the price!)

I hope you can give this recipe a try! I can’t wait to share some more recipes and I hope that this inspires you to make your own flavors at home.

Mint Truffle Creamer
1 can sweetened condensed milk (or make your own sweetened condensed milk)
1 1/2 cups nonfat milk (I used prepared powdered milk)
3 Tablespoons unsweetened cocoa
3 Tablespoons peppermint coffee syrup (or more, depending on your personal taste)

Blend all ingredients together in your blender. Pour into a mason jar or your old coffee creamer dispenser. This creamer will keep up to two weeks in your fridge.

Freebie Friday: October 5, 2007

October 5th, 2007

Health & Beauty:

Donate $5 to breast cancer research for joining the Viva Mailing List.

Always Pantiliners (designed for women sizes 14 and up)

Nivea Hand Cream

Complete Multi-Purpose Contact Solution

St Joseph Aspirin

Curel Ultra Healing Lotion

Jergens Moisturizer

Dove Advanced Care

Suave Professionals Products

Gwen Stefani’s New Perfume

Maybelline SuperStay Silky Foundation

Vera Wang Princess Perfume

Food:

Dale & Thomas $20 gift card for joining their mailing list (Note- I haven’t tried this yet so I am not clear if there is a minimum to buy or anything like that!)

Dunkin Donuts Coffee

Betty Crocker Warm Delights Minis

Entertainment:

Philadelphia Style Magazine

Starbucks Song of the Day (check every day!!)

Wii Remote Jacket (must already have a Wii for this freebie)

SpiritLed Woman Magazine

Pumpkin Stencils

Home & Garden:

Trip Advisor Luggage Tags

Post-It 5 Sheet Sample

2x Ultra Tide

Car Care Guide

Sound Off:

If the best things in life are free, what is your favorite freebie that you have in your life?