What a Difference a Day Makes

September 3rd, 2008

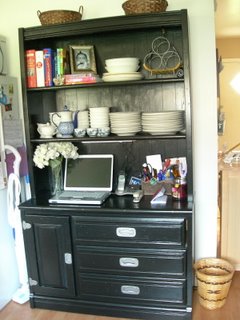
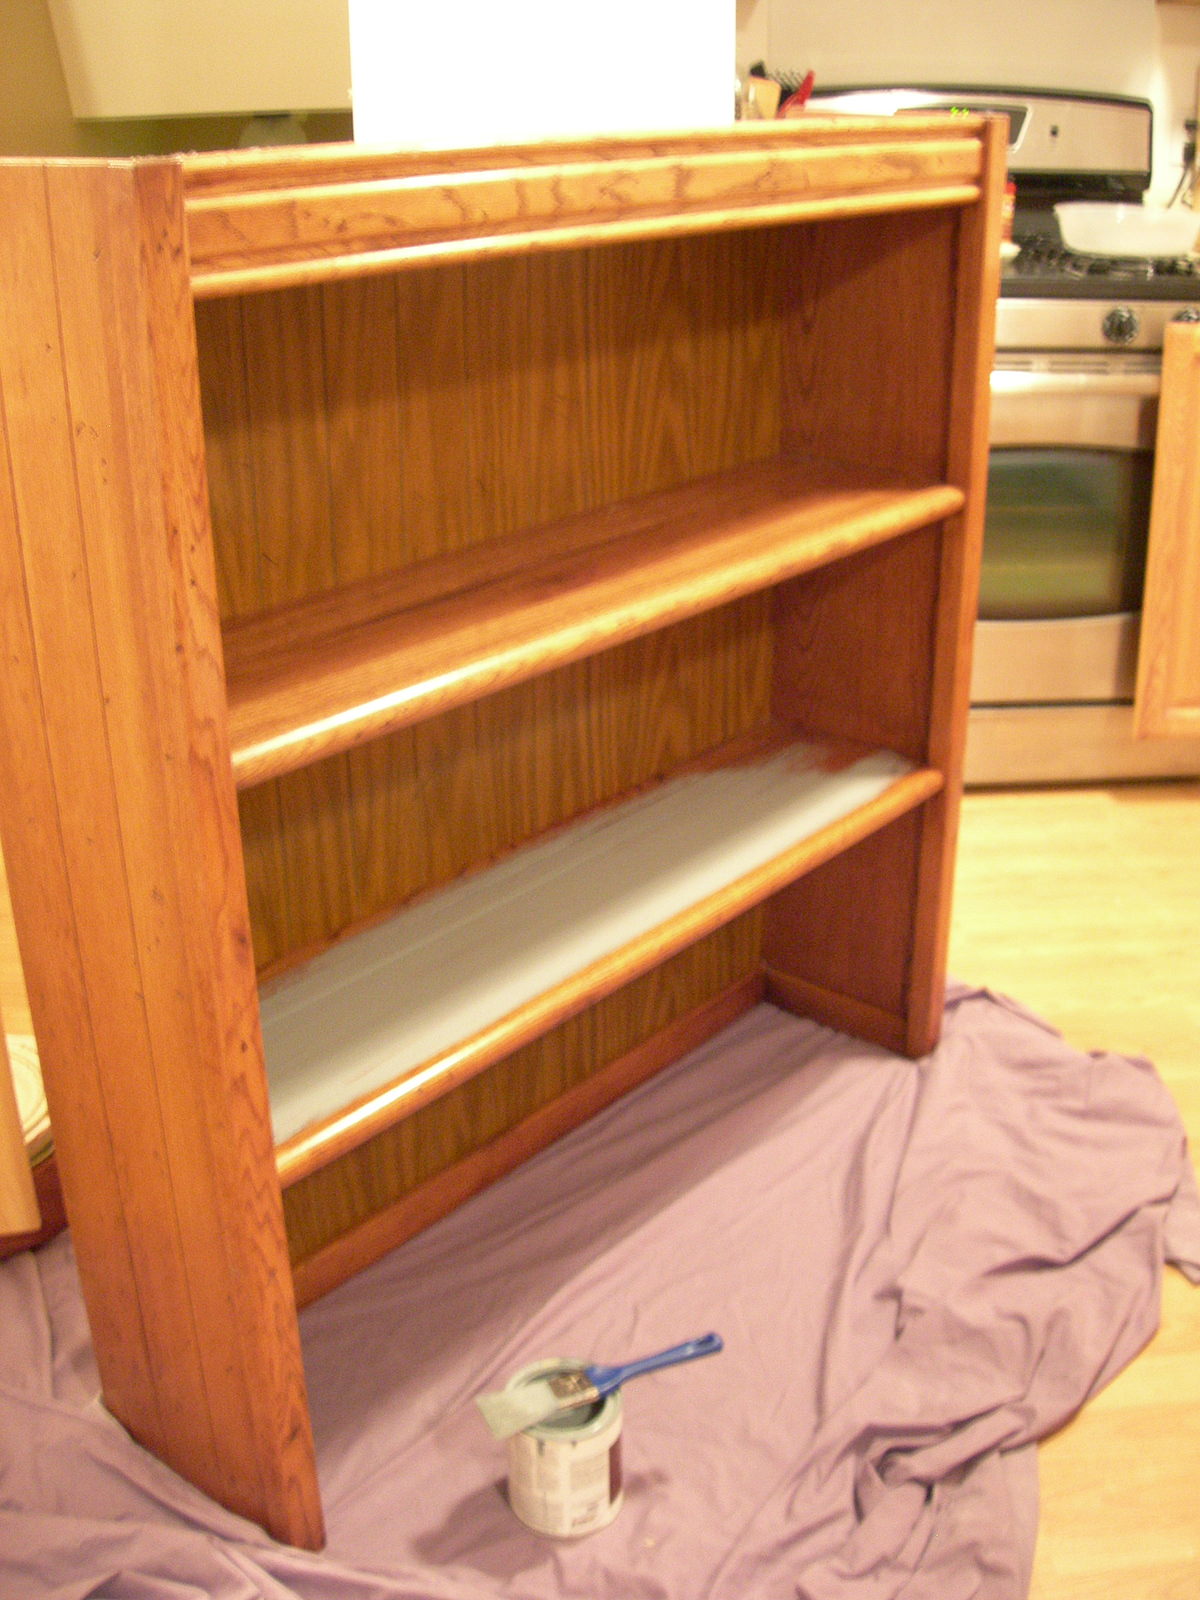
I decided to hit the thrift store this Saturday in search of a china cabinet or unit where I could rest my laptop for our kitchen. I have been hunting for awhile, but just haven’t seen anything with the good bones that I was looking for. I walked around for awhile before I saw IT. You know? The one! The one that I have been hunting for ages looking for? Well, I basically threw my body upon an old eighties cabinet and requested the crew help me load it in my vehicle. The cost was only $99 and the units that I had been looking at in the stores were a minimum of $250 and upwards of $600. This piece looked like it was going to be perfect and I headed over to the hardware store and got all of the supplies to tackle this project.

I was inspired by Meredith’s recent post about a project that was done on Notes from a Cottage Industry. This blogger had painted her unit black and had gotten hers for a mere fifty bucks and made it look like a million.

This was my first attempt at refinishing a piece of furniture and I was pretty nervous at first, but my tentative paint strokes turned to fast swipes as I became more confident with what I was doing.

This particular piece was a knotty oak wood and had worn brass handles on it. We prefer a more contemporary look with clean lines and a silver finish to our pieces so that is what I wanted to achieve when I refinished this piece.

I decided to leave the piece with the knots in the wood, opting to skip the spackling step altogether, and purchased a primer tinted grey to give us a good start on the piece.

I sprayed the unit with a liquid degreaser to get all of the grime and muck of off the wood. Next I primed it with primer and allowed that to dry for a couple of hours. The next step was to put on the black paint and then another coat. Then another coat. Finally, another coat was applied before I could do the final touch-ups to the wood.

The hardware was the type that had been dropped into the a cut-out in the wood of the piece so there was no way that I could replace it. The worn dingy handles received a face-lift with a coat of stainless steel spray paint that was made especially for metal. Fifteen minutes to dry and only four dollars to redo all of the hardware. We are going to be spraying some other ugly brass fixtures around our house that need a little TLC, rather than purchasing new pieces which would cost us a lot more.

I started the project at six o’clock in the evening and painted until 2:30 in the morning. I collapsed in bed and then picked it back up at nine and had it fully assembled with my dishes and cookbooks on it by six the next evening.

It was a bear of a project, but I can’t stop glowing or patting myself on the back for what I accomplished in a single day. The unit is absolutely enormous and I did all of this by myself with the only help from my husband being the help with moving and reassembling it.

The finished product reminds of something you would get at Pottery Barn or Restoration Hardware and I doubt that it would be only $99!

The history of the piece was as interesting as the furniture was itself. A quick discussion with one of the employees seemed to indicate that it was repossessed. After pulling it all apart we found a very mysterious hole that at been cut out of the bottom. A hole that would have no purpose except to hide something. Weed, perhaps? Who knows!

What has been your biggest accomplishment that you have done in or around your house? Have you ever attempted to refurbish a thrift store or yard sale piece? Any blunders refurnishing anything?

* Originally aired April 2, 2007*

Our Kitchen Makeover

September 3rd, 2008

When we moved into our house, one of the big things that attracted us to it was the size of our kitchen. Now that we have lived in our house for four years, I don’t think my kitchen is as big as I would like, but it seemed enormous when our last house had only a galley kitchen. Isn’t that funny how accustomed we can become to more space?

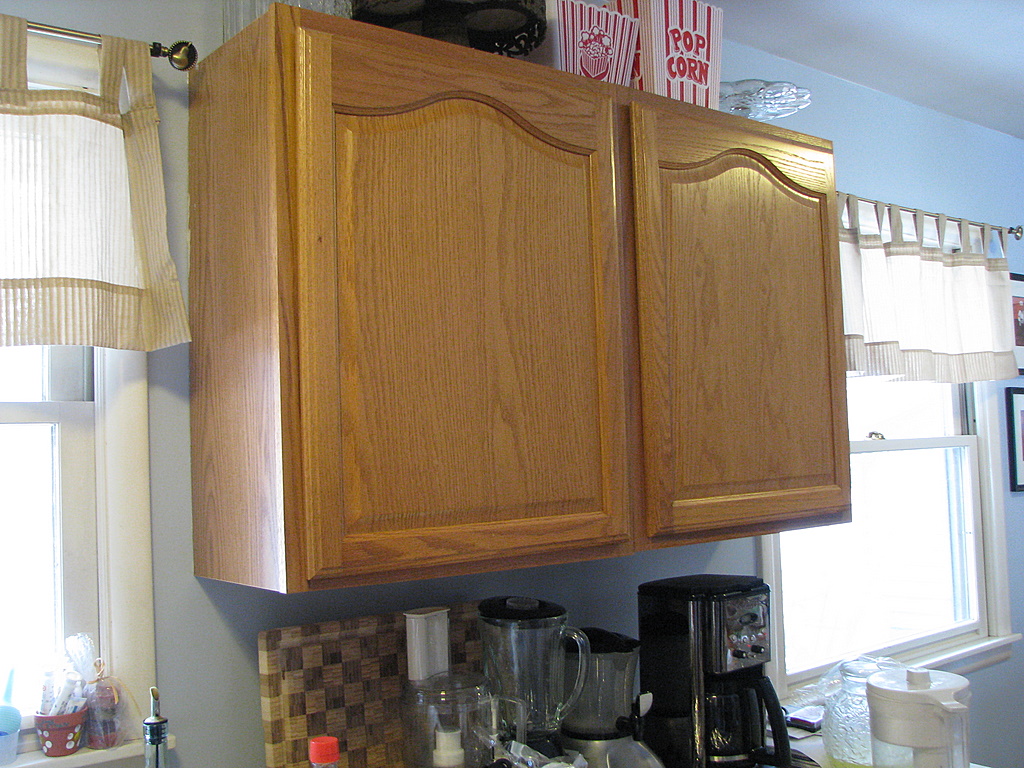
The thing that I was not fond of about the kitchen was the dated look of it and the lack of storage and cupboards. The walls were white, the floors a really light pine color, and the cabinets were oak with no hardware. We didn’t have enough cabinet space, the appliances all needed to be updated, and the kitchen lacked the style I wanted. If this was a reflection of the “heart of our home,” it was certainly missing something. The owner before us had completely renovated the kitchen, but it wasn’t our style and wasn’t cohesive or finished the way we would have liked.

Our kitchen makeover has been a gradual process and we are still working on the details of it, but it has come a long way from the dated eighties look. We would replace things as they went out and updates would come when we had a little extra money. I did want to show where we are at now, with the updating process, and to share how we have renovated our kitchen on a budget.

I wish I would have taken more before pictures of the kitchen, but I hope my descriptions will help.
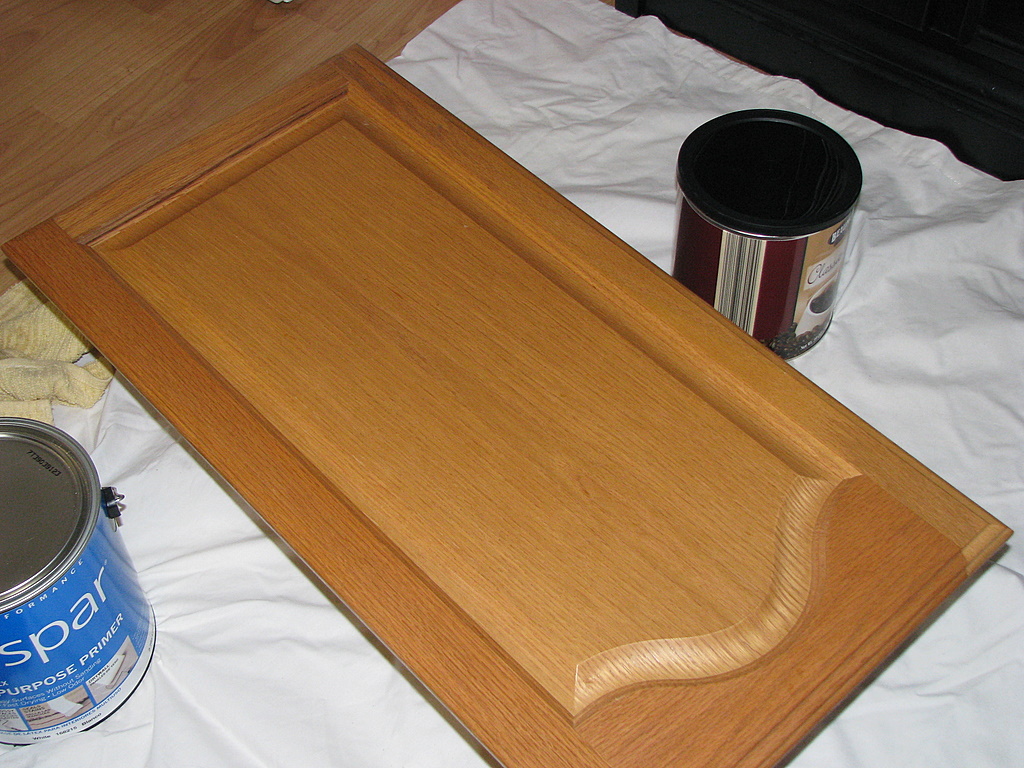
These are the pictures of our cabinets before the makeover. Nice, but not much to write home about. We had received a $50 Lowes gift card for Christmas (thanks, mom & dad!) so we thought we would put the money to good use. I used the steps provided in this tutorial to paint our cabinets. This meant no messy sanding and so it helped to save a step and saved me a lot of cleaning too!
We took all of the doors off and gave them a really good cleaning with a liquid degreaser that I had purchased from the hardware store. Once cleaned, we applied two layers of primer to each side of the doors and to the outside of the cabinets themselves. We allowed the primer to dry one day and then we began painting them the next day. The color that we chose was a Martha Stewart “Wainscot White.” It wasn’t a true white, but was definitely not a cream either.

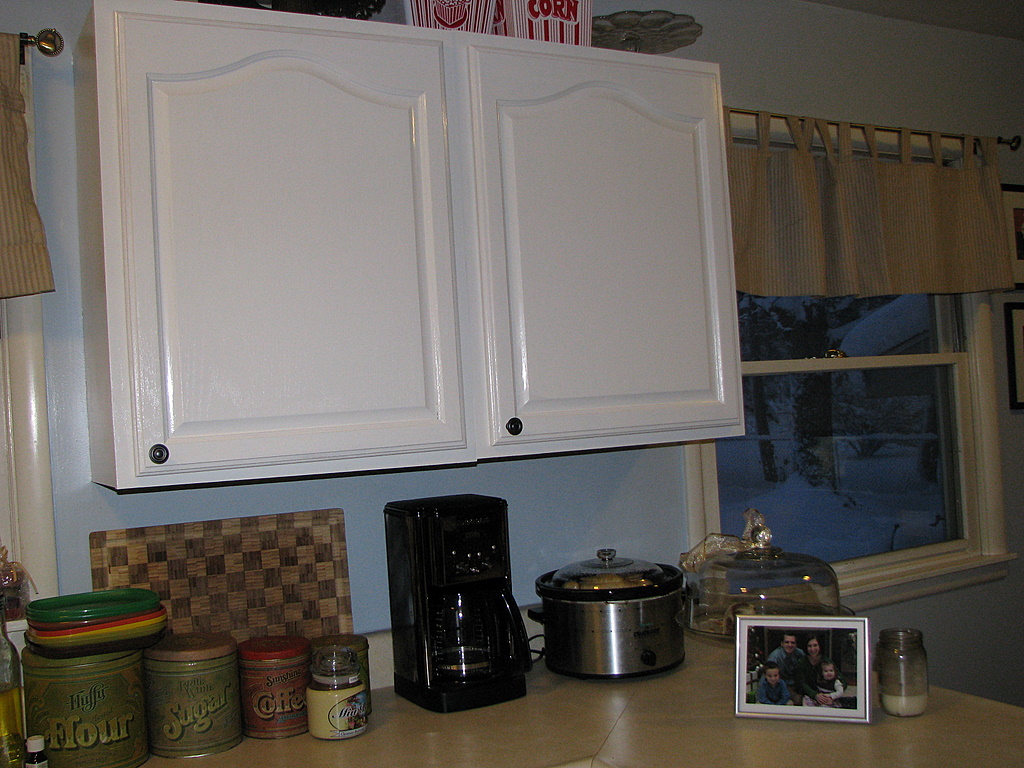
The hardware for the cabinets was purchased from Target. They have ten packs of knobs that very closely resemble the stuff at Restoration Hardware, but they only cost $14.99 for ten versus $5-10 each. The drawer pulls were $4.99 each (also purchased from Target) and they all were in oil rubbed bronze.

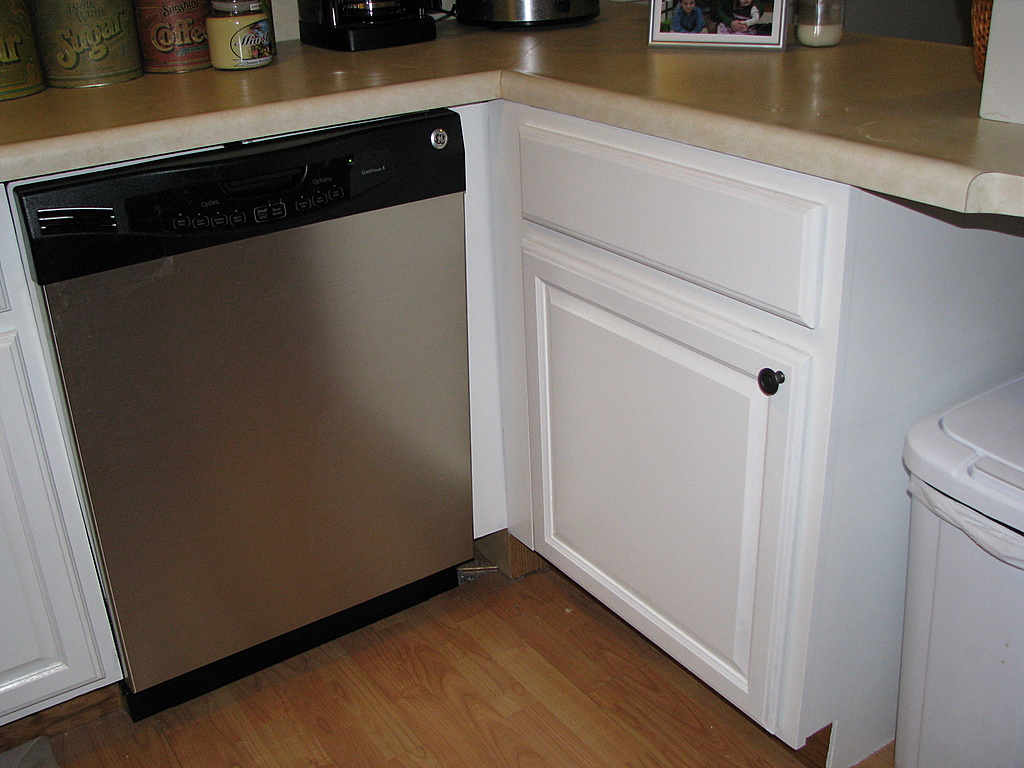
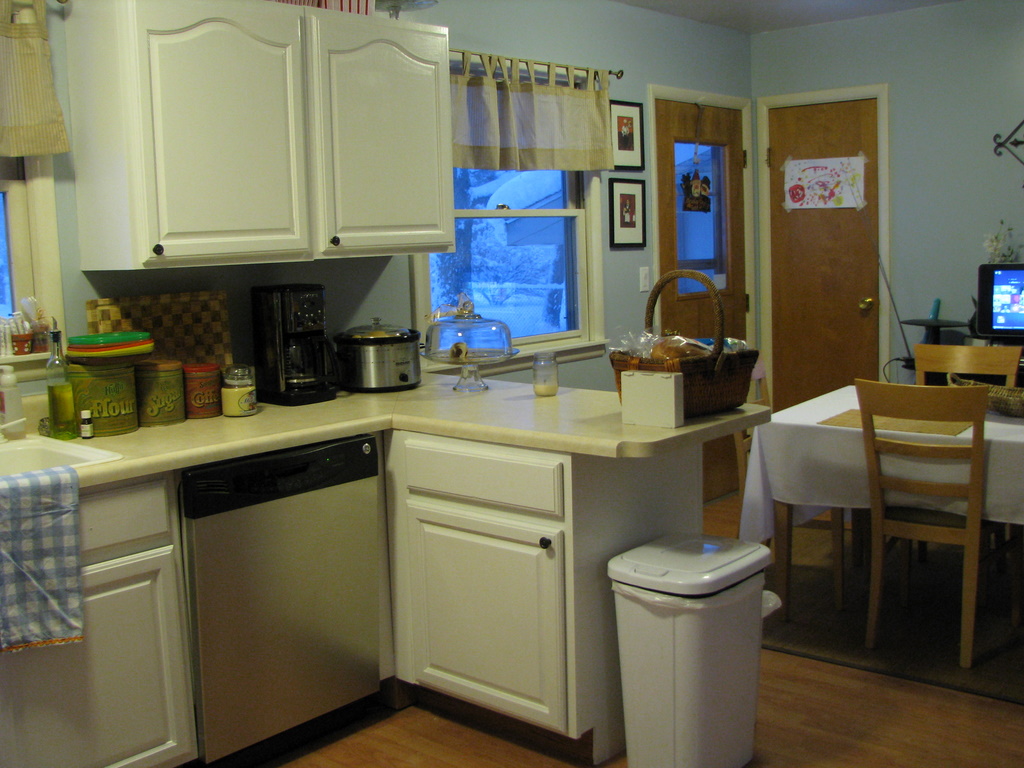
These are the cabinets after. What a difference a weekend can make! The cupboards are so beautiful and have brightened the kitchen up so much. Not only that, but the whole space feels so much larger because of the white cabinets. The walls were also painted a pretty gray blue to bring the more up-to-date feel to our space. We left our counters the same, but hope to one day replace them with a more high-end material (or at least make them look more high end).

We replaced our dishwasher with a new GE dishwasher that we purchased from Sears. It is the stainless steel look instead of the real stainless steel, so little hands can smudge away without mommy having to clean the surface as often. We actually won the dishwasher in an advertising contest that was sponsored by Sears. Technically, all of you AWESOME people helped us earn the dishwasher so we thank you for that. This one is so much prettier than the other one and better yet…it works! What a novel idea!
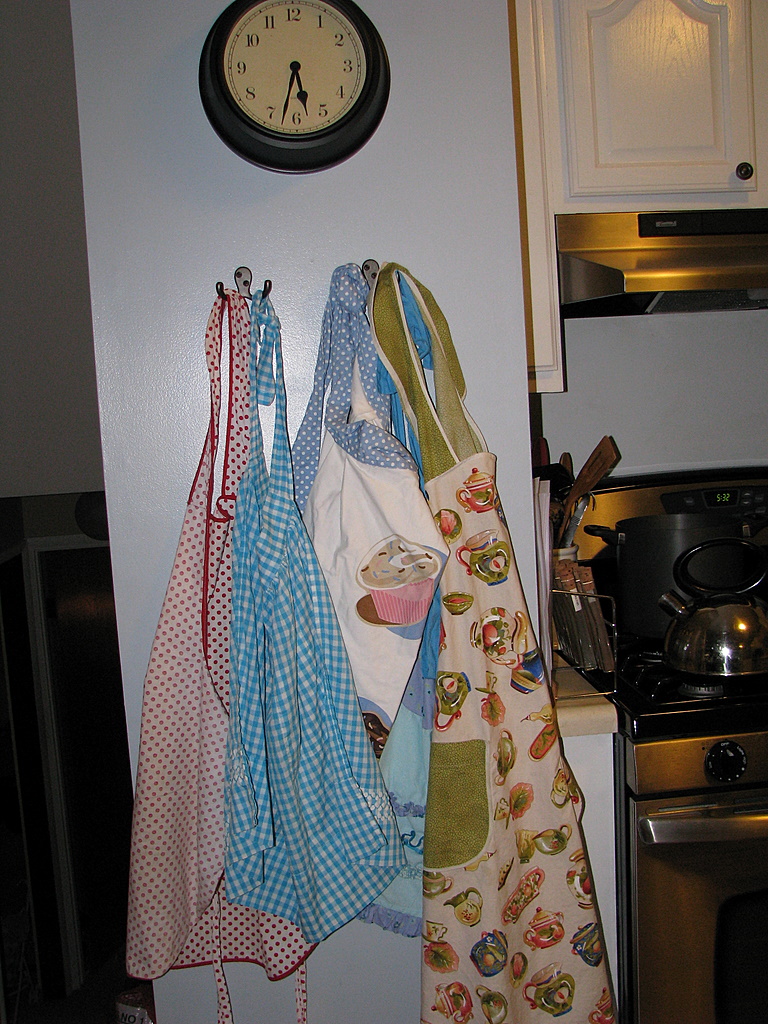
Next to my stove are hooks for my aprons. This was a great way to add some “art” to the walls without making an investment. $3.99 to display a few of my favorite things in the world.

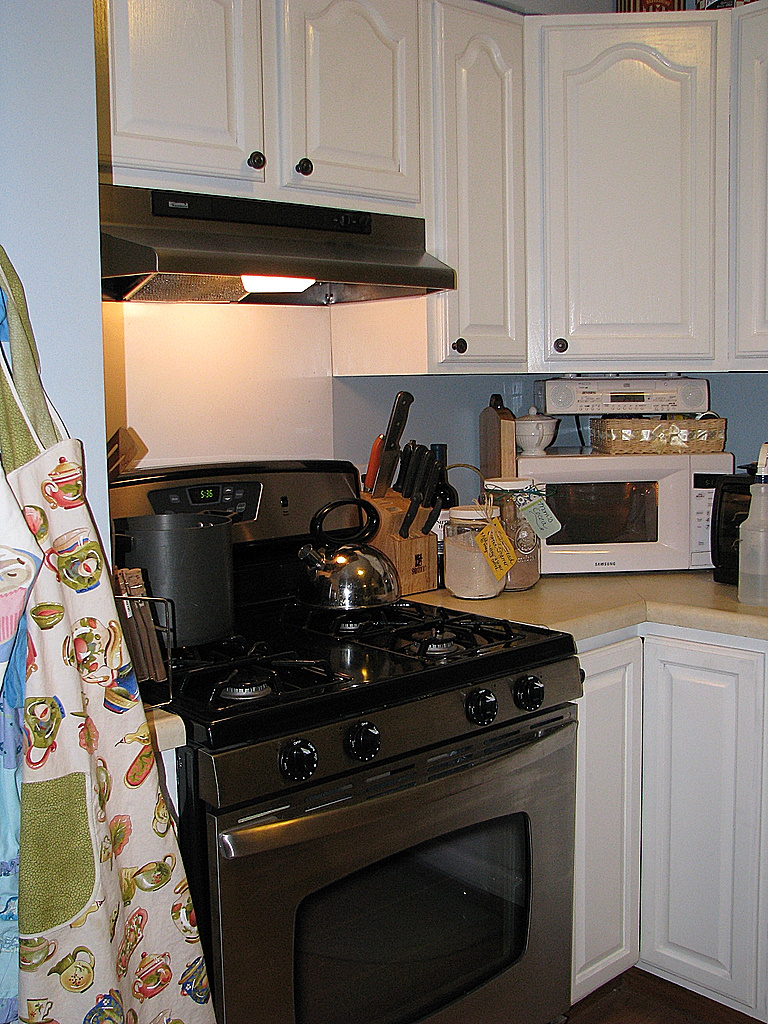
We updated our stove with this fancy stainless steel number. It has everything I could ever want for this space and, while not free, I was able to get a killer deal on it. The stove was marked for $1K and I was able to get them to accept $500. Always pick those floor models, I say, and point out any and every flaw you can…even the stupid stuff. That is how we were able to score this stove.

The range hood was free and part of our Sears shopping spree that we won. Our refrigerator is the last of the white appliances to make an exit, but we are watching Craigslist to see if we can score a good deal on that.
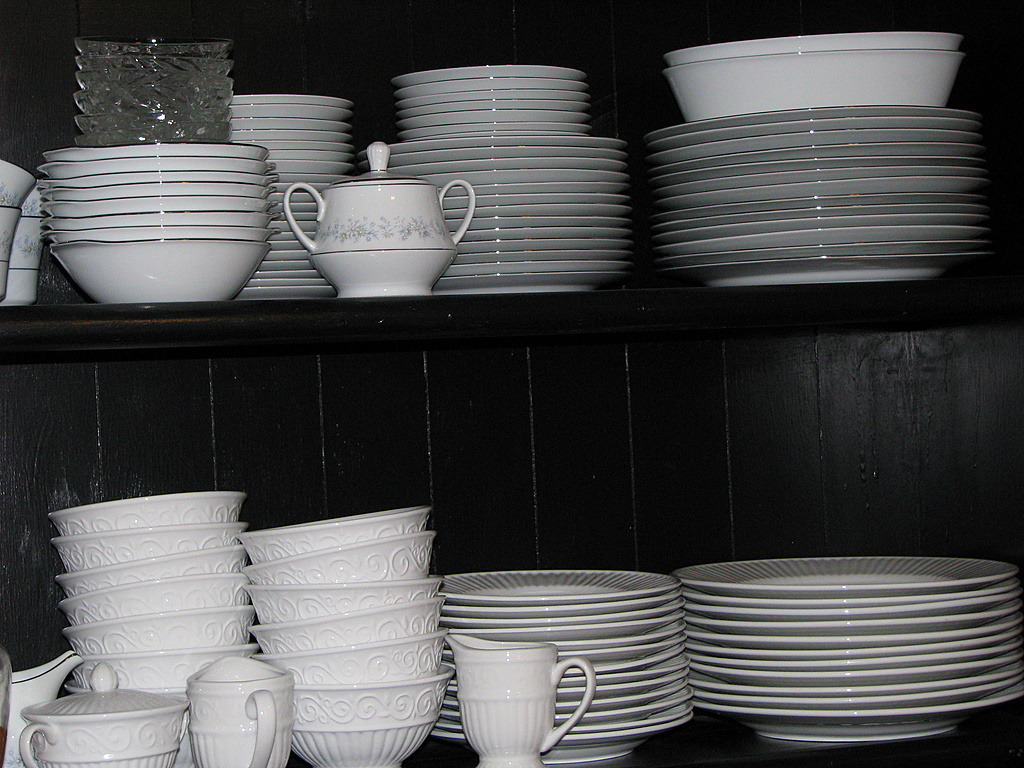
Since cabinet storage was an issue, I was able to find an old ugly eighties desk with a hutch from a thrift store to remedy the problem. I did my makeover work on it and it is now my favorite piece in the house. This was cheaper than buying new cabinets and I just love how it is open for guests to grab their own dishes. The white dishes really make me happy and make me feel like a little Martha when I am entertaining! These dishes were priced at $14.99 for a service for six, including all of the serving dishes! They aren’t the best quality, but I love the clean lines and design on them.

I also have my new china from my mother-in-law that looks so elegant on our tables. She recently brought this over to add to my dishes and I was so thrilled.

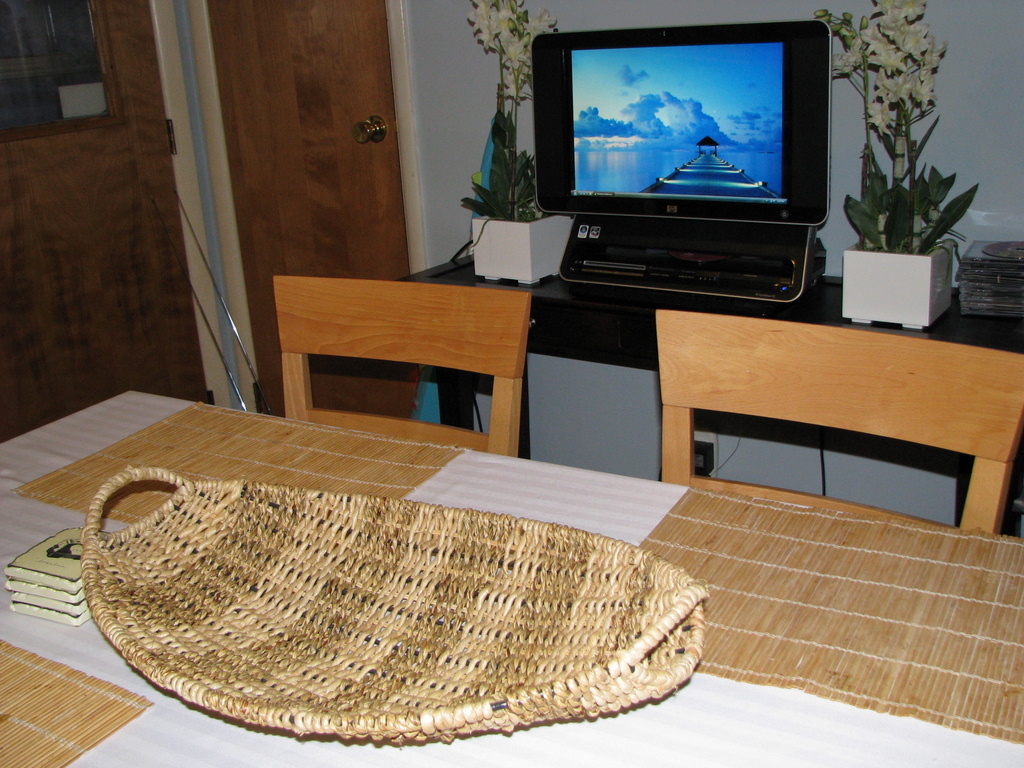
While it can make our seating a little more cramped, we did add a narrow table along the back wall to keep our computer. This has our dinner music on it and I can watch the television while I cook. The two plants on either side were purchased from Target, clearance to $14.99 each. The basket on the table, normally brimming over with fruit, is empty since I need to head to the grocery store. The basket was also a clearance item that I purchased from Marshalls along with some of the decor for our walls.
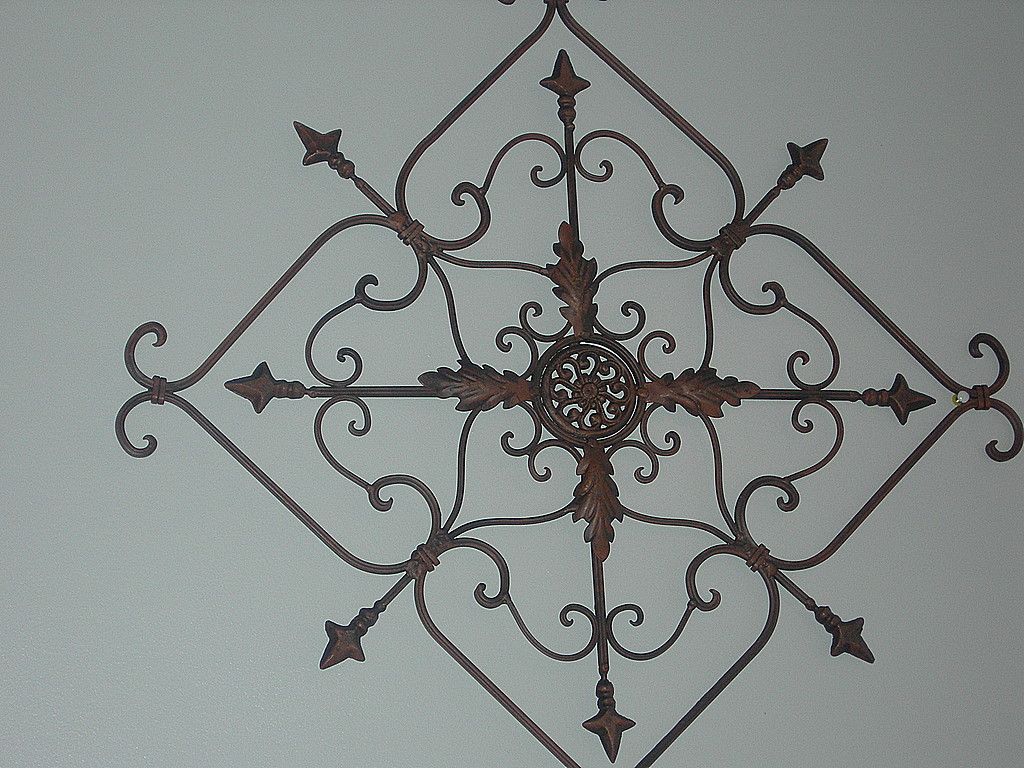
Like this piece that is centered along our back wall! This was a clearance item at Marshalls for $9.99. It got discounted with some of their summer pieces and I thought it would be a perfect focal point in that open spot.

I hope you enjoyed the tour of our kitchen!
We could not be more proud of the space we created…on a budget!

*Originally aired on January 2, 2008*

Weekend Project: New Workspace

September 3rd, 2008

Today we are continuing our week of Play it Again, Momma entries and today’s focus will be on renovating your home on a budget. We have done a lot of work to our late sixties tri-level home and with each project, I feel a little more pride about our home. Our space might be limited, but each entry should showcase how we make our space work for us!

I am so excited because Ryan & I were finally able to complete another project on our to-do list… creating a workspace for two.

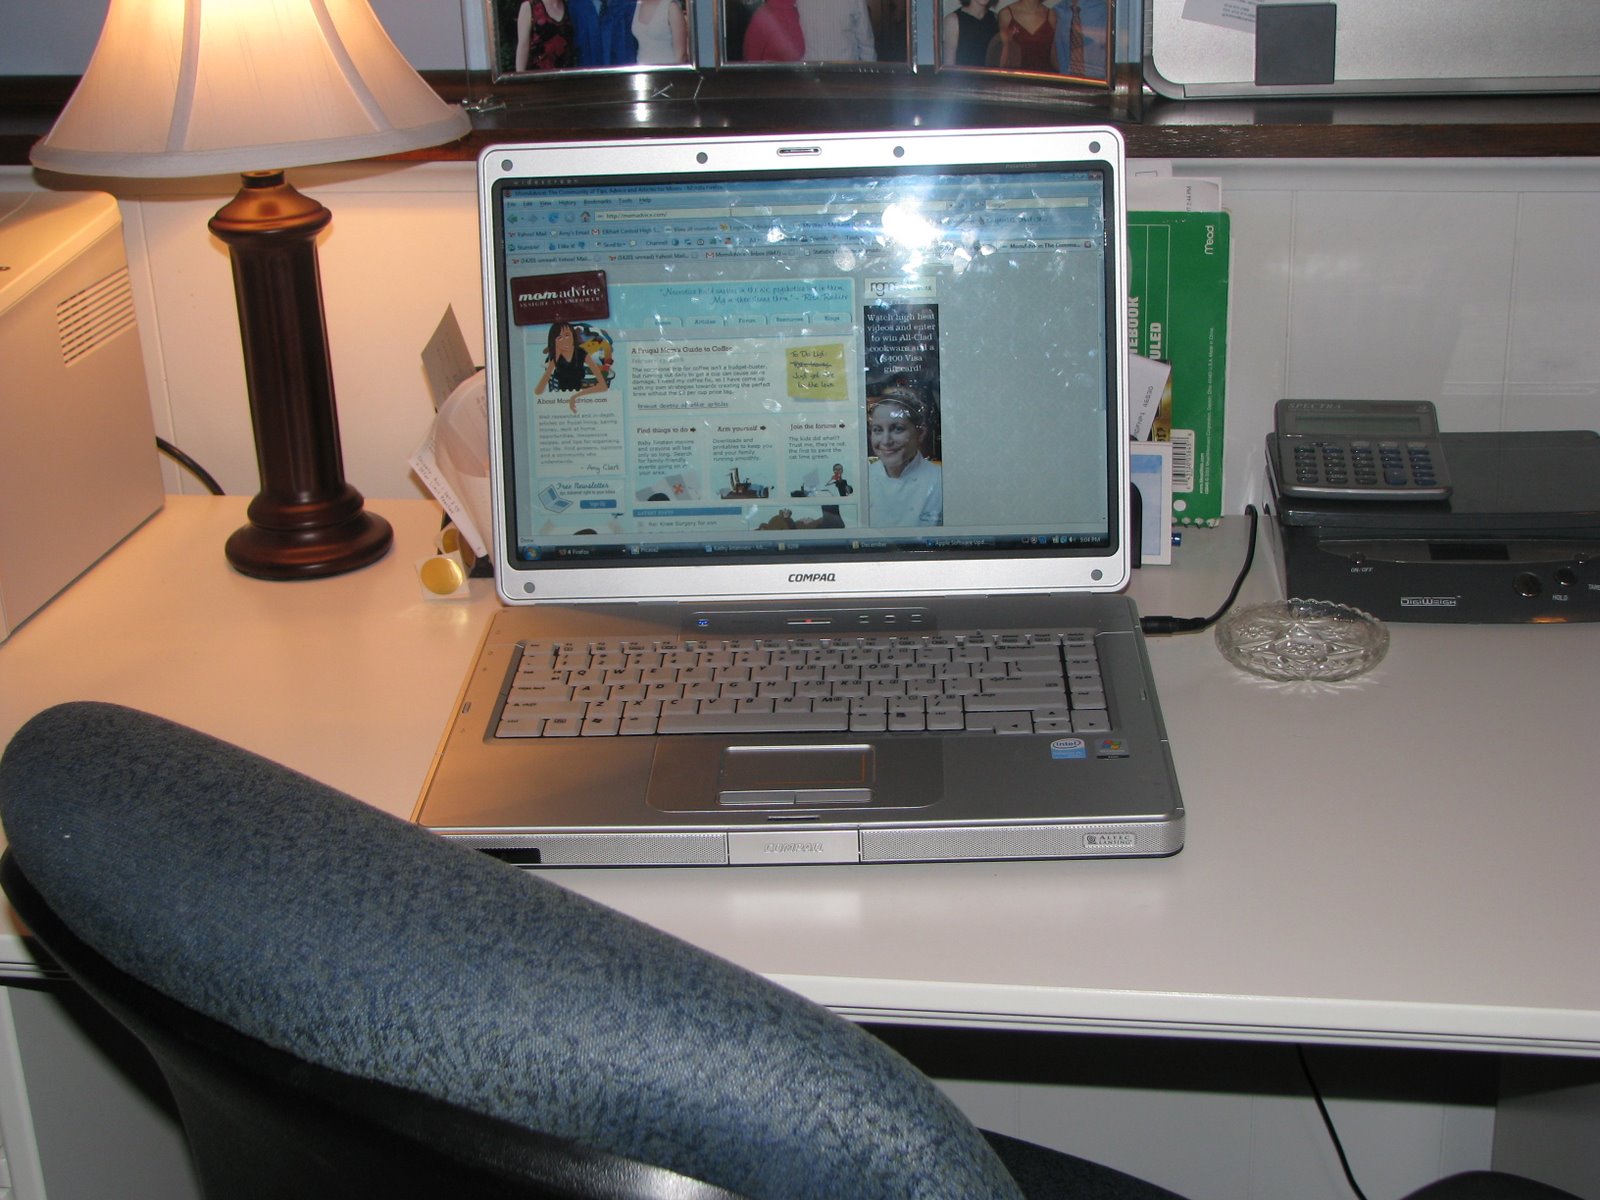
We have had a lot of challenges with the two of us both working from home and both working on the computer. We both needed computer time and we were constantly battling for the computer. One of my first investments was getting a laptop. Thanks to having a computer guy for a hubby, he was able to get me an excellent deal on a laptop and I was partially in business.

I say partially because we were still battling over workspace. I have back problems and would want to sit at a desk. He would need the desk for his computer so we would once again be duking it out for the workspace. One of us would be sitting at our children’s tiny table trying to talk about work ideas and the other one of us would be sitting all comfy at the desk. We also had other scenarios where I would try to be productive working in my room and then fall asleep or I would attempt to work from the couch, but someone would want to watch television. In short, it wasn’t working.

Finding a desk though that could fit our “team Clark” philosophy was tough and expensive! We decided to use some of the money that I earned this year to put towards getting a desk that would be perfect for us to work together.

We found what we wanted in the Pottery Barn catalog, but we aren’t a Pottery Barn kind of family (budget wise, I mean). Ryan was able to find it for a fraction of the price on Target’s website though and you can’t even tell a difference between the two designs. He also found a deal where we got 15% off and free shipping. Timing it with that really helped save us some additional money. While it was definitely a splurge, it provided the perfect space for the two of us to work together.

Welcome to my new workspace- isn’t it great? You can expand these pictures to view it in more detail. We purchased three cabinets and bought two desk tops to make our new work area. The two desk tops rest on the center cabinet and make one seamless unit. This set-up works great for us because we work together on many of our projects.

Not only is this great for working together, but it has created a lot more space in our office because it is all against one wall versus our corner desk that we had before.

This set-up was not without challenges because we had originally intended for it to go along our back wall and found that the unit was a lot larger than we had anticipated. We had to remove our closet doors and allow the unit to go basically into the closet space, which meant that this closet is now open and viewable to the world. I am not liking that too much, but it was a way to encourage us to weed through the items in the desk and in the closet to free up space and make it look more organized. I am thinking about making a curtain that would just partially hide this from view since a full set of curtains probably won’t work.

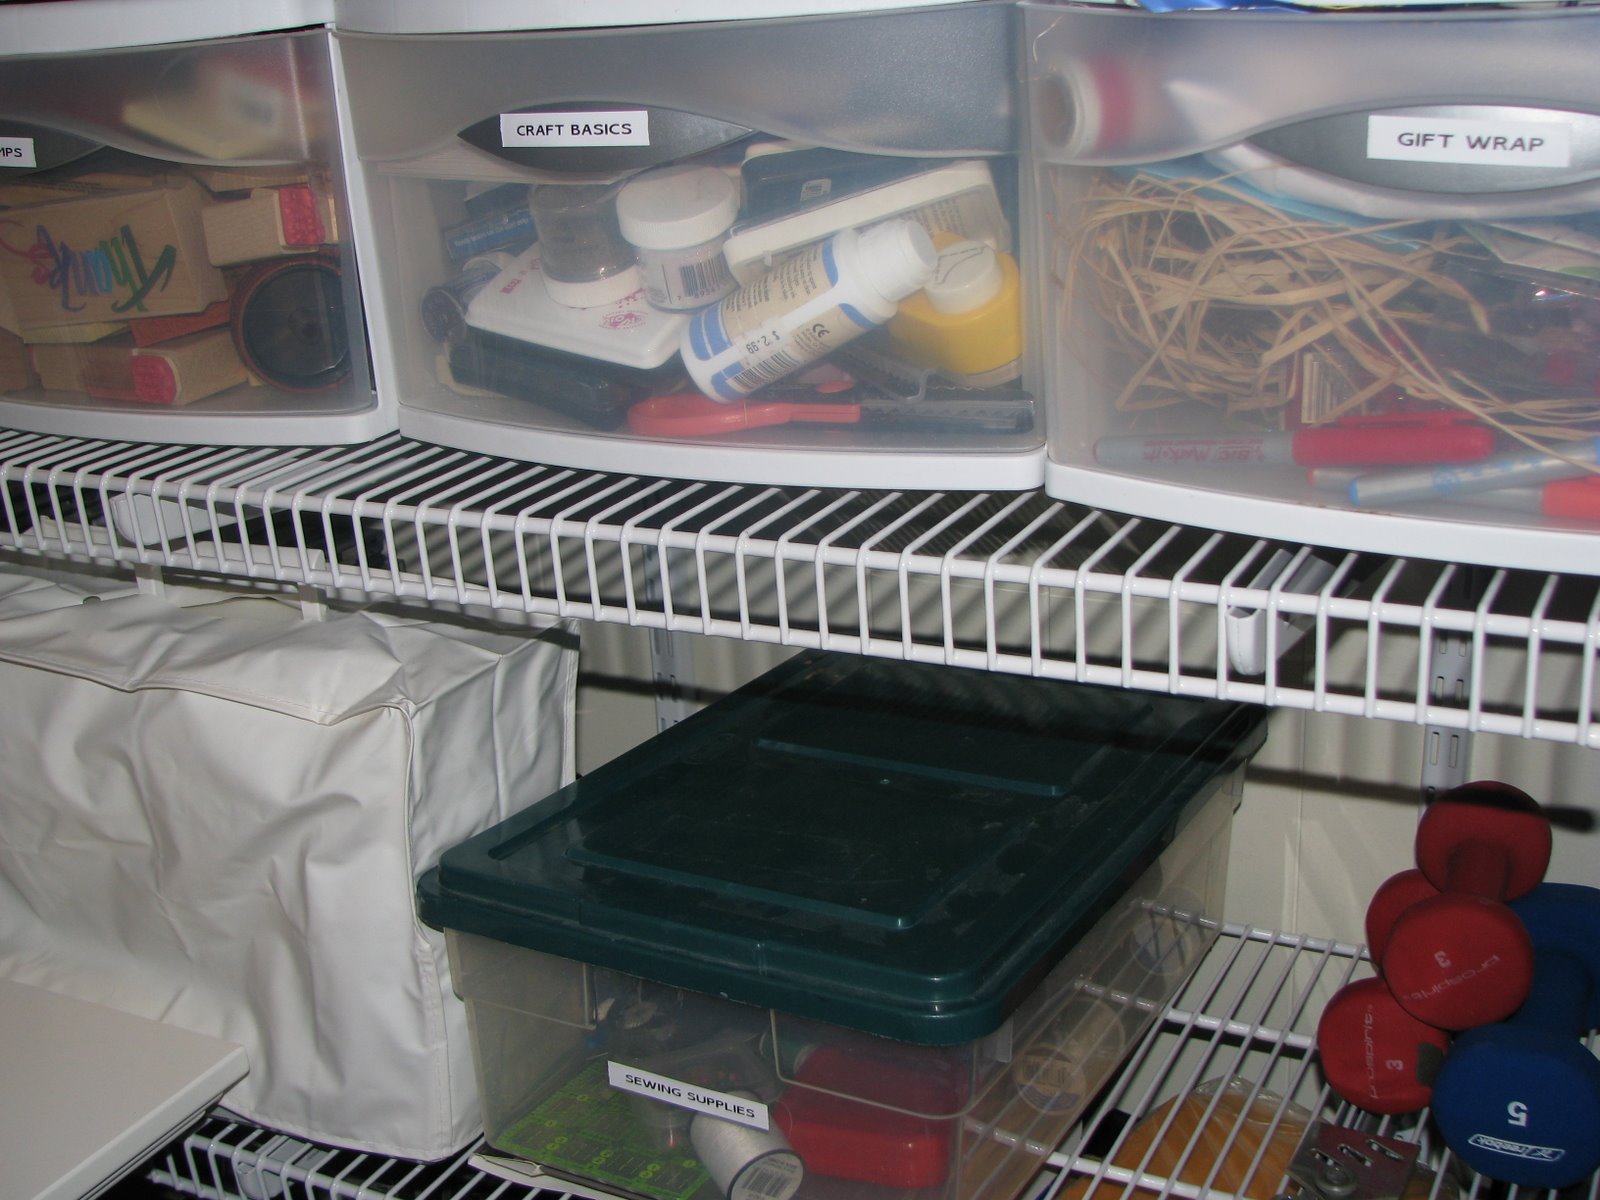
I did tackle an enormous project though…those craft supplies are finally in order! That was no small undertaking and I am so happy to see everything neatly arranged. I even have space for my sewing machine so I can use my workspace to craft as well.

I organized the closet without making any investments. While I think pretty baskets would look so much better, the practical side of me won this battle and I am just using things we already have. If I add a curtain, I can close this off a bit and no one will even notice.

On the opposite wall we have my children’s table and chairs. They can be in the office with us while we work and they can work on their own little projects. You can see past pictures of how we made our workspace kid-friendly.

This is an investment that I hope really pays off because we can both work together and each have our own space. Being productive, without a space to call your own, can be difficult. We love working together so this the ideal space for us!

*Originally aired February 18, 2008*

Find An Inexpensive Hobby

September 2nd, 2008

In my basement are bins and bins of beautiful art supplies and oodles of crafty fun. I could spend years making things out of the items that I have already bought…and yet when I go to the craft store, I still feel that familiar tug that I really need more. I love to explore different hobbies and I love to craft. The fact that I am no good at crafting doesn’t seem to stop me and maybe you are in the same boat? Have you ever really thought about the amount of money you are spending on your hobbies? Have you ever thought about how most of the really popular hobbies cost lots of money to accomplish? Do you have oodles of craft supplies and still have an urge to buy more?

Hobbies are great for a number of reasons and I think they are important to be shared in this series. For one, if you have a hobby it can be a wonderful diversion from shopping and spending money. Hobbies can cost money, but you can choose to embrace hobbies and use your talents creating things that don’t cost much. Although some people might consider shopping a hobby, it shouldn’t be and finding things that fill your life in a positive way can have a positive impact on your wallet.

Not only do hobbies keep you away from shopping, your hobbies can also be turned into profits for your family. If you become good at one of your hobbies, you could potentially earn money with the talents that you have. For example, I love to create hair accessories for my daughter and my friend’s love the accessories that I have made for her. I wasn’t really intending to go crazy selling them, but my interest in making things for her created a small amount of revenue for me.

I can also use my hobbies to help us save our family money. Instead of buying a wreath for our front door, for example, I can make my own out of things in our home or by buying a small amount of greenery from a craft store. Learning to make things that you would buy can help your finances a lot!

Hobbies also have been proven to help people medically. People who are chronically stressed have poor health, while regular relaxation can promote good health. If I relax and really enjoy something in life, I can prevent things like high blood pressure, digestion problems, ulcers, heart disease, and insomnia. Having a relaxed attitude and enjoying the little things in life lead to better health and fewer doctor visits. Who could argue with that?

Hobbies don’t have to be expensive and many hobbies, in fact, don’t even cost a dime. I found a great book on exploring hobbies called (no less!), “Get a Hobby.” In it are tons of great ideas for hobbies that cost little to nothing and can keep you busy for months on end.

Here are some hobbies that you can pursue that shouldn’t cost you a lot of money and will help to keep you out of those craft stores:

Genealogy– Much of your research can come from things that you already have or from items in your relative’s possessions. Try to gather as much information as you can from your family members (names, birthdates, marriages, deaths, significant life events, etc…) and explore this information first. Next, look through old cookbooks, photo albums, newspaper clippings, resumes, scrapbooks, and yearbooks for more family information. You can then begin looking to websites like Genealogy.com or the Family History Library of the Church of Jesus Christ of Latter-Day Saints. Utilize this information to make a family tree.

Tina Barseghian, the author of “Get a Hobby” also suggests creating a living history interview with people in your family. Record them on camera or with a tape recorder and ask them questions about the family and about themselves. (Note: I am going to be exploring this more through another avenue of recording your life history and I can’t wait to share it with you all!)

Journaling & Blogging– To be honest, I have never really thought of my blog as a hobby, but I guess this would be one of the best hobbies I have ever taken on! Blogging and journaling are wonderful ways to preserve memories, to share your life story, or to talk about things you are passionate about.

After I went to a viewing of “The Secret” I began keeping a gratitude journal. For me, this has helped to remind me of all that I have and I also try to do this when I feel the impulse to shop. This has been very therapeutic for me and I feel like it has had a positive affect on my attitude too.

I try to keep all different types of journals that I look forward to sharing with my children. We have a journal of all the funny things that they have said, a Christmas journal, my gratitude journal, and then I do my blogging about things that we do around the house.

You can find beautiful journals at the dollar stores and for one dollar you can begin focusing on all of the wonderful things you have in life.

You can start a free blog through Blogger, My Space, or LiveJournal (just to name a few!)

These are just two examples of great hobbies that you could start today. There are tons others like gardening, cooking, sewing needlework, rubber stamping, decoupaging, or calligraphy.

If you need crafty inspiration, visit the Martha Stewart site and behold her crafting glory! I love to just hunt through the archives and see cool ideas that I can do in my house, that don’t require a lot of money.

I also spend lots of time at our local library hunting through books on crafts that I would like to explore. Many times just reading about the crafts gives me a feel for whether or not I would like to try something, without making the time or money investment into the craft itself.

If you want to learn how to tackle new hobbies, check the big hardware stores (Home Depot or Lowes) for free classes that they offer. Many craft stores also offer free or very inexpensive classes, where you can try a hobby out.

Just remember when going into a hobby, that you really want a hobby that will not require a huge financial investment. If it will require an investment, tell family and friends what items you will need to accomplish the hobby or ask for a gift card to the store to buy the items. One year, I used my gift card to
take a cake decorating course at our craft store. The time invested has helped me greatly and saved us lots of money on birthday cakes.

Potential Monthly Savings: $20 or more

Sound Off: What are your favorite hobbies? How do you save money when it comes to buying the supplies needed to do these?

*This entry originally aired on August 22, 2007*
Eat Your Heart Out Martha: Bubbly Magnets

September 2nd, 2008
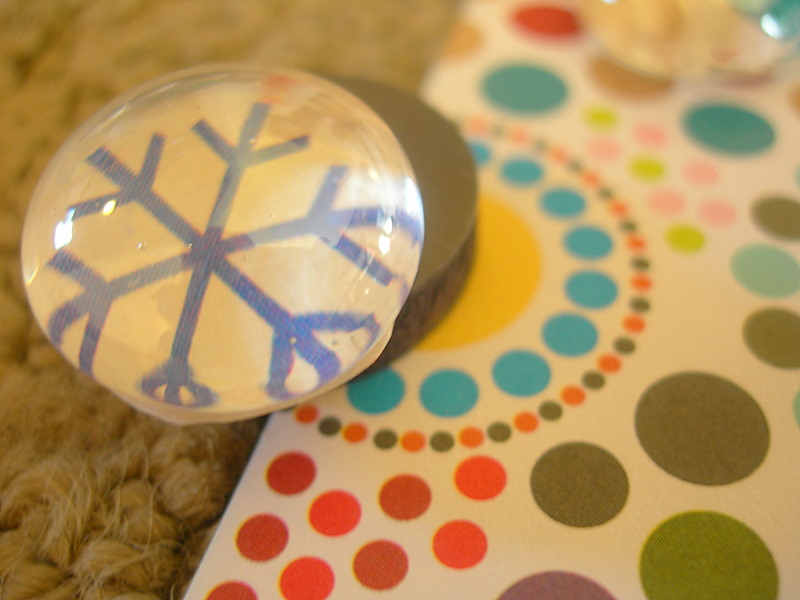
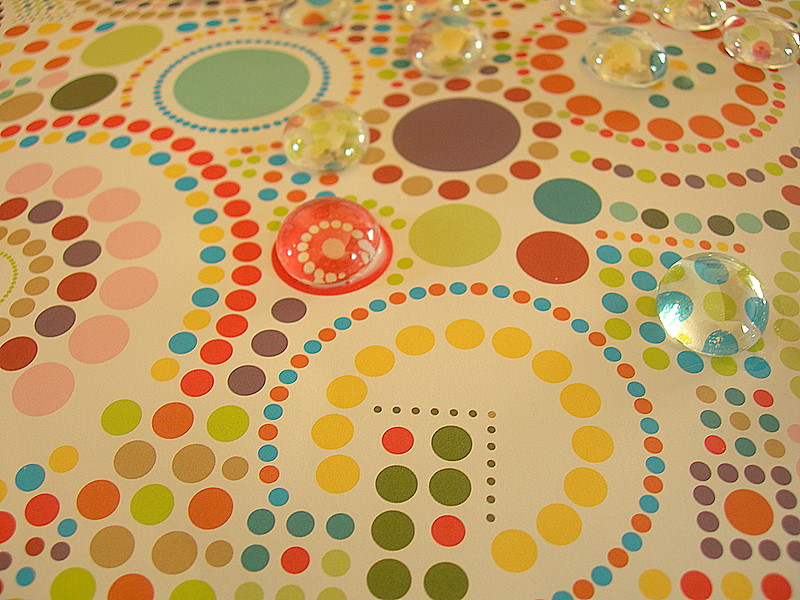
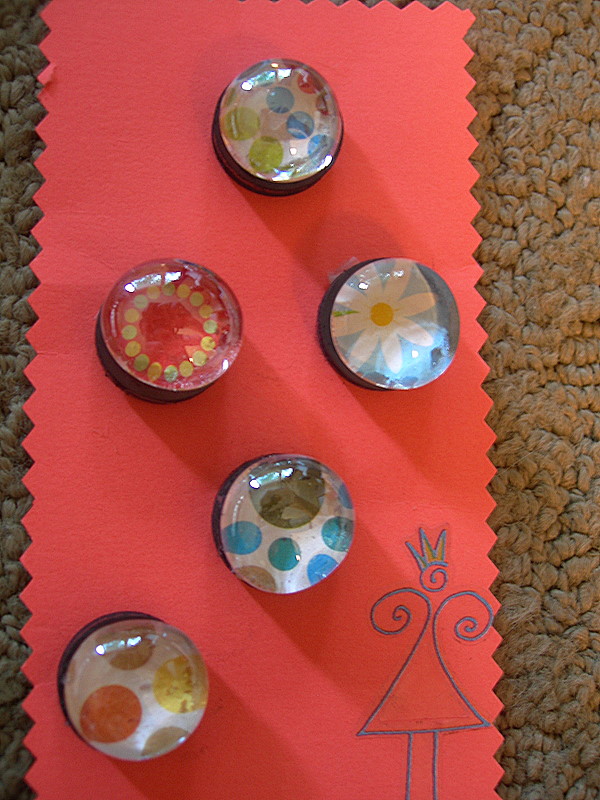
Today I wanted to share a little holiday craft that I have been working on. I have been making some bubbly magnets to go in stockings and as small gifts for those special people in our life.

Remember, I am no Martha Stewart, so any craft that I share is something that a child can do. I am trying to share some little ideas for things that you can make to give for the holidays. Last week I shared my homemade spiced nut mixture and this week I am sharing my magnet craft. Crafting can be expensive, but this craft is affordable and highly addictive!
Supplies Needed:

Flat marbles (These can be purchased at the dollar store or in the floral section of your local craft store)

1/2″ or 3/4″ Round magnets (These are the most expensive purchase. I believe they are $6.99 for 50 magnets, but you can use the Michael’s 40% off coupon in your paper towards this tab)

Modge Podge Adhesive Glue

A small paintbrush

Hot glue gun and glue sticks

Scissors

Pictures for your magnets (you can use photographs, wrapping paper, magazine pictures, scrapbooking paper- anything with a fun design)

Instructions:

Take your marbles and center it over your desired design, just to make sure it will fit perfectly under your marble. Dip your brush into the Mod Podge glue and brush the glue onto your design. Center your marble over the design and stick it to the pattern. Allow the glue to dry for fifteen to twenty minutes. If you are doing more than one magnet, on the same sheet, repeat the process on the paper or move on to your next sheet of paper.

Once your glue has dried, cut around the marbles, as close to the edges as possible. Now take your glue gun and dab a bit of glue on the magnet and attach your marble over the magnet piece. Allow these to dry completely.

Ta-Da! Cute new magnets for your fridge!

* This post originally aired on October 15, 2007*

Eat Your Heart Out Martha (Or How to Make a Diaper Cake)

September 2nd, 2008

Welcome to a Play It Again, Momma week! This week we will be highlighting some of our favorite entries and today’s entries will be all about crafting. What could be better than that? I hope you will enjoy these and remember, if I can craft it, your kid can craft it!

If you can believe it, I have been sitting on this blog entry for a year now. I only know this because the cakes that I have pictured were for my nephew and my best friend’s son and they are both celebrating their first birthday!

Even though I haven’t shared about this, my heart swells a little because I was so proud to carry such a pretty gift into the hospital. I felt even more proud when the nurses stopped me and asked me where I bought it. It was one of my proudest Martha moments because I am not very crafty, but I try oh-so-hard to have those impressive moments in my life.

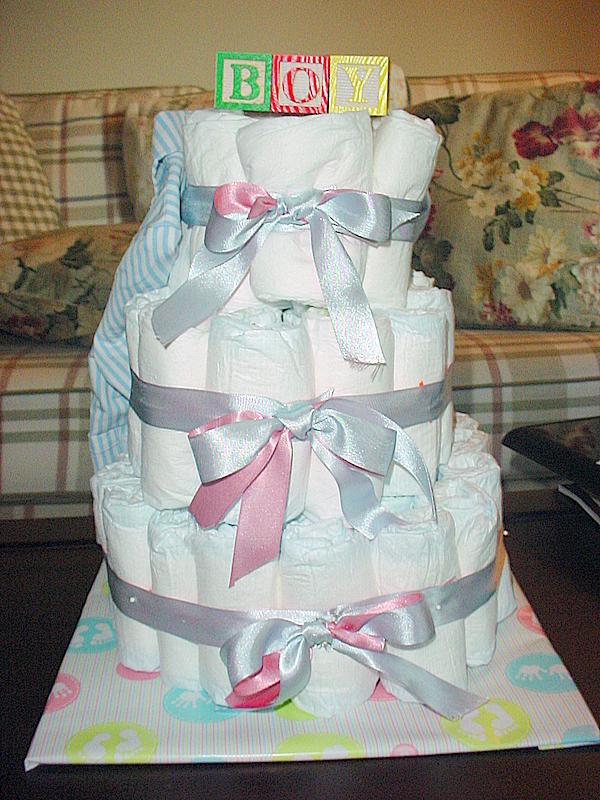
Making a diaper cake is so easy and the results are extremely impressive! I had seen many companies advertising these on their websites, but they were charging fifty dollars (or more!) for these cakes. I ran a search and ran across this great picture tutorial on how to do it, and decided that it was definitely something I could do with just a couple of small purchases.

For my diaper cakes, I needed to establish a base for them so that I could transport them easily. I found a box in our garage and cut a square of cardboard out of it to rest the cake on. I then covered the cardboard with pretty wrapping paper in blues & pinks.

Next I followed the instructions for making the first diaper layer and used a stretchy headband that I had to bring the base diapers all together, making the first layer of the cake. It had suggested using a rubber band, but I didn’t have any that would secure that many diapers together. I then wrapped pretty ribbon around it and tied them together with that, securing them together with white tipped pins, which made it look like part of the ribbon itself. With the next two layers, I was able to use a rubber band to put them together, and then covered the rubber band with the ribbon.

Once you have all of your layers, you can stack them and stick a dowel rod in the center, or anything that is long and will help them stay jointed together.


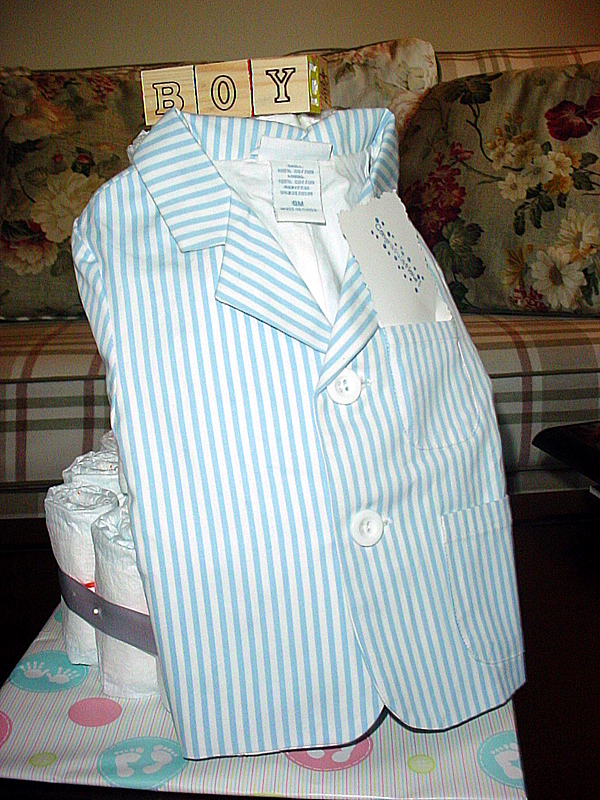
I went to Target and found little man blazers that would be perfect to go with the cake. I pinned these to the back and stuck a little stamped card in the pocket that said, “Congratulations!”

Next I went to the dollar store to buy some shrink wrap and two sets of wooden blocks (over by the baby supplies). I spelled out BOY on each of them and saved the rest of the blocks for our daughter to play with.

Shrink wrapping is very easy! Take the bag and pull it over your item and hold it at the top. Turn your blow dryer on and blast it until the wrapping shrinks tightly to fit your item. Use the bow that is supplied, or tie off with a bow of your own!

Diaper cakes can have small items tucked in the center of them from the mom’s registry or you can go with a themed cake. Remember, the more items you add, the more you add to your cost. If you are trying to keep the cost down, keep it simple.

Here are a few theme ideas:

Bath time Cake- add a baby towel, tuck washcloths in the center and put a Rubber Ducky on top. You can also add small bath toys or bubble bath.

Elegant Cake- Make your diaper cake look like a wedding cake, and surround it with fresh or silk flowers. People will hardly believe their eyes when they see it.

Beach time Cake- This would be for a little later in the baby’s life, but you can fill it up with beachy items. Some suggestions are a shovel, pail, baby sunglasses, a hat and some sunblock.

Night-Night Baby– Include a copy of, “Goodnight, Moon” with this cake. Add a little sleeper set, some calming nighttime lotion, and a compact disc of sweet baby lullabies.

The cost for each of these was:

Diapers– Free! they were given to us as a gift and Emily wore cloth so we never used them!

Diaper Cake Base– Free- made out of an old cardboard box we had!

Ribbon– $1.98

Little Man Blazer– Clearanced out for $2.98 at Target! Gotta love those clearance items!

Shrink Wrap & Baby Blocks– $2

Total Cost= $6.96

Sound Off: Would you guys like to see more, “Eat Your Heart Out, Martha!” moments on here? I have one a year, but I am happy to share the few I do have! I hope this gives you another thrifty gift alternative!

Ask the Frugal Momma: Getting to Know the Bread Machine

September 1st, 2008

You have been talking about bread machines and making bread. I am interested in doing this since I am home all the time and I love fresh bread.

I was at the Goodwill and saw many of them and they were kind of cheap, like 20.00 or less. I am dumb so help me out. Does the machine knead the dough and bake it and everything in the bread machine?

If I would purchase one at the Goodwill how would I know if it works or not?

I am interested. Please help me find a way in a new venture.

Signed,

Future Bread Maker

First of all, thank you for your question! The Ask Frugal Momma column can’t happen without your questions, so please keep sending them my way. You can email any and all questions to amy@momadvice.com. We have had some fun topics and I am very excited to share with everyone!

Do any of you have bread machine gathering dust in your house? A lot of people buy these appliances and then end up donating them at their local thrift store because they never use them. I think of the bread machine as a modern day convenience, but in a culture where we want everything NOW, waiting for a loaf of bread can seem like an eternity. Why wait for a hot loaf of fresh bread when you can grab a loaf at your supermarket? And what exactly is the purpose of that appliance that is taking up space on your shelves?

On any given day in our house, you will find our bread machine happily humming along and whipping up fresh dough and bread for us. We use our bread machine almost daily, and spare ourselves the expense of fancy bakery breads. Not only that, but our bread machine has a regular performance in our house on Friday nights. This appliance makes our favorite pizza dough for our official “family night” together.

The purpose of a bread machine is to be able to make fresh bread when you want it. The reasons vary from person to person on why they choose to make their own bread. Many people have concerns about the additives and preservatives that are found in store-bought breads. Another reason that many people choose to make their own bread is because they just enjoy the taste of homemade bread. My reasoning for making our own bread is because I like to save our family money. Making your own bread costs so much less than purchasing a loaf of bread, and the rising grocery costs have only fueled my desire more to make it at home.

I am not a baker though and our days seem to be jam-packed with activities for our family. Taking the time to knead, rise, and bake bread…well, that hasn’t seemed to top the priority list at this point in my life. Lucky for me, there is an appliance that can do all the work for me and all I have to do is pull the finished loaf or ball of dough out.

To begin, all you have to do is put the ingredients in and select your setting. Some of the older machines have just a handful of simple settings. I find that the settings we use most on our machine are Basic and the Dough cycle, which can be found on every machine. The basic cycle is just the basic setting for making a loaf of bread. The Dough cycle just completes the kneading and rising of the dough. Once the dough cycle is complete, you can take the dough out and shape it into your loaf pan or do fancy braids or rolls out of the dough.

Inserting your ingredients into a bread machine is also very straightforward. If you are making the loaf right away, you can insert the ingredients in any way that you want. All of these ingredients will immediately be stirred together and so it will not matter what the order is. If you use a timer delay on your bread machine, delaying the start time of making your loaf, it is imperative that you put the ingredients in the right order or your loaf will not turn out right. The order of ingredients is liquid (liquids include water, oil, milk, eggs, or honey), flour, other dry ingredients (salt, sugar, baking powder, seasonings), and ending the ingredients with your yeast. The most important part of putting the yeast in is to make sure that you make a small indentation into the center of the flour so that the yeast does not react with the other ingredients.

Upon inserting your ingredients, your bread machine will take over the process from there. The machine will knead the ingredients together, give the bread its rising time, and then it will bake the bread. The bread machine will signal when the bread is ready and you can allow the bread to cool inside of the bread bucket.

There is no need to spend the money on convenience bread machine mixes; in fact, you can make your own convenient mixes handy for the week. I take plastic storage bags and make an assembly line of the dry ingredients and do my bags once a month. On the outside, just write what liquids you will need to add and you will only have a dirty kitchen once.

A quick glance at grocery store prices though and you will wonder how there could be any possible savings with making your bread at home. The key to making this the least expensive on your family is to purchase all of your ingredients at your local wholesale club. With proper storage, you can buy the ingredients in bulk and save your family loads of money. For example, our wholesale club has twenty-five pounds of bread & all-purpose flour for under $6 each. Two pounds of yeast will run you just under $4. What a difference compared to the prices in your regular supermarket!

For storage, flour can be stored for up to a year in an airtight container. With bulk storage, a large plastic bin that has been clearly labeled is ideal to keep your flour fresh. Yeast is the easiest ingredient to store and has a very long shelf life. I store my yeast in a clear jar in our refrigerator door. With both of these ingredients, writing an expiration date on the label will also remind you of when the item is going to expire.

If you do not have a bread machine and are looking for one, garage sales and thrift sales are a great place to hunt. I see these machines for $10 or less, and you will definitely get your money back from the savings of making your own bread. When you find one, ask if you can plug it in and make sure it is working. Just check that it actually powers up, that there is a bread bucket inside, and that there is a paddle in the bottom of the bread machine to stir the ingredients. Having a manual with it is handy, but usually can be found by searching online.

Good luck in your quest to find a bread machine and I hope it is a well-loved appliance in your home!

Related & Helpful Information:

Hillbilly Houswife’s Bread Machine Basics

Buttery Bread Machine Rolls

My Favorite Pizza Dough (after much trial & error)

Storing Homemade Bread & Bread Ingredients

Homemade Croutons

Dinner is in the Bag

* This post originally aired on June 28, 2007*

Best Birthday Cupcakes In the World

September 1st, 2008
My sister-in-law’s boyfriend celebrated his birthday Friday night. To help out with the evening’s festivities, I offered to make the cupcakes for his special day. I found a recipe in my favorite cupcake book, “Cupcakes from the Cake Doctor” and picked her “Best Birthday Cupcakes” recipe.

These cupcakes are as close to a bakery cupcake as I will probably ever make. They are light and sweet, but not too sweet. They have a great consistency and are perfectly moist and sturdy enough to hold up to a good dose of yummy frosting.

I will probably never search for the perfect birthday cupcake again after sampling these. I paired the cupcake with her Chocolate Syrup Frosting which was the perfect way to top this delicious cake.

No more searching, ladies! This is THE cupcake for every celebration. Enjoy!!

The Best Birthday Cupcakes

24 paper liners

1 package plain butter recipe golden cake mix (I subbed with white and loved it!)

1 package (8 ounces) reduced-fat cream cheese, at room temperature

1/2 cup sugar

1/2 cup water

1/2 cup vegetable oil

4 large eggs

1 tablespoon pure vanilla extract

Chocolate Syrup Frosting (recipe to follow)

Colored sprinkles or candy cake decorations for garnish

Place a rack in the center of the oven and preheat to 350 degrees. Line cupcake cups with liners. Set the pans aside. Place the cake mix, cream cheese, sugar, water, oil, eggs, and vanilla in a large mixing bowl. Blend on low speed with an electric mixer for 30 seconds, until the ingredients are well blended then stop the machine and scrape down the sides. Increase the mixer to medium speed and beat for 1 1/2 minutes to 2 minutes more, scraping down the sides again if needed. The batter should be smooth and thickened. Spoon or scoop 1/4 cup batter into each lined cupcake cup, filling it two thirds of the way full (You should get between 22-24 cupcakes). Place the pans in the oven. Bake the cupcakes until they are golden and spring back when lightly pressed with your finger, 24-27 minutes. Remove pans from oven and place them on wire racks to cool for five minutes. Run a dinner knife around the edges of the cupcake liners, lift the cupcakes up from the bottoms of the cups using the end of the knife, and pick them out of the cups carefully with your fingertips. Place them on a wire rack to cool fifteen minutes before frosting. Meanwhile prepare your frosting…
Chocolate Syrup Frosting

1 stick butter, at room temperature

1/2 cup unsweetened cocoa powder

1/2 cup chocolate syrup

3 cups confectioner’s sugar, sifted

1 tablespoon milk

1 teaspoon vanilla extract

Place the butter, cocoa powder, and chocolate syrup in a large mixing bowl. Blend with an electric mixer on low speed until just combined (about 30 seconds). Stop the machine and add the sugar, milk, and vanilla. Blend with the mixer on low speed until the sugar is incorporated, 1 minute. Increase the speed to medium and beat until light and fluffy, 1 minute more. Use to frost your cupcakes.

*This post originally aired on October 8, 2007*

Snickerdoodle Cupcakes

September 1st, 2008

Welcome to a Play It Again, Momma week! This week we will be highlighting some of our favorite entries and today we kick off the week with three great recipes. I hope you will join me this week as I highlight some oldies, but goodies!


We had a reason to celebrate this week because my husband started a new job. We are so grateful that he has been given this opportunity and that he will be able to start a new adventure on his career path.

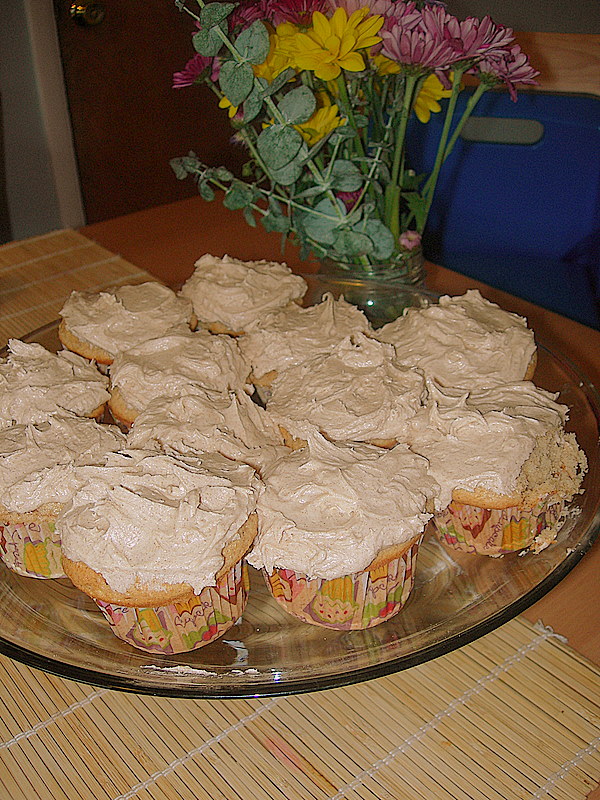
We wanted to do something to celebrate his first day of work so we made him one of his favorite treats…Snickerdoodle Cupcakes!

These are so delicious and I got the recipe from one of the Cake Doctor books. It has been a favorite in our house for several years and a frequent request for family birthdays.

The cake has just the right blending of flavors and the cake mix make these easy to whip up for unexpected company. It is the cinnamon frosting that pushes it over the top though so take the time to make the icing from scratch since you are saving time on the cake by using the mix!

I hope you can try these in your house- let me know what you think!

Snickerdoodle Cupcakes (these can be made into a cake too- whichever you prefer)

1 package plain white cake mix
1 cup whole milk
1 stick of butter, melted
3 large eggs
1 teaspoon vanilla extract
2 teaspoons ground cinnamon

Frosting:
1 stick butter
3 3/4 cup confectioners sugar
3-4 Tablespoons milk
1 teaspoon vanilla extract
1 Tablespoon ground cinnamon

Preheat oven to 350 degrees and flour & grease 2 9″ pans (for cakes) or line your cupcake tin. Place cake mix, milk, melted butter, eggs, vanilla, and cinnamon in a large mixing bowl. Blend for three minutes (stop to scrape once). Pour into pans and bake for 27-29 minutes (for cake) or 22-25 minutes (for cupcakes). Allow the cakes to cool completely.

Beat butter until fluffy for frosting. Add all other ingredients.

Note: I froze half of these (without frosting) to keep in our freezer for another occasion. They freeze very nicely!

One More Picture By Popular Request

August 29th, 2008

No more after this- I promise! This is #10 that has been zoomed in. I am guessing this is the money shot!