Apron Full of Giveaways 06.23.15

June 23rd, 2015

Vintage Gathering Apron via Etsy

Source: Bless This Mess,  $66.00


Welcome to our Apron Full of Giveaways! I hope everyone is having a great week this week! As we do each week, here is our round-up of giveaways for our readers. We hope that this is beneficial to you and your family! Please let us know if you guys win anything- I love to hear the success stories!

Below are the contest links-if you are hosting a contest please link it up below. Sorry, we are not giving away the aprons just showcasing them! Please put your site name and then what type of contest you are hosting. For example, “MomAdvice (Kid’s Movies).”

Good luck to each of you!

Pin It

Strategies for Packing Lighter

June 22nd, 2015

Strategies for Packing Lighter

Packing lighter not only will help you save you time at the airport, but it can significantly reduce the amount of money you spend on your next trip. Unfortunately, most airlines now charge for you to check in your luggage, but it is important to be aware that the largest allowed size for carry-on bags is 22×14×19 inches. With careful planning and strategic packing though you can maximize your suitcase and shave approximately $50 off on your next round trip flight with a few smart packing strategies.

Here are a few quick tips for lightening your load on your next flight:

1. Call Your Destination First

Wherever you are headed, whether it is for business travel or leisure, call first and see what is already included in your hotel room. Some items like bathrobes, hair dryers, and toiletries are common items that are often included within your stay, but you may discover that your hotel can offer some unexpected offerings that will free up a great deal of precious space in your carry-on bag. For example, items like beach towels, toys or movies for children, and portable cribs are items that could be offered complimentary with your room. I have found that it just never hurts to call ahead and ask and you might be surprised to discover just how little you really need to bring!

2. Divide Your Luggage 

If you are traveling as a family, divide the luggage up between each family member and consider investing in one small roller bag for each child that they will be able to maneuver themselves. Child size luggage can be found at discount stores like Target, Walmart, TJ Maxx, and Marshall’s. Even with this investment, you can still easily save $25 on the way back because you won’t need to check a bag. The bonus is that they can use that bag for years to come, making it easy to recoup your travel investment.

3. Pack Smart

It seems that it is always the people that do not take the time to pack wisely that become the most flustered or are asked to step aside by security. The most important thing to note is that Transportation Security Administration (TSA) rules require that passengers only carry liquids in three ounce containers in no more than one, clear, quart-sized bag.

I love to visit freebie sites like Freebies4Mom.com, DealSeekingMom.com, or The Savings Lifestyle and stockpile sample size toiletries and detergent for your trips that will comply with these federal guidelines. If you travel frequently, reusable travel containers can also be a fantastic investment that can be refilled with the items you already have from home. Make sure to store this bag right on top for easy access, as it will need to be removed from your bags when going through airport security.

4. Establish Order In Your Carry-On 

Underneath your bag of toiletries, tightly roll your clothing to prevent wrinkling and to maximize the space within your carry-on luggage. Choose clothing that can easily be mixed and matched and make sure to prepare for what weather conditions may be awaiting you. There is nothing worse than being at an amusement park with your family during a torrential downpour and paying $15 for an umbrella or heading to a state with warmer weather and paying $35 for a junky tourist sweatshirt because you are freezing.

Last, make sure that any electronics that will need to be inspected rest on top next to your toiletries until you get through security. The ones that will not need to be run through separately will be easier to scan if they are right on top and those that require a separate scanning will be easy to access for this procedure. Remember that everything can be rearranged in the bag, once you get through security, to protect your electronics from harm during travel.

5. Save Even More Money

The best part about keeping your bags light though is that you can use this as an excuse to not buy so many travel souvenirs on your trip. Consider that light bag as not only a savings for not checking in, but the ultimate excuse to not indulge in those pricey gift shops. I have been known to use this excuse a time or two when coming home empty-handed after a business trip!

The important thing to remember is if, in the end, you are unable to reduce your luggage to be carry-on compliant, try paying for your baggage online first. Just by paying for your checked bags online you can sometimes save you a few dollars each way.

How to Pack Lighter for Travel

In the end, the lighter the load, the lighter the expense and the easier your life will be when getting through those security checks!

What are some of your tips for packing smarter and lighter when traveling?

Pin It

It’s the 3 Little Things: Polyvore, Dandy Blend, & Books

June 19th, 2015

It's the 3 Little Things

Happy Friday, friends! I hope you had a wonderful week this week.  I am loving being on summer break with my kids and am really savoring the slowed down days that we have been having together. Today we are looking forward to a pool day (finally!) and I can’t wait to sit poolside with a big stack of books- yay!

St. Margaret's House

Before we jump into the happy, I just want to thank you for all of your love and support of our site. The sponsored content that we share help so many charities and this week we were able to donate an entire month of classes to help the women of St. Margaret’s House (a local women & children’s shelter)  learn a new skill or trade including all those materials they need for class. I can think of no better use of money than empowering women to learn a new skill! Look at these beautiful scarves they have been taught to make and be amazed.  This winter, we were also able to supply a large donation valued at $1,500 in eco-friendly toiletries to assist the shelter through my partnership with ePantry. Your continued support makes donations possible to help those in need and I thank you from the bottom of my heart! I know sponsored content isn’t always your favorite thing, but this is how we can help those in need do big things. 

Today we have Cindy Bokma from Hello Dollface and author of A Thousand Dollars For a Kiss and To Marilyn, With Love  joining us to share her happy list!  Lori has been a longtime reader and loyal MomAdvice friend for many years. I am so lucky to know her and I’m lucky to get to share her favorites today! Please give her a warm welcome! If you are interested in being a guest poster on the 3 little things, send over a list of your 3 favorites and why to amy@momadvice.com and I will share them in the upcoming weeks!

Here are Cindy’s 3 favorites this week!

Polyvore

Polyvore

Between blogging and writing and reading, there’s Polyvore. This is like an  adult version of Paper Dolls which I loved playing with as a child. I pretty much love any activity that allows my imagination to run wild.
On Polyvore.com, you can create collages, outfits, interiors…basically whatever you want.  Its a fantastic stress release for creative people. I have spent hours designing things on here! There is nearly unlimited clothing, housewares, backgrounds, art, and so much more to work with.

Books

The happiest time of my day is the evening when I read. My day is over, chores are done, kids are usually finished with their homework and it’s time to relax. Sometimes I’ll go out at night and I can’t wait to rush home to whatever book I am reading! When I go on vacation I used to pack a bag filled with books, now it’s so easy (and lighter) to pack my Kindle or iPad! I always have several books ready to read and spending hours during the day with a book is the ultimate luxury!
I like real books followed by reading on my kindle, then the ipad. There is no greater joy than being really into a fantastic book! I spend a lot of time perusing new books on amazon and reading reviews on Goodreads. There have been times when I’ve whiled away a few hours just reading about reading!

Dandy Blend

Have you heard of Dandy Blend? When I was cutting back on coffee, I searched high and low for a good replacement to fill the void. I discovered this amazing drink which you can buy in tea or instant powdered form.
Dandy Blend is made from the roasted roots of dandelion, chicory and beets. There are numerous health benefits to this beverage which make it a constant in my daily diet. Its cost effective, contains zero gluten or caffeine and is not acidic or bitter. I have switched from drinking about six cups of coffee to one or two cups in the morning and Dandy Blend if I want a hot drink throughout the day!

How fun was that list this week? I am so excited to share more great ideas from you all in the weeks to come! Thank you, Cindy, for generously sharing the happy today!

*this post may contain affiliate links- I only recommend what I love though. Check out past editions of  It’s the 3 Little Things

Now it’s your turn! What’s making you happy this week?

4th of July Flag Fruit Dessert Tray

June 18th, 2015

4th of July Flag Fruit Dessert Tray

*This post is sponsored by Walmart. Thank you for supporting the companies that support this site!

One of my favorite celebrations is 4th of July and today I wanted to share with you a fast & easy 4th of July fruit dessert platter you or your kids can make into a flag to celebrate the holiday.  

This is an easy and festive 4th dish and I have to say that this delivers on the red, white, & blue.


4th of July Flag Fruit Dessert Tray

4th of July Flag Fruit Dessert Tray

Since I am gluten-free, I often have to bypass the dessert trays.

As an adult, it is not a big a deal.

As a child, the dessert table is EVERYTHING, especially when it comes to holiday feasting.

I wanted to create this cute tray just for them and I found these glutino gluten-free yogurt covered pretzels are not only a fantastic way to add the white we needed for our stripes, but they also are highly addictive and delicious.

You can certainly make your own white chocolate covered pretzels, if you are feeling ambitious, but these cut down on the time invested in creating our cute tray!


4th of July Flag Fruit Dessert Tray


Flag cupcake picks can be a great way to festively pick up a berry (or ten).

 I found these at a local party supplies store and they are an adorable touch to a festive spread.


4th of July Flag Fruit Dessert Tray


I think the best part about this tray is that it is not only relatively healthy, but it is also a tray that you can confidently create and know it will get eaten.

After a big cookout, light desserts are a wonderful addition to the table for snacking on.

Have too many desserts on your table?

Save this to serve up during the fireworks.

It will be gone before it even gets dark enough to see them!

Check out the instructions below on how many supplies you need to put this tray together!

4th of July Dessert Tray /MomAdvice.com

4th of July Flag Fruit Dessert Tray
 
Prep time:
Total time:
Serves: 8 servings
A fast & festive gluten-free fruit dessert tray your guests will flip for.
Ingredients
  • 2 pints strawberries trimmed, rinsed, and dried
  • 1 pint blueberries, rinsed
  • 2 packages of glutino yogurt-covered pretzels (or white chocolate regular pretzels, if not going gluten-free on this tray)
Instructions
  1. On a 9×13 cookie sheet, place a small clear plastic (or glass) square container of berries to create your blue flag corner.
  2. Now alternate the red berries and white pretzels in stripes until you have filled your tray.


While you are here, these are a few more of my favorite 4th of July ideas on MomAdvice! xo


Cupcake Pick 4th of July Wreath

Make a 4th of July wreath out of cupcake picks (world’s easiest festive touch!)


Celebrating 4th of July Heroes With Your Kids

Teach your kids about the REAL 4th of July Heroes (the reason we all celebrate!)


Diy Family-Friendly Bar Cart

Turn a tool cart into a bar cart for the 4th (adorable girl not included!)


DIY slow Cooker Citronella Candles

Keep the bugs away with DIY Citronella Candles (made in your slow cooker!)


Red, White, & Blueberry Trifle

Make a Red, White, & Blueberry Trifle (another light & easy dessert!)


3-ingredient Watermelon Granita

Wow your guests with this Watermelon Granita (just 3-ingredients!)


Watermelon Coconut Lime Smoothies #recipe via momadvice.com

Or blend up leftover watermelon into this Watermelon Lime & Coconut Ice (I love leftovers!)


Blueberry Sangria Lemonade

Make a festive Blueberry Sangria Lemonade for toasting the holiday (cheers and cheers again!)


Berry Quinoa Parfaits

Leftover berries? Turn them into a protein-packed Berry Quinoa Parfait.


Greek Quinoa Salad

Everyone loves a good salad! Greek Quinoa Salad is yummy and gluten-free (winning!)


Lemony Spinach & Tomato Quinoa Salad

Why have one salad when you can have two? Lemony Spinach & Tomato Quinoa Salad is delicious (even at room temperature!)


Caprese Pasta Salad #recipe via MomAdvice.com

I am all about the caprese so this Pasta Caprese Salad really fits the 4th of July bill! (can be made gluten-free with a pasta substitute)


5-ingredient Caprese Pork Chops

Did someone say caprese? These 5-ingredient Caprese Chops would be delicious on the grill.


The World's Best Steak Marinade

Feeling Fancy? Try the World’s Best Steak Marinade (it makes cheap cuts taste gourmet!)


Restaurant-Style Steak Recipe

Rained out? Restaurant-Worthy Steak on the stove. In your face, rain!


4th of July Dessert Tray from MomAdvice


walmart_mom_disclaimer

Pin It

Six Easy Ways to Save on That Weekend Getaway

June 18th, 2015

Note: I’m reposting this article in honor of our Travel M Challenge with a new header and format that highlights these great travel saving tips that we continue to use to take short trips and stay on budget.

6 Easy Ways to Save on Weekend Getaways

When my husband and I celebrated nine years of marriage, we wanted to celebrate our anniversary in a special way so we decided to take a little trip to Traverse City, Michigan and enjoy a weekend getaway for just the two of us. My husband’s family was kind of enough to take care of the kids and we were off for two days of sightseeing, window shopping, and delicious eating.

We remained true to our budget through careful planning and research and I wanted to share with you a few ways we found to save on our memorable weekend getaway!

6 Ways to Save on Weekend Getaways

1. Research Hotel Rates

There were tons of great places to stay in Traverse City and I wanted the place where we stayed to be close to downtown shopping to be a fun getaway for us. We checked Kayak for room rates and found the Grand Traverse Resort to be approximately the same price as the other hotels, but it had many amenities. The reviews on the hotel were great and we were thrilled to find a rate that saved us about $70 a night versus the hotel rates.

All of that being said, it seemed because we had booked this discount rate, we also got the discount room. Our room was the one without the view, on the ground floor, and smelled like a smoking room. We also had no idea that they would charge a resort fee of $9.95 a day for all of those amenities that we did not use.

We still did score a great rate, but realized that the amount of time we spent in our room was not worth the grandeur and we will find a less expensive place next time!

2. Request A Visitor Packet

While the visitor packet for this town lacked coupons, it did give us some ideas for good places to visit and offered great historical information on the places we planned to visit. Through this packet of information, I was able to jot down some ideas for places to eat and see while we were in the town.

3. Find the Best Places to Eat

I wanted to eat at the coolest spots in town and we were able to do that with just a little research on my part. I hopped on Chow and checked through the forums for information on the town we were visiting. People offered honest opinions on the best spots in town and we decided to eat at two of the restaurants that had been recommended.

The first restaurant we ate at was called Trattoria Stella – a fantastic Italian place in a renovated insane asylum. No, I am not joking! My husband, who watches many of those ghost-chasing shows, was thoroughly creeped out and it made for great conversation with our waiter. The food and wine choices relied heavily on local farmers and local wines which made for a fresh and delicious dinner.

The other recommendation was for Don’s Drive-In, which was absolutely everything that I adore about diner food. Greasy burgers, giant shakes, and the best fried mushrooms ever. We took our shakes to go and drove near the water for a view. It was far too cold to sit too long, but we prided ourselves on making the most of our two day getaway!

4. Talk to Locals

When someone comes to my town, I love to be a local authority. Isn’t it fun to share all of the hidden gems of your town? We talked to anyone who would chat with us and they shared their special places to eat, shop, and their favorite wineries to visit in town. People just love sharing about their home and that is how we were able to discover an out-of-the-way winery that was not listed on maps. It had closed by the time we arrived, but we were able to take some wonderful pictures of the view.


5. Put Together Your Own Tours & Packages

The Grand Traverse Resort offered a room package that included a tour of local wineries. The package included a two night stay and a tour of three wineries. The price? A whopping $224.50 per person. Since the tour wineries were listed on their website, I jotted them down and we decided to do our own tour. The price for us to do our own wine tour? Gas plus $3-5 per tasting at the wineries. With the money saved, we were able to take home a bottle of wine from each of the three wineries as a memento of our special anniversary! The two highlights for us were Shady Lane & Black Star Farms.

We saved ourselves even more time and money by trying wines at the restaurant and even picking up a bottle at the gas station. Through their wines, we discovered what wineries were not worth visiting and which ones we could not wait to enjoy at their winery.


5b. Put Your GPS/Phone Maps to Good Use for Your Tour

Using first a car GPS, and now our smartphone maps, has saved us so much money in gas and an inevitable divorce because we always get lost. It has been one of the best investments for our family- I truly could go on and on!

Program your device with all of the places that you would like to go before heading on your trip. I visited all of the sites of the restaurants, our hotel, even the downtown shops that I wanted to hit so all of the information was right at our fingertips. We enjoyed a scenic view to the town and we were able to navigate our way around without any problems to all of the places we wanted to see.

6. Stick To Window Shopping

I won’t say we didn’t make any purchases (I’ve already mentioned the wine…), but the majority of the trip was spent window shopping and picture-taking. I was able to take pictures of all the beautiful windows and antiques that we saw and that seemed to satisfy any urge I had to shop. We did enjoy oodles of free food samples downtown and shared a slice of pizza on a park bench to people watch over our lunch.

It was a happy anniversary that celebrated almost 15 years of being together! And staying on budget made it that much sweeter.

Do you have any weekend getaways planned? What is your favorite way to save on your vacation travels? Please share!

Pin It

Beautiful Ideas for Outdoor Entertaining With Goodwill

June 17th, 2015

Beautiful Ideas for Outdoor Entertaining With Goodwill from MomAdvice.com


I love entertaining outdoors in the summertime and today I wanted to share with you some fun and frugal ways you can entertain utilizing items found at your local thrift store.

Outdoor entertaining does not need to be expensive and many of the items found at Goodwill can be repurposed into great items to have on hand for outdoor meals and entertainment for your guests.

Here are just a few beautiful summertime ideas I have gathered to help you  make the most of your outdoor space! 


Host an Outdoor Movie Night

Have you ever wanted to create your own DIY Outdoor Home Theater?

We have had this on our summer bucket list for years and last summer we decided to finally put together our very own DIY outdoor movie night with our kids!

There is something truly magical about watching a movie together under the stars and I love that you can do this right in the comfort of your very own backyard.


Update a Serving Tray With Washi Tape

One of the best arsenals in my tools for entertaining outdoors is utilizing serving trays for displaying food and bringing and taking dishes to and from our kitchen in the summer months.

If you find a tray that is lacking that sparkle you want or you want to easily coordinate a tray with your dishes, consider giving it a beautiful update with a little washi tape.

Design Improvised offers this sweet and simple tutorial for creating a beautiful display for your outdoor table.

The best part?

This DIY isn’t permanent so you can change it with your mood or tablescape.


Add Mason Jar Lights to Your Patio

Outdoor lighting can be tricky and expensive, but it doesn’t cost a lot to set the mood for your next outdoor gathering thanks to these beautiful lights in mason jars.

A Piece of Rainbow shows you how to make these beautiful outdoor lights with just wire hangers and mason jars.

What a treat for the eyes this would be!


Keep the Bugs Away

Bugs can be problematic when dining outside so it is always nice to have coverings and solutions for keeping them away.

Earnest Home Co. shows you an elegant way to keep your food covered with just simple terra cotta pots and a little rope for a handle.

Since my son just did a science project utilizing a pot, we can scientifically say that this is not only a great way to keep food covered, but it also a great way to keep your food insulated (warm or cold) while dining outside.


Dress Up Your Patio

Patio decorating doesn’t need to cost a lot and thrift stores receive many furniture donations that you could potentially use for your outdoor space.
Don’t just think of these items as one piece, but consider the parts of the furniture items for your project.
A pair of legs from one piece and a drawer from another, for example, can be painted into a brightly colored plant display that you could fill with colorful flowers or could be used as an herb garden on your patio.


Of course, keeping the bugs away from YOU is also a good idea especially when you have guests!

Consider using your slow cooker and utilize this fun tutorial I put together for making your very own DIY Citronella Candles in your slow cooker for your own outdoor entertaining or use the gift tag I have created (Thanks for letting us BUG you!) to attach for an adorable hostess gift for summer.

I hope these ideas inspire you this year!

Let me know what your proudest DIY moments are when it comes to outdoor entertaining in the comments below!


Don’t miss these other ideas from MomAdvice.com:


DIY Succulent Terrarium


Warming Up Your Outdoor Space for Fall


Bringing Outdoor Furniture Indoors


Grilled Tomato Bread with Prosciutto


Sign up for the MomAdvice newsletter


Pin It

Amy’s Notebook 06.17.15

June 17th, 2015

Simple Schedule via NoSidebar

Source: No Sidebar


The secret to having a simplified schedule.

This summer book list looks promising!

I love frozen peach treats.

Four book suggestions that will radically simplify your home and work life.

Make summer reading goals fun! Use this gum ball machine printable to set goals and show progress. Printing now!

3 ways to dress a capsule wardrobe up or down.

Oh, I needed this one (ahem).

Shed Office via The Very Worst Missionary

Source: The Very Worst Missionary


This shed business is catching – see ours here.

A new Instagram account to follow, bookworms!

Oh, to meet Judy Blume!

How to learn to say no.

Summer capsule inspiration.

More books to get for my book stack.

Don’t miss it.

amys_notebook

I hope you enjoyed our notebook, a collection of gathered links to DIY crafts, food projects, thrifty ways to spruce up your home, and thoughtful reads. Nothing brings me more joy than to highlight other fabulous bloggers. Follow me on Pinterest for daily inspiration!

Pin It

Learning to Love Travel with Your Husband

June 16th, 2015

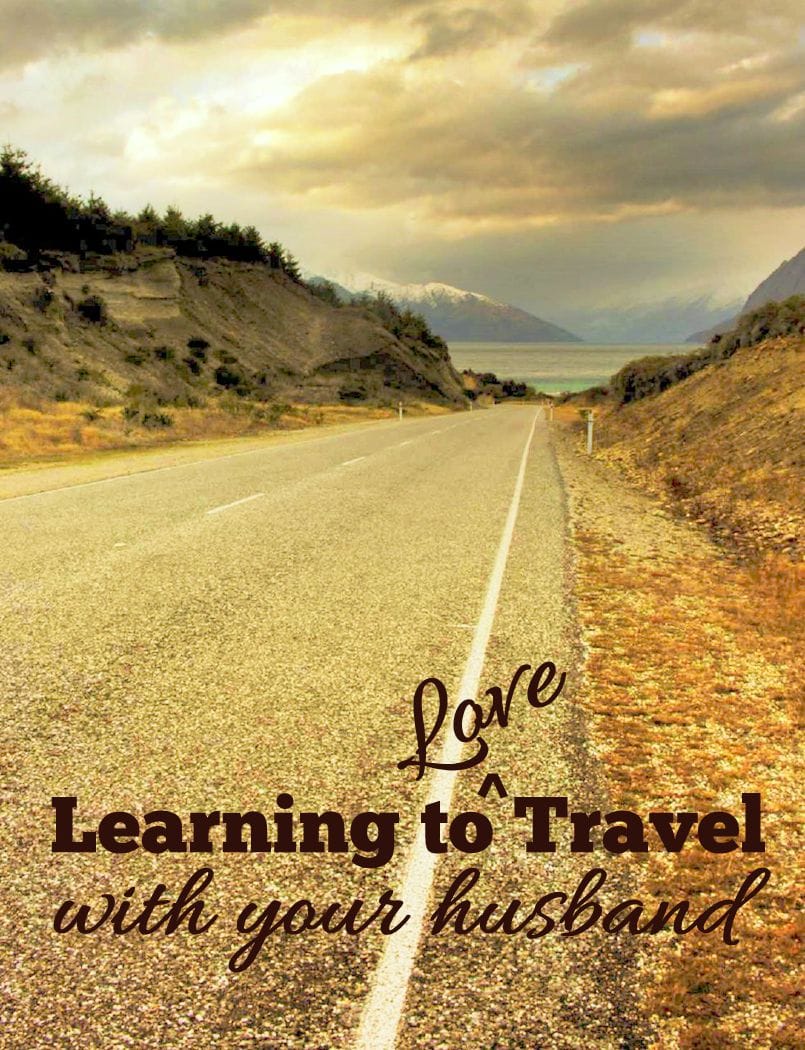
From our marriage & parenting contributor, Mary Carver.

Learning to Love Travel with Your Husband

When I was a kid, my family took a vacation each summer. Even if we could only afford to visit the next state over, we went somewhere new. When my husband was a kid, his family spent a week at the lake each summer. Even if the traffic was horrendous, they took a road trip to spend those days swimming and sunning.

Though we knew these things about each other before getting married, we never imagined it would influence our own relationship and decisions for our family. Unlike money and communication and how to fold towels, we had no idea that our approaches to travel could result in frustration, disappointment and general disagreement.

If you think about it, though, travel is more than an interest or hobby. It’s related to how we view spend our time and money, what we determine are priorities and set as goals, and even what we think is best for our families. No wonder it can cause so much trouble between two people with completely different backgrounds!

While WHERE to go is the obvious difference of opinion when it comes to travel, that’s just the beginning. Since getting married 16 years ago, my husband and I have disagreed about…

  • When to travel – which season, which month, what part of the week? early in the morning or in the middle of the night?
  • How long to travel – a long weekend? a full week? a day’s journey away? only a few hours away?
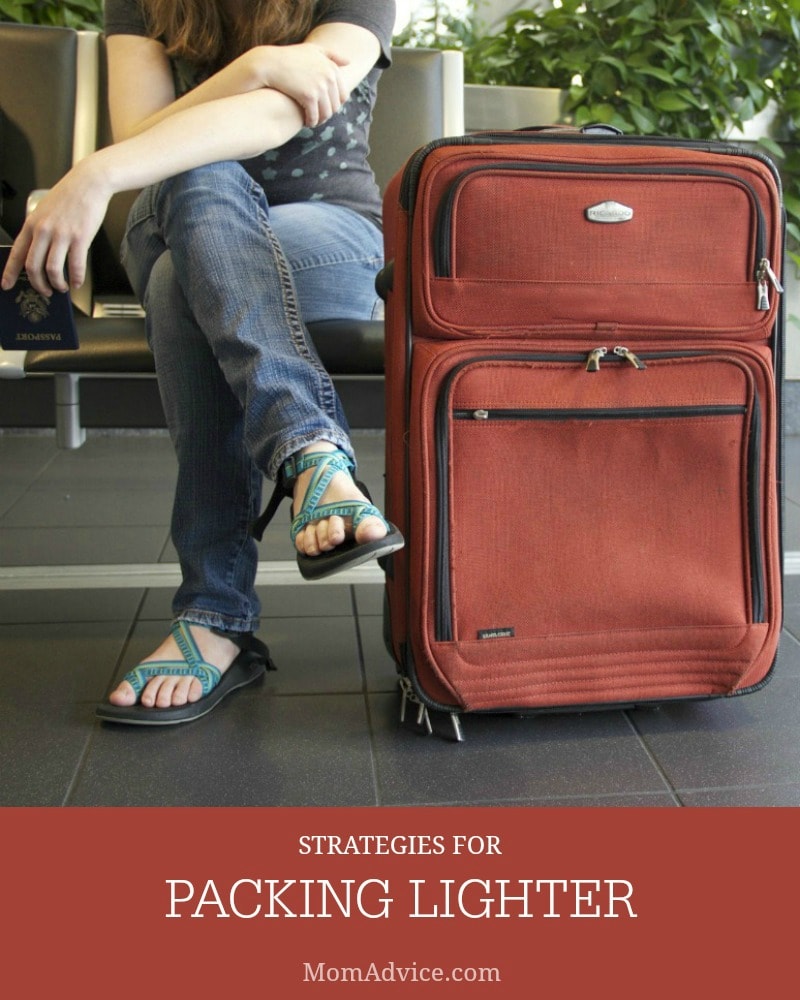
  • How to pack – like a Boy Scout (be prepared)? roll your clothes to fit more in the bag? just the necessities? {shudder.}
  • Whether to fly or drive – spend the money? or the time? or the sanity???
  • When (and whether) to travel with kids or friends or family (speaking of sanity…)
  • How strictly we adhere to an agenda – or do we even need an agenda? {Yes. We always need an agenda!}
  • Where we splurge and where we pinch pennies
  • Whether tourist traps are fun or awful
  • How often to stop for bathroom breaks or photo opportunities

And probably more that I’ve forgotten!

Because of these differences and disagreements, many of our early trips were spent with as many frustrated signs and ill-tempered words as museums and national parks. Both of us assumed that OUR WAY to travel was THE RIGHT WAY to travel, and we felt both disappointed and disgruntled that the other one didn’t get that!

Tips for learning How to Love Traveling with Your Husband

Thankfully, after so many years of traveling together, my husband and I have figured out which details and decisions we can compromise on and which ones we need to take turns on. He knows I’m never going to go somewhere without an agenda, and I know he’s never going to be happy about multiple bathroom and photo breaks. But, for the most part, I can manage a laid back schedule designed for maximum fun and minimum stress – and he almost always humors my requests to stop {again.} for one more break.

Of course, that doesn’t mean our travel planning days are carefree, full of rainbows and giggles. {Um, no.} As a matter of fact, as we worked on plans for this summer’s vacation, we had to debate again the benefit of a larger hotel room when traveling with children versus the benefit of saving a few dollars! But for the most part, our travel dreams are more aligned than ever.

They’re so in sync {sometimes. okay? not always!} that we’ve started a Travel Wish List.

The wish list began when I read something online about how many summers we have left with our kids before they go to college. After I stopped crying my eyes out {because REALLY.}, I counted. My oldest daughter is seven and just finished the first grade. She may travel with us after going to college (and we have a handful more years before her baby sister leaves the nest), but the reality is that we only have 12 summers left before she moves out.

We immediately began brainstorming all the places we want to take her – and then realized that a) the list is way longer than 12 destinations and b) we might not want to take kids on all our trips over the next couple of decades! We came up with a list of 24 places we’d love to take our girls, but the truth is several of the destinations overlap with our couple’s travel wish list.

That may mean we visit those places twice over the years – once with kids, once without. It could also mean our daughters have to make some trips with their own families down the road. In other words…don’t tell the girls, but they might get left with the grandparents a few times, no matter what our list for them says!

These days it feels like a miracle if my husband and I can go to the grocery store together, sans kids, so even a short road trip would be a gift. But we won’t always have young kids, and we want to plan now so bigger trips are possible sooner rather than later. So we’ve made a list for ourselves – and started a savings plan to make those travel dreams come true. Here are the top 5 places we’d love to go together right now:

  • Chicago
  • Savannah/Charleston
  • Hawaii
  • San Antonio
  • Europe

Our 20-year wedding anniversary is coming up in four years, so we’ve actually started saving for a trip to Hawaii. My hope is that we have way more than five amazing trips in our future, whether they’re far away or just a couple hours’ drive from home – and that, one of these days, we can even learn to agree on the ideal playlist, best snack foods, correct number of bags and appropriate souvenir purchases!

Do you and your husband have the same approach to travel?


Photos by wwarby and jolevine

Pin It

Apron Full of Giveaways 06.16.15

June 16th, 2015

Floral Linen Apron via Etsy

Source: Linen Tales,  $28.16


Welcome to our Apron Full of Giveaways! I hope everyone is having a great week this week! As we do each week, here is our round-up of giveaways for our readers. We hope that this is beneficial to you and your family! Please let us know if you guys win anything- I love to hear the success stories!

Below are the contest links-if you are hosting a contest please link it up below. Sorry, we are not giving away the aprons just showcasing them! Please put your site name and then what type of contest you are hosting. For example, “MomAdvice (Kid’s Movies).”

Good luck to each of you!

Pin It

Grilled Brussels Sprouts

June 15th, 2015

Grilled Brussels Sprouts from MomAdvice.com

*This post is sponsored by Wild Oats.  Thank you for supporting the companies that support this site!

Grilling season is in full swing and I couldn’t be happier. What could be better than dining outside, keeping your kitchen clean, and providing a great meal (with leftovers for the week) in the process? Each year I vow to try my grill in a new way and this year I wanted to try some new ways to grill vegetables. Today I am partnering up with Wild Oats and sharing an easy veggie side dish you can create with just Brussels Sprouts, a few of your favorite dried and fresh spices, and a couple of other basic pantry ingredients.

Brussels Sprouts are one of my favorite veggies in the world.  In winter, I love to roast them until the taste resembles a decadent plate of french fries. For the summer months though, I love to keep my kitchen nice and cool so I wanted to figure out a different way I could make them. I decided to try them on our outdoor grill and see if the results would be just as tasty. Guess what? It didn’t disappoint.

Grilled Brussels Sprouts from MomAdvice.com

Wild Oats offers a variety of delicious organic dried spices that you can use on your grilled veggies this summer.  Have you seen these jars in your local Walmart store? It’s a great value and I love the dried spices, particularly when the garden isn’t in full swing or to mix even with the fresh herbs we have on hand. For these Brussels Sprouts you can add a little paprika for a smoky flavor, or chili powder for a little heat, or dress them up simply with a little Italian seasoning blend which pairs perfectly with the fresh garlic we have in this recipe.

Grilled Brussels Sprouts from MomAdvice.com

Although I love the charred bits on my Brussels Sprouts, I do like to protect them with a double layer of foil to prevent them from getting really burnt. The length of time you cook them really depends on your own personal taste. I like mine to have a nice crunch still so 10-12 minutes is a good amount of time for me. If you prefer a softer veggie, 15-18 minutes should do the trick! Keep in mind, these are a great one to prep the night before for a party and tuck in your fridge for your events. How awesome is that?

If you are interested in trying your veggies some new ways this summer, I love this technique for grilling the corn right in their husks, or you can add a rich layer of herb butter on the corn before grilling, we love these three-cheese grilled potatoes for a fun side with our steaks, and grilled tomato bread with prosciutto is an awfully impressive starter to any outdoor feast!

Grilled Brussels Sprouts from MomAdvice.com

Grilled Brussels Sprouts
Prep time:
Cook time:
Total time:
Serves: 4 servings
A fast & easy way to create an elegant side dish without the dishes! Grilled Brussels Sprouts are a crowd-pleaser and can be spiced just the way you like!
Ingredients
  • 2 lbs. Brussels sprouts, trimmed and cut in half
  • 2 garlic cloves, smashed
  • 2 tablespoons extra virgin olive oil
  • 2 teaspoon apple cider vinegar
  • 1/4 teaspoon of your favorite Wild Oats died spice (chili, paprika, or Italian seasoning- just to name a few!)
Instructions
  1. Tear off two 14-inch sheets of foil; fold each in half to make a double layer. Place half of veggie mixture in even layer in center of one sheet.
  2. Top with single sheet of foil and fold up edges to form a rectangular pouch (about 9″ by 6″). Crimp edges tightly until well sealed. Repeat with remaining foil and mixture.
  3. Place on the grill (10-12 minutes yields a great crunch or 15-18 minutes for a softer veggie) and cook until done.

 Get to know Wild Oats!

Check out Wild Oats on their blog,  Facebook, Instagram, Twitter, &Pinterest.

 * This post is sponsored by Wild Oats. Thank you for supporting the companies that support this site!