Archive for the ‘Early Childhood’ Category

Parenting a Child With ADD: The Diagnosis (Part 1)

Tuesday, September 1st, 2015

Parenting a Child With ADD: The Diagnosis (Part 1) from MomAdvice.com

I am sure if you have been a reader here, you know how fiercely I guard the privacy of my children. Over the years I have struggled a lot as a mom and one of my biggest struggles was my son’s diagnosis with ADD. Through his diagnosis and treatment, we have had the opportunity to help so many parents locally who have been going through the same difficulties and  point them to doctors and resources that have helped improve their lives.

It is with his blessing and permission that I share our story today, in hopes we can help someone else going through the same struggles.

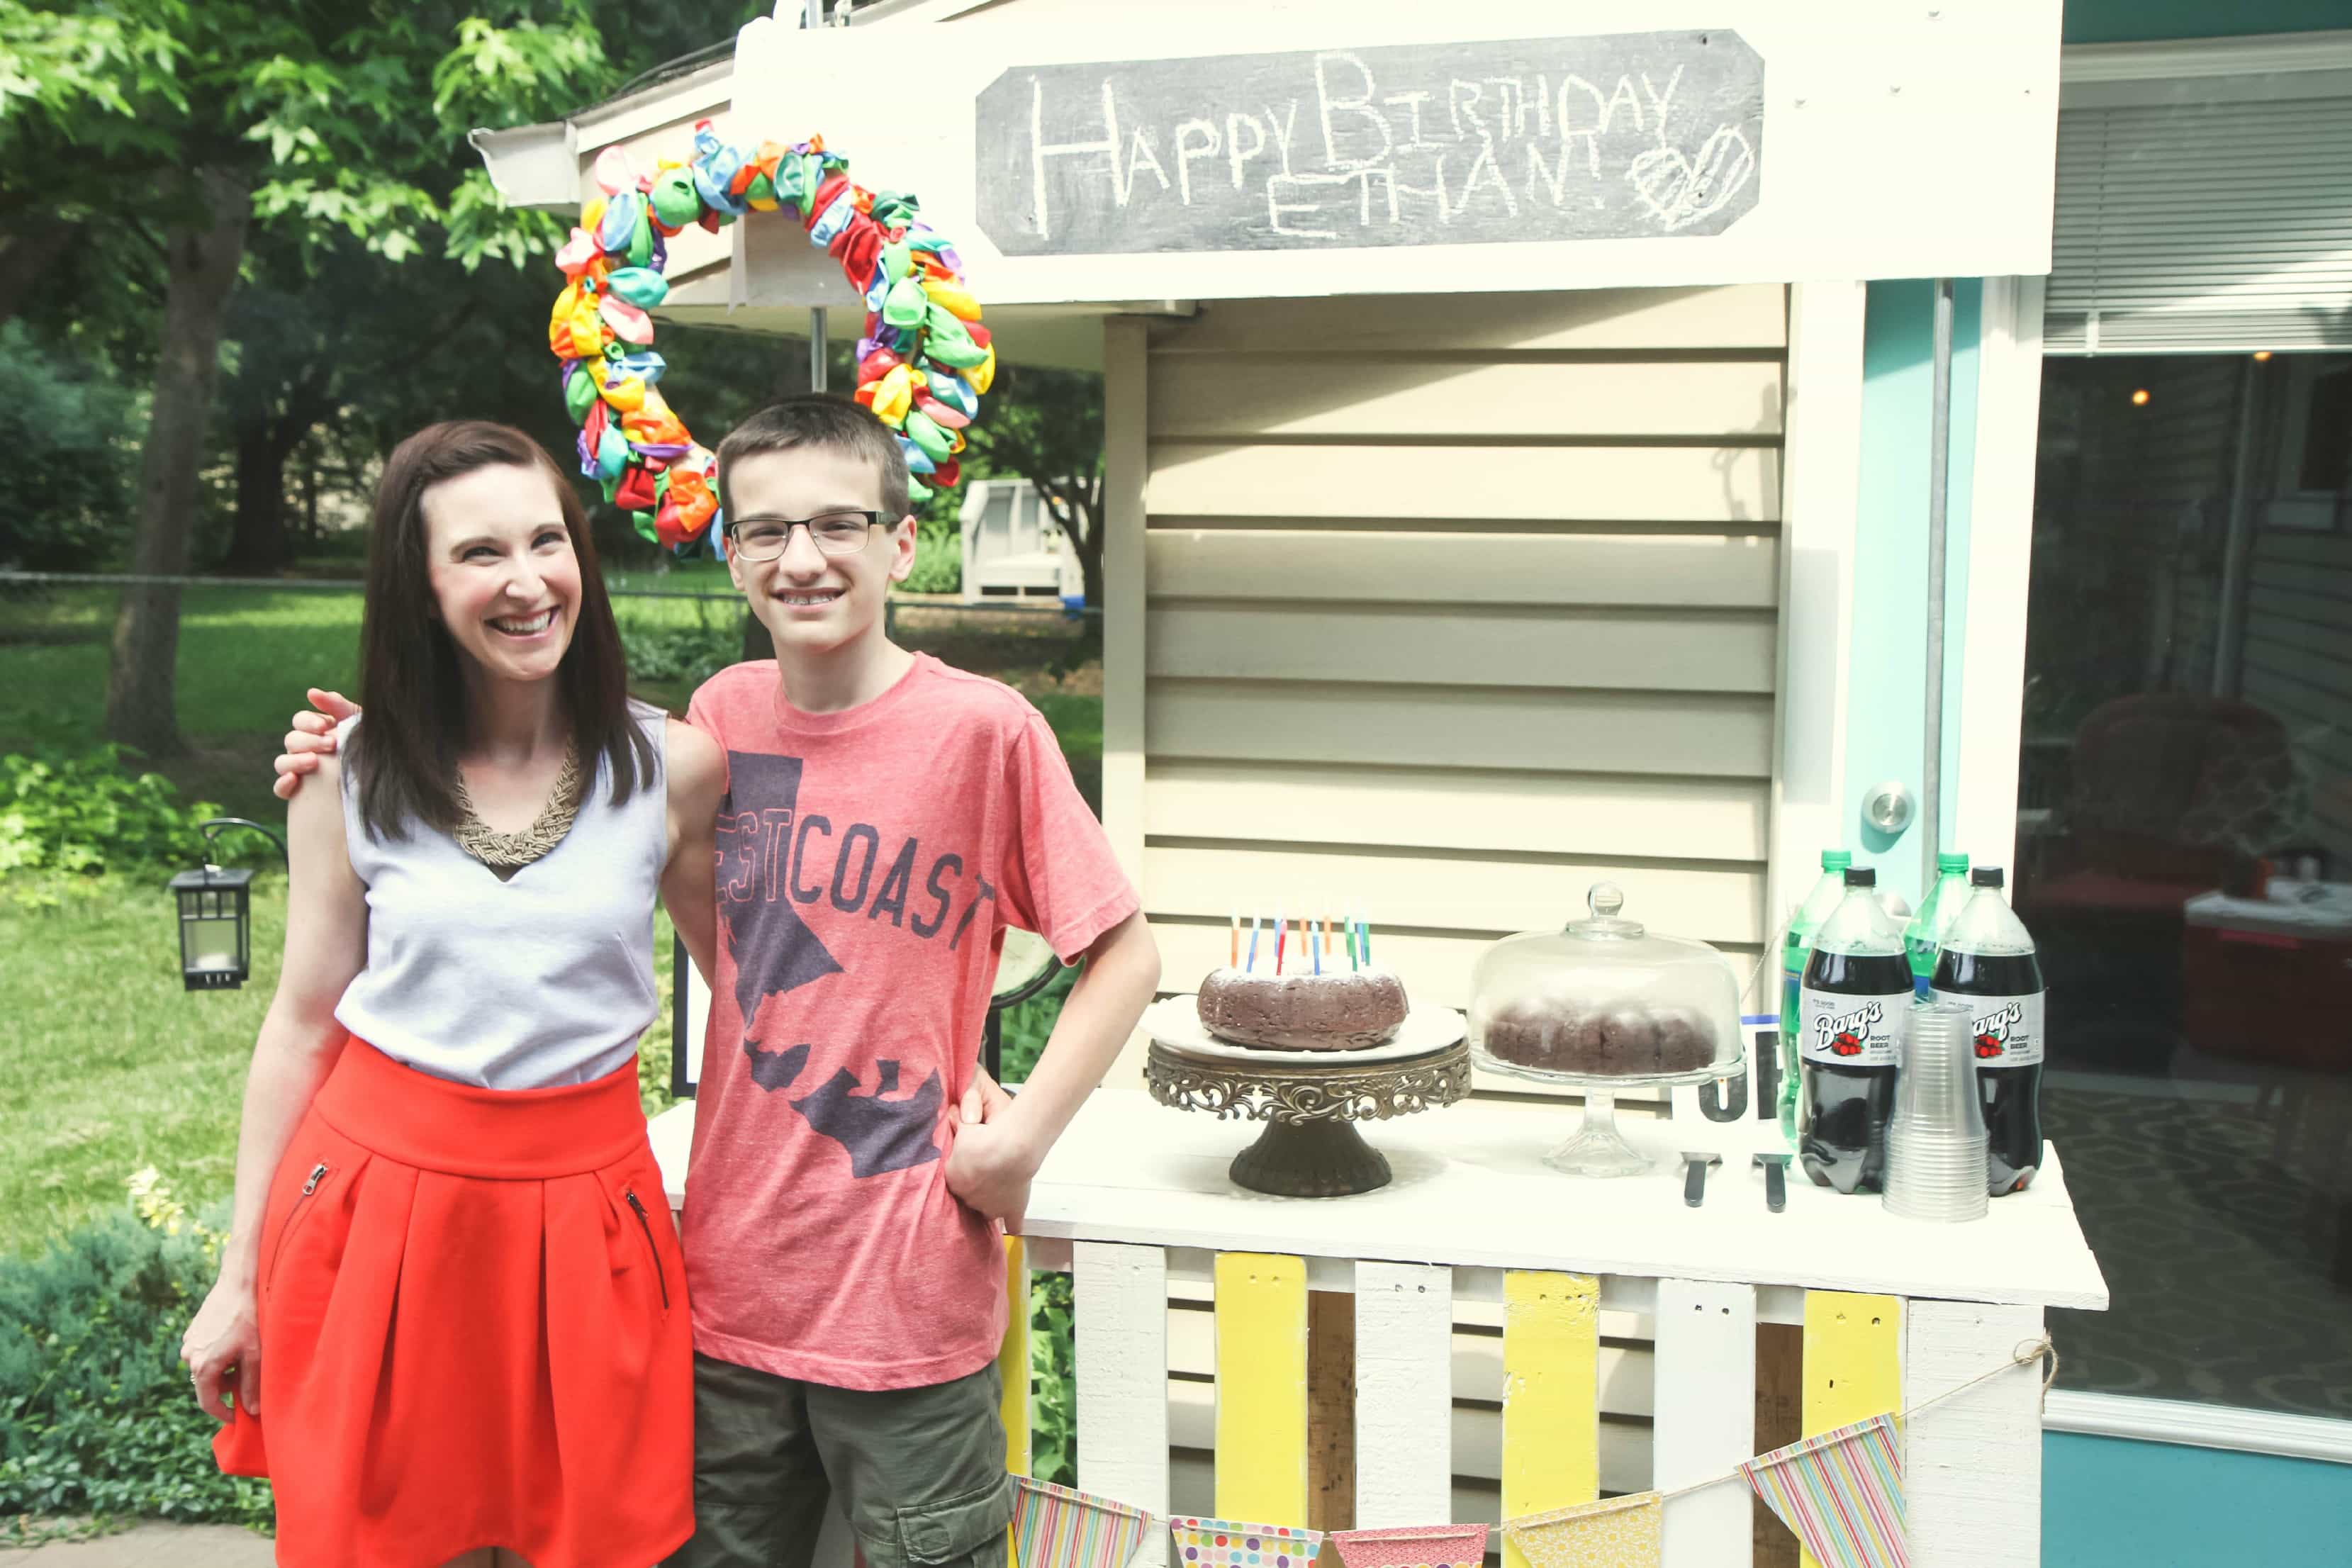
I am so proud of our boy for sharing his story to help other families! I hope you will leave him a little note to tell him that! 

Parenting a Child With ADD: The Diagnosis (Part 1) from MomAdvice.com

When Your Kid Doesn’t Fit in the Box

Ethan was the kind of kid that never fit into the box and this is just one of many reasons why I love him. From his shocking entry into the world (early and complete with a placental abruption that could have killed us both), I should have known he was going to challenge everything I thought about parenting.  Ethan hit most milestones normally with the exception of one… speech.  He was a silent baby and did not make any noises at all.  He rarely made eye contact with us and never turned to us when we said his name. Since he was my first baby, I had no expectations of what he should be doing, but others in our family and our pediatrician were concerned about his lack of speech. At ten months he qualified for early intervention speech therapy in Massachusetts. When my husband lost his job, we relocated around that time to Indiana, and I decided to hold off on the speech therapy and see if Ethan might blossom in his new location.

At eighteen months, he still made hardly any audible sounds and still would not turn to me when I called his name. We were placed into the First Steps program where he benefited from an incredible therapist who helped us both with Ethan’s speech delay and sensory issues. I remember thinking how ridiculous this all seemed as she played with playdough and blew bubbles with him on my kitchen floor. Clearly I knew nothing because not only did he start speaking, we couldn’t get this kid to shut up! The ability to speak helped curb some of his frustrated outbursts and baby signing helped us until he could communicate fully.

Instead of speaking like a baby though, he went full-out sentences and would fixate on one particular thing and talk about it nonstop. It began with trains and then later it was dinosaurs. This child who could not even say mom now said Ankylosaurus and had memorized an entire dinosaur dictionary. It was so wild to me!

Parenting a Child With ADD: The Diagnosis (Part 1) from MomAdvice.com

Everything is Fine Until You Have to Go to School

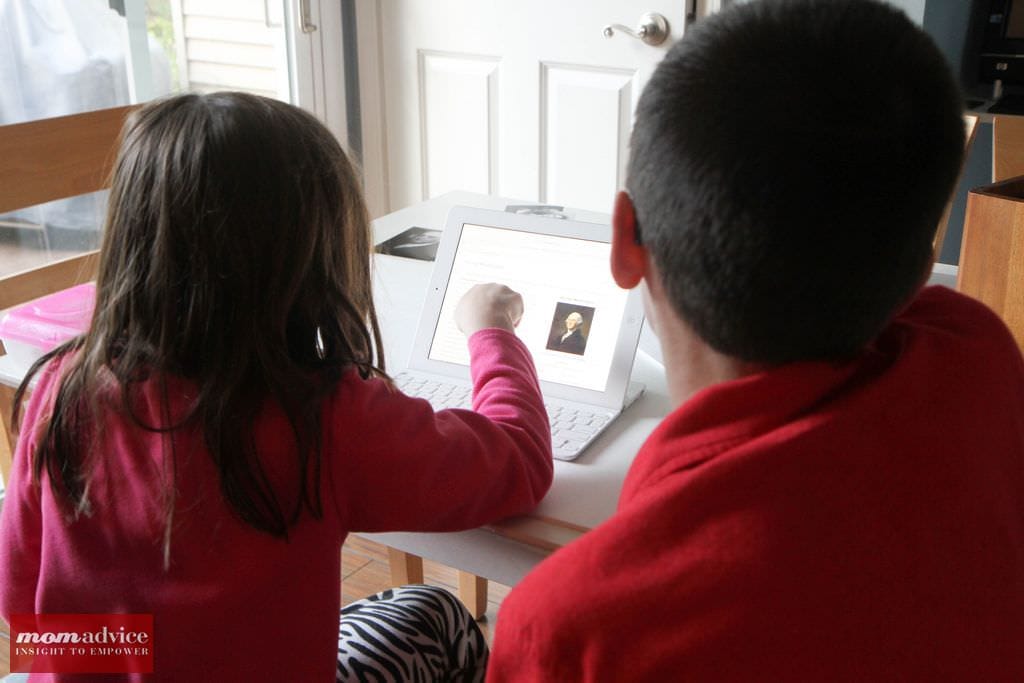
Since Ethan was an only child, our therapist thought he might benefit from being around other kids his age more, so we looked into a school program for him when he turned two. He loved school so much and I loved seeing his vocabulary growing. I remember that he was so busy and I couldn’t believe all this big energy that could be in such a little body!  Socially, we were struggling. Ethan would only do things he wanted to do, preferring to not interact with other kids at all unless they played his games. He never listened to anyone else- and only talked excessively about what he was into. In circle times, he did not sit like he was supposed to, preferring to get up and do laps instead of sitting.

To help improve our circle time at school, I took him to storytime at the library. As the kids sat in their mama’s laps and sang songs and listened to the librarian, my son refused to sit with me and spent the entire time lapping the room, ripping open the cabinets behind the librarian, and screaming if I tried to hold him in my lap. I sobbed in the parking lot and vowed I would NEVER do that to myself again.

We held Ethan back a year to see if he might benefit from an extra year of preschool before we put him in elementary school, thinking he had some social issues to work through. That year of Pre-K was one of the worst years of my parenting life. Ethan was bored in school and every morning to take him there was a battle and not the kind of battles I had ever seen any of my friends deal with. He kicked and screamed. He hit me. He would stretch his arms and legs as wide as they would go and refuse to get in the car. Many days, I took this five year-old kid and left him outside of his classroom, kicking and screaming. I would walk away and be glad I didn’t have to deal with him for a few hours.

It wasn’t my proudest moment as a mom.

I screamed at him.

I was embarrassed by his outbursts.

These moments of frustration were peppered throughout the years until he turned nine. He would have toddler-like tantrums about doing homework.

One night he barricaded his door with all of his belongings just to keep us out of his room.

He was always disorganized.

He would not bring home papers for me to sign, he would do work at school and just fizzle out at the end of worksheets for no reason, and he was always angry and frustrated with us.

Harder than that though, were the apologies after the outbursts and the crocodile tears down his face as he told us he was sorry and didn’t know why he was doing this.

I became a broken nagging record every single day, begging him to just, FOR THE LOVE, do your homework and bring your stuff home. HOW HARD IS IT? IT’S SO SIMPLE.

In fourth grade (for lack of better words), the shit hit the fan. As his teacher was preparing him for middle school, our frustrations got bigger and the homework got longer and the outbursts were out of control. He was so mean and so angry.

I was so mean and so angry.

As I shared my frustrations with a family member, she said, “That reminds me of so-and-so in our family.”

That so-and-so in our family had ADD.

Wait…what?

ADD- Is that Even a Real Thing?

I didn’t think ADD was a real thing, but was an excuse for disorganization and lack of discipline. Feel free to throw rotten tomatoes at me! I tend to believe that good exercise, a healthy diet, and vitamins are the cure for anything that ails you. The idea that my son had something that might require a doctor’s care and treatment baffled me.

I also felt ashamed that it made me feel relieved too to know there was something wrong and I wasn’t just a terrible mom.

If there is something wrong and we can figure it out, I can help us all.

As I clicked through website after website, these things that I thought were problems that only Ethan had, were actually characteristics of someone who had ADD.

  • Constantly fidgets and squirms
  • Often leaves his or her seat in situations where sitting quietly is expected
  • Moves around constantly, often runs or climbs inappropriately
  • Talks excessively
  • Has difficulty playing quietly or relaxing
  • Is always “on the go,” as if driven by a motor
  • May have a quick temper or a “short fuse”
  • Doesn’t pay attention to details
  • Makes careless mistakes
  • Has trouble staying focused; is easily distracted
  • Appears not to listen when spoken to
  • Has difficulty remembering things and following instructions
  • Has trouble staying organized, planning ahead, and finishing projects
  • Gets bored with a task before it’s completed
  • Frequently loses or misplaces homework, books, toys, or other items

It was as though someone knew our family personally and the struggles we were experiencing. Not only that, but when I flipped through his report cards, the teachers had even said some of these same exact phrases on his report card. Were they trying to clue me in?

Now that I thought I might know what the issue was, I was more determined than ever to get a proper diagnosis and not a quickie questionnaire in the doctor’s office. I wanted a true capture of what we were dealing with and how we could help our child.

We reached out to a psychologist in town for an evaluation and waited an excruciating two weeks until he could come in for testing.

That test changed our lives and our interactions with our child forever!

Come back next Tuesday for the continuation of our story!


Pin It

Review & GIVEAWAY: Empowered SAFETY Membership

Thursday, October 30th, 2014

How to Keep Your Family Safe by Monitoring Product Safety Recalls from MomAdvice.com.

*This post is sponsored by the Empowered SAFETY. All thoughts and opinions are my own.

When my children were small, I was absolutely obsessed with tracking recall information. Let’s face it; the sheer amount of equipment needed to keep your baby safe in that first year is astounding.  Back then I subscribed to Parents Magazine and would skim the magazine for the latest recall information. Over the course of those first few years as a mom, there were many recalls, but I was so busy and so tired that I struggled to stay on top of that and keep up with it all.  Thankfully, there are faster and easier ways to stay on top of recalls now.

This week I am partnering with a fantastic site called Empowered SAFETY to share with you all of the great advantages of a membership & how it can help you keep track of legitimate complaints & recalls when it comes to items you use in your home and the food you consume. We are giving everyone one free month to try this service and giving one lucky reader a six month subscription.

  How to Keep Your Family Safe by Monitoring Product Safety Recalls from MomAdvice.com.

What Does Empowered SAFETY Offer?

Did you know that there can be hundreds of complaints made to government agencies about child-specific products before a recall is actually issued?  Instead of waiting for the recall to occur, a subscription to Empowered SAFETY can alert you of the complaints prior to the recall even is issued.

With a premium membership you can simply match the products in your home with the half-million child products in Empowered SAFETY’s database, and you will receive an email notification on that product should complaints be made against it. It is as easy as that!

How to Keep Your Family Safe by Monitoring Product Safety Recalls from MomAdvice.com.

We aren’t just talking car seats and baby equipment though; the service also offers valuable information about food safety which, as we know, can be potentially life-threatening to a child with food allergies. You can receive the food recalls in the area where you live so you can stay on top of potential allergens and safety hazards in your home.

How Can This Help You When Making Purchases?

When I make purchases for my family, I spend hours online trying to decide which item will be the best for us based on the reviews of other shoppers. I hate wasting my money or time on purchase that don’t have longevity in our home. When it comes to purchases that keep our family safe, I really want to know that the items that I am choosing will do their job well and that I won’t find myself needing to replace them later.

Empowered SAFETY can let you know if the product you are thinking of purchasing has had any complaints on it, allowing you to be a more empowered consumer and saving you valuable time.

What Do They Monitor For You?

Complaints can come in many different ways and Empowered SAFETY monitors all the different sources so you don’t have to. Not only do they monitor actual consumer complaints, and product and food recalls and warnings to government agencies, they also follow news reports, legal filings, press releases, blog postings, federal & state agency websites for outbreaks & health alerts, as well as member-reported product issues.

As a busy mom, I certainly don’t have time to monitor all of that so a membership like this can save your family a lot of time, hassle, and unnecessary clutter from items that are potentially unsafe and won’t have longevity in your home.

Everyone is a Winner

Today I am giving EVERY reader a free 28-day promo code to try the Empowered SAFETY site. Just enter code the code ES28DAY93  (Expires 11/30/14) upon sign-up on Empowered SAFETY.

Follow the instructions below in our Rafflecopter widget to enter to win a FREE six-month premium membership to Empowered SAFETY.  Good luck, everyone!

a Rafflecopter giveaway

*This post is sponsored by the Empowered SAFETY. All thoughts and opinions are my own.

Tracking Pixel

Pin It

Celebrating 4th of July Heroes With Kids

Monday, June 23rd, 2014

Celebrating 4th of July Heroes With Kids

As my children grow older, I strive to find more meaningful ways to celebrate holidays.

The 4th of July has always been a burst of red, white, & blue through our home, but I can’t say that we have ever spent time together discussing the importance of this day and getting to know the heroes behind what makes the 4th of July so special.

Today I want to share with you a fun way you can share about the 4th of July Heroes in your home and a fun way to incorporate their images in your home to make the day more meaningful and festive.

I partnered with Walmart on this project and all the materials you need for this can be found at their store.

To begin, you can select your 4th of July Heroes that you want to talk about.

I found this great list for kids that I used to select our heroes to focus upon.

I then headed to Wikipedia and found images of each of our heroes and converted them to black & white and saved them on my computer.

If you would like to use the same heroes as us, here are the heroes we selected for our project.

George Washington

George Washington

Thomas Jefferson

Thomas Jefferson

Benjamin Franklin

Benjamin Franklin

John Hancock

John Hancock

Crispus Attucks

Crispus Attucks

John Adams

John Adams

Abigail Adams

Abigail Adams

Celebrating 4th of July Heroes With Kids

Once you have your heroes selected, head to the Walmart Photo Site and upload the images there.

In addition to having 1 of each image printed in 4×6, also add 1 set of wallets for each person.

 If you send these to the one-hour lab, it will be less than $6 for all of them.

While you are there, you can also pick up a package of mini-clothespins, a set of notecards for your kids to write on, supplies for this easy flag bunting, and this burlap wreath to decorate with.

Since I already had these things in our home, it helps cut down on cost and storage for us this year.

Celebrating 4th of July Heroes With Kids

Once you have your images, have kids select which person they are interested in discovering and have them find information about their 4th of July heroes.

I challenged my kids to find one or two facts about each hero.

We also read about the first 4th of July and how different is from how we celebrate today.

I am embarrassed to say that I was learning right along with my children and soaking it all in as much as they were.

Abigail Adams, for example, was one of our favorite people we learned about. Did you know that she had five kids that she cared for and homeschooled while her husband was away serving his country?

 Not only was she passionate about women’s rights, but she was also passionate about equality for all people, whether they were black or white.

She helped care for the soldiers in her home (feeding them and treating their injuries), and she even learned how to make her own gunpowder.

Emily and I are big fans of Abigail Adams now and all she did for our country.

Celebrating 4th of July Heroes With Kids

Likewise, my son loved John Adams and his fun fact was that he thought his teachers, “held him back.”

Despite being held back from his true potential in grade school, he passed his entrance exams to Harvard and his parents, who were farmers, gave up several acres of their own farm land to pay for John’s schooling.

And, boy, did that pay off!

John Adams strongly supported independence from Britain, signed the Declaration of Independence, and negotiated the treaty ending the Revolutionary War.

He later became the nation’s first vice president and second president.

This led to a great discussion about recognizing our true potential when sometimes others do not.

Did you know that Dr. Martin Luther King referenced Crispus Attucks in one of his speeches?

He held him up as an example of black patriotism at the beginning of our nation’s history.

Yet, we never knew anything about what he did for our country. I’m so glad we know now.

Celebrating 4th of July Heroes With Kids

If you have smaller kids, you can share simple facts and have them draw pictures.

Clearly, the fact that Abigail Adams rocked it as a mom and had five kids was worthy of a picture.

Make this time fun for your kids while acknowledging the sacrifices that so many gave up for our freedom.

Celebrating 4th of July Heroes With Kids

Once we were done discussing our heroes, I incorporated these pictures into our holiday decor.

I pulled some of the flags off of our bunting and switched them with pictures of our heroes.

 I took the items off of my burlap wreath and clipped the wallet images with mini clothespins on the wreath.

I hung this in the center of our mirror and added the flag & hero bunting around the frame of the mirror.

Celebrating 4th of July Heroes With Kids

I love these touches to our 4th of July decorating, but I love even more that my kids know about these patriotic heroes.

 I hope this idea inspires you to learn more about this holiday and the heroes who made this day possible for all of us.

Happy 4th of July, friends!

walmart_mom_disclaimer


Look at these other great ideas from MomAdvice.com:


How to Make Fluffy Slime


Pin It

3 Rainbow Science Experiments for the Legends of Oz: Dorothy Returns Movie

Tuesday, April 22nd, 2014

3 Rainbow Science Experiments

*This post is sponsored by Clarius Entertainment. All thoughts and opinions are my own.

In honor of the upcoming animated film release, Legends of Oz: Dorothy Returns, I am sharing three fun rainbow experiments you can try with your kids. These rainbow experiments are not only fun, but also educational. Before we begin these rainbow crafts though, I have to share with you that I have two major obsessions that you might not know about.

The first is anything to do with Oz and the characters. If you don’t believe me, here is the only year I asked my kids to do my dream costumes… and the only year I ever got away with it.

Wizard of Oz Halloween Costumes

This was my dream Halloween year as a mom and my mother-in-law even helped make the costume for me. Basically, all perfect Halloween dreams come true.

I miss those days.

The other thing you should know is that I am an enormous fan of Lea Michele and anything and all things related to Glee. I run to a Glee playlist, I pretty much cry about every emotional thing on that show, I sleep in a Glee shirt (yes, I do!), and Lea is my favorite actress in it. When I heard that not only was a Legends of Oz movie coming out, but that Lea Michele was doing the voice of Dorothy for it, I was beside myself with excitement.

I will be first in line to buy my tickets. And I will probably pre-order my tickets at my theater. That’s how excited I truly am!

Legends of Oz: Dorothy Returns

In the animated film, Legends of Oz: Dorothy Returns, Dorothy is called back for another adventure in Oz.  After waking to post-tornado Kansas, Dorothy (Lea Michele) and Toto are whisked to Oz on a magical rainbow mover sent by their old friends the Scarecrow (Dan Aykroyd), the Lion (Jim Belushi) and the Tin Man (Kelsey Grammer). Time in Oz has passed much faster than back in Kansas, and Dorothy discovers that the Jester (Martin Short) – the devious brother of the Wicked Witch of the West – is taking Oz over one region at a time, holding their leaders captive and casting a pall of darkness over the beloved land. Even Glinda (Bernadette Peters) is unable to combat the Jester’s evil powers, making Dorothy their only hope.

When she arrives in Oz, Dorothy’s plan is to travel to the Emerald City to reunite with her old friends and join forces with them to stop the Jester. However, the yellow brick road isn’t quite as easy to follow this time around, especially with the Jester planting tricky detours to lead her astray, so she enlists the help of Wiser the owl (Oliver Platt), Marshal Mallow (Hugh Dancy), China Princess (Megan Hilty) and Tugg the tugboat (Patrick Stewart) to help find her way.

Since Dorothy is sent to Oz on a magical rainbow mover, we decided to try three rainbow experiments that you can do together in honor of the film!


Make a Liquid Rainbow

3 Rainbow Science Experiments

Supplies Needed

Olive Oil

Rubbing Alcohol

Dawn Blue Dish Detergent

Corn Syrup

Food Coloring (red & green)

Large Jar


3 Rainbow Science Experiments

3 Rainbow Science Experiments

3 Rainbow Science Experiments

Experiment

Let’s make a liquid rainbow in a jar.

1. To make our blue slowly pour 1 cup of blue dish soap down the side of your jar.  You want to make sure to do this slowly too so you don’t create any bubbles.

2. Next mix  1 cup of water with four drops of green food coloring. Mix well.  Tip your jar and slowly pour the water down the side of the jar.

3. Next pour one cup of oil carefully down the side of the jar to create your yellow.

4. Finally mix 1 cup of rubbing alcohol with four drops of red food coloring.  Tip your jar and slowly pour the alcohol down the side of the jar.

3 Rainbow Science Experiments

3 Rainbow Science Experiments

Results from our Liquid Rainbow

Out of all of our experiments that we performed, this was our favorite. Our yellow got a little bubbly, but everything else stayed true with separate colors. This is a great lesson for teaching your kids about density. The different liquids all have different densities. Density means how much “stuff” there is in something. Not the thing’s weight nor its size, but how many atoms it has in it.  In our liquid rainbow, the dish soap is the densest layer and sits at the bottom of the glass, then the water is next, then the oil (which happens to be thick and can’t mix with water), and then the alcohol is the lightest in density. We are impressed with this one!

Make a Milk Rainbow

3 Rainbow Science Experiments

Supplies Needed

1 cup of half & half or whole milk

Food coloring (in any rainbow of colors)

Dish soap

Experiment

Let’s make a milk rainbow!

1. Pour 1 cup of milk into the bowl

2. Add 3 drops of one color to the edge of the bowl. Repeat with two other colors, placed in the other edges of the bowl. Be careful not to mix or jiggle.

3. Squeeze a drop of dish soap in the center of the bowl.

4. Watch what happens to the colors when the soap is added.

Results from our Soap Rainbow

Does anyone sell real liquid food coloring anymore? We just had the gels so we found that the liquid fell to the bottom in our first experiment The second time around, the dish soap was already added so I made a little mixture of gel food coloring with the water and then we poured it into our bowl. It was amazing to see how the colors stayed separate with this dot of soap in the middle. We learned that the dish soap does not mix with the milk. The dish soap floats on top and spreads over the surface. As it spreads, it grabs the food color we dropped into it. Where the colors meet, they combine to form new colors. We also learned, don’t do this with just gel food coloring. It produces a muddy river when mixed.

Make Rainbow Roses

3 Rainbow Science Experiments

Supplies Needed

Roses

Knife & cutting board (this part is for the grown-ups!)

Food coloring (any color of the rainbow)

Water

Cups

3 Rainbow Science Experiments

3 Rainbow Science Experiments

3 Rainbow Science Experiments

Experiment

1. Trim  the ends of your roses under cool running water.

2. Have a grown-up cut the rose in half.

3. Fill glasses with water and lots of food coloring.

4. Stand roses up and take the two sections of the rose and place them in two different colors of water. Allow them to stand in this water for 24 hours.

Results From Our Rainbow Roses

3 Rainbow Science Experiments

Did you think it would look like this? These Rainbow Roses have been promised on Pinterest dozens of times when I am on there. No, our roses did not look like this at all. They, were just slightly tinted with color on the edges, and two of them died during the rainbow color attempt. It might be better to try this one with carnations or to not split the stems at all.

3 Rainbow Science Experiments

Nailed it!

Well, maybe not.

We still saw how the color traveled through the flower although it wasn’t as rainbow awesome as we had hoped.

Legends of Oz

We know we are guaranteed spectacular rainbows though when Legends of Oz: Dorothy Returns hits theaters, so we plan to catch a rainbow there with the whole gang! I am so excited to see it and can’t wait to hear what you think of the movie when it releases on May 9!

*This post is sponsored by Clarius Entertainment. All thoughts and opinions are my own.

Tracking Pixel

Pin It

How to Find & Write Pen Pals

Tuesday, March 4th, 2014

How to Find & Write Pen Pals

Pen Pals are a beautiful thing in a digital age where pen, paper, the process of writing, and waiting are so hard in our fast moving culture. Today I wanted to share about our experience with finding and writing pen pals that I hope will inspire you to find a pen pal of your own for your child after hearing about our experience.

How to Find & Write Pen Pals How to Find & Write Pen Pals How to Find & Write Pen Pals

Walmart challenged me to come up with a fun Spring Break activity for kids and finding a pen pal for my children is something that I have thought a lot about doing. We found items in their office supplies section like writing tablets (for big and small children), pretty note cards, and freshly sharpened pencils. With these arsenal of tools, we are now ready to begin a new adventure for our kids.

How Do You Find a Pen Pal?

Finding a pen pal is oh-so-easy thanks to social networks like Facebook, Instagram, and Twitter. I posted on my Facebook page that we were looking for children in our child’s age range that did not live in the United States to be pen pals with. Within minutes, we had many people replying about friends and family that lived in other countries with kids just around our age.

Of course, if finding someone living out of the states is harder to come by in your inner circle, consider just finding families that live in other parts of the United States. A child shivering in the polar vortex of Indiana, for example, might find a child’s life in Florida or California quite inspiring!

How to Find & Write Pen Pals How to Find & Write Pen Pals How to Find & Write Pen Pals How to Find & Write Pen Pals How to Find & Write Pen Pals How to Find & Write Pen Pals

Encourage Your Child to Craft a Great Letter

Writing letters not only improves our vocabulary and spelling, but it also helps teach children about the give and take of conversation.

Talk with your child about crafting a great introduction about themselves and how to weave in questions to find out more about their new pen pal. When my daughter asked me if her pen pal had glasses, I told her that this would be a great question to ask her so she could look forward to her response.

How to Find & Write Pen Pals How to Find & Write Pen Pals

Have Your Child Explore Their Pen Pal’s Town

It is easier than ever to learn more about where someone else lives thanks to Google’s Street View and Wikipedia. Although there was no street view for our pen pal, who resides in Greece, we were able to take a peek at pictures of landmark items in her country and read facts about where she lived.

Knowing information like this helps to build those initial letters as you get to know more about each other.

How to Find & Write Pen Pals How to Find & Write Pen Pals How to Find & Write Pen Pals How to Find & Write Pen Pals How to Find & Write Pen Pals

Send Your Letters Off

Once we were done writing our letter, we got to practice addressing an envelope and then added a few decorative touches to the back of our envelope for our new friend.

Although we ran our letter out to our mailbox at home, a great Spring Break activity might be to take that letter to the post office and make it feel even more, “official,” when sending it.

Now we must wait patiently for our response from our new friend and when she writes back, it will be a happy day, indeed!

How to Find & Write Pen Pals

I hope this inspires you to find a few pen pals of your own. And as double inspiration, here is my childhood pen pal. We met at church camp and became best friends through our letters back and forth. I remember that sweet anticipation of the mail dropping through the mail slot of our home and ripping them open to read, then reread, then reread again the precious words from my friend. 25 whopping years later, she is still my best friend for life.

I already told Emily to save her money and hopefully she will have a friend like that in her pen pal who she can visit someday! You just never know- we certainly never did! I shall be very jealous of her trips to Greece, should that happen!

Here’s a little video we put together of Emily’s first pen pal letter! I hope you enjoy it and I would love to hear if you had a pen pal and what they meant to you?


walmart_mom_disclaimer

Pin It

How to Make a Minecraft Steve Costume for Halloween

Thursday, October 10th, 2013

How to Make a Minecraft Steve Costume from MomAdvice.com

Halloween is just around the corner and today I wanted to share a fun Minecraft Costume you can create for your very own little Minecraft-addict. DIY Minecraft costumes are fun to make with your kids and give you a chance to spend time together.

Do you have a Minecraft fan on your hands? Trick or treating in this easy diy Steve costume couldn’t be easier (or more fun). Snag the pdf files to transform a cardboard box into a fun mask.

DIY Minecraft Costume Ideas

My son and I made this Steve Halloween costume way back in 2013 together. This adorable little boy, in these pictures, is now in his junior year of high school and supporting a mustache.

My, how time flies!

When I look back on these pictures, they fill me with a lot of joy because we did this together. While my daughter is ALWAYS game for a diy project, my son is far less interested in crafting with his old mom.

Luckily, his Halloween costume request was just what we needed to enjoy a day of crafting together.

If you are looking for an affordable minecraft costume, this post is just your ticket. Not only am I sharing our homemade Steve costume with you, I’m also sharing several other costume ideas for your Minecraft obsessed kid.

How to Make a Minecraft Steve Costume for Halloween

DIY Minecraft Costume Ideas

Supplies Needed:

1- 11x11x11 box (This size is NOT available at Walmart. We got ours at FedEx, but you can try Kinkos or the UPS store)

Minecraft Steve Printables– PDF’s printed on 11×17 paper (either print at home or have them printed at the same shipping/printing supplies stores that I have listed above)

Glue Stick and/or glue gun & glue sticks

Paper Trimmer or Scissors

Box Cutter

Packing tape

Aqua Blue Shirt


DIY Minecraft Costume Ideas

DIY Minecraft Costume Ideas

Directions:

1. Print out your Minecraft Steve Head printables. I put these files on a jump drive and brought them to Kinkos with me and asked them to print the files on 11×17 paper.

Read through this comment thread for printing options. It appears that UPS Store is the most affordable of the options.

You can also print at home or try printing the files on smaller paper and piecing them together to save on costs. Feel free to also share your own experience with printing these by leaving a comment below!

2. Begin by taping together the bottom of you box. Once the bottom of your box is taped, you can begin folding in the flaps of the box on the other end, to create a hole for your child’s head.

3. Using a paper trimmer or scissors begin trimming off any of the white portions on the printables.

4. Cover the backside of the first printable with glue. We found the glue stick provided a great start and then I reinforced it, using my glue gun, with little dabs of hot glue along the seam underneath.

5. Repeat the above process and finish with Steve’s hair on top, carefully gluing the edges of the hair down around the top of the box with a little hot glue to secure.

6. Have an adult cut the holes out for Steve’s eyes and wear your new Steve head proudly. Pair it with an aqua t-shirt and blue jeans to complete the look.

DIY Minecraft Costume Ideas

DIY Minecraft Costume Ideas

If you think that Halloween is just for kids, you aren’t doing it right. 

Here was our couple’s costume from 2013

Glee Costume Ideas

Glee Costume Ideas Glee Costume Ideas

Glee Costume Ideas Glee Costume Ideas

We sure do love Halloween around here! You can check out our favorite couples costume ideas over here. My husband sure does make a dashing Sue Sylvester! Yes, we get into it just as much as the kids do. And why shouldn’t we?

Looking for more fun DIY Minecraft Costume Ideas? Check out these fun ideas!

Easy Painted Steve Head

Iron Sword & Diamond Pickaxe Printables

DIY Minecraft Wither Skeleton Costume

DIY Minecraft Zombie Costume

Telescoping Minecraft Creeper Costume

DIY Minecraft Costume Printable

20 Amazing Minecraft Costume Ideas (for some extra Minecraft-y inspiration)

And why shouldn’t YOU?

here are a few other halloween diy ideas you might like to try this year!

How to Make Glow in the Dark Jell-O how to make glow-in-the-dark jell-o

Doughnut Hole Ghost Cake doughnut hole ghost cake

How to Paint Pumpkins with Acrylic Paints from MomAdvice.com how to paint pumpkins with acrylic paints (a fun halloween craft idea!)


If you are still looking for fun Halloween ideas, you must visit this DIY Halloween Costume Ideas article and this list of 7 More DIY Halloween Costumes to try creating. Happy Halloween, friends!

How to Make a Minecraft Steve Costume from MomAdvice.com


Developmental Toys

Wednesday, May 4th, 2005

When I was pregnant with my first child a friend said to me, “You know, you don’t need to buy many toys for a child. Just make sure you have some Tupperware, a cardboard box, some plastic measuring cups, and a wooden spoon and she’ll be happy”. I chuckled at the time, thinking “How many toys can one little baby need?”, but by my child’s first birthday I was no longer chuckling. Toys seemed to spontaneously generate in our living room. There were dozens of things that people told me my child needed . Mothers in my play group didn’t ask IF we had something, but HOW MANY we had. I received emails regularly from toy companies touting their latest toys that my child needed to have to develop on target. I conscientiously read all labels, did safety checks, scanned Amazon reviews, and kept checklists to make sure that I got my child what she needed when she needed it and that it was safe and reliable.

Then one day, after I had had my second child and the toy parade had started up its encore, I decided to stop the madness. What did my child really need? I certainly survived childhood (and even came out okay) without all these things to stimulate my left brain, my right brain, my intellect through music, and the many, many electronic items that cause my husband and I to purchase batteries each time we’re near a Target. I took a step back and thought about what we had that we really needed, versus what we enjoyed. The following article covers items that I feel really do contribute to a child’s development. Please note that it is NOT an all-inclusive list. I’m sure there are more things out there, or your own child may have benefited from or loved another item. These are not the “items any mother can’t live without” but my own personal take on “the type of toys that you should invest in since they contribute to a child’s development in his/her first 18 months”. Feel free to add to this list through one of the Mom Advice forums!

For the littlest ones, let’s start with toys that promote sensorimotor development. Rattles encourage reaching and grabbing and help motor skills development. Mobiles encourage visual tracking and reaching. Textures, such as rough, soft, crinkly, etc. give varying kinesthetic responses for your baby. Setting interesting toys just out of reach while on the floor encourages a slightly older baby (4+ months) to reach, roll, or crawl. Having an unbreakable mirror available for “tummy time” is fun for the baby and encourages beginning social skills.

As the child grows, ride-on toys that roll or rock are good for gross motor skill development. Soft balls for throwing and catching are great for outdoors or indoors. A larger, soft ball for rolling, kicking, and throwing with both hands is useful, too.

Language is an area that most parents focus on, and the best way to promote these skills is by talking to your child. (This is even free!). Naming items, talking to your baby whether he or she can understand the words or not, singing, and reading to your child are all important. The importance of reading to your child can’t be underemphasized. However, I have noticed that children’s books are as expensive, if not more, than adult books! The public library can be a super resource for the family. Many libraries also have baby or toddler programs with story time, etc. Books are plentiful and free. Most libraries also hold book sales where you can get children’s books at a bargain. Garage sales and discount websites are good bets, too.

Speaking of books, I’m often asked my opinion on the many electronic books available today. Here’s what I think: they are fun but not necessary. A good, old-fashioned book will do everything you need it to just by being a good story. (I read some interesting research through the International Reading Association recently that suggests that these electronic books are actually a bit of a distraction for “readers”. They are best for preschool and older children who already have the concept of a story (beginning, middle, end, etc.) to enhance the story as opposed to distracting from the language for younger ones).

While we’re on the subject of books, I can’t resist mentioning the oh-so-popular “video board books” that are ubiquitous these days. Do we own them? Yes. Do I like them? Yes. Are they essential for good development? No. There is nothing in these DVD’s that you can’t get from a classical music CD and a good book. (However, I do love how they calm the kids at “fussy time”!!).

This leads me to music, or more specifically classical music. When I was first pregnant I picked up a “brain builder” CD of classical music (for $17.99). I was shocked to see that it was all music I already owned. There was no big secret here. It was basically a lovely selection of classical pieces. Additionally the research on the “brain benefits” of classical music is pretty shaky; however, I’m a big believer in exposing kids to music (not just classical), so a good radio station, or calming CD’s, or favorite digital music station on television is always okay in my book.

As young children develop spatial skills, their cognitive skills develop as well. That’s why is useful to have some simple toys around to build these important skills. Stacking/nesting cups or blocks are usually cheap (mine were $2.99 at Target) but focus on important skills. “Shape sorters” are good, too, to develop cognitive skills and hand-eye coordination. And, I just can’t say enough good about old-fashioned blocks. These can be an essential tool for development that correlates with later math skills (there’s great research out of Boston College on this). I have noticed, though, that it can be hard to find old-fashioned, wooden building blocks, and once I found them I nearly fell over when I saw the price. However, they are a good investment for both boys and girls.

These months from birth to 18 months are key for developing so many skills. Children’s play is largely motor driven at first, and then exploratory. Language is critical, and you want to continue to foster those important language skills with your children through play. By 12-18 months, little ones are ready for a bit more challenge with play, and you can introduce crayons and markers to build motor and spatial skills (and foster creativity!), puzzles for perceptual organization develop, and “imaginary play” items, such as a play kitchen, tool bench, or dress-up clothes.

And, of course, everyone (at all ages!) needs at least one good “lovey”!

How to Potty Train a Toddler in Two Days

Saturday, January 8th, 2005

Ah, potty training!

Go to a local bookseller and you will find dozens of books on the subject. Search the Net and there are thousands of websites with information on how to do it stress free. There are even people who are capitalizing on a parent’s frustration with potty training by offering to do it for you, for a hefty sum! I honestly can’t imagine anything more unseemly than paying someone to teach my child to “go”.

Ewwww!!!

I have successfully potty trained two out of 3 kids so far, baby number 3 is only 14 months so she is off the hook for a few months at least!

I seem to be the envy of the playgroups when other Moms see that my 3 year old son has been in whitey tighties for over a year. My oldest was also 2 when he potty learned.

For me, potty training starts with a newborn. Now don’t get me wrong…I do diaper my babes (unlike the native African mothers who wear their babies on their backs and who, to avoid being soiled on, learn to read their babies’ cues so well that they know when their newborn needs to be held over a bush…no, I’m not kidding!) but I have always used cloth diapers, which encourages babies to train early. I’m not a longhaired, barefoot, off-the-grid hippie (not that there’s anything wrong with that, but you’re more likely to find me in Doc Martens than Birkenstocks!) but I have been cloth diapering since the beginning.

It has saved me hundreds and hundreds of dollars, but I also like the fact that my babies begin to make the association with the uncomfortable wet feeling and the knowledge that they can prevent it. Most babies will wake up dry in the morning at several months of age, demonstrating that they are physically able to “hold it”. In my opinion, Pull Ups are evil and yet another invention that some clever businessman came up with that parents now think is a necessity. Along with formula, baby swings, and the like. Pull Ups just enable a 5 year old to keep soiling himself. Research has shown that cloth diapered babies potty learn several months earlier than disposable diapered babies.

So here’s Grandma’s recipe (and I do owe it to my Mother, like most of the good stuff I know about parenting) for easy potty training, even if you choose not to cloth diaper.

Let your baby come into the bathroom when you go. That way, they know what’s going on in there. You don’t have to get graphic, just talk to them about what toilets are for. If you are a woman at home all day with boy children, encourage Daddy to show ’em how it’s done. You don’t want them thinking that if they go on the toilet their equipment will fall off, like Mum’s obviously did. Strange, but true…some tots will come to this conclusion.

Buy 3 or 4 of those cheap little molded plastic potties and put them around the house. At least, one in each bathroom and one in the kitchen or the room where you spend the most time with your child. Stick a towel underneath for the sake of your carpet if said child is a boy. Speaking of boys…you can take advantage of nature here by keeping an open mind. I know at least one boy who was trained when his Mom let him go off the side of the deck.

The summer that your child is closest to two, take two days and don’t leave the house. Let your child run around naked from the waist down, with a big tee shirt on top so that private parts stay private.

Every 10 minutes, place the child matter-of-factly on the pot. DO NOT ASK inane questions like “Do you need to go potty sweetie pie!?” We are talking about dealing with a two year old here! Just do it like it’s the thing to do, and don’t ask permission. Don’t force it, and if he/she wants to get up right away, let him or her.

If you have a resistant child, set a timer to go off every 10 minutes. It’s amazing what a child will do when the power dynamic is taken away. When the “potty timer” goes off, it’s time to sit on the pot!

Use praise but don’t go overboard. Act like this is the expected thing. Be cool. Say “You put peepee in the potty, just like Mommy and Daddy (and big brother, and your older play group friend…3rd parties are gold here!!) do.

Don’t make a big deal out of what’s happening. Don’t spend hours reading potty training books or videos to the child. Again, be cool. If you make it into a big deal, your child will be more likely to dig in and resist.

Have some “big boy shorts” or “big girl panties” that you know your child will like, perhaps that you have picked out together, ready for the end of the two days. Your child will be less likely to have accidents if s/he is going to mess up their new undies.

When the inevitible accidents happen, don’t scold. Be patient and gracious. This is part of the job. Remember that even if you decide to spring for carpet cleaning, you will still come out ahead if you don’t have to buy diapers for another year or two!

Surviving Winter Break

Saturday, December 18th, 2004

Winter break is much shorter than the summer break, but for many parents it feels like the longer of the two breaks. Being cooped up in the house can make parents and children crazy after a few days let alone weeks on end. Here are ten ideas for you and your children to help you survive the long winter days without blowing your budget or losing your sanity.

  1. Have an indoor picnic with your children. Spread out a blanket and pack a basket of your favorite picnic foods. Take this time to chat about what you miss most about the summer.
  2. Have a family night playing your board games. Offer a grab bag of prizes (purchased from your local dollar store) or let the winner give up their chores for the day.
  3. Indulge your children in fun winter craft ideas. My two favorite sites to hit during the winter season are dltk-kids.com and familyfun.com. Make sure you are stocked on plenty of craft supplies so you don’t have to make a trip out in the cold weather. Do these crafts with your children because they are the types of activities your children will remember for years to come.
  4. Have a day of cooking with your children. Cooking with your kids teaches them valuable skills and also gives them precious time with you. Have smaller children help you measure, stir dry ingredients, and count out ingredients with you. Allow older children to do things themselves under your supervision. Be sure to eat some of the treats you made together and have your child present them to your spouse. It is such a joy to see our children looking so proud of what they have done.
  5. Find out what your local library has to offer. Many offer amazing classes and story hours for children during the winter months. You can also take them to pick out their own books, movies, and music to be enjoyed together or alone.
  6. Play in the snow with your kids. Help them build snow angels, go sledding, build a snow fort, or create a snowman. After a hard morning of playing in the snow, come inside and have a nice warm cup of hot chocolate complete with marshmallows and whipped cream.
  7. Have a beach day in the middle of winter. What could be more fun than a little beach music, drinks with little umbrellas, a big beach ball, and beach chairs? Dress in your swimsuits (if you dare) and toss around the beach ball.
  8. Make your own snow. All you need is soap flakes, water, liquid starch, and white powdered tempra. Mix soap flakes with water into a thick paste. Let your child mix this with a hand beater. Add a small amount of liquid starch and tempra. Let your child create designs by painting with this mixture.
  9. Find a pen pal for your child. ks-connection.org is a website that is devoted towards providing children and schoolteachers pen pals from all over the world.
  10. Exercising is the one thing neglected by all members of the family when the colder weather comes around. Pop in an exercise video or some music and exercise with your children. Older children can be encouraged to use exercise equipment or join you in your own exercise routine. For those who are more creative, let loose and just dance.

With these ideas, winter does not have to be a bore. Don’t forget to stop by your local library to find more resources on activities for children. I hope with these tips in mind your break will fly by and the time spent with your children is treasured in both of your hearts forever.

Back to School Tips

Thursday, August 12th, 2004

It is hard to believe that summer is coming to a close, but the fall and school season is fast approaching. Our son will be beginning his first year of preschool this year and we are both excited and nervous. How nice it has been to not be on a schedule and to be able to lounge around in our pajamas, yet at the same time I am looking forward to having some time on my hands to tackle those projects that have been looming before me all summer long.

I remember the hectic mornings of my youth with three children in our parent’s house. I remember the constant fight over the bathroom, the rushed breakfast, our poor mom driving us to school every single day, and the frantic sense of urgency that we all had to get to where we need to be. I hope that with a few of these organizational tips that you can avoid those hectic mornings and be able to really sit down and enjoy that cup of coffee before your hurried day begins. Here are a few of my ideas for staying organized during a more stressful part of your day.

Plan Ahead

Much of the stress in our lives can be avoided if we can plan ahead and this is the case with returning to school. Usually the teachers send home with your children a list for what will be needed for the next school year and it is important to get all of the required items as well as several back-ups for later during the year. Take advantage of all of those back to school sales with the huge bins of notebooks, loose leaf paper, and pencils and stock up. Designate a spot in your home, which is accessible to the children, for storing all of your back up supplies. Be sure to check your local dollar store as well for the pricier items that your child will need in order to get started for the year. You will be very grateful when the spring rolls around and you do not have to make another trip to the store and pay higher prices for the same items later in the year.

Next, label, label, label. Everything will need to have your child’s name on it and you will be glad that you labeled your child’s items when another child accidentally brings them home with them. You can write your child’s name in permanent marker on belongings such as backpacks, lunch boxes, gym shoes, and other fabric items. For notebooks, pencil totes, and books it might be a good investment to purchase a self-stamping rubber stamp with their information on it or purchase address labels. A good place that I have found to get these is ChecksUnlimited and they offer a wide selection in different styles and fonts.

Be sure not to miss the child’s Back to School night and introduce yourself to their teacher. Be involved in any capacity that you can whether it is room mother, volunteer teacher, or just to help on those field trips. Not only will your child be grateful, but you can establish a relationship with the teacher and open the doors of communication. Remember that if you do not have a wonderful first impression of the teacher to reserve this information when you are around your child. Your negativity can rub off on them and immediately start the year off on the wrong foot.

Clothing Wars & Other Battles

Around the age of two or three you will start to see your child developing their own opinions on what looks good and what does not. Maybe looking like a “fashion don’t” isn’t of any concern to them, but it might be a concern to you on your child’s picture day. It can be a true battle of wills, but there are ways to help your child choose their own clothing with your help.

Invest in a five compartment sweater organizer and use the top one for Monday, the second one for Tuesday, and so on. On Sunday evening have your child help you plan the clothing for the week. Preset everything down to underwear, socks, barrettes, whatever you can do to help make their morning easier.

For younger kids, preset their combs, brushes, toothbrush, towel, and toothpaste so that they can quickly get ready in the morning without you getting everything out for them.

Be sure to have purses, briefcases, coats, and backpacks waiting at the door ready to go for you so that you don’t have to rush around getting everything together in the morning. You will be grateful when you don’t have to spend twenty minutes looking for that one paper or your keys when you are already rushed to get to where you need to go.

Meals

Much can be said about meal planning not only for your hectic morning, but also lunch preparation can be particularly cumbersome when you are trying to get your children to school on time. The supermarkets offer a variety of food that is both unhealthy and pricey, catering to the harried parent who doesn’t think that they have time to be creative. You will waste a lot of your money by buying these convenience and individually sized items. Instead of buying these, look for foods that are nutritious and which will offer your child the nutrients they need for energy to get through their school day. Buy large packages of crackers, cheese, milk or juice, carrots, celery, and other healthy foods and start by dividing these large packages into small lunch-size portions in baggies. Keep these baggies in a Rubbermaid container and then just grab them and drop them in the lunch boxes in the morning. Save your used yogurt containers and refill these with the boxed pudding or Jello that you can make large batches of for a fraction of the cost or refill them with yogurt from larger and less expensive containers. Instead of purchasing juice boxes or individual milks, fill a thermos with the drink of your choice. For younger children you can dilute the juice so that they are not getting too many empty calories. Be fun and creative with lunches and a little note to your child (or your husband for that matter) will really make their day and remind them of how special they are to you. By preparing these meals the night before, you will save yourself some time in the morning.

With that being said, don’t forget to offer your child a healthy breakfast in the morning. It is proven that children perform better on tests and have less health problems later in their life if their day is started with a healthy breakfast. Have a variety of foods on hand such as fruits, whole grain cereals, whole grain bagels, and other healthy foods on hand that your child can prepare for themselves. For the more motivated mother, you could even prepare large batches of French toast, waffles, or pancakes and then freeze them in individual portions for your child to zap in the microwave in the morning. I like to do this on Saturday mornings when I have more time on my hands to really prepare a nice morning brunch and just make tons of extras for those days during the week when I have less time.

Preset your table with silverware, bowls, and plates the night before. Place cereal and other breakfast items on the table where they are accessible to your child to help prepare their breakfast in the morning. Also make sure that your dishwasher is empty the night before so that you can immediately move breakfast dishes to the dishwasher avoiding a sink full of dishes to come home to after your busy morning.

Papers, Paper and More Papers

The beauty of your children’s craft projects from school will wear off if you are saving every single picture and drawing that they have done. Save yourself the loads of clutter by allowing your child to help you pick their most favorite projects for saving. Invest in a couple of inexpensive frames for their bedroom and reframe these periodically with their beautiful artwork or choose one picture for the refrigerator or front of one of your cupboards for saving. By allowing your child to help you choose, they learn the importance of weeding out paperwork.

It is also smart to create an area in your file cabinet or a plastic file crate for your child’s papers and report cards. Have them help you with labeling the folders or decorating them with stickers that they have chosen. This will give them a sense of ownership of their work and also teach them the importance of filing their own papers.

As a parent, your child will be bringing home lots of papers that require your reading or signature. Designate a spot in your home for an inbox and outbox for these papers. Label them clearly for your child and instruct them to unload their papers into the inbox. It also helps if you can create a box for them for their own room where they can put their own homework in that they need to do for the evening.

For papers such as emergency contact sheets, permission slips, and immunization records which come up frequently during the school year for field trips and sports, it is a good idea to invest in photocopying these documents and keeping them in a file for yourself so that you don’t have to constantly be signing and writing the same things over and over again.

When you get papers on bake sales, field trips, and other school events, be sure to immediately transfer these dates onto a calendar. If you have more than one child’s events to attend, assign each child and family member a color for their events. It will make it easier to see that it is Susie’s concert that you need to attend and not Billy’s. Buy a calendar that has plenty of room in it for all of your information and by immediately putting this on your calendar in a neat and organized way, you will have less chance of missing those important events. Consult your calendar first thing in the morning so that you know exactly what you need to do for the day.

A+ Work

Don’t forget to set aside some time in the evening for your child to work on their homework. By setting aside time in the evening you will not have to be trying to complete homework pages first thing in the morning. Take the time to check your child’s work and discuss their homework with them. If you have no idea what they are doing, bluff your way through it or run over to the internet and see if you can figure it out. Trust me, our parents did it- we just really believed them.

Now you truly can enjoy that cup of coffee, your morning paper, and your smooth morning.