Archive for the ‘Home & Organization’ Category

How to Easily Stain Furniture

Tuesday, October 27th, 2015

While I usually use paint to makeover furniture, I tried my hand at staining furniture – this sweet table I found that needed a ton of help to be beautiful – and I love how it turned out! It’s been one of my favorite transformations ever, so of course I wanted to share it for our Transforming Your Space M Challenge.

How to Easily Stain Furniture by MomAdvice.com.

Staining furniture seems like a pretty intimidating project if you have never stained before. Today’s tutorial is going to showcase how to easily stain wood furniture and how you can turn a tired piece into that piece of furniture you have been dreaming of with a simple stain technique.

Today I am working with Cabot Wood Stain to share their new Premium Wood Finish, a stain + sealer product that you can use to restore the finish on your furniture. This H2Oil™ formula provides the best of oil and water-based stains and makes for easy clean up with just a little soap and water!

What I really love about it most though is that it conditions, seals and protects in one step and doesn’t require primer or wood conditioner. You can find this stain at your local Lowes store and the stain color I am working with today is their Espresso finish.  Don’t feel like you have to be committed to just the traditional stain though because it can be tinted to nearly thirty different colors including non-traditional colors like teal and purple!

Premium Wood Finish Colors

Let’s get started on our fun project- I can’t wait for you to see the results!

How to Easily Stain Furniture by MomAdvice.com. How to Easily Stain Furniture by MomAdvice.com.

I headed over to our local thrift store and found this beat-up wooden table for $50. I sent a picture of it to my husband and he replied, “Please tell me you didn’t bring that home.” Yes, you know that you have picked the perfect piece if your husband requests that you not bring it home.

As you can see on the top, this was in extremely bad condition. The top of it looked irreparable and the drawers were deeply damaged. I knew that I would have to be creative with this piece, but the legs and pretty drawers made it a piece worth working on for our office. Because this piece is so damaged, my process took a few extra steps, but even with all the damage, I was able to finish it in a mere 24 hours. You won’t believe this transformation.

How to Easily Stain Furniture by MomAdvice.com.

Supplies Needed

Cabot Premium Wood Finish Stain + Sealer (in your color choice- I have used espresso)

Optional : Cabot Pre-Stain Wood Conditioner (I used this because my piece was so incredibly damaged, but it is an unnecessary step if your piece is in better condition)

Wood Filler

Medium & Fine Grit Sandpaper

Sander (or you can do this by hand)

Rags

Gloves

Drop Cloth

Painting Supplies (if adding painted details like me. The drawers are spray painted using this technique here)

New Hardware or Spray Paint for Old Hardware

How to Easily Stain Furniture by MomAdvice.com.

How to Stain Furniture

1. Begin by thoroughly cleaning your piece well with a clean rag. Once the piece has been cleaned, apply stainable wood filler to any gashes you may see on your piece. Allow the wood filler to dry (two hours) and then using your medium grit sanding paper to smooth and make the filler level to the rest of the surface.

2. Using a sander (or you can do this by hand), sand the piece to remove any old stain and any scratches. Due to the damage on my piece, this took a half hour to do which gave me a chance to begin painting the drawers to this piece.  Make sure that you have on gloves and a mask when sanding your piece and once finished that you clean it well with a clean tack cloth to remove any of the sanding particles before staining.

3. Because of the condition of my piece and how uneven the top still looked on this, I decided to brush on some Cabot Pre-Stain Wood Conditioner (be sure to do this with the grain of the wood)  to make sure that my stain really took evenly. If your piece is in better condition though, you can definitely skip this step. 

On larger surfaces, you will want to work quickly in small sections. Saturate wood with a uniform coat of Pre-Stain Wood Conditioner using a clean brush or sponge. Allow no more than 5 minutes for penetration. Then wipe off all excess. Immediately after removal of Conditioner, apply your Cabot Wood Stain If you are pre-conditioning DO NOT allow the Conditioner to dry. Surfaces which are allowed to dry will not accept stain!

How to Easily Stain Furniture by MomAdvice.com.

4. Now we are ready to stain and seal our piece. Before you begin, make sure your piece is clean and free of any debris using a clean tack cloth.  Again, using a foam brush apply the stain with the grain of the wood. Raw wood is very thirsty so it will absorb the stain quickly. After five minutes, using a clean tack cloth, and wipe it down to remove any stain that hasn’t been absorbed.

How to Easily Stain Furniture by MomAdvice.com.
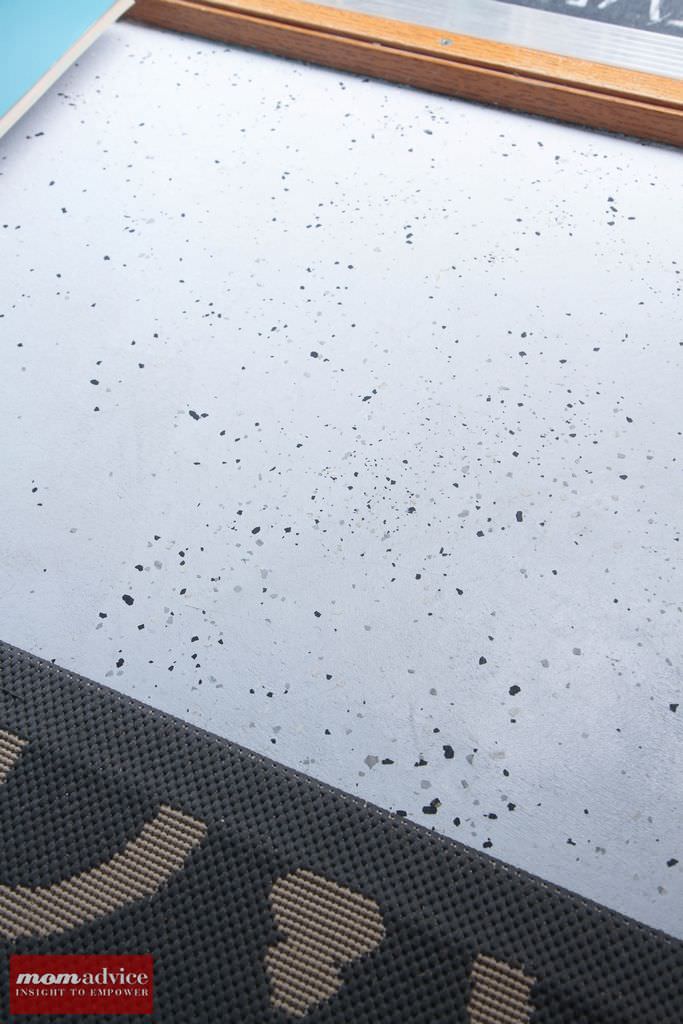
Here is what my tabletop looked like after the first coat. You can see that there is definitely still some unevenness to it, but we are off to a good start. Allow this to dry for 2 1/2 hours before applying the next coat.

How to Easily Stain Furniture by MomAdvice.com.

Sand very lightly with 600 grit sandpaper to smooth wood grain. Remove sanding dust with tack cloth and apply a second thin coat. For full color and maximum durability, apply 2 or more coats. For a muted, distressed look apply 1 coat.  For my table, I applied just two coats so I still had the distressed look that I was after. Since I am impatient, I really love that the Cabot Wood Stain is a fast drying formula that dries in 2-1/2 hours between coats and fully dries in only 6 hours.

Since I also have two kiddos that are rough and tough on my furniture, I also love that it offers a durable finish that will hold up to our abuse and that it protects against spills, water rings and even household chemicals like bleach, alcohol, and nail polish remover.

How to Easily Stain Furniture by MomAdvice.com. How to Easily Stain Furniture by MomAdvice.com. How to Easily Stain Furniture by MomAdvice.com. How to Easily Stain Furniture by MomAdvice.com. How to Easily Stain Furniture by MomAdvice.com.

How to Easily Stain Furniture by MomAdvice.com.

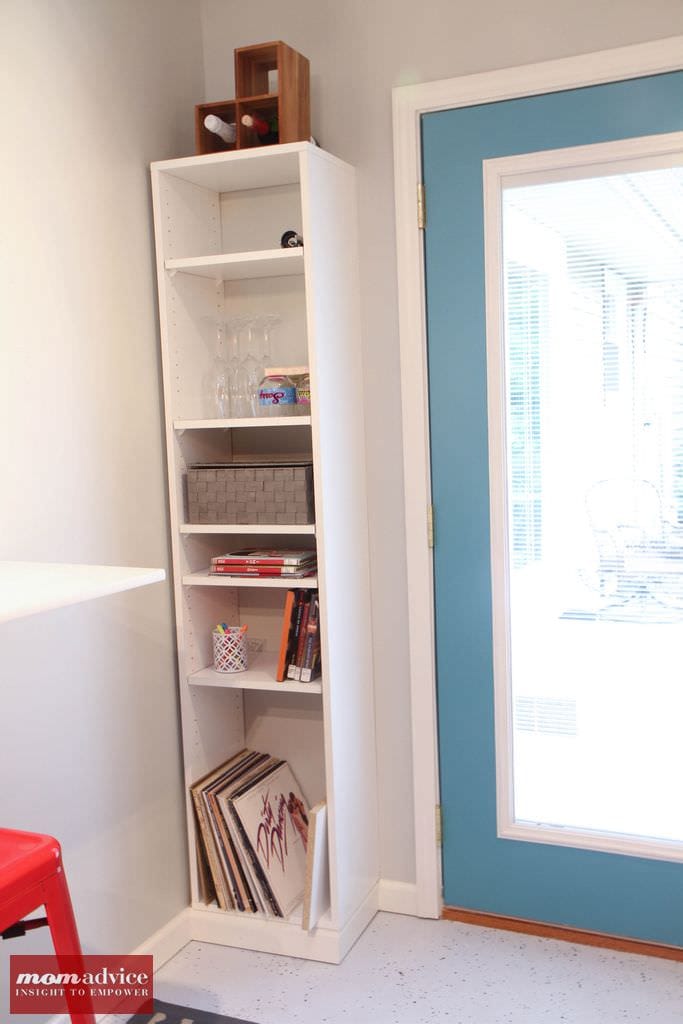
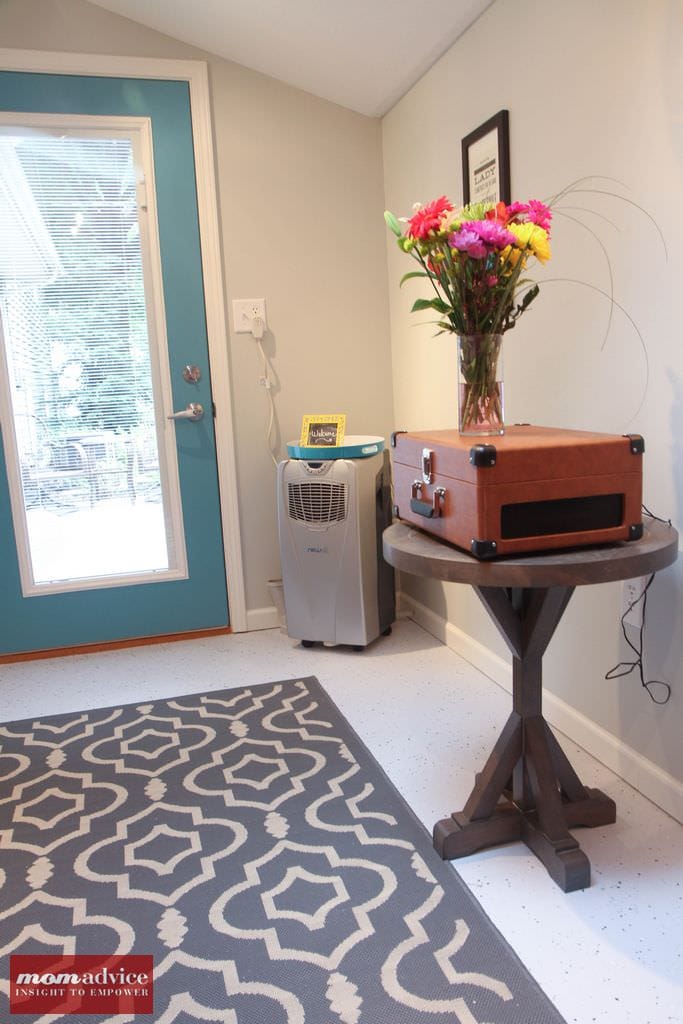
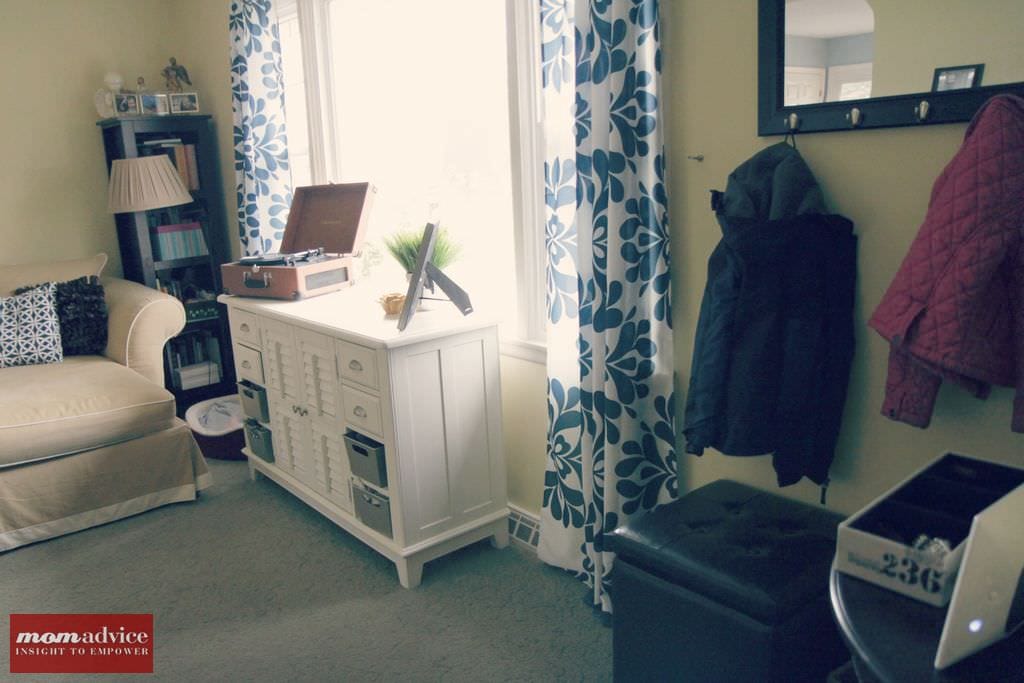
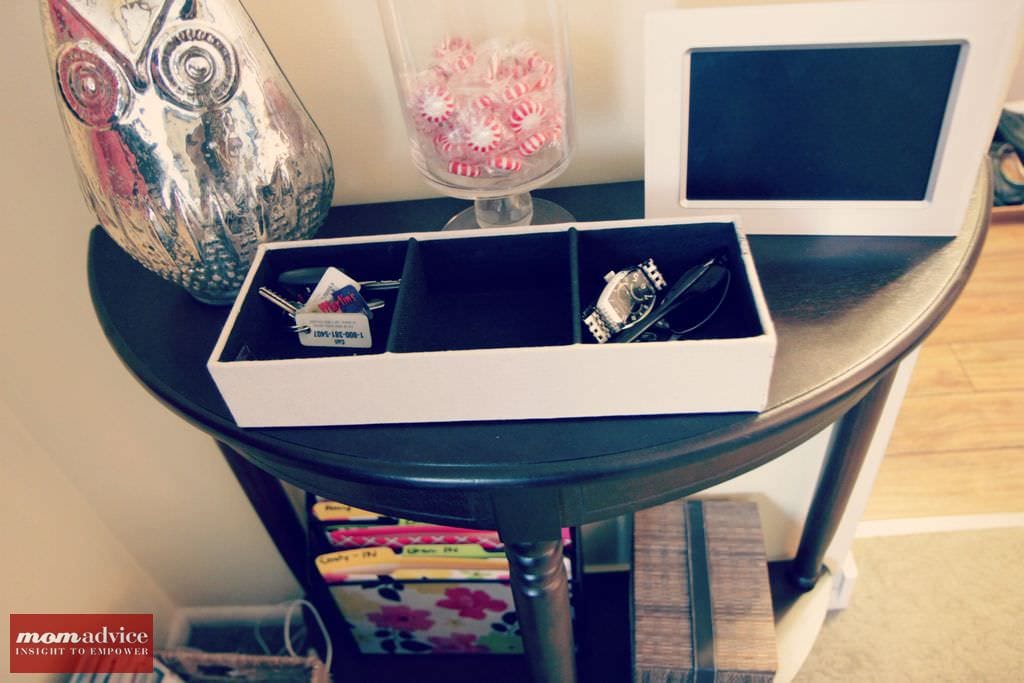
Hello beautiful new table of mine! I am absolutely smitten with this piece and I can’t believe the transformation. We updated the hardware with a couple of new drawer handles since the previous handles were falling apart. The drawers were distressed and antiqued up to match their chippy former days and then I applied my decorative glaze over these spray painted drawers to antique them up a bit more.

How to Easily Stain Furniture by MomAdvice.com.

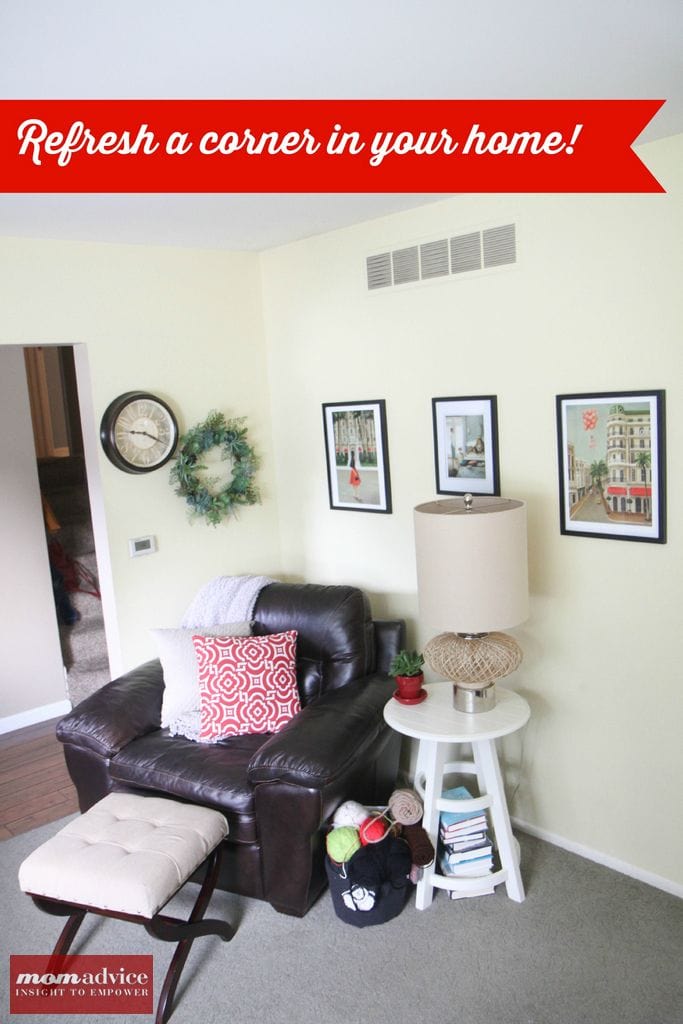
I swear that this new-to-me table looks just like a table I was coveting in my West Elm catalog, but at a fraction of the price. This has become my new favorite corner in our house and I can’t believe the transformation! For other indoor stain ideas, check out Cabot’s Indoor Inspiration Pinterest board and be sure to follow me on Pinterest for more DIY inspiration! 

Have you ever stained furniture before? What are your tips and advice for updating a piece?

This post is sponsored by Cabot Wood Stain.  I’ve received product samples and compensation for my time and effort in creating this post. All thoughts and opinions are my own.


Pin It

How to Makeover a Shed Into a Bonus Room (Tour Our Shed!)

Tuesday, October 20th, 2015

How could I not share my “She Shed” with you again to go along with our Transform Your Space M Challenge? It remains my favorite transformation. ever. I hope you are inspired to take back space and make it work for you!

she-shed-makeover

Today I wanted to share with you how we transformed our outdoor shed into a bonus room. Shed makeovers are one of my favorite things to look at, but I had never considered our own shed a bonus room until this summer.  This transformation from a shed that housed our chaos and clutter into a multi-purpose retreat is one of my proudest makeovers we have ever done on our home.

I partnered with Walmart on this project to showcase a unique idea for outdoor living. Since they partnered with me, I did my best to utilize items from their store while weaving in handmade items from some of my favorite Etsy sellers.

Before I get ahead of myself though, let’s take a tour of our shed before the makeover. As an FYI,  I did not gloss this up for you one bit. This is exactly as awful and as embarrassing as it looked. It took me twelve hours to organize our garage, six donation runs, and a whole day to empty this shed. I am ashamed how bad it had gotten, but I wanted to be honest about all of that with you. This took a lot of preparation for me to empty this and rid my life of a lot of junk to execute this space. It was worth every moment of effort.

Shed Before Pictures

Shed Before Pictures

Shed Before Pictures

Shed Before Pictures

Shed Before Pictures

Shed Before Pictures

Shed Before Pictures

Shed Before Pictures

Shed Before Pictures

Our home is a late-sixties tri-level that had an attached shed on the home.  Although the shed is attached to our home, you do have to step outside to access it, but it is close enough that easy access is possible. This might be unlike  other sheds that might be residing further out from your property. After talking with our neighbor who has been a longtime resident here,  I understand that this wasn’t originally part of the home, but was an addition that had been made later to our house. Over the years, as other homeowner’s owned it things like insulation and electrical were added. The space had good bones to be a room, but no one had gotten any further than that. We have resided in this home 12 years and it only occured to me this summer that maybe we were missing out on a golden opportunity to have a unique bonus room.  After getting estimates and ideas from a few contractors, we hired All Pro Renovations to assist in transforming this dumping crowd of chaos into the room of my dreams.  They were able to address getting our space up to code and also got my vision for what I wanted to accomplish with this room.

My idea for the space was that it could be a retreat for my children during the day and a fun entertaining spot in the evenings. The most important aspect for this project was that we utilize every single inch of this 8×12 space in a thoughtful way. I wanted a bar that could fold down, flush to the wall when it was not in use. I wanted to utilize all the space that we could behind the door to house storage. I wanted furniture that could be stacked or wall mounted for entertaining.  Most of all, I wanted it to feel very modern and light-filled with a glass door and a window.

How to Makeover a Shed Into a Bonus Room

We painted the door with a bright coat of teal paint that I loved so much that we decided to paint the front door too.

How to Makeover a Shed Into a Bonus Room

We quickly figured out that when the kids were in this room that I couldn’t necessarily see that they were in there and would be hunting in the backyard for them. I added a plastic Open/Closed Sign from Walmart that I attached to the trim of the door with a 3M hook so the kids could let me know if they were in there. If they are inside it is open if they go back out to play in the yard, they flip it to closed. My daughter loves to also leave a time on the clock to let me know when she will be back.

How to Makeover a Shed Into a Bonus Room

How to Makeover a Shed Into a Bonus Room

How to Makeover a Shed Into a Bonus Room

Since our home had aluminum siding, All Pro recommended adding light with a skylight (which cost the same as adding a window), because if we damaged our siding, we would not be able to find matching aluminum siding for this home. They found a glass door that we could use for the space. They recommended doing an epoxy-paint floor with neutral tones that would be durable and ideal for this outdoor space. To warm up the floor, I added this outdoor rug in a 5’3×7’7 (an absolute steal at $77.58)   The room was drywalled, painted, and trimmed to finish out the bones of this room.  My color choice for this space was Benjamin Moore’s Gray Owl for the walls (which I now what to paint my entire house in) and Benjamin Moore’s glossy White Dove for all of the trim.  Although the original intent was to add canned lighting, our ceilings were too low for the space so track lighting was installed which adds to that modern retro feel that I was going for.

How to Makeover a Shed Into a Bonus Room

A built-in was added behind the door to make sure that every inch was used. Wine glasses, a rack, and opener are on the top shelves for evening entertaining. On the lower shelves, we have coloring books, crayons, and books. I also added a few of my favorites from our record collection and they fit perfectly on the bottom so we can use our turntable out there.

How to Makeover a Shed Into a Bonus Room

How to Makeover a Shed Into a Bonus Room

How to Makeover a Shed Into a Bonus Room

The focal point of the room is this beautiful Providence Outdoor Day Bed (priced at $399) from Walmart for the back wall.  This canopy bed is so beautifully made that I almost fall asleep every night on it while I am out there. It is generously deep and the canopy element really adds an eye-catching detail to the room. I switched out the pillows with a more modern printed pillow covers that I scored on Groopdealz as one of their deals-of-the-day. I also added this Too Legit To Quit pillow from Michelle Dwight Designs to add a splash of fun to the bed. I found inexpensive pillow forms from Walmart to create cushions with style for the back of this bed.  The pillow forms are two for $5.15 and feel like expensive cushions.   This bed not only is the perfect spot for a reading nook, but it also can double as a guest room year-round for our guests. I kind of want to stay here as a guest myself.

How to Makeover a Shed Into a Bonus Room

How to Makeover a Shed Into a Bonus Room

How to Makeover a Shed Into a Bonus Room


The bar can comfortably seat four people and I found retro Amelia Metal Cafe Bar Stools in red (2 for $159) from Walmart to complete the look.  I actually placed an additional order for two more now that I could see how many I can fit here.  All Pro Renovations created a bar that could be folded down and added a stripe of teal on the edge of my bar to add a little splash of color.

How to Makeover a Shed Into a Bonus Room

How to Makeover a Shed Into a Bonus Room


We added these modern floating shelves (only $19.95) and I filled them with a few fake succulents and wove in a few of my favorite books and a fake orchid.  It creates a soothing and maintenance-free splash of color over there.

How to Makeover a Shed Into a Bonus Room

How to Makeover a Shed Into a Bonus Room

The turntable I was gifted from my amazing girlfriends was placed on this pedestal table from Home Decorators and it was just the right size for this small space. I added this beautiful 30″ handmade arrow from Junk Art Gypsyz to the wall. We also added a beautiful typography piece that has the lyrics from Elton John’s, “Tiny Dancer,” to that wall.

How to Makeover a Shed Into a Bonus Room

Your question might be how we are keeping the room cool in the summer and warm in the winter? I have a great solution for you. We discovered that Walmart offers a Newair NewAir AC-10000H Portable Air Conditioner & Heater unit that not only act as an air conditioner, but a one piece solution for air conditioning, heating, and dehumidifying. The best part is that it can be set on a timer so you can set it for the day and it will automatically shut itself off.  All-Pro got the unit to drain outside of our home and installed a flap for the hose so that the unit is maintenance-free. This was the priciest of the purchases at $471.81, but eliminated the need for multiple units in such a small room.

How to Makeover a Shed Into a Bonus Room

Shed Makeover Shopping List

1. 30″ Marquee Arrow {Junk Art Gypsyz}

2. Too Legit To Quit Pillow {Michelle Dwight Designs}

3. Arrow Apache Blue  & Fynn Cool Grey Pillows {Groopdealz}

4. Tiny Dancer Typography {Concepcion Studios}

5. Safavieh Courtyard Outdoor Rug {Walmart}

6. Chloe Side Table {Home Decorators}

7. Amelia Metal Cafe Bar Stools {Walmart}

8. Newair NewAir AC-10000H Portable Air Conditioner & Heater unit {Walmart}

9. Providence Outdoor Day Bed {Walmart}

10. Danya Floating Shelves {Walmart}

11. Pellon Homegoods Decorative Pillow Inserts {Walmart}

12. Open/Closed Sign {Walmart}

Benjamin Moore Paint Choices


Paint Colors Used In Our Shed

1. Benjamin Moore White Dove (Glossy, Trim)

2. Benjamin Moore Blue Spa (Exterior, Door & Edge of Bar)

3. Benjamin Moore Gray Owl (Semi-Glossy, Walls)


I hope you enjoyed touring our shed.  I have found this room to be so good for my soul. It is so quiet and peaceful in there and is my new favorite place to unwind. Since the room is designed so differently from our home, it truly feels like I am going somewhere else in the evenings. The absence of clutter and our busy everyday life has been very calming to me.  I have been counting down the hours until my kids go to bed so I can escape. I also look forward to entertaining in here with my girlfriends, hosting book clubs, sharing a cup of coffee with good friends, writing alone,  and having a retreat for our kids on rainy days.

I’m thankful to All Pro Renovations for making all my dreams come true and exceeding my expectations for our former junky shed. Professional, courteous, on time (or early) every day, and quick to create smart solutions for this design challenge.  In ten short days, they created a space that I am so proud of and were as equally excited seeing it all come to life. They even came to my rescue when my daughter had a meltdown that her chalkboard door was disappearing and cut it to size for our garage door to surprise her while we were on vacation.  How amazing is that?

How to Makeover a Shed Into a Bonus Room

I could not have asked for more! I am already working on vision boards for other rooms in our home I would like to tackle with them again.

I hope this space inspires you and I’m thankful that Walmart gave me the chance to share about their beautiful outdoor options with you!

walmart_mom_disclaimer

Pin It

Ideas for Transforming Corners In Your Home

Thursday, October 15th, 2015

In honor of our Transforming Your Spaces M Challenge, I’m republishing one of my favorite posts about transforming small areas of our home using a combination of what we have, a few new inexpensive items, and some new fun art!

Transforming Corners In Your Home from MomAdvice.com.

I can’t believe that we have lived in our home 11 years now. What I saw as just our temporary residence until something better came along has now become our forever home as we inch closer and closer towards paying it off.  This is the longest I have lived anywhere and I am so proud of the updates that we have made to our space and creating a place that we can be proud of and share with our family and friends.

Tackling a big renovation on your space can feel daunting and overwhelming. When I look around there is so much that I wish I could do, but just isn’t in our budget. The good news is that small switches in your home can still make improvements to your space that can sit sweetly in your budget and time constraints.

Transforming Corners In Your Home from MomAdvice.com.

Walmart challenged me to refresh a corner in my home using some items from their store and I knew exactly which corner in my home I wanted to tackle. This corner is where I live during the school year. You will find me happily flipping through library books between getting my kids off to school and on their buses or spending my evenings knitting and sipping tea in this chair in the evenings.  The wall has had these three black-and-white pictures of shoes on it for ten years and I find that as I get older and develop my style more, I am drawn to lighter and brighter things in my home, rather than the masculine tones and colors that I was drawn to before.

Transforming Corners In Your Home from MomAdvice.com.

I decided to brighten up the space with a few things we had around our house (rearranging, after all is always the most budget-friendly option), to add a few fresh picks from Walmart that would fit in my budget, and then combine it with our love for great art.  At Walmart, I found two throw pillows for my chair, beautiful picture frames for under $20, a fiery red flower pot, and a small succulent that would require very little watering. I pulled in a light throw I had to bring in the lighter tones and moved a wreath that I had from our kitchen into the spot next to our clock.

Transforming Corners In Your Home from MomAdvice.com.

The entire color scheme hinged around some beautiful prints I found from Janet Hill Studio on Etsy. If you haven’t heard of her, I would just run right over and spend your afternoon coffee with her shop.  We had so much fun picking art for our wall and her pictures were so amazing that it took my husband & I almost three weeks to come to an agreement together on which prints to select. These prints brighten up the space so much more than my black-and-white photos and are a beautiful conversation piece. I love them so much that I have asked my husband if I can have a print for my birthday each year. I want to fill my home with her art, it really makes me that happy.

Transforming Corners In Your Home from MomAdvice.com.

Of course, once you start, it can be difficult to stop.  For me, it is a never ending process of rearranging and adding and taking away items in our home. My view from  the chair was rather uninteresting too so we went ahead and ordered one extra print.
Transforming Corners In Your Home from MomAdvice.com.

Transforming Corners In Your Home from MomAdvice.com.

I now have a pretty view of this beautiful piece titled, “Tallulah Shaw Rehearses Before Her Final Show. 1959.”  With our new front door and the pop of color we embraced while turning our shed into a bonus room, it is a very different hallway view from a few weeks ago.

I hope this inspires you to makeover a corner in your own home.  The beauty for me is that next week this corner could look entirely different because the joy is in the rearranging, the repurposing, and the frugal additions that can make your space so fun!

walmart_mom_disclaimer

Pin It

Secrets to Stealing Some Space of Your Own

Monday, October 12th, 2015

From our marriage & parenting contributor, Mary Carver.

Secrets to Stealing Some Space for Yourself

I’d been feeling out of sorts, but I couldn’t exactly say why. Something was just OFF and it was BUGGING ME. Finally, the cause of my irritation became clear when my husband and I tried to clean our garage.

We live in a small house with small closets, and even though I declutter on a fairly regular basis, we still seem to acquire an outrageous amount of STUFF. And because I don’t always have the time or energy to put that STUFF where it belongs (or, even if I do, it doesn’t actually have a place to belong), it often gets shoved into the garage. In stacks and piles and Chipotle bags and diaper boxes. Anything or any way to contain the clutter I can’t bear to see in my house.

So, there we stood, my husband and me, ready to tackle what had become, on my to-do list, a capitalized chore. You know…Clean The Garage?! We were anxious to park one of our cars in that space, and anxious to remove the task from our list and the burden from our minds. We were going to DO THIS THING!

Except…after spending a solid hour going through a box full of papers and flyers and envelopes and writing utensils and brochures and magnets and statements and batteries, all I’d done was organize the box full of STUFF into three piles. Sure, one pile was a trash pile. But the other two, equally large piles? One was for things that needed to be filed or otherwise put away, and the other was for things that needed to be dealt with in some way.

All I’d done was weed out a bit of trash and create a lot more work for myself. And when I looked at the largest pile, the one for things that needed to be filed or put away? I wilted. I faced my enemy (the pile) and lost. Because the thought of finding homes for each one of those things – plus all the other things we would surely add to it as we cleared more space for our car? Was too much. It was not just daunting, it was devastating. At least to my motivation and determination to whip the garage into shape.

Secrets to Stealing Some Space for Yourself

I couldn’t whip that garage into any shape at all, because my entire house was out of shape. And THAT is why I’d been feeling so out of sorts. When we transformed our guest room/office into a nursery, I didn’t think twice about it (other than to be grateful for a third, albeit tiny, bedroom). And when we moved my desk into my older daughter’s room and our bookshelves into storage, I was so happy to have cleared space in our living and dining rooms, which would surely help us sell the house quicker.

[Spoiler alert: It did not help us sell the house quicker. Or at all. #thatsanotherstory]

Those moves were good things and for good reasons, but they also effectively stole all of MY spaces from our house. I no longer had an office – or even a desk in the dining room. I had a TV tray sitting at the edge of the couch, sagging under the precarious weight of All The Papers that I needed to deal with and/or hadn’t yet tossed into the garage. Every time I sat down to work, I’d scoop up all the STUFF and set it next to me on the couch, opening up my laptop carefully so I wouldn’t knock any remaining phone chargers, remotes, pencils, crayons, toys or other things that had landed on my “desk.”

It wasn’t a good system, and it was causing me to feel majorly out of sorts.

I told my husband then that THIS is why I’d been so grouchy. I needed an office! I didn’t have an office! I NEEDED MY SPACE! I wasn’t really throwing a fit. I was simply figuring out that in order to have peace of mind (and possibly more productivity), I needed a space of my own.

We tossed around lots of ideas that afternoon, including moving our toddler into her sister’s bedroom and turning the nursery back into an office. Since the logistics of staggered bedtimes and shared closet space stymied us, we went another direction. My husband bought a giant set of shelves for the garage, and I priced filing cabinets for the dining room.

I’d like to show you dramatic before and after pictures at this point (and, quite honestly, it’s what I’d planned for this post), but the truth is those shelves are sitting in the middle of our garage, surrounded by the same boxes and bags and piles of STUFF. And I never even bought a new filing cabinet. It’s possible we’ll get around to reclaiming a bit of the dining room for my office and bending the garage chaos to our will soon. But until then, I’ve been thinking of other ways I can steal a little bit of space for myself in this house I share with three other, space-hogging people. Here’s what I came up with:

Secrets to Stealing Some Space for Yourself

Keep it simple. Start small. You may not be able to build a “she-shed” or turn a spare room into your own personal getaway. But if you can carve out just one corner for yourself, I bet it will do wonders for your ability to breathe and smile and feel a little less like you’re wearing an itchy sweater.

When I buy groceries this week, I’m buying a pumpkin. Not for my front porch, but for my entertainment center. And not because Pinterest told me to or to create some kind of seasonal mantel decor, but because my couch/TV tray office faces the entertainment center and seeing that pumpkin (or, if I can find them, line of tiny pumpkins and gourds) will make me smile.

Think about accessibility. My scrapbooking supplies live on the top shelf of my baby girl’s closet. So anytime I want to be crafty after she’s gone to bed, I’m out of luck. We actually have several things stored in her room that I occasionally need after bedtime: luggage, craft supplies, old photos, the vacuum. This inconvenience has taught me to think about when I’m most likely to use my space – and to make sure I can get to it at those times.

Consider making it portable. Could your “space” actually fit into a basket or bin? Could you store your favorite books and a blanket in a basket that you can take with you, creating your own space wherever you are? Maybe you stick your stamps and ink pads in a bin that you can move from room to room – or your most-used file folders or notebooks or journals, with the gel pens you like but want to hide from the kids. Whatever makes your space YOUR SPACE, think about making it portable so you can have a space of your own no matter where you are.

Secrets to Stealing Some Space for Yourself

Make it pretty. Make it yours. Maybe you don’t need a place to work or create. Maybe you’re just tired of every single surface being covered by crayon marks and Goldfish dust. In that case I say steal a little space and make it pretty! Clear off a shelf or the corner of your desk or a spot on the wall or some space on the counter – and put something pretty or sparkly or inspiring there. Whatever makes you smile – something with bling, something with encouraging words, something that smells good – put it there and keep it there and call that YOUR space.

I’m pulling my bookshelf out of storage and making it MINE. No kids books, no stack of bills, no purses or diaper bags or Target bag of things to return to the store. I’m going to give my [way too] many books a home on those shelves and then put something pretty (although still unbreakable) on top of it. It might not be an entire room or even a desk to call my own again, but it will be something and it will be mine. It will not just transform my space; it will transform my state of mind.

How do you steal a little space in your home?

Pin It

M Challenge Mornings Morphosis: Set An Alarm or Not?

Wednesday, September 30th, 2015

As part of our M Challenge Focus on Better Mornings, I asked Mandi Ehman of Life Your Way to share how she is tackling her mornings – and I think her answer will surprise you!

Move towards better mornings with an alarm clock - or without

Confession: I am a firm believer in the value of getting up early, getting your day started before your kids wake up, and taking control of your day. So it might surprise you to hear that I no longer set an alarm 99% of the time.

The reason is simple: While I highly value and need those morning hours to myself, I also know that I need enough sleep or I’m grumpy, impatient and unproductive.

I also know that there’s nothing worse than getting woken up in the wrong part of your sleep cycle.

When I set an alarm, I inevitably get woken up right in the middle of my REM cycle, and my alarm has no idea whether the baby was up 17 times, I suffered with insomnia, or my body just happens to need more rest on any given morning. (And changing the alarm in the middle of the night involves turning on my iPhone screen—since we don’t use a regular alarm clock in our room—which inevitably gives me insomnia because of the bright, artificial light!)

Letting myself wake up naturally means I wake up during the best part of my sleep cycle—usually as soon as it starts to get light out these days—and I’m less groggy. Sometimes it means I sleep a couple extra hours in the morning, but I’m willing to trust that my body knows best on those days!

Obviously this approach isn’t for everyone, and if you’re a natural night owl, have early morning commitments or school buses to catch, an alarm is probably a safe bet.

I’m considering an alarm like ZenAwake or Progressive Alarm Clock that wakes you up with gentle, progressively louder sounds so that your body isn’t jarred out of sleep like with a traditional alarm for those fall and winter mornings when the sun isn’t there to help me get up.

These days, getting enough sleep is a high priority for me even when the to-do list is full, and an alarm clock just isn’t smart enough to know when I really need to get up and when I need to sleep, so—for now—I’m skipping it.

Are you an early bird or a night owl? Do you wake up to an alarm?

Maximize Your Morning Hours

Monday, September 14th, 2015

Maximize Your Morning Hours from MomAdvice.com

I was forced into being a morning person thanks to my kids. In my younger days, I would stay up late watching mindless television, and would sleep in until the last possible moment. There is nothing like an early bus schedule to take a girl out of her cushy routines, is there? Although I never desired to be a morning person, it’s incredible how much better I feel and how productive I can be with those extra morning hours. I am actually pretty thankful that early mornings are now a part of my routine and I even try to maintain the schedule as best as I can during the summer months.

Here is what I know…

If I can become a morning person, ANYONE can!

Today I wanted to share a few tricks that have helped me in creating an ideal morning for my family and I’d love to chat with you about your ideas too! 

Utilize Your Evening Hours to Get a Good Start

Getting up earlier can mean that I am a little less productive in the evening since I am usually pretty worn down after a full day! I try to make a couple of things top priority though to help save my sanity in the morning. The first is that I always set my coffeemaker the night before and program it for my morning brew (this is the inexpensive pot that I use now), I always make sure that the dishes are done and that the dishwasher is run, I always try to get all the paperwork signed and in the backpacks, and I always try to lay out my gym clothes the night before so I can hit the gym first thing in the morning!

These small habits in the evening help us start on good footing the next morning.

Set a Million Alarms

I have a hard time staying on track with the multiple schedules going on during our mornings. Maybe that is just me?  I set an alarm on my phone to make sure each kid is up and then I set an alarm 5-10 minutes before we have to head out the door to have them get their shoes on and grab their gear. Although it doesn’t apply to my morning routines, I set alarms to remind myself when I need to head out the door to the gym, when the buses are returning, and even an alarm to remind me that I can take a break for the day from work and read for an hour.

My poor cat is so annoyed by my alarm system that she cries every single time one goes off.

I won’t lie.

I sometimes want to cry too. I love the reminder though to keep things on track so we don’t miss our morning buses or oversleep!

Maximize Your Morning Hours from MomAdvice.com

Turn Off the Distractors

I know everyone struggles with getting distracted and the quickest way for my morning to get off track is to turn on my phone or computer. I decided to add the Facebook Kills News Feed extension to help me not cheat and peek at Facebook during the day when I need to be productive.

I also make deals with myself about when I am allowed to peek at my phone. Each day the deal is something that I need to accomplish from household chores to an article for a client to finishing a book. Once I fulfill that daily contract with myself, I can cruise the FB newsfeed and catch up on all I am missing out on.

Email also has been of my biggest distractors so now I check it once in the morning, once midday, and once before the kids get home from school. I noticed that each time my phone made a ding, I ran to it like my cat when I shake the treat bag at her. It lead to lots of interruptions, a half-present mom, and a lot of anxiety when I wasn’t dealing with whatever I had opened. If I can’t sit down at my desk and deal with it with a proper response, I just don’t open it! Not only has it made my mornings smoother, but it has made my entire life run more smoothly.

Maximize Your Morning Hours from MomAdvice.com

Make the Morning Household Chores Bearable

I am big on maximizing my time and I know that you are too. I have discovered that podcasts and audiobooks make wonderful companions in the morning while I am getting things done around the house. Three of my favorite podcasts right now for making the most of my mornings are the The Lively Show, Magic Lessons, & Elise Gets Crafty. Thanks to the Overcast app that I downloaded, I also am listening to them at a quicker speed which helps me consume a little bit more while I am tackling that laundry and tidying the house. Not only am I proud that I am being productive in my home, but I’m learning so much about living with intention in the process.

Maximize Your Morning Hours from MomAdvice.com

Make Room For You

I may be one of the rare ones in the world because I rarely feel guilty about making time for myself. I know when I can fill my cup up, I have more to give to everyone else. I am not sure if that is because I have such a supportive spouse who has always encouraged that or if I just have always been thinking about myself. Oh, who are we kidding? It’s probably both! My ideal morning involves a good Bible study on She Reads Truth, a cup of HOT coffee, a little journaling (right now I am doing this journal with my husband) and then I head to the gym where I do classes I really love and that make me happy.

Our mornings aren’t always perfect, but starting with good intentions, smart planning, and a little self-care reward help me start my day on the right foot!

Do you have any tips or tricks for a great morning routine? I’d love to hear them as we explore this topic this month in our m challenge series!

*this post contains affiliate links. I only recommend what I love!


Pin It

Minimize Morning Stress With an Organized Command Center

Thursday, September 10th, 2015

Minimize morning stress with an organized command center

When we created our small space entry DIY command center, my goals at the time were simple: create a space for the kids backpacks and keep their school paperwork off our counters, as well as have a place for basic entry items (space for keys, glasses, etc.). It ended up working great for the space as well as our family AND gave an added bonus:

It has minimized our whole family’s weekday morning stress levels and has helped our morning routines run a lot more smoothly!

Use any space to organize for better mornings!

As I shared, we started with a simple corner in our living room right around the corner from our front door that was a place we naturally dropped our things anyway – that’s the best place to start, right? Figure out what’s already working and then make it work better. And prettier, of course.

Mirrored coat rack

We added a functional and decorative mirrored coat rack, perfect for tying on a scarf before heading out the door as well as holding coats and small purses. We also moved a seldom used storage ottoman here to hold the backpack and briefcase clutter and finished off the mirror area with a large basket  for storing our magazines and umbrellas.

DIY_Command_Center_7

To catch the school paper clutter that always seems to be on the brink of becoming out of control, we use an upright file folder organizer and colorful file folders for organizing the whole family. It has become one of the best things to keep the morning stress level down!

Set Up a File System to Minimize Morning Stress:

1. The kids each now have an IN and OUT folder. If they need something signed, they put it in the IN folder for me for signatures and I give it back to them by putting those items in the OUT folder, that they can check before they leave for school.

2. Special memorabilia that is worth saving still resides in their decorative boxes in their rooms.

3. Mom and dad each have their own files for paperwork that needs to be dealt with before filing or recycling.

4. Taxes has a file for receipts and other items that tend to pile up waiting to be filed.

5. There’s a general “kids” file for any items that we need to take care of (things we want to file, or waiting for a meeting, etc.)

DIY_Command_Center_8

The other thing we added that has helped with our morning routines, almost eliminating the last-minute-trying-to-get-out-the-door search for ________ (fill in the blank: keys, watch, glasses, etc.), is a long, narrow compartment organizer for keys, sunglasses, and other things rests on this half moon table for easy finding and grabbing in the morning. Best. Thing. Ever.

Another crucial element to our daily routine is found above the table: our family calendar. We can keep track of important events at school, doctor’s appointments, business travel, and more – the calendar is usually filled to the brim!

Free-Family-Management-Binder-Printables-Header-2

I also love using our family management binder in this command center, especially to check out the menu before we head out the door to know if there is something I need to pick up at the store. (Oh, and we’ve recently revised the cover so that it now comes undated so that it can be customized by you – I love this binder and hope you do, too!)

If you don’t have your own family binder copy yet, grab one by using the handy form in our sidebar to sign up for our weekly newsletter – a recap of all the happenings for the week and will make sure you never miss a post. Then you’ll be eligible for this and other free printables we offer ONLY to our VIP subscribers.

I had hoped our small family command center would help our mornings run smoother, of course, but it wasn’t one of our main goals, just a happy bonus, and has continued to renew our commitment to living small. Even if you have a small home, you can make any space a functional space for your family!

How do you minimize morning stress?

Warm Up Your Outdoor Space for Fall

Tuesday, September 8th, 2015

Warm Up Your Outdoor Space for Fall from MomAdvice.com

This post is sponsored on behalf of BHG at Walmart.

Fall is just around the corner and today I wanted to share a few ways to personalize your outdoor space for the autumn season by bringing in some warm textures to your outdoor decor. This month I am partnering up with the BHG Live Better Network to show how we personalize our outdoor space with a few items that you can find at your local Walmart store.

Warm Up Your Outdoor Space for Fall from MomAdvice.com

The first step towards warming up our outdoor space was selecting an outdoor rug to go underneath our picnic table. Outdoor rugs have come such a long way, as I discovered when creating my own little she-shed this past year. They really hold up well to the elements and they add such warmth to the space that it almost feels like you are dining inside with these beneath your feet. After endless browsing, I settled on this BHG Medallion Rug in an 8×11 size, for just $159.

Warm Up Your Outdoor Space for Fall from MomAdvice.com

Warm Up Your Outdoor Space for Fall from MomAdvice.com

I’m pretty terrible at caring for plants, but I am a collector of pumpkins. To anchor the corner of my table, I filled this 16″ Bombay Decorative Planter with a few pumpkins from my growing faux pumpkin collection. I love the twiggy pumpkins against my DIY dollar store thumbtack pumpkins that I made last fall. To prop them up, I filled the bottom with paper so the pumpkins could peek out a little higher in this pretty pot.

This pot is the ultimate fake-out too because it looks like a heavy breakable ceramic pot and it is, in fact, PLASTIC and unbreakable. I can’t wait to fill it with plants that care for themselves in the summer!

Warm Up Your Outdoor Space for Fall from MomAdvice.com

Warm Up Your Outdoor Space for Fall from MomAdvice.com

Of course, nothing says warm and beautiful like the twinkle of outdoor lights. I did a ton of research on how we could mount outdoor lights over our picnic table when we didn’t have any trees to anchor them. I read this fantastic article and then was like, “I need pipe and a clasp.” I then hit myself in the head and remembered that we had two fantastic poles that were already ready on our lemonade stand that I could detach and use to hang our lights, clasp even included!

Have you ever hung outdoor lights over your table before? I’d love to hear how you anchor them if you don’t have trees! For now, this set-up worked out beautifully and you can’t beat the fact that I didn’t have to buy anything.

Warm Up Your Outdoor Space for Fall from MomAdvice.com

I am a big fan of utilizing the items we already have to charm up our outdoor space for guests. This knitted leaf centerpiece made from my yarn scraps continues to be a favorite in our home and it adds the perfect Fall touch to our outdoor table.

Warm Up Your Outdoor Space for Fall from MomAdvice.com


I hope these ideas inspire you to warm up your own outdoor space for Fall! I love these sweet and simple affordable touches that can be found at Walmart with a few of my favorite handmade accessories! I hope they inspire you too!


Live-Better-Network-Badge

In accordance with the FTC Guidelines, I am disclosing that I received compensation from BHG at Walmart for my time and participation in the BHG Live Better Network. Although we have material connection to BHG, any publicly stated opinions of BHG and their products remain my own.

Pin It

Organize Your Spice Rack (FREE PRINTABLES!!)

Wednesday, September 2nd, 2015

Organize Your Spice Rack (FREE PRINTABLES!!) from MomAdvice.com

When I say that my life has felt a little disorganized, I mean it! One sore spot in my house has been my spice cabinet and pantry. Thanks to the gentle shove (ahem) of The Magic Art of Tidying Up, I am trying to transform those sad corners and joy-robbers into more thoughtful spaces. I figured that I can’t be the only one with a disorganized spice rack so I wanted to offer free printable spice labels and pantry labels that you can use to spruce up your own space too, designed by our own MJ from Pars Caeli!

Organize Your Spice Rack (FREE PRINTABLES!!) from MomAdvice.com

Here is my cabinet before I tackled it. There were several spices that had empty jars (why? who helped me on clean-up? WHO?), several duplicates (who does the grocery shopping? who? oh wait…), and there were some that had labels as far as back as 2008 (THE SHAME!). There were also spices lurking in a few other corners in the pantry that were, of course, duplicates. Hunting for spices in a million spots and then trying to not get a black eye from knocking myself out with one as I dig around was a nightly occurrence.

Organize Your Spice Rack (FREE PRINTABLES!!) from MomAdvice.com

I absolutely love the clean design of these labels and they couldn’t be easier to print. You will need to purchase a package of this style of label to print on. We kept the design simple and light to keep the ink waste to a minimum.

If you have spice jars you can reuse, by all means do it! About five years ago, I asked my in-law’s for two sets of these jars since I intended to redo my spice cabinet. I found them when I organized my scary storage side of my basement this weekend while binging on podcasts. It felt like Christmas all over again. This decluttering has really been paying off!

I used a small funnel to funnel the spices that still had life in them into these new fresh jars and then attached the new labels. How easy is that?

Organize Your Spice Rack (FREE PRINTABLES!!) from MomAdvice.com

For pantry items with a larger volume, I used some mason jars that I already owned that had been gathering dust on a shelf. These are the perfect holders for these items and the labels work really well on this size jar too!

Organize Your Spice Rack (FREE PRINTABLES!!) from MomAdvice.com

free-spice-label-printables-7

This corner is making me so much happier and it made prepping for our dinner hour so much easier this week! I didn’t realize how much frustration I was having and how much time I was wasting hunting for these spices each night!

Organize Your Spice Rack (FREE PRINTABLES!!) from MomAdvice.com

Organize Your Spice Rack (FREE PRINTABLES!!) from MomAdvice.com

Get the Labels!

If you are interested in receiving 14 free home management printables and these beautiful pantry labels (see the small sampling above), just input your email below or in the sidebar and we will send you the link to your packet as our thank you for being a subscriber (look for it in the final welcome email). Subscribers will have access to our additional printables as they become available.

Note: if you already subscribe to the Mom Advice Newsletter, be sure to look in your inbox for a special email that contains the link for your set of these printables! If you can’t seem to get the form to work with your browser, just look over to your right in the sidebar on the site. You will see a handy form there too that works with all browsers! We appreciate you so much! Thank you! 

##NEWSLETTERFORM##


Pin It

7 Easy Upcycle Projects for Fall

Thursday, August 27th, 2015

Upcycle-Projects-For-Fall.jpg

Do you love decorating for Fall as much as I do?

Of all the seasons, this one is my favorite and I love that you don’t have to spend a lot to make a beautiful impact on your home during this season.

Nature brings so many free and fun elements to your home decorating.

Pairing these with a few simple upcycle DIY’s, you don’t have to spend a lot to make your space cozy and beautiful.

Today I want to share with you seven easy upcycle projects you can try to make yourself and your home cozy for Fall.

These projects were selected because they are easy to execute with some commonly found items!


Transform Book Pages Into a Wreath

Book page projects are always my favorite and I just love this easy DIY Paper Leaf Wreath created by Nalle’s House as a whimsical element of decor to a door or window in your home.
I particularly love that she uses a fallen leaf as a template to create a rustic feel to the wreath and the addition of fallen acorns really embrace the natural elements of autumn.

Add a Little Pottery Barn Style

Wouldn’t we all just love to fill our homes with everything from Pottery Barn?
I know I would, but just can’t justify the expense especially when it comes to simple seasonal decor.
Glass jars are always something I can snag at my favorite thrift store and filler for these can be purchased at your local craft store (with a great coupon, of course!)

Turn Sweaters Into Cozy Legwarmers

Living in Indiana, a girl can never have too many layers in the colder months. I love a good leg warmer or boot cuff to add a touch of color and warmth to my wardrobe.
Lucky for you, sweaters are available in every color of the rainbow.
As explained in the easy tutorial, this is a simple no-sew project since no one will ever see what’s lurking underneath your boots if you don’t feel like making a finished edge.
So cute AND easy!

Create a Book Page Pumpkin

I am always looking for thrifty seasonal touches to add to my bookcases and shelves.
Consider making a simple book page pumpkin out of a book from Goodwill and finish it with a little twine and twig to complete the rustic look.
If you select books in different sizes, you could create a beautiful coffee table display for your home!
Check out this easy step-by-step tutorial from Red Ember to create one of these (or ten!) for your own home!

Add a Fall Touch to a Mug

It is rare that I stop in the thrift store and can’t find a few white mugs for my DIY projects.
I have transformed many a mug into a beautiful gift and I love the idea of adding a fall touch to these treasures with a simple stencil.
Since these are a rub-on transfer (versus a permanent paint transfer) consider using these as a place to tuck your toothbrushes, to fill with a treat for a teacher, or plant a little succulent to place next to a kitchen window!
You can get the scoop on this easy stenciled mug over on Callaloo Soup.

Add Simple Details to a Faux Pumpkin

Although I love a glitzy pumpkin, my eye is drawn to these simple Baker’s Twine pumpkins because they create such a beautiful detail with such pretty lines.
If you aren’t crafty, this is the perfect DIY project for you and just requires a little wrapping of twine to complete.
This project is so easy, you can enlist your kids to help you!
Check out Design Improvised to see how to create these for your own home.

Add a Tassel Detail to a Cozy Throw

I am absolutely nuts about tassels and how they can transform anything from clutches to necklaces to pretty trims.
A basic vintage throw from Goodwill can be taken up so many notches with a beautiful tassel detail.
Design Sponge shows you how beautiful this detail can be in cozy neutrals for the fall season.
I’m dying to replicate this project for our home, aren’t you?
Get the easy tutorial over here today!

What is your favorite upcycle project that you have done for Fall? Feel free to leave your ideas in our comments below!

Check out these other Fall ideas from MomAdvice.com:


Apple Wreath Tutorial


DIY Bar Cart Tutorial with Game Day Tips


Autumn Burlap Wreath Tutorial


Painting Pumpkins with Acrylic Paints


Sign up for the MomAdvice newsletter


This post contains affiliate links.


Pin It