Archive for the ‘Home’ Category

BHG Live Better Style Showcase

Monday, August 25th, 2014

BHG Live Better Style Showcase

This post is sponsored on behalf of BHG at Walmart.

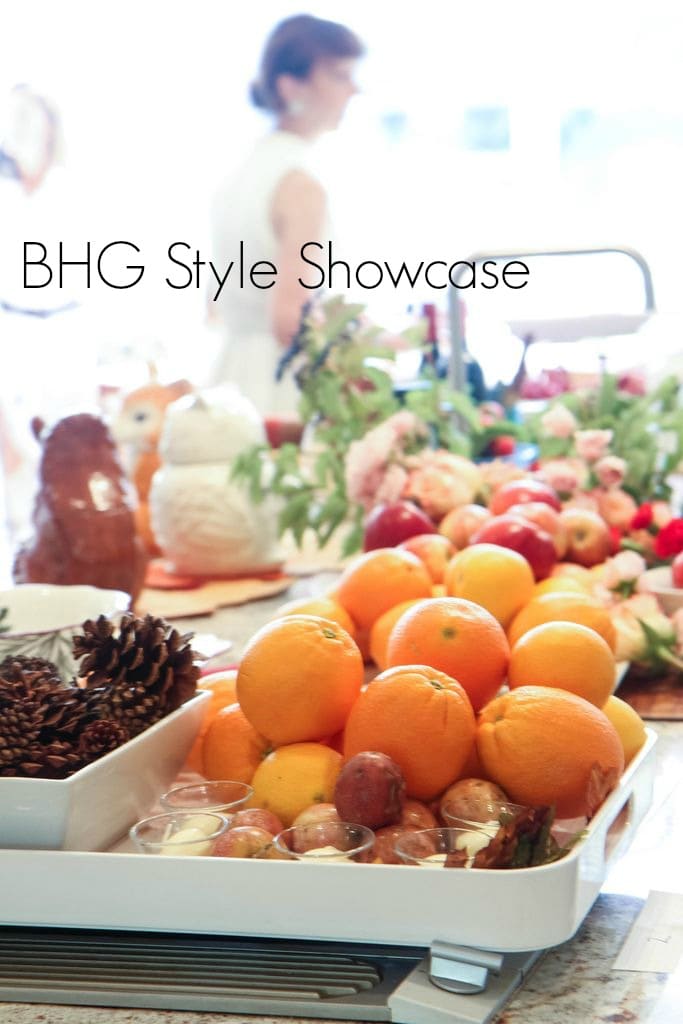
I’m so excited to share with you that I had the chance to participate in a sneak peek for the new BHG products that you will be able to find at your Walmart store. I have been a longtime fan of BHG and this was such a unique opportunity to both see the new products that will be debuting on your store shelves at Walmart as well as in-depth guidance on fun ways to utilize these items in your home. I left feeling excited and inspired about what I could do on a small budget to spruce up my home and I loved the craft & gift ideas that were created to show us new ways to use some of these items for gift-giving and entertaining.

BHG Live Better Style Showcase

This year it is all about mixing textures, embracing the brights, and bold patterns. We got the chance to circulate around the items and were given many tips for utilizing these pieces in our own home.

Here are some of the tips I received from the stylists for ways to make small and thoughtful updates to your home.

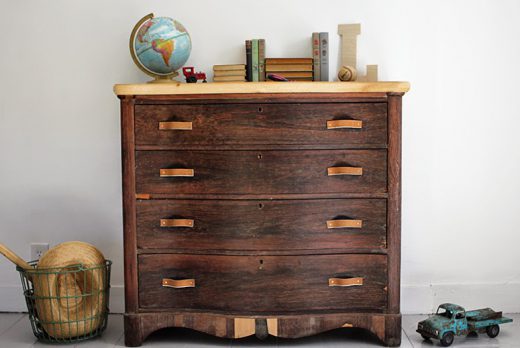
Embrace Weathered Wood

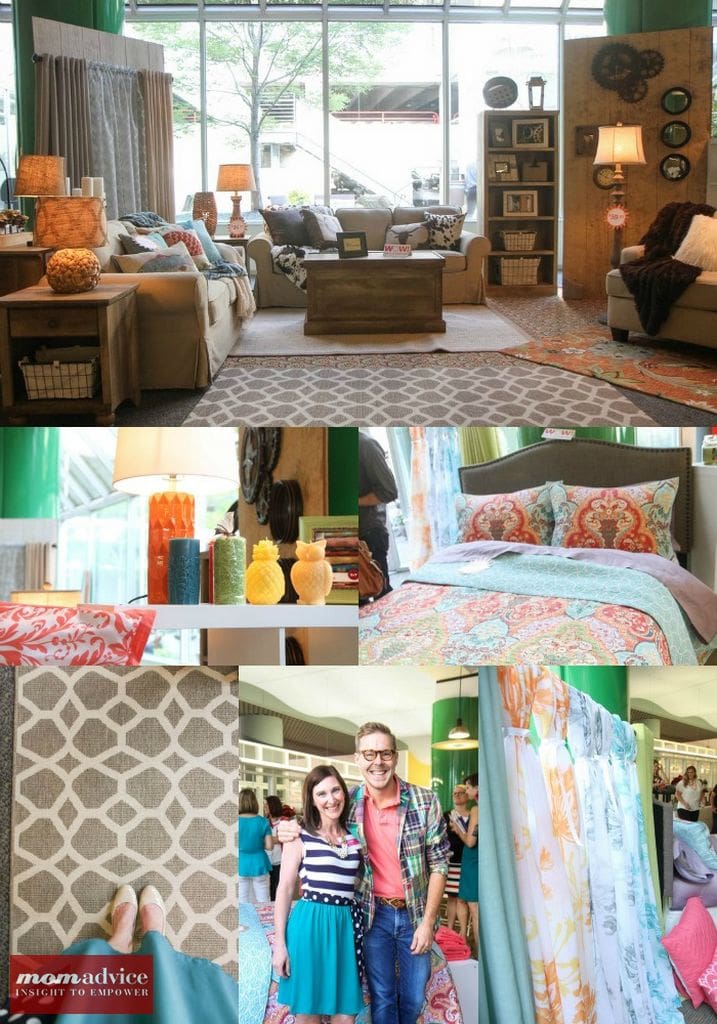
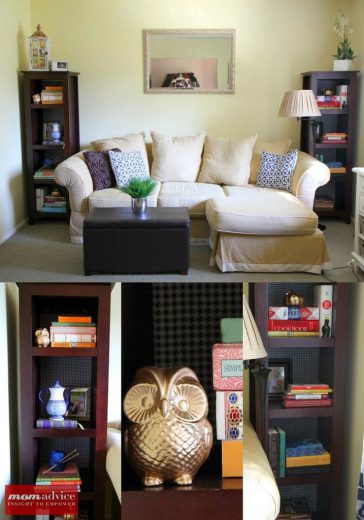
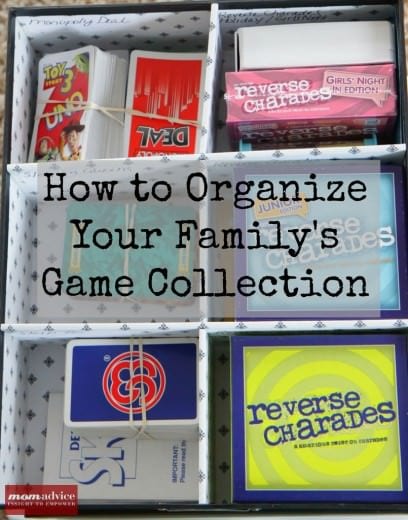
This year it is all about the weathered wood and they have brought this into key items like this awesome coffee table that has generous storage for storing away the family board games, a spare blanket, or the odds and ends that can pop up on a coffee table.  They referred to this style as, “farmhouse luxury.” They are offering many weathered pieces this year along with television stands, side tables, and cubby storage.  This was one of my favorite lines that they are offering this year.

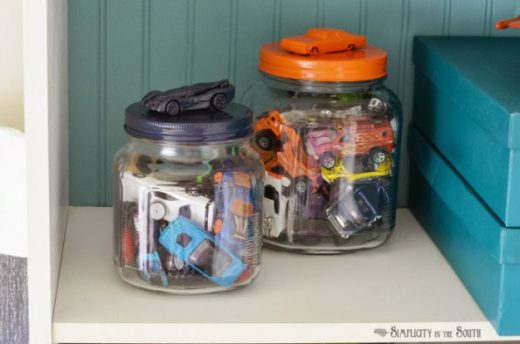
Storage was also a hot discussion and they suggested corralling the remotes on your coffee table in a cookie jar so that you can grab them when you need them, so they aren’t creating a cluttered display in your space. Genius!

Look For The Nailhead Trend

Nailhead trim is very big this year whether it is brought into a headboard or even as a decorative nailhead design in your tableware. I loved this headboard so much that we are planning to purchase it when we update our bedroom. It looked just like one I had been eyeing in a catalog, but came in less than half the price of the one I had planned to purchase.

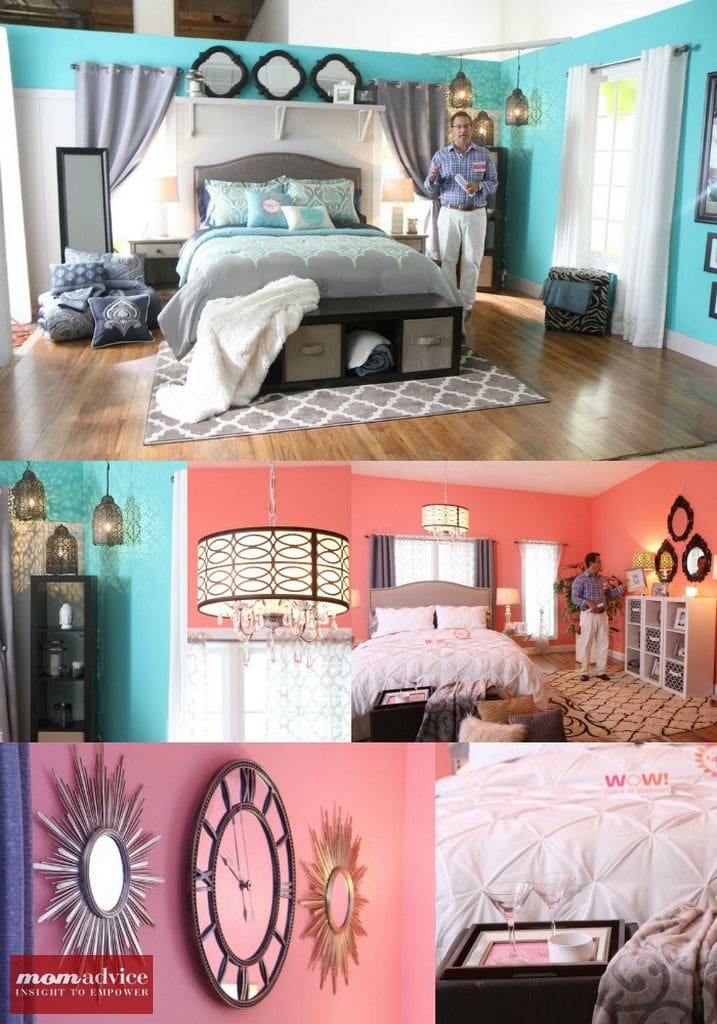
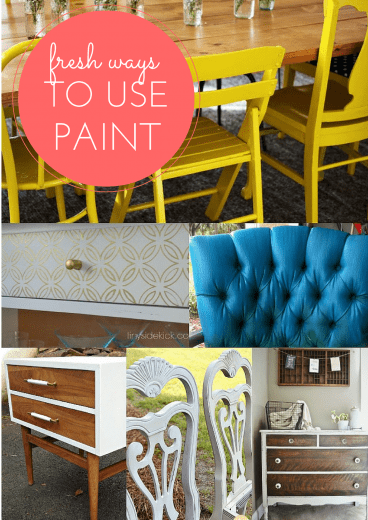
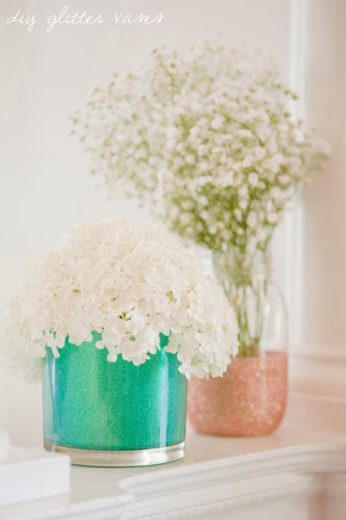
It’s All About Color

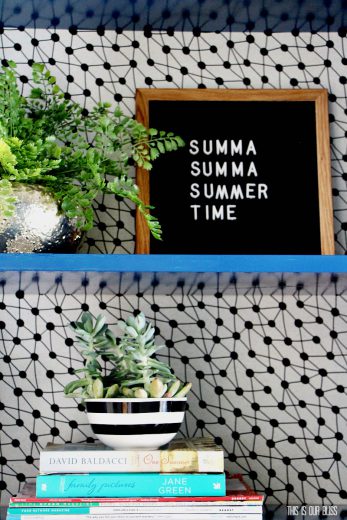
I have always been pretty neutral when it comes to my home, but that changed this year when I started embracing bright colors in my house. The stylists advised that color is big this year and color combos like blue & white, yellow and green, and orange are all hot trends. There is also a running trend of black and white, which will continue through this year.  In my opinion, you can never go wrong with those two colors!

BHG Live Better Style Showcase

BHG Live Better Style Showcase Layer, Layer, Layer

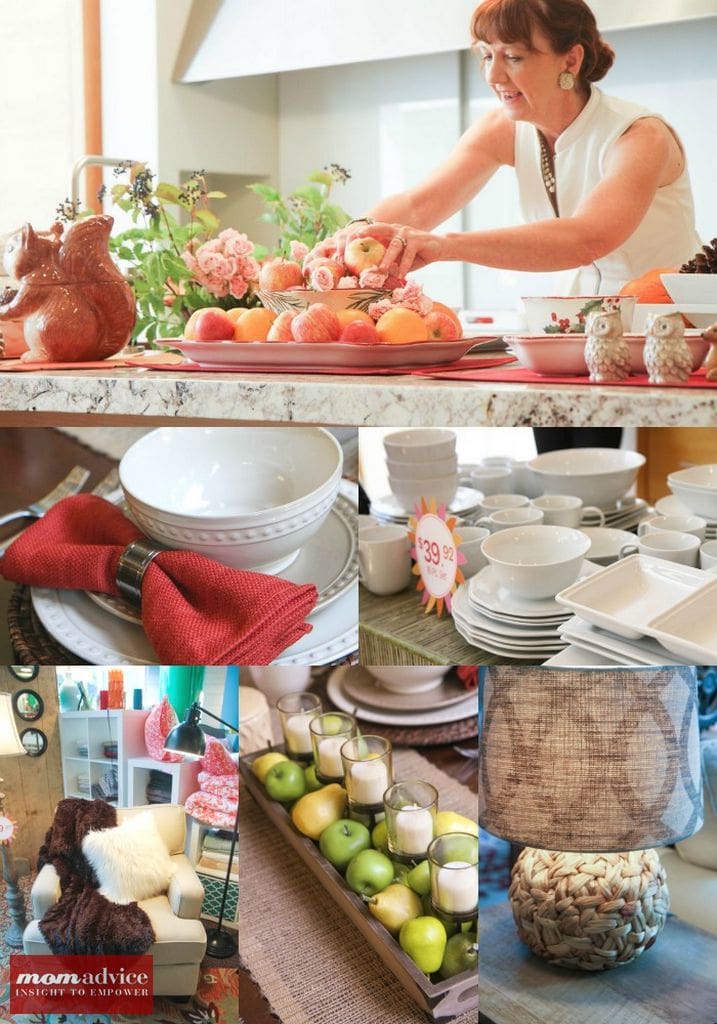
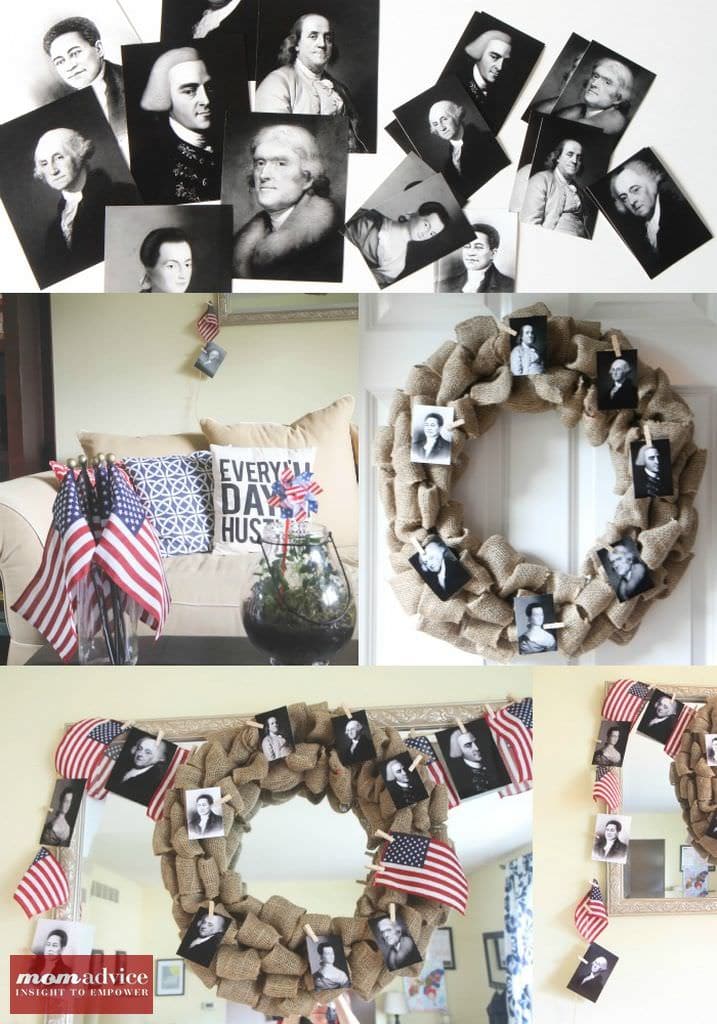
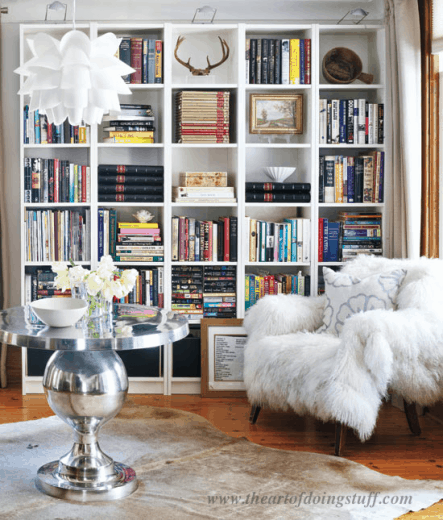
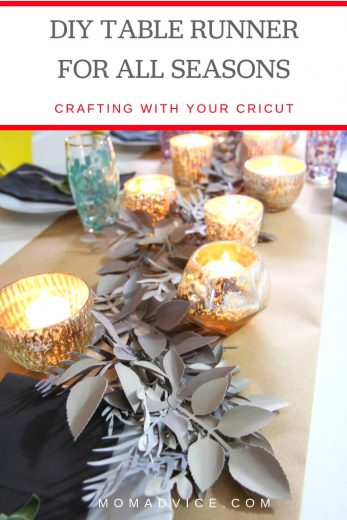
The key to any good design is the layering of textures. Throw a cozy fur throw over a chair or add a fur pillow to add texture to any room. Burlap table runners add a beautiful detail to tables especially when it is paired with a nod to the menswear trend of napkins adorning the tabletop like bow ties.

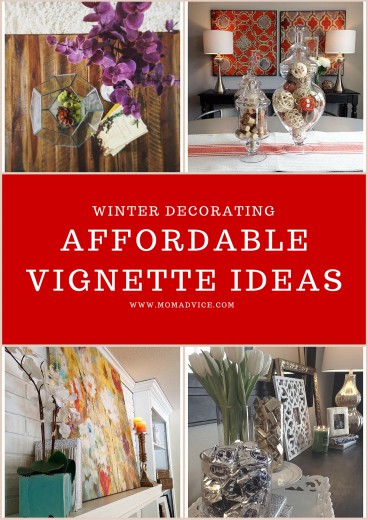
Textures also abound in centerpieces made from fruits that are in season, pinecones, and fresh flowers (from the yard or purchased on sale at your local market). We got to see numerous fun centerpieces made from a variety of items you could find at the market all using one serving plate. It goes to show that you don’t need a lot to achieve a beautifully decorated home.

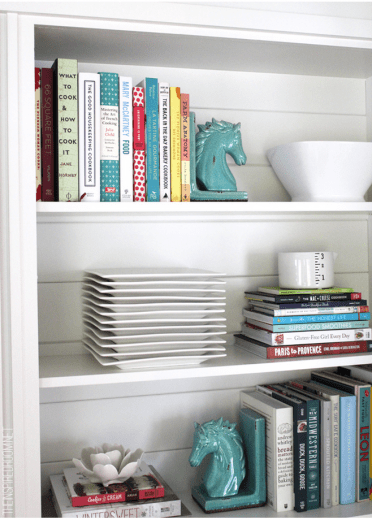
I have already purchased this basic white dinnerware set since I got home and I love that this element of white can be layered with seasonal holiday dishes or even a little woodland animal whimsy for the autumn months.

If there is anything I got out of this day with the stylists it is that I need to embrace more layers to my decorating. I also learned that the burlap runner could double as a bathroom window treatment for a small window which I plan to do in our guest bathroom.

BHG Live Better Style Showcase

Simplify Gift-Giving

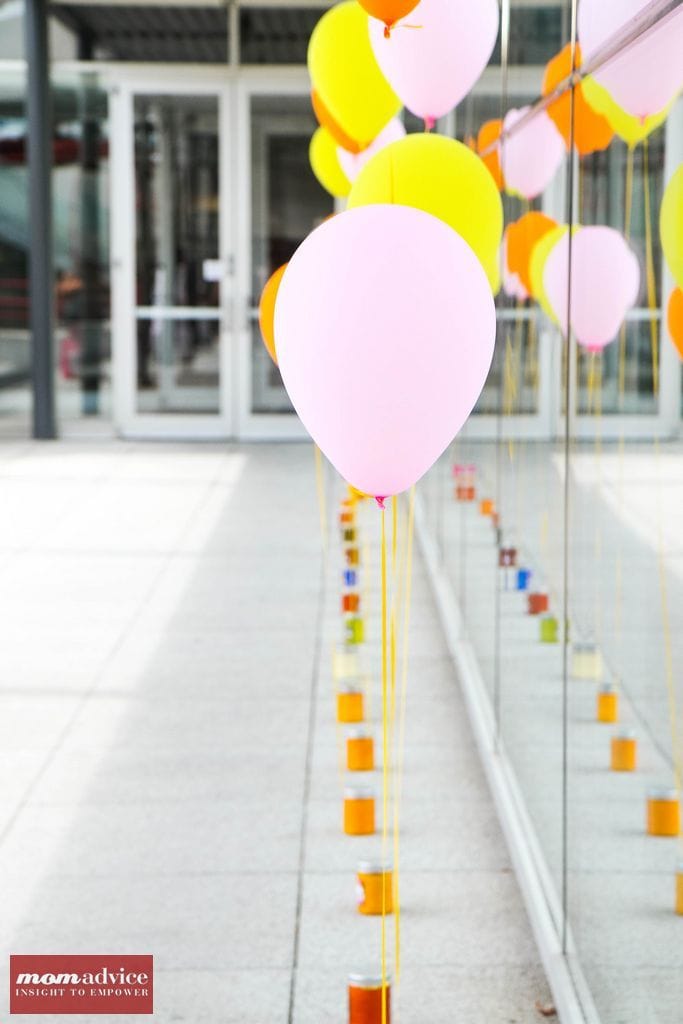
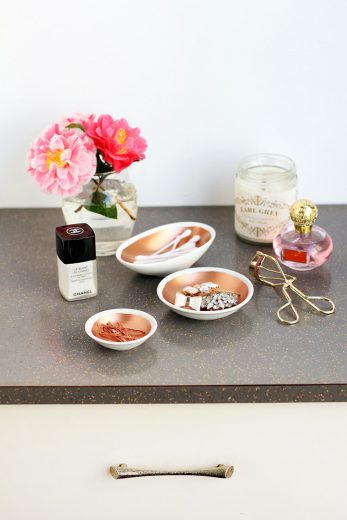
Gift-giving doesn’t need to be extravagant. One of my favorite examples was this simple idea for lining a walkway for your guests. A simple balloon was tied to a small candle that each guest could take home when they leave. I can’t wait to try this one at our next party!

BHG Live Better Style Showcase

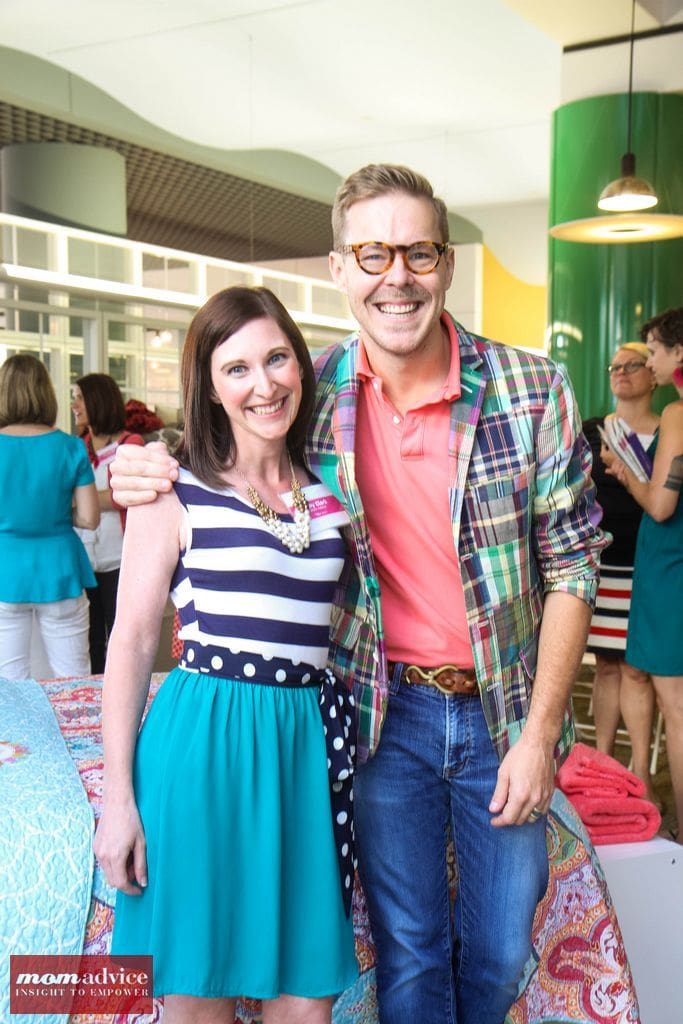
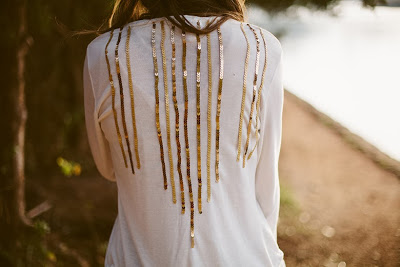
dress: site sponsor, Flourish Boutique

 I have been a longtime fan of Eddie Ross and it was such a treat to get to meet him and also to have him showcase fun ideas for taking houseware basics to another level with the Eddie Ross touch. If you aren’t following his blog or Instagram feed, I highly recommend it. He showed off some of his favorite ways to spruce up the BHG at Walmart items that you could try yourself.

BHG-Style-Showcase-50


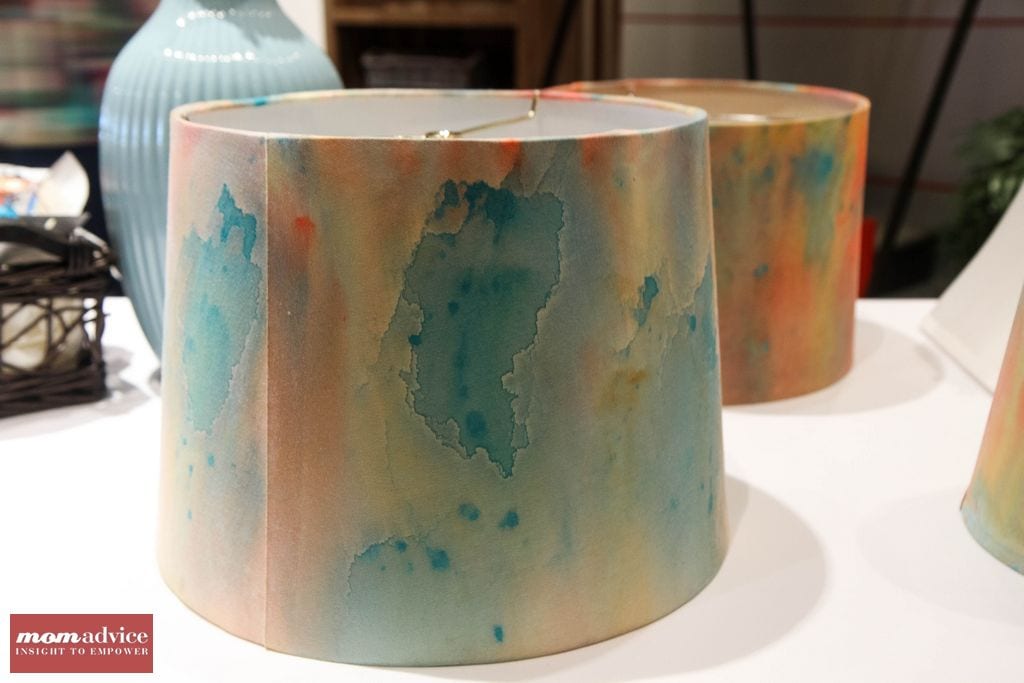
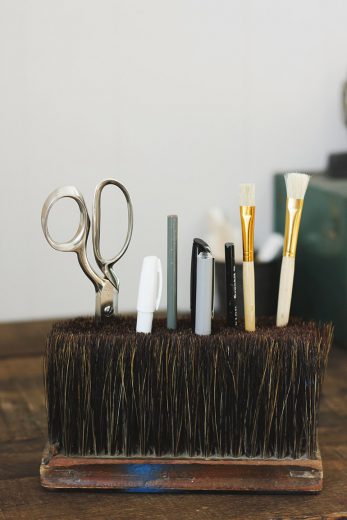
He transformed a white lampshades into a watercolor beauty using a technique with watered down paint and a paintbrush.  I wish I could have seen this one in action, but I left inspired to try my own watercolor lampshade for our home.

BHG-Style-Showcase-51

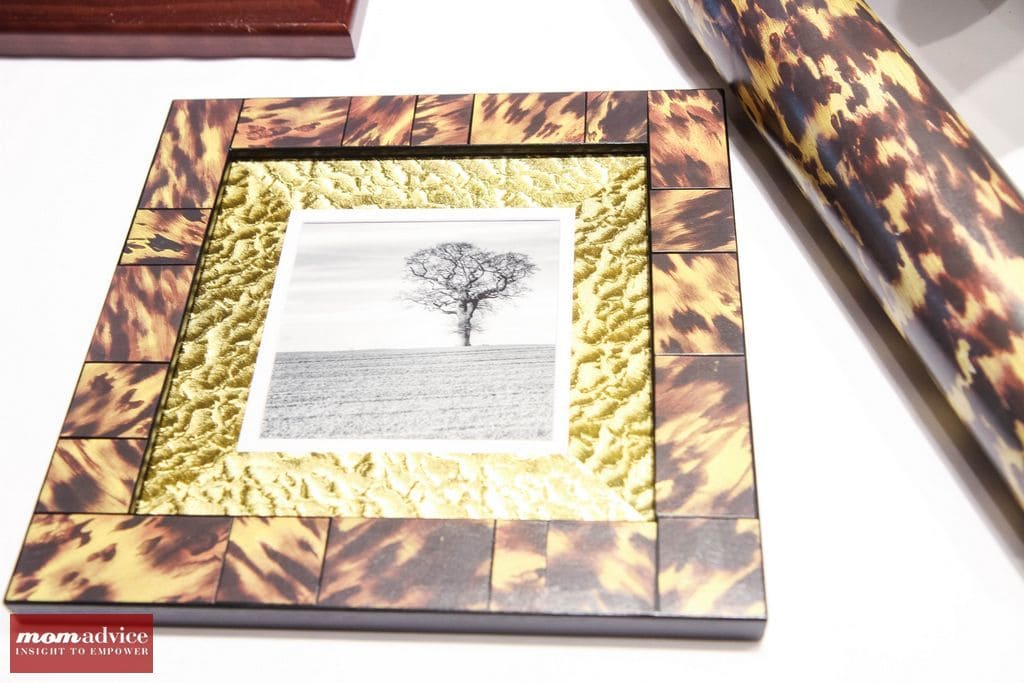
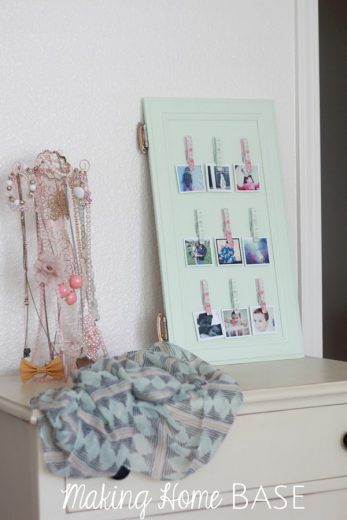
He added a tortoiseshell detail to a plain frame by decoupaging some tortoiseshell paper to a plain picture frame. The detail inside was achieved with a simple metallic tape.

BHG-Style-Showcase-53

Curtains don’t have to be plain, they can be trimmed with ribbon that you can attach with fabric glue or sew to your curtains. He also advised mixing up the curtains and using two different colors to create a more custom window treatment feel to your space!

Live-Better-Network-Badge

I’m very excited to be contributing this year to the BHG Live Better Network! Every other month I will get a project challenge and get to showcase a fun DIY project for you. I’m really excited about this opportunity and I hope to share a lot of fun ideas that you can incorporate in your own homes! I also was thrilled to get to sneak peek all the goodies from the new BHG at Walmart line and to find some inspiration for my own space.

Thank you to BHG for this opportunity!

In accordance with the FTC Guidelines, I am disclosing that I received compensation from BHG for my time and participation in the BHG Live Better Network. Although we have material connection to BHG, any publicly stated opinions of BHG and their products remain my own.

Pin It

8 Fun Dresser Makeovers

Tuesday, July 22nd, 2014

8 Fun Dresser Makeovers


I have so much fun gathering up ideas for repurposing items and look forward to showcasing these ideas for you each month.

Today’s post is all about a furniture staple…the dresser.

I have gathered 8 fun ways you can you can makeover a dresser that I know you will want to run right out and find this thrift store gem to create a new fun piece in your home.

In fact, I can’t wait to snag a dresser myself so I can implement these ideas in my own home.


Create a Unique Kitchen Island

Kitchen islands can be quite pricey, but they don’t need to be.
A dresser can be made over into the perfect kitchen island for your home with a fresh coat of paint.
A kitchen island made from a dresser offers ample storage for table linens and silverware as well as a generous top for a cutting board, fruit bowl, or cake stand.
I love this beautiful mint green kitchen island made from a dresser by You’re So Martha.

Make a Cute Dog Bed from a Drawer

As we showed off last month in our suitcase makeover piece, cute dog and kitty beds are all the rage and can be styled to match the interior of your home.
DIY Show Off takes it to another level with an adorable detachable parasol that offers your pooch shade in the summer months.
If you spy a dresser that isn’t in the best of shape at Goodwill or a garage sale, don’t dismiss the piece.
Dresser drawers are just as valuable for fun DIY projects.
Dare I say, in fact, sometimes even more fun than finishing an entire dresser piece?
 I adore this DIY dog bed and the adorable details for your fashionable 4-legged friends.

Make a DIY Costume Closet

Who knew girls came with so many costumes? When my daughter was small, our dress-up clothes resided in a drawer in her room that often exploded all over her floor.

I love the idea of creating a space just for these outfits and Rambling Renovators made a DIY Costume Closet out of an old dresser that is just too adorable for words.
I particularly love that there is a mirror on the side for a quick costume check and that there is storage for jewels and footwear.
The floral wrapping paper interior also adds a special girly touch that any little girl would flip for. This is a DIY-must for moms of girls!

Create a Planting Station

Although I was not blessed with a green thumb, I do have an appreciation for beautiful pieces that add beauty & function to our outdoor living.
Although I couldn’t find the source for this image, I just had to share this fun idea for a way you could transform a mirrored dresser into a planting station.
By adding peg board to the mirror stand, you now have the perfect storage for your gardening tools.
The top is the perfect stop for planting, or even for decorating outdoors.
The drawers make ideal storage for items like seed packets, small pots, gardening gloves, and your gardening cushion.

Turn It Into a Vanity

As we have found with our sixties home, bathroom renovations can be expensive even with the most basic of remodels.
Have you ever considered a dresser the perfect source for a vanity?
I know I hadn’t until I saw this incredible DIY Vanity made from a thrift store dresser from An Oregon Cottage.
The best part is that you can customize this to the size of your home, add a splash of color (or not), and a scratched-up tabletop basically disappears once you insert your sink.
How fabulous is that?

Create Unique Storage

Storage is always something I am thinking about and I love the idea of using dresser drawers for storage particularly in a guest room.
Liz Marie shows off her two beautiful drawers that have been stenciled with numbers as storage underneath the bed.
I can picture spare linens in here, a few basic toiletries, or even reading material for a rainy day.
Again, look at the bones of the pieces and find what is in the best condition and most valuable to you for your project needs.
This is a perfect example of an element you can use from a furniture piece.

Put a Number On It

Numbering things continues to be a trend and one simple addition that you can add to a dresser is numbering whether it is stenciled, applying house numbers, or getting creative with paint.
I love this modern dresser makeover with fresh paint and modern numbers on each drawer from HGTV.
Speaking of numbers, I am also madly in love with this numbered dresser that your child’s date of birth on it.
I found this adorable idea on To London With Love and it makes me want to do this adorable idea on a dresser for my kids.
What kid wouldn’t love to see his birthday everyday and what mom wouldn’t feel nostalgic every time she went into her child’s room.
I adore this!

Add Unique Hardware

For today’s final idea, I love the idea of looking for unique hardware made from other items you might find at Goodwill.
merrythought showcases a beautiful masculine detail on this dresser makeover utilizing leather belts for drawer pulls.
The same idea could be used with leather pieces from purses or purse straps too.
I love that this is such a simple detail, but can transform a dresser into a real showpiece.

Have you ever made over a dresser? We’d love to hear about it!


Don’t miss these other great ideas from MomAdvice.com:


Make a Closet Office Space


7 Fresh Furniture Painting Ideas


How to Spray Paint Furniture


7 Easy Chalkboard Paint Crafts


Sign up for the MomAdvice newsletter

Pin It

8 DIY Vintage Suitcase Projects

Monday, June 30th, 2014

DIY-Vintage-Suitcase-Projects-Collage


Suitcases are one item that you can always find at Goodwill.

With that in mind, today’s post showcases 8 ideas for ways you can use vintage suitcases for your home.

Whether you are upcycling the suitcases into new pieces or simply adding them to an empty corner in your home, suitcases can offer both beauty and storage to your home.

When my kids were small, I made a rainy day suitcase that was filled with items from Goodwill, craft supplies, and fun dollar store items that they used to look forward to when we were cooped indoors.

I have long been a lover of this sweet item l and after you see these ideas, I know you will too!


Add Vintage Details to a Food Table

I do a lot of entertaining and I am always looking for pretty additions to our tables when entertaining.
Not only does it make for a beautiful display with the addition of a few fresh flowers, but it also gives you the chance to stack dishes at different heights and maximize your table while adding an interesting detail.

Create a Suitcase Side Table

One of my favorite things that I see suitcases being used for is as a furniture piece.
Not only does it add a beautiful detail to a room, but it also offers hidden storage within to house random items that might not have a designated space in your home.
Goodwill can be a wonderful resource both for the base, the suitcase, and any vintage items you might like to display on top.
Check out this fun tutorial for a diy vintage side table from A Diamond in the Stuff.

Add Detail to an Empty Corner

Although I am not a big fan of collecting things for my home, one collection I can get behind is one that both adds beautiful detail to a room and also offers storage for my home.

You know that corner where you usually put the Christmas tree during the holiday season?
That just might be the perfect corner to begin collecting interesting suitcases to stack.
I can totally picture these being filled with off-season items like ornaments and holiday decorations that would save us time hunting for items in our basement.
Try this fun suitcase collection inspired by Joys of Home in a corner in your house.

Create Unique Shelving in Small Spaces

One thing I am always looking for is shelving because our home did not come equipped with a lot of closet space.
This is the perfect spot to also tuck away any items you might want to keep on hand for your guests without cluttering up your space and is a fantastic way to use smaller suitcases in your home.

Add Whimsy to a Bar

This adorable guest room mini bar can be customized for each of your guests!

The Painted Home shows you how to take a small vintage case and turn it into the cutest idea for spoiling your overnight visitors.
Who wouldn’t love this for their guest room?

Create Creative Craft Storage

If your craft room is anything like my own, you are always looking for ways to store your oodles of craft supplies.

What a fun and chic solution for your creative space.

Make a Coordinating Set

The possibilities for decorating a suitcase abound and I browsed through millions of options before I happened upon this adorable set from A Beautiful Mess.

I love the idea of applying coordinating fabrics vintage suitcases to create an adorable matching set.
Wouldn’t these be so cute in a nursery for tucking away baby toys, spare diaper supplies, or spare bedding?

Make a Cozy Pet Bed

Pet beds on the market are pretty ugly, but a vintage suitcase can be transformed into a perfectly coordinated space for your furry friend with just a few supplies.

I love the idea of a cozy home out of an old suitcase and since my cat loves to climb in my suitcase when I am packing to leave for my trips, I have a feeling that this project would be a big hit at our house.
Get the full diy suitcase pet bed tutorial on The Everyday Aesthetic.

Now hurry and snag a suitcase for one of these fun projects today!

What are your favorite ways to use old suitcases?

Don’t miss these other great ideas from MomAdvice:


Crafting with Vinyl


DIY Bar Cart


No-Sew DIY Blanket Scarves


Rose Strawberry Wine Pops


Sign up for the MomAdvice newsletter


Pin It

Celebrating 4th of July Heroes With Kids

Monday, June 23rd, 2014

Celebrating 4th of July Heroes With Kids

As my children grow older, I strive to find more meaningful ways to celebrate holidays.

The 4th of July has always been a burst of red, white, & blue through our home, but I can’t say that we have ever spent time together discussing the importance of this day and getting to know the heroes behind what makes the 4th of July so special.

Today I want to share with you a fun way you can share about the 4th of July Heroes in your home and a fun way to incorporate their images in your home to make the day more meaningful and festive.

I partnered with Walmart on this project and all the materials you need for this can be found at their store.

To begin, you can select your 4th of July Heroes that you want to talk about.

I found this great list for kids that I used to select our heroes to focus upon.

I then headed to Wikipedia and found images of each of our heroes and converted them to black & white and saved them on my computer.

If you would like to use the same heroes as us, here are the heroes we selected for our project.

George Washington

George Washington

Thomas Jefferson

Thomas Jefferson

Benjamin Franklin

Benjamin Franklin

John Hancock

John Hancock

Crispus Attucks

Crispus Attucks

John Adams

John Adams

Abigail Adams

Abigail Adams

Celebrating 4th of July Heroes With Kids

Once you have your heroes selected, head to the Walmart Photo Site and upload the images there.

In addition to having 1 of each image printed in 4×6, also add 1 set of wallets for each person.

 If you send these to the one-hour lab, it will be less than $6 for all of them.

While you are there, you can also pick up a package of mini-clothespins, a set of notecards for your kids to write on, supplies for this easy flag bunting, and this burlap wreath to decorate with.

Since I already had these things in our home, it helps cut down on cost and storage for us this year.

Celebrating 4th of July Heroes With Kids

Once you have your images, have kids select which person they are interested in discovering and have them find information about their 4th of July heroes.

I challenged my kids to find one or two facts about each hero.

We also read about the first 4th of July and how different is from how we celebrate today.

I am embarrassed to say that I was learning right along with my children and soaking it all in as much as they were.

Abigail Adams, for example, was one of our favorite people we learned about. Did you know that she had five kids that she cared for and homeschooled while her husband was away serving his country?

 Not only was she passionate about women’s rights, but she was also passionate about equality for all people, whether they were black or white.

She helped care for the soldiers in her home (feeding them and treating their injuries), and she even learned how to make her own gunpowder.

Emily and I are big fans of Abigail Adams now and all she did for our country.

Celebrating 4th of July Heroes With Kids

Likewise, my son loved John Adams and his fun fact was that he thought his teachers, “held him back.”

Despite being held back from his true potential in grade school, he passed his entrance exams to Harvard and his parents, who were farmers, gave up several acres of their own farm land to pay for John’s schooling.

And, boy, did that pay off!

John Adams strongly supported independence from Britain, signed the Declaration of Independence, and negotiated the treaty ending the Revolutionary War.

He later became the nation’s first vice president and second president.

This led to a great discussion about recognizing our true potential when sometimes others do not.

Did you know that Dr. Martin Luther King referenced Crispus Attucks in one of his speeches?

He held him up as an example of black patriotism at the beginning of our nation’s history.

Yet, we never knew anything about what he did for our country. I’m so glad we know now.

Celebrating 4th of July Heroes With Kids

If you have smaller kids, you can share simple facts and have them draw pictures.

Clearly, the fact that Abigail Adams rocked it as a mom and had five kids was worthy of a picture.

Make this time fun for your kids while acknowledging the sacrifices that so many gave up for our freedom.

Celebrating 4th of July Heroes With Kids

Once we were done discussing our heroes, I incorporated these pictures into our holiday decor.

I pulled some of the flags off of our bunting and switched them with pictures of our heroes.

 I took the items off of my burlap wreath and clipped the wallet images with mini clothespins on the wreath.

I hung this in the center of our mirror and added the flag & hero bunting around the frame of the mirror.

Celebrating 4th of July Heroes With Kids

I love these touches to our 4th of July decorating, but I love even more that my kids know about these patriotic heroes.

 I hope this idea inspires you to learn more about this holiday and the heroes who made this day possible for all of us.

Happy 4th of July, friends!

walmart_mom_disclaimer


Look at these other great ideas from MomAdvice.com:


How to Make Fluffy Slime


Pin It

How to Make a Succulent Centerpiece

Saturday, May 3rd, 2014

How to Make a Succulent Centerpiece from MomAdvice.com

You may think, “Who am I reading? I thought she couldn’t take care of anything (even herself?)!  Well, surprise, SURPRISE, I am showing you an easy DIY succulent centerpiece today and wanted to share with you a few tips on caring for succulents. I think I got my confidence back this year after creating that terrarium for you all and now I think I am some kind of green-thumb-ish-person and I want to take you along on my journey. In all honesty, I worked many a summer in a greenhouse, but I had lost my love of plants when I started changing diapers, cleaning a house, and feeding a family. Maybe you felt the same way?   Today’s project was sponsored by Walmart and they asked me to showcase a fun creation you can make for your own backyard from their gardening department and I thought I would highlight a plant I am kind of crazy about right now…the succulent.

Painted Succulent Pictures

Have you seen a painted succulent before?  True green thumbs may cringe at the painted plants, but (as I illustrated above) I am a newbie to the houseplant world and I love anything that is painted. These succulents have been painted which I think can add a pop of color to your home or as an outdoor centerpiece for your outdoor table, as I am showing off today.

How to Care For Your Succulents

Succulents don’t need a lot to survive, but they do have some small requirements- a lot of light, thoughtful watering, and a little plant food every couple of weeks.

A  succulent is any plant with thick, fleshy (succulent) water storage organs. Succulents store water in their leaves, their stems or their roots. These plants have adapted to survive arid conditions throughout the world, from Africa to the deserts of North America.These plants can take many different leaf forms and plant shapes, including paddle leaves, tight rosettes, and bushy or trailing columns of teardrop leaves.

Light- 

The one requirement I worry about in my home is the lighting conditions because my house doesn’t get a ton of light in it. If you have a home with bright sunny windows, succulents are a perfect houseplant option.

Succulents prefer bright light, such as found on a south-facing window. Succulents will let you know if you are not putting them in an ideal location. Some species will scorch if suddenly exposed to direct sunlight. Their leaves will turn brown or white as the plant bleaches out and the soft tissues are destroyed. If the plant is not getting enough light, succulents will begin to stretch, with an elongated stem and widely spaced leaves. Many varieties of succulents will thrive outdoors in the summer and, depending upon your weather, this might be a better option.

Water-

Most people think that they don’t need to water their succulents very often, but in the Spring & Summer months, succulents actually need more water than they do in the Winter & Fall. Make sure to water your succulents often in the summer.  Allow the potting mix to dry between waterings, but do not underwater. During the winter, when the plants go dormant, cut watering back to once every other month. Really, the watering is probably the most tricky part about succulents!

Fertilize-

Make sure that you purchase some houseplant fertilizer while you are at the store. In the Spring & Summer months, fertilize your plant every two weeks.  Just make sure you stop fertilizing in the winter months.

How to Make a Succulent Centerpiece from MomAdvice.com

Now that we know all about succulents, let’s make a cute centerpiece for our outdoor table!

Supplies Needed

3-4 Succulents (painted or not)- these are priced at $6.88 each

Gold Spray Paint

White Spray Paint

Inexpensive Pizza Pan (this was just $.92)

Painters Tape

How to Make a Succulent Centerpiece from MomAdvice.com

Directions

1. Remove plant in plastic pot from the clay pot. Remove stickers. Hold your can 8 inches away from your surface and spray in a sweeping motion side to side with a slight overlap. It has always been my experience to go thin with the paint, allow it to dry, and then to add another layer for the best results and minimal drip. Allow the paint to dry for one hour.

2. Using your painters tape, tape off anywhere you would like to have some gold peeking through. You can do a paint dipped pot and do the bottoms, trim the top in gold, or create your own unique paint effect with geometric taping. Spray paint those parts gold and allow your pots to dry.

3. Finally, spray paint your pizza pan gold.

4. Once it is dry, pull everything together and display it on your outdoor table for a unique centerpiece.

How to Make a Succulent Centerpiece from MomAdvice.com

How to Make a Succulent Centerpiece from MomAdvice.com

How to Make a Succulent Centerpiece from MomAdvice.com

How to Make a Succulent Centerpiece from MomAdvice.com

Have any tips for succulent care or selection? Feel free to leave them here- I’d love to hear about your experience with these plants!

walmart_mom_disclaimer

Pin It

How to Stain a Picnic Table

Friday, April 18th, 2014

How to Stain a Picnic Table from MomAdvice.com.

It’s that time of year again and I just finished staining my picnic table for another year of memories around this table! I thought it might be good to bring this post back to remind you how easy it is to restore and stain that picnic table. I hope these tips help! 

Have you ever stained a picnic table before? This was our first year staining our table and I wanted to share with you some tips on how to stain a picnic table so you can enjoy it all summer long.  Thanks to a coat of stain, our table looks and feels just like new and I can’t wait to show you just how easy it is to do.

How to Stain a Picnic Table from MomAdvice.com.

Have you ever spotted something in a magazine and just knew you had to have it… yet, you could find it nowhere?

Many years ago, I flipped through a magazine and spied a picnic table that Katie Brown owned that was in her backyard and I just knew I wanted a table like that.

After inquiring on Facebook, we found a gentleman in town who makes picnic tables and after telling him what I envisioned, he built this beautiful table for us that comfortably sits eight to ten people.  When I look out my window, this makes me so happy and the meals shared at this table are what summer is all about.

To keep her looking good, we decided to freshen her up for another year of family meals.

I wanted to share with you my tips for the best type of stain for picnic table and my advice on utilizing a semi transparent stain that can protect our table for years to come (while allowing that natural wood grain to still come through), protect it from uv damage, and that will only require a minimal amount of light sanding. This piece of furniture gets so much love in our backyard and I’m excited to share my tutorial with you today.

How to Stain a Picnic Table from MomAdvice.com.


Supplies Needed:

Thompson’s Waterseal Waterproofing Stain (we did our table in Nutmeg Brown in Semi-Transparent)

Drop Cloth

Knit Rags

Paint Tray

Foam & Paint Brush

Sandpaper

Heavy-Duty Cleaner

How to Stain a Picnic Table from MomAdvice.com.

Directions

1. Before we begin, we need to prep our surface. Using a heavy-duty cleaner, spray and wipe down your table to remove any dirt and grime. Be sure that you clean the entire surface well and then wait 10-15 minutes, or until the table is completely dry, to begin staining. You never want to stain the table while it is wet so be sure that you are not trying to stain after a heavy rain.

How to Stain a Picnic Table from MomAdvice.com.

2. Since our piece was in good condition, it did not require any sanding.

If your piece needs to be smoothed though, use a medium grit sandpaper sanding in the direction of the grain. This can be done with a small palm sander or can be done by hand. Once you are done with that, finish with a finer grit of sandpaper to smooth out any rough areas and give the table an even, smooth finish for the stain. Once it is sanded, make sure to use a tack cloth to remove any sanding.

3. Once your piece has been cleaned and prepped, it is time to begin applying stain.  With the Thompson’s Water Seal Waterproof Stain you do not want to thin this.  Make sure that you shake well and shake, stir or mix thoroughly before and occasionally during use. Before you begin staining, make sure you try a test run with a small trial patch in an inconspicuous place, like the underside of your bench or table, to make sure that the stain is the color you are going for.

Apply using an exterior paint pad, brush, roller, or even a rag to begin applying the stain to your table.  If you are doing the legs and underside of the table, lay down your drop cloth and invert your piece and do the bottom first. Allow the bottom to dry, it should take less than two hours to be fully dry, and then begin staining the top.

How to Stain a Picnic Table from MomAdvice.com.

5. Use your foam brush to get into the detail parts and legs of your table, using a rag to remove any drip marks on the ends.

6. Allow your table to dry for two hours.

How to Stain a Picnic Table from MomAdvice.com.


How to Stain a Picnic Table from MomAdvice.com.

How to Stain a Picnic Table from MomAdvice.com.

How to Stain a Picnic Table from MomAdvice.com.

How to Stain a Picnic Table from MomAdvice.com.

This table looks just like new again and it only cost me $30 in supplies.

Since picnic tables do reside outside, they are exposed to all of the weather elements, which means you need to stain your table from time to time.  This stain typically will last two to three years, but possibly less time than that, depending on if your picnic table is in direct sunlight.

The properties of  sunlight can dry out the stain and cause it to weather much faster.  It also has a lot to do with how much freezing and thawing happens, which in our area, seems to happen often! 

I’m so proud of my table and I hope it inspires you to freshen up your own picnic table for Spring.  Speaking of staining,  I am still SO proud of this stained table I created for our office. If you are looking for tips on indoor staining, be sure to visit that post!

Looking for more stain and paint projects? Here are a few of our favorite makeovers!

How to Stain Furniture how to easily stain furniture

how to paint a laminate fireplace

how to spray paint furniture

How to Paint a Kitchen Table

                               how to paint a kitchen table

Have you ever stained a picnic table or deck? What tips can you share on this?

This post contains affiliate links! I only recommend what I love & genuinely use though! 

Pin It

How to Style Your Bookshelves

Thursday, April 10th, 2014

How to Style Your Bookshelves from MomAdvice.com.


The art of styling bookshelves had never really been important to me until I started perusing pictures on Pinterest and saw the carefully curated collections and beauty in the organized book spines.

Of course, I don’t have an unlimited budget where I can add decorative books in one carefully choreographed color or an unlimited budget for fantastic looking odds-and-ends to update my bookshelves.

That is why I am excited to share with you some easy ideas for updating your bookshelves with inexpensive items and a few budget-friendly craft materials.


Cover Books With Paper

If you have an eclectic collection of books or you want to pick up a collection of books at Goodwill to stock your shelves, one frugal way you can add order and beauty to your bookshelf is to simply wrap each book in paper.

These beautiful bookshelves from Chloe Moore Photography have beautifully hand-stamped spines that add a unique detail to them.

I also love how she has weaved in her photography equipment, adding her own personal nods to her favorite interests.


Spray Paint Items to Create a Cohesive Collection

Instead of trying to find items of a similar color for your bookshelves to add those unique details, consider creating your own collection of groupings with an inexpensive bottle of spray paint.

My own bookshelves were cluttered with items that did not mean anything to me and did not showcase my personality.

I took a day to declutter my shelves, added a fabric back to my bookshelf and then found items that I loved and spray painted them with a little gold spray paint.

It created just the look I was going for, and cost $15 to update my shelves.


Stack Your Books In a New Way

Sometimes we get into a rut with our styling. I thought there were only two ways to style my books- vertically or horizontally.

The Art of Doing Stuff though has me rethinking my book stacks and groupings because there are actually 7 ways you can stack your books.

The names are even fun- the Sandwich Stack, On the Bias, and the Spiral Stack…just to name a few.

Consider regrouping your stacks in new ways and adding to your stacks with items you can find at your store to round out your collection.


Add an Eye-Catching Design to Your Bookcase

Even inexpensive laminate bookcases finds can be transformed with a little paint and thoughtful styling into true things of beauty.

One thing I love to see on bookcases, is an interesting color on the inside of the bookshelves.

This can be added with a pop of color from a brightly colored paint, a pretty fabric, scrapbook paper, or even stenciling.

I love this fantastic idea from This is Our Bliss to use removable wallpaper to add a decorative touch that is both frugal and fast.


Add Your Own Personality

One thing that I have been trying to do is to weed out the clutter in my life and make room for the good stuff.

The same tactic can be applied towards our bookshelves and what we place on them.

My shelves have yarn and knitting books, a shelf dedicated to my favorite classics, and I have a cookbook shelf that not only holds my cookbooks, but also holds the biscuit cutter that my great-grandma used to make biscuits for me when I was a little girl.

Consider creating a bookcase or shelf towards your own personal hobbies and collections.

I love this beautiful cookbook collection from The Inspired Room that celebrates her love for beautiful cookbooks.

This would also be a great spot to find some pretty vintage cookbooks or vintage kitchen items that you could weave into your shelves.

What’s one of your favorite things on your bookshelves? What is one styling trick you like to use when styling your bookshelves? Feel free to share here!


This post contains affiliate links.


Don’t miss those other great ideas from MomAdvice.com:


15 Easy DIY Updates To Help You Love Your Home

15 Easy DIY Updates to Help You Love Your Home


How to Spray Paint Furniture


How to Create Vignettes in Decorating


DIY Table Runner


Pin It

Get Your Home Organized With Goodwill

Thursday, March 20th, 2014

Get Your Home Organized With Goodwill


At the beginning of the year, I get the strong urge to donate everything in my house and start fresh.

I am also always on the hunt to find new strategies for organization in my home that don’t cost a lot.

Today I am featuring some great ideas for organization from commonly found items at your favorite thrift store.

I am so inspired by these bloggers that I have a trip planned for myself this week to try to snag a few of these items.


Get Your Desk Organized

This last month I spent organizing my office and craft space.

One thing I really hate is desk clutter and I have been using a thrift store mug to organize all my writing and cutting tools.

I love this fresh idea for using a broom head as an office caddy for organizing these item in a fun nod to industrial-style and to add a little whimsy to your desk.

Grab the inspiration for this project from merry thought.


Get Your Bathroom Organized

One area I always struggle with organization is our bathroom.
You can always find an abundance of white dishes at Goodwill though and this painting tutorial from Fruetcake shows how to turn plain white dishes into copper vanity bowls with just a little spray paint.
This would be a fantastic way to organize things like bobby pins, cotton balls, or even as a small jewelry holder.

Organize Your Photos

One thing I have vowed to do this year is to print more photos.
Of course the dilemma always is where to hang and display these items.
Luckily for me, I found this adorable cabinet door photo display that you can create with just a few items for decorating the top of your dresser.
If you are an Instagram-addict like me, this is a must-do project for displaying your favorite pictures.

Organize Your Jewelry Collection

Vintage plates and china can be adorned or just allowed to show their original vintage beauty in this adorable jewelry display that you could create from plates at Goodwill.
I love that this organizing project not only organizes, but it also doubles as a cute way to decorate a wall or the interior of a walk-in closet.
To round out this display, check Goodwill’s sheets, linens, and kitchen towels for fabric to add to these embroidery hoops.
If you are a woman that isn’t as fully accessorized (pity the thought!) you can even add to your jewels with items found in their jewelry department.

Organize the Bookcase

Bookcases can become untidy quickly especially in my kid’s rooms.
Consider whittling down the book collection into a more manageable size and then create these adorable bookends from your child’s old action figures and toys.
With a quick mount and a little spray paint, you have a unique bookend that can tidy those stacks.
Grab the tutorial for these easy DIY Bookends from Canadian Family today!

Organize Your Menu Plan

If one of your goals this year is to save money, the one place I always recommend starting is with your grocery shopping and menu planning.
I am a visual person, so I love my chalkboard in my kitchen as a reminder of what we have in store for the week and to prompt me to prep and thaw ingredients for the days ahead.
If you don’t have a chalkboard in your kitchen, making one is very easy thanks to chalkboard paint.
Check your local thrift store for a frame, canvas, or serving tray that you can use to get your menu plan visual.

Organize the Paper Clutter

We talk a lot about book page crafts because this is an item you can always find at your local thrift.
Did you know that you can transform a donated book into an organizer?
As someone who frequently has a pile of cards and tiny notes to myself, I love this thoughtful storage idea for these items!

Organize the Toys

After the holidays, the toy clutter always seems to get out of control at our house.
Thankfully, you can find lots of jars at your favorite recycle shop that can be transformed into adorable containers to house those smaller toys in.
With a little spray paint and a figurine, car or train, you can create an adorable accent to your child’s bookshelves or to tuck away in your toy storage closet.
You can get the scoop on making these adorable toy corrals on Simplicity in the South.

What are your favorite things to use to organize your home? Have you upcycled anything into the perfect storage solution? Feel free to share it here!

This post contains affiliate links.


Need more organizing ideas? Check out these posts from MomAdvice.com:


Minimize morning stress with an organized command center

Organized Command Center


Organize Your Spice Rack


How to Organize Board Games


DIY Breakfast Caddy


Sign up for the MomAdvice newsletter

Pin It

Smart Solutions for Craft Room Organization

Wednesday, February 5th, 2014

Smart Solutions for Craft Room Organization from MomAdvice.com

It’s been a long time since I have shared some pictures of our home. I have been in the thick of organizing my craft room and today I wanted to share with you some ideas for organizing your own craft space in your home.

For my part on the Walmart craft team, they requested that I tackle a craft project. I made a special request that I could share with you today my organized craft space and see if I could find any fun additions to my space at their store and they agreed. So today instead of crafting it up, I am showing off what I have been up to in my space.

Smart Solutions for Craft Room Organization from MomAdvice.com

Let’s start from the very beginning. Three years ago, this was our space that I envisioned turning into our office space. We have a tri-level home, now lovingly called a quad now that we finished this fourth level, and this was what we started with. This space was where we threw our stuff that we didn’t know what to deal with. We had to majorly declutter and we had to save enough cash to make the updates to our home. We were able to accomplish both (loan free!) and create the space I had been dreaming of.

I am starting with this picture to show you that maybe there is an area in your home that could be your special space and you just don’t know it. Maybe it just requires a fresh eye, a bit of decluttering, and a few smart craft solutions to carve a space just for you.

Smart Solutions for Craft Room Organization from MomAdvice.com Smart Solutions for Craft Room Organization from MomAdvice.com Smart Solutions for Craft Room Organization from MomAdvice.com Smart Solutions for Craft Room Organization from MomAdvice.com Smart Solutions for Craft Room Organization from MomAdvice.com

Smart Solutions for Craft Room Organization from MomAdvice.com Smart Solutions for Craft Room Organization from MomAdvice.com

Here is my craft and office space today. When I post these types of pictures, people ask me where I found certain things. Here are some of the things you will find in my space.

Floral Chairs- Found at a local Value City (no longer available-sadness)!

Green Side Table- A side table we owned, but spray painted & distressed

Owl Lamp & Burlap Lamp Shade–  Walmart

Record Table- Thrift Shop Find Stained & Painted

Swivel Metal Stool- Home Decorators

Knitted Leaf Centerpiece- Handmade

Everyday I’m Hustling Pillow- Michelle Dwight Designs

Record Frames- H&M

Smart Solutions for Craft Room Organization from MomAdvice.com Smart Solutions for Craft Room Organization from MomAdvice.com Smart Solutions for Craft Room Organization from MomAdvice.com Smart Solutions for Craft Room Organization from MomAdvice.com Smart Solutions for Craft Room Organization from MomAdvice.com

Crafting and organization do not go hand in hand for me.  I spent a good month getting this room organized and trying to figure out the best solutions for my space. Here are some of the solutions I found inexpensively at Walmart.

Glass Jars– I had all of my craft supplies tucked away in baskets. This meant I spent a lot of time digging through baskets and trying to figure out where I tucked all my crafting odds & ends. Glass jars truly helps me visualize what I have and where it is. I found the smaller jars for just $4.97 and my giant 2 gallon glass jar is the perfect home for my ribbon collection (priced at $9.97).

Clear Clipboards– As a craft blogger, I always have a running to-do list for my site and craft projects. I utilized this to-do list printable (previously featured in our DIY Homework stations) and mounted them on these clear clipboards ($3.88)  with 3M hooks ($3.67) on my wall. I also have my favorite Mead Wall Calendar I buy every year to keep track of when all my projects are due ($7.97).

Metal Bins- Over in the closet solutions, I found a metal tub that I could use to organize my knitting needles. When you start really building up your knitting needle collection, you may have four or more different sizes of the same size needle. I was constantly digging through baskets to find the right needles. I decided to use manilla envelopes and label them #0-15 and then put my needles for each size in these envelopes. This saves me tons of time hunting for the right needles and makes it easy to see what I might need to buy. I put all of these in this metal tub ($9.74) and it is on top of my newly organized craft cart.

Smart Solutions for Craft Room Organization from MomAdvice.com Smart Solutions for Craft Room Organization from MomAdvice.com Smart Solutions for Craft Room Organization from MomAdvice.com Smart Solutions for Craft Room Organization from MomAdvice.com Smart Solutions for Craft Room Organization from MomAdvice.com Smart Solutions for Craft Room Organization from MomAdvice.com Smart Solutions for Craft Room Organization from MomAdvice.com Smart Solutions for Craft Room Organization from MomAdvice.com

Two things we purchased to finish out my crafting space was a crafting table and a crafting cart that I could roll out into the middle of our office when I needed to do my crafting. We found this Martha Stewart Collapsible Crafting Table & Crafting Cart on Home Decorators. If you are struggling with a small space, this is a dream come true. You can fold down one side if your space is small or open it all the way out if you need a large surface to work on.

This space also doubles as an indoor photography studio when the weather isn’t cooperating. I have my photography backdrops stored in the gift wrap center and can really spread my work out, if I need to on this space.

I spent an entire weekend whittling down my craft supplies to what I truly needed in my craft cart. I now everything I need right at my fingertips. I had to keep reassuring myself that it was okay to part with some of my craft supplies. If it hadn’t been used in the last year, it was definitely something that could be donated to free up precious space in my craft cart.

Smart Solutions for Craft Room Organization from MomAdvice.com Smart Solutions for Craft Room Organization from MomAdvice.comAs you can see, I can wheel them over to corners in our office so they don’t get in the way. I am so thankful for these smart solutions for our space. I am also thankful that I finally feel organized in this space.

Smart Solutions for Craft Room Organization from MomAdvice.com

And as a good old-fashioned reminder that all good things should be enjoyed in moderation, I found this old-fashioned closed sign over in the office supplies at Walmart ($1.97). I mounted a 3M clip upside down and hooked it on the back of my computer. This now offers an in-my-face reminder of how I should be spending my evenings.

I hope you enjoyed the tour of my craft space! Feel free to ask me any questions and I promise to try to help!

walmart_mom_disclaimer

Pin It

DIY New Year’s Eve Craft Ideas

Thursday, December 19th, 2013

DIY New Year's Eve Crafts

I can’t believe that December is already here and we are dreaming up great New Year’s projects for you!

Of course, I am featuring glittered projects and upcycle projects that could be enjoyed any time of the year.

The best part is that you can find many of the materials for these projects at your local thrift store for a fraction of the price compared to other retail stores.

Let’s find some thrifty ways to ring in the New Year!


Create Glittered Ballet Flats

If there is one thing I love, it is glitter!

I am always looking for festive additions to add to my wardrobe and these glittered flats couldn’t be easier to create and, according to We Are Not Martha, making these is less messy than you think.

For this craft, head to Goodwill to pick up a basic flat and then create a glittered layer with a little Modge Podge and glitter.

How festive would these be for the holidays?

Or your birthday?

Or everyday?


Make Confetti Surprise Jars

Sometimes the simplest of things bring us the most joy and this craft from diy studio is a joyful & frugal one.

My children would adore these Confetti Surprise Jars for a fun family NYE tradition.

Pick up a jar at Goodwill and spray paint the lid a dazzling shade of gold or silver, fill it with confetti, and add a special surprise inside for the recipient.

For your surprise choices, check out the jewelry section or locate small toys or game pieces that you can add as their surprise.

Don’t be afraid to spray paint those treasures in the same shade of gold or silver for the holiday.


Add A Little Sparkle to Your Wardrobe

If there is one thing that thrift stores have an overabundance of, it is sweaters and cardigans for the Winter season.
Don’t worry if you don’t sew (like me!), this is a project that can be done in minutes with just a little fabric glue.
Sincerely Kinsey offers this fantastic DIY that will add just a hint of sparkle to your wardrobe with this easy sequin cardigan.

Add A Little Sparkle To Your Home

There is always an abundance of vases and jars at Goodwill so I love that I can shop their store for this project.
These easy glittered vases are pulled together much like the glittered flat that I shared about earlier.
You simply need a vase or jar, Mode Podge, glitter, and a sponge brush to create these fun vases.
I think these would make the cutest NYE centerpiece or they could be a fun craft to do with your kids for the holiday season.
Check out this tutorial from the sweetest occasion.

Add Sparkle to Your Wine Glasses

I am no stranger to adding sparkle to stemware and last year I created these monogrammed wine glasses for my girlfriends.

If you are having a small NYE party, consider making these as a fun favor for your guests.
If you lack the ambition to monogram them, keep it simple and just add a glittered stem to your glasses.

Give a Cozy Hostess Gift 

As the resident craft expert for the Goodwill Tips blog, I can tell you that sweater crafts are one of our favorite projects to share about on here.
Yet again, the ever-versatile-and-available sweater makes its appearance in another craft post.
Warm Hot Chocolate shares an easy no-sew tutorial for creating a cozy sweater that can dress up a bottle of wine or champagne.
She adds an adorable pom-pom embellishment with a tag to complete this beautiful gift.

Wine hats and scarves

Wishing you the hap-hap-happiest of New Year’s from MomAdvice.com!! May your holiday be beautiful and thrifty this year!

This post contains affiliate links.
Here are a few more wonderful crafts from MomAdvice.com:

Scrappy Fabric Trees


No-Sew DIY Blanket Scarf


Valentine’s Day Cupcake Liner Trees


Paint-Dipped Spoon Set


Sign up for the MomAdvice newsletter