Archive for the ‘Organizing’ Category

7 Habits to Help Your Kids Have a Great Morning

Wednesday, September 18th, 2019


7 Habits to Help Your Kids Have a Great Morning from MomAdvice.com


Back to school is the perfect time to work on your family’s good habits. Set a goal of getting your kids’ great new habits to stick and make their school mornings a little easier. Just a few minutes a day and some creative thinking can make the school year start off right!


From our marriage & parenting contributor, Mary Carver.

How’s your fall going so far?

It’s felt a little chaotic at my house.

For weeks now, I’ve been saying, “We’re still getting into our school year routine.” But guys? We’ve been back to school for a while. If I can’t get my people into a routine soon, I’m going to have to change my excuse to, “Well, the holidays are just messing us up.” And then it’s winter break and the new year and the flu and spring break and end of school and summer. 

Because the truth is, we’re constantly entering or leaving one busy season or another.

During this stage, with two busy kids and two busy adults, we just don’t have a long stretch of “normal” to look forward to. There’s no sense in waiting to get back to normal before getting organized, finding routines, or learning how to live — because I’ll be waiting forever. 

The number one thing I’ve found that makes a difference in how my kids — and I — deal with busy seasons?

Sleep.

Our quantity and quality of sleep makes an enormous difference in everything — in our health, our attitudes, our discipline in the other things that make life easier or otherwise better. Sleep kind of makes our world go ‘round.

And sleep is a funny thing. Everyone needs it, but everyone needs a different amount. And everyone seems to need different conditions to get good sleep. So it’s a universal need but also a personal one.

Therefore, rather than tell you one, laser-focused solution that works for my family, today I’m sharing several things that seem to make a difference for at least one person in my house. Hopefully something I share will work for someone in your family, and together we can stop needing excuses for being so out of sorts as we move from season to season.


7 Habits to Help Your Kids Have a Great Morning

7 Habits to Help Your Kids Have a Great Morning from MomAdvice.com

Know the facts

When we get busy with evening activities and homework and movie nights and one more story at bedtime, we can easily cut our kids’ nights short without realizing it.

That’s why it’s good to know — and then keep in mind — how much sleep is recommended for each child, based on their age. This article from the American Academy of Pediatrics lists the recommended sleep times that studies have shown are the best for each age range from four months to 18 years. 

This chart was helpful for my family as it showed me that it’s not weird for my 11-year-old to need more sleep than my 4-year-old. Last year I let my older daughter stay up later than her little sister, because I assumed she could handle it. But over the past few months I’ve realized that just isn’t true. They need different amounts of sleep, and what I assumed was wrong. Now they go to bed at the same time, which feels weird — but the AAP says is acceptable and not that weird after all.

Bathe at unusual times

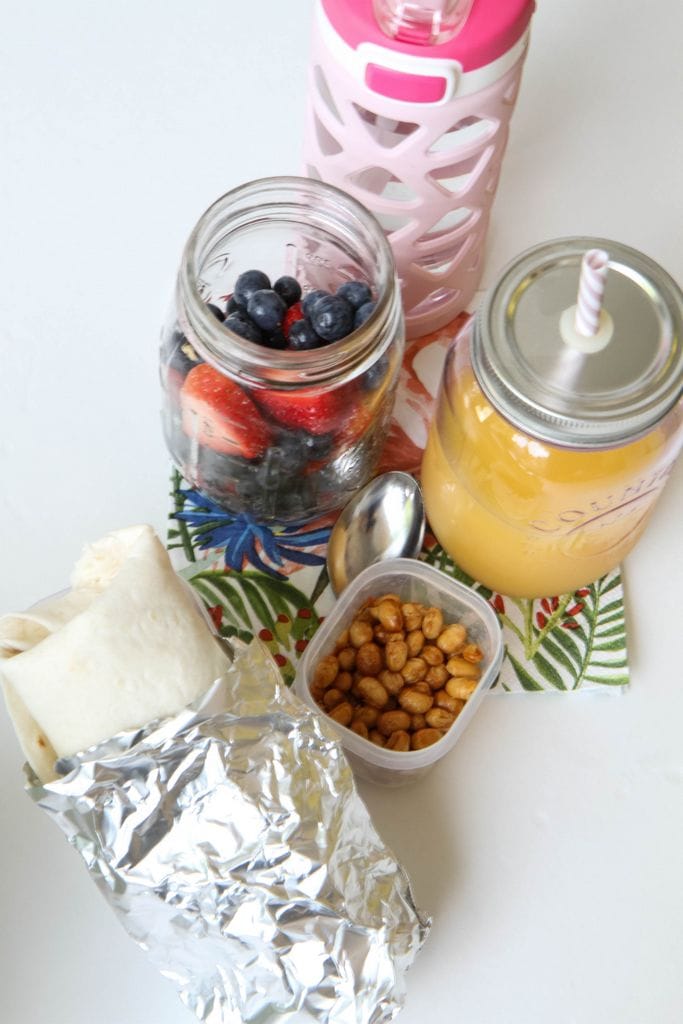
Sometimes it feels like I have to choose between hygiene and sleep — for my kids and for myself! But what I’ve finally realized (it only took me how long?!) is that we don’t have to bathe (or shower) at the “usual” times. I can shower before bed instead of in the morning if I have to. My kids can bathe right after school instead of getting to bedtime and realizing we’ve run out of time and skipping it…again. It seems like a little thing, but it’s made a big difference for us. (And this tip goes for any bedtime or morning task. You can have story time right after dinner, and you can make lunches at night instead of after breakfast.)

Brain dump before bed

While I don’t often struggle with insomnia, I’ve certainly spent many nights staring at the ceiling as my worries or ideas or to-do list run through my brain on a loop. I’ve learned it’s better to just turn on my lamp, grab a notebook, and write it all down. That way, my brain can rest, knowing that I’ve captured all the things and I can tackle them the next day.

Sometimes my kids need that, too. I try to make sure I don’t shut them down if they bring up a tough subject or start telling a long story at bedtime, but when possible, I will ask if it’s something we can talk about the next day. And then, to make sure they know I’m serious, I’ll let them see me make an actual note so we don’t forget to come back to that topic or story.


7 Habits to Help Your Kids Have a Great Morning from MomAdvice.com

Set alarms!

I use the alarms on my phone to keep me on track all day long, all week long. This is especially important for making sure we all get the sleep we need without being late for school or work. I set alarms for —

  • When we need to go upstairs to start the bedtime routineWhen my oldest daughter needs to bring her book out to the hallway (so she doesn’t stay up super late reading…like her mama!)
  • When I need to turn off the TV and start my own bedtime routineWhen I need to get up, at the very least a few minutes before the kids
  • When I need to wake up the kids (I need to get back to setting my 11-year-old’s alarm in her room; that helped her morning attitude a lot when we did it before.)
  • When we need to go downstairs to start packing lunches and eating breakfastWhen my oldest needs to go to the bus stop

Without those alarms, we would be lost!

Make expectations clear 

Nearly every argument my girls and I have in the morning is about whether or not they’ve completed their morning routines: making their beds, brushing teeth, brushing hair, putting on clean clothes.

It doesn’t seem hard to me, but they struggle — so writing down the morning routine and sticking it on the bathroom wall has helped.

I also included what times we do things, so they know if it’s close to 7:30 and they aren’t close to ready for breakfast, they’d better get a move on!


7 Habits to Help Your Kids Have a Great Morning from MomAdvice.com

Have your own morning routine

What makes you feel awake?

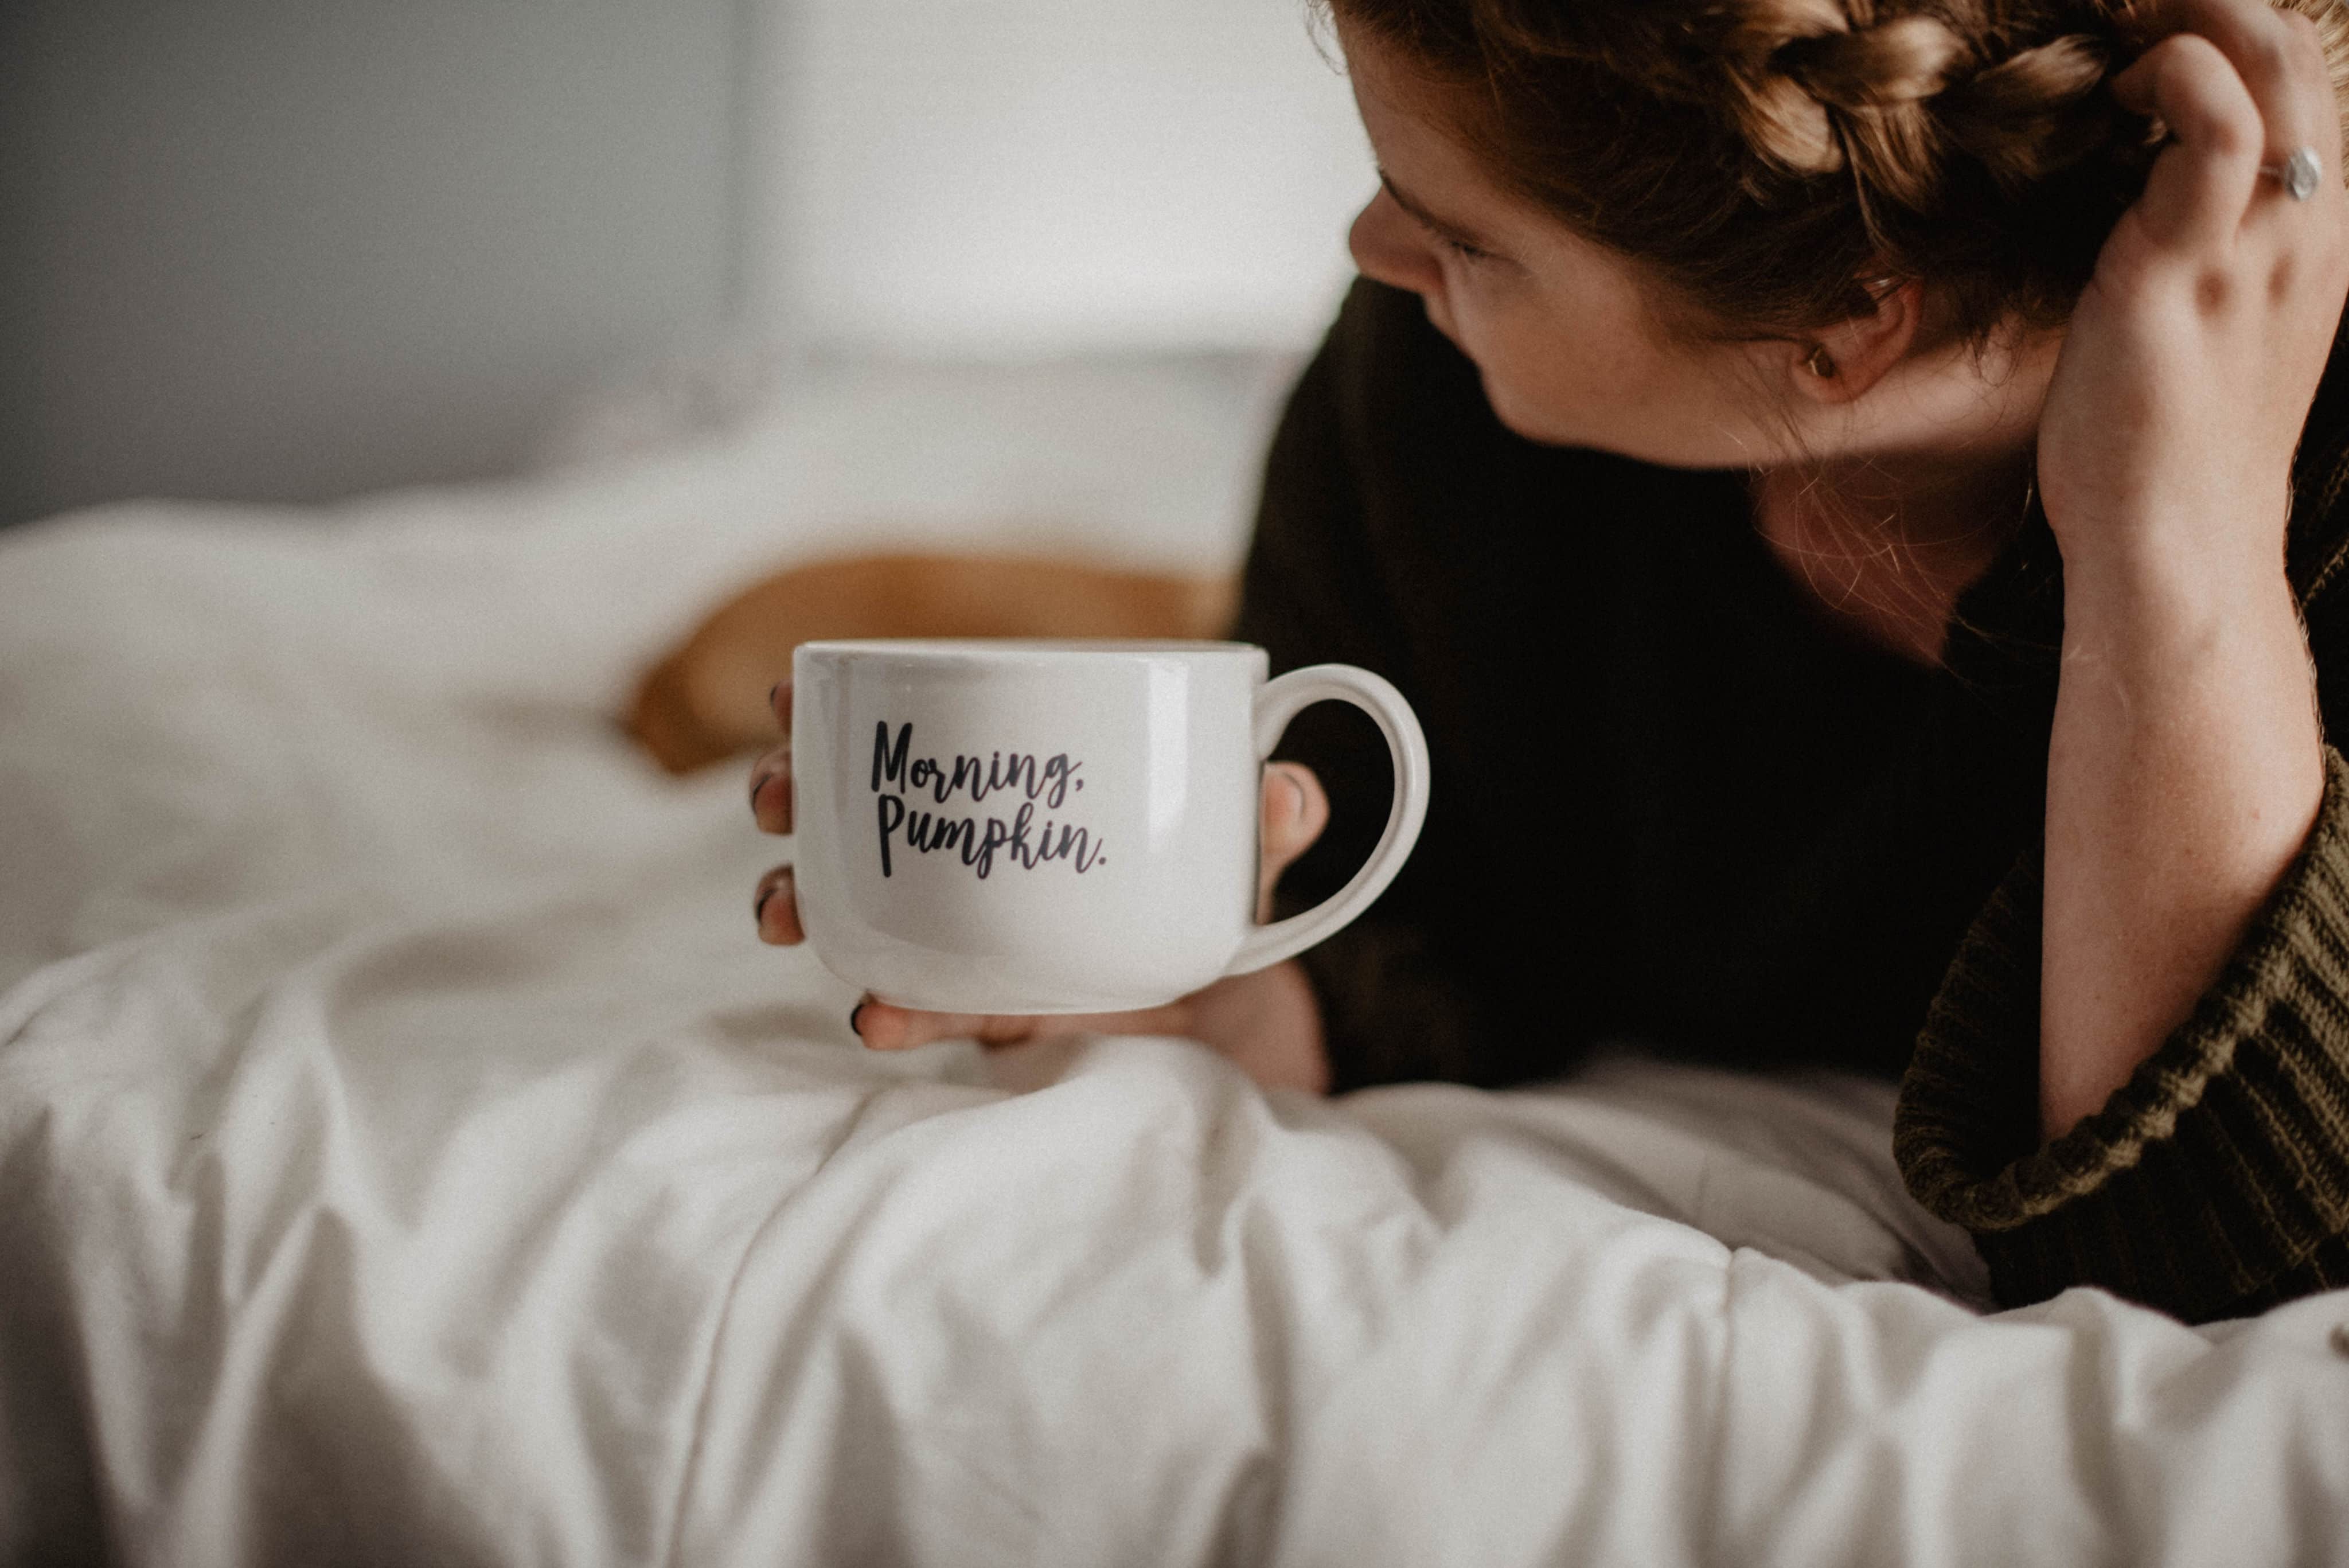
Do you need coffee before you can deal with people?

Or perhaps it’s a tall glass of ice water or a few minutes of stretching that gets your blood moving?

For me, it’s turning on all the lights, brushing my teeth, and putting on a bra. Without those things, I am a slug — and not a very nice one either. We all win when I make sure to complete my own morning routine!

Take a moment 

Look, nobody in my house likes mornings.

So I’m not about to tell you to take hours of your morning to connect with your people. But! If you can take even a few seconds to look them in the face and wish them well (on a test, with a friend, in general) or perhaps play their favorite song in the car and share a smile in the rearview mirror as you do your best car dance, I guarantee it will make a world of difference.

And if you have more than a few seconds? Five-minute family devotions, love notes in the lunchbox, or a blessing prayer in the carpool line will take little time and effort, but leave you feeling like you’ve got this morning thing mastered.

Those are just a few things that help us have better mornings.

We aren’t perfect, and don’t do every thing every day. But when we do our best to check most these boxes? We are more rested and less frazzled, and mornings don’t seem so bad (even to my house full of night owls).


What helps your family have a great morning? Be sure to scroll down for more great parenting articles!

7 Habits for Better Mornings With Your Kids from MomAdvice.com


Mary Carver is a writer, speaker, and recovering perfectionist. She lives for good books, spicy queso, and television marathons, but she lives because of God’s grace. Mary writes with humor and honesty about giving up on perfect and finding truth in unexpected places on her blog,MaryCarver.com. She is the author of Fast Talk & Faith: A 22-Day Devotional Inspired by Gilmore Girls and co-author of Choose Joy: Finding Hope & Purpose When Life Hurts. She is also a regular contributor to incourage.me and MothersofDaughters.com. Mary and her husband live in Kansas City with their two daughters.

Like this article? You might find these other parenting articles helpful too!


How to Handle Lying from MomAdvice.com how to handle lying


A New Way to Teach Your Child to Tie Their Shoes from MomAdvice.com 
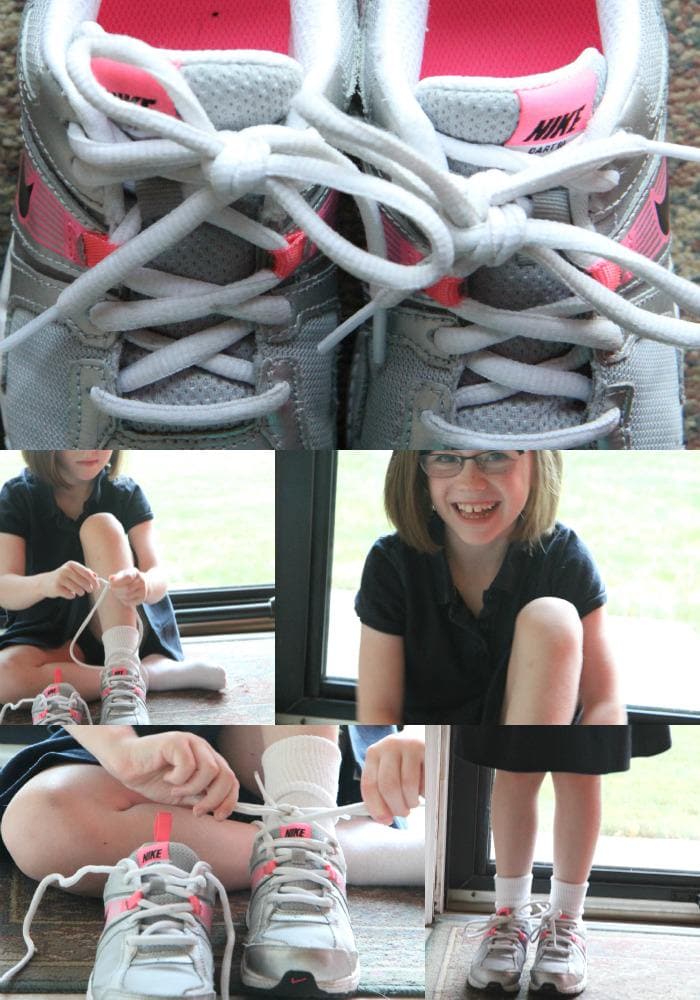
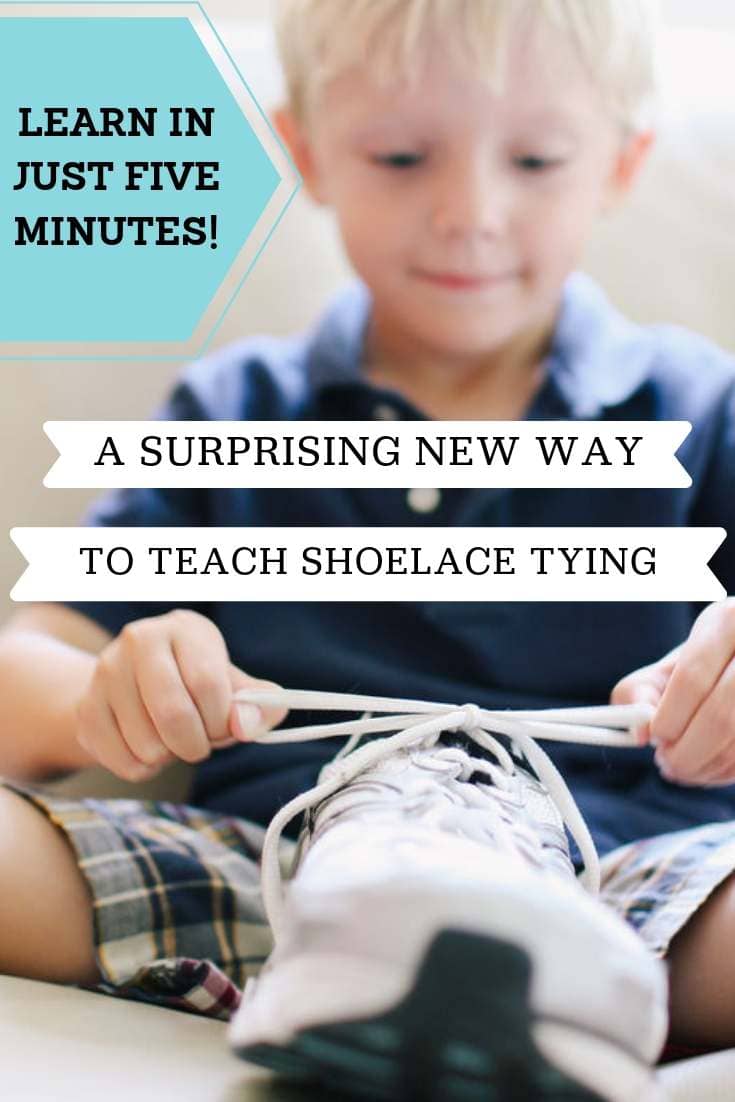
a new way to teach your child how to tie their shoes (my kids learned in 5 minutes flat!!)


Teaching Kids the Importance of Failure from MomAdvice.com teaching kids the importance of failure

Homeschooling a Child With Special Needs from MomAdvice.com homeschooling a child with special needs


How to Find & Write Pen Pals from MomAdvice.com how to find & write pen pals


DIY Tween Confidence Kit from MomAdvice.com diy tween self-confidence kit

5 Book Series for Kids Who Love Harry Potter from MomAdvice.com 5 book series for kids who love harry potter

This post contains affiliate links.


Sign up for the MomAdvice newsletter

Pin It

A New Way to Teach Your Child to Tie Their Shoes (VIDEO)

Wednesday, September 11th, 2019

A New Way to Teach Your Child to Tie Their Shoes from MomAdvice.com

Are you looking for a new way to tie shoes for your child? Today we are showing you a fresh tying technique that will teach this fine motor skill with this easy lace tying strategy. This helpful advice was recommended by an occupational therapist so don’t miss this tutorial!

I am so darn excited about today’s post and getting to share with you the lace tying strategy that helped me succeed at teaching my children how to tie their shoes. This is, honestly, the best shoe-tying tutorial I could ever showcase and it comes to my site courtesy of my amazing friend, Nancy!

When my son was in first grade he was still struggling to tie his shoes. The fact that we put the kid in Velcro shoes his entire life may have been a big factor in why he struggled so much. 

When I shared this with my friend she showed me a new way to teach shoelace tying to see if it would work for our son. 

Lo and behold, a mere five minutes later my son was tying his shoe like a pro.

If you haven’t heard of this method before, you aren’t alone.

It is called the Cheerio Method, because it really focuses on creating a circle with your laces (that looks like…well..a Cheerio) and allows a space for your child to feed their bunny ears into it. The sizing of that delicious cereal is exactly the size of a circle you need to create space for feeding laces.


I don’t know about you, but I really struggled with this skill, when I was a child,  and remember sitting for hours, with a shoe-lacing board. It took me forever to figure out the granny knot and I still remember singing those silly songs to myself about looping those bunny ears.

A New Way to Teach Your Child to Tie Their Shoes

My daughter is three years younger than her brother and when we taught Ethan, she wanted to learn right along side of him. As luck would have it, she caught on just as fast as her brother and it is how she is tying her shoes still today.

You have to see this tutorial to learn how to tie shoes. While it begins with the same shoelace knot, that we are all familiar with, it evolves into an entirely different method to lace shoes.  

If you are struggling with teaching your children to tie their own shoelaces, this is a parenting game changer. I can’t wait to hear about your own success stories with this tutorial.

An enormous thank you to Nancy for so generously sharing her cheerio method video with my readers!

Note About the First Loop

The first time you teach them, you can show them with your own finger how to create that first loop. After that, it shows them how much space they  need to create it and they can do it on their own.

For double knotting the laces, just show them as you normally would, making sure to stress to pull those loops tight (but not *too* tight).

If you have a child still in those early stages of practicing, I have found one of these handy shoe-tying practice boards (affiliate link)  is helpful for teaching kids how to tie.

What if this technique doesn’t work for my child. Do you have any other recommendations to teach my child to tie shoes?

Have you ever heard of the Ian Knot? I had never heard of this technique until I started researching other resources for you. Watch this incredible video (below) of the fastest shoe tying technique.

I’m an adult and don’t be surprised if you find me curled up with my shoes teaching myself this.

Who says an old dog can’t learn new tricks? 

Let us know what you think about today’s post and if it has helped your child as much as it helped my two!

This post contains affiliate links

Looking for more parenting advice? Here are a few other posts that you might find helpful!

how to find and write pen pals

3 easy rainbow science experiments to try

the best back to school books for kids


A New Way to Teach Your Child To Tie Their Shoes from MomAdvice.com


Pin It

5 Ways to Save Money When Facing a Chronic Illness

Tuesday, June 25th, 2019

This post is sponsored by RxSaver by RetailMeNot and includes tracking links. For more information about tracking links and how to opt out, please visit All About Do Not Track prior to clicking any links found in this post. All thoughts and opinions are my own! 

If there is one thing I have learned since my Ehlers-Danlos Syndrome diagnosis, it is just how expensive having a chronic illness can be. The daily maintenance of medications, supplements, therapeutic services, doctor visits, medical devices, and dietary requirements can be extremely taxing on our budget. 

That is why I’m excited to partner today with RxSaver by RetailMeNot to share their online tool that helps you find the lowest prescription prices available. You can shop right at your own nearby pharmacy and save tons. 

As a budget-conscious person, I also wanted to share with you some strategies I have been using to save money to help offset some of our medical expenses. While we can’t always do financial planning for a chronic illness, we can learn better strategies for managing your money with your chronic illness.  

Here are 5 easy ways we saved while not compromising on the care I need to treat my condition!

Get Familiar with Your Health Insurance Plan

If you are fortunate enough to have health insurance, it is SO important to read what benefits are covered under your plan. With a brief scan, you may discover potential savings that allow you to explore services you thought you would have to pay out of pocket for. Many plans can offer coverage for items like medical equipment, home health agency services, physical or occupational therapy, and even your chiropractic care. 

Two appointments I have been regularly booking, for example, have been for acupuncture (to help treat my TMJ symptoms) and massage therapy (to also work out issues around my jaw and neck).  

Those typically sound like spa services, don’t they? 

Can you believe they are covered at my chiropractor’s office? I’m able to have these services processed under the umbrella of chiropractic medical care through my health insurance company.  

Isn’t that so great?

If you are unclear if a particular service is covered, contact the number on the back of your insurance card to request an associate look at your policy and help you walk through your benefits.  This is also a great time to ask about potential discounts for healthy and wellness like discounts on a gym membership, nutritional counseling, or mental health services.  

Save Time & Money By Researching Prescription Prices

Did you know there are ways to save on prescription drugs whether you have insurance or not? If you can’t afford your chronic disease medications, you can take advantage of apps that save you money on your prescription needs. 

Simply head to the RxSaver website (or download the app) to comparison shop the pharmacies near you and evaluate which store offers the best deal for your money.

The nice thing about this service is that they don’t require any personal information to use it and you don’t have to have a membership to take advantage of the savings. Simply enter your prescriptions in, compare prices, and choose the best price and location for you.

When I typed in my own medications, for example, I was surprised to find $20-50 savings on one of my medications thanks to this tool finding the lowest prices for me. Check your own prescriptions right over here.

This quick price check can yield your family up to 80% off at pharmacies nationwide!

Find Ways to Earn Money & Trim Your Current Expenses

When you become diagnosed with a chronic condition, you may find that your days look a lot differently than they did. Honestly, I found that my day was really structured around appointments and squeezing in a little rest.

As we all know, when our days look different our spending can also look different.  

This is a great time to reevaluate your monthly subscription services to see if they are being used enough to justify the expense.  If they no longer fit with your new lifestyle, consider reducing or dropping services to save money to pay for your future medical expenses.  

A monthly gym membership, for example, could be reduced down to a class pass instead that can work with your new daily schedule. 

Small switches like this can free up funds for future medical expenses.

Also, consider tweaks that can help you earn money to help offset costs. Moving your savings to a high interest earning online bank, for example, can yield up to twelve times more interest than what you may currently be earning.

As you explore your financial systems, I would also encourage you to get advice from a trusted financial planner to discover ways you can earn more from interest or strategies for investing wisely to help cover any unexpected expenses. 

Discussing what your new normal looks like, with your financial advisor, can impact lots of future decisions. This is a great time to go over things like estate plans, life insurance, and strategies for covering your medical costs.  The more transparent you are with your financial advisor, the better dialogue you will have to prepare for your future.

Take Advantage of Wholesale Club Prices Without the Membership (or Heavy Lifting)

Wholesale club memberships can be expensive up front, but can yield great money-back rebates and savings on items or services needed for your health. Just think of all the potential savings on things like vision, supplements, or medical care equipment needs. 

Now that I use Instacart for grocery delivery, I discovered that you don’t need a wholesale club membership card to have a grocery delivery service gather your groceries for you. This workaround on the Costco membership means that I can take advantage of all the store has to offer online and have these heavy items delivered to my door.

If you do have a card, you can input your membership number for them to use, securing more in your future rebates without the hassle of shopping for it all yourself.

Keep in mind that the grocery service does not typically purchase a lot of the over-the-counter medications you need though and that section of the store can save hundreds on your health expenses.

No grocery delivery in your area? 

As a small town girl, I feel your pain!  

You may consider doing a grocery pick-up service and having someone at home to assist you with the heavy lifting. 

Single? 

I have found a rolling shopping cart saves me time and energy on my grocery days.  #stillwinning 

Ask About Patient Assistance Programs

Lastly, if I learned anything from my Dad, it is that it never hurts to ask for a discount!  Many places I visit offer a discount card for repeat visits, a reduction on medical bills if paying out of pocket, or can share samples of prescription medication that can help offset a bit of your day to day expenses. 

I highly recommend asking too if there are discounts for students, seniors, military, long-term disability, or being low income discount. I have often been surprised what discounts I had at my disposal that I would have never known about if I had not asked.

Not only is asking about a patient assistance program at your various appointments beneficial, but it is also something you should look for when shopping for items you may be purchasing online.

In fact, many expensive medical devices or medical supplement sites may have a page dedicated to Assistance Programs, on their website. These programs allow you to apply for a set discount on your purchases that can save you a lot of money or can be covered by your health savings account.

Just like being transparent with your financial advisor, I encourage you to have transparency with your physician about your budget too.  When our son’s medication skyrocketed hundreds, we set up an appointment to discuss alternatives that wouldn’t be as costly. By having this conversation, we were able to switch our son to a higher milligram pill that could be split into two doses, giving us twice the amount of pills for a lot less.

Don’t forget though, you have a patient assistance program right in the palm of your hand. The RxSaver app can help you narrow down who has the cheapest prescriptions in your area and get you back to resting in no time flat.

This post is sponsored by RxSaver by RetailMeNot. All thoughts and opinions are my own! 

Pin It

Simplifying Your Holiday Gatherings

Thursday, November 1st, 2018

You will love these strategies for hosting memorable gatherings without the stress.

I’ve got everything from cooking shortcuts to decorations that transition through the seasons to your perfect playlist! 

This post is sponsored by Honeysuckle White. All thoughts and opinions are my own! 

Now that Halloween is behind us, it is time to start thinking about all of those upcoming holiday gatherings. Hostess duties can often feel stressful and overwhelming, don’t they? That is why I’m excited to be partnering today with Honeysuckle White to share some fresh ideas for hosting your next gathering without the stress.

I learned that if I wanted to connect with my friends and family that I often had to be the one to step up to bat and offer to host. I have discovered, over the years, that so many people feel intimidated by hosting and are often self-conscious of things like undone house projects, their limited cooking abilities, or not feeling like they have that perfectly sized space for the ideal gathering.

The thing is, our own intimidations rob us of precious moments with those we love and the people that REALLY and GENUINELY love us will always, always be thankful to you for creating space in your home and day for them.

That is, truly, why I am excited to share that Honeysuckle White recognizes how precious our time is and wanted to take out that intimidation factor by providing a brilliantly easy turkey product that will make gatherings so much easier on busy moms.

Even better?

You can order it right through Amazon.

And, ladies, I KNOW we all have Amazon ordering down pat! (*ahem*)

Say hello to the world’s easiest holiday dish, the NEWS Honeysuckle White Bacon Wrapped Turkey Breast “Turketta”, inspired by the flavor profile of porchetta!

I gave ordering one of these a spin and really was surprised how well-seasoned and easy this was to execute for my Friendsgiving gathering this week.

In your package (that arrives right on your doorstep!)  you will get one of these beautiful roasts that serve approximately 4-6 people.  The packages arrive frozen and you can thaw it for an ASAP gathering or you can tuck this in the freezer for a future meal.

The bird is perfectly seasoned, boneless (no carving- woot, woot!), and requires just a simple quick sear on the bottom and baking.

This isn’t the only option you can have delivered. They also are offering Hickory Smoked Turkey Breast, a Honeysuckle White Fresh Traceable Whole Bird Turkey, & the Honest Turkey Whole Turkey.

Even better, for a limited time offer, MomAdvice readers can get 15% off using my coupon code 15MOMADVICE.

I can really get behind this company and the work they do with farmers, especially after having the opportunity to tour one of the farms.

The company is committed to raising their turkeys without growth-promoting antibiotics and no added hormones or steroids.

They also are committed to supporting independent family farmers to provide family farm-raised turkeys.

I don’t know if you know this, but my great-grandpa was a farmer and that is why that commitment and their true love for these families really warms my heart.

Now that you have the turkey covered, here are a few other ideas for a simple gathering of great friends and great food!

Send Out a Small Invite

I have done loads of large gatherings, but I find the best gatherings are often the intimate ones with just a couple of close friends so you can really catch up.

A friendsgiving need not be a large gathering and the invitation does not need to be a formal one.

Text invitations are perfectly acceptable, especially during such a busy season.

Also, allowing mamas to bring kids is a blessing to the mom (who won’t have to cook) and to you (to get to love on your friend’s beautiful kiddos especially since your kids are tweens/teens and you now have to FORCE YOUR LOVE on them).


Keep the Sides Simple

Roasted vegetables are an easy side that can be prepared a day in advance.

In fact, storing your carrots and potatoes in water overnight will yield a much crisper roast than if you cut them up immediately.

Toss your prepared vegetables in olive oil, kosher salt, and your favorite dried seasoning (I’m a thyme girl!) and roast them at 450 degrees for 25 minutes.

Love perfectly roasted potatoes?

Cut baby potatoes in half and put the cut side down on a cookie sheet that’s been lined with aluminum foil and is lightly greased. You will get a perfect roast every time AND they are so good that my kids call them mom’s french fries.

It goes without saying, but lining the cookie sheets with tin foil or parchment paper squares is also an excellent way to cut down on dishes!

Skip the Baking

Thankfully, there is no need to bake since we have so many delicious options for desserts that are already made and available for purchase at our local markets.

You can still make these purchased desserts feel really special though with quick homemade touches.

Spicing up your whipped cream, adding crunchy toppings, or adding details with pie cutters or an embossing rolling pin (made from refrigerated pie dough) are all fun ways to make pies feel special and more homemade.

This post offers 5 strategies for making store-bought pies feel special that I think you will find REALLY helpful for the holidays and even an idea for packaging up mini pies as a parting gift at the end of the night.

replicate my table with this easy tutorial

Think Evergreen When It Comes to Home Decorating

In the blog world, evergreen content is king. It means that we really focus on creating timeless pieces that can be shared over and over again and always feel relevant.

This is the SAME WAY we can approach our decorating. Purchase or DIY things that are neutral and can be used over and over again throughout the seasons. A bit of faux greenery, a roll of kraft paper (DO buy this– it’s such a affordable investment for decorating and gift wrapping), white plates, and loads of candles are perfect for ANY occasion.

Adding simple seasonal touches, like the small bundles of sage I gathered with cotton twine feel very Martha-y, but cost only a couple of bucks to pull off.

Stop pulling out and storing seasonal bins and buy a few items that you can use over and over and over again.

You can’t imagine the stress you will relieve yourself of!

Set the Mood

Before I go, I have one more fun fact for you…I used to be a glorified D.J. for my college’s radio station.

Music is essential to me like breathing and food.

Growing up, I played the violin, sang in the choir, did musical theater, and had parents who were crazy about music too.

I am also the one that hogs the microphone if you karaoke with me.

To me, a solid playlist for special occasions is oh-so-necessary.

Don’t have time to make one?

How about if I shared mine with you!

Also, as a thoughtful introvert, I have included three goodbye songs at the end that you can feel free to boot those up after the meal when you just need to retreat to your Snuggie and Netflix.

Hopefully they catch on..I know, “CLOSING TIME,” is a very, very subtle exit song!

I have embedded it here for you so be sure to bookmark this awesome post and give me a follow for more fabulous dinner music.

Now hurry on over to order your turkey and don’t forget to use my coupon code 15MOMADVICE to snag your 15% off!

this post contains affiliate links

This post is sponsored by Honeysuckle White. All thoughts and opinions are my own!

Back-to-School Meal Prep Ideas

Tuesday, August 14th, 2018

Back to School Meal Prep Ideas from MomAdvice.com

It’s time to bring on those meal prep ideas for packing lunches for back-to-school. I’m sharing 7 tips to nail your meal prep game for your kids and YOU. I’m excited to be partnering again with the Florida Department of Citrus for the back-to-school season and showing you some fun new strategies for lunch preparation.

It seems surreal to me that we are already talking about back-to-school, but we are just one week away from sending our kids off to school again. It is with this big occasion in mind that I look forward to getting back into our healthy eating routines and finding new ways to minimize stress during our busy weeks.

One of the ways I do that is through our meal prep routines.

back-to-school lunch meal prep ideas from momadvice.com

back-to-school lunch meal prep ideas from momadvice.com

Let’s talk about 5 really great strategies for meal prepping that can help you this year.

back-to-school lunch prep ideas from momadvice.com

back-to-school lunch prep ideas from momadvice.com


back-to-school lunch prep ideas from momadvice.com

Find New Ways to Use Up What’s Already in Your Fridge

Meal planning can save you tons of money at the grocery store, but I have the tendency to get excited about new meals without using up what we already have in our fridge.

Make a plan, but acknowledge ways that you can use up items that may be nearing their expiration date. I love frittatas, for example, because they can be whipped up from whatever you have lurking in your crisper drawer and from your weeknight meal leftovers. Today’s frittata, for example, was made from cherry tomatoes, spinach, mushrooms, and feta…all items leftover our salad nights this week. Ask your kids to help you come up with combos and give them the opportunity to brunch it up at school.

If you are looking for a great recipe, check out my Chicken Pesto Frittata or my Dairy-Free Sausage & Vegetable Frittata for two great options. Either of these can omit the meat for a fun vegetarian option too.

I paired this frittata with orange juice to round out the meal. Keep in mind that the recommended daily intake of Florida OJ is eight ounces for adults and four to six ounces for kids! The best part is that every glass of Florida Orange Juice provides the amazing 5. In fact, you have taste, vitamin C, folate, potassium and no added sugar in just one glass.

back-to-school meal prep ideas from momadvice.com

back-to-school lunch prep ideas from momadvice.com Consider the Snack Pack Trend

We caught a commercial for, “protein packs,” that you could purchase for your lunches that had meat, cheese, and nuts in them.  Even though my husband can’t cook, even he was laughing at how ridiculous it was that people couldn’t put these together themselves.

Snacks packs aren’t a new concept, but they ARE a perfect concept if you have a kid that is a snacker or if you happen to be a snacker yourself.

Utilizing toothpicks, stack a slice of lunch meat, a grape tomato, and a cube of cheese for a delicious bite that is easy enough that your kids can do it (and make their own dang lunch!)

I paired these with fresh veggies, a little ranch, and roasted salted almonds.

Want to add some fruit? Consider an apple! Using an apple slicer like this, slice the apples and then pull them back together in their original shape around the core with a rubber band.

Did you know that for additional insurance you can brush the apple with some orange juice to really help your apple retain its crisp appearance and cut down on browning? Now that’s a #lunchhack

prep peanut butter & jelly

Kids Keeping it Basic? Prep That Too!

I had one child who refused to eat anything except a good old-fashioned PB&J. I admired that she knew what she liked and that she kept it simple for her mom. That said, even those simple tasks rob us of precious time to get ready in the morning so I started meal prepping even these simple sandwiches.

If your child’s favorite is this sandwich too, simply spread peanut butter on both slices of bread to create a wall to prevent the jelly from making your bread soggy. Smear your jelly on in the center of one slice of bread and then put the two slices together. By creating an assembly line of sandwiches for your week you only dirty up the kitchen once and get back a little more time to enjoy your morning cup of coffee.

back to school meal prep ideas from momadvice.com


orange chicken meatballs recipe from momadvice.com

Plan Around Your Own Guilty Pleasures

Have you thought about packing yourself a lunch? I have the tendency to get out of the habit of caring for myself when the back-to-school rush happens and find myself grabbing takeout or “forgetting to eat,” when I don’t have something convenient to grab.

Jot down what your takeout weaknesses are and start searching Pinterest for some great alternatives for your meal prep day.

For me, Chinese is my weakness so these Make-Ahead Baked Orange Chicken Meatballs were just the ticket for my meal prep day. The sauce, of course, gets all of its orange goodness from a little Florida OJ!

Don’t Have Time To Make Separate Lunches? Double Up on Those Dinners!

Life gets chaotic this time of year so if you can’t devote a day to making lunches, consider doubling up on dinner ideas instead. For some great cold options, here are a few of my own recommendations!

Quinoa-Salad-In-A-Jar-7 quinoa salad in a jar with spinach & tomatoes

chicken caesar pasta salad chicken caesar pasta salad

Berry Pecan Salad

berry & candied pecan salad with a homemade raspberry vinaigrette (make with or without chicken)

Caprese Pasta Salad #recipe via MomAdvice.com caprese pasta salad

Roast Frozen Chicken in Bulk roasted chicken (perfect for salads & wraps)

Don’t forget those sides!

make-ahead hard boiled eggs make-ahead baked hard boiled eggs

Smoothie Bowl Recipe smoothie bowl recipes

roasted garlic hummus roasted garlic hummus

No-Bake Gluten-Free Granola Bars no-bake gluten-free granola bars

  trail mix energy bites trail mix energy bites

I hope that today’s ideas inspire you to try something new this year with your meal prep. Self-care is just as important so be sure to take some time out for YOU too with a few of my favorite self-care tips. Thank you to the Florida Department of Citrus for letting me share about these tips with you! Be sure to make Florida OJ a part of your daily routines to help boost your immune system during this challenging mom season.

This blog was sponsored by Florida Department of Citrus. Thank you for supporting the companies that support our site!


Pin It

Trends You Really CAN Do at the 2018 HGTV Smart Home (With SimpliSafe)

Monday, April 9th, 2018

Affordable Spring Decorating Ideas from MomAdvice.com

I had the opportunity to head to Palmetto Bluff, South Carolina to tour the 2018 HGTV Smart Home last month. It has been one of those bucket list items that I have always wanted to do so when SimpliSafe asked if I would like to go, I couldn’t have been more excited.

Today I wanted to share with you the 2018 home decorating ideas that I spotted at the HGTV Smart Home and share a little bit about what SimpliSafe is all about.

SimpliSafe

If you haven’t heard of SimpliSafe before, you aren’t alone! It was, actually, new to me too. This is a smartly designed security system that is meant to integrate seamlessly in your home and offer smart technology protection to keep your home and family safe. It is so seamless, in fact, that SimpliSafe was integrated through the entire Smart Home to showcase just how seamless in design it could be.

Before accepting the trip offer,  I went through the materials about their security system and just knew that I would need to pass on the opportunity to come to this event. I do my best to only feature budget-friendly buys here so when I finally dove into the prices on their units, I was surprised to discover they were incredibly affordable and a perfect fit for a MomAdvice reader. Even as they continued to make improvements to the designs, the costs have remained low for their customers.

In fact, the security subscription service is half of their competitors and they pride themselves on keeping the costs for these home security systems low!

Since we live in a small home, I love the options that are available to customize these to your own space and your own personal needs. Many packages are hard to match with our square footage and what we REALLY need so I loved the build-your-own option choices. Of course, they have conveniently bundled a great starter pack (priced as low as $229) or you have the option to choose your own security adventure and build a package that fits your needs.

2018 HGTV Smart Home

Often when I think of security, I am only thinking about keeping the doors locked and watching for intruders. Security systems are about so much more than that though and one item, in particular, caught my eye. We have had issues with water in our basement, after a few brutal storms, and this very unobtrusive water sensor on the floor, would be an incredible investment for our family. They also offer a Freeze Sensor that can alert you when temperatures drop below 41 degrees to protect your pipes from bursting.

Yeah, that never happens in Indiana.

Cassie and Amy

I can’t rave enough about these smart products and the amazing team that introduced me to them (you can see one of my favorite team members, Cassie, above)! Who knew all of this could be so affordable? Definitely, check them out!

Speaking of affordable, let’s take a tour of some of the other affordable trends that I spotted while touring the 2018 HGTV Smart Home.

2018 HGTV Smart Home

2018 HGTV Smart Home

2018-hgtv-smart-home (3 of 28)

I thought we could start with the exterior of the home. I loved the simplicity of the window box in the front and the beautiful greenery in the beds.

Around the back of the home is an absolutely stunning patio. These tall plant stands with ferns were such a beautiful addition without taking up as much space as flower pots would on the floor and added a little color to this area.

I am a big fan of these statement chairs that have been placed at the end of the table,  paired with the simplicity of these wooden folding chairs. While I don’t know the price tag on these statement chairs, I did spy some beautiful ones over here that I have my eye on that could replicate a more affordable look. We also, typically, have bought our dining chairs from this affordable shop, but now you can find gorgeous chairs just about anywhere and add two beautiful chairs at the end to have that mismatched look for less!

The styling with brown paper covered books and candle lanterns are beautiful (and also so doable!)

2018 HGTV Smart Home Tour

2018-hgtv-smart-home (33 of 7)

2018 HGTV Smart Home Tour

2018-hgtv-smart-home (34 of 7)

This house was filled to the brim with greenery. Plants, plants, plants EVERYWHERE. It was absolutely dreamy. Houseplants can be pricey, but I try to justify it by reminding myself how long a bouquet of flowers last. Even with my black thumb, I can usually get more longevity out of a plant than a bouquet and greenery makes such a beautiful statement in a home.

The mix and match of greenery in this house really caught my eye in every room. If you can believe it, all the greenery (in the vases),  had been purchased from a local Kroger (!!!) so this look is definitely on a budget. I will be referencing these pictures for a great how-to on beautiful mixing because I think that was key with these green displays.

Again, a pair of chairs adds visual interest and I loved the matching blanket and velvet pillow combo that adorned both of them.
2018 HGTV Smart Home Tour

2018 HGTV Smart Home Tour

2018 HGTV Smart Home Tour

2018 HGTV Smart Home Tour

These industrial shelves framed the kitchen sink and I loved the styling they did with them.  I, genuinely, have a hard time styling shelves so I wanted to be sure to snap pictures in here too. Jars of dried beans and colored rice make a lovely display (that can be eaten) and books really made the house.

OF COURSE.

BOOKS ARE AWESOME.

I did find it interesting that this heavy shelving was built in front of the windows.

Once again, they are KILLING IT with their greenery. This big glass vase was a beautiful statement piece on the kitchen island.

2018 HGTV Smart Home Tour

2018 HGTV Smart Home Tour

2018 HGTV Smart Home Tour

2018 HGTV Smart Home Tour

2018 HGTV Smart Home Tour

2018 HGTV Smart Home Tour

2018 HGTV Smart Home Tour

2018 HGTV Smart Home Tour

Here are a few of the details that I loved in the bedrooms.

Suitcases for Storage- This would be such a smart place to tuck an extra set of sheets or blankets for guests.

Floor to Ceiling Curtains- We raised our curtains in our bedroom, but not as high as this. Moving them up to the tippy top made the room feel dramatically bigger and taller.

Wooden Beads- Must invest in millions of strands of wooden beads for decorating. They add such beautiful natural tones and they added these in almost every room.

More Books- Wrapping them in paper is such a beautiful touch and I loved how they are paired with a colored glass vase for a simple pop of color.

Styling Around a Wall-Mounted Television- I loved that the frames were incorporated around this television so it made it blend in more and made the framing of the television more natural.

Smart Touches Above the Beds- In particular, the use of two frames and then the cow OVER the frames made for beautiful visual interest without looking cluttered.

Candlestick Holders- A collection of three was perfect for an ottoman display and added a touch of metal to the room.

2018 HGTV Smart Home Tour

2018 HGTV Smart Home Tour

Heading into the bathroom… This was a SMART home so you can see that the mirrors are also allowing you to surf the web or watch the news while you get ready. You could swipe on them to browse just like you would your phone.

If you have the space, this was such an adorable display for a robe. Also, that painting in the corner is adorable and I loved that it was on an easel display to add some interest around the tub.

2018 HGTV Smart Home Tour

2018 HGTV Smart Home Tour

2018 HGTV Smart Home Tour

Gallery walls make me so happy and I loved the use of mismatched frames and different styles of artwork that helped to achieve this stunning wall. As a perfectionist, I get hung up on the placement and the matchy-matching, but this shows you that they don’t need to match and staggering them adds more beauty to this wall.

2018 HGTV Smart Home Tour

2018 HGTV Smart Home Tour

2018 HGTV Smart Home Tour

2018 HGTV Smart Home Tour

I love when a home uses every nook and cranny and I do think this house did that. This little room has a bookcase with a hidden gaming room tucked behind for the kiddos. A window seat adds a little perch for reading books too.

Once again, I’m in awe of the gorgeous styling on these shelves. The use of just one color of book throughout the bookcase is just stunning.

2018 HGTV Smart Home Tour

2018 HGTV Smart Home Tour

Truly, no corner went to waste in this beautiful space, even in the trickier corners. I loved every inch of this space!

Me


Group Shot

Group Shot 2 Mom Trends * Family Focus Blog * Well-Connected Mom * Christine Koh

The bonus to this beautiful weekend was getting to spend time with some really wonderful friends.

Another huge thank you to SimpliSafe for giving me the opportunity to sneak peek the HGTV Smart Home. It was, truly, a dream come true.

I was provided travel accommodations to attend this event by SimpliSafe

Pin It

DIY No-Sew Reversible Cloth Napkins

Tuesday, March 20th, 2018

DIY No-Sew Reversible Cloth Napkins from MomAdvice.com

The queen of no-sew projects is back and I’m excited to share this EASY DIY No-Sew Reversible Cloth Napkin tutorial with you today.

That’s right, even if you can’t sew, it’s no biggie!

Can’t cut a straight line?

Me either!

No need to even have a skill in that!

Each diy no-sew napkin should take a mere ten minutes to make and can be used for many a dinner with your family and friends. Not to mention, these would make a gorgeous gift for a newlywed or the holidays.

DIY No-Sew Reversible Cloth Napkins from MomAdvice.com

I had a set of cloth napkins that got a lot of love in our house because of their easy-to-wash material and their perfect size. I was never a fan of the colors though and so I measured my current set and headed to the fabric store where I discovered (GLORY BE!) that the fabric bundles, at our local fabric shop, just so happened to be the EXACT same size.

What luck for someone who can’t cut a straight line.

I have always loved the beauty of these color-coordinating fabric bundles (just so perfect for quilters) and thanks to their prepackaged coordination, it makes creating a reversible set of napkins oh-so-easy for those of us born without the gift of pattern-matching.

Here’s my quick tutorial AND scroll down for my system for washing and storing these beauties!

DIY No-Sew Reversible Cloth Napkins Tutorial

DIY No-Sew Reversible Cloth Napkins

diy-no-sew-reversible-cloth-napkins (2 of 23)


Supplies

18×21 inch fabric bundle in coordinating colors- I LOVE these options or you can check here too for a more affordable option (the bundle I purchased had 5 pieces so to create an even number of cloth napkins you will need to purchase two bundles. You will need 2 pieces for each napkin you would like to make). I chose Cotton & Flannel materials for my napkins.

Stitch Witchery or similar fusible bonding web (I swear by Stitch Witchery for the majority of my no-sew projects- it really washes well!)

Chopstick or pointy object to push out your corners

Iron & ironing board

Scissors

DIY No-Sew Reversible Cloth Napkins from MomAdvice.com

Directions

1. Select two coordinating colors and place the first one with the pattern up, facing you, and then flip the other one with the wrong side of the fabric out. Basically, you want the two patterns to be BFF’s and be facing each other.

DIY No-Sew Reversible Cloth Napkins from MomAdvice.com

2. Going all the way across the fabric, lay down your Stitch Witchery all the way across, leaving a little room on each side of the edges, as pictured.

DIY No-Sew Reversible Cloth Napkins from MomAdvice.com

3. Grab you iron (I crank mine to the highest setting on that dial) and iron over the tape until the two fabrics are fused together. This will take several passes and you can additionally spray the fabric with a little water to produce steam and help the tape bond to each side of the fabric. Repeat this process on two more sides.

Leave one side without tape and follow the next steps to finish the cloth napkin.

DIY No-Sew Reversible Cloth Napkins from MomAdvice.com

4. On the final side, we are going to run the tape along like the other sides, but stop to leave a pocket so we can turn this napkin right side out.

DIY No-Sew Reversible Cloth Napkins from MomAdvice.com

DIY No-Sew Reversible Cloth Napkins from MomAdvice.com

DIY No-Sew Reversible Cloth Napkins from MomAdvice.com

5. Using your scissors, cut all four corners so we don’t have excess fabric in the corners. CAREFULLY, turn the napkin right side out and use your chopstick to CAREFULLY poke out those corners. If the tape comes loose while turning this right side out, don’t worry! You can easily reseal that tape again when finishing that edge!

DIY No-Sew Reversible Cloth Napkins from MomAdvice.com

DIY No-Sew Reversible Cloth Napkins from MomAdvice.com

DIY No-Sew Reversible Cloth Napkins from MomAdvice.com

6. Tuck the last of the ends under, to match the rest of the side that has been fused.  Finish with another round of Stitch Witchery and a final press. Once the ends are all sealed, finish with a spray of water to take out any final wrinkles and to give it a good press on all four sides to make sure they are secure.

TA-DA!  That’s it, folks!

DIY No-Sew Reversible Cloth Napkins from MomAdvice.com

DIY No-Sew Reversible Cloth Napkins from MomAdvice.com

DIY No-Sew Reversible Cloth Napkins from MomAdvice.com

I had already received some questions, when I posted these beauties on IG, on how I planned to implement these in our home. I got a container for these and have them on our hutch, next to our silverware. Underneath the sink is a container for tossing the dirty napkins.

I got a small napkin holder that perfectly holds four of these (something like this) for the tabletop and each person gets one napkin per day.

I did request darker colors for messier meals and lighter colors for meals that less messy.

Each person is responsible for tossing their napkin in at the end of the day.

All of this feels REALLY doable to me.

DIY No-Sew Reversible Cloth Napkins from MomAdvice.com

DIY No-Sew Reversible Cloth Napkins from MomAdvice.com

DIY No-Sew Reversible Cloth Napkins from MomAdvice.com

DIY No-Sew Reversible Cloth Napkins from MomAdvice.com

Obviously, I am IN LOVE with these feminine patterns, but I wanted to make some that were more masculine too.

DIY No-Sew Reversible Cloth Napkins from MomAdvice.com

I found some flannel and did some of our napkins in this fabric too.

The best part was that the print was on both sides so the warmer side of the flannel would be perfect for the winter months while the flipside of the flannel was perfect for all seasons (and, honestly, I had less worries about lint issues). I can picture just how beautiful these would be to dress up the table for the holidays.

The best part?

You can’t buy this at Target. You get to be totally unique.

Go ahead and gloat!

Do you love NO-SEW projects? You hit the lottery over here! Check out a few of my favorite no-sew tutorials!

Fabric Flower Wreath Fabric Flower Wreath for Spring

No-Sew Kitchen Cushions DIY No-Sew Reversible Chair Cushions

Fabric Wreath & Garland Fabric Wreath & Matching Garland

Fabric Bulletin Board Fabric Bulletin Board Tutorial

Painted Pumpkins Painting Pumpkins With Acrylic Paints

diy-no-sew-pocket-warmers-10 DIY No-Sew Hand Warmers

Diy Ottoman Serving Tray DIY Ottoman Serving Tray

Scrappy Fabric Trees 15-Minute Scrappy Fabric Trees

DIY Jigsaw Puzzle Mat DIY Roll-Up Jigsaw Puzzle Mat

Told ya, queen of the no-sew life!

DIY No-Sew Reversible Cloth Napkins from MomAdvice.com

Have you made the switch to cloth in your home? I’d love to hear what systems work best for your family?

This post contains affiliate links!


Pin It

7 Things I’ve Learned That Save Us Serious Money

Tuesday, January 16th, 2018

Amy Clark

Hey, hey! Today is my big 4-0 and I keep wondering how I got to this milestone so quickly. In many ways, I wonder when I will feel like an adult. In other ways, I can see how much better I feel in my own skin and the wisdom that has been gained, especially in this last decade of years.

Before I launch into my list, I’d love to share that I am doing a birthday fundraiser on Facebook. I’m asking for donations to Ehlers-Danlos National Foundation. The diagnosis of myself and my children has made the research from this organization an important one for us. I am donating this occasion in hopes that more funding can help provide those needed answers we are in search of.

If you have a buck or two to spare, I’d be thrilled to share this with the Ehlers-Danlos National Foundation

In honor of this day, I wanted to share 7 things that I’ve learned that save us some serious money. As we continue to embrace our simplified path, I can see how being open to learning new skills and continuing to research new strategies has really paid off for us. As I get older, I find more and more joy in the life we have chosen and I’d love to share some of my favorite strategies today. 

birthday reflections

7 Things I’ve Learned That Save Us Serious Money

Restaurant-Style-Steak-Recipe-3

I Nailed a Restaurant-Worthy Steak

Steak dinners and fancy date nights were hard on our budget and learning to master making a perfectly restaurant-worthy steak has saved our family oodles of money. I’m not pro enough that I can touch it and distinguish its degree of doneness, but I do know how to work my digital meat thermometer like a boss and that’s almost the same thing. Our cast iron skillet (another frugal and wise investment) really sears our steaks so beautifully and the butter finish is a decadent treat.

Instead of paying over a hundred dollars for a filet dinner out, my hubby and I take trips to the supermarket and purchase a couple of steaks and a bottle of wine for less than the price of one meal at a restaurant. This recipe has been a go-to for our dates and for special occasions when we are celebrating our kids. It takes about ten minutes to pull this off (with a little roasted asparagus on the side) and everyone gets so excited about this meal.

My secret?

Loads of Kosher Salt, baby, and a screaming hot pan.

Let me know if you can give this technique a spin in your kitchen!

flipster

I Gave Up My Magazine Subscriptions

Magazines have been a weakness of mine and discovering our library has the Flipster app has made me SO incredibly happy this year. Basically, you can get a digital subscription to just about every magazine, check them out digitally, and read your magazines on your tablet or phone.

The best part has been being able to take screenshots of recipes and ideas for myself and as inspiration for our site as I page through them (soooo handy!!)

So far the only catch has been the length of time that you are allowed to check them out (it varies per magazine), but usually I can plow through one in a day and it costs ZERO bucks.

brunch

I Brunch Like a Boss…At Home

Brunch used to be a big weakness for me, but we rarely go out to brunch anymore now that I finally have a few smart brunch recipes up my sleeve.

I call this year the year of the egg because mastering a few techniques was on my cooking bucket list. The omelette, for example, was something that I just couldn’t get the hang of. It usually ended up into messy scrambled eggs over here.

brunch

Not anymore though.

Here’s a little picture proof because I know you don’t believe me!

I watched a YouTube video tutorial, found the perfect skillet for the job, and discovered how awesome coconut oil is for creating a nonstick surface for my omelette making. This has become a go-to for busy nights when I don’t feel like making dinner and is the new tried-and-true for a satisfying weekend brunch at home. It’s also a fantastic way to use up the odds and ends in your refrigerator.

If we aren’t in the mood for an omelette, this Chicken Pesto Frittata, Sausage & Vegetable Frittata, Gluten-Free Overnight Waffles, or these Light & Fluffy Pumpkin Pancakes (I just sub with this flour now to make them gluten-free) are all in our brunch rotation.  Don’t forget this diy drink mix recipe for a delicious drink (with or without alcohol!)

Movie Pass

I Go to the Movies All the Time For Cheap-As-Heck

I’m wondering how long this offer will last, but this girl got on the Movie Pass train really early and it has been a highlight of the year. A membership is $9.95 a month and you can see a movie EVERY SINGLE DAY of the month at a REAL theater (should you so choose!) by only paying the membership fee.

If you haven’t heard of it, I’ll try to explain it as briefly as I can. You sign up, they mail a card that looks like a debit card (can take awhile, fyi!), you download the app, head to your theater to check-in on the app, and it says something like, “enjoy the show!” When you head to the counter, you just use the pass instead of your debit card and that’s it.

Obviously, the big catch is being at the theater to check-in and the availability of seats. I aim for the weird times (like 1 PM in the afternoon) and don’t see the movies as soon as they come out. You also can’t see 3D flicks, but that’s NBD because I’m not into action films.

My goal this year is to start feeling brave enough to go to movies ALONE since my work schedule is so quirky.

It is accepted all the theaters near me and I bribed my sister and neighbor to get a pass too so we could have movie dates together for cheap-as-heck.

Capsule Wardrobe

Honey, I Really Did Shrink My Wardrobe

If you would have told me five years ago that I would embrace a minimalist wardrobe, I would have laughed until I cried. Seriously, I was a dedicated fashionista that loved a good deal. What I’ve learned though is that shrinking my wardrobe has brought me a lot of peace and calmness to my mornings. It feels so good to have everything working together and to look in my closet and have it make absolute sense.

Was this hard? Absolutely!

Was it worth it? Absolutely!

One of my biggest inspirations is this lady and her beautiful book just might be the ticket for you to whittle down your wardrobe (and a few other things!) in your life this year.

I have been documenting my journey on the blog and you can see where I started and where I’m at now over here.

My one smart investment has been Rent the Runway for special occasions. This girl isn’t into one-trick-ponies anymore so I enjoyed their Unlimited services for the holidays and it was a blast, without taking up a lot of closet space as a commitment.

blue-apron

I Learned to Cook New Things For My People

If you think bloggers don’t get into meal plan ruts, you are quite mistaken. I think burnout happens a lot with this job and we often ended up repeating the same meals over and over again so we don’t have to invent one more thing for the day. I got a subscription for the summer to Blue Apron and it has widened my perspective on so many things and brought me a ton of joy.

How does spending money on a meal subscription service pay off, right? I know! I didn’t think it was a good use of money either.

I *may* have made fun of people who did these.

The thing is,  it REALLY broadened my perspective on fruits and vegetables we had been neglecting at the grocery store and taught me some valuable cooking techniques that I would have NEVER tried or figured out on my own.

Blue Apron

The night that my kids and hubby were raving about eggplant about knocked me out of my chair. I was like, “WE ARE DOING THIS FOREVER.”

The biggest lesson I learned is how invaluable high heat is for roasting our veggies. I am now cranking my stove up to 450 degrees to roast everything and it has made everything taste like it is roasted and not steamed.

We have taken a break until next summer on this subscription so that I have the time and slowed down day that I need to get my most enjoyment out of this, but I enjoyed almost every minute of it.

Tackling the challenge that I’m showing you, in the picture above, nearly did me in while they were doing the Master Chef challenges promo for their customers to try at home. This TEAM challenge was pulled off by ONE sweaty mom, but was declared the best meal of the bunch.

I’m not sure if that was true or everyone felt sorry for me after I tackled a TEAM challenge SOLO. I did that challenge though, LIKE A BOSS.

By the way, if you use this link, it should give you $30 off your first box and you can pick all the quick meals so you don’t look crazy like me.

It is almost like it’s your birthday too, amiright?

family

I had coffee with a friend and she shared such a valuable piece of wisdom with me that I wanted to share it with YOU too, as I wrap up my birthday post today. She said that 40 is where you are easing into the second half of your life and you realize who and what is important as you move into this second phase of your life. Who wants to spend the second half of their life keeping up with the Joneses, investing time into shallow relationships, making small talk, and living a life of overcommitment?

Nope, not this girl.

I want all the good stuff- the deep and the meaningful stuff. I want to savor these moments with my kids. I want to be present in this lucky partnership I have with my hubby. I want my friendships to be real and not flighty. I want to continue to give myself grace that life has looked differently, in many sobering ways, but I still have the ability to transform lives by sharing our story. I want to allow people in to see the cracks and brokenness, both online and offline. I want to work on my commitment to believe in God’s plan and timing… even though it looks nothing like the timeline I’ve drawn up.

My word this year is MINDFUL- mindful of my time, mindful of my words, mindful in my role as a mom and wife, mindful of where I invest my time (in my personal life AND business), mindful of our money, and mindfully being my authentic self.

I hope you’ll stick around because having you here has given me purpose in my steps MANY, MANY days!

Can you celebrate with me and share what’s one way you have learned to save your family money or a fun tip that has changed a routine? It would be a fantastic present today!

This post contains affiliate links that help our site! Thank you for supporting me! xoxo 


DIY Breakfast Caddy

Monday, June 19th, 2017

DIY Breakfast Caddy for Car from MomAdvice.com

This blog was sponsored by Florida Department of Citrus. Thank you for supporting the companies that support our site!

Well, hello there! I hope your summer is off to a lovely start! We are trying to soak in as many carefree and unscheduled days as we can, but it is funny how life gets in the way of this. This week we tackled doctor’s appointments, the dentist, running a kid back and forth to a sleepover, and we are signing up for a couple of fun summer programs and camps that are happening around town.

All of that leads to busy mornings so today I am partnering with  Florida Department of Citrus to show you how to enjoy your breakfast on-the-go, complete with a glass of Florida Orange Juice! We are sharing a breakfast caddy idea that you can assemble on the weekends to get your kids off to a great start, no matter what is on the to-do list!

I will admit, I got the inspiration for this from Pinterest where there were numerous pins of fast food meals in totes to make it easier for kids to eat their meals. I wanted to translate that idea into a healthy one that is perfect for busy mornings.

Supplies Needed

Lightweight Plastic Shower Caddy (exact, similar, similar)

Small Plastic Containers or Jars for Food Assembly

Drink Holder

Water Bottle

Food Supplies (as listed below)

DIY Breakfast Caddy for Car from MomAdvice.com

diy-breakfast-caddy-for-car-4

Directions for a DIY Breakfast Caddy

The beauty in this project is that you can fill your tote with whatever you think will help fuel your kids that day.  I can’t stress enough how much I LOVE these make-ahead burritos because they save me on many busy mornings in our house. Once heated, they can be wrapped in tin foil to keep them warm. Of course, if burritos aren’t your thing, a breakfast sandwich made on an English Muffin,  peanut butter on rice cakes (a favorite in our gluten-free home), or even a slice of frittata (try this one, or this one) can be other great options for the main course.

For fruit, I follow the rule that it must be in season and on sale that week to make it in our produce drawer. Today’s fruit selection are blueberries and strawberries in mason jars, but grapes, bananas, cantaloupe, or watermelon also make great options. You could also do a package of easy-to-eat veggies like baby carrots, celery sticks, or red & green peppers if you struggle to get your kiddos to eat fruit.

DIY Breakfast Caddy for the Car from MomAdvice.com

Of course, a surefire way to get your kiddo’s to consume fruit is a little juice, isn’t it? Did you know that an 8 oz. glass of 100% orange juice counts as one of your daily recommended servings of fruit? Pretty cool! Not only that, Florida Orange Juice provides 5 amazing nutrients in every glass: Taste, Vitamin C, Folate, Potassium and No Added Sugar.

Since mornings can be long in the car, I added toasted edamame in a small container for munching before or after our morning activities. You could also do nuts like almonds or cashews to add a healthy crunch to round out the meal or as a great in-between snack once hunger strikes again. You just know it will!

Oh, and don’t forget the water! It has been a scorcher out there so we are trying our best to stay hydrated. It’s also so nice to have a water bottle in case we forget it for the next thing on the agenda.

DIY Breakfast Caddy for the Car from MomAdvice.com

diy-breakfast-caddy-for-car-2

diy-breakfast-caddy-for-car-7

diy-breakfast-caddy-for-car-9

diy-breakfast-caddy-for-car-10

Wouldn’t this be so great for your next family trip too? I have a feeling that our mornings would start out a lot better on trip days if I had a few of these items prepped and ready to go in my fridge for our next adventure.

Well, we are all packed up and off to our next thing probably. I just want time to s-l-o-w down, but I blink and another summer is over. Do you feel that way too?

I hope this idea can be one you can use to fuel the family and maybe squeeze in a good chat with your kids while they are enjoying their breakfast on-the-go. I have, honestly, had some of my best talks with them in the rearview mirror. It is one of those ways that I have found it helps to keep an open dialogue between us as we navigate these new waters of being teens and tweens.

Thank you so much to Florida Department of Citrus for letting us share our fun little diy breakfast caddy with you. We hope you find this idea inspiring.

Cheers, mama, to surviving another summer!

PS- I hope that you made some room for some FLOJ in that mimosa over there!!

Love this idea? Be sure to visit these fun posts too!

Funny Faces Printables

Gluten-Free Orange Creamsicle Pancakes

Make-Ahead Sleepover Breakfast Buffet

Follow the rules below to enter to win a HUGE prize pack from Florida Department of Citrus today!! Follow the rules in the widget below- good luck!

a Rafflecopter giveaway

DIY Breakfast Caddy for Car from MomAdvice.com

This blog was sponsored by Florida Department of Citrus. Thank you for supporting the companies that support our site!

Pin It

DIY Phone Charging Station

Monday, January 2nd, 2017

DIY Phone Charging Station from MomAdvice.com

This post was created in partnership with Waverly Inspirations. Thank you for supporting the companies that support our site! 

A  new year typically brings along new organizing techniques in our home. We have been struggling with keeping track of phone chargers, remembering where we left these poor devices to charge, and figuring out a system that doesn’t require taking up my valuable counter space. I decided I wanted to create a phone charging station that could house all of these devices and be our new landing spot for our home.

This DIY phone charging station is made out of a jewelry armoire and, not only will it house all these phones, it can also be the perfect organizing spot for keys, sunglasses, watches/Fitbit devices, & a place to keep those gift cards we got for the holidays. Wait until you see how we make the most of this little piece!

I also wanted to add a unique touch to this station with some of the beautiful Waverly Inspirations Fabric that I was sent this month. I have never added fabric to a furniture piece before, but not only is it super easy, it also adds a gorgeously unique detail that makes an inexpensive piece look a little more high end. It’s been on my craft bucket list to try this and now I want to add this special touch to a few more pieces in our home.

DIY Phone Charging Station from MomAdvice.com

DIY Phone Charging Station from MomAdvice.com

Supplies Needed (all of these supplies can be found at Walmart!)

Jewelry Armoire (you can browse all the options here)

Waverly Inspirations Fabric  (I used the 100% cotton duck fabric available at the store)

Waverly Chalk Paint in a coordinating color (I am using Agave)

Mod Podge

Paint brushes & Foam Brush

Fabric Rotary Cutter (or you can use scissors or a razor blade for trimming)

Rotary Mat

Drill

Scrap Wood

Screws

Surge Protector

DIY Phone Charging Station from MomAdvice.com

How to Make a DIY Phone Charging Station

1. Begin by assembling your jewelry armoire, but leave all of your knobs off the fronts of the drawers for now.

2. Using your chalk paint and a small paint brush, paint all of the knobs with a coat of chalk paint. Set aside to dry and then add a second layer of paint.

DIY Phone Charging Station from MomAdvice.com

DIY Phone Charging Station from MomAdvice.com

DIY Phone Charging Station from MomAdvice.com

3. Using the front of your drawer as a guide, cut the fabric carefully and as closely as possible, around the drawer. Repeat with all of the other drawers.

4. Before you attach your fabric to the drawer front, make sure any loose threads and lint are removed from the piece (I went over mine with a lint roller to make sure the surface is clean). Dip your foam brush in the Mod Podge and add a thin layer of glue on the front of the drawer. Carefully line the fabric up on the front of the drawer. Once again, add a layer of Mod Podge OVER the fabric, making to seal all along the edges and across all the fabric. Repeat on all the drawers and then repeat with a second layer.

5. Add your painted knobs on the front of the drawers.

DIY Phone Charging Station from MomAdvice.com

DIY Phone Charging Station from MomAdvice.com

6. Drill holes in the back of your drawers and then a hole in the back of the piece. The size and amount of holes needed will depend entirely on how many devices you have and how wide your charger end is.

7. On the bottom of the unit, attach a scrap piece of wood that can be used to attach your surge protector. We attached the surge protector with a couple of screws to mount this scrap wood.

DIY Phone Charging Station from MomAdvice.com

DIY Phone Charging Station from MomAdvice.com

DIY Phone Charging Station from MomAdvice.com \ DIY Phone Charging Station from MomAdvice.com

DIY Phone Charging Station from MomAdvice.com

DIY Phone Charging Station from MomAdvice.com


I realized after we took the pictures how much it could benefit from a little dusting with all our drilling we were doing.

Stretch your imagination a bit for that part as we are still dismantling our home from all these festivities!

I wonder if you are in the same boat today?

Seriously, how cute is this fun diy phone charging station to act as an inexpensive organizing solution for a small space? I decided to tie in those painted handles with a little color on the trim of this piece.  I really think the paint and fabric details really make this piece feel really unique and I love how practical this is for helping everyone stay organized!

A huge thank you to my hubby for his assistance on this DIY.

There is nothing like crafting in your pajamas and coffee with someone you love!

Do you want more craft inspiration from Waverly? Try these!

DIY No-Sew Reversible Chair Cushions

Fabric Wreath & Matching Garland

Fabric Bulletin Board Tutorial

Painting Pumpkins With Acrylic Paints

DIY No-Sew Hand Warmers

DIY Ottoman Serving Tray

15-Minute Scrappy Fabric Trees

Kid Craft: Easy Technique for Painting Gift Wrap

This post was created in partnership with Waverly Inspirations. Thank you for supporting the companies that support our site!