


We survived the first day.
One of us…
*ahem*
Barely. Survived.
I hope you all have a wonderful back-to-school day too! We wanted to share the pictures of our day with our friends here!
xo,
Amy
We survived the first day.
One of us…
*ahem*
Barely. Survived.
I hope you all have a wonderful back-to-school day too! We wanted to share the pictures of our day with our friends here!
xo,
Amy


It is hard to believe that my little guy turned nine this year! When people told me that the years would go by quickly, I did not believe them. It has seemed though that I blinked my eyes and he has grown up. As we do each year, I look forward to celebrating him and wanted to share with you the results of another fun patriotic party that we threw to celebrate Ethan and his awesomeness.
This year’s Walmart Moms challenge was to embrace the 4th of July using supplies from their store and I hope you will love these inexpensive additions that I added to our party this year.

I am lucky to have one child who has a 4th of July party every year and one child who has a Christmas birthday. I always pick anything that is red for these parties because I know that they will serve double duty for our birthday bashes.
I hate to waste any money on paper products and decided this year I would make an investment into napkins for outdoor party. These bandanas in navy and red were the perfect solution for outdoor entertaining and a steal for just $1. I grabbed these over in the Women’s department by the purses and accessories for women. Honestly, if you have any party theme, they had everything from zebra print, to camouflage, to hot pink designs. I picked up sixteen (a $16 investment) of these and rolled silverware sets in each one and put them in the glasses for easy grabbing.
Last year, I got these silverware sets for very little money at the wholesale club. They aren’t the best quality, but they work so wonderfully for occasions like this. Thrift stores also sell silverware and you can often find bags of it very inexpensively. Rolling these into sets made it easier for everyone to grab what they needed and kept the line for the food moving a little quicker. When you are serving a large group, taking an hour to get everything set up like this will really pay off!

Our burger baskets from last year are still going strong and are always a hit at parties. I found these at our local restaurant supply store ($14.99 for 12) and I purchased one package of delicatessen paper ($4.99 for 500 sheets) for my family celebrations. These are not only used for our parties, but for pretty much any cookout our family does. I couple these with small plates for appetizers or sides that just won’t fit in the baskets and an additional plate for the dessert table. These really have paid for themselves over and over again and I love a nod to anything retro.


Tissue paper pom poms are my new favorite thing to make. I made these in shades of pink for Emily’s Barbie birthday party this year and thought it would be fun to have these on hand for our patriotic parties too. These cost $1 in tissue paper to make (I grabbed the tissue paper over by the Hallmark displays at our Walmart store) and can all be done in about thirty minutes.
Visit this tutorial to get the scoop on how to make these. I did the same thing as I did with that tutorial, but cut the corners to a point instead of the rounded, more feminine corners that I did for my daughter’s party. I have packed these away to be brought out for next year’s party or (minus the blue) these could be added for a Valentine’s Day celebration with the addition of one of my pink pom poms from my daughter’s party.

I love a good red, white, and blue theme, but you have to appeal to what your kids desire too. Each year I let my children pick their own cake out of my stack of cookbooks and then I ask them what character they would like to go with for the year. This year, Ethan said he wanted a Bakugan cake. I visited the toy section of our store and found these little guys for $10 to put on top. Whatever tops the cake, doubles as part of their birthday gift so these little guys were rinsed after their cake debut, and are now performing Bakugan battles in my son’s room.
The cake itself was a melted ice cream cake created from a cake mix and a pint of the birthday boy’s favorite ice cream. Tune in on Monday for that recipe and for the homemade chocolate marshmallow ganache that frosted the top. The Wilton sprinkles were leftover from last year’s party and worked perfectly again to add a little nod to the 4th of July theme.

Last year’s star garland was hung (free), a red tablecloth that I have had for about eight years was placed on the table (free), three flags from our party two years ago were nestled in red tissue paper and a glass apothecary jar that I had in our family room (free), and a navy bandana was angled beneath the cake for to add a little bit of color to the display ($1), with the three tissue paper pom poms hung from white ribbon above ($3).

The trifle that I shared with you is a new family favorite and I couldn’t wait to make it. This glass trifle bowl was only $6.97 at the store and will be used over and over again in our house. Everyone must have had the same idea as me because they were all out of these at our store. Thankfully, my girlfriend happened to be at another Walmart when I called, and she snagged one at her store and saved the day for me! I can’t wait to try other desserts in this and even use this bowl for decorating in our house. Be sure to check out the recipe for the red, white, & blueberry trifle!


Two summers ago we bought one of those atrociously large water slides to put up in our backyard to keep the kids entertained. Bought on clearance towards the end of the summer, it has paid for itself in party entertainment and for days when I just want the kids to entertain themselves. The past couple of parties the weather has not cooperated with this form of entertainment for our guests, but this year proved to be just the right amount of humidity and sun that we could put this up for lots of slides and fun with our cousins. I hate putting it up, I hate taking it down…but anything that can keep the kids happy and entertained for hours on end seems like a fantastic idea for a party.

There is nothing catered at this party and I try to mix in a few old favorites with new recipes each year to our party menu. I work hard to make the party planning process as painless as possible. Everything is done in stages during the week so the last day is just a matter of pulling everything together. The cake is baked and frozen until the big day, all ingredients are chopped in bags and ready to go, the decorations are hung the day before, I try to incorporate one recipe that can be thrown into our slow cooker, and I do my best to make the last day as fun as possible for me too!
A few of the standby recipes we used this year were our Perfectly Pulled Pork Sandwiches, our Pesto Pasta Salad, and our Birthday Party Punch. More recipes will be coming in the next two weeks!


Of course, no party would be complete without the birthday announcement on the door. The kids have really come to love this tradition of hanging our birthday balloon wreath so everyone knows that their special day has arrived. It isn’t a party without a wreath.. at least that is my philosophy. There is nothing that makes me happier than these simple traditions of fun, food, and family.

happy 9th birthday, ethan alexander!
I am a part of the Walmart Moms program, and Walmart has provided me with compensation for these posts. My participation is voluntary and opinions are always my own.

I hope everyone had a wonderful Mother’s Day. We really celebrated simply this year and it was still just as perfect. This year I decided to drop the Mother’s Day gifts the day before Mother’s Day so I could really enjoy a day to myself too this year. I don’t know about you, but there is nothing like a fresh bouquet of flowers bought just for me. I know our moms love them just as much so I headed over to the store to pick up a pretty bouquet for each of them.


Supermarket bouquets can sometimes not feel as special as the fancy florist so I love to add my own little touches to the bouquets to make them a little more special. You can find rolls of tulle over in the craft section of your superstores or in the wedding section of large craft stores. Cut off a long strip of it to tie an elegant bow on your bouquet.
This bouquet was wrapped in pink and I thought this bow matched it perfectly. Sometimes the smaller bouquets are wrapped in plain plastic. I love to fill the plastic out with colored tissue paper on the outside or have the floral department wrap the flowers for me. Don’t forget to take those price tag stickers off the outside. After all, don’t we prefer if people don’t know how cheap we really are?

We made little personalized cards that we printed on 4×6 photo paper. I slipped these between the plastic layers and I am sure the little cards were saved as refrigerator mementos, as all personalized cards are. Just like the teacher cards that I made last week, start by uploading your photo to Picnik. Under the CREATE tab, select EFFECTS, then select the BLACK & WHITE option to change your picture to a black & white image. While still under the CREATE tab, select the option for TEXT. Once you are in text, put in your message for your mother. Make sure not to put your text all of the way to the edge of the photo because it may cut it off when you print it. It is better to get it a little further in to assure that you don’t waste ink, paper, or your time! The font I choose for these images was Pupcat. You can do all of this with a free membership to Picnik.

We also framed our favorite picture from Easter and then tied it with another tulle bow. I found inexpensive frames for each of our grandmas and I printed out the photos on my photo printer. We knew these would be a real hit with our grandmas. After all, what kind of grandmas would we have if she didn’t love our pictures?


Then we shocked them with our elegant flower deliveries. I don’t know who enjoyed that part more.

Happy Mother’s Day to our moms. We love you both!

I had a fantastic Mother’s Day. We went to church, I mixed up the waffle batter, then climbed back into my bed to be served. The kids loved serving breakfast to me in my bed and were very professional about checking on me often to see if anything else might be needed. I finished a library book, climbed out of bed for a half price frappe at Starbucks, and then climbed back in bed for the rest of the day. I got lots of hugs, kisses, storytelling, and tickles in with my children. I did not cook anything all day. I did not do one chore. I did not move from my bed hardly at all. It was perfect. It cost $2.22 for the whole day. It was just what I needed.

Editor’s Note: Many apologies that I didn’t get this up sooner for you all! Our web host had some issues this week which halted my progress on this project. I hope that this will still be beneficial to those last minute shoppers or reference for you all next year too! Happy Easter, everyone!
It is almost that time for the kids to dig into their Easter baskets again. Each year I try to do something a little different with our baskets and try to keep a theme in mind. One year it was a basket filled with fun stuff to do outside (bubbles, jump ropes, water toys, sidewalk chalk). Another year we did all arts and crafts supplies (construction paper, watercolors, pencils, markers). Last year was the year of board games (Connect 4, Trouble, Operation).
You see, I am not a big fan of buying a bunch of junk food for my kids to consume and with all of the Easter egg hunts and dinners, my kids still manage to consume a ridiculous amount of sugar without a basket from the bunny at our house. If you saw my children on sugar, you would understand why this is a mom survival tactic! Instead I consider Easter baskets an opportunity to stock up on using their imagination and a tactic to survive the long rainy days ahead for spring.
This month I got the opportunity to create a basket out of supplies from Walmart. It is always fun to see what I can create and this year I did a glamorous basket for the diva princess in our house and I filled my son’s with a fun Bakugan toy & an Etch A Sketch to help him use his imagination.

Here are some ways that I have learned to make creative baskets for less:
Free Refills, Please- Every year I would buy a new basket to leave from the Easter Bunny. A few years ago, I wised up and now the kids leave a basket out for the bunny instead. The kids really look forward to seeing what the Easter Bunny has put in their baskets and this helps to cut down on the expense of buying a basket every year. If you do need to buy a basket, check the yard sales and thrift stores for baskets. With a bottle of spray paint in a pretty Easter color, you can freshen up dingy baskets and give them a new spring look.
Ditch the Fillers– Easter fillers can be quite a mess and also are an added expense to your basket. Instead of Easter grass, opt for shredded paper in a fun Easter color, a little pastel tissue paper to line the basket, or fabric in Easter shades that you might have in your craft supplies. Scrap ribbon tied to the top of your basket will add to the fun Easter theme without breaking the bank.
Wander Away from the Easter Aisle– While there is a great selection of great stuff in the Easter aisle, it also is a blast to wander down other aisles to look for fun additions to your Easter basket. My daughter’s princess glam basket was filled with fun dress-up gloves and a fun dress-up brush that were around $3 each. Sticker books in princess glitter and glam were also a fun filler for around the same price. Visit the health & beauty aisles for fun bath soaps, visit the gardening section for fun accessories to get your garden started, and visit the snacks aisles for healthier alternatives to the Easter candy. By wandering away from the seasonal items, you can really find a lot of fun items to add to your baskets.
Stock Your Baskets With Imagination in Mind– As much as a new electronic game would be fun for the kids, I really try to stock up on things that will help them use their imagination rather than the television. Art supplies, new beach or sand box toys, a family outdoor game, and board games are all great ways to get them to use their imagination.
I am a part of the Walmart Moms program, and Walmart has provided me with compensation for these posts. My participation is voluntary and opinions are always my own.

One of our favorite Easter activities is decorating Easter eggs. Every year we try to do something new with our eggs. The first year I ditched the boxes of Easter egg dyes and created our own out of pantry ingredients. Last year we had a blast trying Kool-Aid egg dying which really made beautiful and vibrant eggs without any effort.
This year I ran across a fun idea for creating marbleized eggs from common items in the pantry. If you have food coloring, vinegar, and olive oil…you have the makings for beautifully marbled eggs. Pictured above are the eggs that my children created this year. This was a lot of fun because each egg could be so different and unique!

1. Hard boil your eggs as desired. In shallow bowls, mix together three cups of warm water with two tablespoons of vinegar and ten drops of food coloring. I used the Betty Crocker Neon Food Coloring that I found in the baking aisle. Whisk the ingredients together well.
2. Submerge your eggs and leave them in there until they reach the desired color. One thing we learned is that it is better to have a lighter color as the base color so the second layer of color will take well on your eggs.
3. Dry your eggs with a paper towel.
4. Repeat the process with the rest of the eggs. Rest them gently on your inverted egg carton to allow them to dry.
5. To the dye that you have already prepared, add one tablespoon of olive oil and then, using a fork, run your fork through the oil to break the oil into pieces to create the solution to roll your eggs. As the oil swirls, roll your egg once through a contrasting color. Allow the oil to pick up & create another round of color on your eggs. Blot gently with paper towels. (Editor’s Note: Many apologies for the lack of pictures after this point. We just really got into it and it was getting a little crazy with eggs dropping rolling)
6. Admire your beautiful eggs!
Don’t forget to turn those eggs into delicious deviled eggs for a fun addition to your family dinner!


If there is one thing that I feel I do really well, it is pulling off a budget-friendly and wonderful birthday party for my children. The truth about pulling off a great party though is that it takes a lot of planning and preparation to make a wonderful party come together. Now that I have shown you how to make your own DIY Barbie Cake and elegant tissue paper pom poms to hang over your party table, I wanted to share with you our menu from this party!
We decided to host the party on a Friday evening since that seemed to work with everyone’s schedule the best. With seventeen people in our immediate family, it makes for a big party even for just a family birthday party. In the dead of winter, I wanted food that would warm everyone up, would be relatively easy to assemble (since the cake did require a bit of effort this year), and that would also make great leftovers.


Homemade party subs are so inexpensive to make and can be a fun addition to any party. Walmart sells french bread loaves for $1.50 each and turkey breast meat (behind the deli counter) is only $3.99 per pound. Each sub was loaded with almost an entire pound of meat, a layer of cheddar cheese (only bought inexpensively behind the deli counter), and then sliced and assembled on cookie sheets. Condiments were gathered on trays and fresh tomato and lettuce was cut the day before to pull out for the big party. These took about fifteen minutes to pull together, serve eight people each, and cost less than $8 each to make yourself (even with the cost of condiments included).
If you have any sandwiches leftover, store them covered in the fridge and the next day they will make fabulous paninis to serve with your leftover soup. As an aside, I make these almost every grocery day for my family as a quick meal when I am too tired to cook from shopping. It is my special treat after getting the shopping done and the kids go bonkers over these subs.


I made a double batch of our Pesto Chicken Tortellini Soup to go along with our sub sandwiches. Bowls and a creamer full of spoons were set out for our guest to dish their soup. I also set out a hunk of Parmesan cheese that could be grated over the bowls of soup to add even more flavor to it. To save on the cost of the soup, buy the pesto over in the pasta aisle (rather than the refrigerated pesto in the dairy cooler) and feel free to substitute the fresh tortellini with the cheese tortellini found in the freezer aisle.

No party is complete in our house without a punch bowl brimming over with some delicious punch. This new punch recipe that I pulled together is the new favorite with strawberry soda, cranberry juice, strawberry lemonade, and cherry 7-up. The cranberry really added a hint of tartness to the punch and this punch bowl was drained in record time this year. I have to say that my thrift store punch bowl is one of our most used party items and has served us well over the years!
In addition to punch, the coffeemaker was preset for hot coffee to go with the dessert portion of the evening.

I rounded out the party table with a couple of easy appetizers that I made the day before. My cheese ball and spinach dip went perfectly with our soup and sandwich theme, and gave guests something to munch on before and after the dinner hour.

Party supplies can really burn through a girl’s budget, but I strive to keep the paper products to a minimum. To incorporate the Barbie theme though, I did find a cute tiara and reuseable Barbie themed cup & plate for the party girl that cost only $5 total. This made the party theme fun for her, but kept my party budget right on track. Our regular dishes were used for everyone else and last year’s vinyl tablecloth made another appearance this year at Emily’s birthday party. With our inexpensive tissue paper pom poms, it still looked like a fabulous party without the need for excessive party themed plates and one-time use decorations!
Here are a few recipes that can be used at your next party!

This tortellini soup brought together all of the flavors that my family loves, but is a versatile recipe that could be created with what is at your supermarket that day or what your family loves to eat. For our vegetarian readers, the chicken tortellini and chicken broth can easily be switched to a cheese-filled tortellini with vegetable broth instead. I used basil pesto in this, but you could also try a sun-dried tomato pesto or omit the pesto altogether if it is not a favorite of your family. Versatility is the beauty of a good soup recipe and this recipe is quite versatile!
Pesto Chicken Tortellini Soup
2 tablespoons olive oil
2 garlic cloves, minced
2 cans petite diced tomatoes (14.5 ounces)
8 cups chicken broth
1 pound chicken herb tortellini or tortellini of your choice (I used the refrigerated kind, but you can also use the dried pasta)
9 ounces spinach, chopped roughly
1/4 cup basil pesto
In a large pot, saute the garlic in the olive oil. After a minute or so, add the diced tomatoes and chicken broth to the pot. Bring the broth to a rolling boil and then add in your tortellini. Cook tortellini as directed on package. In the last minute of cooking time, mix in your roughly chopped spinach and stir in the 1/4 cup of basil pesto. Ladle into bowls and sprinkle with Parmesan cheese on top. Side Note: When reheating, feel free to add some additional chicken broth to thin the soup, as the tortellini will absorb the liquid!
*************************************

You can never go wrong with a good spinach dip and this one is my absolute favorite because of the unexpected flavor that the salsa adds to the dish. You can make it as mild or as spicy as you like! I opt for a mild salsa and serve it with pita chips, tortilla chips, or fresh veggies for a little lighter fare!
Spunky Spinach Dip
2 cups salsa (approximately one standard size jar)
2 cups Monterey Jack cheese
8 oz low-fat or fat-free cream cheese, softened and cubed
10 oz frozen chopped spinach (thawed and drained)
Make Ahead: Mix ingredients together in a mixing bowl. Place in an oven-safe bowl and tuck in the fridge for Thanksgiving Day.
Party Day: Cook at 350 for 20-25 minutes (double your cooking time for a double batch) in an oven-safe bowl (covered). Serve with your favorite dipper! I served this with blue corn tortilla chips, but you could also serve with fresh celery sticks and fresh carrots to balance out the heaviness of your party day food!
*************************************

These cheese ball is so embarrassingly easy, but is always a showstopper when I bring it to holiday get togethers. Put the ingredients for this recipe on your grocery list and relish the joy in ease of the preparation and the compliments that come from it!
Bacon & Ranch Cheese Ball
2 (8 ounce) packages of low-fat cream cheese, softened
1 package of Ranch dressing mix
1 cup cheddar cheese
5-7 strips of bacon cooked and crumbled (or buy prepackaged crumbled bacon)
Make Ahead: Mix all of the ingredients together with a mixer until they are incorporated. Mold into a ball and wrap in plastic wrap,
Party Day: Roll in a plate of shredded cheese. Serve with assorted crackers.
*************************************
No get together in our family is complete without a big punch bowl that is overflowing. This punch is always a hit and it can be ready when everyone arrives. It is loved by kids and adults alike. The addition of cranberry juice adds a delicious tartness to your punch that balances out the sweetness of the strawberry soda and lemonade.
Christmas Cranberry Punch
2 liter bottle strawberry-flavored soda (I found this at Walmart)
2 liter Cherry 7-Up
1 (12 ounce) can frozen pink lemonade concentrate
1 container of cranberry juice
Mix all the ingredients together for the punch. This will fill one large punch bowl or two smaller ones.
Once again, I just wanted to send out a gentle reminder of what a wonderful opportunity we have to give back to our communities right now! I was lucky enough to not only get to partner in the Fighting Hunger Together campaign with Walmart, but I also had the opportunity to share a little fun for the lives of those in need.
Walmart challenged me to take $100 and see how far I could stretch our dollars by shopping in their toy department to bless an organization in our community. We decided to continue our efforts of doing our best to bless the Elkhart Faith Mission and picked up some fantastic board games to benefit the Women & Children’s Shelter during this holiday season. Although we were only able to drop them off and not give them to the director in person, we know how much these small gestures mean to this shelter…and how much they mean to our own family to get to do them.
Thank you to Walmart for giving us the opportunity to give so much and being able to showcase how much we can do with $100 to bless the lives of children in our community!
I am a part of the Walmart Moms program, and Walmart has provided me with compensation for these posts. My participation is voluntary and opinions are always my own.
It is that time of year again and that means another Advent season. Today I wanted to share with you a “use what you have” Advent calendar that we created last year. It was such a hit that I plan to make another one for this year! This requires no pricey materials and is based around what the holiday season should be all about… being together!
In the years past, we have always had a Christmas Jar of activities. Each day we would randomly draw from a set number of activities and enjoy a holiday activity together as a family. This year, our life with our two children has become increasingly busy and scheduled. We have two school schedules, extracurricular activities, homework, holiday programs, holiday family events, and so much more going on. Our life of leisure seems to have taken a detour and I have had to be more thoughtful in our approach towards carving time out for what we would hope to accomplish this year.
I wanted to create our own countdown to Christmas in a creative way, but I didn’t want to spend any money on it. I decided to use what I had to create our homemade Advent filled with fun activities and wanted to share with you what we created!
Supplies needed:
A large circle punch (in scrapbook supplies at craft store) or a jar or glass for tracing
Tape
Scrapbook or festive holiday gift wrap
Ribbon
Marker
2 Muffin Tins
A picture frame stand or a place to prop your finished tins
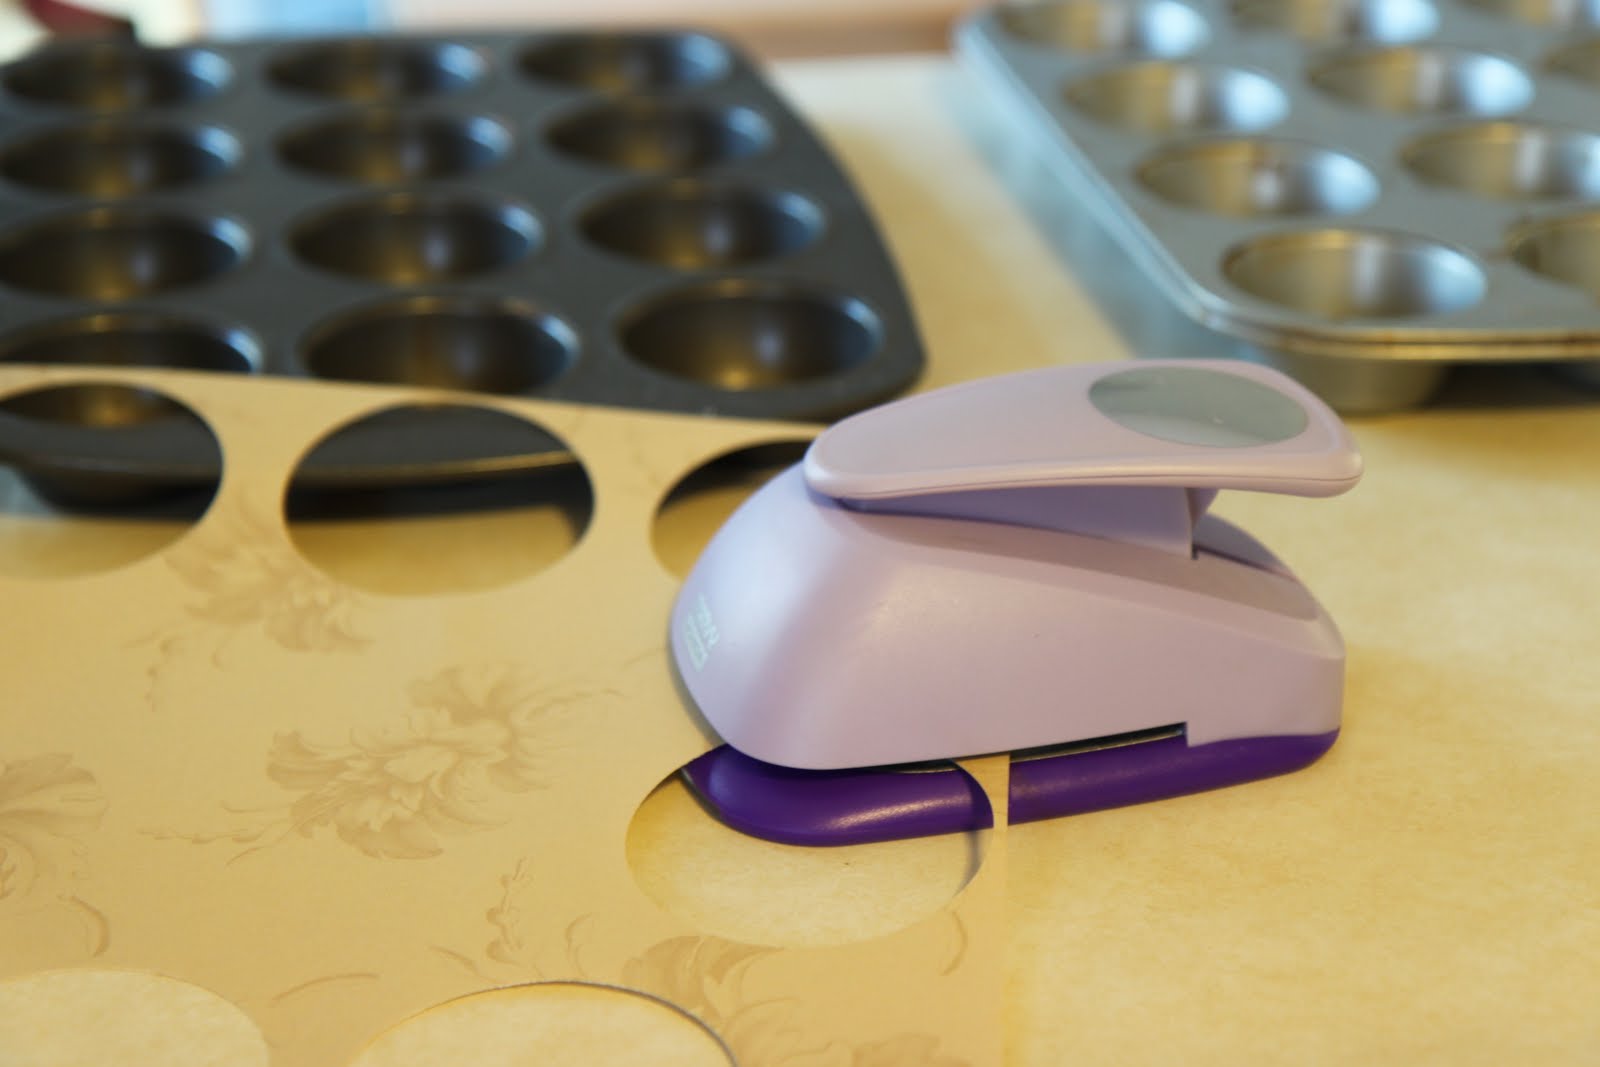 I began this project by punching out 48 circles. On half of these write the numbers 1-24 and on the other half you can write fun activities to do with your children in anticipation of the big day.

Stick your holiday activity folded up inside of each muffin tin and then attach the numbered circles to each individual muffin tin. Secure with tape on both sides to hold your activities in securely.
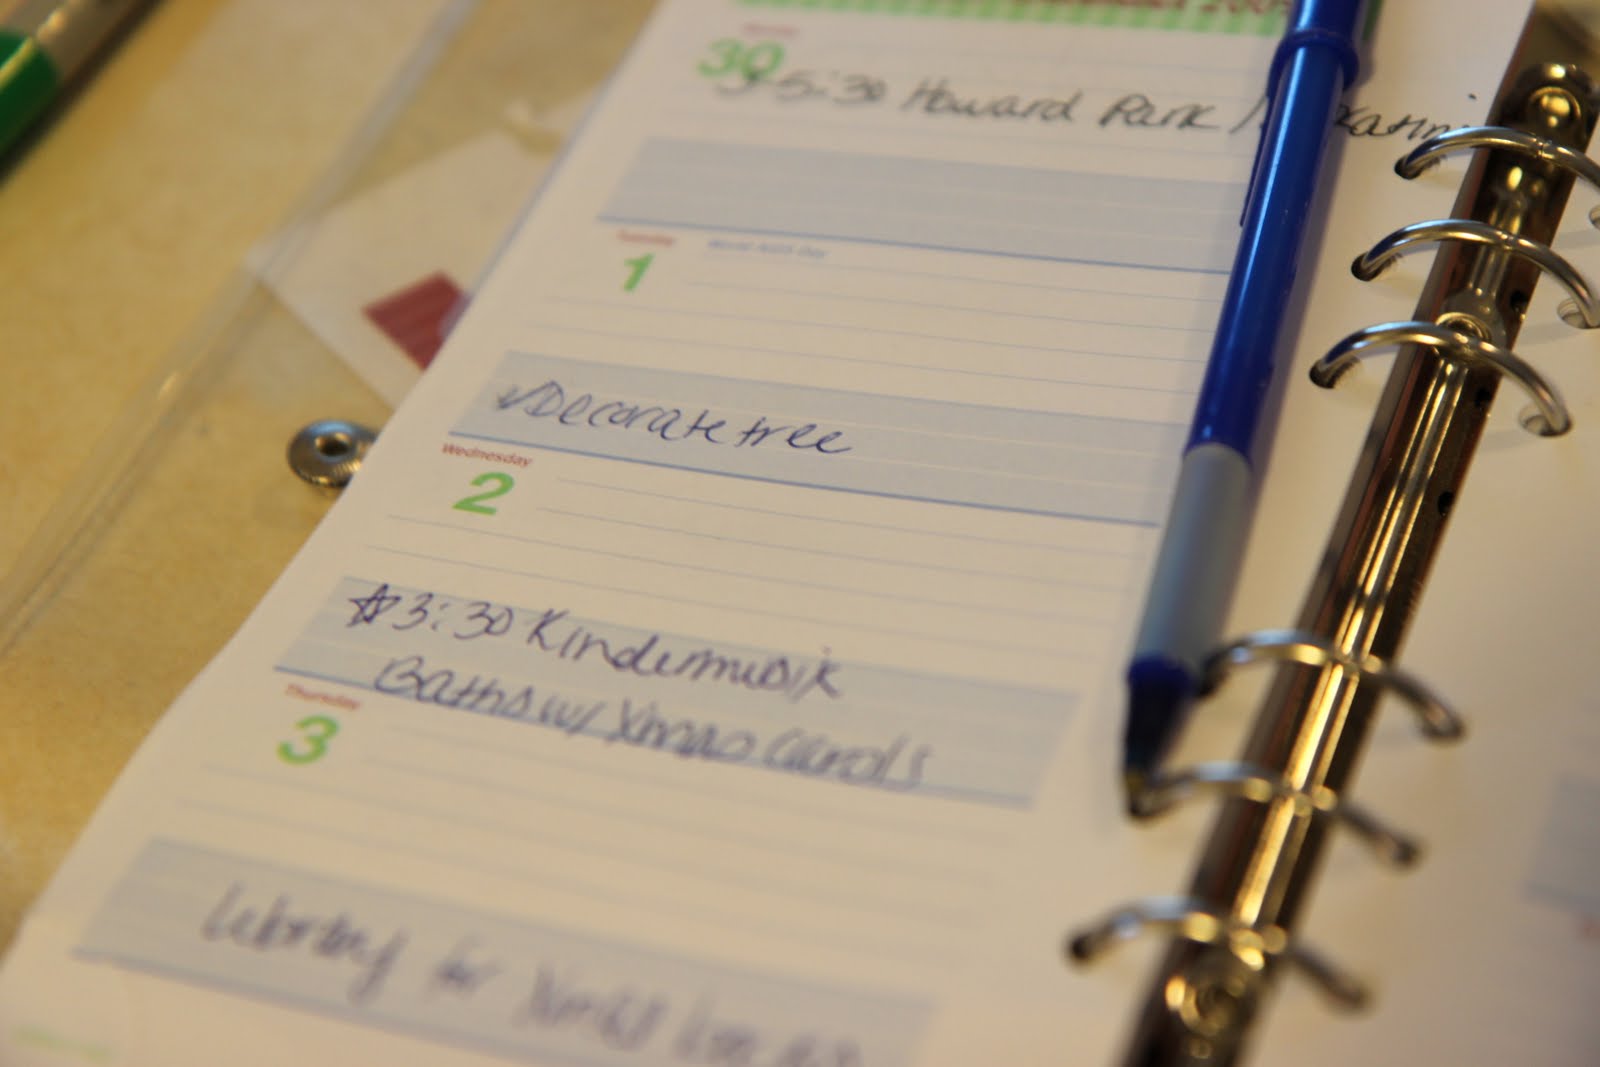
Break out your trusty calendar and jot down the activities for each day to remind yourself what you need to plan for and what supplies will need to be purchased to accomplish the activities.
 Add a little festive ribbon to the top of your muffin tin. Display the muffin tin by using a picture frame stand or finding a sturdy wall to prop it up with. Have your child draw an activity each morning to complete as a family.
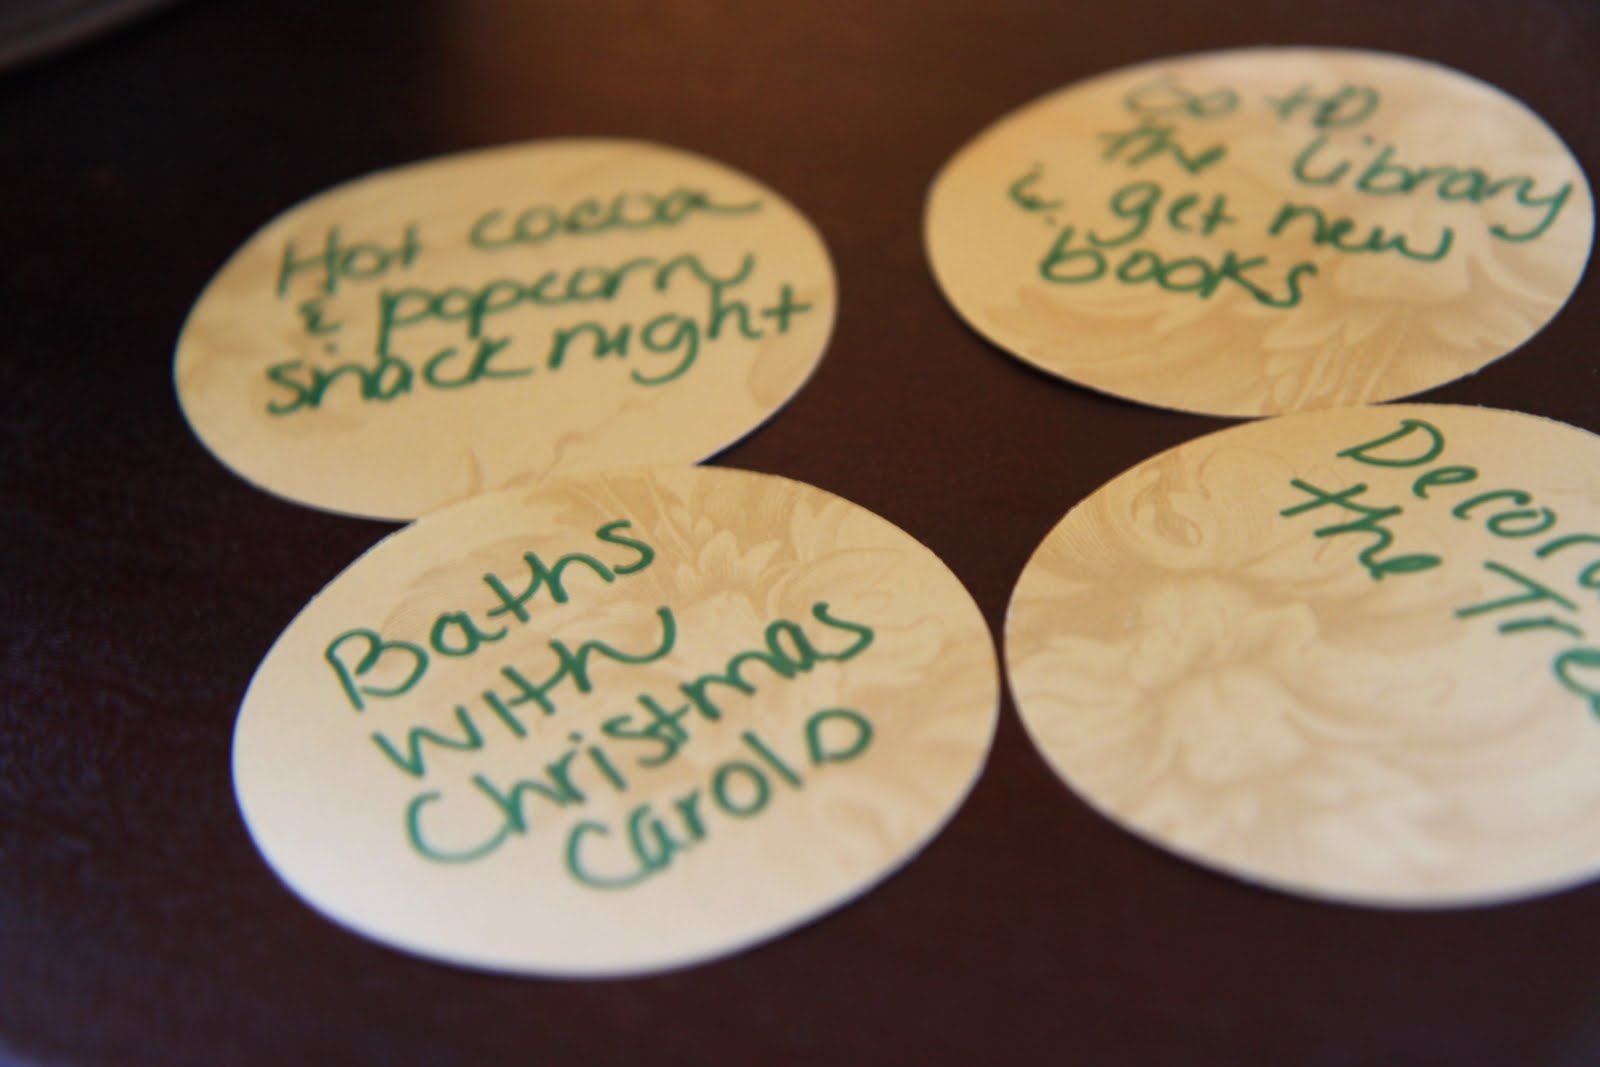 Our Activity List
1. Decorate the Christmas tree.
2. Big bubble baths with holiday music playing.
3. Going to the library to pick out holiday books.
4. Special popcorn and hot cocoa snack (possible visit for the tree lighting ceremony in town).
5. Going to a Christmas Concert.
6. Decorating gingerbread houses.
7. Make Christmas cards for our special friends.
8. Watch a holiday movie.
9. Color a holiday coloring page.
10. Bake Christmas cookies.
11. Go see holiday lights.
12. Go see Santa and a trolley ride through downtown.
13. Write a letter to Santa.
14. Pop popcorn & play a board game together.
15. Host an ornament decorating party.
16. Color a holiday picture.
17. Holiday party to attend.
18. Go to the dollar theater and see a movie.
19. Go see the Christmas lights.
20. Deliver holiday treats to our friends & the firefighters in town.
21. Big bubble bath with holiday music.
22. Open one gift early.
23. Watch a holiday movie.
24. Celebrate our family Christmas.
Total cost for this project was zero and very little money will be spent to do these activities together. The memories I hope to create with my children though, I hope those will be priceless!
Do you do an Advent calendar or have a special way your family celebrates the countdown to Christmas? I would love to hear your ideas!


If you are anything like me, I am sure you have a few extra cans of pumpkin leftover after making those pumpkin pies for the Thanksgiving feast.
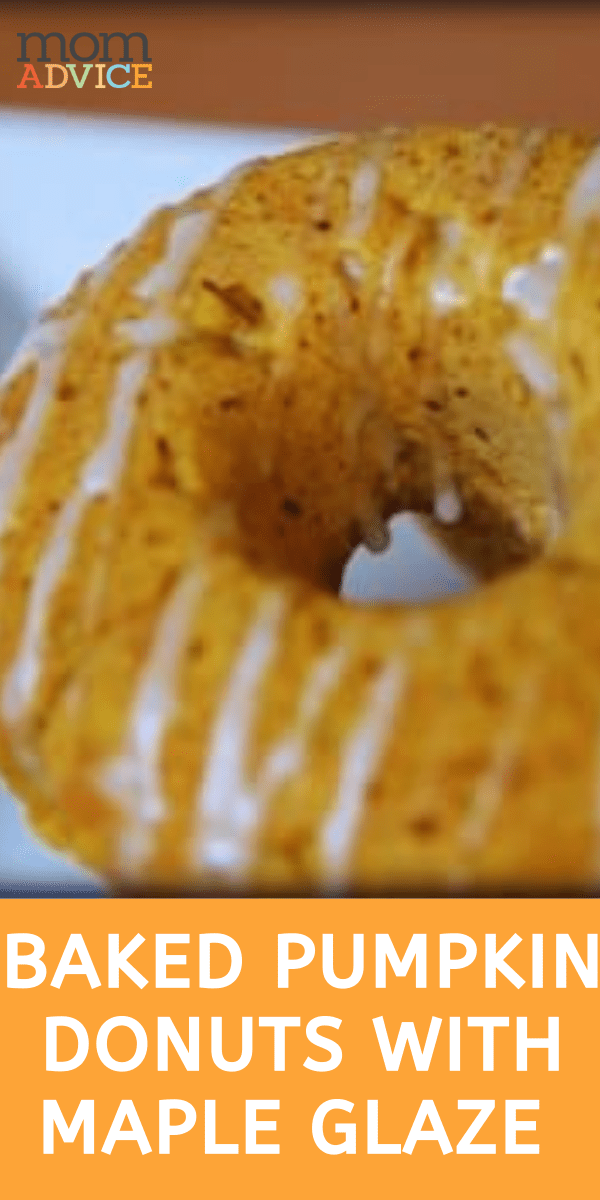
I have just the idea for where you can put those cans to good use and wanted to share with you my baked pumpkin donuts with a maple syrup frosting drizzle that would be a wonderful treat to indulge in while you are tackling those holiday to-do lists.
I had been dying to get a baked donut pan after seeing all of the wonderful baked donuts circulating the blogs this fall.
Luckily, I had a few Swagbucks set aside and credited those towards an Amazon gift certificate to purchase them for free.
I found these Norpro 6-count Nonstock Donut Pans for $12.99 each and decided to put my certificates towards two of those.
If the picture above doesn’t say, “these are worth every dime,” then I don’t know what would convince you!
If you don’t want to buy them for yourself though, these would make a lovely holiday gift to add to your Christmas list this year.
As a special treat after church, I have been making the family donuts to go with our Sunday paper.
I mix all of the dry ingredients before we leave, or if I am running ahead of schedule, I make the batter and tuck in the fridge until we get home.
We all are loving the homemade and fresh from the oven donuts.
I love that these baked varieties are healthier than the fried versions.
Still not healthy, but you know… healthier.
Let’s get started…

To begin making these donuts, you need to mix together the dry ingredients in one bowl.
In a separate bowl, mix together all of your wet ingredients.
Then just add your dry ingredients to the mixed wet ingredients, just until they are combined.
I just used my little hand mixer for this quick job.

Lightly spray your donut pan with a little cooking spray.
To fill the pan, you can do my lazy version or you can do it the “right way.”
To do it the right way, scoop the batter into a gallon size bag and cut off the end corner to pipe the batter in.
The lazy version simply requires an ice cream scoop and trying to scoop half the batter in on one side and half the batter in on the other side.
Then smooth the batter on top with a butter knife.
You want to fill them about 3/4’s full which worked out to be nine donuts worth.
Slide them into your oven and bake them for eight to ten minutes.

After you have pulled them out, allow them to cool for a couple of minutes and then invert them on a cookie sheet with a cooling rack on top.
Now it is time to make your delicious maple syrup drizzle to make these even more delicious.

Here we go, it’s time to mix up your maple syrup frosting drizzle for the tops.
It sounds fancier than it really is- you just mix up some confectioner’s sugar, milk, and a little maple syrup to make your frosting.
It makes a ton of frosting so it is up to you how much frosting you want to add to your donuts.

Now it is time to frost your donuts.
I just grabbed a spoon and drizzled the frosting in a back and forth motion over my donuts.
You could also dunk the tops in the frosting and then allow the icing to harden or you could skip the frosting altogether and just enjoy them with a light dusting of confectioner’s sugar.
I highly recommend the frosting though, it really adds a little sparkle and an extra bit of delicious to your donuts.

Now you can eat your donuts.
These are flavorful and almost like a glass of wine, you can taste all the different flavors as you eat them.
You can taste the hints of cinnamon and nutmeg, the rich pumpkin flavor, and then that maple syrup sweetness from the light glaze drizzle.
The texture is different than a fried donut and more like a muffin or a good piece of cake.
They are not overly sweet though and the pumpkin really seems to add a savory quality to these.
I hope you enjoy these as much as we have! Still have pumpkin left?
Be sure to check out my 8 Ways to Use Canned or Fresh Pumpkin for some added inspiration!
Baked Pumpkin Donuts With Maple Syrup Frosting
2 cups flour
1 1/2 teaspoons baking powder
1/4 teaspoon baking soda
1/4 teaspoon salt
2 teaspoons cinnamon
1 teaspoon nutmeg
1/8 tsp cloves
1/2 cup brown sugar
4 tablespoons butter, softened
2 eggs
1 teaspoon vanilla extract
2 1/2 tablespoons milk
1 cup pumpkin purée
For the Maple Syrup Glaze:
1 1/2 cups confectioners’ sugar
1/4 cup milk
1/8 cup maple syrup
Preheat the oven to 375 degrees and grease two doughnut pans. In a medium bowl, whisk together the flour, baking powder, baking soda, salt, and spices.In another medium bowl, cream together the brown sugar and butter. Beat in the eggs one at a time, and then the vanilla extract, milk, and pumpkin puree. Gradually beat the dry ingredients into the wet ingredients just until combined. Fill each doughnut mold 3/4’s full with batter. Bake 8-10 minutes or until the doughnuts spring back when touched. Remove from the pan and cool completely.
For the maple syrup glaze: In a small bowl, combine confectioners’ sugar, maple syrup and milk; stir well. Add additional milk, if needed, to reach desired consistency. Drizzle over donuts.
Serve with big mugs of coffee or milk for dunking. Expect praise and wild applause from your family members.
More fabulous fall ideas:


Well, sweet friends, for the first time ever…I am taking a little vacation from the blog. In almost seven years, I have never purposefully taken a week off unless it was because of technical difficulties. This week will be a crazy one as I have a film crew moving in for the day to shoot a webisode for my spokesperson job with Cheer and I am hosting both sides of our fabulous family for Thanksgiving. Vacation timing, for me, could not be more perfect.
I leave you with these beautiful portraits of our family that my wildly talented and awesome friend Nancy took of our family. I must be the luckiest girl in the world because I have, like, ten close friends that are all wildly talented photographers in town. We never have a shortage of wonderful people to take our picture here. We were so excited to do a portrait session with Nancy. If you live here, you should too.
I hope you all have a wonderful Thanksgiving filled with laughter, love, great food, and family. I will be back in a week as we gear up with holiday crafts, traditions, and food to create this holiday season.
With much love and thanksgiving for you,
Amy