Archive for the ‘Food & Recipes’ Category

Bruschetta Chicken Bake

Sunday, February 25th, 2007

Brushetta Chicken Bake
Recipe Supplied by Kraft Foods

Serves Four

1 can (14.5 oz) diced tomatoes, undrained
2 cloves garlic, minced (Note- if garlic is not available that day, you can substitute with 1/4 tsp of garlic powder)
1 pkg (6 oz) chicken-flavored stuffing mix
1 1/2 lbs boneless skinless chicken breasts, cut into bite–sized pieces
1 tsp. dried basil leaves
1 cup Shredded Mozzarella Cheese

Preheat oven to 400. Place tomatoes with liquid in medium bowl. Add garlic and stuffing mix and 1/2 cup water; stir just until stuffing mix is moistened. Set Aside.

Place chicken in 9×13 pan; sprinkle with basil and cheese. Top with stuffing mixture.

Bake 30 minutes or until chicken is cooked through

Nutritional facts per serving (daily value): Calories 366kcal; Protein 45g (90%); Total Fat 4g (6%)(Sat. 1g (5%)); Chol. 99mg (33%); Carb. 36g (12%); Fiber 2g (9%); Sugars 7g; Calcium 85mg (9%); Iron 4mg (23%)

Italian Chops

Sunday, February 25th, 2007

Italian Chops

Italian Chops
Serves Four

4 tablespoons olive oil
4 pork chops – bone in (Available in the Frozen section. I prefer the center-cut chops, but the assorted variety are slightly cheaper)
1 can diced tomatoes – in juice
2 teaspoons Italian Seasonings Blend spices
¼ cup white wine (anything you would drink)
1 pound angel hair pasta (Note- there are times where this type of pasta is not available. You can substitute this ingredient with a box of thin spaghetti)

Heat the oil in a heavy large skillet over medium heat. Sprinkle the pork chops with salt and pepper. Add the pork chops to the skillet and cook until they are brown approximately 3 minutes per side. Transfer the pork chops to a plate and tent with foil to keep them warm. Add white wine to the pan and deglaze the pan with a whisk (getting up all of the drippings from the pan). Add the tomatoes with their juices, and spices.. Cover and simmer until the flavors blend and the juices thicken slightly, stirring occasionally, about 15 minutes. Season the sauce, to taste, with salt.. Return the pork chops and any accumulated juices from the plate to the skillet and turn the pork chops to coat with the sauce. Meanwhile, cook pasta until al dente and then drain. Place 1 pork chop on top of the angel hair pasta onto each plate and spoon the sauce over the pork chops and pasta.

Nutritional facts per serving (daily value):
Calories 293kcal
Protein 21g (42%)
Total Fat 19g (29%)
Sat. 4g (19%)
Chol. 59mg (20%)
Carb. 10g (3%)
Fiber 2g (7%)
Sugars 5g
Calcium 57mg (6%)
Iron 2mg (11%)

Hi, My Name is Aldi Queen

Thursday, February 22nd, 2007

Any fan of our website, MomAdvice.com, knows that I am obsessed with Aldi Supermarket. My site contains menu planners and information on the store and I never expected the response that we received from these planners. We received thousands and thousands of hits a month searching for this type of information. It was one of those times were I felt like I hit a nail square on the head and I was actually onto something.

The menu planners were very extensive though and took forever to post. There had to be an easier way than posting twenty pages of planners on our site. That is when I came up with the idea to create an online cookbook where you could actually glimpse into the kitchen of an Aldi chef. A cook who prefers the goodness of homecooked foods, but understands the necessity for a budget in a single income family.

Unlike my other blog, The Motherload, I will not be sharing any tips in this dose of bloggy goodness. This will simply be recipes and nutritional information on dishes you can throw together for your family utilizing only Aldi ingredients. I make my disclaimer now that I am not a professional chef or a professional food photographer. If the recipes do not appeal to you, please don’t voice criticism and just hold out for a recipe that will work well for your family.

The only ingredients that I am including that may not be available at Aldi is yeast and basic dried seasonings. Yeast will be an essential part of cooking and can be picked up at any store (most affordably at your warehouse store). While yeast is available around the holiday season at Aldi, it is not available year-round, thus you may need to purchase that one at another store. Dried herbs will be included, as I feel most cooks have those already within their pantry.

I hope that you will enjoy this as much as our other blog. I am excited to be sharing all of my recipes with you!

Frugal Momma’s Test Kitchen: Roast Chicken Recipe #2

Thursday, January 25th, 2007

I have started sharing my roast chicken recipes because a whole chicken is so darn cheap and so good! Last week, I shared my Roasted Balsamic-Glazed Chicken recipe that I happened upon through the Food Network website. If you haven’t tried it, I do highly recommend that one.

This recipe came out of just the types of ingredients I happened to have on hand. Grocery day was looming, but still so far away, so I had to be a little more creative in the kitchen. Time was also in short supply so this recipe had to be quick and require no monitoring on my part.

The chicken turned out moist and delicious. Despite dumping an entire contents of a dressing packet on top, the chicken is not salty at all and just leaves a pretty crust on top of the chicken.

As with all my recipes where I use a chicken in the slow cooker, I always make a rack of tin foil before putting the chicken in so the meat doesn’t become soggy. Simply ball three pieces of tin foil up and make a rack for the chicken to rest on. Place the chicken on top and when it is done cooking, remove the tin foil and you should have a lovely broth on the bottom to spoon over mashed potatoes.

Hope this recipe is a hit in your house too!

Amy’s Quick & Easy Roast Chicken

1 whole chicken
3 lemons
1 packet of Italian seasonings dressing packet (zesty or plain)

Clean chicken and remove the giblets and extra fat on the chicken. Make a rack out of tin foil by balling three pieces of foil up and putting them inside of your slow cooker. Rest the chicken on top. Cut the three lemons in half. Juice two of the lemons over the chicken and then rest them around the chicken. Put the other two halves of the third lemon inside of the chicken. Empty the seasoning packet on the outside and inside of the chicken. Cook on low for six to eight hours.

Spinach & Tomato Orzo with Chicken

Wednesday, January 10th, 2007

This week’s Works-For-Me Wednesday has a theme and the theme is sharing a low-fat recipe with everyone. I wish I would have saved my low-fat chocolate chip cookie recipe for this week, instead of last week, but hopefully you can still enjoy that recipe.

Here is one of my absolute favorite low-fat dishes that I love to eat. The chicken in this dish could be omitted if you wanted to keep the dish vegetarian.

This recipe came from one of my Rachael Ray cookbooks and it was originally prepared without the chicken, and was served as a side dish. I thought the addition of the chicken would make it a wonderful main dish.

This is one my favorite recipes to bring to potlucks because it something different than people normally prepare and it can be served warm, room temperature, or cold.

I hope you will enjoy this recipe as much as I do. The only bad thing about this dish is that it isn’t as good reheated the second day. The tomatoes make it a mushy mess. The good news though is that there are rarely any leftovers! Enjoy!

Be sure to swing by Rocks in My Dryer for more great recipes!

Spinach & Tomato Orzo With Chicken

1 pound spinach, washed, dried, stems removed

1 pint grape or cherry tomatoes, halved
2 lemons, zested
1 1/2 cups orzo, cooked to al dente
1 tablespoon extra-virgin olive oil
24 basil leaves, torn or thinly sliced
1 pound cooked chicken breasts, diced
Salt and pepper

Pile spinach leaves in stacks 1 on top of the other. Thinly slice stacks of leaves to make spinach confetti. Pile shredded spinach into the bottom of a medium sized mixing bowl. Halve grape or cherry tomatoes with a paring knife and add them to the mixing bowl. Add the zest of 2 lemons to the bowl and save the lemons in the refrigerator to juice for another recipe. Next add, the cooked chicken to the bowl. Add hot cooked and drained orzo pasta to the mixing bowl. The heat of the pasta will wilt the spinach and warm the tomatoes at the bottom of the bowl and get the juices flowing from veggies. The heat of the pasta will also release the flavor and oils in the lemon zest. Drizzle 1 tablespoon extra-virgin olive oil over the pasta and toss to combine the veggies and orzo. Add basil and salt and pepper and toss to combine. Taste your orzo to adjust seasonings and serve.h

Frugal Momma’s Test Kitchen: Roast Chicken Recipe #1

Monday, January 8th, 2007

I am a big fan of roasting whole chickens, particularly because they are so darn affordable. I can get a good five to six pound chicken for only around$3.50 at Aldi. For only $3.50, we are able to get a dinner out of the chicken and usually enough for sandwiches or for taco meat the next day.

Since we eat roasted chickens often, I wanted to start sharing my chicken recipes and different variations that we experiment with. I ran across this recipe and thought we would give it a try.

This chicken is incredibly moist and flavorful and the smell drove me mad because my stomach growled the entire two hours that this cooked.

This recipe is very simple, but elegant enough to entertain with. We served this with a side of mashed potatoes and steamed broccoli.

I do want to warn you to either spray your roaster really well with nonstick cooking spray or line your roasting pan with foil because the balsamic vinegar became almost like a tar on my dish and required much scrubbing and soaking before I was able to get all of the vinegar off of the bottom.

I hope your family can give this recipe a try. The thing that I loved most about it was that these were ingredients that I already had in my pantry so I didn’t have to buy anything special to make this dish.

Make sure to make two of these because you will regret it if you only make one…they are that good!

Roasted Balsamic-Glazed Chicken (adapted from Food Network)

1/4 cup balsamic vinegar
1/4 cup extra-virgin olive oil
2 teaspoons salt
1 teaspoon freshly ground black pepper
3 tablespoons herbes de Provence
1 medium lemon, juiced and halves reserved
1 (5-6 pound) roasting chicken
4 sprigs rosemary
8 cloves garlic (I omitted this and used garlic powder instead)
1 thinly sliced white onion (also omitted because we do not like onions)

Preheat the oven to 350 degrees. Combine the vinegar, oil, salt, pepper, herbes de Provence, and lemon juice in a bowl, whisking until emulsified. our over the chicken, taking care to completely coat it. Insert the reserved squeezed lemons, plus the rosemary & garlic into the cavity. Layer the onions in a roasting pan and place the chicken on top (I just used a roasting rack). Put the chicken in the oven and cook at 350 for two hours, basting it occasionally.

Making Your New Year’s Resolutions Work: Light Chocolate Chip Cookies

Thursday, January 4th, 2007
I recently ran across a recipe in my Redbook magazine for a light chocolate chip cookie. I was intrigued by the ingredients because there were no fat substitutes or sugar substitutes and only four tablespoons of butter. How could a cookie with no substitutes and little fat actually be yummy?

That is the goal in Nick Malgieri’s new cookbook called, “Perfect Light Desserts.” He makes fabulous cookies, pies, and more made with real butter, sugar, flour, and eggs. What a concept, huh? This is the kind of cookbook I have been looking for and all of the recipes are under three hundred calories per “generous serving.”

I was able to check the cookbook out from my library and I was not disappointed at all. The desserts are exactly what I would want if I was trying to eat better, and have no replacement ingredients that leave you with a nasty aftertaste in your mouth.

First, I had to share a picture of my new dessert set of plates & mugs that my best friend got for me for Christmas. Each of the plates has a different design on it and they came with a matching little espresso mug & napkins. Aren’t they so cute? She knows me so well!

Back to my review… I made these Light Chocolate Chip cookies and they were absolutely divine. Not too soft, not too hard, chewy, but not too chewy. Mine did come out a little flatter than I had hoped, but that second tablespoon of whole milk, probably ended up being four tablespoons so I fault only myself.

Each cookie contains a mere 114 calories and five grams of fat. This made me think…how much fat were in the ones I was eating before? I shudder to think! These are perfect if your New Year’s resolution is to lose that extra baby weight or just to eat healthier. (Chocolate chip cookies are healthy, right?)

Hope you can give these a try. Feel free to post your impressions of the recipe under our comments section!

David’s Skinny Chocolate Chip Cookies


1 ¼ cup all-purpose flour
1 teaspoon baking soda
½ teaspoon salt
4 tablespoons unsalted butter, softened
½ cup light brown sugar, firmly packed
6 tablespoons granulated sugar
1 large egg
2 tablespoons whole milk
1 teaspoon vanilla extract
1 ½ cups (about ¾ of a 12-ounce bag) chocolate chips
2 cookie sheets lined with parchment or foil

Set racks in the upper and lower thirds of the oven and preheat to 350 degrees. Mix the flour, baking soda, and salt together and set aside. Beat the butter and sugars together by machine with the paddle attachment on medium speed until well mixed (about one minute). Beat in the egg and milk until they are absorbed and then the vanilla. Don’t worry if the mixture looks curdled, the flour mixture will smooth it out. Scrape down the bowl and beater and beat in the flour mixture on low speed. Use a large rubber spatula to fold in the chocolate chips. Chill the dough in the bowl for fifteen minutes to keep the cookies from spreading too much while they are baking. Form the dough into 1 1/2-inch balls or use a small ice cream scoop to form the cookies. Arrange the balls of dough 2 inches apart all around the prepared pans. Bake the cookies for eight to twelve minutes, or until they look dull on the surface, have spread, and are still quite moist. Cool the cookies on the pans on racks for five minutes. Slide the papers to racks and cool the cookies completely. For storing: keep the cookies between sheets of wax paper in a tin or plastic container with a tight-fitting lid.

Per cookie: 114 calories, 5 g total fat, 3 g saturated fat, 2 g protein, 17 g carbohydrates, 1 g fiber, 11 mg cholesterol, 85 mg sodium

Buttery Bread Machine Rolls

Monday, January 1st, 2007

Maybe I am the only one in the world who feels this way, but there are a lot of things that intimidate me when it comes to cooking. Working with dough is one thing that I have always been intimidated by. I watch people make bread and pastry doughs on cooking shows all of the time, but I always feel like they know more than me.

Since I have always had this fear of making bread, the bread machine was a great way for me to practice and start learning how to work with dough. When using a dough cycle, all you have to do is throw in the ingredients and wait until the machine beeps. When you hear the beep, you know that the dough has already risen and is ready to either be rolled or put directly into the pan to bake your loaf.

Since I have been more open to working with dough, I offered to bring the rolls to our Christmas dinners. I am always worried that a dish isn’t going to work out so I made sure to do a practice run since I have never made rolls before. I was extremely worried that they wouldn’t turn out or that my poor kneading or rise times on these would make a flat & yucky roll.

Now that you know how worried I was about working with dough, you will know that this recipe is completely foolproof. Despite being nervous, I am happy to report that these rolls were amazing. They honestly looked like something you would get in a bakery and I had to convince my husband that I actually did make these and didn’t buy them.

These rolls are buttery and light. They are great out of the oven or cold. In fact, we had two leftover from our Christmas dinner and we fought over who would get to eat them on the way home.

I guess what I am trying to say is…make this your year to overcome something that you might be intimated by in the kitchen. Maybe it is pie crust? Maybe you have never roasted a chicken? Maybe you just don’t know how to cook at all? This might be the year for you to learn a new skill in the kitchen that you can feel really proud of.

What is one thing that you have never tried and wish you could do? Is there something you have always been scared to do because it seemed too difficult? Please share!

Buttery Bread Machine Rolls Recipe #65340 (Courtesy of Recipezaar.com)

1 cup warm milk (70 to 80 degrees F.)
1/2 cup butter or margarine, softened
1/4 cup sugar
2 eggs
1 1/2 teaspoons salt
4 cups bread flour
2 1/4 teaspoons active dry yeast

In bread machine pan, put all ingredients in order suggested by manufacturer. Select dough setting. When cycle is completed, turn dough onto a lightly floured surface. 4. Divide dough into 24 portions. Shape dough into balls. Place in a greased 13 inch by 9 inch baking pan. Cover and let rise in a warm place for 15 minutes. Bake at 375 degrees for 13-16 minutes or until golden brown.

**Amy’s Notes**- I actually cooked these for about twelve to fifteen minutes at 350 because that seemed to work better. Otherwise, I prepared these just as directed.

Frugal Momma’s Test Kitchen: Pizza Dough- Take Six

Thursday, December 28th, 2006

Is anyone else annoyed with my constant changing of the recipes in my house? I am never quite satisfied with a recipe until I have tried several variations on it. Don’t believe me? In April, I shared two variations on pizza dough. I revisited my recipe when I found a new cookbook and I really liked that variation too. Then more recently, I shared my discovery for another great recipe and shared how to simplify the dinner process by storing your ingredients in a bag.

I really believed that the last one was *the* star in all of my recipes. I had planned to never revisit this recipe again. Unfortunately, I ran across a copy-cat recipe for a Pizza Hut dough that I just had to try. The results…worth the reevaluation!

Let me preface by saying that I do not like Pizza Hut. It is way too greasy for my taste and has never agreed with my stomach too well. I didn’t try this recipe because I love Pizza Hut so much, but I was simply intrigued by the ingredient list.

Although this recipe has a few more ingredients than my past variations, it is by far THE BEST pizza dough. I promise not to lead you astray and hope that you might get a chance to give this recipe a shot. It is worth the effort.

This dough is light and airy and does not rest heavy in your stomach. I think this is attributed to the addition of the baking powder.

This dough also has a great texture to it, which comes from the addition of cornmeal. It is not enough to give it a grainy texture, but simply adds to the bite and makes it more pleasing to the mouth than the flat flour, oil, yeast, water combination.

I hope that you can try this one. Don’t forget to throw a few extra of these into a bag to enjoy in the weeks ahead. This recipe yielded a large crust and an order of cheesy bread for our family. The cheesy bread was prepared by rolling out the dough, drizzling it with olive oil, sprinkling with cheese & garlic salt and throwing it in with the pizza dough after it has been prebaked. You can cut these (before baking) with a pizza roller.

I topped the pizza with a can of crushed tomatoes, which had been simmering on the stove for about fifteen-twenty minutes. I added a little salt, a pinch of sugar, and a little dried oregano to the sauce. It turned out perfect! I topped the pizza with part of it and then used the rest as our dipping sauce.

I hope you enjoy this recipe as much as you have enjoyed the past variations!

Pizza Hut Style Pizza Dough

1 1/3 cups water
2 tsp sugar
1 1/4 tsp salt
2 Tbsp olive oil
2 Tbsp cornmeal
3 1/4 cups flour
1 tsp baking powder
1/4 tsp garlic powder
1/4 tsp onion powder
1 1/2 tsp yeast

Add ingredients to bread machine, according to manufacturer’s settings, and run dough setting. After the machine beeps, roll out the dough. You can roll the dough into two 9×13″ pizzas (great for kid’s lunches!) or into two medium pizzas or a large pizza and an order of breadsticks (as instructed above). Parbake the crust with a drizzle of olive oil on it at 450 degrees for ten minutes. Remove the crust and add sauce and toppings. If making breadsticks, add your breadsticks at this time. Place into the oven for another ten to fifteen minutes or until golden and bubbly. Enjoy!

Frugal Momma’s Test Kitchen: Homemade Microwave Popcorn & Caramel Corn

Tuesday, November 28th, 2006


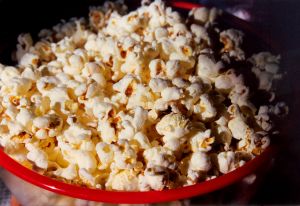
I love popcorn. I love flavored popcorn, I love plain popcorn, and I love the air popped variety. Since we enjoy popcorn so much, I purchased an air popper at a thrift sale last year and we have used it a lot, particularly for our Friday night family night. It is a great little tool to have in the kitchen. It pops popcorn quickly and is also much healthier than the prepackaged stuff.

There are times though where I miss the convenience of the bagged variety. Unfortunately, it is expensive and also not as good for you.

Recently though, I happened upon a recipe (on Food Network) for making your own bagged popcorn. The instructions seemed easy enough and the results…near perfection.

To make your own homemade version all you need is popcorn kernels (purchased in bulk at your wholesale club cuts down the cost on these even!), a paper bag (lunch bag size), and a stapler.

Pour a 1/4 cup of popcorn kernels into the bag (for one generous serving) or a 1/2 cup (for two generous servings). At this point, you can add two teaspoons of olive oil (if you wish), add your salt (if you wish) and then fold the bag down a little. Using your stapler, staple a single staple into the top to keep it shut. Put the bag in the microwave and pop for one to two minutes. Be sure to keep a close eye on the popcorn because it burns quickly. Open the bag, pour into a bowl, and enjoy!

My only gripe with doing popcorn this way is that the bag creates a bit of a greasy mess on the interior of your microwave since it is so thin. You could lay down a napkin or paper towel though to keep it clean while the popcorn pops and avoid this mess completely.

If you are interested in making caramel corn, this too can be made from your microwave. This is a great treat to have around the house or to give as hostess gifts when going to all of these holiday get togethers.

I ran across this ezine article that explains the process in much better detail than I could….

Microwave Caramel Corn
by Joyce Moseley Pierce

Part of the hesitation in making caramel corn is the sticky, gooey mess that remains once you’ve finished making it. You almost need a blow torch to remove the hardened sugary stuff from your pans.

Help is on the way! This recipe can be made in your microwave, and when you’re finished, you can just throw the paper sack away.

This doesn’t mean that it doesn’t take a little preparation time, but at least you can relax
and enjoy the finished product without having to worry about a lot of cleanup.

Next time you go to the grocery store, ask for your groceries in paper bags. You’ll need one bag per batch.

Here’s what you’ll need:
3-4 quarts popped corn

1 stick of butter (no substitutes!)
3/4 cup brown sugar
1/2 tsp salt
1/4 cup Karo Syrup

1 tsp baking soda – add last

Pop the corn and discard the unpopped kernels. Put the popped corn in the paper sack. While the corn is popping, put the butter, sugar, salt and syrup in a glass bowl and bring it to a boil in your microwave. Stir after one minute, and let it boil for an additional minute. Add one tsp of
baking soda and stir well, until thickened.It will turn light in color and look like taffy.

Pour this mixture over the popped corn in the paper bag and shake well. Put the paper bag
back in the microwave and cook an additional 1-1/2 minutes (90 seconds). Remove and shake well again.

Return to the microwave and cook another 1-1/2 minutes. Shake again. Open the bag and let it
cool. You can even tear the bag down the side and speed up the process.

Plan to make more than one batch because you’ll want to eat the first one! Great for Christmas
or birthday gifts. I gave this as a Christmas gift to my co-workers one year and the next year they started hinting for it again in September.

Once completely cooled, break up the chunks, put it in a plastic holiday bag and tie with a festive ribbon. If you eat a lot of ice cream the containers with lids make a great receptacle for packing the caramel corn.

Save your ice cream containers throughout the year, wash them out, line with plastic wrap and stick a bow on the top. Include the recipe and directions unless you want to tell them it’s an old family secret, but let me warn you that if you don’t share the recipe,
they will come back next year begging for more.

Joyce is a freelance writer and owner of Emerson Publications. She is the creator of “All They’ll Need to Know,” a workbook to help families record personal and financial information. http://www.emersonpublications.com/…43554/index.htm She is also the editor of The Family First Newsletter, an ezine for families with young children. To subscribe: http://www.emersonpublications.com/pages/848640/index.htm

Happy Holidays!