Archive for the ‘Food & Recipes’ Category

Quick Weeknight Dinner: Rosemary Chicken

Monday, January 5th, 2009

Here is a great go-to dish that can be made with a couple of easy ingredients in your pantry. If you do not have fresh rosemary on hand, you can substitute with dried rosemary instead. I serve this with a little rice and a vegetable for a quick weeknight dish.

Rosemary Chicken
Courtesy of Rachael Ray’s 30 Minute Meals

4 pieces boneless, skinless chicken breast, 6 to 8 ounces each
2 tablespoons balsamic vinegar
2 tablespoons extra-virgin olive oil
3 stems rosemary, leaves stripped and chopped, about 2 tablespoons
Salt and coarse black pepper
4 cloves garlic, cracked away from skin with a whack against the flat of your knife

Coat chicken in balsamic vinegar, then olive oil. Season chicken with rosemary, salt and pepper and let stand 10 minutes. Heat a medium nonstick skillet over medium high heat. Add chicken breasts and cracked garlic to the pan. Cook chicken 12 minutes, or until juices run clear, turning occasionally. The balsamic vinegar will produce a deep brown, sweet finish on the chicken as it cooks.

Meal Planning Monday: 12.29.08

Monday, December 29th, 2008

Here has been our menu plan for the past two weeks with recipes!

1. Deli Sandwiches With Chips (for shopping day)

2. Herb Baked Tilapia, Rice, & Corn

3. Roasted Chicken, Mashed Potatoes, & Peas

4. Rotini Pasta With Turkey Meatballs & Garlic Bread

5. Poppy Seed Chicken Casserole Over Egg Noodles (Scroll Down to View)

6. Sloppy Giuseppes With Oven Fries (Scroll down to Meal #8)

7. Ground Beef Tacos With Tortilla Chips

8. Italian Chops Over Spaghetti

9. Yeast Waffles with Orange Juice

10. Chicken Enchiladas With Homemade Enchilada Sauce

11. Skillet Chicken & Ziti with Broccoli & Homemade Breadsticks

12. French Bread Pizzas

13. Chicken Parmesan Over Spaghetti

14. Chicken Wings, Celery with Ranch, & Cheese Quesidillas

*************************

Please visit “I’m An Organizing Junkie” for a round-up of great menu plans!

Our Birthday Brunch Bash (With Recipes)

Monday, December 22nd, 2008

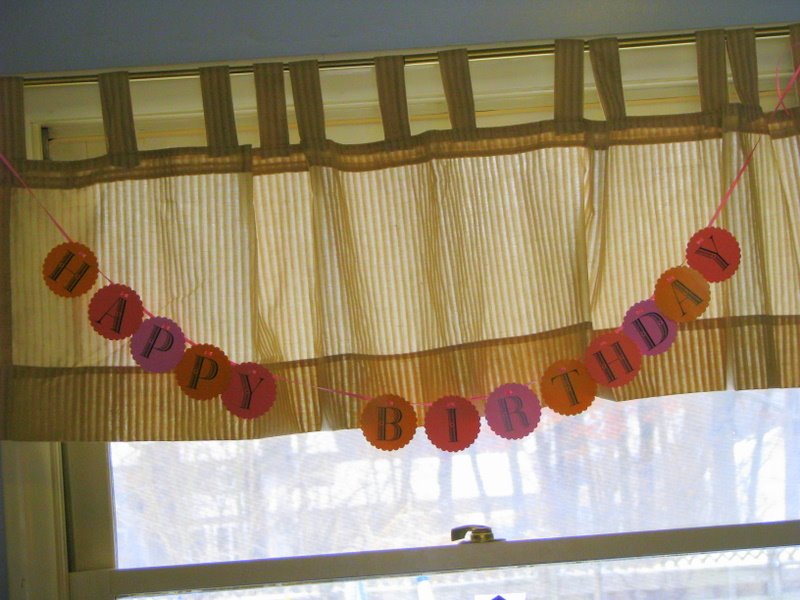
Our famous birthday banner was hung high this weekend for Emily’s 3rd birthday. Sprinkled all over the house were purple birthday balloons and pretty purple ribbons tied on anything and everything that I could tie to. In the background was playing a slide show of our sweet Emily (thanks to my friend Rachel for that great idea!) with a collection of photos of our sweet girl growing up.

Just before her party, Emily and Ethan bonked heads so hard that they both were crying uncontrollably leaving Ethan with a goose egg on his forehead and Emily with what appears will soon be a black eye. That is always good for those birthday photos!

The anticipation of waiting for our guests was almost too much to bear. The roads were sheets of ice and accidents were witnessed by many of our party guests on their way to Emily’s party. We were so thankful to everyone that came and drove on the treacherous roads for our celebration.


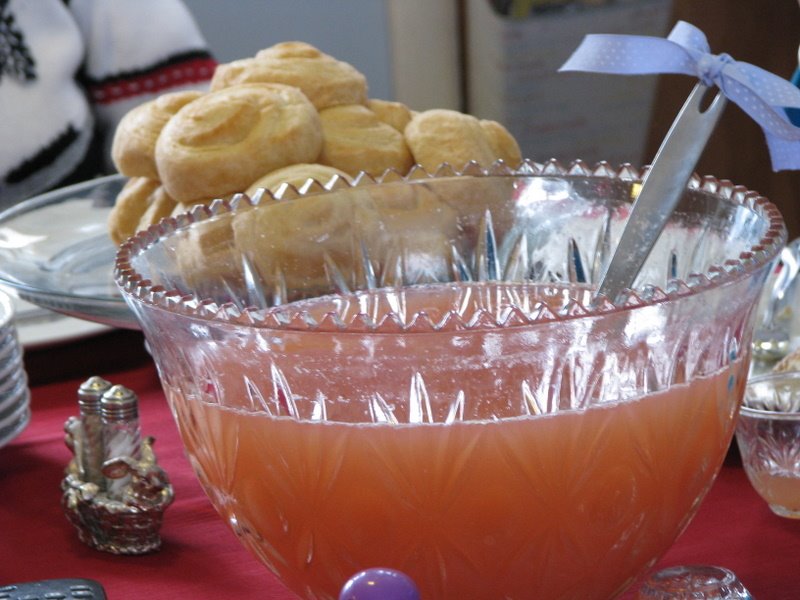
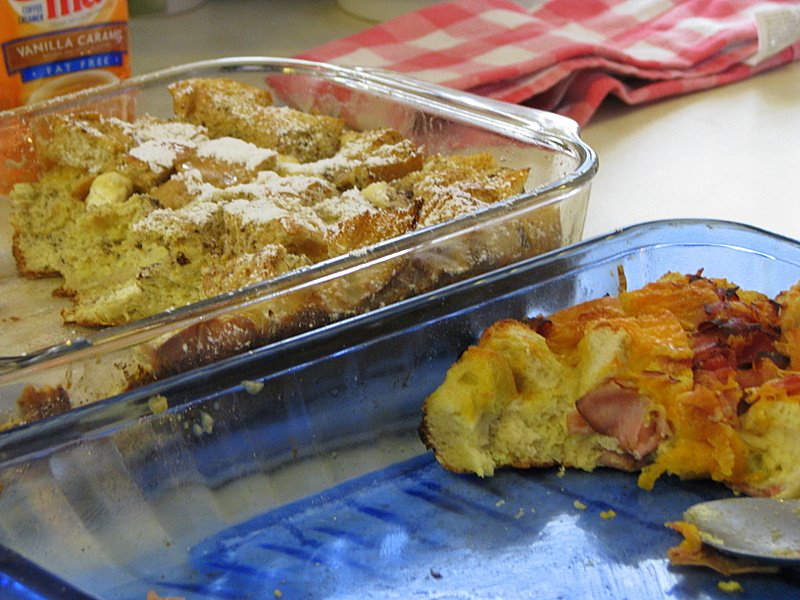
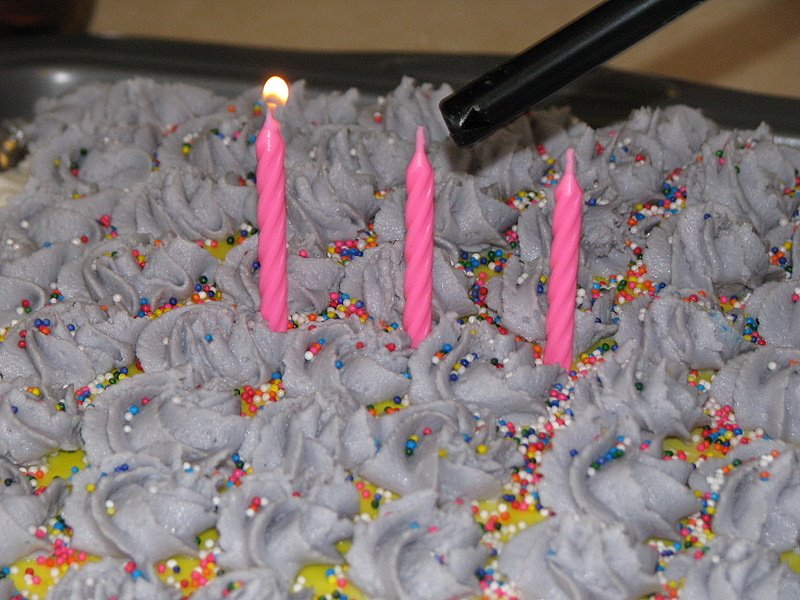
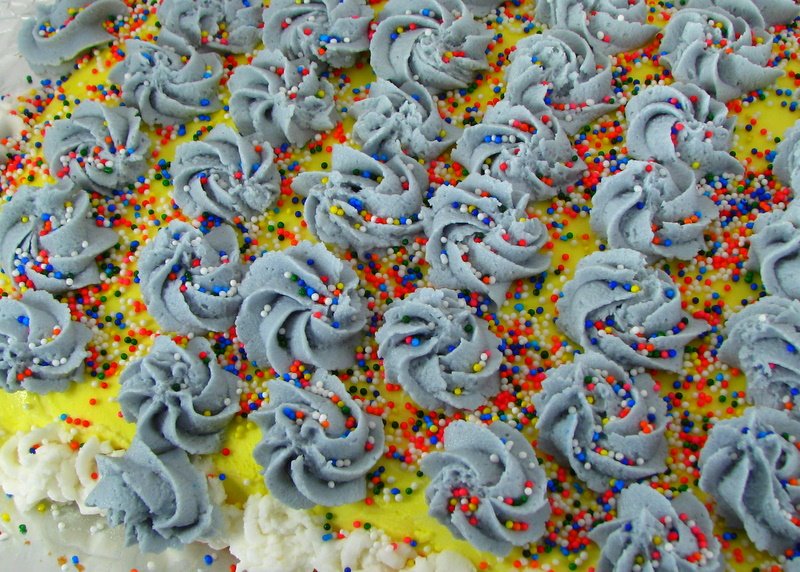
I decided to do a brunch this year because I could prepare all of the food the day before and brunch is an economical dish to serve for a crowd. I made an Overnight Breakfast Casserole, a French Toast Souffle, Holiday Punch, and purchased (at a 40% discount on the marked down items in the bakery) croissant pinwheels, coffee with flavored creamers/syrups, and our birthday cake. All in all, I spent about $30 on all the food & decorating supplies to serve sixteen people. We kept it simple by just inviting family this year and opting for some playgroup fun around the holidays instead of a friend party.

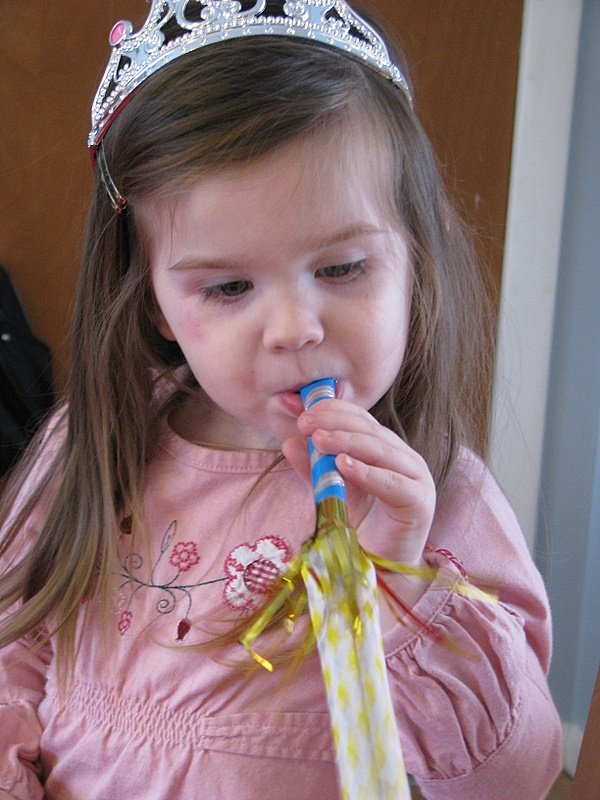
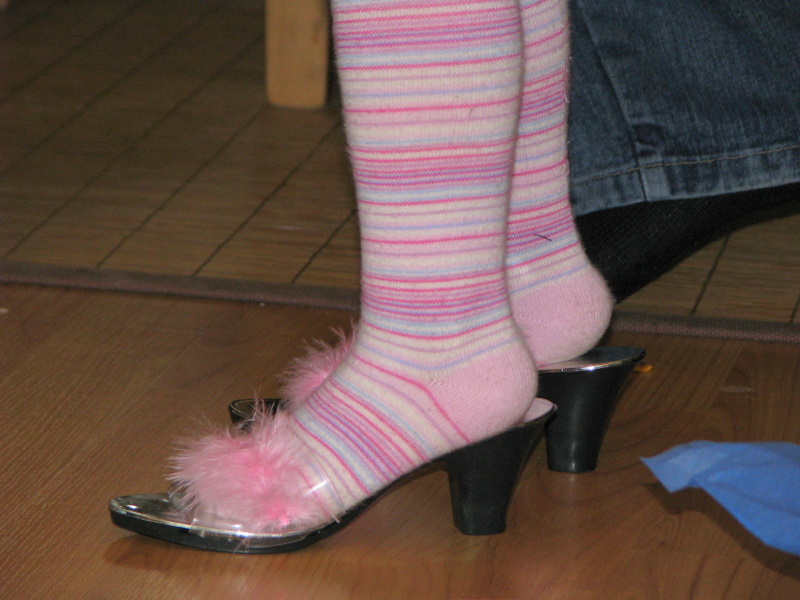
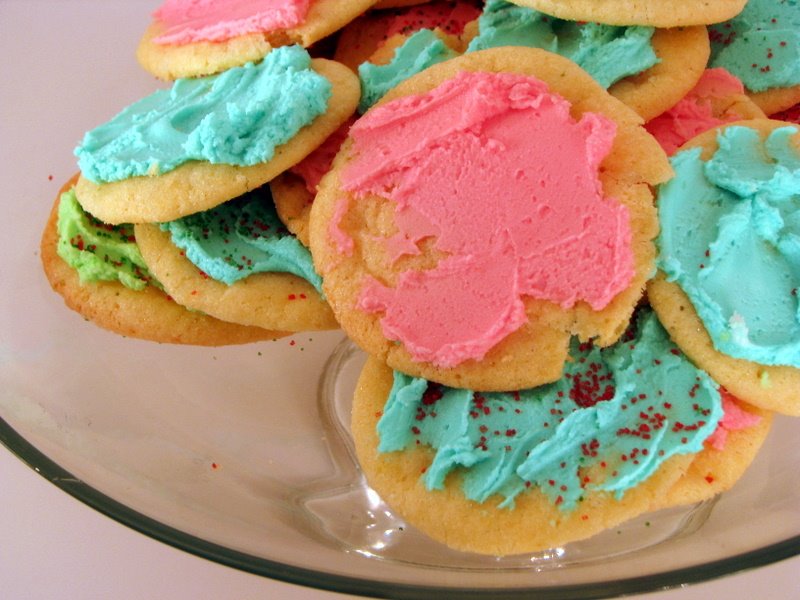
Emily opened her presents which were filled with more princess stuff than you could shake a wand at. The hit of the party, a very special pair of princess shoes of which I am quite sure she will be toppling over and getting a matching black eye as she traipses along her imaginary runway.

Happy 3rd birthday, Miss Emily! You are loved and adored by all who have the pleasure of knowing you!

French Toast Souffle

10 cups white bread cubes (I used a loaf of French Bread)
2 Tablespoons each of sugar and cinnamon
1 (8 ounce) package low fat cream cheese, softened
6 eggs
1 1/2 cups milk
2/3 cup half-and-half cream
3/4 cup maple syrup
1/4 cup brown sugar
1 t cinnamon
1 t nutmeg
1/2 teaspoon vanilla extract
2 tablespoons confectioners’ sugar
Maple Syrup for topping

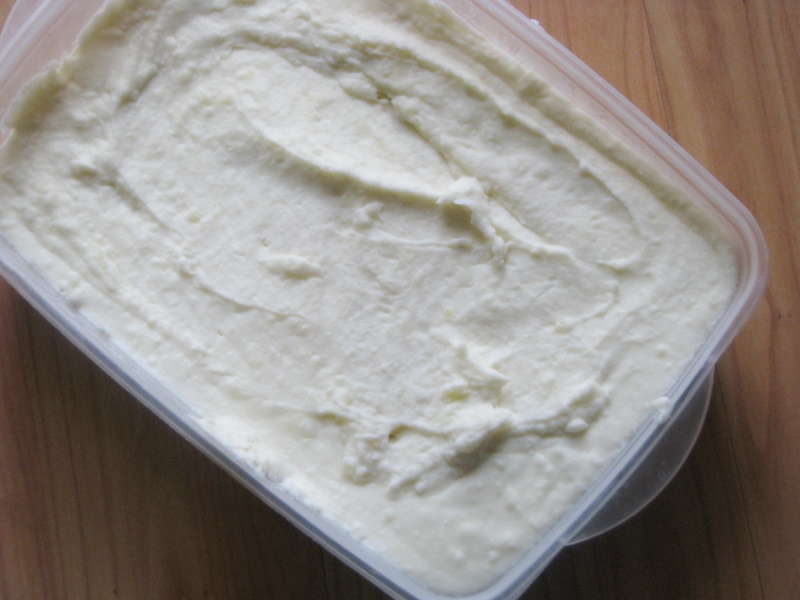
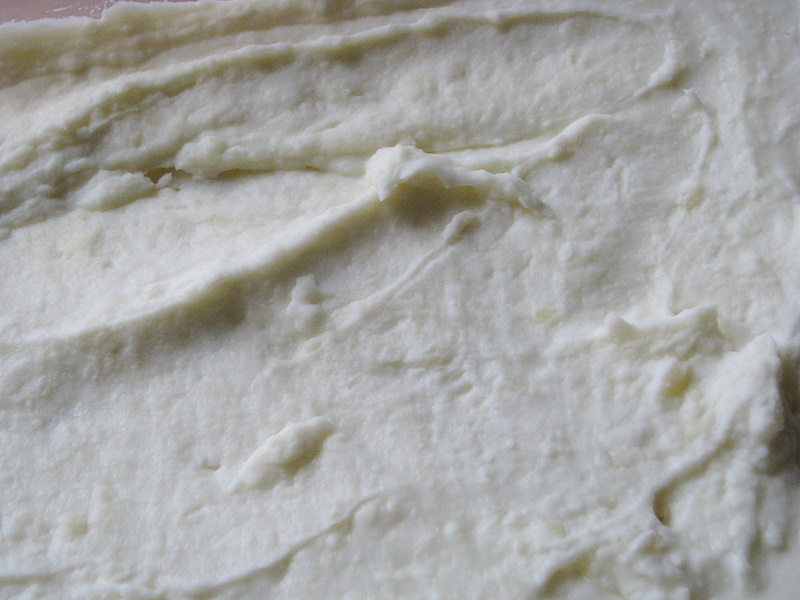
Place bread cubes in a lightly greased 9×13 inch baking pan. Pour sugar and cinnamon on the bread and lightly toss with your hands. In a large bowl, beat cream cheese with an electric mixer at medium speed until smooth. Add eggs one at a time, mixing well after each addition. Stir in milk, half and half, maple syrup, cinnamon, nutmeg, brown sugar, and vanilla until mixture is smooth. Pour cream cheese mixture over the bread; cover, and refrigerate overnight. The next morning, remove souffle from refrigerator, and let stand at room temperature for 30 minutes. Meanwhile, preheat oven to 350 degrees. Bake, uncovered, for 45 minutes in the preheated oven, or until a knife inserted in the center comes out clean. Immediately after removing from the oven, drizzle maple syrup over the top (it will melt into the souffle). Using a sifter, shake the powdered sugar all over the top.

Side Note: I had some trouble with the cream cheese mixing in & not making it look curdled so I followed another recipe that suggested leaving the cream cheese as a block and cutting small cubes of cream cheese to dollop between the layers of bread. You can do whichever you prefer!

Overnight Breakfast Casserole

1 pound sliced ham (lunch meat)
2 teaspoons mustard
½ teaspoon salt
4 eggs, beaten
2 cups milk
6 slices white bread, toasted & cut into cubes
8 ounces mild cheddar cheese

In a medium bowl, mix together mustard, salt, eggs, and milk. Add the ham (cut into cubes), bread cubes, and cheese, and stir to cat evenly. Pour into a greased 9×13″ baking dish. Cover & chill in the refrigerator for eight hours, or overnight. Preheat oven to 350 degrees. Cover and bake 45-60 minutes. Uncover and reduce temperature to 325 and bake for an additional 30 minutes or until set.

Amy’s Holiday Punch

1 (2 liter) bottle cherry 7-Up soda
1 liter (half a bottle) raspberry flavored soda (I found this at Walmart)
1 (12 ounce) can frozen lemonade concentrate
1 (12 ounce) can frozen pink lemonade concentrate
1 (1 liter) can pineapple juice

Mix all the ingredients together for the punch. This will fill one large punch bowl or two smaller ones. Rum can be added
for a spiked punch, but that would be super inappropriate for a princess party! This will convert the non-punch lovers in the group, I promise!
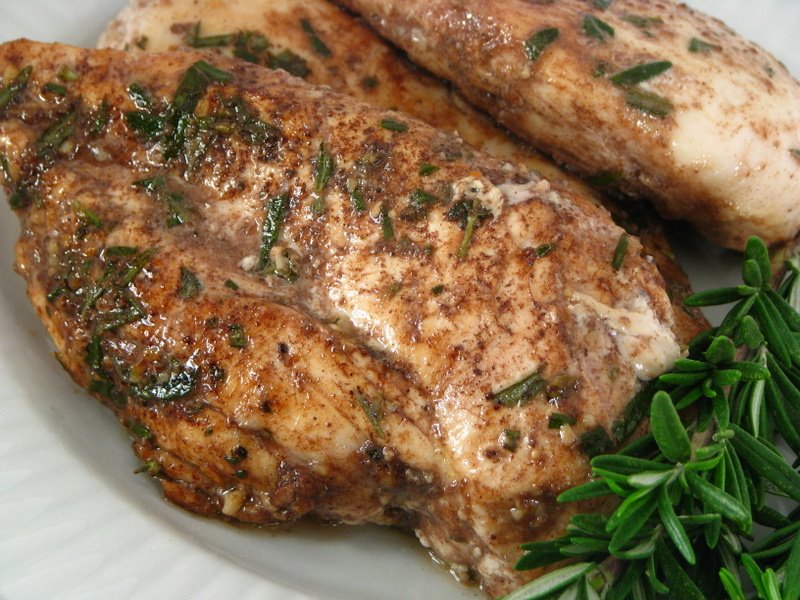
Lovely Little Birthday Cake

Monday, December 22nd, 2008


Emily celebrated her third birthday this weekend and made a few special birthday requests. She wanted presents, a party hat, a purple cake, and purple balloons.

I headed over to Michael’s and got the supplies to make this cake. I baked a white cake (using the white cake mix from Aldi) and baked it in a 9×13″ pan. While the cake baked, I made two batches of frosting. I tinted one cup of frosting white, two cups yellow, and three cups purple.

I let the cake cool and then popped it in the freezer (I froze mine overnight). In the morning, I put on a layer of yellow frosting and then piped rosettes as a border on the cake. The top was then covered in purple rosettes and then sprinkled generously with rainbow sprinkles.

To make the rosettes, I used a 1M tip bought at Michael’s. If you desire a smaller size rosette, you can use a #18 tip, which would be great for cupcakes or adding a little addition to your border.

To make a rosette, fill your piping bag with icing. Hold your bag at a 90 degree angle, with the tip slightly above the surface. Squeeze out the icing to form a star and without releasing pressure, move the tip in a tight complete rotation, starting at 9:00, moving to 12:00, then to 3:00, then 6;00, and then end it back at 9:00. Stop the pressure and lift your tip away. To see how to make these in pictures, I found this great little tutorial. If you want to fancy up the rosettes, you can add a dot in the center in a contrasting color.

I am no pro at cake decorating, but I have found the cake decorating classes offered by craft stores to be an invaluable tool to help me feel more confident in making birthday cakes for my children. It has really helped when my kids have come up with more unusual cake requests (like a Lego cake, for example) and it has saved us a lot of money over the years.

Here is the recipe for the frosting that I used for this cake!

Buttercream Frosting Recipe

1/2 cup solid vegetable shortening
1/2 cup butter or margarine
1 teaspoon vanilla extract
4 cups sifted confectioner’s sugar (approximately 1 pound)
2 tablespoons milk

Cream the butter and shortening with an electric mixer. Add vanilla. Gradually add the sugar, one cup at a time, beating well on medium speed. Scrape sides and bottom of bowl often. When all the sugar has been mixed in, the icing will appear dry. add milk and beat at medium speed until light and fluffy. (Yields 3 cups). Store icing in the refrigerator when not in use. Rewhip before using.

For Chocolate Buttercream Icing: Add 3 oz. melted unsweetened chocolate and 1 tablespoon more milk to the Buttercream Icing recipe.

For Stiffer Frosting (if needed when decorating): Substitute all vegetable shortening and 1/2 teaspoon butter flavoring.

Do you make birthday cakes or opt to buy them? What are some ways you save money on birthday celebrations?

Our Favorite Cocoa Mix

Monday, December 15th, 2008

A good cocoa mix is harder to make than it might seem. I like my hot chocolate to be the right balance of creamy and chocolate goodness. It needs to be yummy enough on it’s own, but also be able to endure my loads and loads of whipped cream and marshmallows.

After trying and testing many variations in our house, we finally have determined that this is the best cocoa mix of all. It is the perfect ratio of everything and can make a fabulous gift to give to someone special in your life.

Most of the items, I am sure, you will find lurking in your pantry. We store ours in a thrifted jar with some festive ribbon. As a special Friday night treat, I load up a breakfast tray with all the fixings and mix up a batch of this to enjoy with a little popcorn. It is our holiday tradition that I hope the kids will remember. This recipe is tucked away in my holiday journal to give to them when they are older. I hope they will someday be serving this same mix to their own children. Ah, a girl can dream can’t she?

Hot Cocoa Mix

4 cups nonfat dry milk powder
1 1/2 cups sugar
1 cup non-dairy coffee creamer
2/3 cup unsweetened cocoa powder
1 (4 ounce) package instant chocolate fudge pudding

Mix all the ingredients together in a large bowl. If a finer consistency is desired, you can pour the mix into a blender or food processor and run it through that. Store in an airtight container. Add 1/4 to 1/2 cup (depending on your cocoa preference) of the mix to an 8 ounce mug of boiling water.

Rotini With Turkey Meatballs

Monday, December 15th, 2008


Ever since my son was a little boy, he would curl up with me and watch a marathon of Food Network on Sunday afternoons. It has been our little thing for years. He will bury his head into the crook of my arm, snuggle under the blanket, and talk food with me. Will these days end? I hope not for a long time!

One day as we watched episode after episode of Everyday Italian he looked at me and said, “Mommy, can we make that?” The dish was relatively healthy and could be adjusted with ingredients in our pantry so our version of Giada’s dish was recreated in our kitchen together. I can think of no better way to spend a Sunday afternoon than cooking with my son.

This is our version of Orecchiette with Mini Chicken Meatballs– our new family favorite that is gobbled up by all!


Rotini With Turkey Meatballs

Meatballs:
1/4 cup plain bread crumbs
1/4 cup chopped fresh flat-leaf parsley
2 large eggs, lightly beaten
1 tablespoon whole milk
1 tablespoon ketchup
3/4 cup grated Romano (or Parmesan)
3/4 teaspoon salt
3/4 teaspoon freshly ground black pepper
1 pound Italian turkey sausages (remove the casings)

Pasta & Sauce:
1 1/2 cups low-sodium chicken stock, hot
4 cups cherry tomatoes, halved
1/2 cup freshly grated Parmesan
1 pound rotini pasta

Bring a large pot of salted water to a boil over high heat. Add the pasta and cook until tender but still firm to the bite, stirring occasionally, about 8 to 10 minutes.

In a medium bowl, stir together the bread crumbs, parsley, eggs, milk, ketchup, Romano cheese, and the salt and pepper. Add the turkey and gently stir to combine. Using a melon baller (or a teaspoon measure), form the chicken mixture into 3/4-inch pieces. With damp hands, roll the chicken pieces into mini meatballs.

In a large (14-inch) skillet, heat the oil over medium-high heat. Working in batches, add the meatballs and cook without moving until brown on the bottom, about 2 minutes. Turn the meatballs over and brown the other side, about 2 minutes longer. Add the chicken stock and tomatoes. Bring to a boil. Using a wooden spoon, scrape up the brown bits that cling to the bottom of the pan. Reduce heat to low and simmer until tomatoes are soft and meatballs are cooked through, about 5 minutes. Drain the pasta, reserving about 1 cup of the pasta water. Transfer pasta to a large serving bowl and add the Parmesan. Toss to lightly coat the pasta, adding reserved pasta water, if needed, to loosen the pasta. Add the meatball mixture. Gently toss to combine.

Alternative to Pan-Frying Meatballs: Make your meatballs the standard size and put them on a baking sheet. Bake at 400 degrees for ten to fifteen minutes. Heat chicken stock and tomatoes and bring to a boil. Let them cook as directed and then drop in the baked meatballs for a few minutes. This is less mess and less calories!

My Favorite Frosted Sugar Cookies

Monday, December 8th, 2008

I love decorating cookies with the kids and these are a batch that we whipped up this past week. We let the kids have a decorating extravaganza and they were able to not only decorate our tree, but also decorate these cookies too.

These cookies would be great just plain and rolled in sugar, but I am frosting girl myself. I just can’t resist a smear of frosting on a sugar cookie.

With a little frosting and a shake of sprinkles, these cookies rival those yummy sugar cookies at the mall. May I recommend not rolling them in sugar though if you are doing the frosting? It is a little too much sugar even for the sugar-addicts in the group.

Soft Sugar Cookies

2/3 cup butter-flavored shortening
2/3 cup butter
1 1/2 cups sugar
2 eggs
2 teaspoons vanilla extract
2 1/2 cups flour
2 teaspoons baking powder
1 teaspoon salt

Preheat oven to 350 degrees. In a bowl, cream together butter, shortening, and sugar. Stir in the eggs and the vanilla. Combine flour, baking powder and salt and add these to the creamed mixture. Chill dough for one hour in a bowl covered with plastic wrap. Roll dough into walnut size balls and roll balls in sugar (unless frosting). Place on an unprepared cookie sheet. Bake ten to twelve minutes or until the bottoms are lightly browned. Remove from sheets and allow to cool.

Sugar Cookie Frosting

4 cups confectioners sugar
1/2 cup shortening
5 tablespoons milk
1 teaspoon vanilla extract
Food coloring

In a large bowl, cream together confectioners sugar and shortening until smooth. Gradually mix in milk and vanilla with an electric mixer until smooth and stiff, about five minutes. Color with food coloring if desired.

Do you have a favorite holiday cookie or holiday cookie recipe you would like to share? I would love to see what graces your cookie platters!

Storage for Thanksgiving Leftovers

Tuesday, November 18th, 2008


I am saving all of my yogurt, sour cream, and whipped topping containers for our Thanksgiving feast. I found a bunch of them in my fridge with a scoop of this and a dab of that in them.

These were run through the dishwasher and are now waiting for all of those Thanksgiving leftovers. I am sure our guests will want to take home some of the leftovers from our feast so I am making sure we are prepared this year. No one likes the burden of returning a dish so these will make the perfect containers to send home all of the goodies without the hassle. Best of all, we are putting these containers to good use rather than adding them to the recycle bin.

If you were feeling ambitious, you could cover them with scrapbook paper. I, however, feel hosting Thanksgiving dinner is ambitious enough and I hope our guests will appreciate the thoughtful gesture of having these containers to enjoy a little of the feasting in their own home.

Make-Ahead Mashed Potatoes

Monday, November 17th, 2008


This will be my first year hosting the family Thanksgiving dinner so I am working on putting our food together to pop in the freezer so I can enjoy the day free from worries about everything getting done. What is one of my least favorite things to make? Mashed potatoes! I find them to be a little labor-intensive and they can dirty a lot of pots. It is a Thanksgiving staple though so I thought I would figure out how I could make them ahead of time.

I had found a recipe for mashed potatoes that not only freeze beautifully, but they also can be reheated on low in the slow cooker. Both of these qualities make them a winner because I can keep the oven freed up for the other dishes and I can make them early.

Here is my recipe, adapted to our personal taste, perfect for any holiday get together! These are creamy and have a hint of tang to them from the sour cream. Sprinkle with a little paprika, if you so desire, and enjoy the convenience of pulling these out of your freezer for this holiday season.


Make-Ahead Mashed Potatoes
Serves 15

5 pounds of potatoes
1 block (8 oz) of low-fat cream cheese, softened
3/4 cup low fat sour cream
4 tablespoons butter
3/4 cup milk (or more if desired)
1 1/2 teaspoons salt

Peel potatoes and cut into small cubes. Throw the potatoes in a large pot filled with cold water. Cook for 25 minutes or until fork-tender. Drain the potatoes and put them back into the hot pot. Add cream cheese, butter, milk, and salt. Mash with a potato masher or use a hand mixer to whip the potatoes. Spoon mixture into a freezer-safe container and label.

Thanksgiving Day: Put potatoes in the fridge 1-2 days before to allow them to completely thaw. Spray slow cooker with cooking spray and put potatoes in the slow cooker. Brush the top of the potatoes with a tablespoon of butter and sprinkle with paprika. Cook on low for two to four hours.

If you would rather bake these, bake the potatoes at 350 degrees for thirty to forty minutes or until completely hot.

This side dish was entered in the Frugal Thanksgiving Mini-Series hosted by Frugal Upstate. Be sure to visit for more great Thanksgiving meal ideas!

Notebook Experiments: Can I Make a Juicy Turkey Burger?

Thursday, November 13th, 2008

Experiment: Can I make a juicy turkey burger?

Experiment Taken From: Notebook Entry 10.23.08

Materials Needed: Please see Serious Eats for the full instructions. I followed the instructions exactly and made my turkey burgers in my stainless steel cookware because it is was roomier than the cast iron skillet I have.

Results: I was really excited to try this turkey burger recipe because every turkey burger I have ever tried seems to come out really dry. I was really intrigued by the ingredient list and that there were no eggs or milk involved (as my past recipes) and instead the only binding agent was ricotta cheese.

I am really not a fan of ricotta cheese, but I was willing to give this a try. I was very worried the ricotta would add a gritty texture to my burger (especially with 1/2 a cup of ricotta in there) and I was also worried how it would go over with the rest of the family.

I prepared the burgers as instructed and cooked them for four minutes on each side. I then reduced the heat with the lid cracked for ten minutes and then served them up on bakery buns with a slice of cheese and ketchup.

These were the best turkey burgers I have ever eaten in my life. They were moist and flavorful all the way through. Even the protesters in my family who said they would not eat one of my burgers finally relented and ate everything on their plate.

We all agreed that we could not taste the ricotta at all, but could only taste the meat and a hint of mustard that was incorporated in the mix.

Conclusion:I will be making these over and over again for my family. It was a great quick meal to put together and served with apple slices, it was a great meal for the entire family. Thanks to Serious Eats for sharing this recipe idea!

********************

I am so excited to open our Notebook Experiments up to everyone and I hope that you will be able to participate this week or in weeks to come! I will be posting this each Thursday so please mark your calendars if you plan to participate. You can post your entries at any time throughout the week and then leave your entry in the links below.

We have this handy banner that you are more than welcome to use, but it is not a requirement! It is just something you can add to add a little sparkle to your entry.

Rules for Participation:

1. Choose anything from any of our notebook entries (past or present) to do with your family. We have hundreds of bookmarked links of crafts, ways to save money, and organizing ideas.
2. Complete an experiment from the notebook and share about it on your blog or website. We would love to see pictures of what you accomplished or a detailed description of how your projects turned out. Please include a link to this entry, a link to the original posting of the entry (at the original crafster’s blog), and (to help us relocate the project) the date or link of the notebook entry where you found it. You can use the same formatting as our entries or you can just include that information in your post in your own unique way!
3. Post a link below. Please include your name or blog name & a fast description of your project. Example- MomAdvice (WHO bread)

I can’t wait to see what you create and what you find inspiring!