Archive for the ‘Food & Recipes’ Category

Gluten-Free Meatball Sub Game Day Appetizer

Monday, October 5th, 2015

Gluten-Free Meatball Sub Game Day Appetizer from MomAdvice.com

*This post is sponsored by Walmart. Thank you for supporting the companies that support this site!

Gluten-free and game day parties? Oof. Not fun, friends, not fun at all! I have learned a lot about social engagements like this though and know the best defense to any social gathering is to carry around my own dishes and drinks so I never go hungry or thirsty again. You will rarely see this girl without her own food!

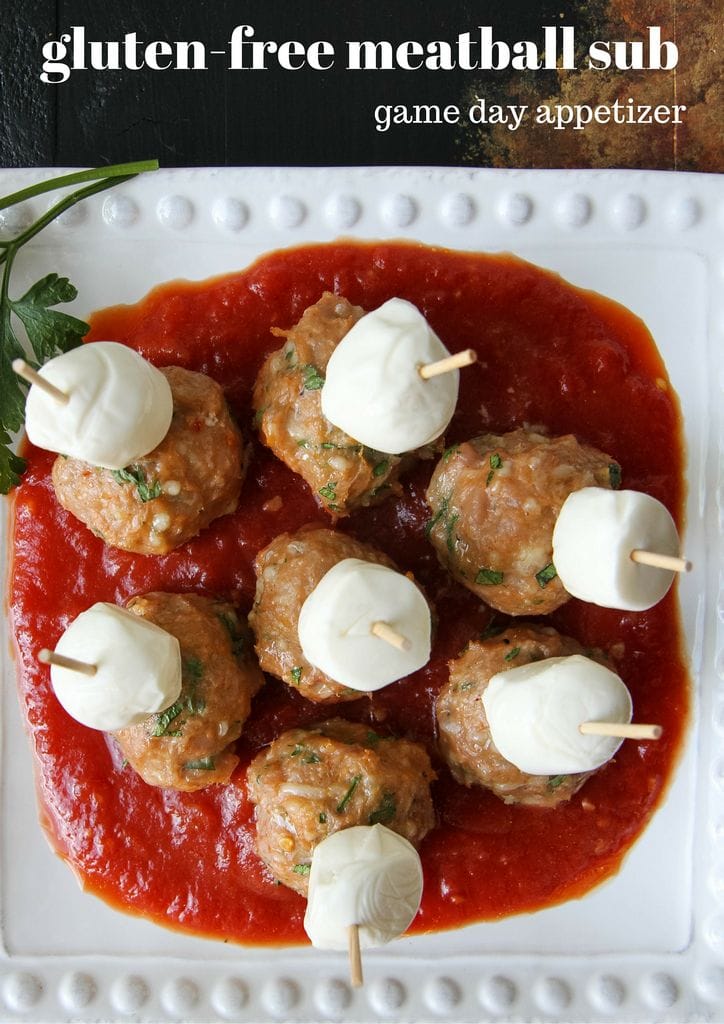
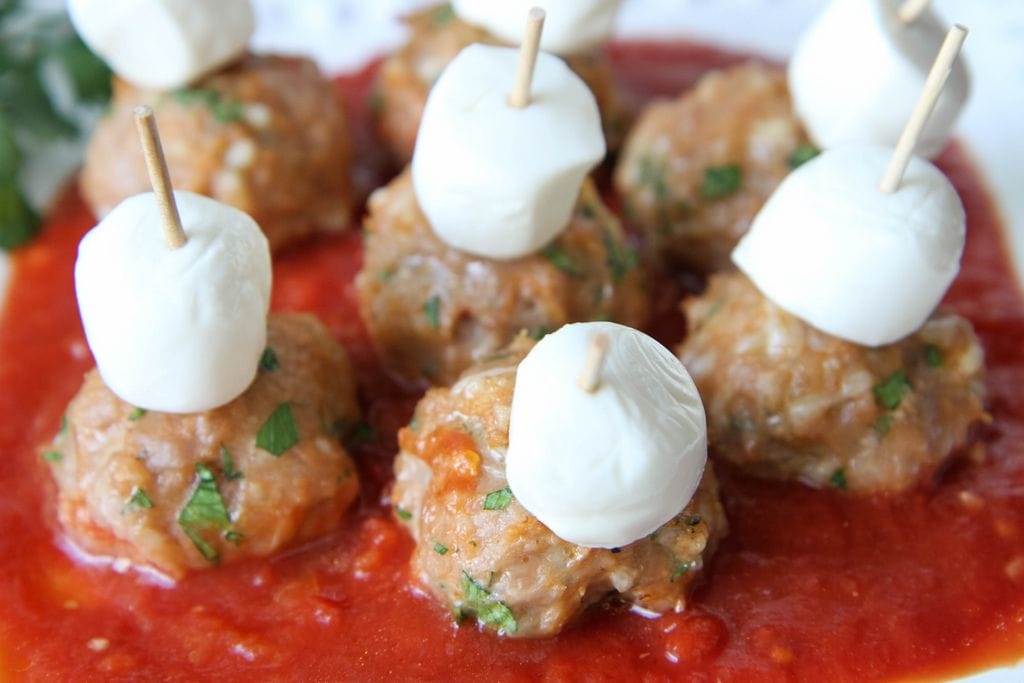
Game day food is delightfully rich and comforting which is why I love it so darn much.  Today I wanted to create an appetizer that echoed those feelings of comfort and what could be more comforting than a pile of homemade meatballs? This meatball sub appetizer is gluten-free, but I promise you would never know it. It’s got everything I love in a meatball sub simply minus the bread.

Gluten-Free Meatball Sub Game Day Appetizer from MomAdvice.com

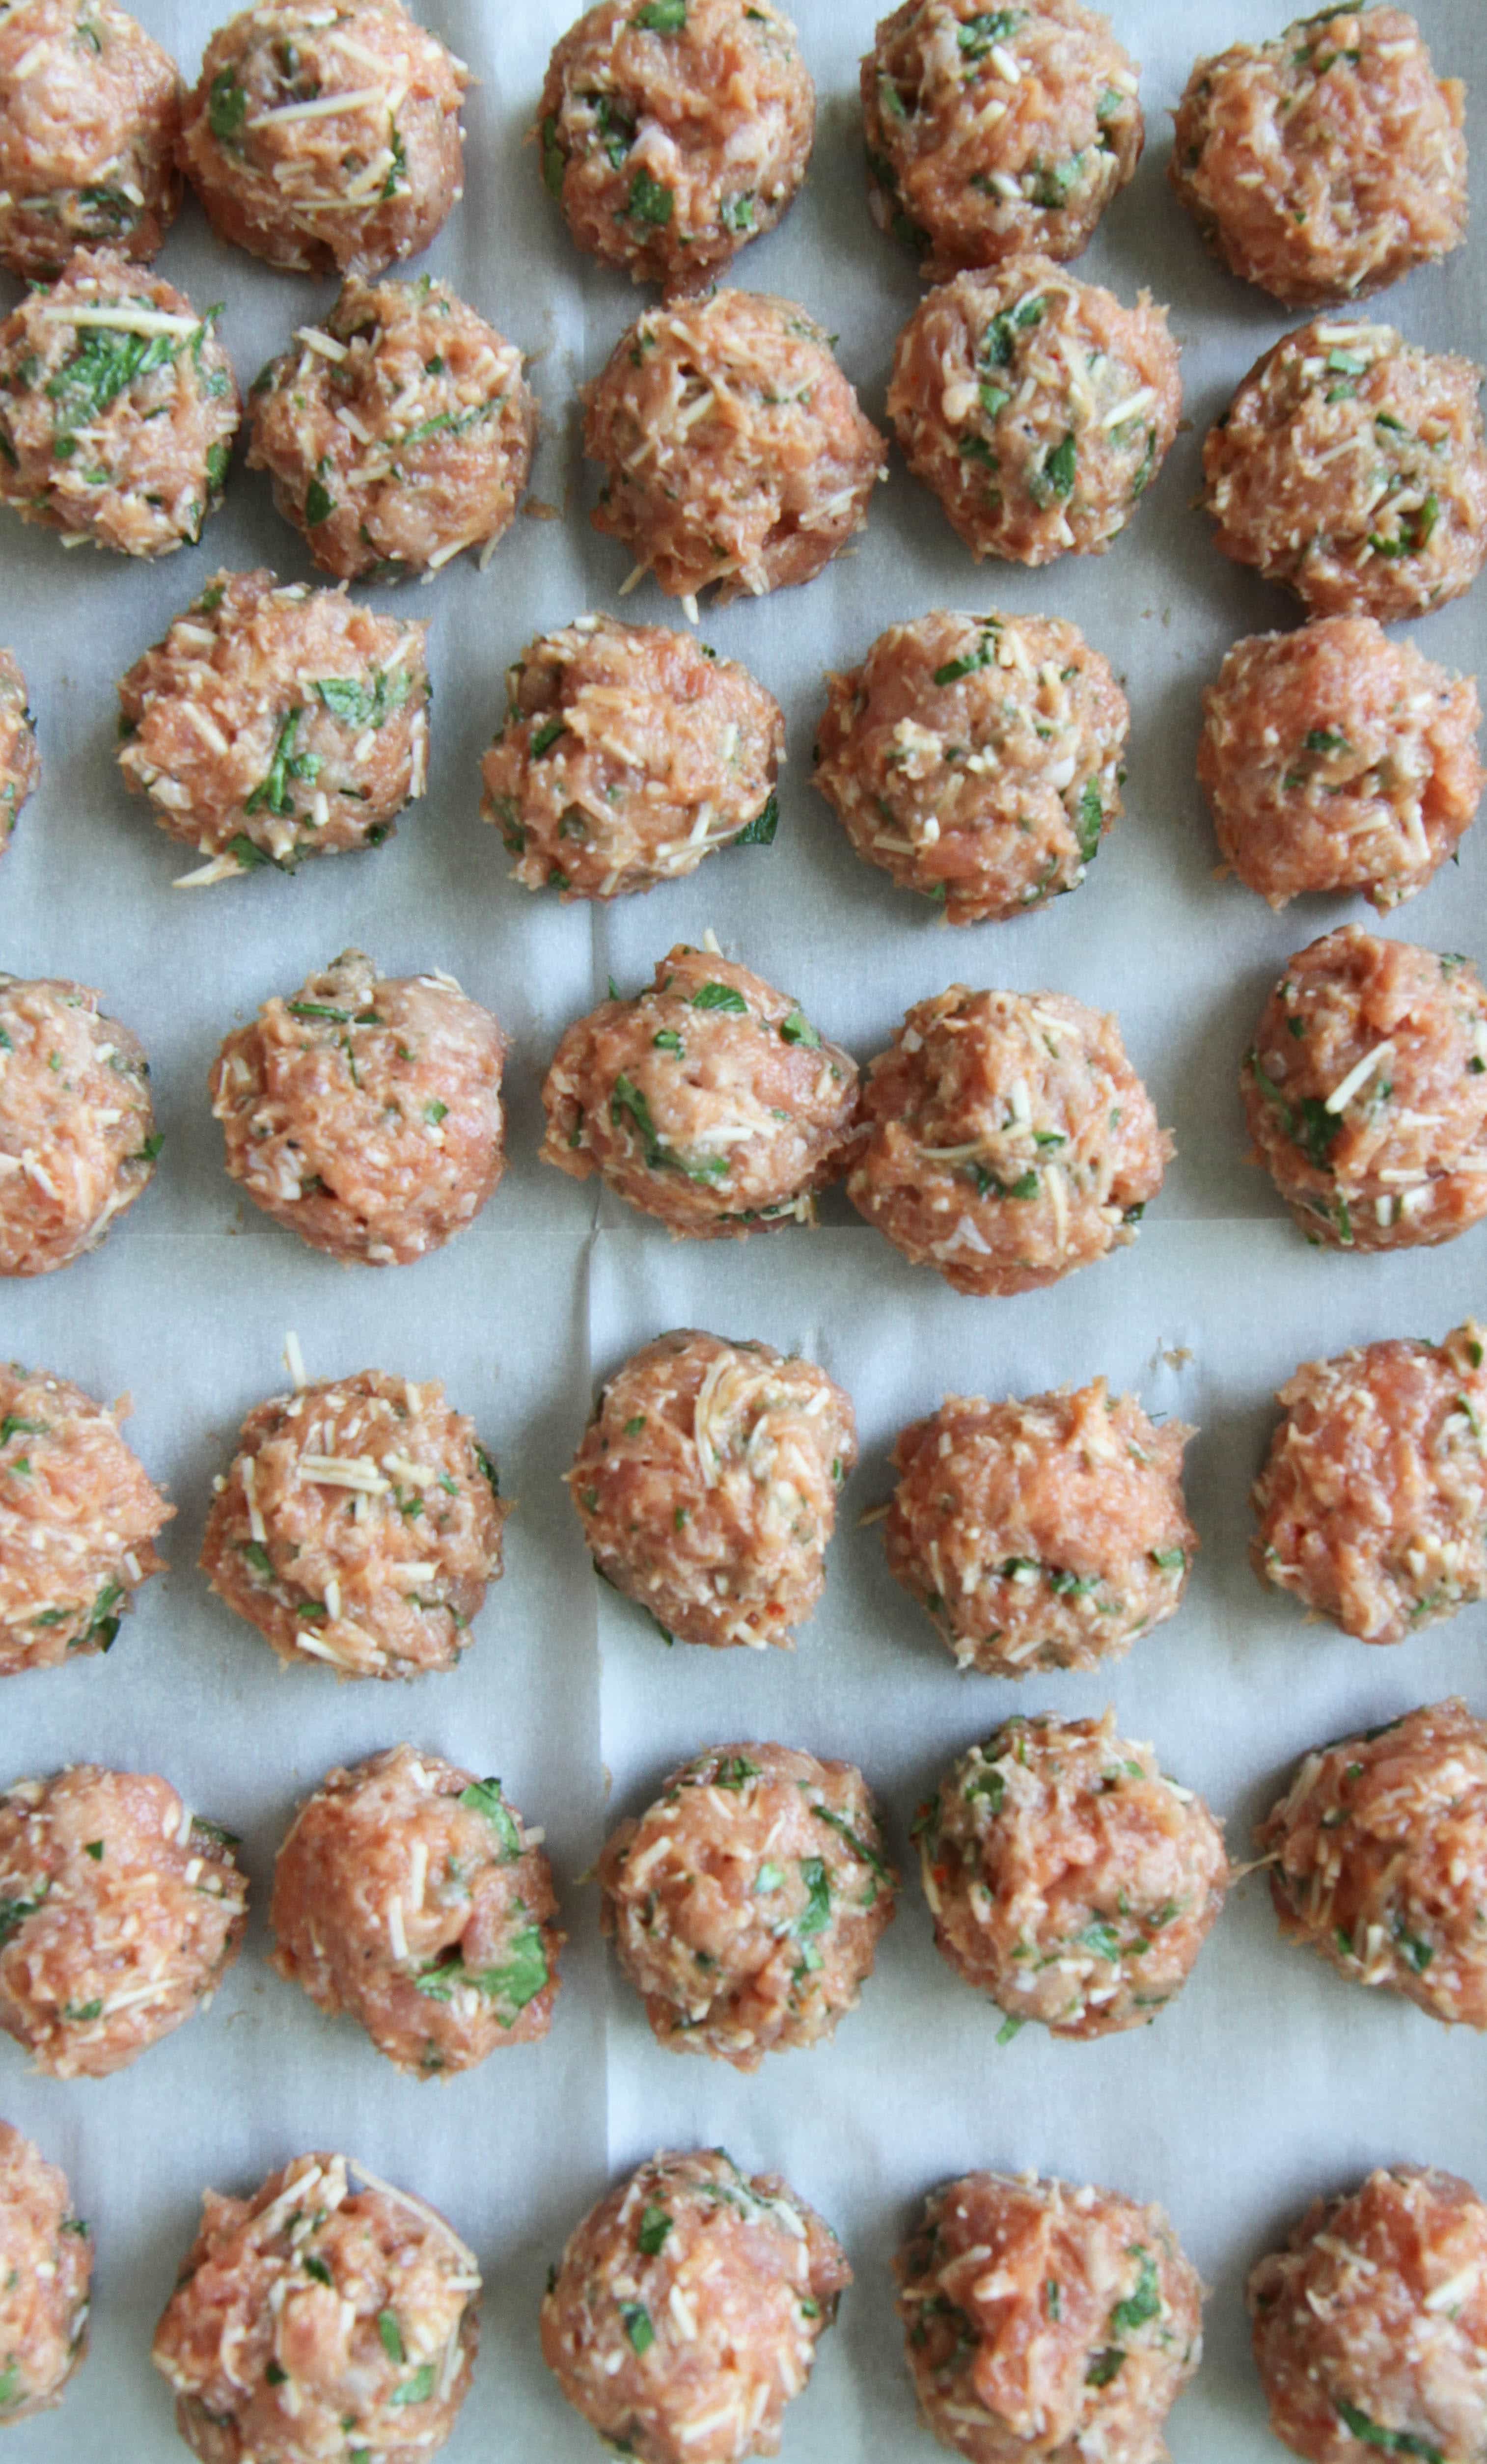
I’ve made meatballs a lot over the years (here is one of our favorite dinner dishes that we created together using my standard meatball recipe), but this was my first time trying to create a meatball without the addition of breadcrumbs or panko. With a blend of turkey sausage and ground turkey, I then mixed in fresh parsley, parmesan cheese, a little tomato sauce, and two eggs to bind it all together. I have a cookie dough scoop that I used to make sure all the meatballs were roughly the same size (and so they would fit on my toothpick).

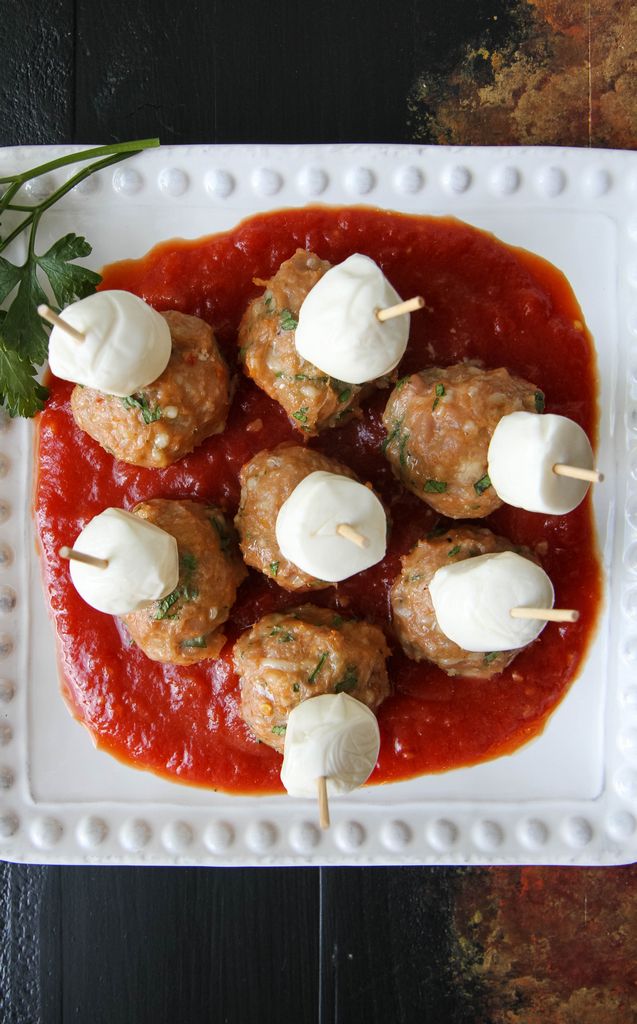
These meatballs are a little more delicate without the breadcrumb binder so I baked them on a parchment-lined cookie sheet so that they would lift easily and not fall apart. Not only does this help the meatball hold its shape, but it also helps cut down your kitchen clean-up time. I would call that a game day win!

Gluten-Free Meatball Sub Game Day Appetizer from MomAdvice.com

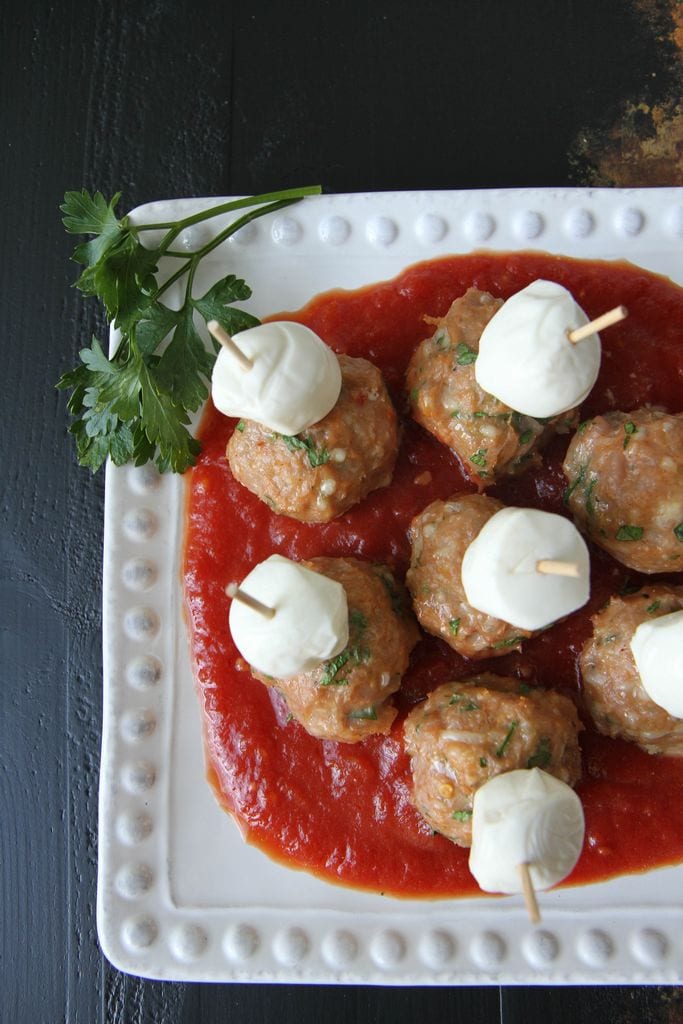
Canned crushed tomatoes, garlic, salt, and a dash of sugar yield a vibrant sauce to nestle this appetizer in. I have tried a million different brands of canned crushed tomatoes over the years and I swear by the Great Value brand ones at Walmart. I don’t know why, but it always yields the best pizza sauce for me! I try not to use anything else.

What’s Your Favorite Game Time Recipe?

Are you feeling inspired? Do you have an incredible dish that everyone looks forward to on game days? Walmart happens to be running a GameTime Recipe contest and would love for you to post a photo of your favorite game time recipe on Instagram or Twitter using #WalmartMVPContest. By doing this, you will be entered to win a trip to LA to go to the YouTube studios to have a pre-Superbowl party and create content with some big YouTube stars. How cool is that? Read here for all the official rules! Need some inspiration? Check out all of the great GameTime Recipes that have been posted!
In the meantime, I hope you will enjoy this gluten-free game time creation I have created for you!
Gluten-Free Meatball Sub Game Day Appetizer from MomAdvice.com

Gluten-Free Meatball Sub Game Day Appetizer from MomAdvice.com

Gluten-Free Meatball Sub Game Day Appetizer from MomAdvice.com

Gluten-Free Meatball Sub Game Day Appetizer
Prep time:
Cook time:
Total time:
Serves: 33 meatballs
Ingredients
  • 1 pound ground turkey
  • 1 pound Italian turkey sausage
  • 1/4 cup Parmesan cheese
  • 1/4 cup parsley
  • 1/4 cup tomato sauce
  • 2 eggs
  • Salt and pepper
  • 2 packages baby mozzarella balls (over in the specialty cheese cooler by the deli)
  • 1 can crushed tomatoes
  • 2 tablespoons olive oil
  • 2 teaspoons minced garlic
  • 1 teaspoon sugar
  • 1 teaspoon salt
  • toothpicks
Instructions
  1. In a medium bowl, stir together the ground turkey, parsley, eggs, Parmesan cheese, garlic, salt & pepper, and tomato sauce. Stir gently to combine.
  2. Make your meatballs the standard size and place them on a parchment-lined baking sheet.
  3. Bake at 400 degrees for ten to fifteen minutes (this size took 12 minutes).
  4. Meanwhile, in a pot heat olive oil and add your minced garlic, cooking for just one minute.
  5. Add your crushed tomatoes, the remainder of your small can of tomato sauce, sugar, and salt. Allow this to simmer for ten minutes.
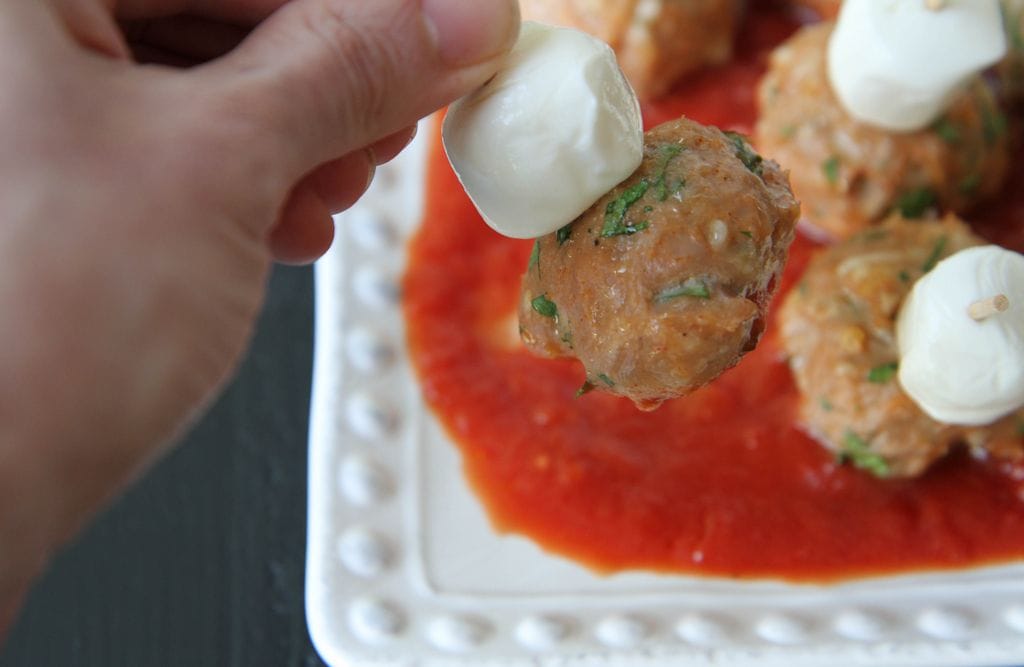
  6. Once the meatballs are done, ladle the sauce into a deep dish or bowl. Skewer one mozzarella ball and one meatball on a toothpick and nestle in the sauce. Serve hot.

As a participant in the Walmart Moms Program, I’ve received product samples and compensation for my time and efforts in creating this post. All thoughts and opinions are my own.


Pumpkin Nut Quinoa Breakfast

Wednesday, September 30th, 2015

Perfect for the fall and for our M Challenge Focus on Better Mornings, I’m republishing this easy breakfast of pumpkin flavored quinoa with yummy sugared pecans because it will definitely help get your day off to a great start!

Pumpkin Nut Quinoa Breakfast
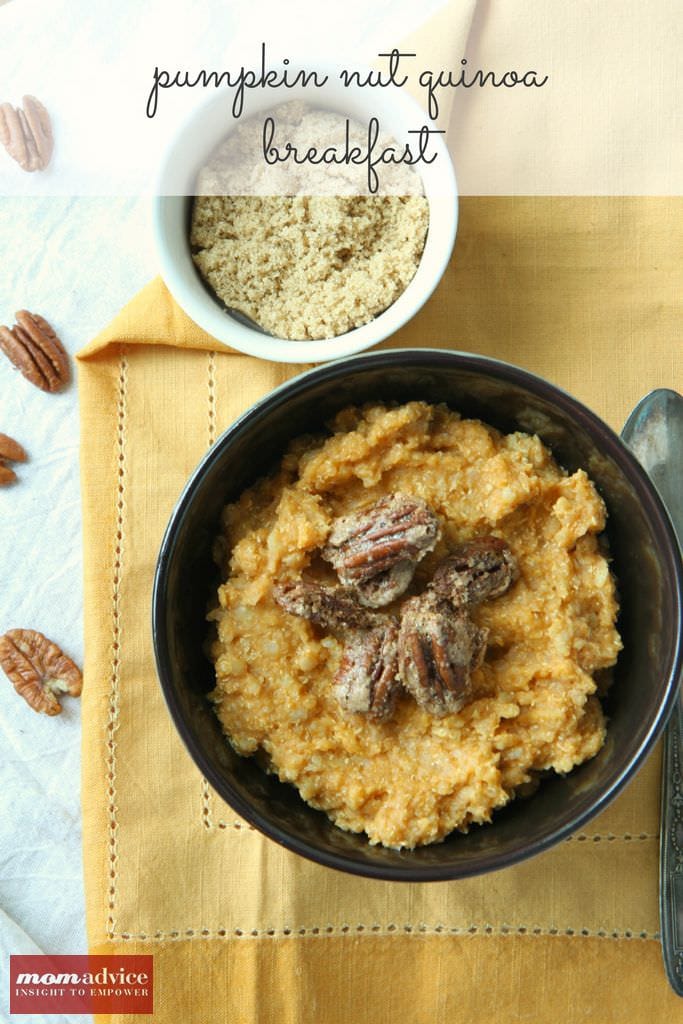
I can’t think of two ingredients I am loving more than pumpkin and quinoa right now. This recipe is a deliciously satisfying pairing of pumpkin and quinoa together in this Pumpkin Nut Quinoa Breakfast. The best part is the fun topping addition of sugared pecans that make this dish such a standout!

Pumpkin Nut Quinoa Breakfast

Over this past year I have showcased lots of fun recipes to try with quinoa from basic preparation to summer salads to breakfast bowls to stuffed peppers. What you might not know though is that there is another variety of quinoa that you can purchase for your baking and breakfast needs. Quinoa flakes remind me of Cream of Wheat in their texture, but they are packed with loads of protein. They can be found at natural food stores and are often available in both a boxed variety or can be purchased in the bulk section of the store.

Last winter I became addicted to these quinoa flakes for a hot breakfast bowl. I dressed mine up simply with a little stevia, maple syrup, and almond milk, but I wanted to try another spin with this ingredient for the Fall.

Pumpkin Nut Quinoa Breakfast
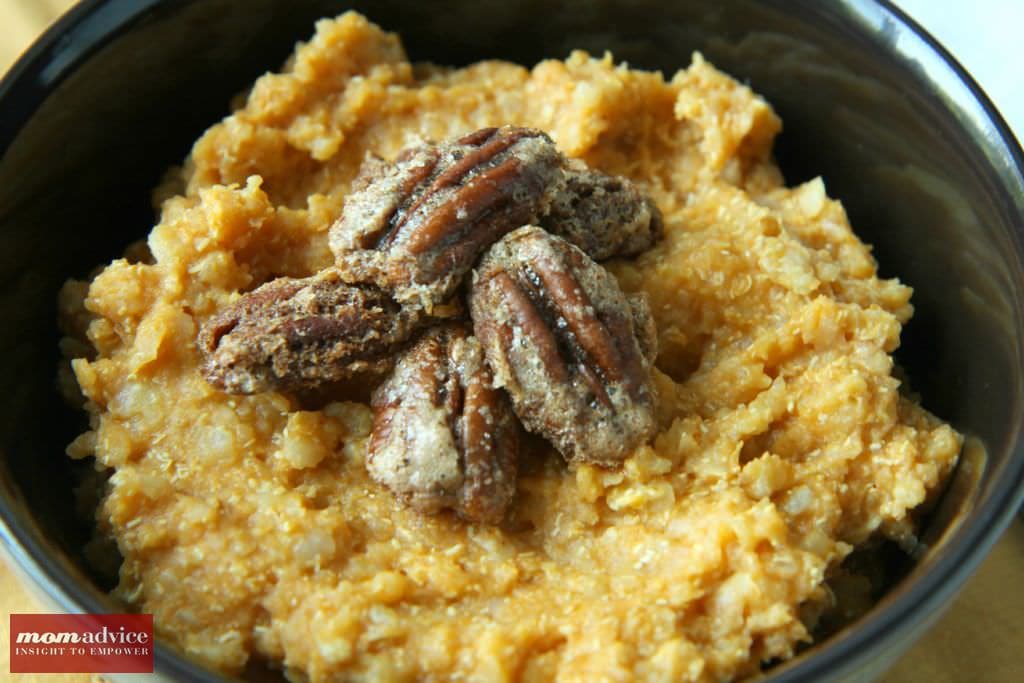
This recipe for Pumpkin Quinoa can be modified to your own dietary needs. I prepared mine with almond milk, but you can use regular milk too. The nuts are tossed in cinnamon, cloves, and nutmeg and a little egg white. They remind me a lot of these
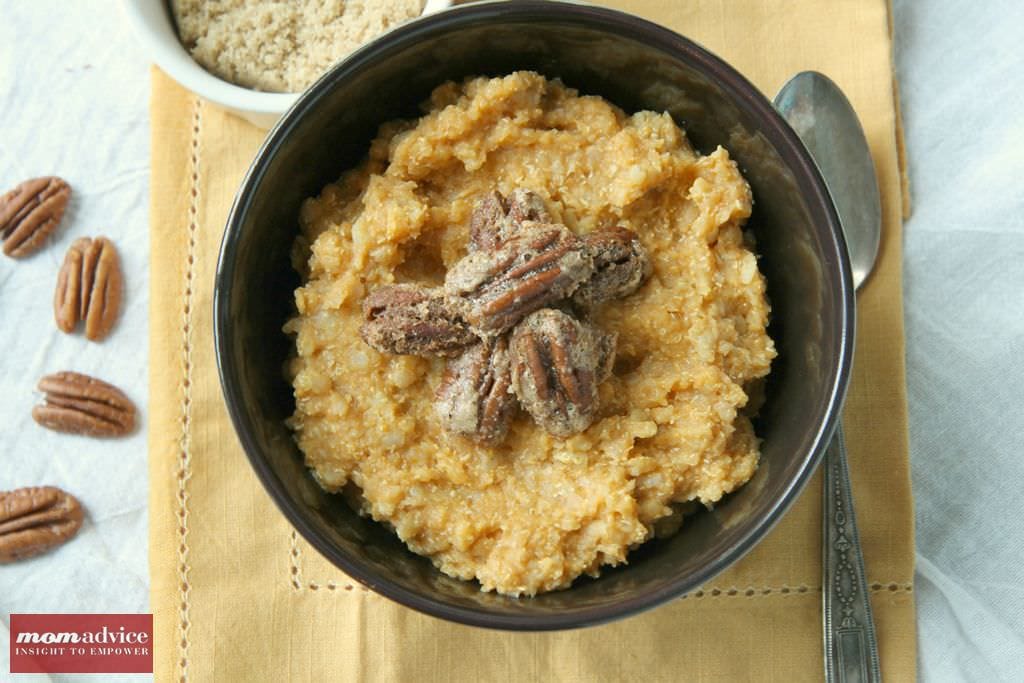
 Sugar & Spice Nuts that I love to share around the holidays.

If you are vegan, try substituting the egg white with 2-3 tablespoons of water and 1 tablespoon of flax, mixed well, to coat the nuts. For those living gluten-free, no modifications need to be made! It is one of those recipes that is easy to modify for your family!

I hope you enjoy this recipe as much as I did. I reheat my leftovers in the microwave and add a little milk to thin them out again. This is a great one to tuck in your fridge for a hot breakfast all week long!

Pumpkin Nut Quinoa Breakfast

Pumpkin Nut Quinoa Breakfast
Recipe Type: Breakfast
Author: Adapted from Deliciously G-Free by Elisabeth Hasselbeck
Prep time:
Cook time:
Total time:
Serves: 4
A deliciously gluten-free dish that can be enjoyed on Fall mornings. This pumpkin quinoa is packed with protein and has added flavor & texture from the amazing sugared pecans that adorn it.
Ingredients
  • 1/4 cup granulated sugar
  • 1/2 teaspoon ground cinnamon
  • 1 teaspoon cornstarch
  • Pinch of Salt
  • 1/4 teaspoon ground cloves
  • 1/4 teaspoon ground nutmeg
  • 1 egg white (see above for vegan substitution)
  • 1/4 teaspoon vanilla extract
  • 1 cup pecan halves
  • 1 3/4 cup water
  • 1 3/4 cup milk (or milk substitute)
  • 1 1/3 cups quinoa flakes
  • 1 cup canned pumpkin
  • 1/4 cup half-and-half (or additional milk substitute)
  • 1/4 cup light brown sugar
Instructions
  1. Preheat the oven to 300 degrees. Line a rimmed baking sheet with parchment paper.
  2. Place the sugar, cinnamon, cornstarch, salt, ground cloves, and ground nutmeg in a plastic bag, seal the bag, and shake to mix.
  3. Pu tthe egg white and vanilla in a bowl, and beat until slightly foamy. Add the pecans and stir to coat them well. Using a slotted spoon, lift the pecans out the bowl and transfer them to the bag of sugar and spices. Shake, making sure the pecans are well coated with the seasoning. Spread the pecans out on the prepared baking sheet, and bake for 30 minutes. Remove from the oven and let them cool on the baking sheet.
  4. Meanwhile, place the water and milk in a large saucepan and bring to a boil. Add the quinoa flakes and reduce the heat to medium. Cook for 5-10 minutes, until the liquid has decreased by half and the mixture is thick.
  5. Combine the pumpkin and the half-and-half (or milk substitute) in a small bowl and whisk until smooth. Swirl the pumpkin into the quinoa and sprinkle with the brown sugar. Divide among four bowls, sprinkle with nuts, and serve immediately.

Source: Deliciously G-Free (affliliate)

Looking for more things to do with the rest of the can of pumpkin? Be sure to check out these 11 pumpkin recipe ideas for your Fall cooking!


Pin It

3 Ways to Take the Hassle Out of Packing School Lunches {& Free Printable!}

Tuesday, September 29th, 2015

This is a post from our diy/craft contributor, MJ.

Mom Advice lunch time printable- free download!

For the first time ever, I’m packing lunches for three kids – which means three drinks, three sandwiches, three treats, and three sets of complaints! Like any parent, I strive to pack healthy and tasty meals that the kids can enjoy in the middle of their days, but oftentimes my best attempts fall short of their hopeful stomachs.

So now that our trial and error efforts have failed, and I’ve talked it over with my children, we’re proud to recommend these three ideas that have helped turn our lunchtime fails into lunches that leave only the crumbs behind.

1. Ask your children what they want and give them the tools to make good decisions.

Before we head upstairs for bedtime, I ask each child what they’d like for lunch. Sometimes we have what they want, sometimes they ask for food they shouldn’t have, and sometimes they have NO ideas. To avoid the headache, I created this Lunchbox Helper!

DOWNLOAD THE FREE LUNCHBOX HELPER PRINTABLE!

Lunch box helper printable

Food choices are separated (roughly) by food groups, and my children are able to make smart choices for themselves (eg: see that fruits and vegetables should be a part of every meal!). It’s also come in very handy for grocery prep. My children can add their own ideas to the sheet and mark off what they’d like to pack for lunches and snacks, and we can know in advance what we need to have in our pantry!

3 Ways to Take the Hassle our of School Lunches

2. Organize ingredients in a place they can pack for themselves!

Lunchbox Helper lets your children see and select what they want to eat, but let’s take it to the next level and have them pack their own meals. In our home, we have all the good stuff on the lower shelves where small hands can reach exactly what they need. In the pantry and in the refrigerator, all the fruits, veggies, grains and goodies are at child height.

I love how Amy organized her space so that an entire lunch can be gathered up from the space of a few drawers. No confusion means less work and less hassle for everyone!

School Lunch Ideas

3. No matter how the food tastes, send them off with your love notes.

When my oldest started in full-day Kindergarten, I sent her off with a note in her lunchbox. As she mentioned that she sometimes didn’t know what to talk about at the lunch table, I started adding a joke to those notes. Over the years, these evolved into illustrated notes with the drawing sometimes being much funnier than the corny joke!

Through a wonderful partnership with The Land of Nod, my illustrated jokes are now reaching hundreds of lunchboxes! Just a few months ago, my Lunchtime LOL Notes went on sale as a full pack of 180 jokes for every day of the school year. It’s been such a treat to hear how parents and children alike are enjoying these notes and turning any menu into a time for giggles.

_______________________________________________

I’d love to hear your ideas! What works for packing lunches in your family? Any great foods to suggest?

XOXO, MJ

The MomAdvice Make-Ahead (Week 3)

Monday, September 28th, 2015

The MomAdvice Make-Ahead (Week 3)

When grocery day used to come, it would be the day of trashing perfectly good food that would have been perfectly delicious if I ever would have gotten around to cooking it. This week we threw away a little celery and some hard boiled eggs for the entire week of wasted food. If I questioned if making the food ahead was worth the effort, this helped me understand LOUD AND CLEAR that this family needs this to save money and waste less.

We also did not eat out this week (other than a work engagement my husband had) so that is two weeks in a row that I have felt more in control of our family finances.

That is NOT to say that I did not drag my feet this week. This takes a ton of effort and I started this incredible book and it pained me every minute I was away from it. The reward though is that I will have loads more time to read this week with ZERO guilt because I am ahead of the game this week.

I’d love to hear if you tried anything from our make-ahead ideas or what your favorite make-ahead dish is. I am sure I am going to be needing some new recipes soon!

Approximate Time for Preparation- 4 hours plus clean-up! 

The MomAdvice Make-Ahead

Homemade Pizza Sauce (double batched- popped one in the freezer)

Pizza Dough (I bagged the dry ingredients for my homemade pizza)

Roasted Chicken (NEW TUTORIAL!! for salads & wraps)

Blueberries & Strawberries

Brown Rice (four cups)

Slow Cooker Stuffed Green Pepper Soup

Cantaloupe

Baked Hard Boiled Eggs

Chicken Enchiladas (stored sauce in a separate container)

Homemade Enchilada Sauce

Slow Cooker Italian Beef Sandwiches

Brussels Sprouts (trimmed)- to be made into Oven Roasted Brussels Sprouts

Sliced Mushrooms & Green Beans (trimmed & stored in separate bags)- planning to roast them like this

Broccoli- to make into Microwave Lemony Broccoli

Slow Cooker Chicken Italiano

Chopped Carrots & Celery (I store these in water)

Green Smoothie Packets (I use this recipe and froze the strawberries, bananas, and spinach in packets for the morning. This week I added some blueberries that were on sale!)

Meal Plan

Breakfasts- Green Smoothies or Hard Boiled Eggs & Fresh Fruit

Lunches- Leftovers or Hard Boiled Eggs, Veggies, & Fresh Fruit, or Stuffed Green Pepper Soup with Salads

Dinners-

Monday- Roasted Chicken Wraps With Broccoli or Salads (Topped With Berries, Balsamic Dressing, Slivered Almonds, & Chicken)

Tuesday- Chicken Enchiladas, Brown Rice, & Tortilla Chips with Salsa

Wednesday- Italian Beef Sandwiches on Hoagie Rolls with Roasted Brussels Sprouts & Fresh Fruit

Thursday- Chicken Italiano served over Brown Rice Pasta with Balsamic Roasted Green Beans & Mushrooms & Fresh Fruit

Friday- Homemade Pizza Night

Saturday- SAYSFN (Seek and Ye Shall Find Night)

Sunday- SAYSFN (Seek and Ye Shall Find Night)

make-ahead-meals-1

No more cooking for this girl ALL WEEK- YAY!! Happy Monday, friends!! xo


The MomAdvice Make Ahead (Week 2)

Monday, September 21st, 2015

The MomAdvice Make Ahead Meal Ideas

The first week of my make-ahead feasting went so well that we didn’t even eat out once last week despite a grueling activity schedule! I will be sharing make-ahead tutorials as I have lots of techniques to share with you about how we are accomplishing our make-ahead feasts! Today you can catch my tips for hard boiled eggs in the oven!

Since we have another crazy week (who doesn’t it?), I wanted to share what is in our fridge this week.  I hope this can help inspire you for making ahead a few dishes for your week too.

The MomAdvice Make-Ahead

Fresh Berries (Strawberries & Blueberries)

Chopped Broccoli (to be made into this easy Microwave Lemon Broccoli  for a side)

2 Pounds Taco Meat

4 Cups Brown Rice (for taco bowls)

Chopped Lettuce (for tacos/taco bowls)

2 Italian Meatloaves (Prepared minus the breadcrumbs to make it gluten free. I popped one in the freezer for another week!)

Gluten-Free Orange Chicken (I cooked the chicken and have the sauce set aside in a separate container for warming)

3 pounds Roasted Chicken, sliced (for wraps & salads this week)

2 dozen Hard-Boiled Eggs Prepared in the Oven

Chopped Carrots & Celery (I store these in water)

Green Smoothie Packets (I use this recipe and froze the strawberries, bananas, and spinach in packets for the morning)

The MomAdvice Make Ahead Meal Ideas

No more cooking for this girl ALL WEEK- YAY!! Happy Monday, friends!! xo

Hard Boiled Eggs In The Oven Recipe

Monday, September 21st, 2015

Hard Boiled Eggs In The Oven Recipe Header

Want hard boiled eggs fast? Try this oven method for baking eggs for deviled eggs, Easter eggs, egg salad, or a simple protein-packed snack. Make perfect hard boiled eggs fast with this smart Alton Brown approved method.

Have you ever prepared hard boiled eggs in the oven?

I had seen the tutorials floating around Pinterest, but I gave this method a spin while meal prepping for our busy week.

These are the perfect hard boiled eggs for an afternoon snack or for a quick lunch with chopped veggies and I can’t wait to show you how easy this method is.

Although I rely usually on my Instant Pot, you are limited to just a dozen at a time.

It does seem kind of crazy to bake your eggs, but this is a great way to make a lot of eggs for your week or for your Easter egg decorating.

Hard Boiled Eggs In The Oven Recipe Placed in Muffin Tin

Make Hard Boiled Eggs in the Oven Recipe

Here is the thing, results seem to vary on success with baking your hard boiled eggs in the oven and it’s a good idea to give these a test run in your oven with just a couple of eggs rather than wasting an entire dozen. 

What Can Improve My Experience Baking Hard Boiled Eggs?

Hard Boiled Eggs In The Oven Recipe

Get an Oven Thermometer

I am telling you that one of the best gadgets you can buy, if you are not getting consistently good results with baking in your oven, is an inexpensive oven thermometer.

I have had ovens, in apartment rentals, that were fifty degrees off or more. I could have saved myself a lot of tears and burnt dishes if I would have known that this cheap little gadget could improve the results in my cooking in a dramatic way.

Try Different Temperatures

Once you know that your oven temperature is correct (or how to gauge it if isn’t) try baking the eggs at 325 degrees first.

If your eggs are not to your liking, increase the temperature to 350 degrees.

Hard Boiled Eggs In The Oven Recipe in Ice Water

Stop the Brown Spots

Brown spots can develop on your egg from resting in the muffin tins, particularly with a dark muffin tin like the one I am showing in this picture.

Although the spots don’t really bug me, you can prevent them by using a silicone muffin pan, baking in a mini muffin tin, or lining your muffin tin with liners, tin foil.

Wildly I have also heard that cotton pads/balls can offer a buffer between your egg and the bottom of the pan. Alton Brown, in fact, actually recommends placing the eggs directly on your oven racks and skipping the muffin tin altogether.

I’d love to hear your thoughts on that one and if you have any success with it.

Make Peeling Easier

Did you know that fresh eggs can actually be more difficult to peel? We have discovered peeling the eggs is so much easier with eggs that have been in our fridge at least a week.

Hard Boiled Eggs In The Oven Recipe Storing

How Should I Store My Eggs?

Once you have your week’s worth of eggs, how the heck do you store them?

I read a lot of advice on this one when we prepared our eggs!

Ideally, you want to keep these in their shell since it acts a barrier to bacteria and it helps them last longer too.

Within the shell, you can eat these safely for up to seven days (although they never last that long in our house!!).

Hard Boiled Eggs In The Oven Recipe Finished Yolks

 Peeled hard-boiled eggs can be stored in the refrigerator in a bowl of cold water to cover for about five days (change the water daily) or in a sealed container without water (cover the eggs with damp paper towels) for the same length of time.

We store ours in their shell since I am worried about the bacteria factor.

I also ended up stumbling on this egg storage method for our fridge so we started doing that instead.

How Do I Cook Hard Boiled Eggs on the Stove Top If I Don’t Love the Oven Method?

My mom was always a big fan of this stovetop method and I love that you don’t need a gadget to make it happen!

Place eggs in a large pot of water and cover them with an inch of water (cold). cover the pan with a lid and listen for boiling water. When the water has come to a boil, let it boil over high heat for 6-7 minutes. Remove these with a slotted spoon and give them the same ice water bath treatment as you do for the oven method.

Hard Boiled Eggs In The Oven Recipe
 
Recipe Type: Breakfast
Author: MomAdvice.com
Prep time:
Cook time:
Total time:
Serves: 12 or more servings
Want hard boiled eggs fast? Try this oven method for baking eggs for deviled eggs, Easter eggs, egg salad, or a simple protein-packed snack. Make perfect hard boiled eggs fast with this smart Alton Brown approved method. This quick method is perfect for big-batch make-ahead preparation of hard boiled eggs. Be sure to read the post for additional tips for success.
Ingredients
  • 1 dozen eggs or more (preferably, older eggs that have been in your fridge for one week or more)
Instructions
  1. Preheat oven to 325 degrees
  2. Put 1 egg in each of 12 muffin cups.
  3. Bake in preheated oven for 25-30 minutes.
  4. Plunge baked eggs in a large bowl of ice water until cooled completely, about 10 minutes.
  5. Remove the room temperature eggs with a slotted spoon and store in your refrigerator for up to a week.


As an Amazon Associate I earn from qualifying purchases.

Love these tips? Here are a few other great make-ahead meal prep ideas for your week!

How to Make Perfect Brown Rice in Your Rice Cooker from MomAdvice.com how to make perfect brown rice in your rice cooker

How to Make Quinoa in the Rice Cooker how to make quinoa in your rice cooker

Roast Frozen Chicken in Bulk roast frozen chicken in bulk for your week

Instant Pot Shredded Chicken from MomAdvice.com instant pot shredded chicken for all your recipes

Happy cooking, friends!

Make Hard Boiled Eggs in the Oven Recipe Header


Pin It

Berry Quinoa Parfait

Tuesday, September 15th, 2015


Berry Quinoa Parfait from MomAdvice.com

Quinoa is such a perfect, protein-rich way to start your mornings, I just knew I’d need to share this Berry Quinoa Parfait with you again as a part of our M Challenge Focus on Better Mornings. I know that when you start the day with one of these delicious parfaits, it really will be better!


I love berries and today I am showing off a delicious gluten-free Berry Quinoa Parfait that you can enjoy in any season with fresh or frozen berries.

Since going gluten-free, I have learned that the key to beating hunger pains (without eating gluten-free junk food) is a protein packed meal or snack.

Quinoa is one of my favorite foods whether it is just cooked as a basic, in a yummy Greek Quinoa Salad, in my favorite Lemony Spinach & Tomato Quinoa Salad, in my Quinoa Berry Bowl, or even using those quinoa flakes in my Pumpkin Nut Quinoa Breakfast.

Combining the protein power of quinoa with the protein power of Greek yogurt makes this healthy treat more filling. 

Did you know that a typical 6-ounce serving of Greek yogurt contains 15 to 20 grams of protein?

That is approximately the equivalent of two to three ounces of lean meat.  

Just as a reference, one cup of cooked quinoa (185 g) contains 8.14 grams of protein, which means the quinoa paired with the Greek yogurt definitely will help you feel fuller longer. 

Not to be outdone, berries have many health benefits, but the biggest health benefit is the antioxidants that they have which help you fight off illnesses. 

Berries are filled with potent antioxidants that can help with arthritis, age-related memory loss, and cataracts and other eyesight problems.

They also are said to assist with weight-loss because they are filled with so much water. 

A sprinkle of toasted slivered almonds adds the perfect finishing touch since almonds are a great source of vitamin E, copper, magnesium, and (as if you needed more!) they are another great protein source.


Berry Quinoa Parfait from MomAdvice.com


If you haven’t tried quinoa in a sweet dish, it is just as delicious and satisfying as it is in a savory dish. It reminds me a little of one of my favorite dishes… rice pudding.  

To add to its sweetness, I cooked it in a little vanilla and with a little dash of cinnamon.

Make sure that you allow the quinoa to cool before adding it to the yogurt.

Once you have made your assembly line of treats, wrap each one in plastic wrap and pop it in the fridge for a healthy snack after your workout or as a healthy dessert with your family.


Berry Quinoa Parfait from MomAdvice.com

Berry Quinoa Parfait
 
Author: Amy Clark
Prep time:
Total time:
Serves: 2
A gluten-free protein-packed parfait that is both healthy and satisfying. Try this fun new idea to enjoy your fresh berries this summer.
Ingredients
  • 1/2 cup quinoa
  • 1/2 cup water
  • 1 teaspoon vanilla
  • 1/4 teaspoon cinnamon
  • 1 cup greek yogurt
  • 2 tablespoons honey
  • 1 cup (or more) of your favorite berries, fresh or frozen (I love blueberries & strawberries)
  • 2 tablespoons sliced almonds, lightly toasted
  • Mint leaves (optional)
Instructions
  1. Use my directions for cooking quinoa as a basic (linked to above) or follow package directions adding the vanilla and cinnamon to your water. Allow to cool.
  2. Mix the greek yogurt and honey together in a small bowl.
  3. Using a spoon add a ⅓ of the yogurt mixture into your glass.
  4. Top with ⅓ of sliced strawberries and blueberries then add ⅓ of the quinoa. Sprinkle with toasted almonds.
  5. Repeat with the remaining yogurt, berries, quinoa and almonds until you have three layers.
  6. Finish with your mint leaves.
 

Looking for more great berry ideas? Check out these:


Freshly Baked Strawberry Doughnuts

 Baked Strawberry Donuts


Blueberry Sangria Lemonade

my Blueberry Sangria Lemonade


Blueberry Recipes

these 8 unique blueberry recipe ideas


Freezing Berries

 a guide to freezing your berries this year!


Happy berry-eating!

walmart_mom_disclaimer

Berry Quinoa Parfait from MomAdvice.com

Pin It

The MomAdvice Make Ahead

Monday, September 14th, 2015

The MomAdvice Make Ahead

Wow, I can’t believe our family’s Choose Your Own Adventure trip has finally been fulfilled! It was such an incredible vacation (equal parts busy and equal parts R&R)  that I’m looking forward to sharing more about it with you this week! In the meantime, I have been knee deep in laundry, grocery shopping to replenish the very empty fridge, and I have been doing some food prep this week to try to get ahead.

I hope to try and doing a little making ahead each week since our family life has gotten quite busy between dance lessons, cross country meets/practice, and instrument lessons.  I shared this photo on Instagram and had a few people ask me how I made certain things for the week so I thought maybe sharing it here so you could not only hold me accountable (something I can always use), but I hope it might inspire you to get a little ahead during your busy weeks!  I must say that Shutterbean has been such an inspiration to me in this department-have you read this post on make-ahead planning? I also love to follow along with her hashtag to think of new ideas that I can do ahead in my kitchen!

The biggest thing for me is my desire to decrease the amount of food waste we have in our house. If things are pulled together, frozen, and incorporated into our dishes, there is less chance of those items going to waste in our home.

For me, it’s also less about menu-planning and more about thoughtful preparations that can be pulled together for the week ahead whether it is breakfast, lunch, or dinner. For menu-planning advice, I’m An Organizing Junkie is a pioneer for Menu Planning Mondays where you can gather so much good stuff each week and you can start brainstorming what you can make ahead for your meals each week.

Here is what I got ready for our crazy activities week!

The MomAdvice Make-Ahead

Gluten-Free Chicken Noodle Soup (Prepared minus the noodles- I like to make them fresh so they maintain their consistency)

Spaghetti Sauce (double batched)

Chopped Broccoli (to be made into this easy Microwave Lemon Broccoli for a side)

Roasted Green Beans (prepped and thrown in a bag for the week)

3 pounds Roasted Chicken, sliced (for wraps & salads this week)

1 dozen Hard-Boiled Eggs (I used this oven baking method with really good success. I also kept the shells on the eggs for storage because they keep for one week like this and it keeps bacteria away!)

Chopped Carrots & Celery (I just chopped these up while chopping up the celery and carrots for my soup)

Pot Roast Italiano (prepped and thrown in a bag for the week)

Green Smoothie Packets (I use this recipe and froze the strawberries, bananas, and spinach in packets for the morning)

For a couple of hours of cooking and prepping, I’m hoping we can stay on track with our family’s eating this week!

Let me know if this helps you and if you would like me to continue sharing these ideas with you! xo


Pin It

Make-Ahead Breakfast Burritos

Friday, September 11th, 2015


Make ahead  and freeze these breakfast burritos from MomAdvice.com


Here’s one of our favorite breakfasts that helps our mornings run smoother – easy burritos that can be pulled from the freezer whenever you need them. It doesn’t hurt that they’re delicious and customizable, too!


Make-Ahead Breakfast Burritos

Back-to-School requires a lot of planning and getting back on track with a healthy breakfast is one thing I want to work on this year.

Today I wanted to show you a recipe for Make-Ahead Breakfast Burritos that can be made ahead and also created for your gluten-free or dairy-free family members.  

One batch of these freezer breakfast burritos can yield 15-18 burritos, depending on how you stuff  ’em, and they are filled with everything your kids need to start their day on the right foot.

I am partnering with Walmart on this back-to-school idea today so you can snag all the supplies you need right at their store.


Make-Ahead Breakfast Burritos


What I love about these burritos is that they are not only filled with fresh whole foods, but also that they are inexpensive to create.

With kitchen staples like eggs, cheese, potatoes, and tortillas, it is likely you already have a few things on hand for this back-to-school breakfast.

Create an assembly line of ingredients in the kitchen and have your kids jump in on the fun.


The potatoes are tossed in paprika and garlic powder for a tasty topping to the eggs.

I love a little Italian turkey sausage, red peppers, and cheddar or colby cheese for these burritos.

You can create your own flavor combinations or consider clearing out items from the fridge and making a unique combination all your own.


Make-Ahead Breakfast Burritos


Be careful to not overstuff the burritos so they can be wrapped easily and place them on a parchment-lined cookie sheet to place in the freezer until frozen.

Once these are frozen you can tuck them in a freezer bag and just grab them when you need them.

Do you know how to wrap a burrito?

 If not, I love this tutorial for perfectly wrapped breakfast burritos!


Make-Ahead Breakfast Burritos


With one kid in middle school (GASP!) and a daughter who prefers not to eat in the morning, I am hoping that these burritos will be the perfect way to get them motivated to eat a healthy breakfast.

Just grab one from the freezer and wrap it in a dampened paper towel for the microwave for three minutes (flip it halfway through).

Wrap in foil and let them eat them on the way to the bus or in route to school.  

These also make a great after school snack,  after sports activities, or an impromptu dinner with their pals while doing homework.

To make them dairy-free substitute the cream with almond milk (which is what we did) and add a vegan cheese to them or leave them cheeseless.

For a gluten-free burritos, Walmart offers this option in their stores.

We hope you love this delicious breakfast as much as we did.

We have already started raiding our make-ahead breakfast burritos for quick lunches this week.

I am shocked how beautifully these reheat and taste.

There are no excuses why you can’t tackle a healthy breakfast.

Be sure to check out my recipe for Slow Cooked Honey Crisp Apple Oatmeal for another fun breakfast treat!


Make-Ahead Breakfast Burritos

Make-Ahead Breakfast Burritos
 
Recipe Type: Breakfast
Prep time:
Cook time:
Total time:
Serves: 18
A make-ahead breakfast burrito that you can tuck in your freezer for a healthy breakfast, snack or meal.
Ingredients
  • 2 tablespoons olive oil
  • coarse salt and freshly ground pepper
  • 3 large russet potatoes, peeled and diced
  • 1 teaspoon garlic powder
  • 1/2 teaspoon paprika
  • salt & pepper
  • 1 lb Italian Turkey Sausage
  • 1 dozen eggs
  • 2 tablespoons cream (or milk substitute)
  • 1 red bell pepper, cored and diced
  • 1/2 pound cheese of your choice (or vegan cheese)
  • 18 tortillas, soft-taco size (8-inch), whole-wheat, flour, or gluten-free tortillas
Instructions
  1. To roast potatoes, preheat your oven to 475 degrees. Line a cookie sheet with parchment paper. Drizzle diced potatoes with oil and season with salt, pepper, paprika, and garlic powder. Toss the potatoes together to evenly coat in oil and seasonings, and spread out into a single layer on the parchment. Roast until browned on the bottom and tender, about 20-25 minutes.
  2. Brown your sausage. Once it is cooked through, set aside in a large bowl, leaving about a 2 tablespoons of drippings in the pan for the eggs.
  3. In a medium bowl, whisk the eggs with the cream (or milk substitute) and pour into the sausage skillet. Cook over medium heat until just set, stirring as needed. season with salt and pepper and stir to combine, and transfer to the bowl with sausage.
  4. In the same skillet, cook your red peppers over medium heat until fragrant and softened, about 10 minutes.
  5. Make an assembly line- tortilla, cheese, followed by a small handful of potatoes and a scoop of the egg/sausage mixture. Roll the tortilla up.
  6. For freezing, place burritos on a wax- or parchment-lined baking sheet and place in the freezer until firm, at least an hour. Transfer to large freezer bags and keep frozen for up to one month.
  7. For reheating, place a frozen burrito in a dampened paper towel and microwave for three minutes, turning halfway through.
 
Recipe Adapted From: Dinners For Winners


Easy freezer recipe for breakfast burritos from MomAdvice.com


Make ahead and freeze this easy breakfast burritos from MomAdvice.com


walmart_mom_disclaimer


Meal Prep: Breakfast Sandwiches Recipe from MomAdvice.com

Make Ahead and Freeze Breakfast Sandwiches


DIY Breakfast Caddy

DIY Breakfast Caddy


Applesauce Cinnamon Breakfast Muffins

Honey Sweetened Applesauce Cinnamon Breakfast Muffins


Quinoa Berry Breakfast Bowls

Quinoa Berry Breakfast Bowls

Pin It

Organize Your Spice Rack (FREE PRINTABLES!!)

Wednesday, September 2nd, 2015

Organize Your Spice Rack (FREE PRINTABLES!!) from MomAdvice.com

When I say that my life has felt a little disorganized, I mean it! One sore spot in my house has been my spice cabinet and pantry. Thanks to the gentle shove (ahem) of The Magic Art of Tidying Up, I am trying to transform those sad corners and joy-robbers into more thoughtful spaces. I figured that I can’t be the only one with a disorganized spice rack so I wanted to offer free printable spice labels and pantry labels that you can use to spruce up your own space too, designed by our own MJ from Pars Caeli!

Organize Your Spice Rack (FREE PRINTABLES!!) from MomAdvice.com

Here is my cabinet before I tackled it. There were several spices that had empty jars (why? who helped me on clean-up? WHO?), several duplicates (who does the grocery shopping? who? oh wait…), and there were some that had labels as far as back as 2008 (THE SHAME!). There were also spices lurking in a few other corners in the pantry that were, of course, duplicates. Hunting for spices in a million spots and then trying to not get a black eye from knocking myself out with one as I dig around was a nightly occurrence.

Organize Your Spice Rack (FREE PRINTABLES!!) from MomAdvice.com

I absolutely love the clean design of these labels and they couldn’t be easier to print. You will need to purchase a package of this style of label to print on. We kept the design simple and light to keep the ink waste to a minimum.

If you have spice jars you can reuse, by all means do it! About five years ago, I asked my in-law’s for two sets of these jars since I intended to redo my spice cabinet. I found them when I organized my scary storage side of my basement this weekend while binging on podcasts. It felt like Christmas all over again. This decluttering has really been paying off!

I used a small funnel to funnel the spices that still had life in them into these new fresh jars and then attached the new labels. How easy is that?

Organize Your Spice Rack (FREE PRINTABLES!!) from MomAdvice.com

For pantry items with a larger volume, I used some mason jars that I already owned that had been gathering dust on a shelf. These are the perfect holders for these items and the labels work really well on this size jar too!

Organize Your Spice Rack (FREE PRINTABLES!!) from MomAdvice.com

free-spice-label-printables-7

This corner is making me so much happier and it made prepping for our dinner hour so much easier this week! I didn’t realize how much frustration I was having and how much time I was wasting hunting for these spices each night!

Organize Your Spice Rack (FREE PRINTABLES!!) from MomAdvice.com

Organize Your Spice Rack (FREE PRINTABLES!!) from MomAdvice.com

Get the Labels!

If you are interested in receiving 14 free home management printables and these beautiful pantry labels (see the small sampling above), just input your email below or in the sidebar and we will send you the link to your packet as our thank you for being a subscriber (look for it in the final welcome email). Subscribers will have access to our additional printables as they become available.

Note: if you already subscribe to the Mom Advice Newsletter, be sure to look in your inbox for a special email that contains the link for your set of these printables! If you can’t seem to get the form to work with your browser, just look over to your right in the sidebar on the site. You will see a handy form there too that works with all browsers! We appreciate you so much! Thank you! 

##NEWSLETTERFORM##


Pin It