Archive for the ‘Main Dishes’ Category

Gluten-Free Broccoli Grape Harvest Salad

Wednesday, August 27th, 2014

Gluten-Free Broccoli Grape Harvest Salad

I don’t know if I ever devoted an entire post to grapes in over a decade of running this site, but perhaps this showcases how underappreciated this fruit is.  It is a staple around here as a side to round out our sandwiches, it’s an effortless appetizer paired with wine and cheese, and it spends its freshly rinsed self at the pool with us as a snack that can withstand the heat and temperatures. We are definitely fans of the humble grape and I am sure you are too.

Walmart gives me a produce challenge each month to showcase one of their produce items. If you haven’t followed along on my journey towards appreciating fruits and veggies, I have roasted and churned a Roasted Plum & Cinnamon Ice Cream,   Baked Strawberry Doughnuts, created a Blueberry Sangria Lemonade, threw on my grill  Grilled Tomato Bread With Prosciutto, churned Fresh Peach Sorbet, slow cooked my Slow Cooker Honey Crisp Apple Oatmeal, wowed my family with a 3-ingredient Watermelon Granita,  and my fresh Gluten-Free Orange Chicken is our weeknight staple now. What a journey it has been to appreciate the produce section.

Gluten-Free Broccoli Grape Harvest Salad

Tips for Selecting Great Grapes

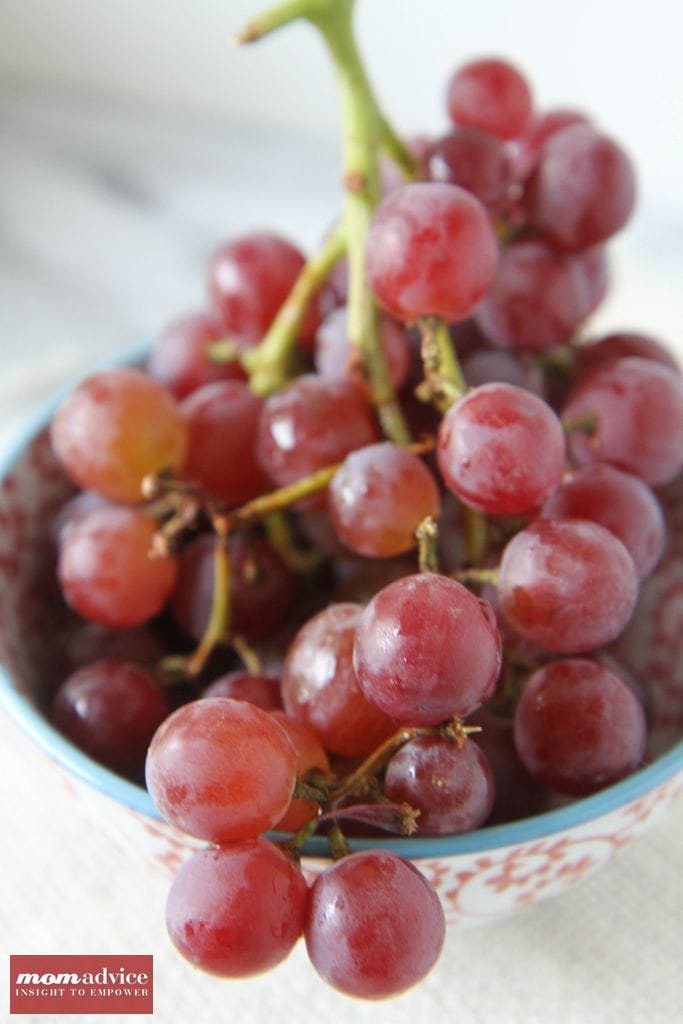
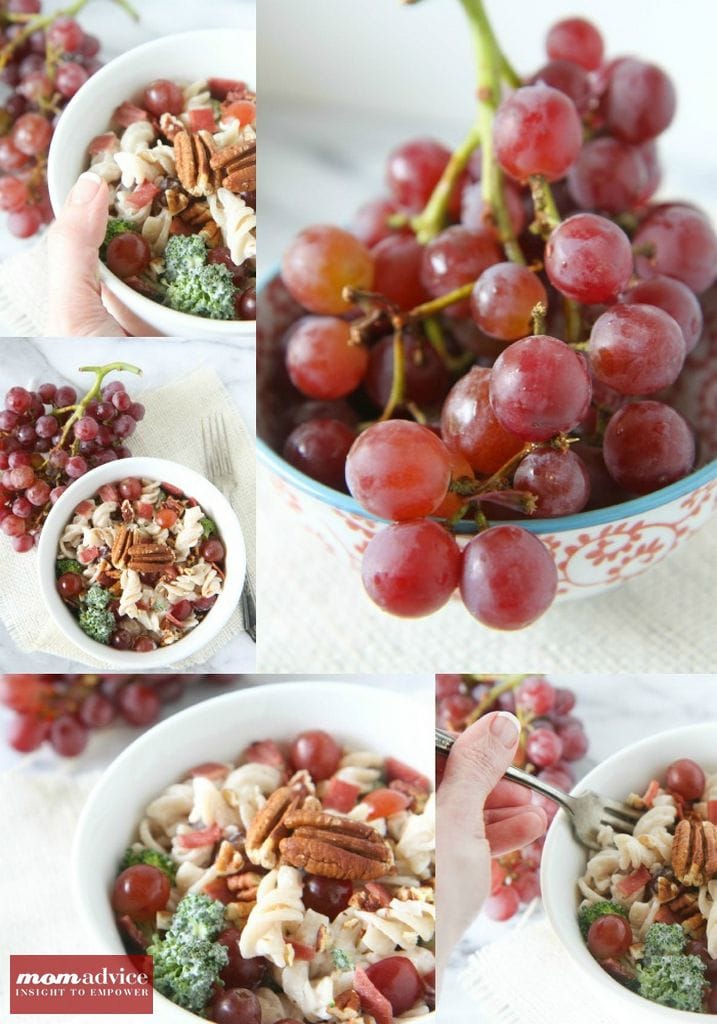
Unlike some of the more difficult fruits I have featured, it is quite easy to spot a good batch of grapes.  Did you know premium grape season is actually September and October? It really is the best time to buy a big bag of grapes for your family. It is advised to select grapes based on the color of them. For green grapes, they should have a slightly yellowish, translucent hue rather than a true, opaque green. Red grape varieties should be mostly red and have a rich, crimson tone.

One other way to check for a good grape is to look at the stem of the grapes. A dry and brittle stem indicates that the grapes might not be as fresh and seeing a little peek of green on the stem is a good indicator of a fresh batch. The shape of the grape should not be misshapen or wrinkled, but plump and juicy.  Of course, you can always bring them back to Walmart if they aren’t perfect thanks to their 100% money back guarantee so selecting great grapes is foolproof.

Gluten-Free Broccoli Grape Harvest Salad

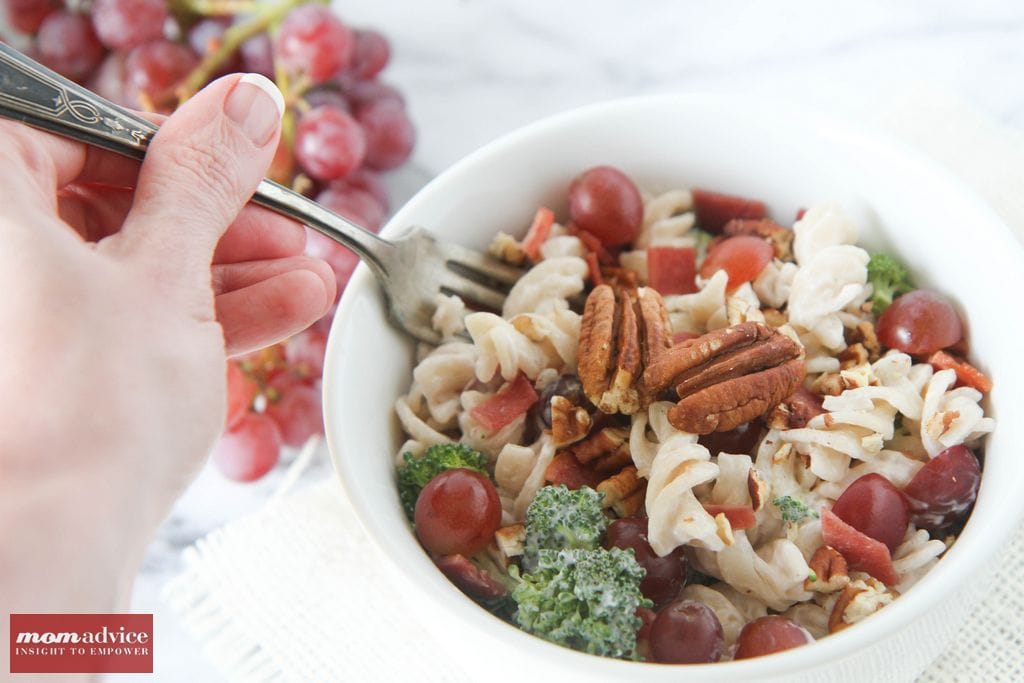
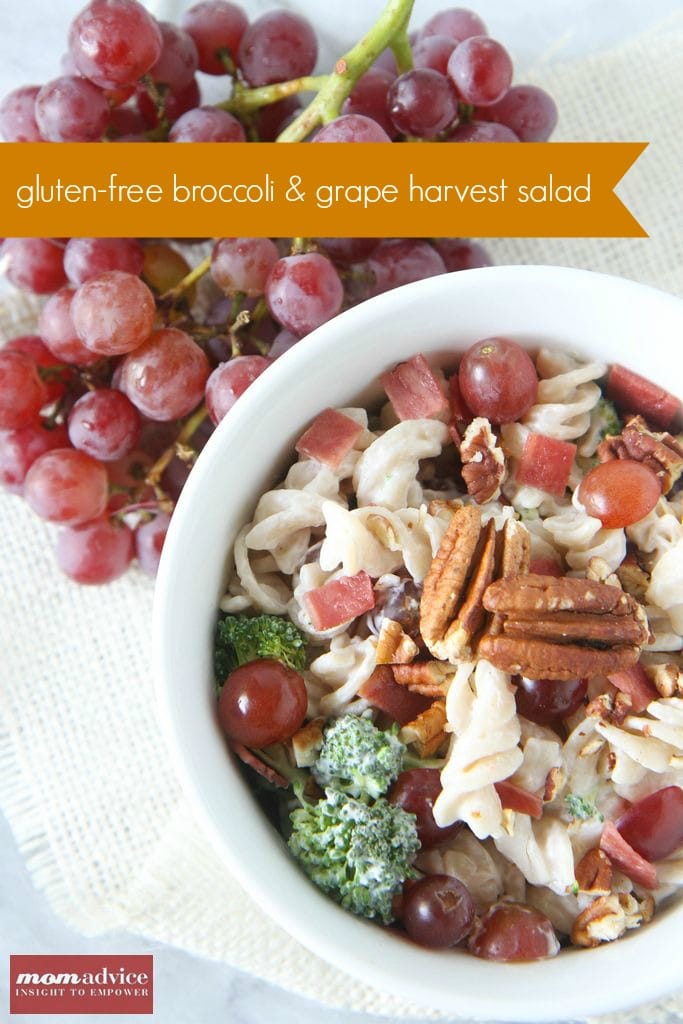
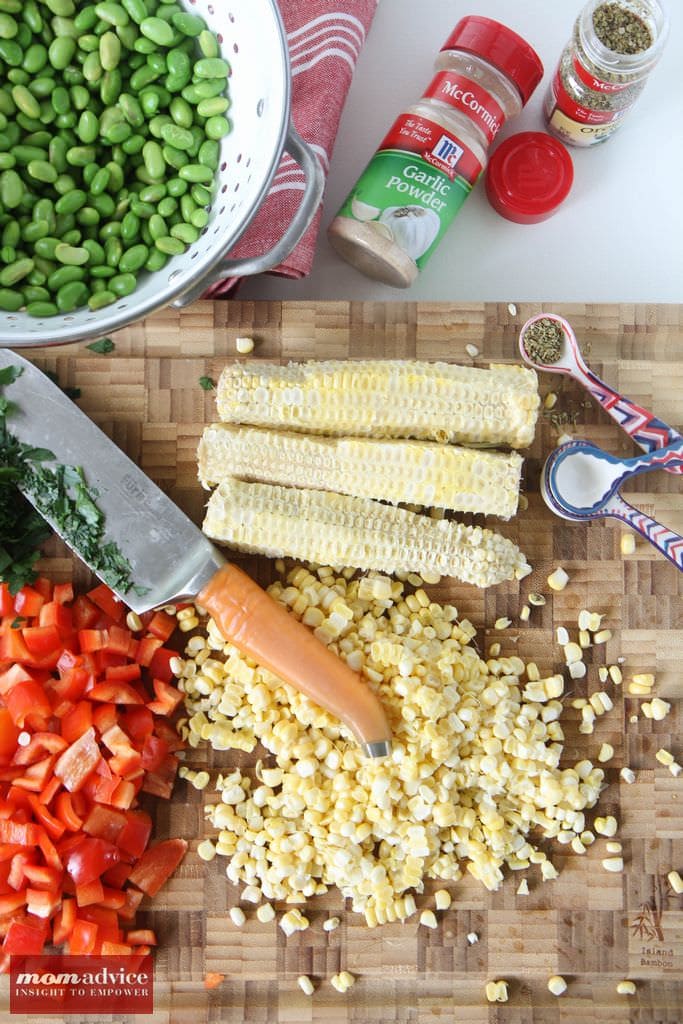
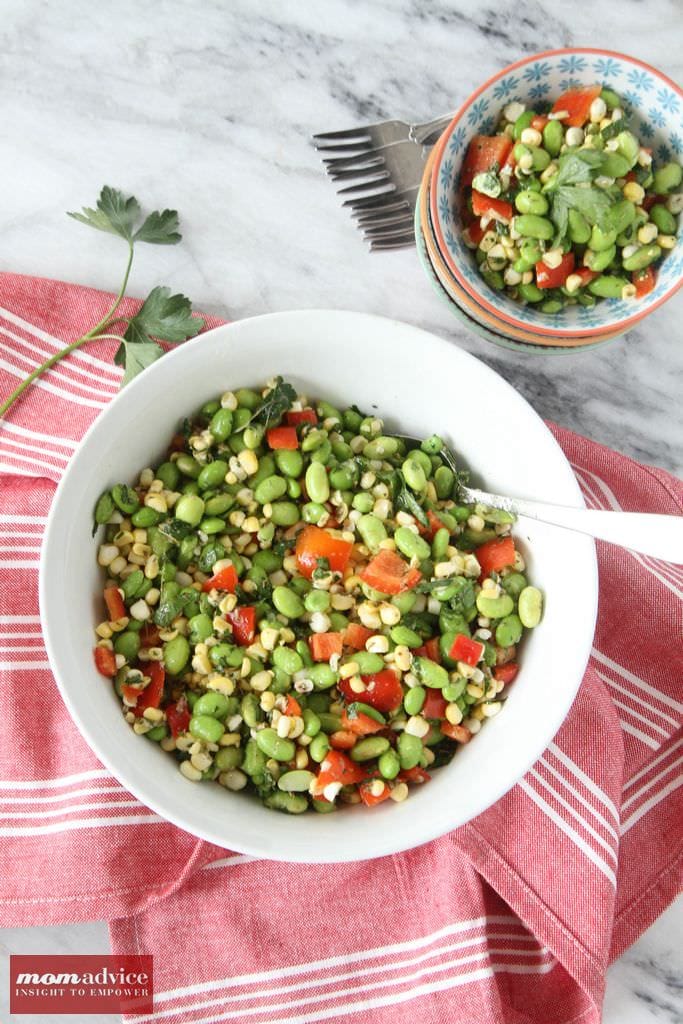
I decided to incorporate these grapes into a gluten-free pasta salad to take to a cookout. This salad was hearty and filling for someone who is often unsure if she will be able to eat at social events (ahem). Not only is this just the kind of creamy pasta dish I love, but it incorporates the smoky saltiness of turkey bacon and chopped toasted pecans for a protein punch that really fills you up.  The smokiness is balanced with the sweetness of the grapes making for an interesting flavor combination and perfect for showcasing the beautiful in-season grapes.

Oh, grape, you certainly are a wonderful fruit and I’m sorry we haven’t loved on you more over the years! I promise to do better!

Gluten-Free Broccoli Grape Harvest Salad

Gluten-Free Broccoli Grape Harvest Salad
Recipe Type: Side
Prep time:
Cook time:
Total time:
Serves: 8
A gluten-free pasta salad laced with pecans, bacon, and sweet grapes.
Ingredients
  • 1 bag of gluten-free pasta (any variety)- 16 ounces
  • 1 lb. fresh broccoli
  • 1/2 cup light mayonnaise
  • 1/2 cup plain Greek yogurt
  • 2 packets Stevia
  • 1/3 cup red wine vinegar
  • 1 tsp. sea salt
  • 2 cups seedless red grapes
  • 10 cooked turkey bacon slices, crumbled
  • 1/2 cup pecans
Instructions
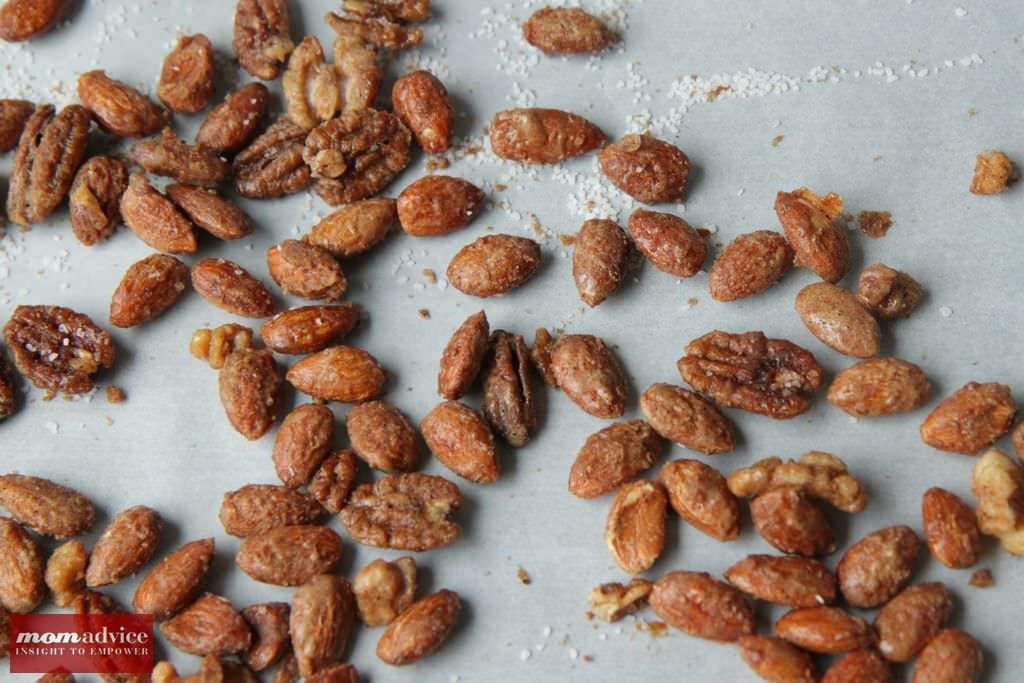
  1. Preheat oven to 350 degrees F. Bake pecans in a single layer in a shallow pan for about 6 minutes until lightly toasted and fragrant, stirring halfway through.
  2. Prepare pasta according to package directions. Once done cooking, rinse well before assembling.
  3. Meanwhile, cut broccoli florets from stems and separate into small pieces using a paring knife. In a large bowl, whisk together mayo, yogurt, Stevia, red wine vinegar and salt and toss with broccoli, hot cooked pasta (that has been rinsed) and grapes. Stir to coat.
  4. Cover and chill for up to 3 hours. Stir in bacon and toasted pecans just before serving.
  5. Note- The sauce on this can be doubled if you desire a more creamy pasta.
Slightly Adapted from Eat Yourself Skinny

walmart_mom_disclaimer

Pin It

McCormick FlavorPrint + 3 Fun Ideas for Dinner!

Wednesday, June 25th, 2014

*This post is sponsored by McCormick Spice in partnership with the One2One Network.

One of my late night past times is staying up to take ridiculous quizzes like, “What 80’s Boyfriend Should You Have?,” and “What OITNB Character Would You Be?” and one of my favorites, “What Country Should You Live In,” as though these quizzes will hold the deep meaning to life.

In case you are wondering, I am Piper, Lloyd Dobbler from Say Anything should be my boyfriend, &  I belong in Paris. All completely accurate & true.

Well, if you are a quiz junkie like, me you will love the new FlavorPrint tool from MCcormick Spice that is a lot like those quizzes you love, but actually will be useful because you can plan your family’s meal around the answers you provide. For someone who is stumped for fresh ideas in the summer and who has found herself gravitating towards the same three dishes for ease, I couldn’t wait to take the quiz and figure out what options would fit our family’s needs.

McCormick FlavorPrint

McCormick has found that each person has a unique flavor “fingerprint” that is conveyed through a distinct visual mark, which has 33 “spikes” to represent different flavors in your personal flavor profile. The bigger the spike, the more prominent the flavor. Through this quiz, it can identify your own personal tastes and provide delicious options that fit that unique profile for your dinner hour.

The quiz takes about two minutes of answering questions like, “Do you like mint?” and then “How about onions?” Once you have completed the quiz, it will provide meal options for you that you can try. If you like the options, you can dive in deeper and give them a thumbs up, answer more questions about your personal taste, share what you always have on hand in your pantry, and even tell them what type of equipment you have or don’t have in your kitchen. It will continue to share more and more personalized meal options as you completely more answers. For quiz junkies like me, it was a little slice of heaven.

McCormick FlavorPrint
For families that suffer from food allergies or sensitivities, you can also share what you need to avoid. I love that Wheat was an option on this so that the recipes that were shown for our family were gluten-free meal options, helping us really have useful choices for us. The last thing I want to see is all the wheaty goodness I can’t indulge in. Thanks, FlavorPrint, for making me feel like I actually have food choices.

McCormick FlavorPrint After answering the questions, these were the flavors that rose to the top. Based on this information, FlavorPrint offered some meal ideas for us. After I picked a meal to try, I answered  more questions on the quiz and got more meal ideas.  Here are three meal ideas that FlavorPrint suggested for me.

Edamame and Corn Salad with Oregano Vinaigrette

Edamame and Corn Salad with Oregano Vinaigrette

The first dish it recommended for me was a Edamame and Corn Salad with Oregano Vinaigrette. I can see exactly why it would recommend this for me because I LOVE edamame and I love corn. Since sourness is something I love, the acidic dressing just makes sense for me. This salad had fresh corn, red bell peppers, parsley, and edamame in it. This would be a great dish to take to a cookout and I have been eating the leftovers as a side dish for my lunch.

Creamy Spinach & Mushroom Risotto

Creamy Spinach & Mushroom Risotto

Playing on my love for all things cheesy, the next recommendation that was made was this Creamy Spinach & Mushroom Risotto made from an easy boxed rice mix. Although I wouldn’t say that this would be in our regular rotation, I know that on a busy weeknight of activities, this would be a fun side to add with a little grilled meat and is much easier to create than babysitting a pot of homemade risotto.

Let’s be honest…ain’t nobody got time for that.

My kids really loved this dish and I found it comforting & satisfying. We called this another dinner win!

Grilled Chicken Caprese

Grilled Chicken Caprese

Grilled Chicken Caprese

Grilled Chicken Caprese

The last dish recommended was a Grilled Chicken Caprese which could not have fit our family more perfectly. You may recall, I had just shared a 5-ingredient Caprese Pork Chop recipe that our family loved. This mimicked those same flavors, but did not require marinating the chicken, but utilized Lawry’s Roasted Garlic Salt with Oregano & Basil instead and a grilled tomato that was sprinkled with the same. My family absolutely loved this dinner option and my only regret was not making a double batch of these. It paired well with the risotto and would be a perfect summer meal to entertain with.

McCormick FlavorPrint

As you can see, we got some great dinner ideas using the FlavorPrint tool and we can’t wait to continue quiz-taking to find more meal ideas for our family.  I highly recommend you take the quiz too and get some fresh ideas for your dinner hour. In the meantime, I have created three pinnable images (below) for the meals that we tried, in case your FlavorProfile looks anything like ours!

Edamame and Corn Salad with Oregano Vinaigrette

Creamy Spinach & Mushroom Risotto

Grilled Chicken Caprese


Cheers to summertime meal ease & quizzes that give us actually useful information for our families… although wouldn’t you be sad if you didn’t know your destiny resides in Paris?  I hope you love it as much as we did!


*This post is sponsored by McCormick Spice in partnership with the One2One Network.

Berry Pecan Salad With Candied Pecans & Homemade Raspberry Vinaigrette

Tuesday, June 17th, 2014

Berry Pecan Salad With Candied Pecans & Homemade Raspberry Vinaigrette

Summer was made for salads.  This month I want to share with you some new salad flavor combinations we have been trying for our family dinners. Today I am sharing a delicious Berry Pecan Salad that is perfect for sharing around the picnic table or at your next cookout. It is my new favorite salad and what makes this salad standout is the homemade raspberry vinaigrette dressing, pecans, and the combination of berries.  When I took an enormously large bowl of this to our last cookout, I brought home an empty bowl and a promise to share the recipe.

Berry Pecan Salad from MomAdvice.com.

Where to Buy Raspberry Balsamic Vinegar

Since going gluten-free, I have become really diligent about package reading and making sure that I am not eating anything that can make me sick. Many of the bottled dressings are not anything that I can eat or even pronounce. Unfortunately, not all the items I need to create beautiful flavor combinations are necessarily on the grocery store shelves where I shop.

For this dressing recipe, you will need Raspberry Balsamic Vinegar. I went to two grocery stores and wasn’t able to find it so I headed to The Olive Branch, a locally-owned shop that sells olive oils and vinegars. I spent the morning tasting all of these rich balsamic vinegars and learning more about the different flavor notes in each one. I took home a bottle of their Red Raspberry Balsamic Vinegar and couldn’t wait to put it to work in this salad.  You can certainly substitute this homemade version with a bottled dressing, but I promise you that it will lack the depth of flavor and the richness that I was able to achieve with my homemade dressing. Because the dressing is so rich, a small drizzle is all you need to dress your salad bowl.

Candied Nuts

Have you ever candied nuts before?  It is ridiculously easy and you can make a large quantity at one time for your salads.  This recipe calls for just Candied Pecans, but you can add any variety of nuts into your salad that you prefer. Pictured above are my Sugar & Spice Nuts that are always a fun gift to give (and to eat!).  They also are a delicious topper to oatmeal or even bowls of warm quinoa.

For the chicken, I use this technique for cooking chicken in bulk. If you are pressed for time, you can certainly substitute with a rotisserie chicken from your grocer.

To keep this salad vegan, ditch the chicken and replace the egg white in the nut recipe with two to three tablespoons of water and a tablespoon of flax to coat the candied nuts.

To enjoy this salad all week long, prepare it all for the week and consider creating your own DIY Salad Bar in the fridge for easy summer meals after a long day with the kids. Everyone can customize their own salad bowls and you can enjoy that prep work all week long!

I hope this salad inspires you to get creative with your summer salad and I look forward to sharing more fun salad combinations in the upcoming weeks!

Berry Pecan Salad from MomAdvice.com.


Editor’s Note- Our recipe software is not working this week and we have submitted a support ticket. Please accept our apologies!

A berry pecan salad that is perfect for celebrating the berry season. Enjoy this one at your next potluck or cookout!

Pecan Berry Salad

1 bag of spinach

1 pint of strawberries, sliced

1 pint of blueberries, rinsed

1 pound roast chicken (see technique above or use a rotisserie chicken), sliced

1/4 cup granulated sugar

1/2 teaspoon ground cinnamon

1 teaspoon cornstarch

Pinch of Salt

1/4 teaspoon ground cloves

1/4 teaspoon ground nutmeg

1 egg white (see above for vegan substitution)

1/4 teaspoon vanilla extract

2 cups pecan halves

1/4 cup raspberry balsamic vinegar

1/2 teaspoon salt, plus more if needed

1 teaspoon Dijon mustard

3/4 cup extra-virgin olive oil

1-2 tablespoons white sugar (to taste, you may not even need it depending upon the quality of your balsamic vinegar)

1/4 teaspoon dried oregano

Freshly ground black pepper to taste

Preheat the oven to 300 degrees. Line a rimmed baking sheet with parchment paper.

Place the sugar, cinnamon, cornstarch, salt, ground cloves, and ground nutmeg in a plastic bag, seal the bag, and shake to mix.

Put the egg white and vanilla in a bowl, and beat until slightly foamy.

Add the pecans and stir to coat them well. Using a slotted spoon, lift the pecans out the bowl and transfer them to the bag of sugar and spices. Shake, making sure the pecans are well coated with the seasoning. Spread the pecans out on the prepared baking sheet, and bake for 30 minutes. Remove from the oven and let them cool on the baking sheet.

Assemble the salad: spinach, sliced strawberries, blueberries, roast chicken, and then top with cooled candied pecans. In a mason jar, add the oil, vinegar, oregano, salt, pepper, mustard, and sugar. Shake well. Serve on the side for your salad, shaking well before using.

Prep Time: 10 Minutes

Cook Time: 30 Minutes

Serves: 6

Pin It

A Self Crusting, Dark Leafy Green Quiche Recipe

Monday, May 26th, 2014

From our food contributor, Diana Bauman. A Self Crusting, Dark Leafy Green Quiche | momadvice.com Spring is my favorite season of the year. Being from Iowa, it’s a breath of fresh air, literally, to be able to spend time outdoors as the weather warms and the cycle of life begins anew. As much as I enjoy spring time and all that it brings, it also happens to be a busy season in my life. With 2 boys and a husband in baseball and an urban homestead to keep up on, I intentionally seek out and prepare meals that come together quickly. One spring ingredient I take full advantage of are eggs. I know what you’re thinking, “eggs are available year round.” Well, yes they are; however, having raised backyard hens for 5 years, I’ve come to learn that they are indeed seasonal. In the winter, hens need to conserve body heat and so they produce fewer eggs. When spring arrives and the weather warms and the daylight increases, their egg production soars. I’m currently getting around 10-11 eggs per day whereas in the winter my hens would only lay about 2-3 eggs per day. Their egg production usually stays up until the heat of summer kicks in around July and August. At that time, their egg production slows and gradually increases as the weather cools in fall. Then when winter arrives, their egg production is nearly halted until the spring comes again. The reason hens raised commercially are able to produce eggs year round is that they are kept in an environment that is neutral with heat, light, and grains so that they are able to lay continually, year round. Isn’t it neat to be in touch with the seasons and cyclical patterns of life? For now, my family is living in an abundance of eggs and nothing makes me happier since they are a traditional source of complete protein and nutrition.

A Self Crusting, Dark Leafy Green Quiche

A Self Crusting, Dark Leafy Green Quiche | momadvice.com 
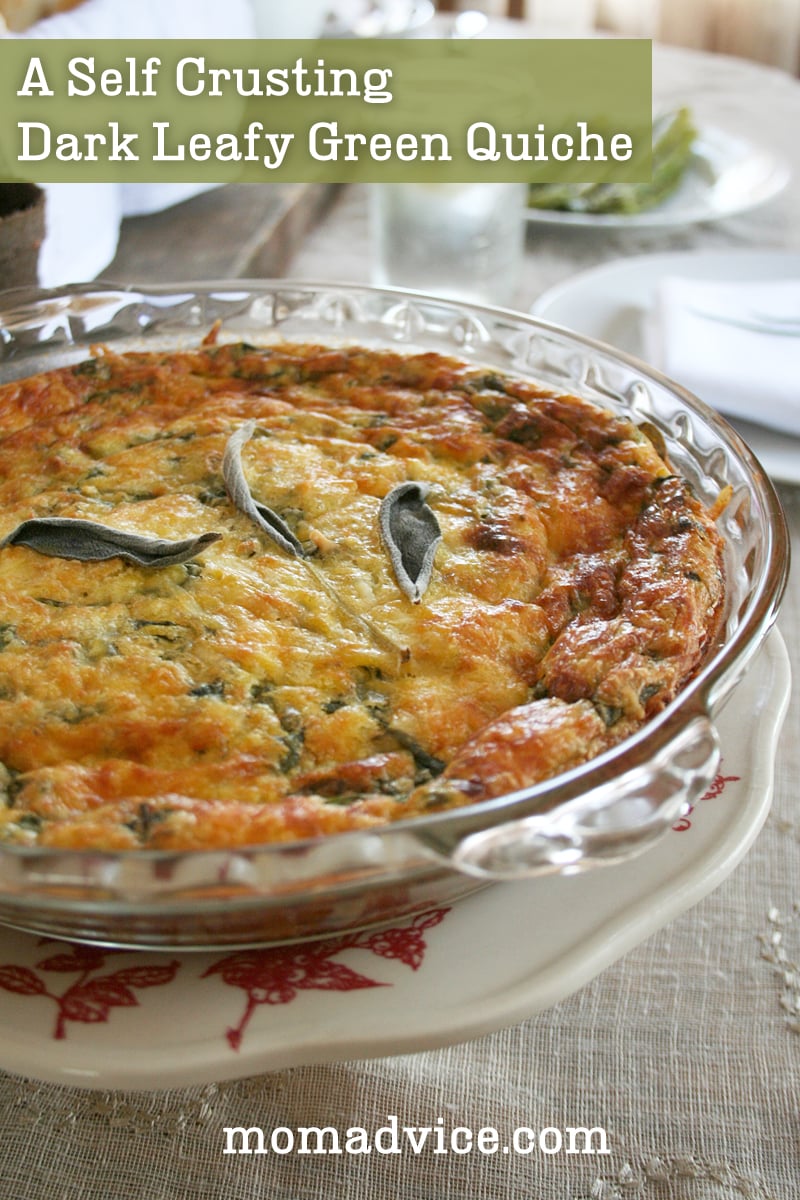
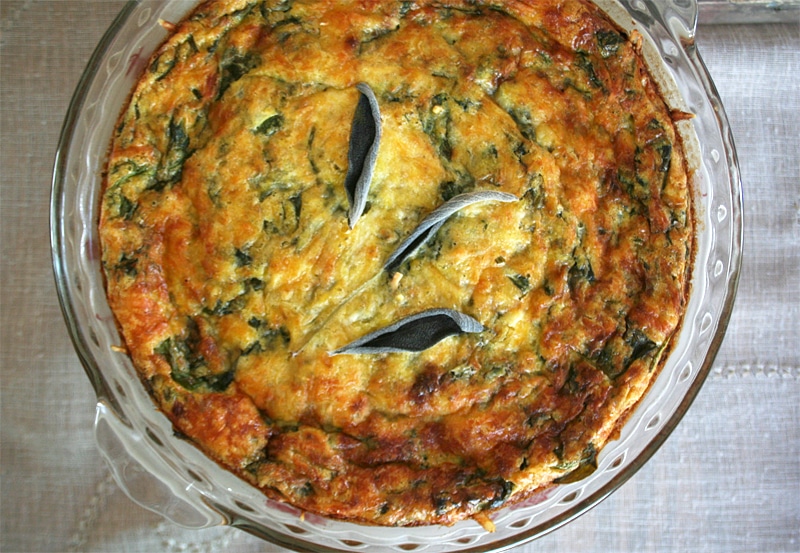
One of my favorite way to use our abundance of eggs packed full of nutrients is by making a quiche – a light dish, perfect for a spring time brunch or supper. self-crusting-quiche4 A quiche is essentially a custard that is made with milk and eggs and then poured into a pastry crust to be baked. As delightful as a traditional quiche is, I’m oftentimes to busy in this season to make the crust, allow it to firm up in the fridge, roll it out, and then mold it into a pie dish. Instead, on busy spring days, I usually make a self crusting quiche that forms itself by the addition of flour and a bit of baking powder. It creates its own darkened type crust right in the oven as it’s baking. It saves me so much time and makes this dish come together in literally minutes! self-crusting-quiche5 
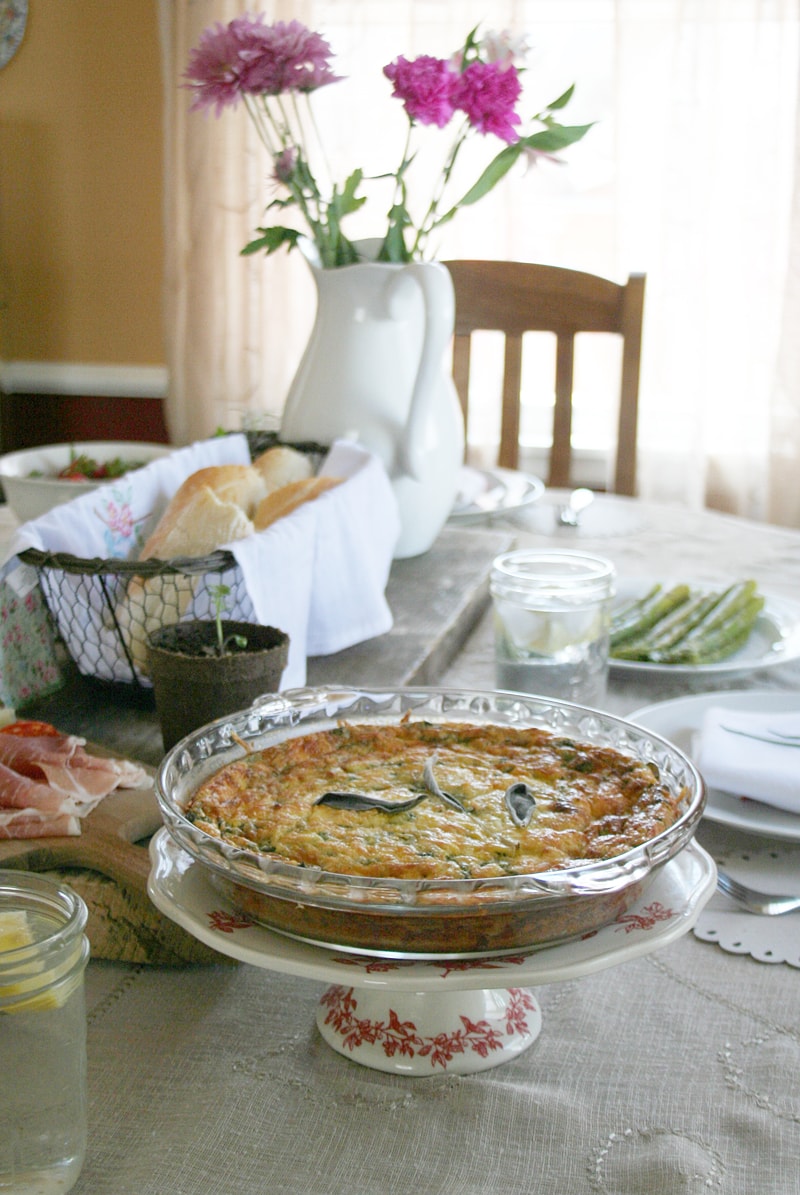
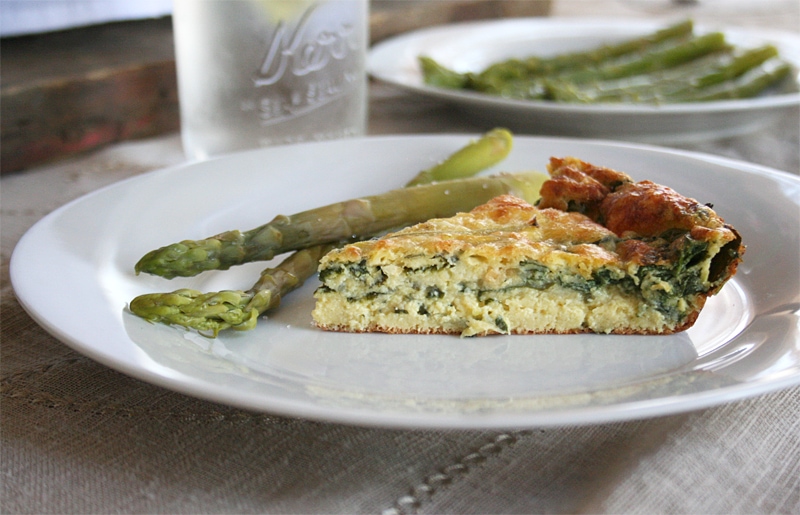
For this particular quiche, I added dark leafy greens of swiss chard, kale, and spinach. Together with cheddar and pecorino romano cheeses, this quiche is light, creamy, and savory. What’s great about a quiche is that it can be eaten warm, at room temperature, or cold. On days that my family has ball games to play, I’ll usually whip up a self crusting quiche during the day and refrigerate it to eat cold later in the evening. A quick, nourishing, and satisfying spring meal.

A Self Crusting, Dark Leafy Green Quiche
Recipe Type: Dinner
Cuisine: French
Author: Diana Bauman
Serves: 4-5
A self crusting, dark leafy green quiche. A perfectly light, quick to make spring meal your entire family will enjoy.
Ingredients
  • 2 tbls extra virgin olive oil
  • 1/2 medium yellow onion, diced
  • 2 cups packed dark leafy greens (like spinach, swiss chard, kale)
  • 1/4 cup water
  • 4 eggs
  • 1 cup milk
  • 1/2 cup cheddar cheese
  • 1/2 cup flour (for gluten free, sub oat flour)
  • 1/2 tsp baking powder
  • 1/2 tsp salt
  • 1/4 cup Pecorino Romano Cheese or Parmesan
Instructions
  1. Preheat oven to 400F.
  2. Lightly butter a 10-inch pie plate
  3. In a skillet or cast iron pan, heat 2 tbls of extra virgin olive oil and saute the onion until translucent. Add 2 cups, dark leafy greens and the water. Cook until the greens just start to wilt; 3-4 minutes. Set aside to cool.
  4. In a large mixing bowl, whisk together the eggs and the milk. Add the cheddar cheese and mix though. Add the flour, baking powder and salt; whisk through then stir in the greens and onions.
  5. Pour the contents of the bowl into the pie plate. Top with the Pecorino Romano cheese.
  6. Bake for 35-40 minutes, or until the center is set and the outside edges are golden brown.

What are your favorite meals to whip up on busy days?


Pin It

5-Ingredient Caprese Pork Chops

Tuesday, May 20th, 2014

Caprese Pork Chops from MomAdvice.com


Nothing says summer like summertime grilling.  

Today I am sharing an easy 5-ingredient recipe for Caprese Pork Chops that you must try for your backyard grilling.

These 5-ingredient pork chops couldn’t be easier and are our family’s new favorite dish.

Anything that can be made with minimal effort, reheats like a dream, and makes my whole family happy is a winner in our kitchen.

This recipe serves all three of those purposes!

As we head into the summer months on the blog, my focus on projects and food are going to be all about simple things that add value and save you time in your day.

I hope you will appreciate the shift in focus and be inspired to try incorporating some of these ideas into your life, especially when they are so easy to execute.

If you plan to do some gardening this year, this recipe is a great way to use up your basil and cherry tomatoes or even create the pesto from scratch from your garden of herbs.

You can also try my version by hitting your local grocer, farmer’s market, or vegetable stand to snag these ingredients.

Be sure to check out my get your grill on Pinterest board for additional inspiration and, if it hasn’t gotten too hot where you are, clean your grill while you sleep!


5-Ingredient Caprese Pork Chops from MomAdvice.com #grilling #glutenfree

5-Ingredient Caprese Pork Chops
 
Recipe Type: Grilling
Author: Amy Clark
Prep time:
Cook time:
Total time:
Serves: 8
An easy 5-ingredient Caprese Pork Chop that couldn’t be easier to prepare…or eat!
Ingredients
  • 8 thick center-cut pork chops, boneless
  • 1 jar of pesto (I love the Classico brand- over by the spaghetti sauce/pasta aisle)
  • 1 pint cherry tomatoes
  • 1 ball of fresh mozzarella
  • Handful of basil
  • Salt & Pepper, to taste
Instructions
  1. Place pork chops in a bag and pour the jar of pesto over them. Season with salt and pepper. Seal the bag and move the bag around to coat all of the chops in the pesto. Allow them to marinate for four hours or overnight.
  2. Slice the cherry tomatoes in half in a small bowl. Chop or tear the basil and add them to the tomatoes, seasoning with salt and pepper. Slice the mozzarella into eight slices and set aside.
  3. Preheat your grill on medium-high heat. Place chops on the grill and cook for five minutes on each side. In the last two minutes, add a slice of mozzarella on each pork chop. Shut the grill and allow the cheese to melt.
  4. Once the pork is cooked through, remove it from the grill and allow the chops to rest for 5 minutes. Top each chop with the tomato salad. Serve.
 

Caprese Pork Chops from MomAdvice.com


For more grilling recipes try these:


Chicken Pesto Burgers from MomAdvice.com

Chicken Pesto Burgers


Beef Gyros

Grilled Ground Beef Gyros


Chicken Gyros

Grilled Chicken Gyros


Chicken Kabobs

Grilled Chicken or Shrimp Kabobs


Balsamic Rosemary Salmon

 Balsamic & Rosemary Grilled Salmon


Honey Grilled Salmon

 Applebee’s Honey Grilled Salmon


Grilled Chicken Tenders

 Cracker Barrel Grilled Chicken Tenders


Grilled Shrimp

 Grilled Shrimp with Garlic & Herbs


Pin It

Slow Cooker Mexican Black Beans

Tuesday, April 29th, 2014

Slow Cooker Mexican Black Beans from MomAdvice.com.

For years I have been wanting to make beans in the slow cooker, but was intimidated with the process. Beans in the slow cooker though are surprisingly easy and frugal to create in large batches for your family. Today I wanted to show you a foolproof and delicious recipe for Slow Cooker Mexican Black Beans for all of your Cinco de Mayo fun, or as a frugal side dish for your next taco night. Today’s cooking tutorial is going to take you through the in’s and out’s of how to cook beans, how to freeze them, and then in the comments below you can share your views on bean preparation. Everyone has a theory, a trick, and a recipe. Let’s share what we know works best for us!

Bean Cooking 101

How to Cook Dried Beans

Why Should You Trouble Yourself With Dried Beans?

There is true convenience in grabbing a quick can of beans for your dishes out of your pantry. Although it is still a frugal staple, dried beans are oh-so-much cheaper and they have much more flavor than the canned variety. Dried beans typically cost two to three times less than canned beans and they have the added benefit of less sodium, more flavor, and can save you a lot of room in a small pantry. Did I mention that they can be made while you are sleeping in your slow cooker? Now that’s a beautiful thing.

When I posted that I was working on this on Instagram, many people commented on their techniques as well as their failures in cooking beans. I guess I am not the only one a little intimidated by the process. Now that I have made them though, I will be making this a regular habit because it saves me a lot of money and is a very filling protein for someone who is on a gluten-free diet and always hungry.

A Little Sorting Never Hurt Nobody

Once you purchase your beans, make sure you sort them out. Arrange dried beans on a sheet pan or clean kitchen towel and sort through them to pick out any shriveled or broken beans, stones or debris. This is not an all-day affair, just a quickly peek and move on to the next steps.

Rinse It, Rinse It Good

Always make sure you rinse your beans really well before beginning. Make sure you also rinse them well after our salt brine (below).

Slow Cooker Mexican Black Beans from MomAdvice.com.

To Soak or Not to Soak

Sounds like a great Shakespeare line, doesn’t it? I know that many people skip the soaking process and opt to just throw them right into the slow cooker after a rinse.  I always consult the experts when it comes to cooking and according to Cook’s Illustrated, quick soaking can be effective, but their proven method of soaking beans in a brine, yields a bean that a girl can really be proud of.  Just as a brine on a bird can yield tasty results, beans can benefit from salt too. The salt soak prevents magnesium and calcium from binding to — and, subsequently hardening — the cell walls on your beans. When people  complain that they can never get the beans to soften, you can be assured that a brine can help with that, while maintaining the shape of your beans.

Cook’s Illustrated recommends, for 1 pound of dried beans (about 2 cups) dissolve 3 tablespoons of salt in 4 quarts of water. Add the rinsed beans and let them soak at room temperature for at least 8 hours or up to 24 hours. (If you’re short on time, quick-soak the beans: Place the beans in a large heatproof bowl. Bring 2 quarts of water and 3 tablespoons of salt to a boil. Pour the water over the beans and let them soak for 1 hour before draining and rinsing.)

As far as salting goes for your beans for seasoning though, it is advised to wait until the end and salt once they are cooked and season to taste. You also want to be sure that you are rinsing that brine off before you get started with your recipe.

Slow Cooker Mexican Black Beans from MomAdvice.com.  Cook Them Low & Slow

Since beans need to be cooked low and slow, the slow cooker is ideal for cooking your beans. Once you have rinsed these after the salt brine, add them to your slow cooker along with liquid and seasonings of choice and turn your slow cooker on Low and head to bed.  Skip the addition of anything acidic though because the acid can prevent those beans from breaking down and it’s all about getting these beans to break down.

I cooked mine in my Ninja Cooker and set it for six hours and it set’s itself to warm after that.  The beans should take roughly six to eight hours to cook and slow cookers can be the ideal tool for cooking them. According to The Kitchn, it’s adviseable to pick a slow cooker that fits best with the amount of beans you are cooking. They advise that for small batches of beans, a pound or less, to rely on a 3 1/2-quart or smaller slow cooker. If cooking 2 pounds or more, you can use your 7-quart slow cooker.

Slow Cooker Mexican Black Beans from MomAdvice.com. Freeze Those Beans

Once the beans are done, divide them up into two cup portions in freezer bags and put them in the freezer.  You can now enjoy the savings all month long and enjoy these beans as a side or accompaniment to any of your favorite Mexican dishes.

I hope this tutorial helps and I can’t wait to read your own tips for cooking beans in the comments below! These would be delicious paired with my favorite 10-minute fish tacos, our chicken enchiladas (made with homemade enchilada sauce), my roasted corn salsa, and a tall margarita or mojito…just in case you are looking for a few great dishes for Cinco de Mayo!

Slow Cooker Mexican Black Beans from MomAdvice.com.

SAFETY NOTE: If you are cooking kidney beans, boil them for 10 minutes before cooking. This neutralizes a toxin called phytohemagglutinin that can cause acute digestive distress.

Slow Cooker Mexican Black Beans
Author: Amy Clark
Prep time:
Cook time:
Total time:
Serves: 6
Be sure to read our Bean Cooking Tutorial before you begin! These beans make the perfect side dish for any meal!
Ingredients
  • 1 pound dried black beans
  • 6 cups chicken or vegetable broth
  • 6 cloves garlic, smashed and chopped
  • 1 tablespoon cumin
  • 1 tablespoon chili powder
  • 1 (14.5-ounce) can diced tomatoes, or 2 cups fresh chopped tomatoes (ADD AT THE END)
Instructions
  1. Follow the instructions for sorting, rinsing, brining, and then rinsing again as I have outlined above.
  2. Put the drained beans into your slow cooker, then add the chopped garlic, broth, cumin, and chili powder. Stir well to combine.
  3. Set on LOW for six to eight hours in your slow cooker (see above for recommended slow cooker sizes based on pounds).
  4. Once they are done, stir in diced tomatoes and season.
This post contains affiliate links.

What’s your favorite way to cook beans? Any tips, tricks, or techniques that work well for you?

Pin It

A Lentil Stew – Anyway You Want It

Monday, April 28th, 2014

From our food contributor, Diana Bauman.

A Lentil Stew - Anyway You Want It | momadvice.com

Am I ever excited to talk lentils today! Being that I’m part Spanish, lentils are a staple in my home. My mother is from Sevilla, Spain. I’ve spent many summers abroad visiting my family there and one meal that I could never get enough of was lentejas con chorizo, lentils with Spanish chorizo sausage. Lentils, to a Spaniard, is just as comforting as a warm bowl of homemade mac and cheese is to an American. The great thing about lentil dishes is that kids love it just as much as adults. Whenever I prepare lentejitas, as I call it, my kids gobble it up and I’m sure yours will to.

A Lentil Stew - Anyway You Want It | momadvice.com

Lentils are legumes (beans) that are quick and easy to make. They readily absorb flavors from other foods and spices making them a bean that many people enjoy to eat. Lentils also pack a healthy punch. They contain high levels of soluble fiber which lowers cholesterol and helps in reducing your risk of heart disease and stroke. Also, because it contains so much soluble fiber it stabilizes your blood sugar levels making this a great food for diabetics. Lentils are also a good source of folate and magnesium which contributes to heart health. They’re also a good source of B vitamins. It’s been found that many people with depression, stress, and anxiety have low levels of B vitamins and magnesium. Adding lentils to your diet can help alleviate physical symptoms and lift your spirits. Let’s not forget, lentils are also packed with protein! Out of all the legumes and nuts, they contain the third-highest level of protein.

So, if you were ever squeamish to try lentils, all of these nutritional benefits should make them a staple in your home.

My favorite way to prepare lentils is by making them in a stew. The greatest thing about a lentil stew is that all you have to do is place all of your ingredients in a pot, add water, and cook. It couldn’t be easier. When making a lentil stew, you can make it with any vegetable that happens to be in season.

From zucchini, carrots, and dark leafy greens…

A Lentil Stew - Anyway You Want It | momadvice.com

to pumpkin, turnips, and rutabaga.

A Lentil Stew - Anyway You Want It | momadvice.com

In Spain, the most comforting way to eat lentil stew is by adding Spanish chorizo sausage (not to be mistaken for Mexican, uncured, chorizo). This cured meat gives the stew depth in flavor and adds a bit of piquant by the Spanish paprika (pimenton) seasonings within it. Both the chorizo and Spanish pimenton used to be difficult to source in the United States but is now readily available in most specialty stores. If you can’t find the sausage, no worries, It tastes just as good by adding any other type of sausage including bacon or even by omitting the meat all together.

Today, I’m going to share with you the lentil stew recipe I typically make at home. I usually add chorizo sausage, a bit of rice, potatoes, and dark leafy greens.

A Lentil Stew - Anyway You Want It | momadvice.com

It’s simple to prepare, comforting, and the entire family enjoys it. I hope yours will as well.

A Traditional Spanish Lentil and Chorizo Stew
Recipe Type: Dinner
Cuisine: Spanish
Author: Diana Bauman
Prep time: 5 mins
Cook time: 40 mins
Total time: 45 mins
Serves: 4-5
This is a nourishing lentil stew made with Spanish chorizo sausage that the entire family will enjoy.
Ingredients
  • 1 cup dried lentils
  • Spanish Chorizo Sausage, sliced in coins (about 1 1/2 cups)
  • 1/2 green pepper, roughly chopped
  • 1/2 white onion, roughly chopped
  • 3 garlic cloves, whole and smashed
  • 2 roma tomatoes, whole
  • 2 bay leaves
  • 3 tbls extra virgin olive oil
  • 1 tsp Spanish paprika, pimenton
  • 3 russet potatoes, roughly chopped
  • 1/2 cup white Basmati rice
  • 1 tsp salt
  • 3 large handfuls dark leafy greens
Instructions
  1. In a large pot or dutch oven, add the lentils, chorizo sausage, green peppers, onions, garlic, tomatoes, and bay leaves. Cover all the ingredients with water so that it covers them by 1-2 inches.
  2. Add the olive oil then bring to a boil over high heat. Once boiling, lower the heat to medium and simmer, uncovered for 25 minutes.
  3. After 25 minutes add the potatoes, rice, and salt and simmer for an additional 20 minutes or until the potatoes are tender and the rice is cooked through.
  4. As soon as all the ingredients are cooked through, add the dark leafy greens and serve right away.
3.2.2265

Does your family enjoy eating lentils? What’s your favorite way to prepare them?

Pin It

Thai Coconut Chicken Curry

Monday, April 7th, 2014

From our food contributor, Shaina Olmanson.

Thai Coconut Chicken Curry #recipe via Shaina Olmanson at MomAdvice.com
Thinking fast on your feet is one of those skills no one ever tells you you’ll need as a mom. I often feel like there should have been a prerequisite before choosing to have kids, a mini boot camp that presented you with harrowing situations and tight time limits for figuring out the solution. Where were those life skills taught?

More often than not, when I reach the 5 o’clock hour I’m in a mad rush to throw something together before whatever activities the evening holds. I have four kids emptying their backpacks on my dining room table as I stare into the refrigerator, and as I’m stress-searching the contents of crisper drawer and the inner door, one of them is bound to ask for homework help. Why didn’t I remember to take the meat out of the freezer?

It is in these parenting moments where I feel utterly defeated by life that I find the greatest opportunities to defeat it instead. This meal is one of those that lends itself to last-minute meals. I try to keep ingredients for it on hand, ready at a moment’s notice, along with a Greek seasoning blend and taco seasoning and cans of beans in the pantry (which isn’t really a “pantry” as much as basement shelves and a cupboard in the garage at my house). They’re the things I turn to when everything is falling apart, when I’ve dropped every ball there was to juggle. The thing they have in common: quick cooking times.

Cutting the chicken thin helps it cook faster. If you only have chicken in the freezer, thaw it partially and then cut it. It’s wonderfully easy to slice thinly when there’s still a bit of frozen resistance. The vegetables are interchangeable, for the most part. Use what you have on hand. Zucchini and mushrooms can be great in this curry, too.

Thai Coconut Chicken Curry #recipe via Shaina Olmanson at MomAdvice.com
Let’s talk rice. I’m not going to judge the type of rice you use here, whether you’re a boil-in-the-bag home, a minute-rice family, you rely on those microwaveable pouches and trays, you are a diehard stovetop rice cooker, or you – like me – are devoted to your rice cooker. For me, I find that the best way to cut down on rice cooking time is simply to make exactly the amount you need. My rice cooker takes far longer to cook six cups of rice (I like leftovers) than it does to cook two. Similarly, if you are making it on the stove, bringing several cups of water to a boil is going to take more time than if you only make what you’ll be eating.

Thai Coconut Chicken Curry
Recipe Type: Main Dish
Cuisine: Thai
Author: Shaina Olmanson
Serves: 4-5
Ingredients
  • 2 tablespoons oil
  • 2 chicken breasts, cut into thin slices
  • 2 tablespoons Thai red curry paste
  • 1 red bell pepper, thinly sliced
  • 1 daikon, julienned (see notes for substitutions)
  • 1 tablespoon brown sugar
  • 2 teaspoons fish sauce
  • 1 can (15 ounces) coconut milk
  • 4 green onions, diced
  • 3 tablespoons fresh cilantro
  • 4 cups cooked rice
Instructions
  1. In a wok or large saucepan, heat the oil over medium-high heat. Add in the chicken and cook until white on all sides. Stir in the curry paste. Add the red bell peppers and the daikon and saute for 3 minutes.
  2. Stir in the brown sugar, fish sauce, and coconut milk. Bring just to a boil, then lower the heat and simmer for 5-7 minutes.
  3. Sprinkle green onions and cilantro over the top just before serving. Serve over rice.
Notes
You can substitute bamboo shoots, bean sprouts, or another vegetable for the daikon.


Pin It

Mama Francesca Cheese & a Gluten-Free Meatball & Pasta Recipe

Monday, March 31st, 2014

Mama Francesca Premium Cheese Review

*This post is sponsored by Mama Francesca

I have been looking forward to sharing with you all week my new partnership with Mama Francesca Grated Cheese. The company reached out to me to share about their beautiful product and I couldn’t wait to start cooking with it and showing it off on our site.

Mama Francesca Premium Cheese Review Mama Francesca Premium Cheese Review

Have you heard of Mama Francesca? It is a delicious new grated cheese that comes in five different varieties. I am showcasing three flavors that I found at my own store. The ones pictured here are: Aromatico (Parmesan, Basil & Oregano), Fiero (Parmesan & Red Pepper), & Pungente (Parmesan & Garlic). As you can see from the picture, the cheese is light and fluffy while blended with delicious spices that you can see and taste in your dishes.

You can also find Audace (Parmesan & Romano), and Perfetto (Classic Parmesan) on your store shelves.

 Mama Francesca Premium Cheese Review

Many times when we think of parmesan cheese, we think of it as a way to just dress our dishes. With these fun cheese blends though, they offer a delicious ingredient alternative in your favorite recipes that, not only add flavor, but can save you time in the kitchen since they incorporate that perfect blend of spices.

My family is a big fan of pasta and meatballs.  I wanted to create that familiar dish that we love, but in a gluten-free variety using Mama Francesca’s cheese as the inspiration for our new dish. I replaced the spices and cheese with the Aromatico (Parmesan, Basil & Oregano) cheese blend and then replaced the breadcrumbs in these meatballs with a little gluten-free panko. The replacement of spices and cheese saved me time digging through my spice rack and the cheese blend managed to still perfectly spice our meatballs. When it comes to meatballs,  I recommend doubling these to enjoy a delicious meatball sub for a busy weeknight meal- topped with sauce & cheese.

With this dish, you can use any variety of gluten-free pasta shape you love. Rotini, shells, and elbow macaroni are three of my favorites in this dish. The pasta can be tossed gently in this delicate fresh tomato sauce.

Mama Francesca Premium Cheese Review 
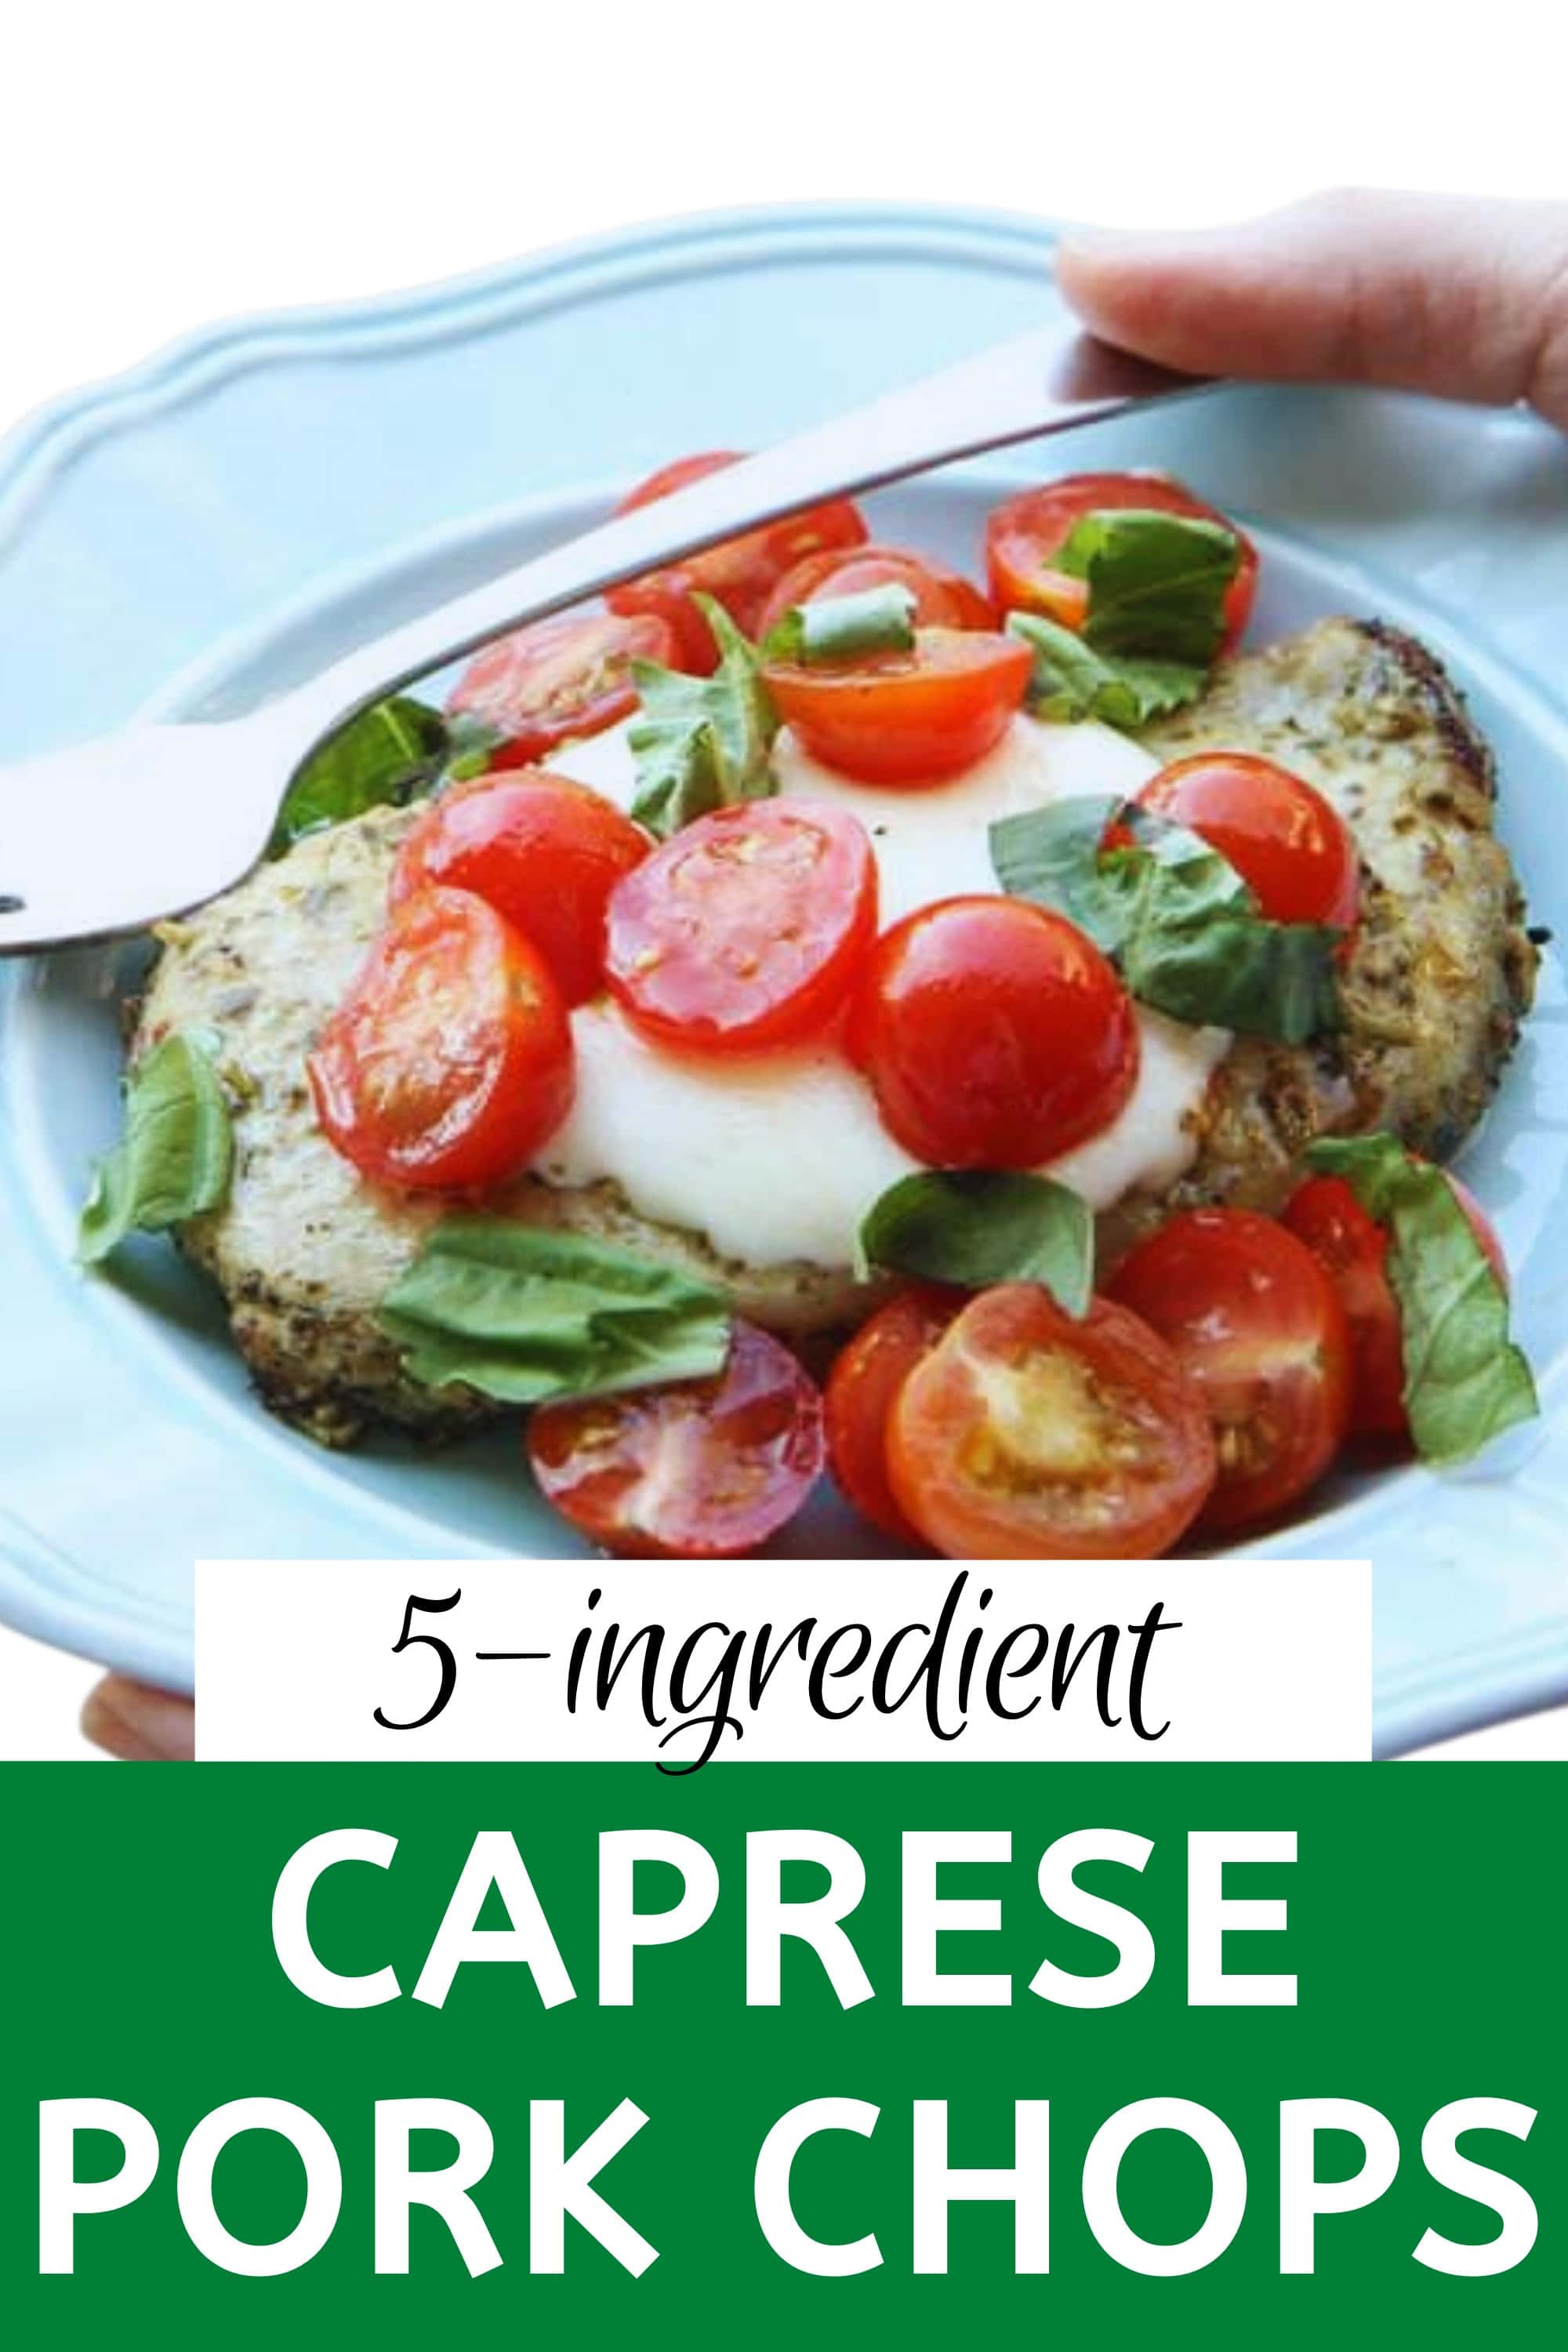
Of course, just because you use the cheese in the meatballs doesn’t mean you can’t shake on the cheese liberally over your plates of pasta. Set out a few varieties of cheese and let your family member’s customize their dishes for a fun family meal!

I hope you will give Mama Francesca a try for your next family dinner! I promise that this cheese does not disappoint!

Gluten-Free Meatball & Pasta Recipe

Gluten-Free Meatball & Pasta Recipe
Recipe Type: Main
Author: Amy Clark
Prep time:
Cook time:
Total time:
Serves: 6
A gluten-free meatball & pasta dish that is just as delicious as the gluten-filled version.
Ingredients
  • Gluten-Free Pasta With Meatballs
  • ¼ cup gluten-free panko
  • 2 large eggs, lightly beaten
  • 1 tablespoon whole milk
  • 1 tablespoon ketchup
  • ¾ cup Mama Francesca Aromatico (Parmesan, Basil & Oregano) Grated Cheese
  • ¾ teaspoon salt
  • ¾ teaspoon freshly ground black pepper
  • 1 pound Sweet Italian Turkey Sausages (remove the casings)
  • 1½ cups low-sodium chicken stock
  • 1 tablespoon olive oil
  • 1 tablespoon minced garlic
  • 4 cups cherry tomatoes, halved
  • 1 pound gluten-free pasta (any variety)
Instructions
  1. In a medium bowl, stir together the panko , parsley, eggs, milk, ketchup, cheese, salt, and pepper. Add the turkey and gently stir to combine.
  2. Make your meatballs the standard size and put them on a baking sheet.
  3. Bake at 400 degrees for ten to fifteen minutes.
  4. In a large pot, heat your olive oil and then heat your garlic for about thirty seconds. Next, heat chicken stock and tomatoes and bring to a boil.
  5. Bring a large pot of salted water to a boil over high heat. Add the pasta and cook until tender but still firm to the bite, as directed on the packaging directions of your favorite pasta variety.
  6. Drain the pasta and rinse well with warm water. Add the meatball mixture and garnish with fresh parsley and more cheese.

Tracking Pixel

Pin It

Gluten-Free Pancakes (With A Better Batter Coupon Code)

Tuesday, March 4th, 2014

Gluten-Free Pancakes from MomAdvice.com.

If there is one thing this girl loves, it is pancakes. Today I am sharing a recipe for gluten-free pancakes that taste as light and fluffy as our gluten-filled variety, but are perfect for creating for those who cannot tolerate gluten.

Gluten-Free Pancakes from MomAdvice.com.

Fluffy gluten-free pancakes are easier to create than you might think, it just requires the right measurements, a good flour, and a little milk on hand if your batter gets too thick. Before we made the switch to gluten-free, I loved to throw wheat germ into our hearty wheat-filled pancake. No wonder I felt so awful after our Sunday brunches!

Now we have substituted our wheat love-fest with flax seed in our pantry for our pancakes and energy bites, a deliciously healthy addition to just about anything, and still get that taste and texture that I love.  As with all my favorite pancake recipes, it is laced with cinnamon and vanilla while these pancakes get their sweetness from a little honey.

Gluten-Free Pancakes from MomAdvice.com.When I first discovered that I had to go gluten-free, my best friend recommended a book called, “Gluten-Free on a Shoestring.” (affiliate link) I treated myself to the cookbook for Christmas and loved that the author relied upon one all-purpose mix to make almost all of her recipes.

I placed my first order for Better Batter after reading it and started testing recipes with this cup-for-cup substitute shortly after buying it. None of us could believe how good everything had tasted and with very little adjustments in our favorite family recipes.

I immediately wrote the company and asked if they might be interested in a partnership. I truly believe in their product and how it can help beginner gluten-free chefs overcome their difficulties with baking. Not only did they send me some products for our recipes, but they also are offering valuable coupon codes for our readers to try their flour too.

Not only does the flour perform well, but it is much more affordable than other flours on the market. You can even buy their product in bulk to snag additional savings.

What are the Ingredients In This Flour?

The flour I have featured today is an an all-purpose flour substitute that you can use as a cup-for-cup substitute in your recipes. The packaging states that it contains: Rice flour, brown rice flour, tapioca starch, potato starch, potato flour, xanthan gum, and pectin (lemon derivative). It is the blend of these flours that makes it such a great performer in baking recipes. I hope that helps!

How Can I Save Money On This Flour?

I truly believe you will love this flour and am so excited that Better Batter is sharing some coupon codes with our readers to help them save even more. This month you can use the coupon code XNF6EBYK4JRT for $8 off ANY SIZE ORDER.

That’s right, I said ANY SIZE! 

I hope you can take advantage of the savings and can enjoy a stack of these delicious pancakes in your home!

Gluten-Free Pancakes from MomAdvice.com.

Gluten-Free Pancakes
Recipe Type: Breakfast
Author: Amy Clark
Prep time:
Cook time:
Total time:
Serves: 4
You won’t even miss the gluten with this delicious pancake recipe. Be sure to double your recipe so you can enjoy these all week long!
Ingredients
  • 2 cups Better Batter All-Purpose Flour
  • 1 teaspoon baking powder
  • 1 teaspoon baking soda
  • 2 tablespoons flax (optional)
  • 1 teaspoon cinnamon
  • 1 teaspoon salt
  • 2 teaspoons vanilla extract
  • 2 tablespoons honey
  • 2 eggs, lightly beaten & at room temperature
  • 6 tablespoons unsalted butter, melted and cooled
  • 2½ cups milk (or milk substitute)
Instructions
  1. Heat your griddle or nonstick pan and coat generously with butter.
  2. In a large bowl, place the flour, baking powder, baking soda, flax, cinnamon, and salt in and whisk to combine.
  3. Create a well in the center of the dry ingredients, and add the eggs, butter and milk, one at a time, blending well after each addition. Add vanilla and honey and continue to mix until the batter comes together and there are no lumps.
  4. Working quickly, ladle the pancake batter on the griddle surface, and allow to sit until bubbles begin to appear on the surface (2 to 3 minutes). Flip and continue cooking for another 1 to 2 minutes, or until the underside is browned.
  5. Remember that your batter thickens as it stands and may require more milk to keep your batter in a pourable consistency.
  6. Serve with fresh fruit and maple syrup.


Pin It