Archive for the ‘Main Dishes’ Category

Notebook Experiments: Can I Make a Juicy Turkey Burger?

Thursday, November 13th, 2008

Experiment: Can I make a juicy turkey burger?

Experiment Taken From: Notebook Entry 10.23.08

Materials Needed: Please see Serious Eats for the full instructions. I followed the instructions exactly and made my turkey burgers in my stainless steel cookware because it is was roomier than the cast iron skillet I have.

Results: I was really excited to try this turkey burger recipe because every turkey burger I have ever tried seems to come out really dry. I was really intrigued by the ingredient list and that there were no eggs or milk involved (as my past recipes) and instead the only binding agent was ricotta cheese.

I am really not a fan of ricotta cheese, but I was willing to give this a try. I was very worried the ricotta would add a gritty texture to my burger (especially with 1/2 a cup of ricotta in there) and I was also worried how it would go over with the rest of the family.

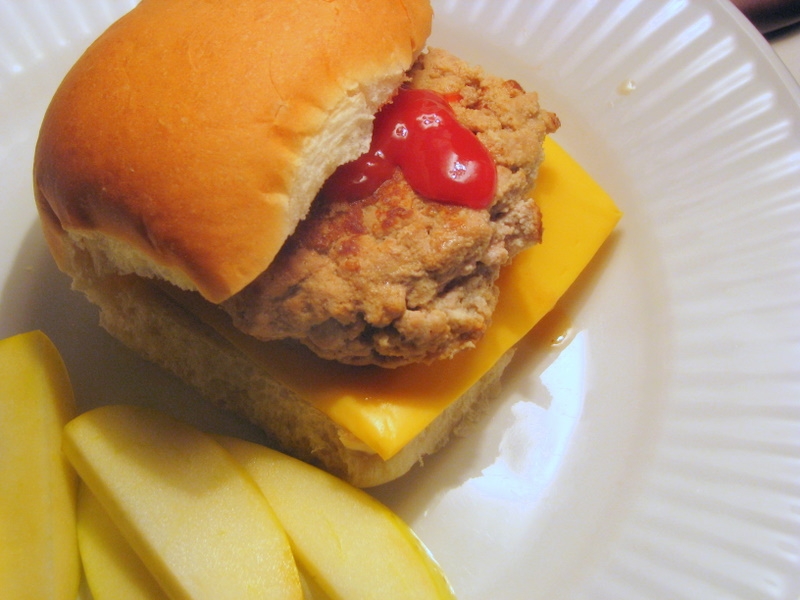
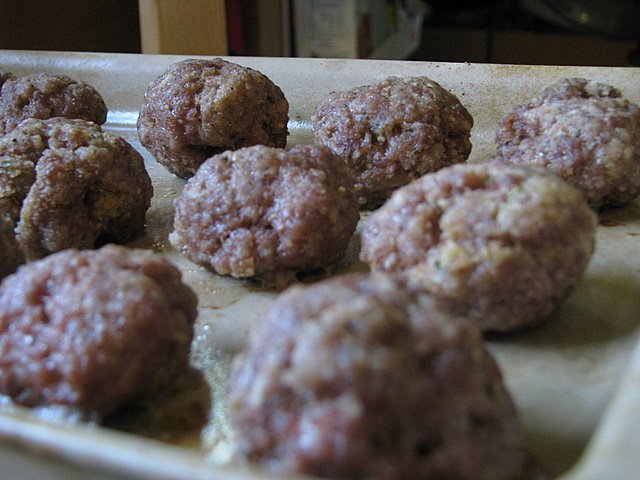
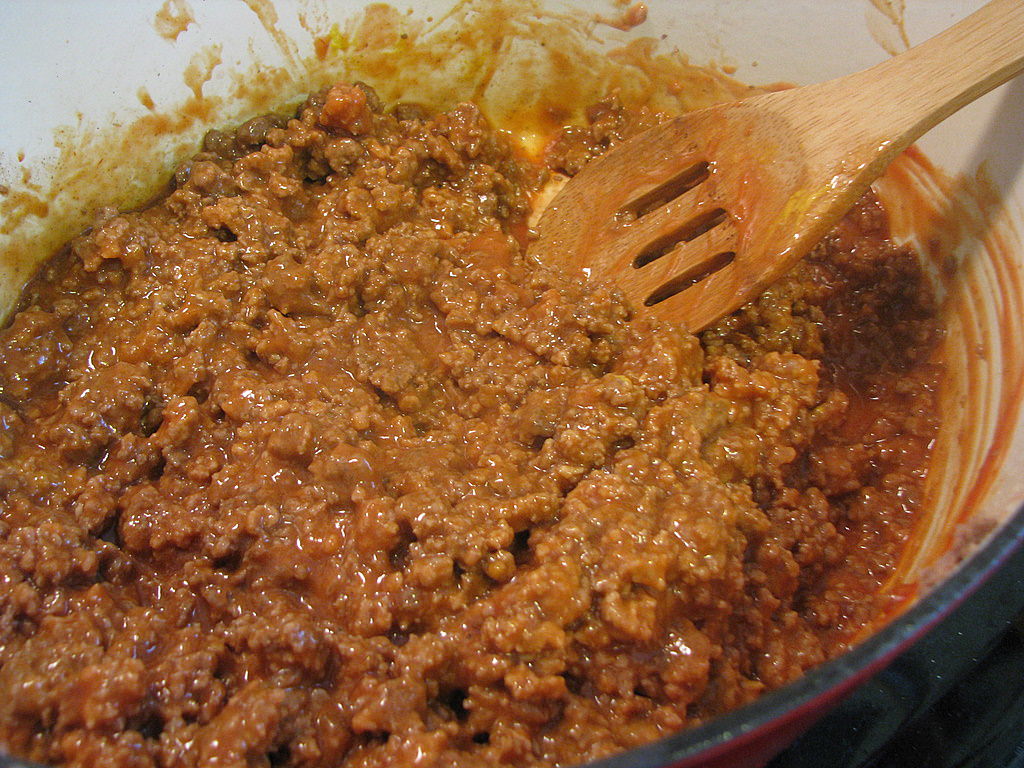
I prepared the burgers as instructed and cooked them for four minutes on each side. I then reduced the heat with the lid cracked for ten minutes and then served them up on bakery buns with a slice of cheese and ketchup.

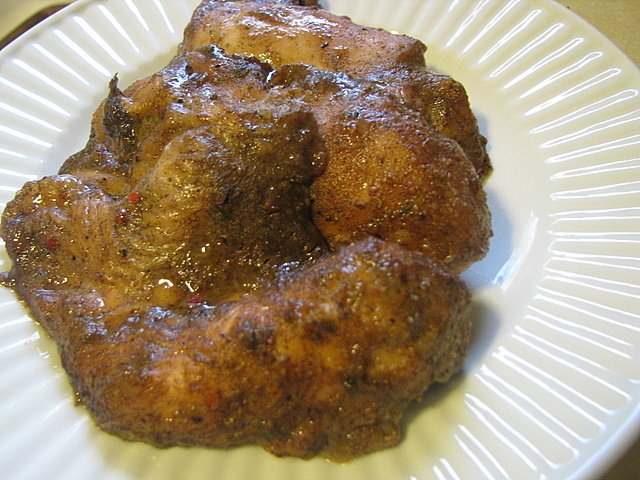
These were the best turkey burgers I have ever eaten in my life. They were moist and flavorful all the way through. Even the protesters in my family who said they would not eat one of my burgers finally relented and ate everything on their plate.

We all agreed that we could not taste the ricotta at all, but could only taste the meat and a hint of mustard that was incorporated in the mix.

Conclusion:I will be making these over and over again for my family. It was a great quick meal to put together and served with apple slices, it was a great meal for the entire family. Thanks to Serious Eats for sharing this recipe idea!

********************

I am so excited to open our Notebook Experiments up to everyone and I hope that you will be able to participate this week or in weeks to come! I will be posting this each Thursday so please mark your calendars if you plan to participate. You can post your entries at any time throughout the week and then leave your entry in the links below.

We have this handy banner that you are more than welcome to use, but it is not a requirement! It is just something you can add to add a little sparkle to your entry.

Rules for Participation:

1. Choose anything from any of our notebook entries (past or present) to do with your family. We have hundreds of bookmarked links of crafts, ways to save money, and organizing ideas.
2. Complete an experiment from the notebook and share about it on your blog or website. We would love to see pictures of what you accomplished or a detailed description of how your projects turned out. Please include a link to this entry, a link to the original posting of the entry (at the original crafster’s blog), and (to help us relocate the project) the date or link of the notebook entry where you found it. You can use the same formatting as our entries or you can just include that information in your post in your own unique way!
3. Post a link below. Please include your name or blog name & a fast description of your project. Example- MomAdvice (WHO bread)

I can’t wait to see what you create and what you find inspiring!

Chicken Enchiladas With Homemade Enchilada Sauce

Monday, October 20th, 2008

Chicken Enchiladas from MomAdvice

Make your own healthy enchiladas at home suited to your family’s tastes with this simple chicken enchilada recipe. Includes an easy homemade sauce recipe as well!


I am still working my way through my month’s worth of meals, and we finally got to try this really yummy & quick recipe from “The America’s Test Kitchen Cookbook.”

Homemade Enchilada Sauce from MomAdvice


My family is not really into Mexican food and I have to ease them into new dishes, thus why the enchiladas are not smothered in sauce and cheese.

Instead, I provided the sauce and cheese on the side so everyone could smother them (or not smother them as they like).

I really loved this homemade enchilada sauce because it was made from pantry ingredients.

I also could adjust the spiciness to our own tastes (hold the cumin, 1 teaspoon of chili powder versus 3 tablespoons).

That is truly the beauty in making your own mixes & convenience foods.

The entire family gobbled these up and the enchilada sauce on the side appealed to my children’s urge to dip everything.

These were absolutely delicious and we had just enough leftover to take in my husband’s lunch this week.


Chicken enchilada recipe

Easy Chicken Enchiladas (Courtesy of “The America’s Test Kitchen Cookbook“)

3 cups shredded cooked chicken (1.5 pounds)
12 ounces sharp cheddar cheese, shredded (3 cups)
2 1/2 cups enchilada sauce (use provided recipe or 20 ounces in the can)
1-2 (4-ounce) cans chopped green chiles, drained
1/2 cup minced fresh cilantro
12 (6-inch) soft corn tortillas

Adjust an oven rack to the middle position and heat the oven to four hundred degrees.

Combine the chicken, 2 cups of the cheddar cheese, 1/2 cup of the enchilada sauce, the chiles and cilantro.

Season with salt & pepper to taste.

Stack the tortillas on a microwave-safe plate, cover with plastic wrap and microwave on high until warm & pliable (approximately 1 minute).

Spread the warm tortillas out over a clean counter.

Place 1/3 cup of the chicken mixture evenly down the center of each tortilla.

Tightly roll the tortilla around the filling, then lay seam-side down in a 9×13” baking dish lightly coated with vegetable oil spray.

Lightly spray the enchiladas with vegetable oil spray.

Pour 1 cup of the remaining sauce over the enchiladas to coat thoroughly.

Sprinkle the remaining 1 cup cheddar down the center of the enchiladas.

Cover the baking dish with foil and bake until the enchiladas are heated through, 20-25 minutes.

Remove the foil and continue to bake until the cheddar browns, about five minutes longer.

Serve, passing the remaining 1 cup of sauce.


Fast Enchilada Sauce

1 tablespoon vegetable oil
1 onion, minced
1/2 teaspoon salt
3 tablespoons chili powder (we adjusted to 1 teaspoon)
3 garlic cloves,minced
2 teaspoons cumin
2 teaspoons sugar
2 (8-ounce) cans tomato sauce
1/2 cup water
Pepper

Heat the oil in a 12″ skillet over medium heat until shimmering. add the onion and salt and cook until softened, about five minutes.

Stir in the chili powder, garlic, cumin, and sugar.

Cook until fragrant, about fifteen seconds.

Stir in the tomato sauce and water. Bring to a simmer and cook until slightly thickened, about five minutes.

Season with salt & pepper to taste.


Chicken Enchiladas from MomAdvice


Sign up for the MomAdvice newsletter!


Look for more great recipes?


best ground beef taco recipe

Best Ground Beef Taco Recipe


10 Minute Fish Tacos Recipe

10 Minute Fish Tacos


DIY cake release spray

DIY Non-stick Cooking Spray

Clay Cookery: A Frugal Chef’s Dream Come True

Tuesday, September 23rd, 2008


A long time ago, I read a post from Meredith, at Like Merchant Ships, about her clay cooker. Since her post, I have been on the lookout for a clay baker of my own, but have not seen one on any trip to the thrift shops. I am sure that I probably passed a million, not knowing what the heck they were, but when I finally figured it out…there were none to be found.

Until last week, that is! I actually spotted two of them sitting together on a shelf. I lunged to grab one and took home the one that was in the best condition. It was marked for six dollars, a bit more than I usually spend on a single item in housewares. After months and months of waiting though, I was willing to fork over the six dollars.

The lid was tightly taped shut and, I prayed that there was nothing wrong inside of it. What I discovered was that the clay cooker had never been used and all of the information packets were neatly tucked inside waiting for the next owner.

Today we roasted a chicken for our family in it. A good old Aldi chicken was stuffed with rosemary from my garden and seasoned with a little salt and pepper. I slid the chicken into the cold oven, after soaking my baker in water, and baked it at 450 degrees for 85 minutes.

I had read the packets cover to cover, praying that I wouldn’t screw it up. Would the chicken really be moist and flavorful? Would it be brown or would it be light in color like my slow cooker chickens? Was it really true that it didn’t require liquids?

We held our breaths as I lifted the lid…

What was unveiled was better than I had imagined. A juicy and flavorful chicken- full of color and just as good as any chicken I have bought in a store.

After we were all done applauding… well, maybe that didn’t really happen, but I will say that we were all really impressed with just how good that chicken tasted.

I can’t wait to try other things in the clay cooker and, just in case your thrift store find does not come with a booklet, here are a few of the tips that were provided for using your clay baker:

  • Soak it in water- Completely immerse the top and bottom in water for ten to fifteen minutes before each use.
  • Place in a cold oven- After adding the ingredients, place your clay baker in the center of the cold oven.
  • Time cooking according to your own preferences and oven- tastes and ovens vary. Time your dishes according to the way you want them and don’t hesitate to vary the recipe slightly. Recipes usually can be converted for clay pots by increasing the cooking temperature by 100 degrees and deducting a 1/2 hour of cooking time.
  • Put the clay cooker on a cloth when you remove it from the oven- Sudden changes in temperature should be avoided. When the clay baker is removed from a hot oven, place it on a towel, hot pad, or wooden board rather than a cold surface.
  • Clay bakers are ideal for the microwave- Because microwaves vary to such a great degree, it is impossible to state any rules for converting recipes for the microwave. Use the oven manufacturer’s guidelines for cooking times.
  • Clean with a hot water and a brush- Use hot water and a stiff brush to clean your clay baker. A little baking soda will cut any grease. Translation: NO SOAP! Never scour with a scouring powder or metal scouring pad. It can block some of the pores of the clay, reducing the water absorption.
  • Don’t use it on an open flame- It is designed only for the oven.
  • Place the lid upside down on top of base when storing- When the clay baker is not in use, keep it in a place where the air circulates. Place the lid upside down on top of the base, so the air can reach inside the bottom.

But, why is a clay baker helpful for a frugal cook? Here are a few reasons I think this can be a good addition to the kitchen:

  • Cooking food in a cooker requires no additional liquids. It pulls all the natural juices out of your dishes so no need to add cans of chicken stock or extra ingredients to make your food flavorful.
  • Clay bakers allow you to prepare quick, healthy, high quality meals that cost less and taste better. My Aldi chicken looked and tasted better than any other preparation I have tried before and it browned the chicken beautifully without any extra steps at all!
  • You can cook very nutritiously. You can cook all kinds of foods without adding any fat. Due to the low cooking temperature the aroma, vitamins and minerals are preserved within your food. As someone who is trying to eat well, this is an important feature for me!

I can’t wait to try other things in this clay baker and I hope you can score one of your own for your kitchen!

Have you ever tried cooking in a clay baker before? If not, what are some items you use in your kitchen that may seem unconventional to others, but have saved you time or money?

Skillet Ziti With Chicken & Broccoli

Monday, September 15th, 2008


I had several new recipes for this month’s planner that I was trying and wanted to review for you guys. This first recipe comes from the America’s Test Kitchen Family Cookbook, a favorite cookbook in my collection. The cookbook includes really great reviews on the best products and rates common cooking tools for chefs. There has not been a recipe yet that I have tried and not enjoyed!

I am a big fan of skillet dinners because you only have to dirty one pan and they come together quickly. Two of my favorites are the Skillet Penne & Sausage Supper (also from the America’s Test Kitchen Family Cookbook) and the Cheeseburger Pasta Skillet Dish. These dishes are great for busy weeknights and make great leftovers for the next day’s lunches.

Skillet Ziti With Chicken & Broccoli

1 pound boneless, skinless chicken breast, sliced into 1″ pieces
Salt and pepper
3 Tablespoons unsalted butter
1 onion, minced (we omitted this due to personal tastes)
1/4 teaspoon red pepper flakes
1/4 teaspoon dried oregano
3 garlic cloves, minced
8 ounces ziti (2 1/2 cups)
2 1/2 cups low-sodium chicken broth
1/2 cup heavy cream (I substituted this with half & half)
1 bunch broccoli (1 1/2 pounds)
1 cup jarred roasted red peppers, rinsed and sliced 1/4″ thick (we omitted these due to personal taste)
1 ounce Parmesan cheese, grated (1/2 cup)
2 tablespoons fresh lemon juice (optional)

Pat the chicken dry, then season with salt and pepper. Melt 1 tablespoon of the butter in a 12″ skillet over medium heat. Add the chicken and cook until it is lightly browned, but not fully cooked, about four minutes. Transfer chicken to a bowl. Add 1 more tablespoon of the butter, onion, red pepper flakes, oregano, & 1/2 teaspoon salt to the skillet. Cook until the onion is softened, about five minutes. Stir in the garlic and cook until fragrant, about 15 seconds. Sprinkle the ziti evenly into the skillet. Pour the broth and cream over the ziti. Cover and bring to a boil, about five minutes. Reduce the heat to medium-low and stir in the broccoli and roasted red peppers. Cover and continue to simmer, stirring occasionally, until the pasta begins to soften and the broccoli turns bright green (approximately eight minutes). Stir in the chicken and any accumulated juice. Cover and simmer until the chicken is cooked through, about three minutes longer. Stir in the remaining 1 tablespoon butter, the Parmesan, and lemon juice (if using). Season with salt and pepper to taste.

  • This dish made about six servings for our family. I diced fresh tomatoes to sprinkle on top of the pasta, which added a really nice fresh burst of flavor and sprinkled it with a shaving of Parmesan cheese.
  • When I packaged our leftovers, I added a drizzle of chicken broth to each container to keep the pasta moist for reheating.This definitely helped it to not dry out when it was reheated and added a little additional flavor to the leftovers.
  • If you want to make this an Aldi-friendly recipe, just substitute the ziti with elbow macaroni or penne pasta and adjust the cooking time accordingly. You would have to omit the red peppers and replace heavy cream with half & half (which substituted beautifully).
  • Don’t be afraid to add a little extra liquid to the dish- I added an extra 1/4 cup of chicken broth and an extra 1/4 cup of half & half to keep the pasta nice and moist. You don’t want the pasta to dry out and it should have a very thin sauce that helps to coat the pasta.
  • To make this dish vegetarian, just omit the chicken and up the veggies. The sprinkle of tomatoes or a handful of sundried tomatoes and spinach could make this a veggie packed dish worth repeating!

This dish was a huge hit with everyone except with Ethan, who has firm beliefs that no food should ever touch. He liked all the foods separately, but not mixed together. The rest of us absolutely loved it and I plan to make this again and again!

Beer Poached Italian Brats

Monday, June 2nd, 2008

Last week we decided to dine on Italian Brats cooked on our grill. To be honest, the only kind I have ever had were prepared by someone else or were the pre-cooked variety that you find next to the hot dogs.

I had a lot of beer leftover from my Retro Housewife Bunco night though and thought why not poach the brats in some beer before we threw them on the grill?

They turned out delicious! I used this recipe (scaled down for 1 pound of brats and minus the onion because of personal preference) and served these with some tortilla chips and carrot sticks.

I took advantage of the Memorial Day cookout sales that were going on at the store and stocked the freezer with some yummy goodies to throw on the grill this summer. These brats were on sale for $2.50 per pound, which made them both economical and a delicious choice for summer.

Sound Off: What is your favorite grilling recipe for the summer? I am looking for some suggestions to add to our mix this summer!

Old-Fashioned Spaghetti & Meatballs (And How to Eat It)

Monday, May 19th, 2008

With my grocery dollars screaming for mercy right now, I am trying to focus more on eating more budget-friendly fare. My grocery lists have shifted from what we want to eat to what is on sale and what is going to give us the best bang for our buck. A manager’s special on a meatloaf mix of meat dictated what we would be dining on this week…a good old fashioned plate of spaghetti and meatballs.

I really love my spaghetti and meatballs recipe, but I saw a recipe for spaghetti and meatballs in an AllRecipes Dinner Tonight Cookbook (picked up at our local thrift store for $2) and knew that I had to try this recipe.

I followed all of the directions except that I prefer to bake my meatballs rather than fry them. It is easier clean-up for me and healthier for our family. You can bake the meatballs in a preheated oven at 400 degrees for fifteen minutes and then I gave them a little dip in the sauce to take on some of those flavors.

This dish is perfection. I still prefer my meatball recipe over this one, but the sauce recipe wins hands down. This made a large batch of sauce (enough for approximately six to eight servings) and cost about $2.33 to make the sauce. The meatloaf mix was on sale for $2.09 and I used a box of pasta that I had purchased on sale for $.89. Total cost of the meal $5.31 or approximately $.89 per serving (if serving six generous portions).

I made a double batch of the meatballs and we will be having meatball subs on homemade sub rolls this week and leftovers another day. I just love food that can be served over and over again!

Italian Spaghetti Sauce With Meatballs

1# lean ground beef (ground turkey, meatloaf mix, or turkey sausage)
1 cup fresh breadcrumbs
1 tablespoon dried parsley
1 tablespoon Parmesan cheese
1/4 teaspoon ground black pepper
1/8 teaspoon garlic powder
1 egg, lightly beaten
2 tablespoons olive oil (omit if you are baking these)
3/4 cup chopped onion (we omitted because we don’t like onions)
5 cloves garlic, minced
1/4 cup olive oil
2 (28 ounce) cans whole peeled tomatoes, undrained
2 teaspoons salt
1 teaspoon white sugar
1 bay leaf (I omitted because we didn’t have any)
1 (6 ounce) can tomato paste
3/4 teaspoon dried basil
1/2 teaspoon black pepper

To make the meatballs, in a large bowl, combine ground beef, breadcrumbs, parsley, Parmesan, 1/4 teaspoon black pepper, garlic powder, and egg. Mix well and form into 30 balls. In a large skillet, cook meatballs in two tablespoons hot oil over medium-high heat seven minutes or until browned; remove from skillet and drain.

To make sauce, saute onion and garlic in 1/4 cup olive oil until onion is translucent. Stir in tomatoes, salt, sugar, and bay leaf. Cover, reduce heat to medium-low and simmer one hour and thirty minutes. Stir in tomato paste basil, 1/2 teaspoon pepper, and meatballs and simmer thirty more minutes. Discard bay leaf. Serve over spaghetti.

Spaghetti and meatballs is a family favorite in our house. Now let us show you how to eat it properly and our sweet little Emily will demonstrate.

Emily just loves to eat this, but she likes to have the long noodles for slurping, not short and stumpy noodles. I can understand this, but… She usually ends up looking like this.

Then we have to hold our noodles and balance them at the very top of our head in our hair. Is it sufficiently rubbed into our forehead and hair yet? If you can complete this trick, you can move on to the next step.

Be sure to get your entire face in there so it looks like this.
And don’t let the face outshine your toes. After all, eating like a monkey is the Clark way.

Dinner and a show! Two for the price of one!

Yummy Jerk Chicken

Thursday, May 8th, 2008

We tried a new marinade for Caribbean Jerk Chicken this week and it was delicious! This spice mix has the perfect balance of spices and coats the chicken beautifully. I marinated the chicken for a few hours and we had planned to grill it outside. The weather didn’t end up cooperating so I ended up baking this for 350 degrees for about forty-five minutes, and it was absolutely perfect.

We served the chicken with rice and some corn to complete the dinner!

Yummy Jerk Chicken

1 envelope Italian salad dressing mix
2 tablespoons brown sugar
2 tablespoons olive oil
2 tablespoons soy sauce
1/2 teaspoon cinnamon
1 teaspoon thyme
1/2 teaspoon ground red pepper
2 1/2 lbs chicken pieces

Mix the marinade ingredients into a bowl and then pour over the chicken pieces. Allow this to marinate for a minimum of one hour or overnight. Grill your meat until it is done.

Sloppy Joes & Oven Fries

Monday, March 3rd, 2008

I always love to try out new recipes and wanted to give a new recipe for Sloppy Joes a shot. These sandwiches were absolutely delicious. I have made this recipe twice and adjusted the ratios to our liking. This ground beef mixture has just a little bit of tang, with a whole lot of tomato-y goodness.

I served these on my homemade hamburger buns, with a side of these Seasoned Baked Potato Wedges, that I had been dying to try (from Tammy’s Recipes)

The potato wedges were equally delicious and a perfect balance of spices. They were crispy and not soggy, which I find to be quite important in an order of fries. Best of all, they were a hit with the whole family!

Yummy Sloppy Joes (adapted from Recipezaar)

1 lb ground beef
1 cup chopped onions (I omitted these because I don’t like onions)
1 cup ketchup

1 tablespoon mustard
2 tablespoons red wine vinegar

1 teaspoon salt

2 teaspoons Worcestershire sauce

In a large skillet, brown beef with onions (make sure to drain or rinse your meat after this step). Mix the rest of the ingredients together. Add to beef and onions. Cook for 1 hour over medium heat, stirring occasionally. Serve on warm hamburger buns.

One-Pan Chicken & Potato Bake

Thursday, December 27th, 2007

Source: Kraft Magazine

To see our review of this recipes, please visit this post!

One-Pan Chicken & Potato Bake

4 bone-in chicken pieces (1 ½ pounds)
4 large potatoes cut into wedges
1/4 cup Italian Dressing (I used ½ cup because I wanted more flavor to the chicken & potatoes)
¼ cup Grated Parmesan Cheese

Preheat oven to 400 degrees. Place chicken & potatoes in 13×9” baking dish. Pour dressing over chicken & potatoes; sprinkle with cheese. Bake one hour or until chicken is cooked through. Sprinkle with fresh parsley, if desired.

Creamy Stovetop Mac & Cheese

Monday, December 24th, 2007

I made this one day for a playgroup and it was delicious. This comes from the ” The American Test Kitchen” cookbook (an excellent investment for a home cook!)

Creamy Stovetop Mac ‘N’ Cheese

8 ounces macaroni (2 cups)
Salt
2 large eggs
1 (12 ounce) can evaporated milk
1 teaspoon dry mustard, dissolved in 1 teaspoon water
1/4 teaspoon Tabasco (I omitted this ingredient)
Pepper
4 tablespoons unsalted butter
12 ounces shredded cheddar cheese (3 cups)

Bring two quarts water to a boil in a large pot for the macaroni. Stir in 1 1/2 teaspoons salt and the macaroni and cook until almost tender but still a little firm tot he bite. Meanwhile, mix together the eggs, half of the evaporated milk, the mustard mixture, Tabasco, 1/2 teaspoon salt, and 1/4 teaspoon pepper. Drain the pasta and return to the pot. Set the pot over low heat and stir in the butter until melted. Stir int he egg mixture and half of the cheddar. Continue to cook over low heat, gradually stirring the remaining milk and cheddar, until the mixture is hot and creamy, about five minutes. Season with salt and pepper to taste.