Archive for the ‘Main Dishes’ Category

Skillet Penne and Sausage Supper

Monday, February 1st, 2010

You know when you have one of those moments that you know what you are planning to serve your family is going to to totally bomb at the dinner table, but you want to just make it for yourself anyway. This dish, I thought, would completely bomb at our house. It has spinach, sun-dried tomatoes, penne pasta instead of spaghetti, and white sauce instead of red. In short, it had vegetables and it wasn’t spaghetti.

The thing was, it didn’t bomb… in fact, everyone happily munched away. It might have been the right day for introducing new foods, it might have been that it was later than it usually was and everyone was starving, or it might have been because this dinner is so darn delicious.

Whatever the reason, it reminded me that many times my own fears about how my kids will feel about foods inhibits my cooking style.  I am often holding my own self back from introducing them to new foods because the stress of them not eating or rejecting what I am offering influences how I cook. It offered a reminder to me to keep on introducing those new foods, those new vegetables, those delicious nutrients and stop worrying so much!

The next night when I served sugared snap peas instead of the edamame that I had planned for our dinner hour because of a mix-up in the supermarket freezer section, my son found a new favorite food. My daughter still happily pulled the peas out and didn’t eat the skins, but it was a new food that they were willing to try.

Now that you know that this dish was a hit with my kids, I hope you might give it a try at your house. It is a recipe adapted from The America’s Test Kitchen Cookbook and what drew me to the recipe was the fact that it was a skillet supper.

Skillet suppers rock and are one of my favorite weeknight meals because it is a one pot dish which cuts down on clean-up and leaves me more time to read or watch a little American Idol this winter. The Skillet Ziti with Chicken and Broccoli and Cheeseburger Pasta both make fun weeknight skillet dinners minus those packages of Hamburger Helper. Secretly though, I just love Hamburger Helper… I hope that I won’t be rejected completely from the foodie community with that admission, but I believe it must be said!

Tonight enjoy a night free from a sink full of dishes and be proud to introduce your kids to new fun foods that embrace just a hint of vegetable-packed deliciousness!

Easy Skillet Penne and Sausage Supper (adapted from The America’s Test Kitchen Cookbook)
Serves Six

1 tablespoon olive oil
3 cloves garlic minced (I do buy the bottled variety at Aldi)
1 pound Sweet Italian Turkey Sausage Links (remove from the casing)
1/2 cup sun-dried tomatoes, chopped fine (I buy the packaged variety over by the potatoes in the produce section of Walmart, next to the garlic)
1/2 pound penne pasta
2 cups chicken broth – low-sodium
1 cup milk
1/2 cups grated Parmesan cheese
6 ounces baby spinach

Heat the oil in 12-inch nonstick skillet over medium heat until shimmering. Stir in the garlic and sausage and cook, breaking up the meat with a wooden spoon, until no longer pink, about 4 minutes. Sprinkle the penne evenly over the sausage. Pour the broth and milk over the pasta. Bring to a simmer, then reduce the heat to medium-low and cover. Cook, stirring occasionally, until the pasta is tender, about 10 minutes (it took mine around 15 minutes). Stir in the spinach a handful at a time, and cook until wilted, about 2 minutes. Stir in the Parmesan and sun dried tomatoes. Season with salt and pepper to taste.

Note: Italian pork sausage can be used here, however, you may need to spoon off some of the fat before adding the pasta. When you are adding the spinach, it may seem like a lot at first, but it wilts down substantially. Be sure to at least have a 12-inch wide skillet here– this recipe fills it nearly to the rim.

What are your kid’s favorite vegetables or favorite vegetable-packed dishes that you love to serve? Have you ever found yourself inhibited to serve things because you aren’t sure if they will like them? Feel free to share links to your favorite dishes!

Shrimp Linguine Alfredo

Monday, January 11th, 2010

I decided to step out of my usual box this month and bought two packages of frozen shrimp to work into our menu plans this month.

My husband and I both really love shrimp, but it was a new food for the kids and I figured the best way to get them to eat it would be incorporating it into two new pasta dishes. Choosing pasta to work our  shrimp in also extended the amount of servings we could get from it. With this one dish,  we  had six large helpings helping to carry us through a couple of lunches too!

I decided to tweak the recipe a bit and added lemon zest into the sauce to give it a little kick. Adding this little extra in, a few slices of lemon to garnish on top, and the fresh parsley, brightened up the dish a lot and added to the fresh taste.

I choose the frozen, uncooked, peeled, and deveined shrimp for our dish from our supermarket (40 count bag was roughly $5. 84 at Walmart). Living in the Midwest, the fish doesn’t taste very fresh to me, and keeping it in the freezer kept a great dish on hand that would be worthy of a night of entertaining guests in your home.

As for the kids, we got two thumbs up from my daughter and one thumb down from my son. My son wasn’t a fan of the texture, but still ate the pasta. In my husband’s words, “That means there is just more for me!” Emily, on the other hand, loved this fun new food. One out of two isn’t too bad and I am happy to have a fresh new dish to add to the menu plans!

Shrimp Linguine Alfredo (Adapted from AllRecipes Dinner Tonight)

1 (12 ounce) package linguine pasta
1/4 cup butter, melted
1/4 cup diced onion (we omitted because we are not fans!)
1 tablespoon minced garlic
40 small, uncooked shrimp, peeled and deveined
1 cup half-and-half
Zest from two lemons
2 teaspoons ground black pepper
6 tablespoons grated Parmesan cheese
Garnishes: Fresh parsley, sprigs, lemon slices (use the lemons that you zested)

Bring a large pot of lightly salted water to a boil. Add pasta and cook in boiling water for eight to ten minutes; drain. Meanwhile melt butter in a large saucepan. Saute the onion and garlic over medium heat until tender. Add shrimp; saute over high heat for one minute, stirring constantly. Remove shrimp into a bowl and set aside. Stir in half and half and add the zest of two lemons. Cook stirring constantly until your sauce thickens. Add shrimp back in and turn off heat. Place pasta in a serving bowl and cover with shrimp sauce. Sprinkle with black pepper and Parmesan Cheese. Toss to incorporate. Garnish if desired.

Does your family have a favorite seafood dish? Please share it here!

Slow Cooker Beef Stew

Monday, November 23rd, 2009


Sometimes you just need something warm and satisfying and after an entire day of “playing” in the leaves, I knew that our family was up for just that kind of food!

As a nod to how far my culinary abilities have come, I love to share with people that I had no idea that beef stew was something you could make and was not something that came out of a can. Dinty Moore was what we had always ate growing up and it was served with a can of biscuits as a quick weeknight meal.

Imagine my surprise when one day I was watching Food Network and watched as someone made this dish out of common pantry items. To me, it was completely mind-blowing! I always think of that day as a turning point for me in the kitchen. It was that year that I made some of my greatest culinary discoveries and the year that I suffered through some of my biggest culinary failures.

Over the years, I have prepared this beef stew for our family hundreds of times. This beef stew is one of my favorite fall dishes to share around the dinner table after a busy day. It can be created in your slow cooker and cooked until you need it or it can be prepared in a pot and ready to go within an hour of cooking. Either way, it is a satisfying meal that will warm you up on the coldest day!

We serve our beef stew with a big batch of pumpkin cornbread muffins and cups of cider.

I hope you can indulge in this delicious dish one night in your house and be sure to check out our One Month of Slow Cooking for other great slow cooker dishes to prepare!

Slow Cooker Beef Stew

2 pounds beef stew meat – cubed
2.5 cups carrots
2.5 cups potatoes
1 cup celery
1 can diced tomatoes – with the juice poured in
1 can beef broth
1 cup water
1 tsp ground mustard
3 sprigs rosemary

Put beef in a zipper bag with a 1/4 cup of flour and toss to coat. Brown the meat in a skillet and place on the bottom of the crock pot. Coarsely chop vegetables and place on top of the meat. Pour in the can of diced tomatoes with juice, can of beef broth, water, and ground mustard. Place sprigs of rosemary on top and cook on high for four hours or on low for six to eight hours.

Oven-Version: Follow directions above, but fill the pot with the chopped vegetables after browning the meat. Pour in all of the additional ingredients and cook on low heat for one hour, stirring occasionally.

Easy Make-Ahead Recipes for Thanksgiving Day

Thursday, November 12th, 2009

Over the years, I have shared many ideas that can be incorporated into your Thanksgiving planning. Today I just wanted to recap some of the best ideas and recipes that have been shared in one spot for your planning needs.


I had found a recipe for mashed potatoes that not only freeze beautifully, but they also can be reheated on low in the slow cooker. Both of these qualities make them a winner because I can keep the oven freed up for the other dishes and I can make them early.

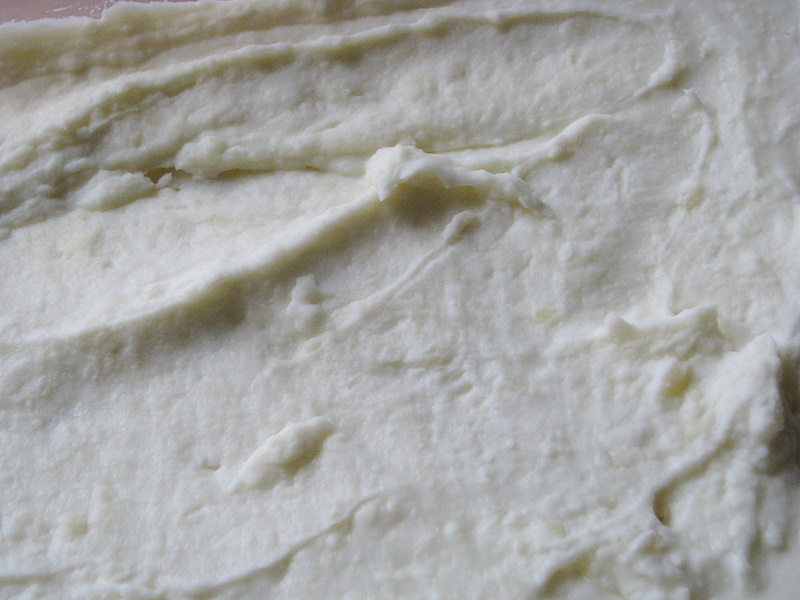
Here is my recipe, adapted to our personal taste, perfect for any holiday get together! These are creamy and have a hint of tang to them from the sour cream. Sprinkle with a little paprika, if you so desire, and enjoy the convenience of pulling these out of your freezer for this holiday season.


Make-Ahead Mashed Potatoes
Serves 15

5 pounds of potatoes
1 block (8 oz) of low-fat cream cheese, softened
3/4 cup low fat sour cream
4 tablespoons butter
3/4 cup milk (or more if desired)
1 1/2 teaspoons salt

Peel potatoes and cut into small cubes. Throw the potatoes in a large pot filled with cold water. Cook for 25 minutes or until fork-tender. Drain the potatoes and put them back into the hot pot. Add cream cheese, butter, milk, and salt. Mash with a potato masher or use a hand mixer to whip the potatoes. Spoon mixture into a freezer-safe container and label.

Thanksgiving Day: Put potatoes in the fridge 1-2 days before to allow them to completely thaw. Spray slow cooker with cooking spray and put potatoes in the slow cooker. Brush the top of the potatoes with a tablespoon of butter and sprinkle with paprika. Cook on low for two to four hours.

If you would rather bake these, bake the potatoes at 350 degrees for thirty to forty minutes or until completely hot.

**************************
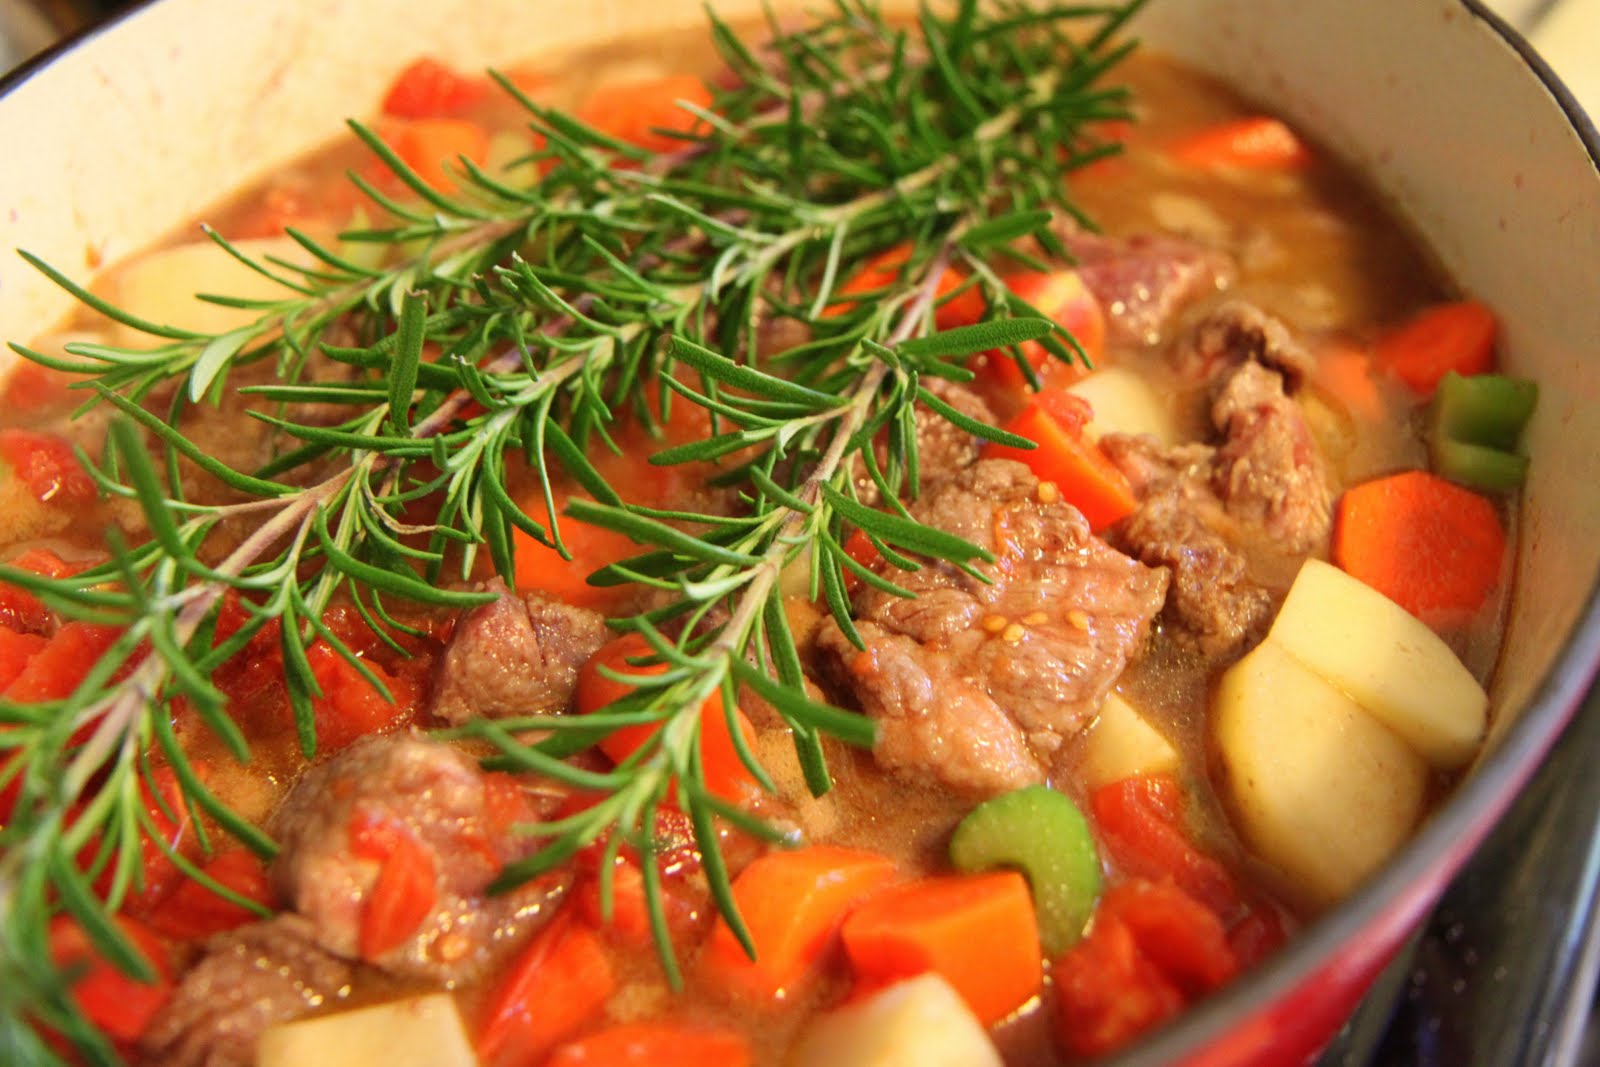
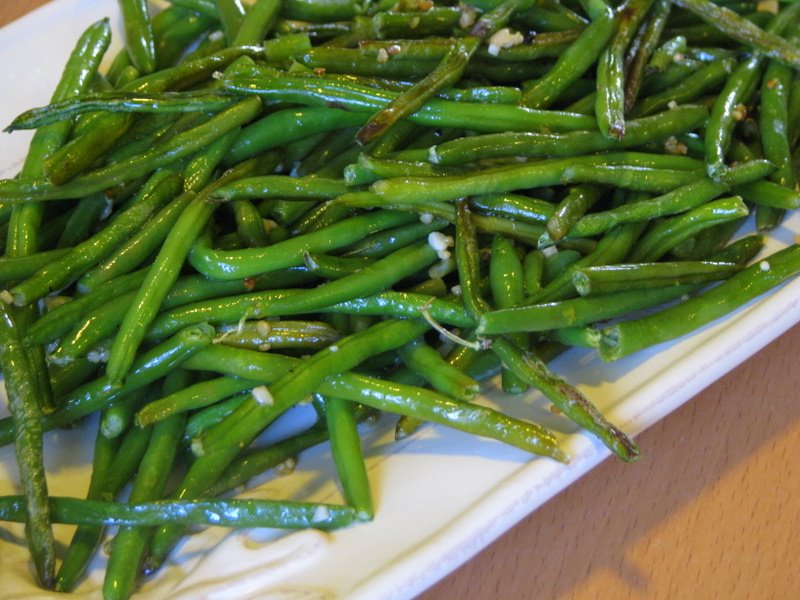
I have roasted a lot of vegetables during my lifetime, but I can honestly say that I had never roasted green beans before. I saw a recipe for roasting green beans and knew I would have to try it. I decided to use what I had in my produce drawer and pantry to make this great little side dish that I know you will absolutely love.

The original recipe did call for fresh green beans, but I had a bag of the fancy frozen ones from Aldi in my freezer that I wanted to use. I added an extra ten-fifteen minutes cooking time for these and they were perfect for our taste. You can roast them longer, if you like, but this amount of time seemed to fit well for me.

While these can’t be made ahead, necessarily, they are quick cooking and could be thrown in the oven while you are carving the turkey. Within just a short time, you have an elegant side dish that will be elegantly plated with your turkey and mashed potatoes this year.

Roasted Green Beans

2 pounds fresh green beans (or a bag of frozen fancy green beans)
1-2 tablespoons olive oil
2 tablespoons minced garlic (I use the bottled garlic to save a little time)
Salt & Pepper
Zest from one lemon (save the juice for later)

Preheat your oven to 400 degrees. Grab a jelly roll pan and dump green beans on the pan. Sprinkle seasonings, lemon zest, and garlic over the green beans. Drizzle the olive oil over the green beans and then toss with your hands until they are all coated with the seasonings and zest. Spread out in a single layer and slide your cookie sheet into the oven. Roast fresh green beans for 20-25 minutes and roast frozen green beans for an additional 10-15 minutes. When they are done, pull from the oven and put them on a serving platter. Squeeze the lemon juice over the top (from the lemon you zested) and serve.

**************************

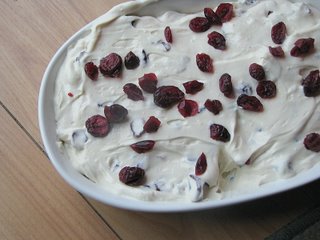
This spread is unbelievably addictive and so festive on your holiday table. Just try and eat one cracker and don’t be surprised if you are scraping the bottom of the bowl by the end of the day. This was a hit with everyone in our family and a nice change from the traditional cheese ball.

Cranberry Spread

16 oz. cream cheese, softened
1 cup dried cranberries
1/4 c. orange juice

Do-Ahead: Mix all of the ingredients together and mold into a ball or leave loose as a spread. Wrap in plastic wrap, then wrap in foil, and store in a freezer bag. Make sure to label your bag so that you can find it again.

Thanksgiving Day: Let the spread thaw in the refrigerator 1-2 days before Thanksgiving. Place dip in a bowl (or on a platter if it has been molded into a ball) and serve with gingersnaps or crackers.

**************************


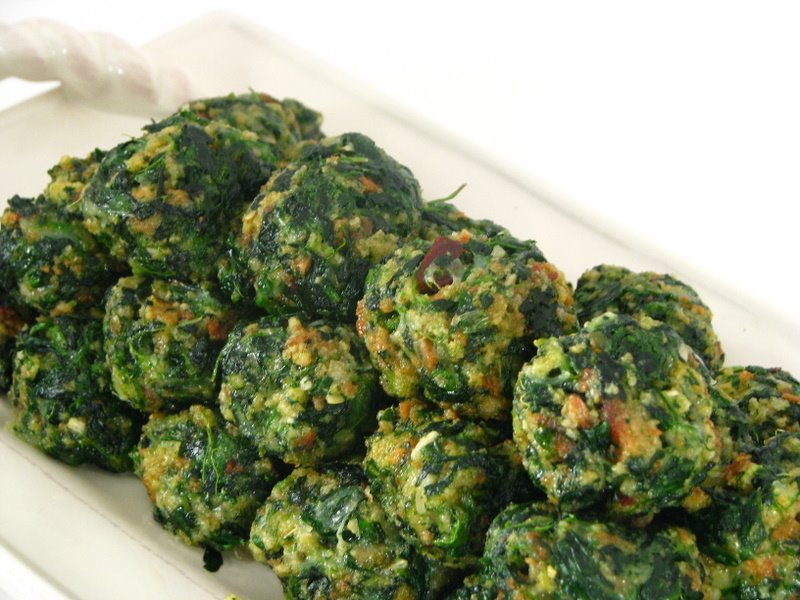
This was my appetizer dish for a New Year’s Eve bash that my husband & I attended. My husband absolutely hates spinach so I wasn’t sure how well these would go over. If you can believe it, he really loved them so even if you aren’t a spinach lover these are definitely worth a try. The chicken flavored stuffing throws you off from the spinach and because the spinach is fully cooked, the texture of these is so great.

I love any appetizer that you can pop into your mouth gracefully. The spinach between the teeth though…well, you may still have that problem. I am planning to make these often for future nights of board game fun because they are portable and come together in a flash. To save yourself from cooking on the day of an event, make these ahead and keep them in the freezer.

Spinach Balls

2- 10 oz packages frozen spinach
1 package chicken-flavored stuffing mix
1 cup grated Parmesan cheese
6 eggs, lightly beaten
3/4 cup butter, melted
Salt & pepper to taste

Do-Ahead: Cook spinach according to instructions, drain in a sieve, use back of a wooden spoon to press the spinach against the sieve to get as much moi
sture as possible out In a bowl combine the spinach, stuffing mix,cheese, eggs, butter, salt& pepper Mix thoroughly& roll into small balls 3/4 to 1″ size. Place on a cookie sheet and freeze.

Thanksgiving Day: To serve place frozen balls on a cookie sheet and bake at 350F 10-15 minutes or until lightly browned If you are doing them fresh or thawed only bake for 7-10 minutes. Serve hot.

**************************


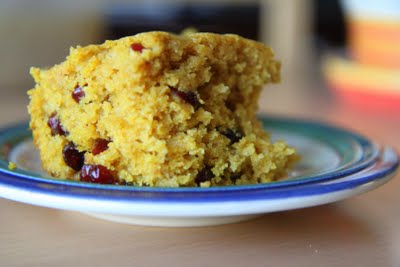
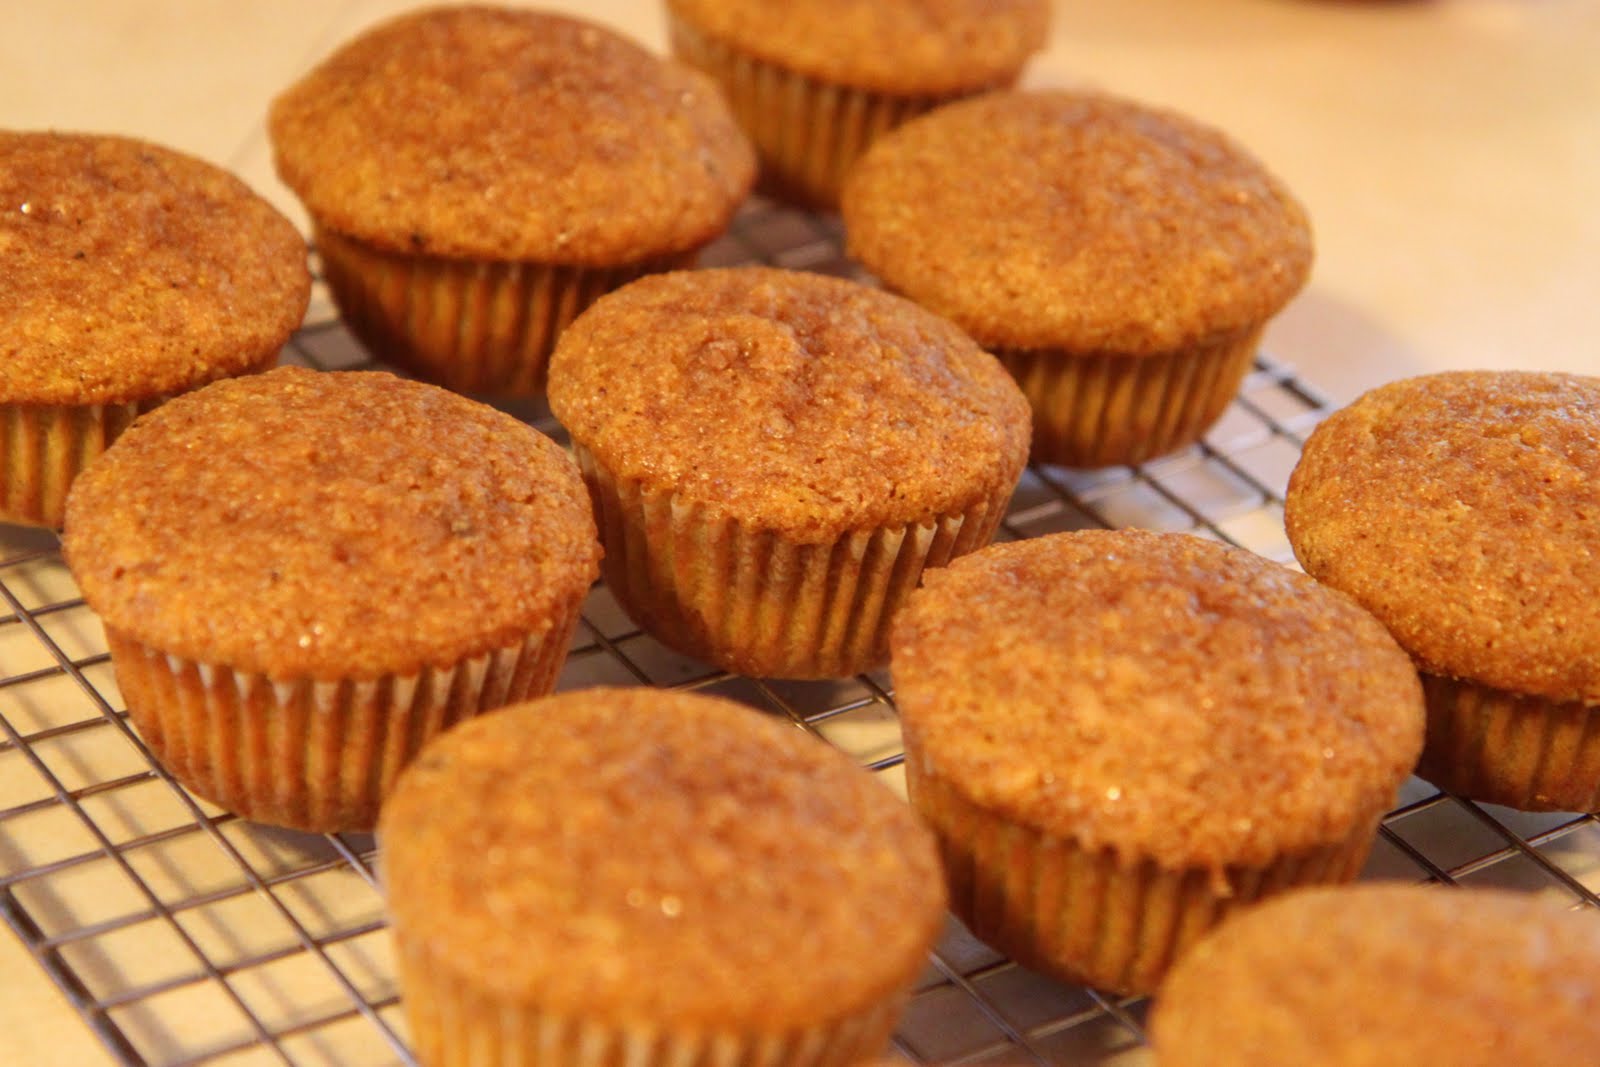
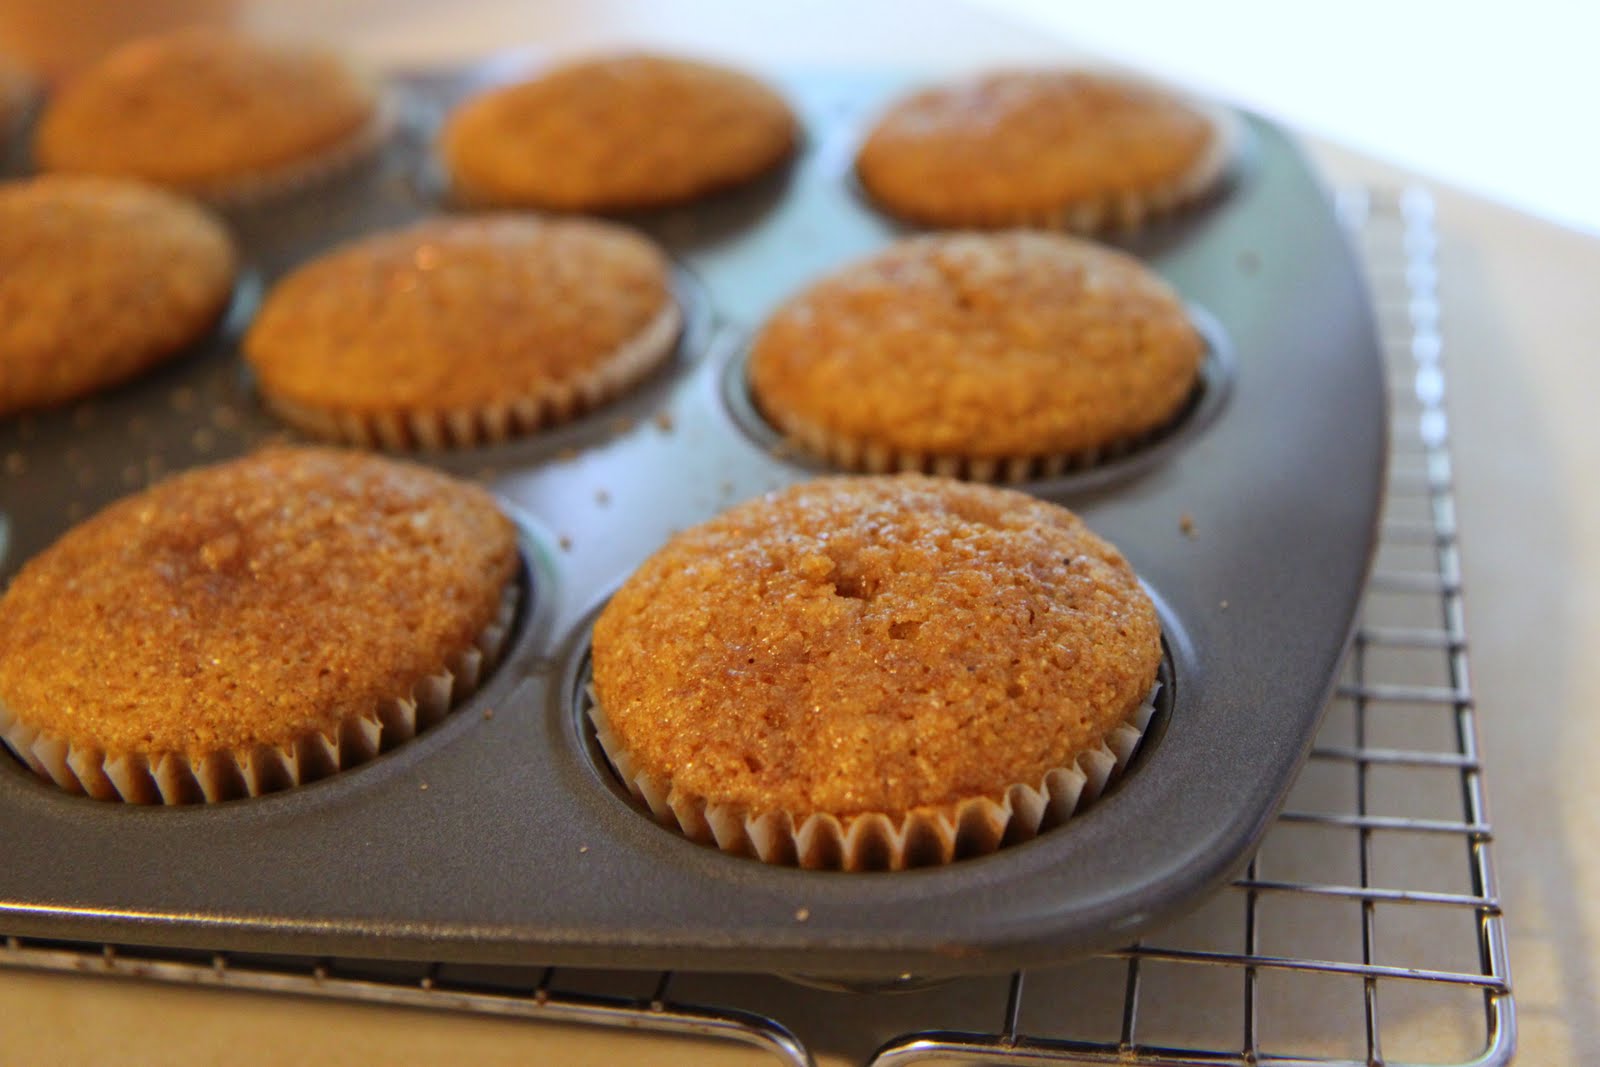
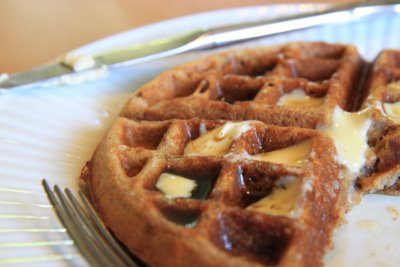
I have prepared this recipe two ways for you! The first is the traditional way stuffed with cranberry deliciousness. The second version is as a muffin and minus the cranberries for the cranberry-haters. We have one of those in our family so I made the second batch just for him…To which my husband pronounced, “Perfection,” and then he swiftly ate three!

Because these are better the second day, this is just another example of something you can make in advance so you can kick your feet up while the turkey is cooking!

Pumpkin Cranberry Cornbread

1 1/4 cups flour
3/4 cup cornmeal
2/3 cup light brown sugar
1 tablespoon baking powder
1/2 teaspoon salt
1/2 teaspoon nutmeg
1/2 teaspoon cinnamon
3/4 cup canned pumpkin puree
3/4 cup buttermilk (I substituted with regular milk and a teaspoon of vinegar to sour)
1/4 cup butter, melted
2 eggs, room
2 tablespoons honey
1 cup dried cranberries

Preheat oven to 350 degrees. Lightly grease a 8″ x 8″ baking pan or a 9-inch pie pan. In a bowl, toss together flour, cornmeal, sugar, baking powder, salt, nutmeg and cinnamon. In another mixing bowl, mix with a wooden spoon, the pumpkin puree, sour cream or buttermilk , butter, eggs and honey, until well combined. Add the pumpkin mixture to the flour mixture just until combined. Mix in the cranberries. Transfer to a prepared baking dish. Bake for about 40 minutes, or until edges just begin to color. Cool to room temperature.


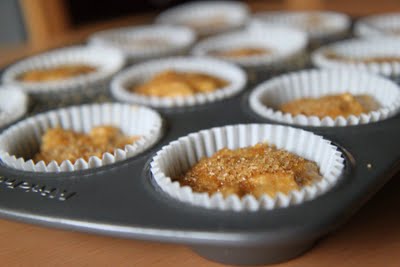
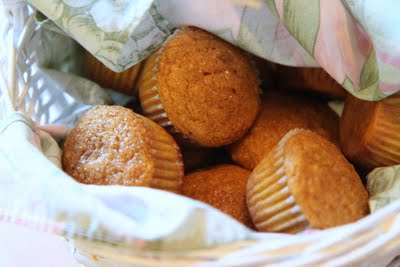
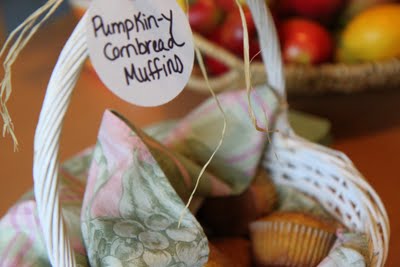
Pumpkin-y Cornbread Muffins (For the Cranberry Haters)

1 1/4 cups flour
3/4 cup cornmeal
2/3 cup light brown sugar
1 tablespoon baking powder
1/2 teaspoon salt
1/2 teaspoon nutmeg
1/2 teaspoon cinnamon
3/4 cup canned pumpkin puree
3/4 cup buttermilk (I substituted with regular milk and a teaspoon of vinegar to sour)
1/4 cup butter, melted
2 eggs, room
2 tablespoons honey
Sugar for sprinkling (I used the raw sugar)

Preheat oven to 350 degrees. Line a muffin tin with muffin liners. In a bowl, toss together flour, cornmeal, sugar, baking powder, salt, nutmeg and cinnamon. In another mixing bowl, mix with a wooden spoon, the pumpkin puree, sour cream or buttermilk , butter, eggs and honey, until well combined. Add the pumpkin mixture to the flour mixture just until combined. Transfer to the prepared muffin tin. Sprinkle with a little sugar (I used raw sugar) on top. Bake for about 20-25 minutes, or until edges just begin to color. Cool to room temperature. Makes approximately 12-13 muffins.

**************************

I am still the biggest fan of my bread machine. I do realize that they aren’t for everyone. Some people love to knead dough and use their stand mixer to do the heavy duty mixing or even to do the process by hand. Not me! The bread machine is the way to go at this stage in my life and it is worth every inch of space that it takes up, residing on the top of the refrigerator.

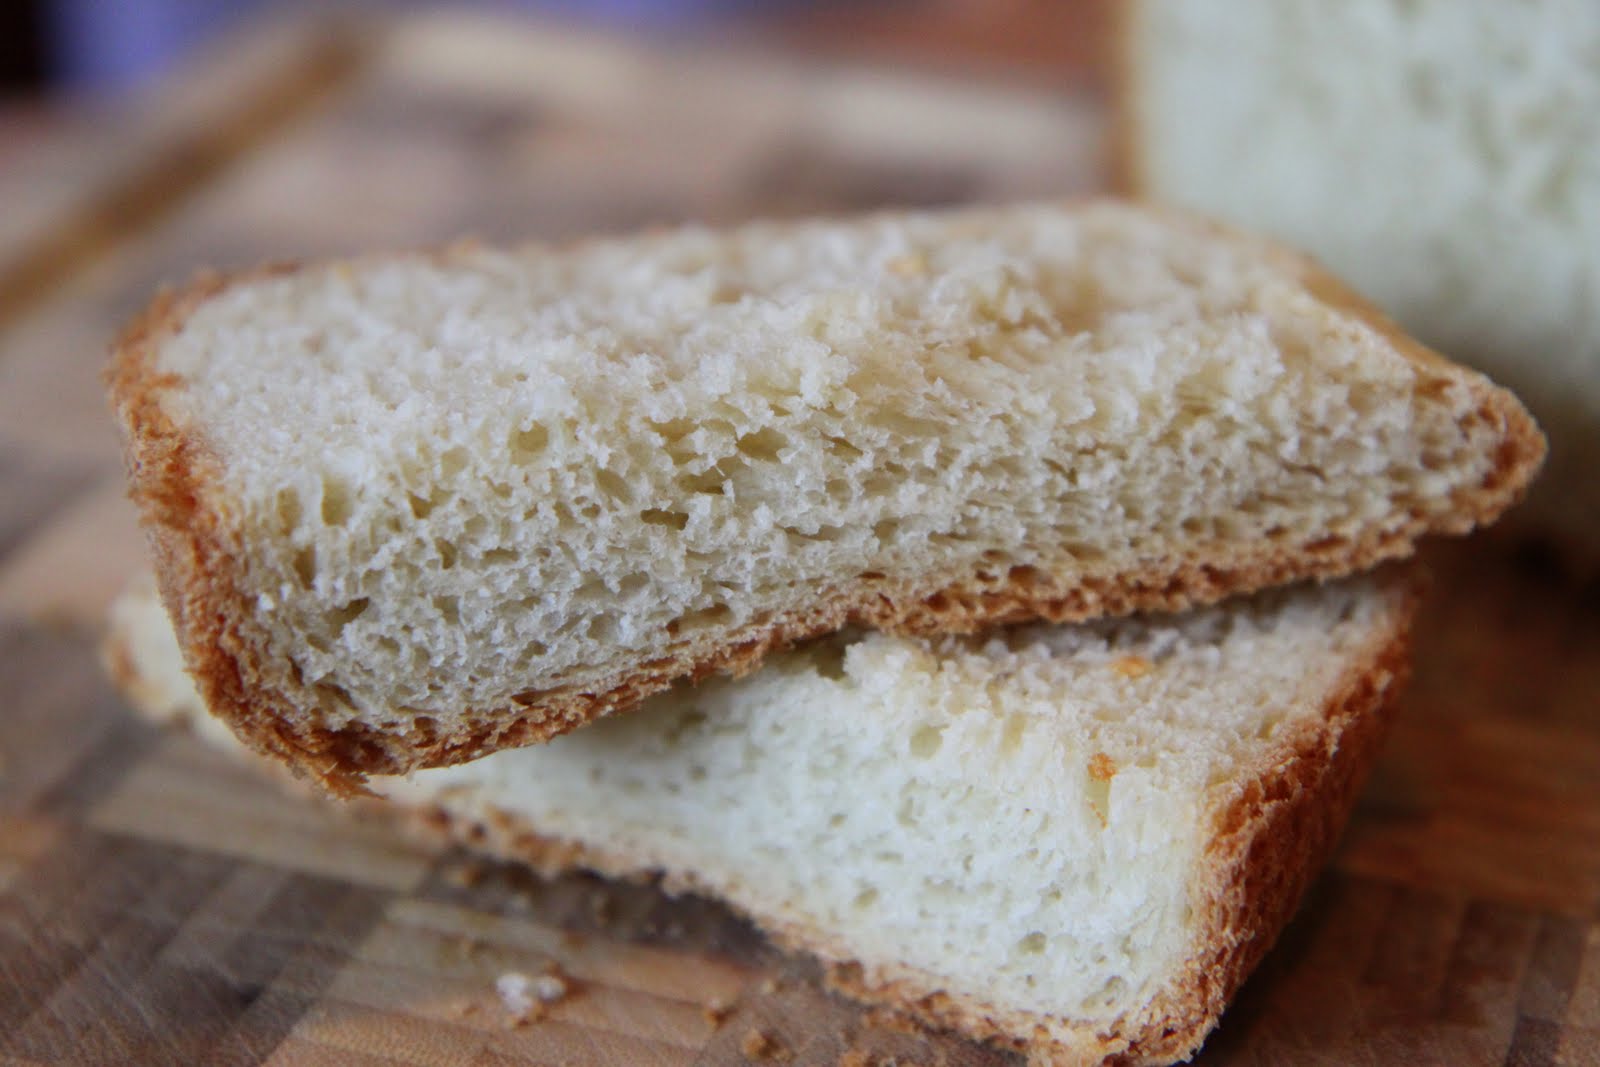
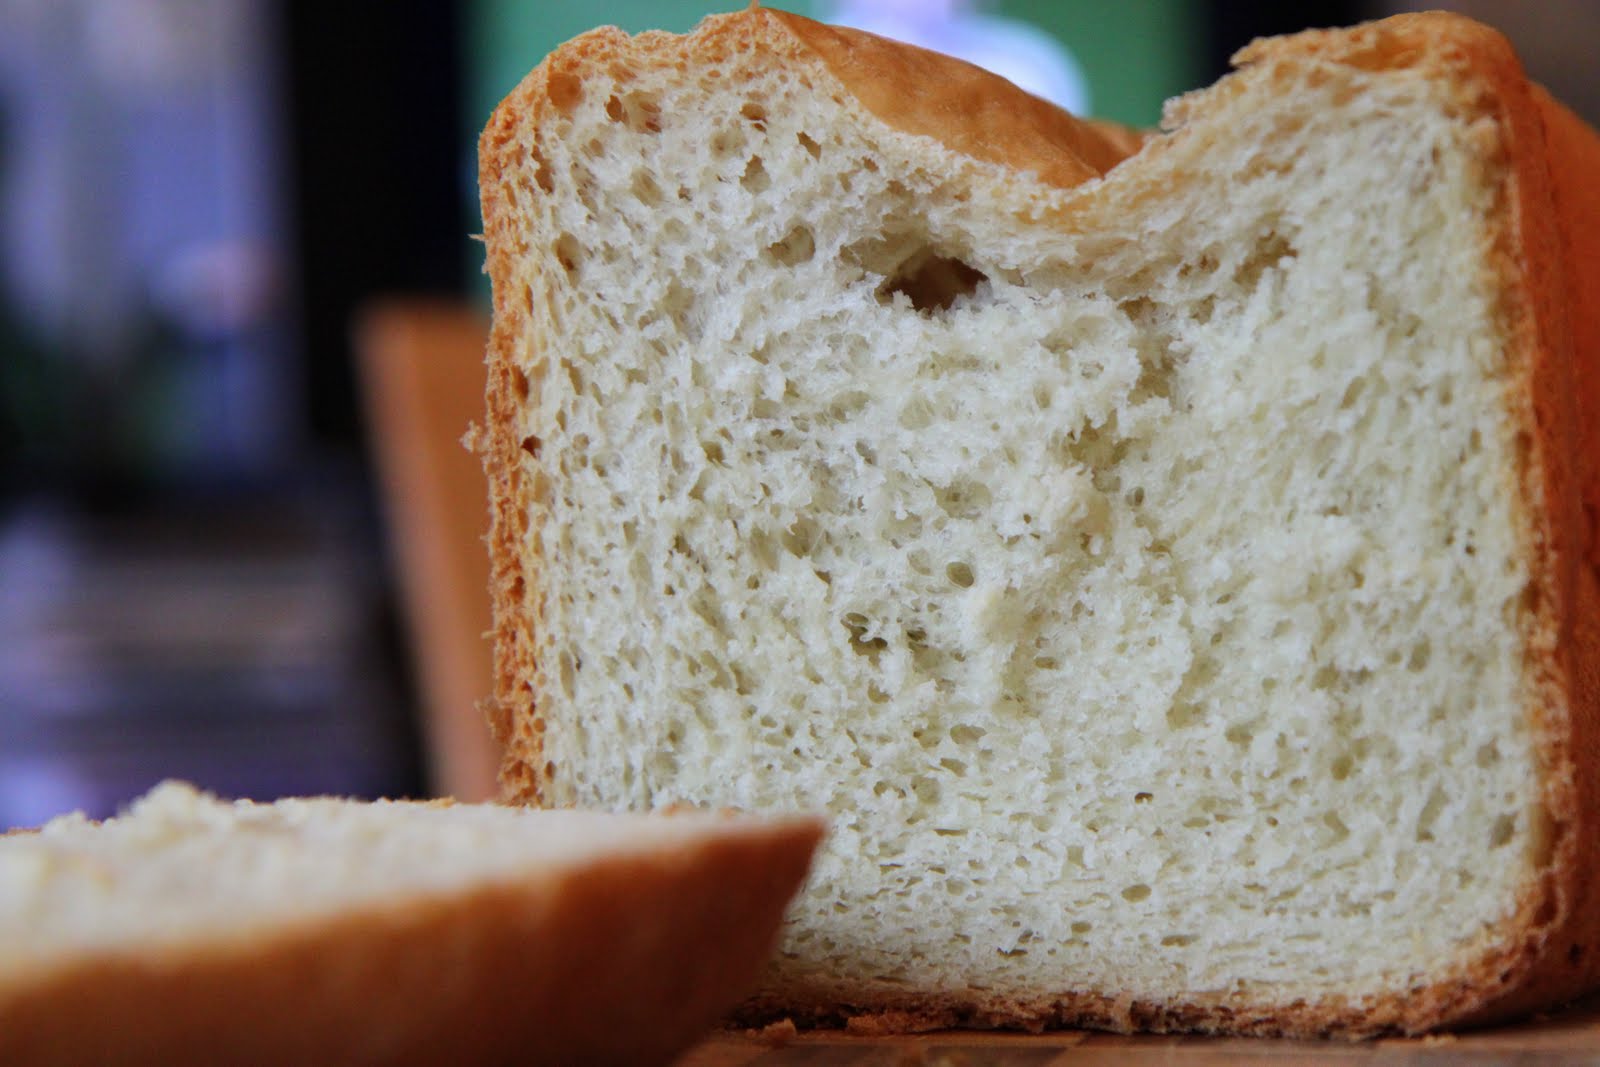
This bread recipe is a no-fail bread machine recipe that I have used for years. The ingredients are so simple and it makes the perfect loaf of bread every single time.

Throw the ingredients in the bread machine on Thanksgiving morning or take advantage of that delay timer on your bread machine to wake up to the smell of freshly baked bread. This recipe is a tried-and-true in our family!


Portuguese White Bread

1 cup water
3 tablespoons margarine
1 tablespoon sugar
1 teaspoon salt
3 cups white flour
1 1/2 teaspoons bread machine yeast

Add all ingredients in order listed into your bread machine. Choose the”basic” cycle and wait for the perfect loaf of white bread to appear! Yes, it is that simple!

**************************
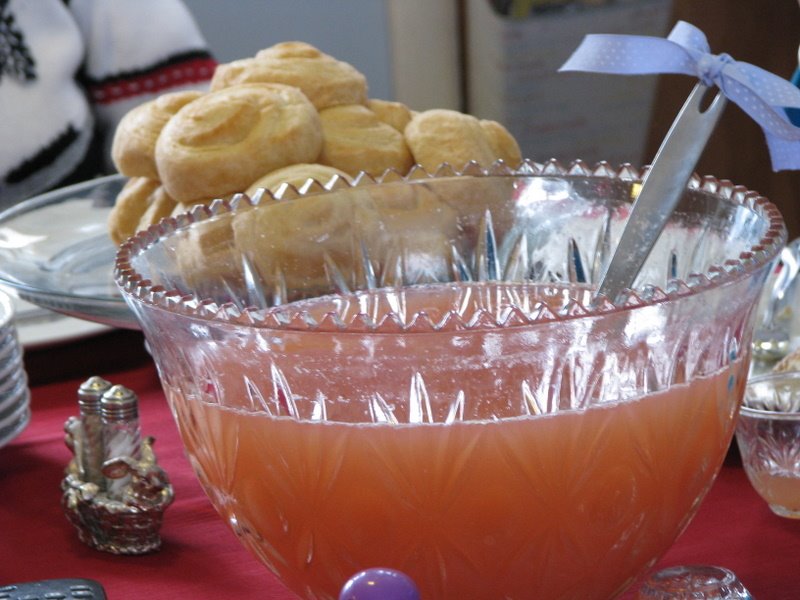
No celebration would be complete in our house without a big bowl of holiday punch. This is a cost-effective and elegant way to keep everyone hydrated without breaking the bank! I can’t imagine hosting any holiday celebration anymore without my holiday punch and I hope you can try this fantastic recipe in your house!

Amy’s Holiday Punch

1 (2 liter) bottle cherry 7-Up soda
1 liter (half a bottle) raspberry flavored soda (I found this at Walmart)
1 (12 ounce) can frozen lemonade concentrate
1 (12 ounce) can frozen pink lemonade concentrate
1 (1 liter) can pineapple juice

Mix all the ingredients together for the punch. This will fill one large punch bowl or two smaller ones.

**************************

A Word About Leftovers (if there is such a thing)


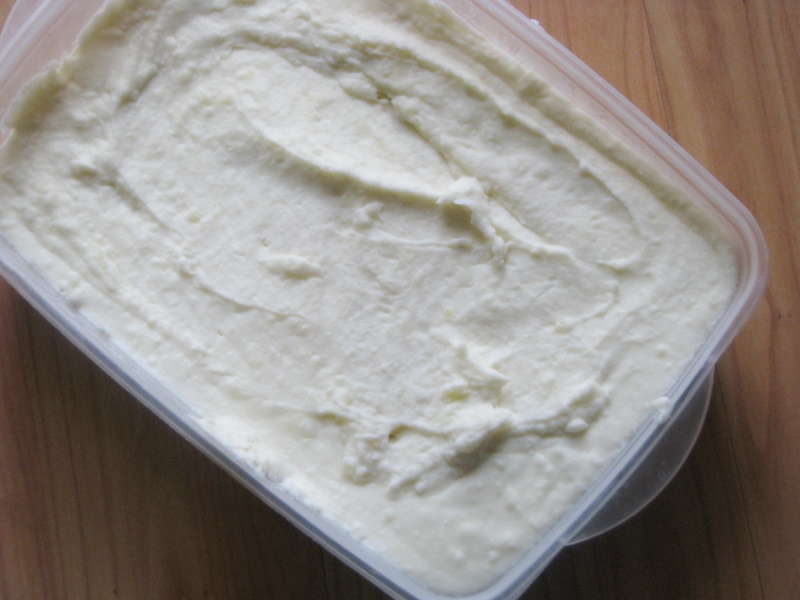
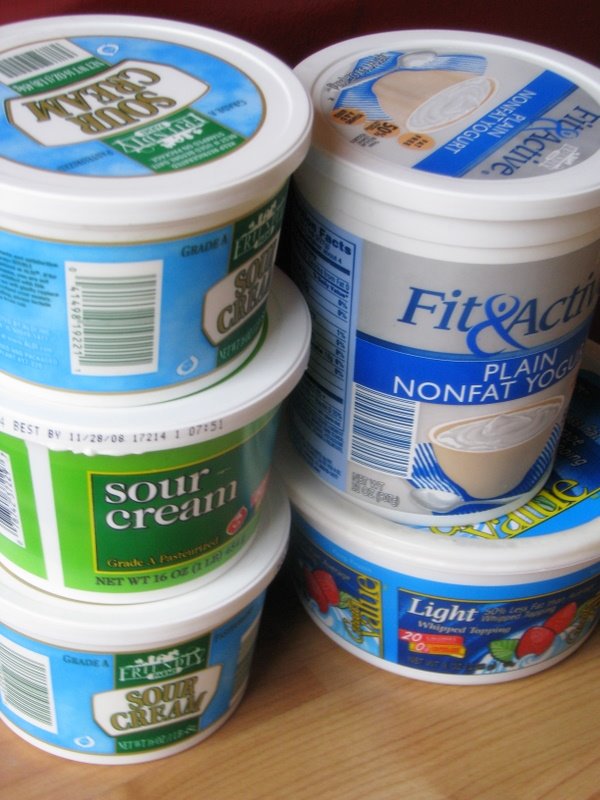
Last year, I saved all of my yogurt, sour cream, and whipped topping containers for our Thanksgiving feast. I found a bunch of them in my fridge with a scoop of this and a dab of that in them.

These were run through the dishwasher and are now waiting for all of those Thanksgiving leftovers. I am sure our guests will want to take home some of the leftovers from our feast so I am making sure we are prepared this year. No one likes the burden of returning a dish so these will make the perfect containers to send home all of the goodies without the hassle. Best of all, we are putting these containers to good use rather than adding them to the recycle bin.

If you were feeling ambitious, you could cover them with scrapbook paper. I, however, feel hosting Thanksgiving dinner is ambitious enough and I hope our guests will appreciate the thoughtful gesture of having these containers to enjoy a little of the feasting in their own home.

**************************

What is your favorite Thanksgiving recipe, tradition, or time-saving strategy in your family? I would love your ideas!
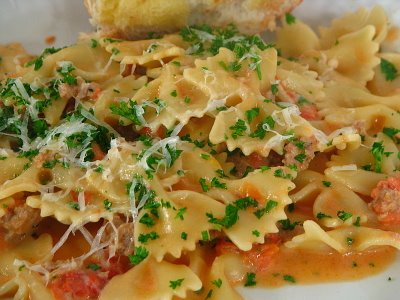
Pot Roast Italiano

Tuesday, September 22nd, 2009

Pot Roast Italiano

3 pounds beef chuck roast
1 can diced tomatoes – drained
1 can tomato sauce – 12 oz
2 tablespoons red wine vinegar
2 medium onions- sliced (I omitted these because of personal taste)
1 teaspoon oregano
1 teaspoon garlic powder
1 teaspoon basil
6 oz. can tomato paste
Grated parmesan cheese
Salt and pepper

Place sliced onions on bottom of crock pot. Place roast in crock pot. Season with salt and pepper. Pour diced tomatoes, tomato sauce, vinegar, and spices over roast. Cook on high for 1 hour, and then low for 8 hours. Transfer meat to cutting board and cut into chunks. Meanwhile, whisk tomato paste into the gravy in the pot roast and add parmesan cheese to taste. Gravy will get thicker after a minute or two. Add meat back to gravy and serve.

Leftover Tip- If you have any meat leftover (which will be highly unlikely), shred it for sandwiches. Serve the shredded meat on hoagie rolls with chips and fresh veggies. Yum!

Zesty Chicken Marinade

Tuesday, September 22nd, 2009

Zesty Chicken Marinade

(Marinade for 12 pieces of chicken, halve this recipe for four to six pieces)

1 cup oil
1/2 cup vinegar
2 tablespoons Miracle Whip or Miracle Whip light (I use the Fit & Active version with light blue lid)
3 tablespoons Worcestershire sauce
2 tablespoons lemon juice
1 tablespoon salt (to taste)
1 tablespoon pepper
2 tablespoons thyme
1 tablespoon garlic salt

Whisk together all ingredients in a small bowl. Use to marinate chicken pieces at least 30 minutes and then to baste the meat as it cooks in the oven or over hot coals.

5 Quick Dinners for Busy Weeknights

Monday, September 21st, 2009

Between running children to school and activities, weeknight meals can be a challenge. It is hard to resist the urge to run to the fast food restaurants on many of the crazy nights during the week. Slow cooker dishes can be key in planning meals on those nights. The other key? Having just a few dinners that can be pulled together easily with ingredients already on hand.

I wanted to share with you 5 of my favorite dishes for busy weeknight meals. These dishes are fast, simple, and delicious. These are always in rotation in my menu plans and are just a few of my family’s favorites!

Skillet Ziti With Chicken & Broccoli

1 pound boneless, skinless chicken breast, sliced into 1″ pieces
Salt and pepper
3 Tablespoons unsalted butter
1 onion, minced (we omitted this due to personal tastes)
1/4 teaspoon red pepper flakes
1/4 teaspoon dried oregano
3 garlic cloves, minced
8 ounces ziti (2 1/2 cups)
2 1/2 cups low-sodium chicken broth
1/2 cup heavy cream (I substituted this with half & half)
1 bunch broccoli (1 1/2 pounds)
1 cup jarred roasted red peppers, rinsed and sliced 1/4″ thick (we omitted these due to personal taste)
1 ounce Parmesan cheese, grated (1/2 cup)
2 tablespoons fresh lemon juice (optional)

Pat the chicken dry, then season with salt and pepper. Melt 1 tablespoon of the butter in a 12″ skillet over medium heat. Add the chicken and cook until it is lightly browned, but not fully cooked, about four minutes. Transfer chicken to a bowl. Add 1 more tablespoon of the butter, onion, red pepper flakes, oregano, & 1/2 teaspoon salt to the skillet. Cook until the onion is softened, about five minutes. Stir in the garlic and cook until fragrant, about 15 seconds. Sprinkle the ziti evenly into the skillet. Pour the broth and cream over the ziti. Cover and bring to a boil, about five minutes. Reduce the heat to medium-low and stir in the broccoli and roasted red peppers. Cover and continue to simmer, stirring occasionally, until the pasta begins to soften and the broccoli turns bright green (approximately eight minutes). Stir in the chicken and any accumulated juice. Cover and simmer until the chicken is cooked through, about three minutes longer. Stir in the remaining 1 tablespoon butter, the Parmesan, and lemon juice (if using). Season with salt and pepper to taste.

Yummy Sloppy Joes

1 lb ground beef
1 cup chopped onions (I omitted these because I don’t like onions)
1 cup ketchup
1 tablespoon mustard
2 tablespoons red wine vinegar
1 teaspoon salt
2 teaspoons Worcestershire sauce

In a large skillet, brown beef with onions (make sure to drain or rinse your meat after this step). Mix the rest of the ingredients together. Add to beef and onions. Cook for 1 hour over medium heat, stirring occasionally. Serve on warm hamburger buns.

Chicken Broccoli Lo Mein

8 ounces thin spaghetti (if linguine is available, I prefer this over the spaghetti)
2/3 pound skinless, boneless chicken (3 chicken breasts, thawed overnight)
1 cup fresh button mushrooms
1 tablespoon vegetable oil
1 bag frozen broccoli pieces
3 tablespoons soy sauce
1 tablespoon white vinegar
1 tablespoon ketchup

Cook pasta as directed. Clean & chop mushrooms. Heat oil. Cut chicken in bite size pieces. When all the chicken is cut, add it to the skillet. Add mushrooms and broccoli to the skillet. Cook for five to six minutes or until mushrooms have released their liquid and chicken is cooked through. Add soy sauce, vinegar, and ketchup. Stir to combine. Add cooked pasta and serve immediately.

Bow Ties With Sausage, Tomato, & Cream

1 (12 ounce) package bow tie pasta
1 tablespoon olive oil
1 lb Sweet Italian Turkey Sausage (removed from the casing)
1/2 teaspoon red pepper flakes (can omit/decrease if your family doesn’t like spicy dishes)
1/2 cup diced onion
3 garlic cloves, minced
1 (28 ounce) can Italian-style plum tomatoes, coarsely chopped
1 1/2 cups heavy cream (or half & half to save on calories)
1/2 teaspoon salt
3 tablespoons minced fresh parsley

Bring a large pot of lightly salted water to a boil. Cook pasta in boiling water for 8 to 10 minutes, or until al dente; drain. Heat oil in a large, deep skillet over medium heat. Cook sausage. Stir in onion and garlic, and cook until onion is tender. Stir in tomatoes, cream, and salt. Simmer until mixture thickens, 8 to 10 minutes. Stir cooked pasta into sauce, and heat through. Sprinkle with parsley.


Whole Wheat Cinnamon Waffles

1 cup whole wheat flour
3/4 cup unbleached flour
1/4 cup toasted wheat germ (I substituted this with 1/4 cup rolled oats)
1/3 cup instant nonfat dry milk powder
1 tablespoon ground cinnamon
1 tablespoon baking powder
1/2 teaspoon baking soda
1/2 teaspoon salt
2 eggs (separate the egg whites from the egg yolks)
3 tablespoons canola oil
2 teaspoons vanilla extract
2 cups buttermilk (I used regular milk and then added 2 tablespoons of vinegar & let it stand for five minutes)

In a large bowl, combine the whole-wheat flour, unbleached flour, dry milk, cinnamon, baking powder, baking soda, wheat germ, and salt; mix well. Separate the egg yolks from the egg whites. In a medium bowl, mix the yolks, oil, buttermilk, and vanilla. Pour over the dry ingredients. In a small bowl beat egg whites until stiff peaks form (tips stand straight up). Gently fold egg whites into flour and egg yolk mixture, leaving a few fluffs of egg white, Do not overmix. Coat your waffle iron with vegetable cooking spray and preheat. Pour 1/2 cup
of the batter into the center of the hot waffle iron and cook until the batter stops steaming, about 6 minutes. Cooking time varies according to the they type of waffle iron you have. Repeat with remainder of the dough, applying the cooking spray between waffles. Serve warm with your favorite syrup.


Do you have a favorite busy weeknight meal to share? What meals do you rely on to get dinner on the table quickly?

Notebook Experiments: Will We Like a Chicken Cooked in Milk?

Wednesday, September 16th, 2009


I had to bring this experiment back one more time because it has been my new favorite Sunday tradition. There is rarely a bite of meat left when I make this chicken and my family looks forward to this dish more than I can say. I highly recommend giving this recipe a try- you won’t be disappointed!

Experiment: Will my family love a chicken cooked in milk?

Experiment Taken From: Notebook Entry 04.02.09

Materials Needed: Please see The Kitchn for specific directions on how to make Jamie Oliver’s chicken cooked in milk & lemon. I followed the instructions outlined by The Kitchn and left the lid on for the first hour of the cooking time, versus the chicken uncovered as Jamie outlines in his recipe. I also omitted the cinnamon stick to go with a more traditional flavor, but might give that a try next time.

Results: I love roasted chicken and it is the ultimate Sunday dinner for our family. When I saw this recipe, I knew I would have to try it. I happened to be out at Target so I picked up all the ingredients there including an organic bird since they had them on sale.

The main difficulty I had with the recipe was frying the bird in the butter. I think the butter could have been easily reduced to half the amount and still brought out a lot of flavor. I had a hard time flipping the bird without splattering myself, but got a good start on the skin before it went into the oven.

I added all the ingredients to the pot and then put the lid on it. It cooked for the first hour with the lid on and then I basted it and removed the lid for the last half hour.

Here is what you need to know about this recipe that makes it worth the little bit of effort. First, it made the whole house smell amazing and I literally wanted to eat it within the first fifteen minutes of cooking because the house smelled that good. Second, the meat literally falls off of the bone. There is no carving, it literally falls off. Third, the sauce is delicious and the “curdled” appearance was barely noticeable at all in the sauce.

All of that being said, the breast meat was drier than I would have liked so I am not sure if that could be remedied with a shorter cooking time or cooking it with the lid on the entire time. I am going to try a few different scenarios until I perfect this one because it is truly that good.

Make sure to have lots of bread for mopping up all that great sauce. If you pair this with a good white wine, a pile of mashed potatoes, and a great Etta James CD (like our family did), you will love every minute and bite that happens during that dinner!

Update: We tried this chicken again. This time I did not brown it, omitted the butter entirely, and cut the lemons in half and added two halves around the chicken and two halves stuffed in the chicken. I sprinkled the outside of the chicken with cinnamon instead of the cinnamon stick (which costs quite a bit more at our supermarket). I cooked it covered and then gave it twenty minutes with the lid off. The second time…absolutely perfect and lower calorie to boot!

Conclusion: This recipe will be repeated again and again! I thank The Kitchn for highlighting it and I can’t wait to try some different variations to make this chicken the ultimate chicken in our house!
**********************

I am so excited to open our Notebook Experiments up to everyone and I hope that you will be able to participate this week or in weeks to come! I will be posting this each Wednesday so please mark your calendars if you plan to participate. You can post your entries at any time throughout the week and then leave your entry in the links below.

We have this handy banner that you are more than welcome to use, but it is not a requirement! It is just something you can add to add a little sparkle to your entry.

Rules for Participation:

1. Choose anything from any of our notebook entries (past or present) to do with your family. We have hundreds of bookmarked links of crafts, ways to save money, and organizing ideas.
2. Complete an experiment from the notebook and share about it on your blog or website. We would love to see pictures of what you accomplished or a detailed description of how your projects turned out. Please include a link to this entry, a link to the original posting of the entry (at the original craftster’s blog), and (to help us relocate the project) the date or link of the notebook entry where you found it. You can use the same formatting as our entries or you can just include that information in your post in your own unique way!
3. Post a link below. Please include your name or blog name & a fast description of your project. Example- MomAdvice (WHO bread)

I can’t wait to see what you create and what you find inspiring!

Classic Slow Cooker Entertaining: Pot Roast Italiano

Monday, September 14th, 2009

Sometimes a girl needs a fantastic dish that she can whip up in no time and look like a superstar in the kitchen. I dusted off some old recipes and remembered this delicious pot roast I had for just such an occasion. My grandparents were visiting from Florida and my husband was out of town for the day so I knew I would need to come up with some that would be easy and impressive enough to showcase my cooking skills.

My Pot Roast Italiano is guaranteed to knock your socks off! At the end of the cooking, you whisk in a can of tomato paste, which finishes off the delicious gravy. I served the roast with my favorite cheesy orzo pasta, my lemony roasted green beans, and my fast peanut butter cookies.

Instead of spending the day in the kitchen, the kids & I decided to spend the day at our dollar movie theater and caught a movie together instead. I love when I can spend more time with my kids and less time in the kitchen! This dish will do just that for your family- I promise!

Pot Roast Italiano

3 pounds beef chuck roast
1 can diced tomatoes – drained
1 can tomato sauce – 12 oz
2 tablespoons red wine vinegar
2 medium onions- sliced (I omitted these because of personal taste)
1 teaspoon oregano
1 teaspoon garlic powder
1 teaspoon basil
6 oz. can tomato paste
Grated parmesan cheese
Salt and pepper

Place sliced onions on bottom of crock pot. Place roast in crock pot. Season with salt and pepper. Pour diced tomatoes, tomato sauce, vinegar, and spices over roast. Cook on high for 1 hour, and then low for 8 hours. Transfer meat to cutting board and cut into chunks. Meanwhile, whisk tomato paste into the gravy in the pot roast and add parmesan cheese to taste. Gravy will get thicker after a minute or two. Add meat back to gravy and serve.

Leftover Tip– If you have any meat leftover (which will be highly unlikely), shred it for sandwiches. Serve the shredded meat on hoagie rolls with chips and fresh veggies. Yum!

To Die For Pot Roast Sandwiches

Monday, August 17th, 2009

Sometimes it is nice to have a recipe in your back pocket that you can throw on the dinner table in minutes and that will leave everyone feeling full and satisfied. This week my children will both start school and for the first time in my life, I am going to have a few hours on my own. I am sure there will be many more blog entries about this momentous occasion, but in the meantime I want to focus on the usefulness of that slow cooker that might be gathering dust in your kitchen.

When the school season starts, our slow cooker is the best tool that I can arm myself with to get dinner on the table. There are so many things that you can make in the slow cooker that are satisfying and will leave you with lots of yummy leftovers for the week.

This recipe is one of my favorites from our One Month with Your Slow Cooker article. If you haven’t seen this article, it is THE best tool for busy moms who want ideas for slow cooker meals that are true show-stoppers in the kitchen. I entertain with these dishes, I share them when I bring meals to families in need, and our family eats from these thirty recipes about once a week.

You will notice that few of our recipes have convenience foods or mixes in them, but this roast is my one exception to the rule. Do your best to look for low-sodium mixes though and avoid adding any salt to this recipe. These three little mixes and some water make the most flavorful roast. Not a hint of dryness in this roast and the leftovers heat up perfectly for a special lunch.

I shared the leftovers with my mom and served these sandwiches with multi-grain chips with salsa and a delicious batch of blueberry iced tea.

To Die For Pot Roast

1 beef roast – any kind (I look for roasts that are between 3-5 pounds)
1 package dried brown gravy mix (look for low-sodium varieties)
1 package dried Italian salad dressing mix (look for low-sodium varieties)
1 package dried ranch dressing mix (look for low-sodium varieties)
1 cup water

Place beef roast in slow cooker. Mix the dried mixes together in a bowl and sprinkle over the roast. Pour the water around the roast. Cook on low for seven to nine hours.

Do you have a favorite slow cooker recipe to share? I would love to get some new ideas for the school year! Please share!