Archive for the ‘Breakfast’ Category

Baked Pumpkin Donuts With Maple Syrup Frosting

Monday, November 29th, 2010


Baked Pumpkin donuts with maple syrup glaze from MomAdvice.com


If you are anything like me, I am sure you have a few extra cans of pumpkin leftover after making those pumpkin pies for the Thanksgiving feast.

I have just the idea for where you can put those cans to good use and wanted to share with you my baked pumpkin donuts with a maple syrup frosting drizzle that would be a wonderful treat to indulge in while you are tackling those holiday to-do lists.

I had been dying to get a baked donut pan after seeing all of the wonderful baked donuts circulating the blogs this fall.

Luckily, I had a few Swagbucks set aside and credited those towards an Amazon gift certificate to purchase them for free.

I found these Norpro 6-count Nonstock Donut Pans for $12.99 each and decided to put my certificates towards two of those.

If the picture above doesn’t say, “these are worth every dime,” then I don’t know what would convince you! 

If you don’t want to buy them for yourself though, these would make a lovely holiday gift to add to your Christmas list this year.

As a special treat after church, I have been making the family donuts to go with our Sunday paper.

I mix all of the dry ingredients before we leave, or if I am running ahead of schedule, I make the batter and tuck in the fridge until we get home.

We all are loving the homemade and fresh from the oven donuts. 

I love that these baked varieties are healthier than the fried versions.

Still not healthy, but you know… healthier.

Let’s get started…


To begin making these donuts, you need to mix together the dry ingredients in one bowl.

In a separate bowl, mix together all of your wet ingredients. 

Then just add your dry ingredients to the mixed wet ingredients, just until they are combined.

I just used my little hand mixer for this quick job.


Lightly spray your donut pan with a little cooking spray. 

To fill the pan, you can do my lazy version or you can do it the “right way.”

To do it the right way, scoop the batter into a gallon size bag and cut off the end corner to pipe the batter in.

The lazy version simply requires an ice cream scoop and trying to scoop half the batter in on one side and half the batter in on the other side.

Then smooth the batter on top with a butter knife. 

You want to fill them about 3/4’s full which worked out to be nine donuts worth. 

Slide them into your oven and bake them for eight to ten minutes.


After you have pulled them out, allow them to cool for a couple of minutes and then invert them on a cookie sheet with a cooling rack on top.

Now it is time to make your delicious maple syrup drizzle to make these even more delicious.


Here we go, it’s time  to mix up your maple syrup frosting drizzle for the tops. 

It sounds fancier than it really is- you just mix up some confectioner’s sugar, milk,  and a little maple syrup to make your frosting.

It makes a ton of frosting so it is up to you how much frosting you want to add to your donuts.


Now it is time to frost your donuts.

I just grabbed a spoon and drizzled the frosting in a back and forth motion over my donuts.

You could also dunk the tops in the frosting and then allow the icing to harden or you could skip the frosting altogether and just enjoy them with a light dusting of confectioner’s sugar.

I highly recommend the frosting though, it really adds a little sparkle and an extra bit of delicious to your donuts.


Now you can eat your donuts.

These are flavorful and almost like a glass of wine, you can taste all the different flavors as you eat them.

You can taste the hints of cinnamon and nutmeg, the rich pumpkin flavor, and then that maple syrup sweetness from the light glaze drizzle.

The texture is different than a fried donut and more like a muffin or a good piece of cake.

They are not overly sweet though and the pumpkin really seems to add a savory quality to these.

I hope you enjoy these as much as we have! Still have pumpkin left?

Be sure to check out my 8 Ways to Use Canned or Fresh Pumpkin for some added inspiration!


Baked Pumpkin Donuts With Maple Syrup Frosting

2 cups flour
1 1/2 teaspoons baking powder
1/4 teaspoon baking soda
1/4 teaspoon salt
2 teaspoons cinnamon
1 teaspoon nutmeg
1/8 tsp cloves
1/2 cup brown sugar
4  tablespoons butter, softened
2 eggs
1 teaspoon vanilla extract
2 1/2 tablespoons milk
1 cup pumpkin purée

For the Maple Syrup Glaze:

1 1/2 cups confectioners’ sugar
1/4 cup milk
1/8 cup maple syrup

Preheat the oven to 375 degrees and grease two doughnut pans. In a medium bowl, whisk together the flour, baking powder, baking soda, salt, and spices.In another medium bowl, cream together the brown sugar and butter. Beat in the eggs one at a time, and then the vanilla extract, milk, and pumpkin puree. Gradually beat the dry ingredients into the wet ingredients just until combined. Fill each doughnut mold 3/4’s full with batter. Bake 8-10 minutes or until the doughnuts spring back when touched. Remove from the pan and cool completely.

For the maple syrup glaze: In a small bowl, combine confectioners’ sugar, maple syrup and milk; stir well. Add additional milk, if needed, to reach desired consistency. Drizzle over donuts.

Serve with big mugs of coffee or milk for dunking. Expect praise and wild applause from your family members.

Baked pumpkin donuts with Maple syrup glaze from MomAdvice.com

More fabulous fall ideas:


Easy Homemade Gluten-Free Pumpkin Bread

Gluten-Free Pumpkin Bread


Pumpkin Hand Pies from MomAdvice.com

Pumpkin Handpies 


DIY Thumbtack Pumpkins from MomAdvice.com

DIY Thumbtack Pumpkins


Homemade Pumpkin Pie Spice


How to Make a Pumpkin Spice Latte from MomAdvice.com

DIY Pumpkin Spice Latte

Cinnamon Bun Pancakes

Thursday, November 4th, 2010

I decided to surprise our family with a little unexpected treat and whip up a batch of these Cinnamon Bun Pancakes from How Does She? that we featured in our weekly notebook. Not known to be much of  a pancake flipper, I wowed the family with this special surprise and even had pancakes that were intact this time!  Another unexpected treat was the cinnamon maple frosting drizzle in lieu of the traditional syrup I usually serve.

Only quiet smacks and a few “ohhh’s” and “ahhh’s” were heard at my kitchen table. Swift and sticky hugs were given to me and proclamations of my awesomeness may have been made by my children.

Belly clutching and groaning may have concluded the dinner for the adults, but they were satisfying groans and an evening spent of television watching. There may have possibly been more proclamations of awesomeness as we made vows to hit the gym and treadmill the next day.

Not enough pancake magic for you? Be sure to try our Light & Fluffy Pumpkin Pancakes for another dinner worthy of many more sticky hugs and heartfelt proclamations!

Apple Pie Muffins

Monday, September 20th, 2010

Fall is my favorite season and what says autumn more than apples? I wanted to share with you one of my favorite apple recipes from my own kitchen. My family does not like apple pie, but they do really love my apple pie muffins that incorporate those delicious flavors of the apple pie with a simple crumb topping. If you happen to have an abundance of apples on hand, I highly recommend giving these apple muffins a try.

You can choose any kind of apples you like and we happened to have a large amount of Golden Delicious apples that worked really well in these. You just want to make sure that you select an apple that is sturdy enough and appropriate for baking. My usual selection in these apples is a Granny Smith because I love how the tart addition balances out the sweetness in these muffins.

The batter is sweet, but not too sweet, and the apples have a warmness to them thanks to the cooked apple and the cinnamon that is worked into the crumb topping and within the muffin itself.  Serve these up with a big glass of milk and you have the makings of a perfect snack!

Apple Pie Muffins (Adapted from Food.com)

Crumb Topping:

1/2 cup  firmly packed  brown sugar
1/3 cup all-purpose flour
1/4 cup unsalted butter, softened
1 teaspoon cinnamon

Muffins:

1 1/2 cups firmly packed brown sugar
2/3 cup canola oil
1 egg
1 1/2 teaspoons vanilla
1 teaspoon cinnamon
2 1/2 cups all-purpose flour
1 teaspoon baking soda
1/4 teaspoon salt
1 cup buttermilk (I used 1 cup of regular milk and then added 2 tsp. white vinegar to sour it)
3 cups diced peeled firm tart apples

Topping: In a small bowl toss together sugar, flour, butter and cinnamon until crumbly; set aside. Muffins: In a large bowl whisk together brown sugar, oil, egg, cinnamon, and vanilla until smooth. In a separate bowl, sift together flour, soda and salt. Stir oil mixture into flour mixture alternately with buttermilk. Fold in apples, mixing just until combined. Spoon into greased muffin cups filling 3/4 full.
Sprinkle topping over evenly.  Bake at 350°F for 25-30 minutes (mine took about 27 minutes)  or until golden brown and tops spring back.

**********************************

Frozen Crumb Topping

Crumb topping is an easy recipe to double or triple for your freezer. I love to make a huge batch of this to keep on hand for topping any muffins we might be creating in our kitchen. When you want to use it for your next batch of muffins, just pull it out and use a fork to give it a scraping to loosen the topping. I find when it is frozen, it makes it even easier to get that delicious crumb effect on top. It is my favorite topper to these muffins and my banana crumb muffins and adds that bakery feel to any baked goods you might be making!

If you still have lots of apples on hand, I highly recommend giving some of these Apple Pork Chops a try! They are moist, sweet, savory and the perfect addition to your menu planner!

What are your favorite apple recipes? Feel free to share your links or ideas for using those apples in your house!

Blueberry Pancakes

Monday, August 2nd, 2010

We do a lot of breakfast-for-dinner nights in our house because it is a favorite meal for everyone in the family and it is so darn frugal!  While our family embraces our “Jazzy Sunday” philosophy paired with mountains of homemade waffles each week, we do enjoy a little pancake flipping once in awhile. A pancake laced with fresh handpicked blueberries seems the perfect occasion to break out the old griddle and spatula for a fun and inexpensive weeknight meal.

I love that with this better it is encouraged to mix the batter up ahead of time and allow it to rise for a bit on the counter. What happens is that this seemingly unimpressive batter is magical as it puffs up beautifully once placed on the griddle. Once poured on the griddle, I sprinkle the blueberries into each pancake individually as they become golden. The pancakes are then served with a little syrup and another generous handful of fresh berries on top.

I hope you enjoy this recipe as much as our family did! The best part is that if you are a family that stands divided on the deliciousness of blueberries, half of you can enjoy blueberry pancakes and the other half can leave their pancakes nice and boring plain.

For those of you who are growing tired of my blueberry recipes, we will be returning to our regularly syndicated recipe program next week. In the meantime, I hope you will enjoy just one more recipe from my collection and see the potential in all of the berry goodness in your house.

Delicious Blueberry Pancakes (Adapted from AllRecipes.com)

2 1/2 cups all-purpose flour
1 teaspoon salt
2 tablespoons baking powder
2 1/2 teaspoons white sugar
2 eggs
2 cups milk
1 tablespoon butter, melted
1 cup blueberries (I used fresh)

In a large bowl, sift together flour, salt, baking powder and sugar. In a small bowl, beat together egg and milk. Stir milk and egg into flour mixture. Mix in the butter. Set aside for 1 hour. Heat a lightly oiled griddle or frying pan over medium high heat. Pour or scoop the batter onto the griddle, using approximately 1/4 cup for each pancake. Sprinkle the blueberries gently into each pancake.  Brown on both sides and serve hot with a sprinkle of fresh blueberries and a little pancake syrup.

*****************************

Not enough blueberry recipes for you?  Be sure to check out our blueberry cobblerblueberry muffin cake, blueberry pancake syrup, blueberry syrup for iced tea or coffee, lemony blueberry muffins. Have extra berries you need to freeze? Be sure to see our easy 1-2-3 blueberry freezing techniques!

Wafflepalooza: 6 Amazing Waffle Recipes & Tips to Get Your Waffle On

Monday, July 5th, 2010

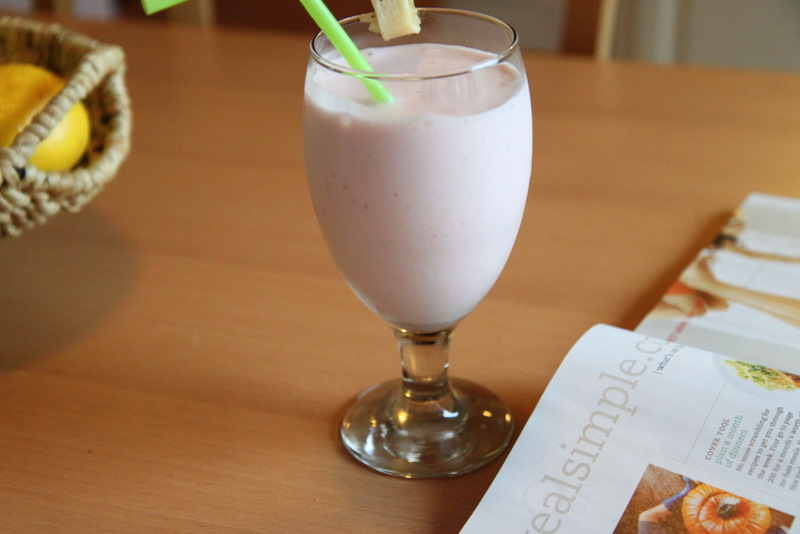
In this family, we are all about traditions… especially food traditions.  One tradition that we started a few years ago was a waffle or pancake tradition each and every Sunday for brunch. It has become such a normal part of our week that you would think that it would lose some of its shine over the years, but it honestly has not. Thanks to a wide variety of fun waffle recipes and our fun tradition of jazz music with the Sunday paper, it is truly what Sunday afternoons have become all about for me and my family. Honestly, who could refuse a little Harry Connick Jr. and a little homemade waffle magic for a Sunday tradition? Not me!

This tradition is the gift that keeps on giving because I always make a double batch of orange juice and a double batch of waffles that are frozen and are at the ready for a quick breakfast that costs a fraction of the price.  With my big breakfast eaters in the house, it has definitely helped save us a lot on the cereal budget.

Today I am throwing my own little wafflepalooza with all of the great waffle recipes that we have featured over the years a few fun ways to dress them up,  and a few quick tips for great waffle success.

This waffle is still our absolute favorite and it has been tweaked over the years and is now the most perfect and light wheat waffle that I have ever eaten. Give this one a try!

Whole Wheat Cinnamon Waffles

1 cup whole wheat flour
3/4 cup unbleached flour
ALTERNATE FLOUR IDEA: Use 1 3/4 cup whole wheat WHITE flour instead of the wheat & white flour as directed above. If you use this, there is no need to separate the egg yolks and whites. It will still yield a very light waffle without beating the egg whites separately!
1/4 cup toasted wheat germ (I substituted this with 1/4 cup rolled oats)
1/3 cup instant nonfat dry milk powder
1 tablespoon ground cinnamon
1 tablespoon baking powder
1/2 teaspoon baking soda
1/2 teaspoon salt
2 eggs (separate the egg whites from the egg yolks)
3 tablespoons canola oil
2 teaspoons vanilla extract
2 cups buttermilk (I used regular milk and then added 2 tablespoons of vinegar & let it stand for five minutes)

In a large bowl, combine the whole-wheat flour, unbleached flour, dry milk, cinnamon, baking powder, baking soda, wheat germ, and salt; mix well. Separate the egg yolks from the egg whites. In a medium bowl, mix the yolks, oil, buttermilk, and vanilla. Pour over the dry ingredients. In a small bowl beat egg whites until stiff peaks form (tips stand straight up). Gently fold egg whites into flour and egg yolk mixture, leaving a few fluffs of egg white, Do not overmix. Coat your waffle iron with vegetable cooking spray and preheat. Pour 1/2 cup of the batter into the center of the hot waffle iron and cook until the batter stops steaming, about 6 minutes. Cooking time varies according to the they type of waffle iron you have. Repeat with remainder of the dough, applying the cooking spray between waffles. Serve warm with your favorite syrup.

********************************

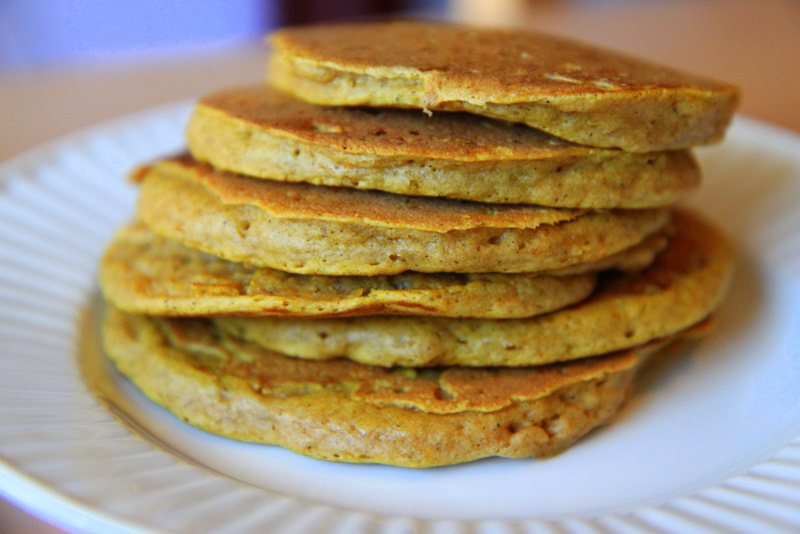
While this is definitely a waffle that might feel more appropriate in the fall season, if you have a can of pumpkin gathering dust in your pantry, I highly recommend freeing up your pantry space on this waffle recipe. These are my most requested waffles by my kids!

Deliciously Spiced Pumpkin Waffles

1 1/2 cups all-purpose flour
3 teaspoons baking powder
1/2 teaspoon baking soda
1 teaspoon cinnamon
1 teaspoon nutmeg
1 teaspoon ground ginger
1 pinch salt
2 eggs
1/4 cup firmly packed brown sugar
1 cup canned pumpkin puree
1 2/3 cups milk
4 tablespoons butter, melted and cooled

Mix together flour, baking powder, baking soda, cinnamon, nutmeg, ginger, and salt in large bowl. In a second bowl, add eggs, sugar, pumpkin, milk, and butter; beat well. Gently fold in the flour mixture. Spoon in about 3/4 cup of batter into the waffle iron. Cook each waffle for 4-5 minutes. This recipe makes approximately 5 waffles on my waffle iron.

Additional Notes- I double this recipe to make an extra batch to freeze or when entertaining. Make sure to spray your waffle iron well with nonstick spray or these will stick to the waffle iron and make a big mess. Also, be sure to leave these on at least four to five minutes. If you try to take them off sooner than that, they will not taste as good or set up as nicely.

********************************

Sometimes you just want a deliciously light waffle just like you would get at a great waffle house. This is my favorite waffle house type waffle and comes from the legendary Better Homes & Gardens cookbook. It is rave-worthy and perfect for your next Sunday brunch!

Best Waffles Ever (Courtesy of Better Homes & Gardens Cookbook)

1 3/4 cups all-purpose flour
1 teaspoon baking powder
1/4 teaspoon salt
2 egg yolks
1 3/4 cups milk
1/2 cup canola oil
2 egg whites

In a medium mixing bowl stir together flour, baking powder, and salt. Make a well in the center. In another bowl beat egg yolks slightly. Stir in milk and oil. Add egg yolk mixture all at once to the dry mixture. Stir just till moistened (should be lumpy). In a small bowl beat egg whites until stiff peaks form (tips stand straight up). Gently fold egg whites into flour and egg yolk mixture, leaving a few fluffs of egg white, Do not overmix. Spoon waffle batter into your waffle iron, making sure not to overfill it.

Note- I doubled this recipe for my family of four and we had enough for three extra Belgian waffles.

********************************

One of my oldest and most favorite waffles are these Oatmeal Cookie Waffles. They are deeply satisfying and are created using one of my favorite budget-friendly pantry ingredients!  This produces a giant batch of deliciousness with stick-to-your-ribs tastiness.

Oatmeal Cookie Waffles

4 cups quick oats (grind the oats in your food processor or blender until it is a fine powder)
1 cup all-purpose flour
2 teaspoons salt
3 cups milk (you can use prepared powdered milk)
2 tablespoons baking powder
2 beaten eggs
2 tablespoons molasses
4 tablespoons canola oil
2 teaspoons vanilla
2 teaspoons cinnamon
1/4 cup sugar

Mix all ingredients together until there are no lumps. Pour batter into well-greased waffle iron and allow each waffle to cook four minutes. Serve immediately.

Note: If you make the batter ahead of time, be sure to add milk to thin it out. My batter became too thick to even put in my waffle iron so add a little milk until you reach the desired consistency.

********************************

Looking for a waffle recipe that you can create the night before and then just wake up and heat up that waffle maker? Well, look no further than this delicious waffle that requires some time in your fridge overnight to rise. This recipe was gifted to me after enjoying a girl’s weekend with one of my dearest friends, passed on to her by her own mom. It is definitely great for after church service entertaining!

Overnight Yeast Waffles

1/4 cup warm water
1 package yeast or 2.25 teaspoons of yeast if bought in bulk(dissolve the yeast in the ¼ cup of water)
½ cup oil
1 egg
1 tablespoon sugar
¾ teaspoon salt
3 cups flour
2 cups warm milk

Mix all ingredients together, cover, and refrigerate overnight. Warm waffle iron and spray with non-stick spray. If batter is too thick, use milk to thin down.

Note: Keep water warm- if  it is too hot it will kill the yeast.

********************************

These waffles are our special Christmas morning treat and reserved for our Christmas Eve gift opening. These are so special and my kids know that they can look forward to this yearly tradition, reserved for this season of giving once a year. Bookmark this recipe for the holiday season!

Gingerbread Waffles (courtesy of 30 Minute Meals)

3 cups all-purpose flour
4 teaspoons baking powder
2 teaspoons ground cinnamon
2 teaspoons ground ginger
1/2 teaspoon freshly grated nutmeg, eyeball it
1/2 teaspoon salt
4 l
arge eggs
2/3 cup packed dark brown sugar
1 cup canned pumpkin puree
1 1/4 cups milk
1/2 cup molasses
1/2 cup (1 stick) melted butter, plus some to butter the iron
Syrup, whipped cream or fresh fruits for topping, to pass at table

Preheat waffles iron. In a large bowl combine flour, baking powder, cinnamon, ginger, nutmeg and salt. In a medium bowl, beat eggs and brown sugar until fluffy, then beat in pumpkin, milk, molasses and melted butter. Stir the wet into dry until just moist. Do not overstir the waffle batter. Brush the iron with a little melted butter and cook 4 waffles, 4 sections each. Serve with toppings of choice.

********************************

After years of trial and error in waffle-making, these are my simple tips for waffle success:

Get a Great Waffle Iron– The first tip to great waffle success is to find a great waffle maker.  Remember that a great waffle maker is not necessarily a bulk waffle maker. I made the mistake of asking for this Cuisinart 6 slice waffle maker that I thought would save me from standing over the waffle maker and enjoy some time with my family. Instead, we found the waffles that it created were teeny-tiny waffles and six of these teeny-tiny waffles barely fed one mouth and got cold before the syrup hit them. I am still a fan of a simple and inexpensive Belgain waffle maker.

Freeze the Leftovers– I try to always make a double batch of batter to insure that we can enjoy waffles all week long. As I make the extra waffles, I fan them out on my cooling racks until they are completely cool. Once they are cool, I slide them into a freezer bag, stacked on top of one another. If they are completely cool before freezing, they will just pop apart without the need for any wax paper to go in between.


Cut Those Waffles in Record Time– If you have several mouths to feed, cutting the waffles can be tedious work. My favorite and most overworked gadget in my kitchen drawer is the pizza cutter. Cut the waffles into waffle strips for dunking in the syrup on the side or cut into bite-sized pieces in record time.

Make the Toppings Fun– Waffle toppings don’t have to be boring and I love to add variety to my toppings. Try this recipe below for blueberry syrup in the summer or this apple cider syrup in the fall to spice up the waffles. Forget the syrup and serve with a little nutella, peanut butter, or just a little fresh fruit on top.  Don’t forget you can also ditch your dependence on store-bought syrups and make your own homemade pancake syrup at home.

Fresh Blueberry Pancake Syrup

1 pint (or two cups) fresh blueberries
1 cup sugar
1 teaspoon vanilla
1/4 cup water

Place all ingredients in a saucepan. Cook over medium heat and stir to dissolve the sugar. Allow it to cook for 12-15 minutes and give the berries a little smash with your wooden spoon to break them up into the syrup. This syrup can be served warm over The Best Waffles Ever or you can serve the syrup cooled.

Homemade Pancake Syrup

2 cups warm tap water
4 cups sugar
2 tablespoons molasses
1-1/2 teaspoons maple flavoring
1/4 teaspoon butter flavoring (optional)

In a three-quart saucepan combine the water, sugar and molasses. Put the pan on the stove over medium heat. Stir every now and then until the syrup comes to a rolling boil. Watch the syrup carefully because it has a tendency to foam and will boil over if your pan is too small. If this starts to happen, remove the pan from the heat and turn the heat down. After the syrup boils, cover the pot and simmer it for ten minutes over a low flame. Do not stir it for this ten minutes. Remove the pan from the heat. Take off the lid and let it cool on the counter for about 15 minutes. Stir in the maple flavoring (and butter flavoring if you’re using it). Store the syrup in a clean quart canning jar.

Have you tried a waffle recipe that has been featured on MomAdvice? We would love to hear your feedback! Feel free to share your own recipes (links or plug in those recipes below) and share your family’s favorite food traditions!

Oatmeal Cookie Waffles

Monday, June 28th, 2010

Life has been feeling a little crazy these days. Am I the only mom who is feeling like she is treading water this summer and not getting anything really completed?  I find myself in a state of collapse at the end of the day despite my best intentions to remain unscheduled and laid back this summer. It seems that I have blinked my eyes and we are somehow almost halfway through our beautiful summer together.

No matter how busy we get, waffles are still my favorite Sunday brunch food and I am always looking for new ways to spice up our favorite weekly treat. I love a waffle that sticks to your ribs and settles there. I also adore a waffle that doesn’t get soggy under the weight of great toppings and syrup. This waffle is just that. It is densely delicious and will keep your children satisfied for an entire day of activities.

I have tried this recipe two ways- grinding the oats in my food processor and then making the batter with the oat flour and using quick oats that have not been ground and just allowing them to soak for a few minutes in the milk. Of these two scenarios, I greatly preferred the oats ground and mixed into the batter instead of the soaked oats. Soaking the oats seemed to add a gummy texture and a little too much chewiness for my taste. This is just my own preference though, feel free to experiment with this recipe yourself!

With the addition of molasses, cinnamon, and vanilla you might just close your eyes and think you are enjoying a delicious oatmeal cookie instead of a breakfast treat.

Nothing takes away that hectic, crazy, overbooked summer feeling like a little time out with a yummy treat. Wishing you each those few moments of peace over a batch of these waffles.

Oatmeal Cookie Waffles

4 cups quick oats (grind the oats in your food processor or blender until it is a fine powder)
1 cup all-purpose flour
2 teaspoons salt
3 cups milk (you can use prepared powdered milk)
2 tablespoons baking powder
2 beaten eggs
2 tablespoons molasses
4 tablespoons canola oil
2 teaspoons vanilla
2 teaspoons cinnamon
1/4 cup sugar

Mix all ingredients together until there are no lumps. Pour batter into well-greased waffle iron and allow each waffle to cook four minutes. Serve immediately.

Note: If you make the batter ahead of time, be sure to add milk to thin it out. My batter became too thick to even put in my waffle iron so add a little milk until you reach the desired consistency.

Deliciously Easy Raisin Bran Muffins

Thursday, May 20th, 2010

Entertaining in the morning can be tough and requires a little bit of planning on my part. I love hosting our monthly book club meeting though and try to make a yummy treat to go along with the coffee and discussion for our group.  I was excited to try the Raisin Bran Muffins that were featured in our weekly notebook on the Brown-Eyed Baker. I thought this morning playgroup would be the perfect occasion to try out the recipe.

The batter can be kept in the fridge for up to three days which makes it a perfect recipe for morning entertaining. I decided to buy the Raisin Bran with the granola clusters, substituted the vegetable oil with canola oil, made my buttermilk by souring up some milk that I had in the fridge, and gave them a little sprinkle of raw sugar to make a delicious topping before baking. They were perfection and everyone really enjoyed them! I will definitely be making these again, but next time I will go for the just bran flakes since one of my kiddos was weirded out by the raisins baked in…strange children, I know!

While I was busy baking in the kitchen, Emily was busy baking in her playroom. She served what could only be called the perfect mixture of food by a child. “For you, mama! It is a donut, french fry, cookie, pizza bowl.” I guess we all  have our favorites!

With less time spent baking in the morning, I will have more time to savor another stack of great reads from the library. Thanks to Brown-Eyed Baker for sharing a fun and delicious treat from her kitchen!

Homemade Bunny Bread

Wednesday, March 31st, 2010


When I see cake pans at the thrift store, I can’t resist picking them up, even if I have nothing in mind to do with them. This bunny-shaped pan was $2 at Goodwill and has been gathering dust in my basement. I decided to break it out to make the kids a special Easter treat.

Our Easter tradition usually consists of my homemade cinnamon rolls, but I thought it would be fun to do something a little different this year. I remembered this great little recipe for homemade monkey bread and also know that it happens to be one of my husband’s favorite childhood treats so I thought I would give this recipe a spin.

I opt for the lazy version though and prefer making things in my handy little bread machine, so I modified the recipe to put my little appliance to work and thought I would share my version here.

Homemade Bunny Bread or Bread Machine Monkey Bread
Author: Adapted from Baking Bites
Prep time: 10 mins
Cook time: 2 hours
Total time: 2 hours 10 mins
Serves: 6
Ingredients
  • 1/4 cup water, warm (100-110F)
  • 2 tbsp butter, melted
  • 3/4 cup milk, warm (100-110F)
  • 1/2 tsp vanilla extract
  • 1 large egg (beaten)
  • 3 – 3 1/2 cups all purpose flour
  • 1 tsp salt
  • 3 tbsp sugar
  • 2 1/2 tsp active dry yeast (.25-oz)
  • Sugar Mixture:
  • 2 cups brown sugar
  • 1 1/2 tbsp ground cinnamon
  • 1/2 tsp ground allspice
  • 1/2 cup butter, melted
Instructions
  1. Lightly grease a standard 10-in bundt pan with vegetable oil or any cake-shaped pan. Set aside.
  2. In a microwavable bowl, combine the water, milk, and butter and microwave it for one minute (or just until warm). Pour this into the bottom of your bread machine. Add the egg and vanilla next. Add the flour, salt, sugar, and then finally the yeast. Run the Dough cycle on your bread machine and let it run through the entire cycle until it beeps.
  3. Turn dough out onto a very lightly floured surface and gently deflate so that dough is relatively flat (maybe 1/2-3/4 inch thick) Using a knife or a bench scraper, cut off small pieces of dough to form 1/2 to 1-inch balls. As you cut each piece of dough, roll it into a ball in the palms of your hands. Dunk each ball in butter, use the fork to remove it and transfer it to the sugar mixture to be thoroughly coated. Place all coated dough balls into prepared bundt pan.
  4. Once all balls have been coated and places in the pan, cover the pan lightly with plastic wrap and let bread rise for 60 minutes, until almost doubled in size. I covered this with plastic wrap and then popped it in the fridge overnight.
  5. Preheat the oven to 350F when you are ready to bake it.
  6. If it is in the refrigerator, pull it out a half hour before and let it rise on the kitchen counter before baking. Bake for 30-35 minutes. Bread will spring back when lightly pressed. Let bread cool in pan for 10 minutes, then turn out onto a serving platter.
  7. Eat immediately (or reheat leftovers), as the bread is best served warm and gooey.
Pin It

Protein Packed Strawberry & Banana Smoothies

Monday, October 12th, 2009

While my kids have been enjoying Thrifty Banana Cream Pie Smoothies with their peanut butter toast for breakfast, I have started making smoothies for myself as my post-workout treat!

Yes, I am proud to say that my 30 day exercise challenge is turning into a way of life for me. I have continued to try and exercise three to five days a week, but this last month I started to feel like I needed something to help keep my blood sugar level. I headed over to to the nutritional supplement store and picked up a container of Strawberry Creme whey protein to add to my smoothies.

Buying smoothies can be expensive, but making smoothies at home can be inexpensive. Not only am I saving by working out at home, but I have my own smoothie bar upstairs in my kitchen to keep expenses down.

I freeze my banana slices in a shallow dish and then scoop them into a freezer bag to add to these smoothies. I can buy a large container of low-fat strawberry yogurt at Walmart (Great Value Brand) for $1.89. This large container has enough in it for eight smoothies! The protein powder is $14.99 at The Vitamin Shoppe, but contains enough protein for 30 smoothies. After some tough calculator-crunching, I know that I can make a protein-packed delicious treat for roughly eighty cents! I would love to see where you can find a large smoothie for that price!

The protein powder is an added expense, but one that definitely leaves me feeling fuller for longer. Fitness Magazine had a great article this last month entitled, “Alternative Energy,” focusing on the protein hype because fit women are now the fastest growing market for sports nutrition products. They covered everything from those expensive protein-packed bars to gels and the protein shakes.

How much protein does your body need to support an active lifestyle? Well, some mixes contain 40-50 grams, but ideally women only need 20-30 grams. According to this figure, you might want to check the back of the containers to insure you are getting the proper amount of protein and not just extra calories!

Despite sharing that a lot of protein is a lot of hype and can be satisfied by our normal healthy diets, it concluded that whey-protein powder is absorbed into your system more quickly than other forms of protein, which makes it useful in muscle recovery.

This scoop of protein powder has helped a lot with keeping my blood sugar levels steady and has even been a nice snack instead of reaching for a bag of chips. For me, it works, and is a fantastic reward for completing a workout. Paired with a favorite read or a soak in the tub, it is something that makes me look forward to the completion of my workout. You could say that our blender is now one of our most used appliances!


Protein Packed Strawberry & Banana Smoothies

1/2 cup sliced ripe banana
1/2 cup low-fat or non-fat strawberry yogurt
1/2 cup milk
4 ice cubes
1 scoop of strawberry-flavored protein powder

Arrange banana slices in a single layer on a baking sheet, and freeze until firm (about 1 hour). Place frozen banana and remaining ingredients in a blender. Process until smooth.

What do you eat after you work out? Do you buy alternative protein products to feed your active lifestyle? I would love to hear your perspective on this!

Fluffy and Light Pumpkin Pancakes

Monday, October 5th, 2009

I experienced quite the thrill this week at the grocery store and found a fully stocked aisle filled with canned pumpkin. Are these shortages real or do they do this to inflict pain on those of us intent on doing our fall baking a tad earlier than October 1st? Regardless, the pumpkin food trend continues in our house with a new recipe to add into our family rotation and we are thankful to have our pantry filled to the brim with cans of pumpkin to make our creations.

These pumpkin pancakes are truly light and fluffy with just the perfect balance of pumpkin and spices. I have never experienced a more perfect pancake and a drizzle of syrup with butter makes these a delicious morning treat on a cool autumn day.

See how perfectly those pancakes look? That is because I did not flip them. I am, perhaps, the worst pancake flipper in the world. My pancakes are weird shapes and are even peeled from the griddle in chunks.

We have found my husband’s calling in the kitchen though and he is now the official pancake flipper in the house. He even cranks out shapes and spells things for the kids on our inexpensive little griddle. The love it and I enjoy finally getting to enjoy a hot brunch with them instead of eating alone… like on waffle days!

By the way, a huge thank you to everyone for making this blog a place to visit for pumpkin ideas! Our Creamy Pumpkin Pasta was one of the 50 most bookmarked sites on the web one day on Delicious and that was a fantastic surprise! Seeing my recipes featured on Craftzine is such a highlight too! Thank you so much for sharing and trying these recipes!


Fluffy and Light Pumpkin Pancakes
Author: Adapted from my Martha Stewart Cookbook
Prep time: 10 mins
Cook time: 5 mins
Total time: 15 mins
Serves: 4
The world’s best pumpkin pancake recipe. Be sure to double or triple your batches because these go quickly!
Ingredients
  • 1 1/4 cups all-purpose flour
  • 2 tablespoons sugar
  • 2 teaspoons baking powder
  • 1/2 teaspoon cinnamon
  • 1/2 teaspoon ginger
  • 1/2 teaspoon nutmeg
  • 1/2 teaspoon salt
  • 1 1/4 cup low-fat milk
  • 1/3 cup canned pumpkin puree
  • 2 tablespoons melted butter
  • 1 egg
Instructions
  1. Whisk flour, sugar, baking powder, spices and salt in a bowl.
  2. In a separate bowl whisk together milk, pumpkin, melted butter, and egg.
  3. Fold mixture into dry ingredients.
  4. Spray or grease a skillet and heat over medium heat: pour in 1/4 cup batter for each pancake.
  5. Cook pancakes about 3 minutes per side. This recipe makes six 6-inch pancakes.

Stumped for what to do with the rest of that can of pumpkin? Be sure to visit my list of 8 ideas for things to do with canned or fresh pumpkin this year! 

Pin It