Archive for the ‘Crafts & Celebrations’ Category

MomAdvice’s Big Give: Kickoff

Wednesday, October 29th, 2008

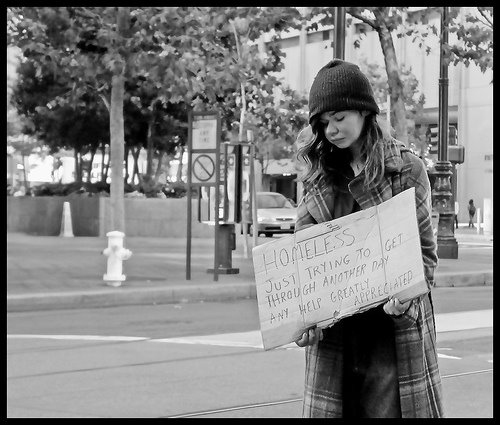
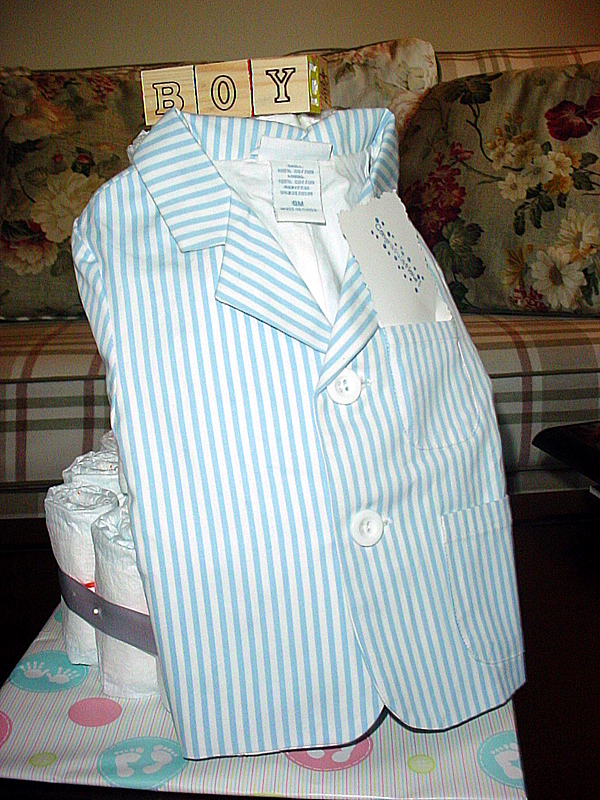
I am just speechless by the response that we have received already from each of you on our Big Give mission. The emails, the donations, the comments, the messages, the blog entries that have been written truly moved me to tears yesterday. I felt like I was taking a risk putting this out here, but now I know how good it feels to be sharing this with all of you and to know that you want to make a difference in your own communities (and even in my little town) has been an incredible gift.

Today is the first vlog in our series sharing about our Big Give. Before I began this, I knew that I would need to call them and see if Faith Mission would even accept our help. What would they need? What could we do to make their days a little better? Who did they serve?

I was extremely nervous and went into an immediate sales pitch of myself and what I hoped to do for our local shelter. It was a careful balance of not wanting to over commit and disappoint them, but wanting to also exude confidence that I could get the backing that we needed to make a Big Give happen.

The response from them was incredible and I knew that we had picked the perfect charity to work with. Not only were they excited about anything we could do, but they were excited to bring us in so we could immediately see what they really need and to help us better understand their mission.

Tonight we will be heading to Faith Mission to get a glimpse into their day and we have received permission to take some video footage so we can share it with all of you! I can’t wait to share more with you about the charity as our family works towards making this Big Give happen!

In short, step one for us was contacting the charity and seeing how we could fit in with their missions and goals.

On a much lighter note, don’t you love this dorky expression that I have on my face? Why does it have to appear like this. You will also notice someone dropping in on my party halfway through. Wouldn’t you wonder what was going on if your mom was sitting at the kitchen table talking to herself? Again? Well, maybe that doesn’t happen in your house… My house also looks like it was hit by a tornado. Remember that little person that is crashing in on my video? Yup, that is exactly what happened. This is my real life- dorky expressions, a house that has been hit by a tornado, & talking to myself. Enjoy!

The MomAdvice Big Give: Faith Mission of Elkhart, Indiana

Monday, October 27th, 2008
Image Credit: femuruy

Recently Ron Hudson, from Immediate Influence, created a list with the top 50 most influential women in social media, and to my surprise, I found myself listed as #8 on that list. I don’t mention this to brag, but I mention this because the list claimed that we were not only influential, but that we were also very powerful women.

With power comes great responsibility though and I don’t feel like I have been using my internet powers for all the good that I can. I have quietly been taking care of myself and my family and reaping the rewards that come along with it- free trips, free products, and great connections.

My muscle is weak, but I want to flex it a little bit right now because I owe it to myself and I owe it to my community.

You see, my hometown is filled with factories with laid off workers. My town is filled with families who can’t pay their bills. My town is filled with hungry children. Don’t believe it? My hometown was featured in the New York Times recently and they stated this, “Elkhart, near the Michigan border in an area known as Michiana, is the white-hot center of the meltdown of the American economy. Its main industries, the manufacturing of recreational vehicles and motor homes, have fallen apart over the last year because of high gasoline prices. That has taken down ancillary businesses like R.V. parts suppliers and storage warehouses. The jobless rate in Elkhart has increased more than in any metropolitan area in the country; it rose over 4.8 percentage points from August 2007 to August 2008. According to labor statistics released this summer, nearly 10,000 people were out of work, a rate of 9.3 percent.”

My family is made up of blue collar workers who work hard for a living and they all live in uncertainty if their jobs will last. My family members have been laid off, they have been worried about health care, and they are swallowed by medical bills. Likewise, surviving a year of my husband being laid off was one of the hardest times in our marriage, the hardest time in our finances, and the hardest time as a parent. We have made it through, but many families can’t.

I want to do something big for our local shelter. I want to give what I can to help the families who are not able to have a bright Christmas. I want them to have something to look forward to.

It is hard to put it out here in black and white because now I have to do it. I am gathering the names of all the PR people who have contacted me to do product reviews and giveaways to help me make something happen in my town. Even if we do not receive help from anyone, we have reserved money in our savings to do something on our own. We are hoping though to make a bigger difference than that though and have high hopes that our prayers and dreams will come true.

If you are in PR, if you are a business that can donate, I ask that you email me (amy@momadvice.com) and tell me what you can do for our local shelter. I will include and publicize any business that contributes to my give through our website and blog, along with a special shout-out on The MotherLoot for the entire month of January. It will be the first entry that anyone sees for that whole month and it will say, “Thank You to these Powerful Companies.”

In addition, if you are a blogger who can share about our efforts on your blog or if you can contribute in your hometown and dedicate an entry to us, we will thank you in a blog entry for making your own charitable efforts.

Our local shelter, Faith Mission, has an urgent need for the following items:

• Towels
• Pillows
• Deodorant
• Disposable Razors
• Shaving Cream
• Kleenex
• Cough Drops
• Aspirin
• Non-Alcoholic Cough Syrup
• Alka-Seltzer
• Pepto Bismol
• Tums
• Body Lotion
• Cologne
• Conditioner
• Hats & Gloves all sizes

Want to give financially? You can donate to our cause via the following link. We’ve set no minimum amount. Your heart will determine that:


I will be video documenting our journey and sharing our triumphs and struggles as we work on our big give and I really encourage you to follow us as we learn more about our shelter and the need that lies within our own community. You can follow our videos as we add them here:

Watch the Mission Unfold:

MomAdvice’s Big Give: Kickoff
The Faith Mission Wish List
Big Give Makes the Front Page
Big Give Makes Big Strides

With power comes great responsibility, how can you flex your powerful muscle in your community?

Here is our banner and if you will be sharing about our big give efforts or if you are doing a big give in your town, please link up to our entry and we will give you FREE advertising on our blog for the month of January. We want to see pictures and hear your own inspiring stories in your town. We want to make a difference and we know you do!

Here is the code for the button, if you would like to place it on your blog:


To make it easier to track participants, just add your name to the Mr. Linky below. Feel free to use the banner for your blog or for your particular entry.

A Family Day at the Pumpkin Patch

Wednesday, October 8th, 2008


Our family decided to take a trip over to the pumpkin patch this weekend together. We decided to visit Amazing Acres in Edwardsburg, Michigan because we had heard so many great things about it. As soon as we pulled up and I saw the truly amazing varieties of pumpkins and gourds they had to offer, I just knew we made the right choice.

I loved that they had tons of wagons available so you could load your purchases right up into your car. The cobwebs gathering on a few of them just spoke of Halloween to me!

Can you see my favorite pumpkins peeking their heads out at me? I just loved all of these little pumpkins sitting in rows. I couldn’t resist getting inside to takes some shots of them sitting in on the ledge. Pumpkins have to be one of the greatest subjects for photography, don’t you think?

The first thing we had to do was take a hayride with the kids. For our family of four, the cost was $16 for a hayride and to visit the petting zoo.

They clang this old bell each hour to let you know that the ride is getting ready to start. We hurried over to make it for the very first ride of the day!


We were excited because our ride was the first one leaving so we got to stop and give the horses breakfast. The gentleman who gave us the ride turned and told us a little bit about each horse. “This horse is two years old and she likes to bite.” To which Ethan loudly replied, “Just like our Emily.” Everyone turned to our family and the guy asked who Emily was. “My sister,” he said with a little grin. I guess we have a little pony in our family.

The hayride pulled right up to the pumpkin patch where the kids could choose a pumpkin for one dollar. We were told if anyone picked a cell phone out of the patch, they would receive the biggest pumpkin in the whole place. Unfortunately, we weren’t able to find the poor guy’s phone, but as frugal as I am, you can bet that I sure tried!

Some had an easier time finding their perfect pumpkin.

Others had to think and contemplate much longer before settling on the pumpkin of their dreams.

After our hayride, the kids loved spending time in the troughs filled with corn. Emily left with about four corn cobs in her diaper after they practiced making snow angels and jumping and swimming in the kernels.

We also couldn’t resist seeing all the beautiful animals and the creative places they lived.

This little storefront was just for the bunnies!

All in all, we had an amazing day at the pumpkin patch, that I don’t think our family will soon forget!

** If you want to see the whole set of pictures, you can see our Pumpkin Patch photos over at Flickr! Enjoy! **


Do you do have any special Fall family traditions? What is your favorite thing to do in the Fall as a family?

Dressing Up the Front Step For Fall

Tuesday, September 30th, 2008

I loved the white pumpkins featured in A Soft Place to Land and gained some inspiration from that post for my own doorstep. Of course, I took the lazy and cheap route, but I think they turned out beautifully.

I purchased faux pumpkins at Michael’s Craft Store. The were on sale for 40% off this past week. I found two pots to rest my pumpkins in and a bolt of black ribbon to dress up the pots.


I used my glue gun to attach the ribbon around the outside of the pot. With the leftover ribbon from the bolt, I made a bow and then tied it off with a little raffia. The pumpkins wedge perfectly in there.

I am hoping it will be something that I can use each year. I have found most of our guests think they are real pumpkins when they come over and have spent a lot of time thumping and touching them. I am not usually one to pick things that aren’t natural for decorating with, but I love being able to store these and use them year after year. If they are fooling people, then that works even more to my advantage!

Of course, if those pumpkins don’t last until next year, I have these two little pumpkins that I can set out there on occasion to dress up the step!

What are some creative ways you decorate your home for fall?

Celebrating Financial Milestones as a Family

Tuesday, September 16th, 2008

This morning on WSBT, I discuss some ways that you can celebrate your financial milestones as a family. This topic is near and dear to my heart because I think it is so important to teach and share your financial victories and shortcomings in ways that your children can understand.

Here are two of our links to our past celebrations:

Debt-Free Party
Cars Party

We are now working on paying off our student loan debt so we can achieve our American Dream. I hope that all of this will inspire other families to start their own celebrations with their children!

*************************************

We are offering two exciting giveaways on our blog- don’t forget to put in your entry!

Last week, I provided a list of 35 Ways to Save on Your Grocery Budget that I hope will be really helpful for families. I want to add a #36 though that I know would make your day… how about free toilet paper and paper towels for an entire year from Scott’s? Head over right now and put in your entry at The MotherLoot today. Please do not enter here, only entries over here will qualify. The contest is open until Tuesday night and then I will draw our winner!

And our brand new giveaway has just begun! Enter today to win a 10th Anniversary Harry Potter prize pack. We are giving away beautiful boxed sets of the Harry Potter series and the new anniversary editions of, “Harry Potter & the Sorcerer’s Stone” Please do not enter here, only entries over here will qualify. The contest is open until October 13th and then I will draw our winner! The contest is open until Tuesday night and then I will draw our winners!

Good luck, everyone!

Eat Your Heart Out Martha: Bubbly Magnets

Tuesday, September 2nd, 2008
Today I wanted to share a little holiday craft that I have been working on. I have been making some bubbly magnets to go in stockings and as small gifts for those special people in our life.

Remember, I am no Martha Stewart, so any craft that I share is something that a child can do. I am trying to share some little ideas for things that you can make to give for the holidays. Last week I shared my homemade spiced nut mixture and this week I am sharing my magnet craft. Crafting can be expensive, but this craft is affordable and highly addictive!
Supplies Needed:

Flat marbles (These can be purchased at the dollar store or in the floral section of your local craft store)

1/2″ or 3/4″ Round magnets (These are the most expensive purchase. I believe they are $6.99 for 50 magnets, but you can use the Michael’s 40% off coupon in your paper towards this tab)

Modge Podge Adhesive Glue

A small paintbrush

Hot glue gun and glue sticks

Scissors

Pictures for your magnets (you can use photographs, wrapping paper, magazine pictures, scrapbooking paper- anything with a fun design)

Instructions:

Take your marbles and center it over your desired design, just to make sure it will fit perfectly under your marble. Dip your brush into the Mod Podge glue and brush the glue onto your design. Center your marble over the design and stick it to the pattern. Allow the glue to dry for fifteen to twenty minutes. If you are doing more than one magnet, on the same sheet, repeat the process on the paper or move on to your next sheet of paper.

Once your glue has dried, cut around the marbles, as close to the edges as possible. Now take your glue gun and dab a bit of glue on the magnet and attach your marble over the magnet piece. Allow these to dry completely.

Ta-Da! Cute new magnets for your fridge!

* This post originally aired on October 15, 2007*

Eat Your Heart Out Martha (Or How to Make a Diaper Cake)

Tuesday, September 2nd, 2008

Welcome to a Play It Again, Momma week! This week we will be highlighting some of our favorite entries and today’s entries will be all about crafting. What could be better than that? I hope you will enjoy these and remember, if I can craft it, your kid can craft it!

If you can believe it, I have been sitting on this blog entry for a year now. I only know this because the cakes that I have pictured were for my nephew and my best friend’s son and they are both celebrating their first birthday!

Even though I haven’t shared about this, my heart swells a little because I was so proud to carry such a pretty gift into the hospital. I felt even more proud when the nurses stopped me and asked me where I bought it. It was one of my proudest Martha moments because I am not very crafty, but I try oh-so-hard to have those impressive moments in my life.

Making a diaper cake is so easy and the results are extremely impressive! I had seen many companies advertising these on their websites, but they were charging fifty dollars (or more!) for these cakes. I ran a search and ran across this great picture tutorial on how to do it, and decided that it was definitely something I could do with just a couple of small purchases.

For my diaper cakes, I needed to establish a base for them so that I could transport them easily. I found a box in our garage and cut a square of cardboard out of it to rest the cake on. I then covered the cardboard with pretty wrapping paper in blues & pinks.

Next I followed the instructions for making the first diaper layer and used a stretchy headband that I had to bring the base diapers all together, making the first layer of the cake. It had suggested using a rubber band, but I didn’t have any that would secure that many diapers together. I then wrapped pretty ribbon around it and tied them together with that, securing them together with white tipped pins, which made it look like part of the ribbon itself. With the next two layers, I was able to use a rubber band to put them together, and then covered the rubber band with the ribbon.

Once you have all of your layers, you can stack them and stick a dowel rod in the center, or anything that is long and will help them stay jointed together.


I went to Target and found little man blazers that would be perfect to go with the cake. I pinned these to the back and stuck a little stamped card in the pocket that said, “Congratulations!”

Next I went to the dollar store to buy some shrink wrap and two sets of wooden blocks (over by the baby supplies). I spelled out BOY on each of them and saved the rest of the blocks for our daughter to play with.

Shrink wrapping is very easy! Take the bag and pull it over your item and hold it at the top. Turn your blow dryer on and blast it until the wrapping shrinks tightly to fit your item. Use the bow that is supplied, or tie off with a bow of your own!

Diaper cakes can have small items tucked in the center of them from the mom’s registry or you can go with a themed cake. Remember, the more items you add, the more you add to your cost. If you are trying to keep the cost down, keep it simple.

Here are a few theme ideas:

Bath time Cake- add a baby towel, tuck washcloths in the center and put a Rubber Ducky on top. You can also add small bath toys or bubble bath.

Elegant Cake- Make your diaper cake look like a wedding cake, and surround it with fresh or silk flowers. People will hardly believe their eyes when they see it.

Beach time Cake- This would be for a little later in the baby’s life, but you can fill it up with beachy items. Some suggestions are a shovel, pail, baby sunglasses, a hat and some sunblock.

Night-Night Baby– Include a copy of, “Goodnight, Moon” with this cake. Add a little sleeper set, some calming nighttime lotion, and a compact disc of sweet baby lullabies.

The cost for each of these was:

Diapers– Free! they were given to us as a gift and Emily wore cloth so we never used them!

Diaper Cake Base– Free- made out of an old cardboard box we had!

Ribbon– $1.98

Little Man Blazer– Clearanced out for $2.98 at Target! Gotta love those clearance items!

Shrink Wrap & Baby Blocks– $2

Total Cost= $6.96

Sound Off: Would you guys like to see more, “Eat Your Heart Out, Martha!” moments on here? I have one a year, but I am happy to share the few I do have! I hope this gives you another thrifty gift alternative!

Getting Crafty With Your Kids & Big News

Friday, August 29th, 2008

This week on WSBT, I shared my crafty ideas for things you can make with your kids from common items out of your pantry. I had tons of props prepared after doing the Michiana Family Expo (sponsored by Michiana Family Magazine). We spent twelve hours at the mall showing parents some fun crafts to do with their kids and I reused these same props for this segment. For those of you who weren’t able to make it out to see us, I hope this will provide a great substitution.

To go along with this fun discussion, please visit our latest article, “Being a Crafty Parent… When You Just Aren’t.” As a parent who struggles with being crafty and fun, I hope that I can help provide inspiration for you to get crafting with your children. This article contains a few easy recipes that will help get you started on a fun crafting adventure with your kids. Be sure to check our resource list for our top recommendations for craft books and hit your local library.

I have two new articles up on the Kenmore website that I think you guys will really love. The first article is, “Help Kids Earn & Learn.” This article focuses on teaching your children how to start a small business or helping them earn money by simply helping you around the house. I worked really hard on it so I hope you enjoy it!

The second article is, “Plan the Perfect Summer Getaway.” I meant to highlight this sooner, but had forgotten to. I hope you can bookmark it for planning your next vacation and we share some of our favorite family trips & trips for organized and thrifty traveling.

**************************

Next week is going to be a fun week on our blog because I am going to be be doing an entire Play It Again, Momma week! I am going to highlight some of my favorite entries on here for the week so please join me! I will still be running a giveaway on Tuesday and our Freebie Friday, but everything else will be taking a week off so I can spend some time with my family. If you decide to do a Notebook Experiment, just hold it tight for a week or give yourself two weeks to complete it.

I have never taken a vacation from my blog so this will be a new one for me. I need some time to rejuvenate and refresh so I can bring some new ideas to the table. In the meantime, you can read all of the stuff that I am most proud of so I hope it will be a good compromise!

I will also be busy working on helping with the Eleven Moms gig and have added a new role to my list- Editor of Blissfully Domestic. I have taken over the Family Channel and I have twenty-five amazing writers that I will be working with. Basically, I am not sleeping and that is why I need a week to sleep.

We have two amazing giveaways this week that you can enter- but do not leave your comments here. Head to the provided contest links to leave your entry!

We are giving away a $50 Visa gift card to a lucky MomAdvice reader to relax, recharge, and rejuvente however you choose, be it a spa trip, yoga classes, or some retail therapy. To enter, simply leave your favorite household tip by September 2nd (Tuesday) at 8PM EST. Sorry- only US residents are eligible for this contest. Contest Details

Cetaphil is offering one lucky winner one of every single product from their product line! That is a huge box of loot, people! To enter, let us know one way you save money on your beauty care needs. We love frugal tips so I can wait to see what you come up with! Comments must be left by September 2nd (Tuesday) at 8 PM (EST). Contest Details

Being a Crafty Parent… When You Just Aren’t

Sunday, August 24th, 2008

I am not a crafty person although if someone could become a crafty lady on just a strong desire and urge to craft, I would be the queen of crafting. Instead of throwing my hands up and telling my kids that mommy just can’t do that stuff, I have made a commitment to be as creative as I can be. This may mean looking to others for guidance and lugging out a zillion books from the library, but I will do the best I can with my limited abilities. I want my children to remember how fun their mom was and how she wasn’t afraid to craft with them, even if their projects looked ten times better than mine.

Let’s face it though, for people like me, crafting is a lot of work. When creativity doesn’t come naturally you may have to work at it more, but it can be a wonderful way to bond with your children and to teach them an appreciation for the arts.

Here are some things that we are trying in our house:

  • Designate a spot in your house for all things crafty that will make it easier to organize your items. It can be something as simple as a plastic crate or it can be a cabinet where you store your art supplies. For houses with limited space, under-the-bed organizers can be a great place to store all of your supplies. Try to keep this stocked with paper, colored pencils, crayons, popsicle sticks, felt, scissors, pipe cleaners and anything else that can keep your child entertained.
  •  Start keeping a file folder of craft ideas for your children. When you see something in a magazine or website, tear it out or make a copy of it for your file folder. When you need a stroke of inspiration in your day, pull out the file and work from that.
  • If you do a lot of work on the computer or find it easier to keep track of projects virtually, set a favorites button on your web browser for craft projects. I keep a virtual notebook of all the things that I would like to try and we try to do one project each week from this notebook and document it for remembering.
  • Composition books are inexpensive and are a great way to keep your children entertained. Younger children can draw pictures to tell stories and older children can fill these with tales from their own imagination. These composition books can also be made into nature books and you can send your children out to explore what is in their own backyard. Reference books and field guides can offer additional assistance in finding, discovering, and drawing what they find in nature. This not only makes them more aware of what is around them, but it also can offer a wonderful educational experience for learning about leaves, birds, bugs, and plant types. Pair a composition notebook with binoculars and send them on an exploration trip for the day.
  • Don’t be afraid to take your crafting show on the road. Some of the more messy crafts are great for outdoors and can keep the mess contained outside. Younger children especially love doing things unexpected outdoors and it is much easier to hose them down if they get a little carried away with their painting.

Really the best way to teach your children about crafting is to be an example to them. When my kids see me working on something, they immediately want me to get out their own supplies so that they can be crafting alongside me. This is a special time for all of us and it is great to be able to share in our work together.

Crafty Resources

Crafty Recipes

Fun Sidewalk Paint

  • 1/4 cup cornstarch
  • 1/4 cup cold water
  • 6 – 8 drops food coloring

Mix cornstarch and cold water together in a small bowl. Add food coloring and stir. Repeat the process to create different colors of paint. This paint can easily be washed away with water. You can use it to make hopscotch grids, cakewalks, even make believe roads and highways for toy cars.

Pudding Paint

  • 1 large package of instant vanilla pudding (3.4 oz)
  • 2 cups ice-cold water (less if you want to have more of a finger painting consistency)
  • Food coloring

Whisk water and instant pudding together in a bowl for two minutes. Refrigerate for five minutes. Divide into several small bowls or muffin tins. Add 5-7 drops of food coloring to each bowl or tin and mix. You can paint with a brush or use them as finger paints.

Edible Play Dough

  • 1/4 cup peanut butter
  • 1/2 cup dry milk
  • 1/2 Tbs. honey
  • Plastic zip bag

Pour peanut butter, dry milk, and honey into a plastic zip bag. Close bag and knead until mixture turns to dough. Do not reuse or store this dough. You can use raisins and assorted candies to add eyes, mouths, and other features to your edible creations.

Fruity Play Dough

  • 1 cup flour
  • 1 package Kool-Aid (any flavor)
  • 1 tablespoon cream of tartar
  • 1 tablespoon vegetable oil
  • 1/4 cup salt
  • 3/4 cup boiling water
    (the original recipe called for one cup of boiling water, but I found it made the dough too loose- aim for 3/4 cup and add more if needed)

Mix all dry ingredients in bowl then oil, then pour boiling water in and mix thoroughly. Wrap in cellophane or air tight container and store in fridge. The play dough should last a few months.

Invisible Ink

  • 2 Tbs. pure lemon juice
  • Cotton swab

Pour lemon juice into a small glass or plastic dish. Soak one end of the cotton swab to write a secret message or draw a picture on a sheet of paper. When you are ready to view your secret message have an adult hold the sheet of paper near a light bulb. The heat will slowly turn the lemon juice dark brown and reveal a hidden message.

Tornado in a Bottle

  • 1- 16 oz clear plastic soda bottle with a cap (the rounder the bottom the better the tornado)
  • 2 drops clear liquid dish detergent
  • 1 tsp. glitter

Fill the bottle with cold water. Add liquid dish detergent and glitter to the bottle. Screw on the cap tightly. Holding the bottle by the neck, turn it upside down. Quickly rotate your wrist several times in a clockwise motion. When you stop rotating, a min-tornado will form inside the bottle. Using permanent markers, you can draw a picture of a city or landscape around the bottom of the plastic bottle. Add a few drops of blue food coloring to the bottle to create a sky effect.

Monica’s Favorite Note Cards

Sunday, August 10th, 2008

I am so excited to kick off our weekend guest posts with Monica, from the wonderfully creative blog, The Homespun Heart. I consider Monica to be one of my dearest blogging friends and an inspiration to me to be a more creative mother. I do hope that you will check out her amazing blog!

If you are interested in submitting a post on frugal living, creative/crafty parenting, or organizing, you can email your entries to me at amy@momadvice.com. Please include a bio with a link to your site and (if you would like) a picture of yourself to include.

This is one of my all time favorite craft projects to do! An hour or two spent making cards and envelopes is really fun for me.

I start with plain 8.5″ x 11″ cardstock. I really like this brand from Michael’s. They have a package of 50 sheets (which makes 100 cards) on sale periodically for $1.99 making it very inexpensive to make these cards! I have never tried the pre-cut paper, but my sister loves it – so whatever works best for you!

I slice the paper in half on a paper trimmer. Then, I fold each half in half again which makes your blank cards. Simply choose any photo you want to put on the front and attach with double-stick tape. I used to love using glue sticks – but have found the results with double-stick tape to be much better. Even though the tape is more expensive, I think it is worth it!

To make the envelope, select one full page photo from a magazine. Either take apart an envelope you already have that is the right size or print this template. Use template as a pattern and cut out the envelope. Fold side edges in first, then fold bottom flap up. Attach with double-stick tape. Fold top flap down – done!

To mail, tape back closed and use a label on the front for addressing. I love giving a stack of these for a gift, and you can see more of that in the related links below.

There is a step-by-step photo tutorial that I did a year ago, the links are below listed as Steps 1-4.

Enjoy!

Here are some previous posts about this very topic:
Homespun Wrapping
Gifts for Nursery Volunteers
Step One
Step Two
Step Three
Step Four
Christmas Cards

Monica is a stay at home mom to three little ones ages 3, 2 and 6 months! She loves to bake, offer hospitality, create fun memories for family and friends and is an avid crafter! She also loves blogging at The Homespun Heart!