Archive for the ‘Crafts & Celebrations’ Category

Play It Again, Momma: Rainy Day Survival Kit

Tuesday, March 24th, 2009

Spring is almost here in Indiana and with it comes those rainy days! I will be working on restocking our little suitcase for those days ahead and I hope this offers a fun idea for keeping your children entertained when the bad weather strikes!

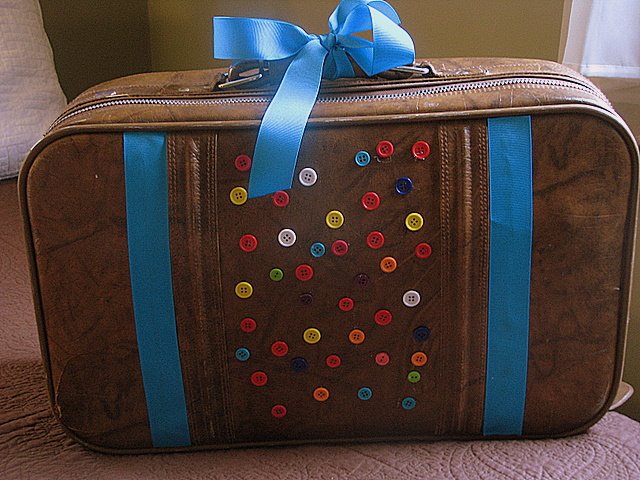
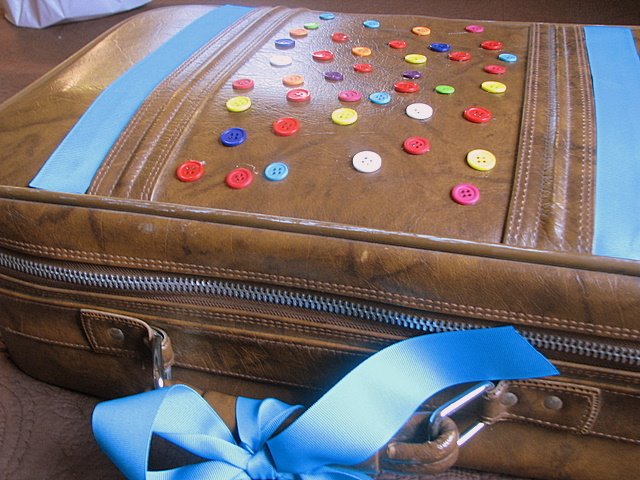
I have been wanting to work on this project for some time, and since it was miserable weather all weekend, it seemed like the perfect time to tackle this project. I went to Goodwill and found a plain leather suitcase for $5. I gave it a good scrubbing, when I got it home, and proceeded to decorate it with some knick knacks from my craft supplies. I tied a big bow on the handle and made it look super cool for the kids. If you have older, children, you could invite them to help you! I applied the buttons and ribbon with my trusty hot glue gun.

Hmm… I wonder what could be inside? Let’s take a peek, shall we?

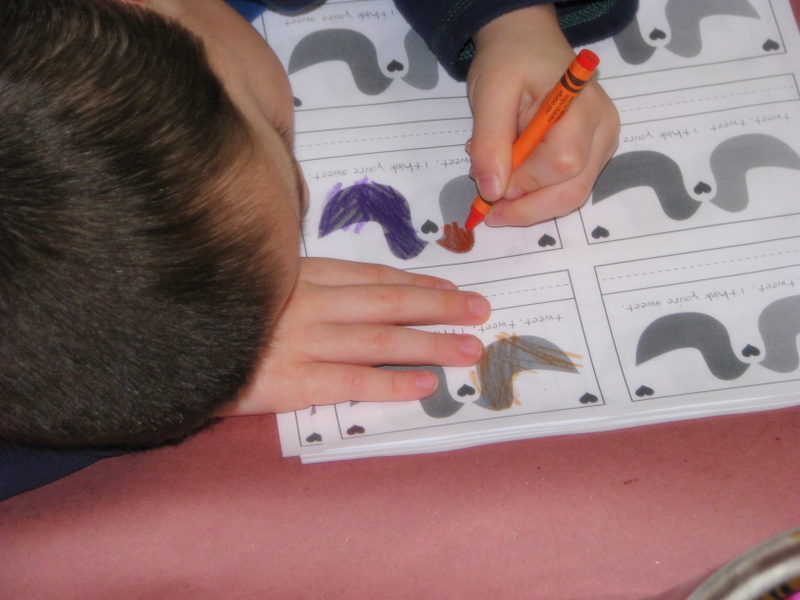
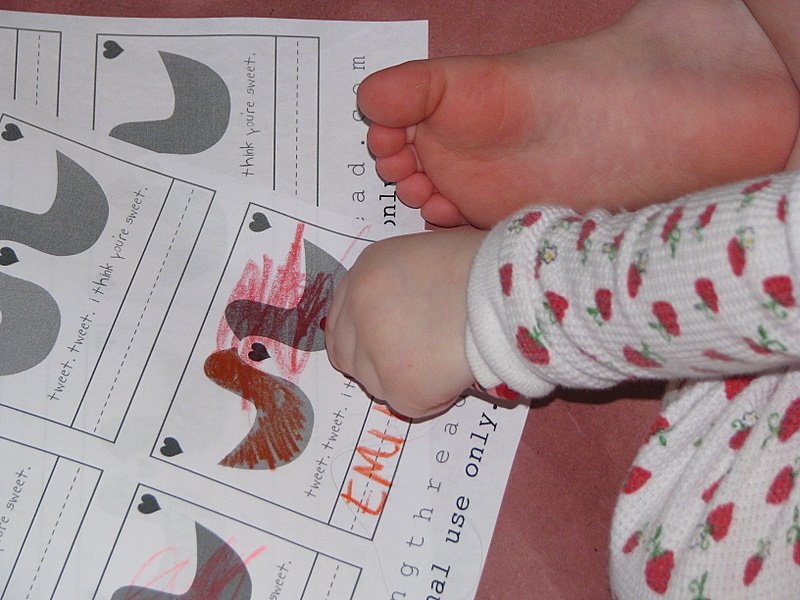
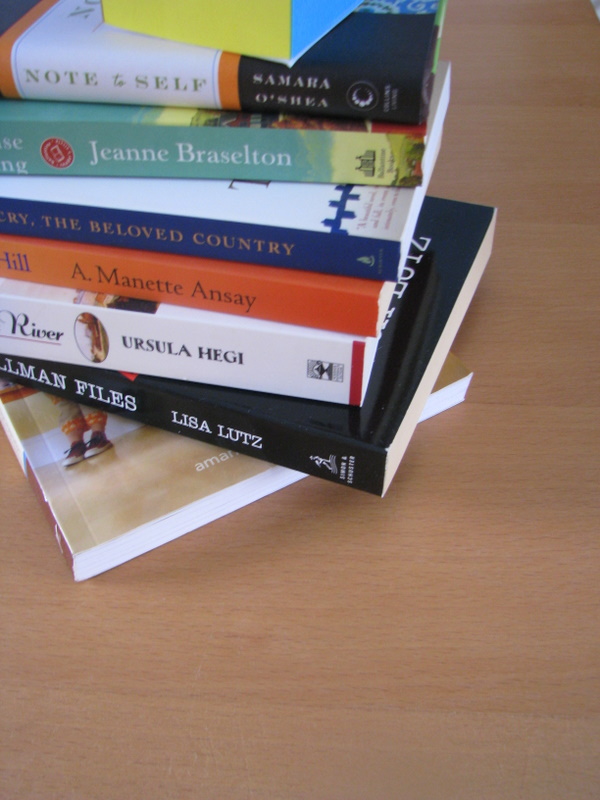
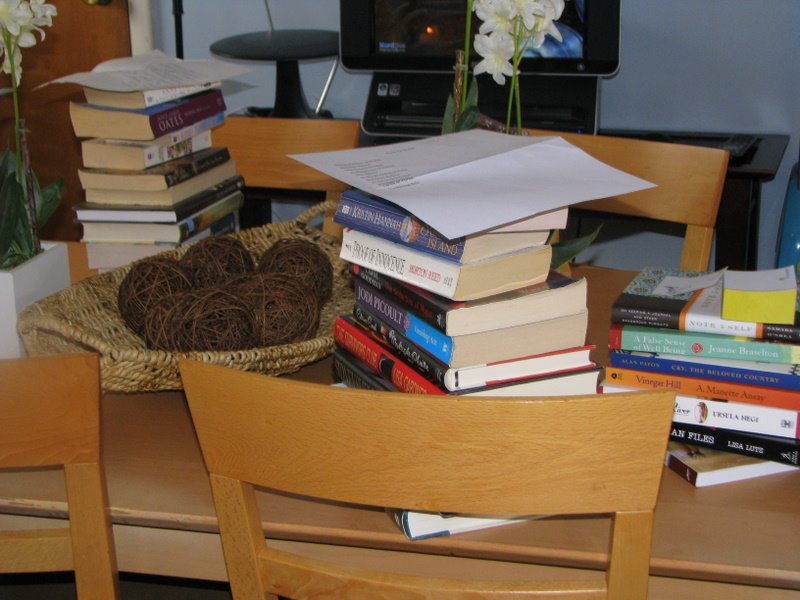
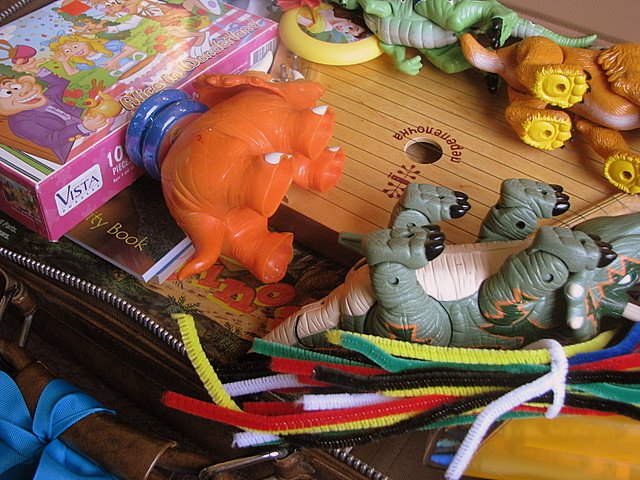
It might not look like much to you and me, but to my kids…well, this is a good couple of hours of enjoyment. Inside here I have coloring books, crayons, a deck of cards, pipe cleaners (yes, I told you it wouldn’t look like much to us), a 100 piece puzzle, little spinning princess tops, yo-yos, dinosaurs, a little jewelry set with a crown, board games, quiet instruments, and books. Some of the items were “new” and purchased from the thrift store, some were items that I had been rotating and storing because no one was playing with them, and some of them were purchased from the dollar store. I would say even with the cost of the suitcase, there is probably about $15 of stuff invested here, but it is OH SO WORTH IT!

You could pick activities based upon how involved you really want to be with this. If you are looking for a little sanity break, I would suggest putting things in there that they could enjoy playing with by themselves or with their siblings. If you are looking for a good time to bond with your kids, put things in there that you can do with them like board games or stuff for art projects. If you are super smart, you will have a case of each- momma needs a break suitcase and momma wants to be your awesome friend suitcase.

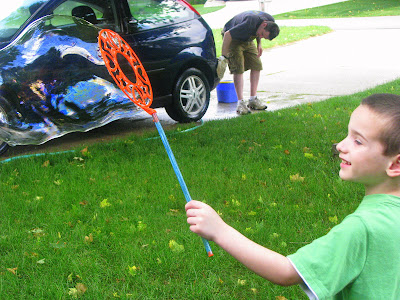
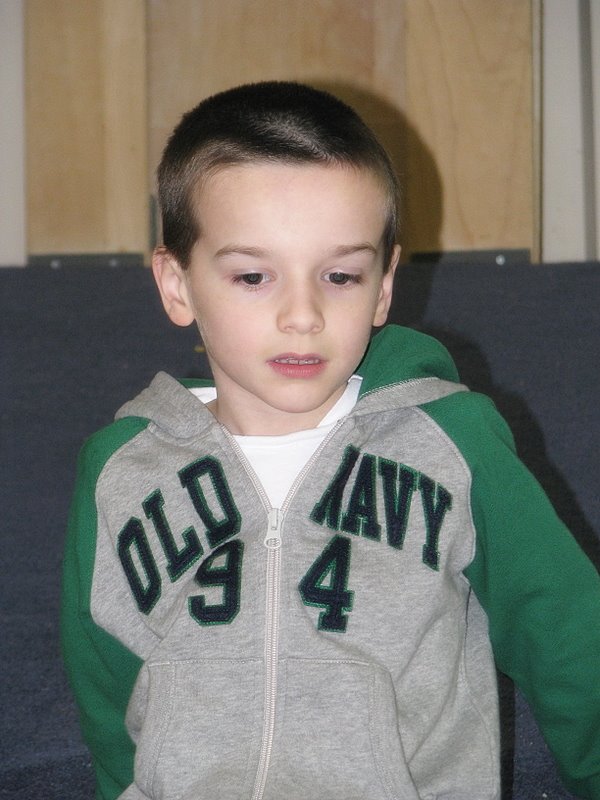
This is such a hit in our house! Ethan keeps asking if it is wet on the ground because he wants to play with this special stuff. Pretty sad when your kids are begging for rainy days, but it makes me feel like this was a great idea and a great way to keep them occupied! Being a Midwest girl, I am sure I will have plenty of days to really use this. If I lived in Seattle, I might have to have a few hundred of these so they wouldn’t get tired of the same old stuff.

Might I just add that this would be a great birthday gift for a child and would be a wonderful addition to a grandparent’s house too! I am thinking this would be something fun that I could put together for my nephews or would be a great way to store a little girl’s dress-up clothes. The possibilities really are endless.

Related Links:

Spring Break ’08 Cost Breakdown

A Drizzly Saturday

Fruity Play Dough

Summertime Planning

Is anyone else looking forward to the spring weather? Do you have any big Spring Break plans this year? Please share!

Notebook Experiments: Are Homemade Bubbles Better?

Wednesday, March 11th, 2009

I wasn’t able to get to any experimenting this week so I wanted to share one of my favorite experiments with you that I have completed so far. If you haven’t tried this recipe, I swear it is worth those little moments of effort!

Experiment: Can homemade bubbles trump our dollar store variety?

Experiment Taken From: Notebook Entry 05.29.08

Materials Needed: Please see Sparkle Power for specific directions on how to complete this experiment. I was able to find the glycerin behind the pharmacist counter at Super Target. The container of glycerin was $2.69 for four ounces. I also mixed my bubble solution up in an old milk jug (inspired by Frugal Dad’s uses for milk jugs) which made it easier to pour and store our homemade bubble solution. The bubble wands were found at the Dollar Spot at Target.

Results: Is it just me or are the dollar store bubbles horrible? My son is able to blow bubbles with these, but my daughter really got frustrated because she couldn’t seem to blow any bubbles before her wand would need to be dipped again.

I was really excited to try this recipe for bubbles and couldn’t wait to mix up a batch of these for the kids.

I followed Candace’s suggestions and actually mixed these up the night before so the ingredients had plenty of time to incorporate. I had some pink dish soap in my pantry so I used that- your bubbles will be whatever color of dish soap you choose.

The next night, we spent an entire evening blowing bubbles and everyone had to take a turn waving the wands through the air to make the giant bubbles. These bubbles were so amazing that our neighbors came over to ask where we had gotten the bubbles from. I couldn’t wait to share the recipe with them and pass it on! After seeing our bubble pictures, my mother-in-law is even going to make some of these for her own house so the kids can blow these bubbles over there too.

Conclusion: Homemade bubbles rocked the socks off of the dollar store bubbles. Thanks to Sparkle Power for such a fun recipe. I will never buy those bubbles again and I hope it is a recipe that we can pass down through generations!

**********************

I am so excited to open our Notebook Experiments up to everyone and I hope that you will be able to participate this week or in weeks to come! I will be posting this each Wednesday so please mark your calendars if you plan to participate. You can post your entries at any time throughout the week and then leave your entry in the links below.

We have this handy banner that you are more than welcome to use, but it is not a requirement! It is just something you can add to add a little sparkle to your entry.

Rules for Participation:

1. Choose anything from any of our notebook entries (past or present) to do with your family. We have hundreds of bookmarked links of crafts, ways to save money, and organizing ideas.
2. Complete an experiment from the notebook and share about it on your blog or website. We would love to see pictures of what you accomplished or a detailed description of how your projects turned out. Please include a link to this entry, a link to the original posting of the entry (at the original craftster’s blog), and (to help us relocate the project) the date or link of the notebook entry where you found it. You can use the same formatting as our entries or you can just include that information in your post in your own unique way!
3. Post a link below. Please include your name or blog name & a fast description of your project. Example- MomAdvice (WHO bread)

I can’t wait to see what you create and what you find inspiring!

Ask the Frugal Momma: Throwing a Baby Shower on a Budget?

Tuesday, March 10th, 2009

Amy,

I am turning to you for some advice about an upcoming baby shower that my husband & I are co-hosting because I know what a budget savvy and creative person you are!

A roommate of mine from college is expecting her first child in May. After asking her several times if anyone was throwing her a shower and her saying no, we offered to co-host a couple’s shower with a guy that works with her husband and his wife.

So here’s where I get to the dilemma…she e-mailed me the guest list this week and there are 30 couples on it…that’s 60 people!

I need some advice for how to pull of the kind of shower that they deserve, but on my budget!! I feel like we have to feed all of these people and provide adult beverages, but I don’t know how we could do that for less than a small fortune!!

Sincerely,

J.

Thank you so much for your question and I am so happy to offer a little advice on your baby shower! As always, if you have any questions that you would like to send me, you can email them to me at amy(at)momadvice(dot)com and I would love to share any expertise that I can offer.

Here are a few tips and tricks for throwing a fun baby shower on a budget:

Keep The Decorations Simple

You can burn through a lot of money quickly just on the decorations so one cost effective way to decorate is to decorate with item’s that the mother can use or by making a few sweet handmade items.

One of my favorite decorations for a table centerpiece are diaper cakes because it is a special gift for the new mommy and it can double as an attractive centerpiece for the occasion. You can visit my easy instructions and a little cost-breakdown and my tips for how to make these inexpensively.

(photo credit: Wendy Copley)

(photo credit: Janice)

Make a baby clothesline to hang near the food table or behind where the mother will be opening her gifts. Pick cute coordinating items and then give them as a gift to the mother at the end of the shower.

(photo credit: Jaime Compton)

A simple, sweet banner can double as a decoration later for the child’s nursery. It doesn’t have to be anything elaborate at all, in fact, the simpler the better. If you know the mother’s nursery colors, try and coordinate the banner to the baby’s future room. For a simple banner tutorial, I love this cute square banner, a bunting made from newspaper, and for the ambitious a knitted bunting. The possibilities are endless and could be made from supplies that you already have on hand in your crafting supplies.

Inexpensive Food to Feed the Masses

If you have a large group to feed, you could stick to between meal times and just provide fun snacks or a fun dessert table. Appetizers will go a lot further than a meal will. If you would like to do a meal, a brunch can be a really cost effective way to entertain and is a classy way to throw a fabulous spread.

Spinach Balls

Bite Sized Sandwiches with vegetable & fruit trays

Mini Quiches with an elegant salad (photo credit: chanmelmel)

Breakfast Casseroles & a Festive Punch

Mimosas (photo credit: K Santos)

A Creative Cake

Instead of doing an elaborate cake, offer guests mini-cupcakes in sweet pastel colors with a creative cupcake topper. These cupcake toppers from papertreats are just one example of cute homemade toppers that can decorate your cupcakes very creatively and that will make them sparkle when your cake decorating skills are lacking. If you are really ambitious, you could make your own cupcake picks with the baby’s initial stamped on them or even something more elaborate like this. Check a scrapbooking supplies store or a craft store to find cute paper and embellishments for your project.

Remember that you can freeze cake ahead of time, so you can crank out those cupcakes even the week before and keep them in the freezer. I like to decorate the cake while it is still frozen because it helps reduce the amount of crumbs that can collect in your icing. Ice them the day before and assemble them on pretty cake stand or make your own cake stands for a thrifty and creative alternative.

You will need to modify the length of time you cook your cupcakes for cooking mini-cupcakes. Follow the instructions exactly, but just cook your cupcakes for half the time. Keep an eye on them just because they will cook quickly!

Here are some of my favorite cupcake recipes:

Moist Chocolate Cupcakes With Vanilla Buttercream Frosting

Snickerdoodle Cupcakes

Chocolate Cupcakes With Peanut Butter Frosting

The Best Birthday Cupcakes in the World

Fun & Games

I may be the minority, but I am not a fan of baby shower games. With sixty people in attendance, you are going to have a hard time pulling off an organized activity. Spend that time socializing or do a game like these that will not require everyone being quiet and sitting in a circle.

(photo credit: Emma Black)

Have your guests email you a picture of them from when they were a child. Print out copies of the pictures and make it a party game to Guess Who? is in the pictures.

(photo credit: the higher nest)

How about a Baby Shower Price is Right card and choose the closest winner on how much common baby items would cost?

(photo credit: nhearon2003)

Of course the simpler the game, the easier! Why not throw candy in a clear jar and have your guests guess the total amount? With large group activities, the simpler the better! The bonus with this game is that this game can double as a centerpiece!

Parting Gifts

In a party of this size, I do not think people will be expecting to take home a party favor. Everyone is going to be happy to be included and will just be enjoying the celebrating. Concentrate your efforts on the food, cake, and entertainment and your guest will leave with the wonderful memory of the occasion rather than a gift that they probably will not use.

Consider your shower and any of the centerpieces and decorations your gift to your friend. If you want to add a special gift that she can use, give her a basket of thank you cards and stamps which she can use to thank all of her guests for their thoughtful gifts!

Good luck with your shower and I hope these ideas will give you a good starting point for a festive and frugal celebration!

(Photo Credit: Picture 1- Jerusalem)

Do you have any tips or advice for the hostess for throwing a great budget-friendly shower? I know she will really appreciate it!

Day 15: Birthday Parties Without Spending a Dime

Monday, February 16th, 2009


We received a birthday party invitation this month and I was a little worried what we could offer to the birthday girl. I am always thankful for my small stash in our gift closet when times like these arise, and headed straight to my closet for this occasion.

In the stash of gifts, I found a book, a few homemade hair bows, and a cute little iron-on transfer for a t-shirt to give her. If I had been more ambitious that morning, I would have definitely made a container of play dough, but my time was limited that day.

The kids had an amazing time at the party and our hostess provided pizza and cake which was a special treat for the kids. The children played until they were near exhaustion and I heard barely a peep on our way home. Sweet quiet!

I now realize that I don’t need to go so overboard with party gifts and that my simple gifts can be just as much appreciated.

Notebook Experiment & No Spend Day 11: Be My Valentine

Thursday, February 12th, 2009


Due to the MomAdvice Simplified podcast airing on Thursdays, I am going to be moving our Notebook Entry and Notebook Experiments to Wednesdays instead. I hope you will understand and will come back on Wednesday for these entries. Thank you so much for your patience!
Experiment: Can we craft up some Valentines?

Experiment Taken From: Notebook Entry 02.12.09

Materials Needed: Please see the long thread for the full instructions.

Results: Today’s Notebook Experiment & No Spend Challenge picture are one and the same. Since we are not spending money this month, we have had to get creative with our Valentine’s this year and are making them at home.

I loved the round-up of cute homemade Valentine’s on the long thread and we decided to download and print the ones that she made available on her site. Unfortunately, we don’t have a color printer so they are not nearly as cute, but they were free, which makes them the best kind of little love notes in the world.

Conclusion: This was a fun and free activity that I could do with the kids. Ethan is so excited to give them to his friends and I am so happy that we saved some money in the process. Thanks to the long thread for sharing such a sweet and fun little template!

**********************
Want to join in on the MomAdvice No Spend Challenge? Make sure to add your name to the linky list and read more about our challenge. You can also join our No Spend Challenge Flickr Group and upload your pictures of what you did each day.

To read all the entries on not spending, you can visit our No Spend Challenge category!
********************

I am so excited to open our Notebook Experiments up to everyone and I hope that you will be able to participate this week or in weeks to come! I will be posting this each Wednesday so please mark your calendars if you plan to participate. You can post your entries at any time throughout the week and then leave your entry in the links below.

We have this handy banner that you are more than welcome to use, but it is not a requirement! It is just something you can add to add a little sparkle to your entry.

Rules for Participation:

1. Choose anything from any of our notebook entries (past or present) to do with your family. We have hundreds of bookmarked links of crafts, ways to save money, and organizing ideas.
2. Complete an experiment from the notebook and share about it on your blog or website. We would love to see pictures of what you accomplished or a detailed description of how your projects turned out. Please include a link to this entry, a link to the original posting of the entry (at the original crafster’s blog), and (to help us relocate the project) the date or link of the notebook entry where you found it. You can use the same formatting as our entries or you can just include that information in your post in your own unique way!
3. Post a link below. Please include your name or blog name & a fast description of your project. Example- MomAdvice (WHO bread)

I can’t wait to see what you create and what you find inspiring!

Anthropologie Inspired Knitted Capelet Take Two

Tuesday, February 10th, 2009


Yup, I made it again because I loved the pattern that much. I am, in fact, working on a third one and I am afraid that I will never knit anything BUT these Anthropologie inspired knitted capelets again.

This one was knitted with Lion Brand Homespun yarn in a moss green. It happened to be on sale, right after the holidays, and I bought two packages of it for only $4 each! I was able to knit this pattern using only one of the packages so I am sure I will be able to find a good use for that extra yarn. The button was the second in the package of what I had used from before.

Don’t be surprised if I never knit anything else again. I am working on one in black and was able to pick through my girlfriend’s stash of antique buttons for the next one. You know, because every girl needs a black capelet. It goes with everything.

Details on Pattern: This is the Anthropologie Inspired Capelet from Peony Knits. I used size 11 (8.00 mm) needles and Lion Brand Homespun Yarn in Moss Green, purchased at Michael’s. I wasn’t sure if I would be able to make it so I bought the inexpensive yarn.

Modifications: I added two inches to the length of the capelet and then added 5 rows of additional ribbing to the sleeves. It is a small pattern. I have a very narrow frame and am petite and this fit me perfectly. I would recommend modifications if you are busty or have a wider frame. This project did require some blocking, but came together quickly with instant gratification.

New Printable: Weekly Menu Planning Sheet

Tuesday, January 27th, 2009


I am so excited to share with you that we have a new printable available for you to use on our site. It is a Weekly Menu Planner that you can use to jot down your meals for the week and even has some room for snacks, lunches, and breakfast. I hope it will help make menu planning easier.

If you have other ideas for printables that you would like to see on here, please let us know. My web designer (also known as my husband) might be able to squeeze in a few more here and there!

If you need more ideas for menu planning be sure to visit the resources list and check out the podcast for more discussions on simplifying our home management routines!

Free & Fun Resources for Book Lovers

Tuesday, January 27th, 2009

The coffee tray was assembled with all the necessary items for a good cup of coffee.

I gathered a stack of books from my bookshelves that I was not planning to read right now and books that I had read and truly loved.

Our fearless book club leader, Jessica, suggested a book swap for the month. I offered to host our book gathering and couldn’t wait to see what everyone brought. We piled the books on the table, we shared what we thought about our respective stacks, and we sipped some coffee. Everyone left with a bag full of new books and not a dime was spent. It was like going to the library, but no one will fine me if I don’t get it read in three weeks time. As a busy mom, this is exactly the type of book activity that I was game for.

If you don’t have some friends to swap books with, here are a few book resources that I have gathered for the book lovers of the world:

GoodReads or Shelfari– I use GoodReads to keep track of all of the things that I am reading or plan to read. I am not good about remembering the books I have read or that I would like to read in the future. This site helps me keep track of my impressions of books and keep my bookshelves fully stocked with the books I am really interested in reading. I love to keep a pad of paper with me in my purse or make notes into my cell phone when I am at the bookstore so if I happen upon a book I am interested in, I can jot down a note so I can pick it up at my local library.

BookCrossing– This site offers a fun way for you to clear out your bookshelves. The idea is simple, but so fun. Just put a tag within your book to track it and release your book into the wild, which just means leave it somewhere where someone else can find it (coffee shops, doctor’s offices, schools, etc.). When someone finds a book with a BookCrossing ID number in it, they can enter that code into the site and report where the book has moved to. It is a fun way to track where your books have traveled and see how far they can go.

Library Elf– This program helps you keep track of your library materials so you won’t get socked with late fees. Elf is an Internet-based tool for keeping track of what’s due, overdue and ready for pickup. Reminders are sent when the user wants it — before items are due (up to seven days advance notice, weekly notice or everyday reminders). For my local friends, South Bend is not currently participating, but the Elkhart Library is. The basic membership to Library Elf is free.

Frugal Reader, Paperback Swap, & Bookmooch– Just three of many sites where you can exchange books for free. You simply sign up for a membership and list the books on your bookshelf. You can then browse the books from other members and make a request to receive a book. When you are done with the book, you can list it back on the site or keep the book. New members start out usually with credits to get started on exchanging books. The more you ship and share, the more credits you recive to get more books.

Bookins– This is another great site where you can not only swap books, but also movies. Their system will automatically arrange for shipments from you to one member and from a third member back to you, and so on. You never have to contact anyone, there is no bidding, and there are no hassles of dealing with different traders and personalities for each exchange. The shipping charges are always a flat $4.49 for the service. You can keep what you get or exchange it again when you are done.

SwapSimple– This is a site where you can list textbooks, books, games or DVDs. Begin by listing what you have to be available to others. Right when you list an item, they will figure out what it’s current market value is, and award you 20% of it’s value up front for your use. You get the remaining 80% when you send your item to another swapper. This means you can list items, and get items immediately!

Amazon’s Free Kindle Downloads– For those that have moved towards the electronic books, Amazon has books available to download for free through February 28th. Be sure to snag these books and save!

Of course, the ultimate in free resources for book lovers is your local library. Be sure to check the Resources page on your library’s website and see what tools you might be overlooking. My library card comes with free passes to local museums, online memberships to many research tools, even iPods and audio book downloads right to my iPod!

Do you use any of these resources for your reading? Feel free to share your own resources that you have discovered that could help your fellow book lover out!

Notebook Experiments: Can an Indoor Snow Day Keep the Kids Busy?

Thursday, January 22nd, 2009

Experiment: Can I entertain my kids with a pile of snow?

Experiment Taken From: Notebook Entry 01.15.09

Materials Needed: Please see The Homespun Heart for the full instructions.

Results: It has been brutally cold here with blowing snows and blizzards and the usual Midwest winter fun so it makes playing outside in the snow difficult. We have also been battling bronchitis and the winter bugs that make their way from school to our home so going outside hasn’t been in the cards lately.

Luckily, I saw Monica’s brilliant idea for having an indoor snow adventure and thought that would be just the ticket for the kids. I found a small tote in the basement, filled it up with snow, found some random spoons from the kitchen, and gave them the Little People to make snow angels. I put some jazz music on, and got some work done while they played.

I will admit, the quiet was quite lovely. And then the giggling. And then the chatter. And it pulled me away from my work.

And I plopped on the floor and enjoyed their sweet little selves for an hour.

And Emily wrapped her icy cold hand over mine and said, “Mommy, you are my best friend.” And I admit it, I teared up.

But by dinnertime I was told, “Mommy, you are not my best friend.” It didn’t phase me.

I just held that moment in my heart because for that one hour, we held hands over the snow and pledged our friendship for that moment.

Conclusion: Playing in snow INSIDE is our new favorite winter activity and I look forward to doing it again…and just maybe I will be back on the friend list! I encourage you to put this on your activity list this week. Thanks to Monica, at The Homespun Heart, for the brilliant idea!

********************

I am so excited to open our Notebook Experiments up to everyone and I hope that you will be able to participate this week or in weeks to come! I will be posting this each Thursday so please mark your calendars if you plan to participate. You can post your entries at any time throughout the week and then leave your entry in the links below.

We have this handy banner that you are more than welcome to use, but it is not a requirement! It is just something you can add to add a little sparkle to your entry.

Rules for Participation:

1. Choose anything from any of our notebook entries (past or present) to do with your family. We have hundreds of bookmarked links of crafts, ways to save money, and organizing ideas.
2. Complete an experiment from the notebook and share about it on your blog or website. We would love to see pictures of what you accomplished or a detailed description of how your projects turned out. Please include a link to this entry, a link to the original posting of the entry (at the original crafster’s blog), and (to help us relocate the project) the date or link of the notebook entry where you found it. You can use the same formatting as our entries or you can just include that information in your post in your own unique way!
3. Post a link below. Please include your name or blog name & a fast description of your project. Example- MomAdvice (WHO bread)

I can’t wait to see what you create and what you find inspiring!

Play It Again, Momma: Fruity Play Dough

Wednesday, January 21st, 2009

Each day we have been enjoying something off of Ethan’s summertime list. One of the things that he wanted to do was to make play dough so I found a really great recipe that I thought would work perfectly and keep our kitchen nice and cool. This recipe requires no cooking, which is a bonus on a hot summer day, and uses Kool-Aid mixes to make your colors.

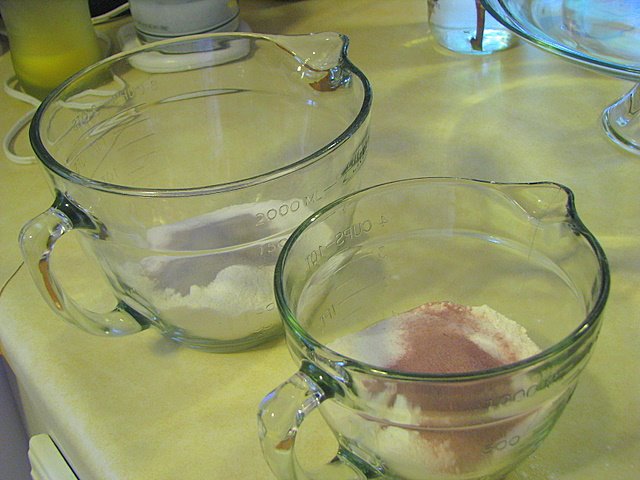
I made a batch in each of the kid’s favorite colors and was suprised how quickly and easily this dough came together. In about five minutes, the dough was ready to go for little hands to enjoy.

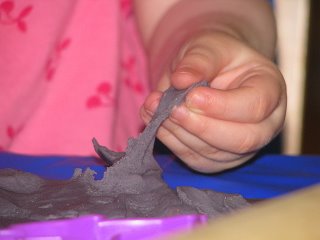
Boy, did they enjoy this! I put out my biscuit cutter, plastic forks and knives, cookie cutters, and a giant rolling pin- all items courtesy of my kitchen! The kids played in this for over an hour and then I stored the batches in plastic containers.

This dough stays nice and soft and the smell is delicious… which is very confusing for a two year-old. Emily found out the hard way that it didn’t taste as good as it smelled, but it only took one taste to find that out.

Fruity Play Dough (courtesy of Recipezaar.com)

1 cup flour
1 package Kool-AidKool-Aid (any flavor)

1 tablespoon cream of tartar

1 tablespoon vegetable oil
1/4 cup salt
3/4 cup boiling water (the original recipe called for one cup of boiling water, but I found it made the dough too loose- aim for 3/4 cup and add more if needed)

Mix all dry ingredients in bowl then oil, then pour boiling water in and mix thoroughly. Wrap in cellophane or air tight container and store in fridge. The play dough should last a few months.