Archive for the ‘Home’ Category

Tips for Successful Menu Planning

Tuesday, August 4th, 2015

Tips for Successful Menu Planning from MomAdvice.com

One of the most stressful parts about my job as a mom is creating menu plans to feed my family and accomplishing the weekly grocery shopping. Today I want to share with you some of my own tips for successful menu planning, but first I want to work on some honesty with you about my attitude towards food preparation in my house.

Is it okay to say that I have a terrible attitude about this?

I hope it is because something happened this summer that has helped transform my mindset a bit.

Tips for Successful Menu Planning from MomAdvice.com

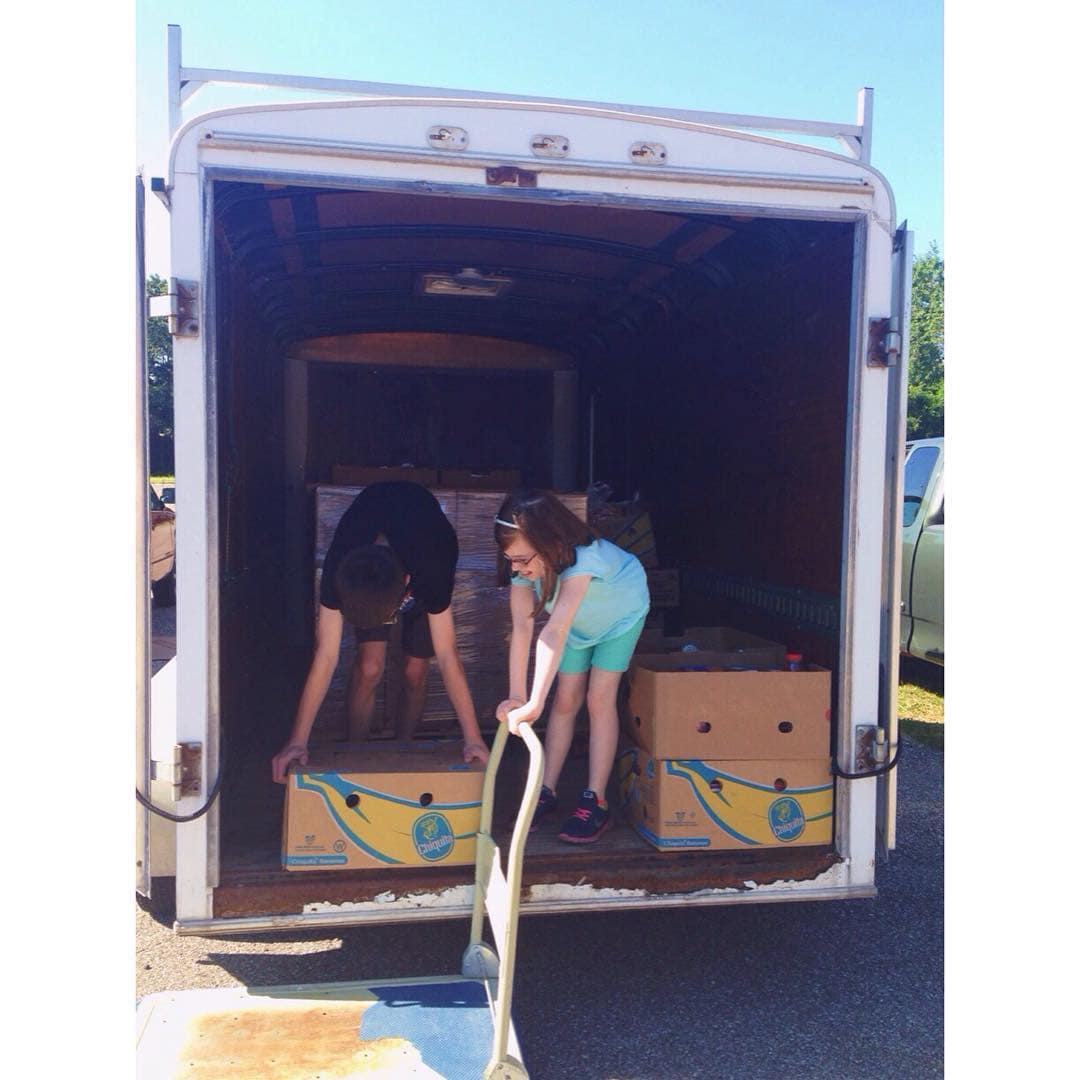
This summer I wanted to create some great learning experiences for my kids and to teach them how lucky we are for all that we have. One of those experiences has been volunteering at our church’s food pantry where over 400 local families are served each month. I had not expected the enthusiasm that these two brought to the job, but these kids were so happy to do this that they begged to return the next week to help again.

I am not sure what it is like for you and your children, but I feel like we live in this protected bubble that I am constantly trying to push them out of… but not TOO far.  I’m pushing on those walls because there is such a big world out there full of people who need us and it’s important to see and address those needs when we can.  I thought it would be great for them to serve others and to understand how lucky we are.

As we pulled in the first day to volunteer there was a gathering of people waiting for the doors to open. At the time we had pulled in, there was TWO MORE HOURS until the food pantry doors were open to the public. When I asked about this, I was told that they arrive that early to be able to be the first to select the food. The food given would last a family of 4 a few days, an incredible offering when one needs  it, but it made me very ashamed about my attitudes towards feeding my family.

I can plan meals for my family and buy whatever we need for the week in one trip without any worries.

I complain when the grocery line is too long, but others wait for hours just in the hopes that they will have fresh produce.

I whine about how annoying it is to have to haul so many bags from my car and put them away.

Guess who had the transformation?

I know we can’t always go into that zen place of happiness when planning our meals, but I’m working on my attitude and I want to do what I can to simplify this process for our family. It’s a bit of a privilege to go into the store with a plan and come out with what we need, isn’t it?

Meal planning is necessary to stay on budget. In fact, as I have said in my book, I feel that this is one of the biggest places I feel families should analyze when living on a budget. This is a flexible area in our spending, but it takes a good plan to stay on budget.

Here are a few of my tips for successful menu plans:

Gluten-Free Orange Chicken

gluten-free orange chicken

Be Realistic About Your Meal Plans

The overachiever in me really believes that I will cook a great meal for my family every night. The reality is that many nights I am running kids to activities and I am not home (or too tired) to execute all those good intentions. What happens when you have a lot of intentions and not a lot of time?

Spoiled food and wasted money.

I shop for 5 meals for the week, giving us two nights for leftovers and reality.

Kind of the same thing- ha!

Take a serious look at your calendar and analyze what will be happening for the week so that you can create a menu plan that will serve your family well. Slow cooker dishes are arranged on busy days where I don’t have time for food preparation, Sunday suppers are leisurely meals with all the fixings doubled so we can enjoy the dish another night, and grocery days are often prep days for chopping and dicing for quick wraps & salads for nights I don’t have the time to cook.

Slow Cooker Carnitas

slow cooker carnitas

Try a Rotation Schedule

I am a lover of routines and that also comes to the food that we share around the table. In our house, we usually have one slow cooker dish, one pot of soup or a large salad (depending on the season), some type of taco night, one “fancy” dish for Sundays, a brunch dish (that later acts as breakfast on busy school mornings), and I try to implement one new recipe a week to keep things fresh. A rotation schedule creates a clear routine for a busy week and makes grocery shopping easier since you know what you typically need each week. 

Routines are my jam!

I try to make one dish that can easily be doubled or tripled since we have been working on weekly entertaining or to share with someone who might be having a hard week. This can also be a great time to feed the freezer for another week.

Gather Inspiration for Your Meals

It would be hard not to be inspired now that we have tools like Pinterest at our disposal. I think more than anything it is not to feel OVERWHELMED with all of the meal choices or choosing dishes that are far too ambitious for your time constraints. My best bet for busy weeknights are 30-minute recipes or 5-ingredient or less ideas and that is typically what I search for when hunting down new dishes to add to my menu. 

I subscribe to my favorite food blogs through Feedly and utilize their bookmarking tool to save the recipes I want to come back to. I also utilize a private Pinterest board just for my family to test out different recipes in our kitchen. Cookbooks are like old reliable friends that I know I can always count on for a recipe or two. Foodgawker is where I also favorite dishes that I want to try in our menus (you can see our own dishes that made the cut over here!)


Tips for Successful Menu Planning from MomAdvice.com

Use Your Smartphone to Make Smart Lists

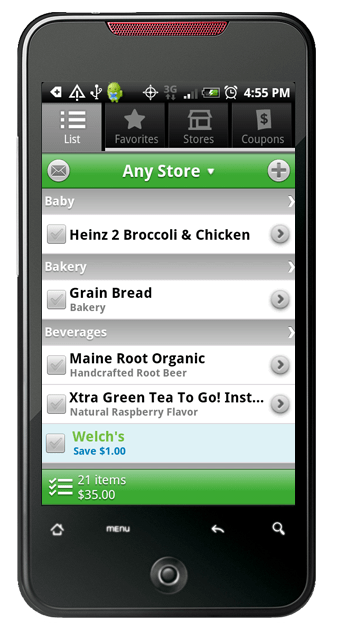
What did I ever do without my smartphone? This little device has made creating and maintaining my grocery lists each week so much easier. I am a BIG fan of the Grocery iQ app (FREE!)  for creating my grocery list because you can reuse the same master list that you use over and over again (especially if you have a routine rotation of meals) and this app automatically organizes and finds any coupons that you might want to use for your purchases. 

With Grocery iQ you can type, speak, or scan grocery list items into your list. The list automatically adds your items into categories and then alerts you if coupons are available for any items you might be adding to your list. Coupons can then be sent to your email when your list has been made or (if you have a wireless enabled printer) can be sent to your printer for printing. As you gather your items from your list, simply check it off and the item moves to the bottom of the list. Once your whole list is complete, everything is shifted towards the bottom and then can simply be clicked to add those repeat items back on the list for your next visit.

Switching to an electronic list was much easier than I expected. It also keeps me off my phone while shopping so I can really concentrate which is half of the battle for me when it comes to menu planning.

Tips for Successful Menu Planning from MomAdvice.com

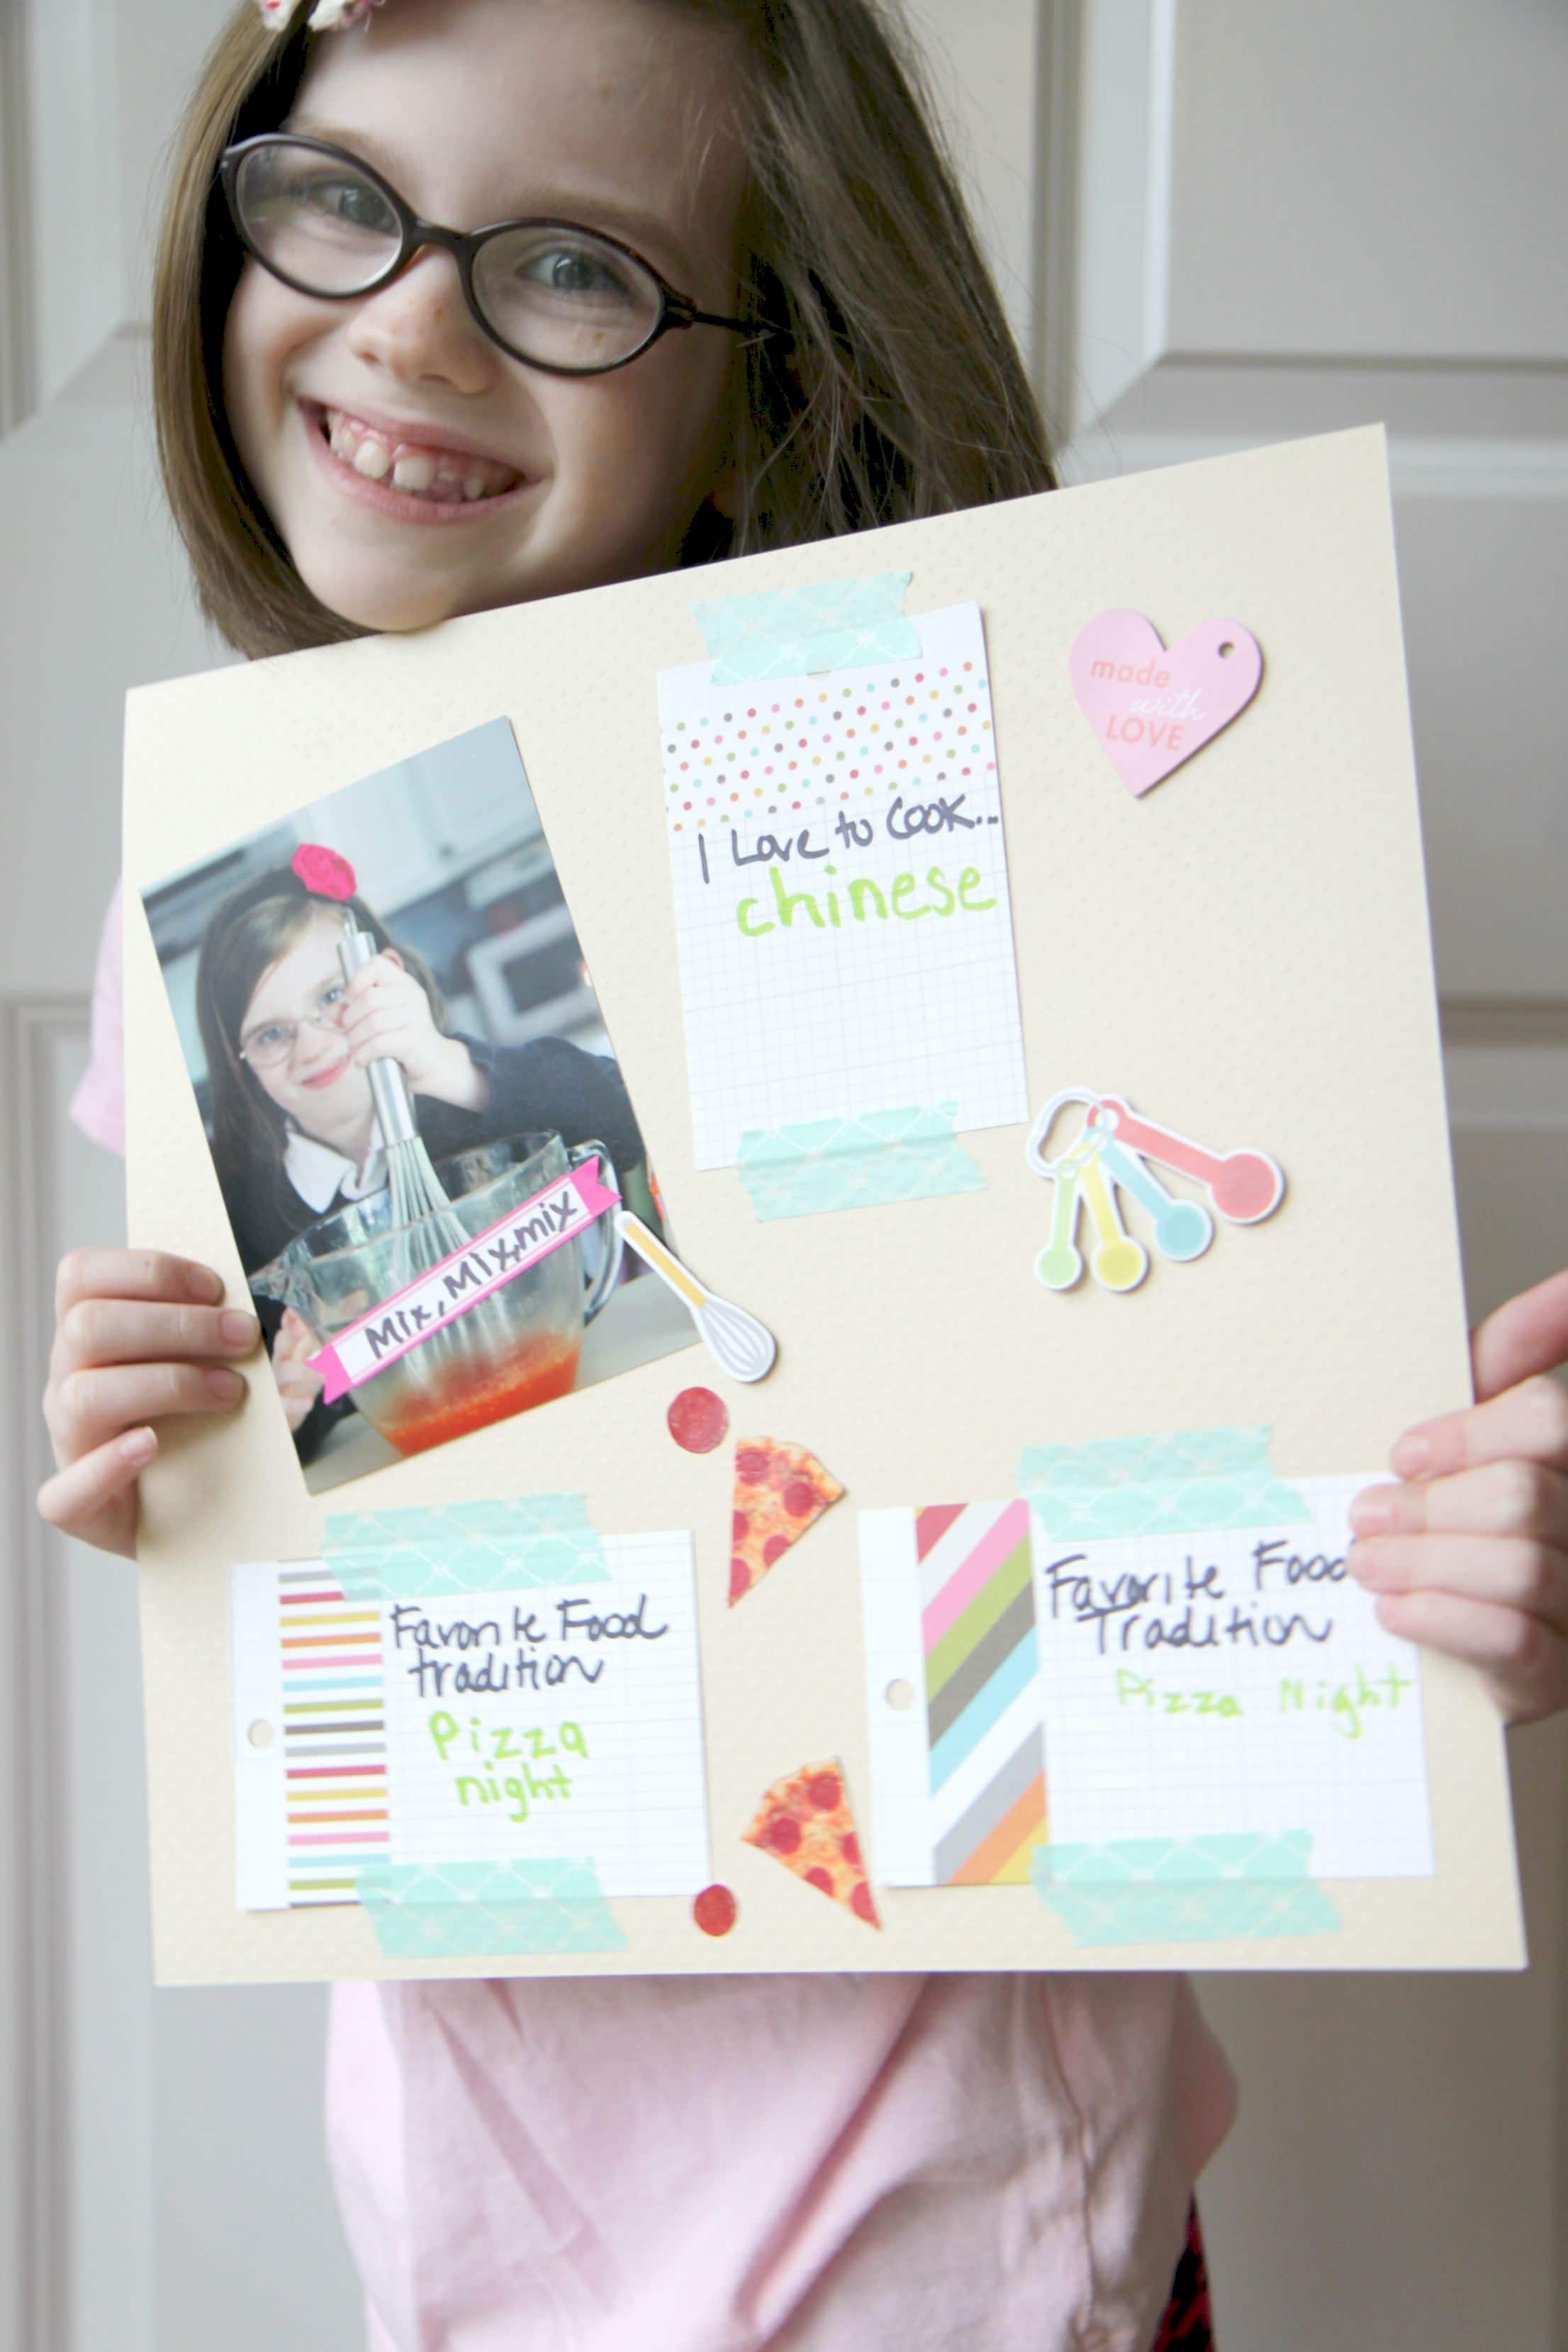
Journal the Family Favorites & Put Them In Your Plans

In our family, every person has a favorite dish or a favorite memory of a meal we have shared together. To make your week easier, creating a family journal or scrapbook where you have all your family favorites for weekly inspiration and rotate a family member’s favorite each week.

Tips for Successful Menu Planning from MomAdvice.com

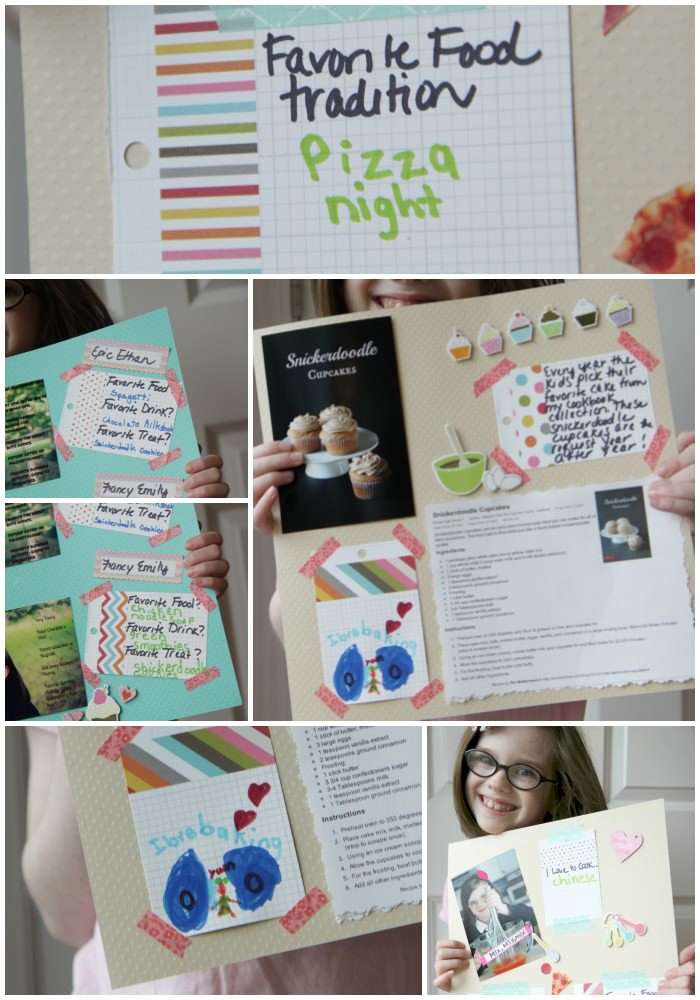
We made a food journal and printed out our favorite recipes and why the kids loved these dishes. This can be a fun craft project to do together AND it is something you can pass on to them when they leave the nest (but that won’t be for a LONG time so I’m not worried). If you want to try making your own cookbook, you can see this tutorial we created for it!

One thing I don’t think very often about is that many of our favorite recipes are online. If the sites ever go down (which has been known to happen), we may no longer have access to our favorite dishes. I want a place where we can keep all these food memories so a family journal is a fun activity that you can enjoy for years to come.

Pick What’s Important & Make it Happen

I have many friends that deal chase for their menu plans, but I have never been much of a deal chaser.  As the extracurricular schedule grows and my work becomes more demanding, I have to make choices about what I realistically can and cannot do. It’s okay to not chase deals.

I do my menu planning first thing in the morning (eat the frog!!) and I go to grocery stores where deal chasing doesn’t need to happen. ALDI has (and always will be) my first destination for our family groceries and thanks to the Savings Catcher app, a scan of my receipt at the end of my shopping at Walmart means I can look forward to pocketing any savings if any store goes lower in prices without chasing deals anymore.

You may find shopping at night is better for you or you may get a thrill from a deal well chased. Pick what’s important to you and make it happen for your family, but do what fits best with your own lifestyle for menu planning success.

Do you have any strategies you can share for menu planning? Let us know in the comments below!


Pin It

How to Make a Closet Office For Under $200

Monday, July 6th, 2015

How to Make a Closet Office For Under $200 from MomAdvice.com.

This post is sponsored on behalf of BHG at Walmart.

If you have learned anything from my past posts, you know that my desire is to make the most of every corner in our little home. Small space living requires works especially when want you make each room as functional as possible. I love how much it challenges me and today I wanted to show how we made over a neglected closet into a closet office as a birthday gift for our soon-to-be teen son. As part of the BHG Live Better Network, I am partnering with them to show how to help someone create a new space so today we are showing off our ideas for small space office that we think would work beautifully in a closet in your home. The best part is that this makeover cost us under $200 to pull off!

How to Make a Closet Office For Under $200 from MomAdvice.com.

My son’s room is small and his closet is pint size like our’s (thus why I embraced the fashion capsule project so much).  Over time though, we have learned that these closets are just right for us and this closet wasn’t getting a lot of use now in his room. We had pulled his dresser in there to save space, but you can see how beautifully that all worked out (ahem!). Too small clothing and the piles of clothes given to this kid to put away in his drawers on laundry day had created a mountain of a mess. The first step was to weed through the pile and, with our recent growth spurt, we were able to whittle this pile down to nothing and give our great stuff to someone in need. The dresser was relocated to the end of our bed which freed the space up entirely for a new purpose.

How to Make a Closet Office For Under $200 from MomAdvice.com.

How to Make a Closet Office For Under $200 from MomAdvice.com.

The hard part with this makeover was just getting this space prepped and ready for its new purpose. We removed all the old closet hardware and trim, painted the walls in our favorite shade of Benjamin Moore Gray Owl (leftover paint from our shed makeover last summer) and sanded down the old eighties paint job on the high shelf to create a more distressed wood look to the shelf.

Here’s a fun fact! We found a little boy’s name scrawled on the side of the wood when we took it off the shelf. That is one of the best parts about having an older house…the sweet discoveries of little things like that add to its charm. We, of course, left it there for someone else to discover one day.

How to Make a Closet Office For Under $200 from MomAdvice.com.

Pictured Above: Better Homes & Gardens Traditional Task Lamp ($22.56)/ Mainstays Parsons Desk With Drawer ($53.53)/ Mainstays Contemporary Office Chair  ($45.00) /Mainstays Canvas Ironwork Curtain Panel ($11.18)/ Better Homes & Gardens Boule Bronze Curtain Rod ($25.38)

How to Make a Closet Office For Under $200 from MomAdvice.com.

How to Make a Closet Office For Under $200 from MomAdvice.com.

We hung a single curtain panel that helped frame the space and also could be a way to hide the inevitable chaos that will happen on this desk. As you can see, we hung the bar high to help prevent our chair from rolling into our curtains and also to make this tiny space feel bigger.

How to Make a Closet Office For Under $200 from MomAdvice.com.

On the side, we moved our hamper so it is tucked away for tossing our clothes into. A giant pegboard was added to the wall for odds & ends and any art we want to display.  I hung his favorite hat on top of a thumbtack that I had pushed in. This sign made him laugh so we thought it would be a cute touch (found at Hobby Lobby). A task lamp with extension cord creates a well-lit space for doing our homework in this space.

Happy 13th birthday, Ethan! We hope you create your next artistic masterpiece in this new space we have created for you! Thank you BHG at Walmart for the fun challenge this month! We couldn’t be more thrilled with our space and to create a new purpose to a once cluttered closet!

How to Make a Closet Office For Under $200 from MomAdvice.com.

Live-Better-Network-Badge

In accordance with the FTC Guidelines, I am disclosing that I received compensation from BHG at Walmart for my time and participation in the BHG Live Better Network. Although we have material connection to BHG, any publicly stated opinions of BHG and their products remain my own.

Pin It

Beautiful Ideas for Outdoor Entertaining With Goodwill

Wednesday, June 17th, 2015

Beautiful Ideas for Outdoor Entertaining With Goodwill from MomAdvice.com


I love entertaining outdoors in the summertime and today I wanted to share with you some fun and frugal ways you can entertain utilizing items found at your local thrift store.

Outdoor entertaining does not need to be expensive and many of the items found at Goodwill can be repurposed into great items to have on hand for outdoor meals and entertainment for your guests.

Here are just a few beautiful summertime ideas I have gathered to help you  make the most of your outdoor space! 


Host an Outdoor Movie Night

Have you ever wanted to create your own DIY Outdoor Home Theater?

We have had this on our summer bucket list for years and last summer we decided to finally put together our very own DIY outdoor movie night with our kids!

There is something truly magical about watching a movie together under the stars and I love that you can do this right in the comfort of your very own backyard.


Update a Serving Tray With Washi Tape

One of the best arsenals in my tools for entertaining outdoors is utilizing serving trays for displaying food and bringing and taking dishes to and from our kitchen in the summer months.

If you find a tray that is lacking that sparkle you want or you want to easily coordinate a tray with your dishes, consider giving it a beautiful update with a little washi tape.

Design Improvised offers this sweet and simple tutorial for creating a beautiful display for your outdoor table.

The best part?

This DIY isn’t permanent so you can change it with your mood or tablescape.


Add Mason Jar Lights to Your Patio

Outdoor lighting can be tricky and expensive, but it doesn’t cost a lot to set the mood for your next outdoor gathering thanks to these beautiful lights in mason jars.

A Piece of Rainbow shows you how to make these beautiful outdoor lights with just wire hangers and mason jars.

What a treat for the eyes this would be!


Keep the Bugs Away

Bugs can be problematic when dining outside so it is always nice to have coverings and solutions for keeping them away.

Earnest Home Co. shows you an elegant way to keep your food covered with just simple terra cotta pots and a little rope for a handle.

Since my son just did a science project utilizing a pot, we can scientifically say that this is not only a great way to keep food covered, but it also a great way to keep your food insulated (warm or cold) while dining outside.


Dress Up Your Patio

Patio decorating doesn’t need to cost a lot and thrift stores receive many furniture donations that you could potentially use for your outdoor space.
Don’t just think of these items as one piece, but consider the parts of the furniture items for your project.
A pair of legs from one piece and a drawer from another, for example, can be painted into a brightly colored plant display that you could fill with colorful flowers or could be used as an herb garden on your patio.


Of course, keeping the bugs away from YOU is also a good idea especially when you have guests!

Consider using your slow cooker and utilize this fun tutorial I put together for making your very own DIY Citronella Candles in your slow cooker for your own outdoor entertaining or use the gift tag I have created (Thanks for letting us BUG you!) to attach for an adorable hostess gift for summer.

I hope these ideas inspire you this year!

Let me know what your proudest DIY moments are when it comes to outdoor entertaining in the comments below!


Don’t miss these other ideas from MomAdvice.com:


DIY Succulent Terrarium


Warming Up Your Outdoor Space for Fall


Bringing Outdoor Furniture Indoors


Grilled Tomato Bread with Prosciutto


Sign up for the MomAdvice newsletter


Pin It

Making the Most of Your Outdoor Table (GIVEAWAY!!)

Friday, May 8th, 2015

Making the Most of Your Outdoor Table from MomAdvice.com

This post is sponsored on behalf of BHG at Walmart.

The winter has been a long one in Indiana so as soon as the warmer temperatures start creeping in, you will find us spending our evenings outdoors on our patio every night. The outdoor space that we started with has evolved over the years and has become one of my favorite places in our home. As part of the BHG Live Better Network, I am partnering with them this month to showcase how we do our entertaining outdoors and today I am sharing how we make the most of our outdoor table.

Making the Most of Your Outdoor Table

Our original patio, using street paver bricks, is still one of our most-pinned items on the site, but thanks to a weedy and unlevel backyard, we wanted to replace it with a stamped concrete patio and firepit that we could use for our outdoor entertaining needs without the maintenance.  Since our kitchen has hardwood floors and we knocked a wall out to create a huge patio door outside, overlooking the backyard, we wanted to create an extension of that space. Thus, the idea to stamp these as wood was born! These stamped wood planks even have little nail holes and grooves in them.

Making the Most of Your Outdoor Table

The shed bonus room is where we set up when the weather is dreary and when it is beautiful, we enjoy a dinner on our beautifully handmade picnic table (see my tutorial on how to stain it to keep it looking fresh!)  with our family and friends.

Making the Most of Your Outdoor Table

Making the Most of Your Outdoor Table

Making the Most of Your Outdoor Table

Making the Most of Your Outdoor Table

Last summer, I invested in 20 BHG melamine dinner plates (a mere $2.48 per plate!!)  that we could use when entertaining outdoors and it has been, by far, one of the best entertainment investments I have ever made.   Thanks to the built-in storage behind the door  in our little shed, we have the perfect spot to house these when we are entertaining outside.

I picked three different patterns since the store offers these for individual purchase to create a more eclectic tablescape. These plates are beautiful and look like pretty china patterns while being sturdier than a paper plate, but more lightweight for carrying to and from your outdoor table. You can mix and match to your heart’s delight and create your own unique dinner table.

Making the Most of Your Outdoor Table

Shopping List:  Franklin Sports Indoor Table Tennis Conversion Top 9′ x 5′ ($100)- (sold out- similar HERE)/ Stiga Three-Star White Table Tennis Ball, 6 Pk.($6.32)/ STIGA Classic 4-Player Table Tennis Set ($13.33)/ BHG Medium Wire Basket With Chalkboard (available in stores)

Of course, after dinner is when we are really looking to entertain our kids and guests so I wanted to find a way that we could make the most of our table.  After a fun night out with friends and seeing my husband giddy from playing ping pong for an evening, I knew I had to find a way to make a ping pong table part of our lives. With a small home though, we had nowhere to put one so I started researching ones that could be placed on the tabletop and found a table tennis conversion top with the same dimensions as our beloved ping pong table dreams.

Making the Most of Your Outdoor Table

This table is two hinged pieces that fold up for storage.  These are heavy pieces (each piece weighs about 50 pounds) so it is definitely a two person set-up. If you are worried about scratching your outdoor table, consider using a sheet or blanket to protect before placing the tabletop on top.  A BHG wire basket acts as the perfect storage for ping pong balls and paddles for easy grabbing when we want to set up for the evening.

Our whole family has so enjoyed these effortless outdoor dinners and the hours of fun afterward playing ping pong. Windy days certainly force you to up your game and help increase that skill level! Consider making the most of that outdoor table enjoying family meals and then game time together all in one spot!

Making the Most of Your Outdoor Table

As a mom, it makes me happy to see my kids outside and playing together. As we move into the teen mode (hard to believe) and tween mode (hard to believe), it becomes increasingly challenging to find things we love to do together that don’t involve screens.  A view like this out my kitchen window is a real treat.

It’s not just for the kids though. My husband and I had wine last night on the patio and then played ping pong until midnight together.  It is just as much for us as it is for them.

Want to make the most of your outdoor table too?  Enter below to win one $100 Walmart Gift Card from BHG at Walmart to make the most of your outdoor living space. One lucky winner will receive this lovely gift card!  This giveaway ends on May 15th and you must be a US resident and at least 18-years-old! Good luck, everyone!

a Rafflecopter giveaway

BHG Live Better Network

In accordance with the FTC Guidelines, I am disclosing that I received compensation from BHG at Walmart for my time and participation in the BHG Live Better Network. Although we have material connection to BHG, any publicly stated opinions of BHG and their products remain my own.

Pin It

How To Use A Home Management Binder

Thursday, April 23rd, 2015

How To Use a Home Management Binder

Have you been using our free home management binder printables yet? I thought it would be good during this m challenge month of Loving Your Home to revisit the home binder that I lovingly call our family “Bible” for the way that it has become indispensable for keeping us organized (and me sane!). It’s hard to love where you’re at if nothing seems to be working right and I’ve found that keeping a list of to-dos (both what we have to do and wish to do) can help you feel like you’re moving in the right direction – creating a place that truly feels like ‘home’ for your family.

A well-designed binder helps you manage everything in your household in one place. After a number of years using a home management binder, here’s the way that I’ve found it works best:

How to Use a Home Management Binder

~ Keep the binder in a central location in your home where everyone can access it

~ Include your family calendar and keep it up-to-date

~ Add important contact information that you want to have at a moment’s notice (particularly for someone who might babysit)

~ Use it as a meal-planner with weekly meal plans, grocery lists and a price sheet, as well as a list of family favorites (when the family’s raving about the meal, easily jot it down in the binder and you’ll have your family’s favorite dishes at your fingertips to make future meal planning easier!)

~ Add sheets that you need to run your family’s finances smoothly, like budgeting and planning for large purchases.

~ Use it as a central To-Do list for your home, both routine maintenance and any plans for updates. I’ve loved being able to see how far we’ve come and all the improvements we’ve made to help make our house into a home we love!


How to Set Up a Home Management Binder

~ I recommend this binder, both for it’s size and the view pockets for the outside.

~ Then purchase a set of pocketed dividers where you can tuck important information that you might need to easily find. When school starts, in particular, you will find your mailbox filled with fliers for events, important forms that need to be filled out, appointment reminders, and invitations. Instead of piling them on a desk or tacking them on the fridge, use the pockets so you always know where to find these items when you need them.

~ Keep an extra pocket or two in the back for the randomness in life- consider it another junk drawer, if you will.

~ I have also found that a good spot in the home for daily reference is in your family’s command center.

~ Print out any header pages for sections on heavy-duty cardstock so that they can hold up to the abuse of being referenced daily.

Family-Management-Binder-Collage

Of course, you can use any printables you want, but we are pretty attached to ours! Our set of binder printables is free to all who subscribe to our weekly newsletter simply by entering your email below or in the sidebar. We will then send you the link to your packet as our thank you for being a subscriber (look for it in the final welcome email). The binder set includes the following pages:

  • Family Budget Pages
  • Grocery Price Sheet
  • Grocery List Sheet
  • Menu Planner Sheet
  • Family Calendar
  • To-Do List
  • Contact Sheet
  • Header Pages for Each Section

Wondering about our newsletter? The Mom Advice newsletters are a recap of all the happenings for the week and will make sure you never miss a post. It’s also where our subscribers can access the free printables and any additional freebies that we may offer ONLY TO NEWSLETTER SUBSCRIBERS.  It is beautiful, simple, mobile-friendly, and fast to scroll through.  I promise, I will never send you junk. I know your time is valuable and so is mine- I am committed to a very useful newsletter!

Note: If you can’t seem to get the form below to work with your browser, just look over to your right in the sidebar. You will see a handy form there too that works with all browsers! We appreciate you so much! Thank you! 

##NEWSLETTERFORM##


 This post contains affiliate links.


Pin It

DIY Lampshade Ideas

Tuesday, April 14th, 2015

DIY Lampshade Ideas from MomAdvice.com

One of the quickest ways to update a room is to spruce up a lamp in your home and today I wanted to show you some easy and affordable ways to transform a lampshade from Goodwill.

I love these ideas so much, in fact, that I have plans to add a new lamp or two to our space now for Spring!

I hope you will be as inspired as I am by these bloggers and their incredible lampshade makeovers.


Add a Fun Print With Leggings

You can find a pair of leggings in just about any pattern or color combination right now at just about any store.
Consider snagging a pair of inexpensive leggings and using this material to stretch over a lampshade in your house to add a trendy color or pattern to your home without a big financial commitment.

Add an Adorable Ping Pong Detail

I am a big fan of ping pong craft ideas and love this detail on a lampshade.

You can use fabric paints to match a room in your home and then glue on this three dimensional detail for a fun look for any game room.

Get the scoop on this DIY Ping Pong Lampshade from I Love to Create here.

Go Industrial

Your local thrift store is the perfect place to hunt for lampshades that have beautiful bones underneath their fabric exterior.
A simple removal of the fabric can create a beautiful industrial lampshade and the edition of an Edison bulb really completes the look on this easy DIY project.
Check out this industrial lampshade makeover on Bless’er House.

Add a Fabric Detail

If you aren’t a fan of the industrial look, but have a great lampshade base to work with, consider adding your own unique touches with scraps of fabric.
If you are a sewer, you may have a mystery bag of materials to work with to create this adorable scrappy fabric lampshade for a corner in your craft room like Pen’s Nook!

Add a Feminine Touch

Nothing says Spring like floral and that is why I love this fabric flower lampshade.
With simple fabric circles, glue, and a little shaping, this is the perfect craft to work on while binge-watching all of your favorite shows on television.
Since you are covering the entire lampshade in flowers, it can really breathe life into a lampshade that may have seen better days thanks to a camouflaging of rosettes.


Add a Unique Embroidered Touch

I love, love, love the look of embroidery and this DIY Constellation Lampshade from Martha Stewart is jaw-droppingly awesome.

I have been seeing constellation projects popping up on table runners and wall murals, but have fallen in love with this lampshade for my small home.

If you can’t find a navy lampshade for your project, consider covering it in navy leggings (as I showed you in our first project listed here) or hunt through the t-shirt section of a thrift shop for the perfect navy shirt to use!

What are some ways you have transformed a lampshade?

Feel free to leave a comment below!

We love hearing your ideas!


Don’t miss these other great ideas from MomAdvice.com:


Spice Up a Goodwill Lamp


How to Dye Your Jeans


DIY Roll-Up Puzzle Mat


9 Unique Ideas for Frugal Date Nights


Sign up for the MomAdvice newsletter


Pin It

7 Fresh Furniture Painting Ideas

Tuesday, March 17th, 2015

7 Fresh Furniture Painting Ideas from MomAdvice.com

I am a big fan of painting furniture and when the Spring temperature arrive, I start dreaming of all the pieces I can redo.

Does anyone else refer to Spring as spray paint season?

Maybe that’s just me.

Today I wanted to share some ways that you can add a fresh new look on a furniture piece from your favorite thrift store.

Often when we see pieces, we can’t see the true potential in them if they are dated, mismatched, or distressed.

It can be challenging to look at each piece as something full of possibilities.

Here are some great ways to bring tired furniture to life, to create the optical illusion of sets of furniture, and some really great new ways I have found to experiment with new painting techniques.

Over the years I have painted more pieces of furniture than I ever dreamed I would.

In fact, if you come to my house on any given day, I am sure you will find something being painted at our house.

Paint is such an inexpensive way to add new life to furniture!


Just to illustrate my point, above are two pieces that I just did for our bedroom.
I loved the bones of these dressers, but hated the light pine color.
I painted these white, slightly distressed them, spray painted the hardware, and and then sealed them.
Isn’t it amazing how even a simple can of white paint can do so much for an old piece?

Create a Set with Paint

When you visit the store you may find that you can only find one or two of an item which can be a challenge when you are looking for multiples of something, like seating.

Consider painting all of the items in one color to create the illusion of a set that is both unique and whimsical.

I love this set of beautiful yellow chairs that were showcased on A Beautiful Mess as a perfect example of mismatched fun brought cohesively together with one paint color.


Try Painting Upholstery

Did you know that you can even paint an upholstered chair with fabric paint?

Over on Pinterest Addict you can see how Tulip Spray Paint can transform an upholstered chair.

Although this project cost $35 in supplies, the cost is far less than it would be to have the chair reupholstered and you can update the arms and legs of the chair with a couple of coats of fresh & shiny paint.

I absolutely love this fabulous teal chair and wish I could put it in my house!


Dip Them in Metallics

If there is one trend I am really loving it is the mix of metallics and the effect of paint dipped legs on chairs and tables.

Honeybear Lane shows how she combined these two trends and refreshed a pair of tired barstools into a thing of beauty with a bright raspberry paint & beautiful gold spray paint.

Those before pictures really show how much paint can bring an old or dated piece to life.

Try Stripping Your Furniture

Stripping furniture can be a time-consuming process, but worth it if you want that beautiful natural wood to pull through on a design.

Liz Marie shows off a beautiful piece (you must peek at her before pictures) that she wanted to create by painting just the outline of the dresser and leaving those drawers in their natural wood state.

The deep rich stain makes this a very show worthy piece!

Add an Embossed Detail

Stenciling is back and better than ever with modern and edgy designs.

Embossing is a technique that I have tried with paper crafts, but never knew that you could do the same thing on a piece of furniture.

As Tiny Sidekick illustrates in her embossing furniture tutorial, the trick is to keep moving that heat to help keep the paint job underneath intact.

I am so inspired by this that I can’t wait to give it a try in our house!


Try A Fresh Coat of Spray Paint

Spray painting furniture can be intimidating, but it doesn’t have to be.

The nice thing about spray paint is the quick coverage you can do with it and the distressing that can be done after so that you don’t have a one-dimensional finish.

I experimented with spray paint and a dark stain on a side table and loved the results. With a little distressing, no one would ever guess how you painted it.

Refresh Restyle shows you how to apply paint with a sprayer and then adds a little distressing to her dining chairs.

The speed of this project really appeals to me!


See the Potential in Everything

Sometimes it is hard to see the potential in pieces and we give them away or pass on them when we see them in the store.
This beautiful mid century modern dresser on Sunflower Hugs showcases a piece that had been kicked to the curb that she was able to make brand new again with a little paint and hardware updating.
Now this looks like a piece that you purchase from the West Elm catalog with just a little elbow-grease and a vision for what to do with something no one else wanted.
Love these paint ideas? Check out these other MomAdvice furniture projects:

How to Spray Paint Furniture


How to Paint a Kitchen Table

How To Paint a Kitchen Table


How to Paint a Laminate Fireplace

I hope that this article inspires you to start hunting for new pieces for your space and that you can begin seeing the potential in things you have never noticed before!

For more inspiration, sign up for the MomAdvice.com newsletter!

Pin It

Our Bathroom Makeover Reveal

Monday, March 9th, 2015

Bathroom Makeover Reveal from MomAdvice.com.

This post is sponsored on behalf of BHG at Walmart.

Spring is in the air and with it comes my urge to continue creating a beautiful space in our home that we will love for many years. Today I wanted to show off a space that we recently renovated and how we brought our ideas to life  in this space.  As part of the BHG Live Better Network, I am partnering with them this month to showcase how you can add a new color into your home utilizing the products from BHG that are available at Walmart.  For me, the color that we are working to add into our home happens to be gray and so this month’s feature is all about that beautiful hue and how I was able to accessorize my new space with their help. Before we accessorize though, let’s take a look at some before and after pictures of our space.

Bathroom Makeover Reveal from MomAdvice.com.

Bathroom Makeover Reveal from MomAdvice.com.

Bathroom Makeover Reveal from MomAdvice.com.

Bathroom Makeover Reveal from MomAdvice.com.

Here are a few before pictures of our basement bathroom that we planned to renovate. This was actually the first room that we did ourselves when we moved into our home eleven years ago. When we purchased the home the original room actually had about four layers of wallpaper on it that we attempted to remove and then discovered mildew had been residing between the layers making all of that drywall unusable. The previous owners had used it as a laundry room,  but it lacked the ventilation needed to keep mildew at bay. We had one of my husband’s uncles and his father help us rip all of the walls and put in new ones which was a really big job for these newbie homeowners. We were on a tight budget so we added sticky tile flooring and my husband added this wainscoting detail on the wall with a ledge. With a coat of paint, we were satisfied with this space.

As our kids get older (and the sticky tiles began to shift beneath our feet), I started dreaming about how we could transform this half bath into a full bath so that we could have two showers in our home instead of one. I have never had two showers in one space in my entire existence so entertaining this idea was, seriously, exciting for me. I began to put together my vision boards for this space. After all, if we can turn our old storage shed into the bonus room of my dreams, why couldn’t we do the same in this little space? If there is one thing I have learned about renovating our tri-level home, it is that every corner must be looked at with potential. Why shouldn’t this empty bathroom corner become a fully functional shower for our family?

My inspiration came from this photo on Houzz. After putting together a million idea for my husband, we sat down one night and both agreed that this is the style of the bathroom we wanted. The best part was that the Hilton Head Island Architects & Building Designers took the time to answer everyone’s questions about the materials that were used in this room. I jotted down some notes and took these ideas to All Pro Renovations to see if we could make something like this happen in our space.
Bathroom Makeover Reveal from MomAdvice.com.


Here were the original ideas that I wanted for this space. You will see that I rethought some of this (even frantic texts as close to midnight on the paint color). The initial ideas though of a ceiling with a 1×8 v-groove pine with fresh trim were painted in Benjamin Moore White Dove, the standard (3×6) subway tile on the walls, additional lighting was added, and the standard hex tile with a gray grout all ended up being implemented in our space.

To save on cost, we ended up just using a shower purchased from our local hardware store, ditched the sconce lighting (since we added additional lighting in our fan), and gave up the idea of raising the ceiling since it was going to be another $1,500 or so just to reroute some of the heating & ventilation that were all funneling through this room.

In an effort to interject a little color, I ended up painting the walls in Benjamin Moore Gray Owl which kept things fresh and modern, without looking unfinished or the fear of a dirty white walls and white flooring/tile.


Bathroom Makeover Reveal from MomAdvice.com.

Bathroom Makeover Reveal from MomAdvice.com.

Bathroom Makeover Reveal from MomAdvice.com.

Can you believe this corner was just sitting there unused and now houses a pretty generous stand-up shower? Although we had talked about making this a custom unit, I am so happy with this unit we purchased that was all ready to go from our hardware store.


Bathroom Makeover Reveal from MomAdvice.com.

Bathroom Makeover Reveal from MomAdvice.com.

Bathroom Makeover Reveal from MomAdvice.com.

Bathroom Makeover Reveal from MomAdvice.com.

Bathroom Makeover Reveal from MomAdvice.com.

How gorgeous is this new space? Would you ever guess that this is in the lower level of our home? Although the ceiling is slightly lower with the addition of the pine planks, you really don’t feel closed in due to the lines of the boards and the fresh white paint. We left our existing fixtures and lighting in, but did add a light that looked almost identical to our original that added a fan in the space. We had a medicine cabinet installed that helped add additional storage and also provided extra mirrors for getting ready in the morning.

Bathroom Makeover Reveal from MomAdvice.com.

Bathroom Makeover Reveal from MomAdvice.com.

Bathroom Makeover Reveal from MomAdvice.com.

Bathroom Makeover Reveal from MomAdvice.com.

Bathroom Makeover Reveal from MomAdvice.com.

To add more pops of gray and to organize our space, I headed to Walmart to snag some new additions to the space. These included some beautiful plush towels in gray flannel,  some modern chevron print towels for our hand towels,  new jars to organize the odds & ends in our storage unit, and the perfect cushy chevron bath mat for our feet. This brought more of the gray in and added those modern touches that I wanted for our space.

Bathroom Makeover Reveal from MomAdvice.com.

I’m so proud of our new space and love the fresh new colors that we are bringing in to our home! Thank you to All Pro Renovations for the beautiful workmanship they did in this space!


In accordance with the FTC Guidelines, I am disclosing that I received compensation from BHG at Walmart for my time and participation in the BHG Live Better Network. Although we have material connection to BHG, any publicly stated opinions of BHG and their products remain my own.


The Power of Living Small

Thursday, February 5th, 2015

The Power of Living Small from MomAdvice.com

Small space living comes with many challenges, but the rewards for a family on a budget are great. For a long time I considered our smaller home a temporary means to get us by until we could afford more.  As the years have gone by though, I have truly discovered the power of living in a smaller house and making the most of what we have been given. I can fully admit though, that it is all about our approach towards making our space our own, more than it is about the amount of square footage in our house.

Small space is all relative, of course, isn’t it? In full discretion, our home is 1,500 square feet for our family of four. While that may sound like a lot or a little, the space is made smaller and more challenging with a tri-level floor plan. If it was spread on one or two levels, I am sure it would feel much larger. I think it has been the floor plan that is more of a challenge than the square footage of our home. Regardless, spatial challenges have existed and we have learned a lot from working through them.

One thing that people remark on though is how our home doesn’t feel small at all and I recently had a visitor who said she was so impressed with how efficient our home was (world’s best compliment- by the way!). I attribute it to one part renovation, one part smarter selections for our home, and one part major clutter-busting. The investments that we have made have given us a new appreciation for our space and have helped us fall in love with this house.

Now if we moved, I know I would never be as happy as I am right here.

That’s a good feeling to have.

Regardless of your square footage though, I wanted to share with you a few ideas for learning to embrace the power of living in the space you are in right now. There is so much that I have learned over the years about making our home the best that we can and I wanted to share with you some ideas on how to make the most of the space you are in right now.

Transforming-Corners-In-Your-Home-15

Reconsider Your Furniture

Furniture can truly make a room feel larger or smaller depending on the size of it and the purpose it serves in your home. Our larger furniture that we purchased for our previous home was not well-suited for the home we had now, but replacing it was not a cost that we could really afford.

Instead, consider scaling back on the amount of furniture you have in your rooms. Do you truly use the side tables in your home? Is the coffee table really needed or would your space benefit from an ottoman that could serve as dual storage? Try removing pieces of furniture from the room and see if they make the flow of the space feel bigger.

The Power of Living Small from MomAdvice.com

When you do replace furniture, try buying items that could serve as a dual purpose or could maximize your smaller rooms. Our ottoman in our family room is the perfect place to tuck our record collection in our home, for example. One piece, but two functions to everything helps to make the most of the corners in our home.  The furniture, as we have begun to replace it, serves multipurposes like beds with bookcase and drawer storage.

Basement Before 2

Cut the Clutter in Half

The best part about living in a smaller space is that it has forced me to edit the belongings I have and has kept me from buying as much as I would in a larger space. If your home closets that are small, if you don’t have a basement, if there is no garage…than these situations can truly work for you as a way to keep your clutter naturally under control. Here is my spot where I like to throw things I don’t know what to do with- we all have ’em. I am a work in progress just like the next person, but I am proud to say that I have reduced our clutter by 50% this year thanks to a few new decluttering & minimizing challenges I have embraced.

Lately I have been trying to live my life by the infamous quote from William Morris, “Have nothing in your home that you do not know to be useful and believe to be beautiful.” If it is not bringing beauty or usefulness to my space, then I can feel good about passing those items on to someone else in need.  Suddenly, my kitchen counters feel spacious, the basement really does have a spot for everything in storage, and the house really does have enough space for us all. It’s all about perspective and investing in the things you really do want in life.

Consider making a weekly date with yourself to devote an hour towards improving one spot in your home that you struggle with. If it is a drawer that never opens, an office that is filled with useless papers, a basement that has become an avalanche of misplaced items, spend your hour making those spots in your home better. Make it a goal to cut the clutter in half in these spots to make them more livable and enjoyable.

The Power of Living Small from MomAdvice.com

Make Wise Renovation Investments

Once you cut the clutter in your home, you can begin dreaming of new ways to use that freed up space. Renovating your home can be costly, but it is not as costly as it is to buy a brand new home. The best part is that you can take your time with it and tackle one corner at a time, personalizing it to your own personal style. If there is a particular area in your home you want to improve, consider getting an estimate to make your space more livable. Many homes have unused corners and smaller spaces that could be improved upon to make the home more livable.

Our little house got a much needed renovation to make our space work for us for many years to come that has been one of the wisest investments we have ever made.  With one wall knocked out and putting unused basement storage to work, our home was renovated into a spacious family room and a quiet home office in the basement. Each year we tackle one project (at least) to make our home look and feel spacious and loved. We have updated our backyard shed into a useable bonus space, we did a beautiful stamped patio & firepit that could act as an extension to our indoor space outdoors, and we added little things like a fireplace in the office that cozy up the home, and knocked out walls to let the sunshine in through big open windows. As we speak, we are adding a shower to our little guest bathroom so that we can make this home a two bath house.

With a ’60’s home, there will always be projects, but I actually love the dreaming and scheming of making these spaces in our house uniquely us.

As my husband’s grandmother says when she visits us, “I love coming here because there is just always something new to look at!” That is probably a very true statement since we are always working on our little fixer-upper.

Begin really thinking about the space you are in and how you could make it work for your family. Look for guidance in home magazines or consider spending the money on having an architect coming to evaluate your home to draw up a plan for making more out of the space you are currently in. You may be surprised to discover how much more square footage you might have right where you already are.

Family-2014-1

Make Your Space Feel Permanent

If you look at your home as a temporary place until you find something better, you might be overlooking the chance to really make the space you are in work for your family. I found that when I finally told myself that this was my home (whether I liked it or not) and put the elbow grease into it, it transformed not only the space…but my attitude towards it.  As with all things in life, it is what you make it and I am choosing to make it the best that I truly can!

If you are living in a smaller home or apartment, just remember to consider your blessings. Not only do you have a mortgage or monthly payment that you can afford, but you have less of a home to clean, a natural way to edit the excess from your life, and more importantly….cozier quarters that force your family to always be together. What could be better for a family than that?

We have a sign hanging in our home that reads, “Small homes grow tight families.” It is truly my belief that  our little house fosters just the kinds of relationships that I want with the best people in my life.  I can continue to maximize the square footage on the existing space, but I love the togetherness that our smaller space brings.

How have you learned to embrace the space you are in right now?

Pin It

Declutter Your Space & Rid Your Life of Clutter Forever

Tuesday, February 3rd, 2015

How to Declutter Your Home from MomAdvice.com

This year I went on a journey towards being truly serious about decluttering our home of unnecessary items.

I would conservatively say that we have reduced our belongings easily by 50% and I still feel that there is more that we can do this year. Is your dream to declutter your space this year and rid yourself of clutter forever?

It is a common resolution and I am living proof that this is achievable, although I will always be a work in progress.

Today I want to share with you a few resources that have helped our family on the journey towards reclaiming our home – the transformation is so worth it!


Try the 40 Bags in 40 Days Challenge

I attribute the 40 Bags in 40 days Challenge as the kickstart towards decrapifying (that is totally a word!) our life.
Each year White House Black Shutters shares a 40 Bags in 40 Days Challenge that typically runs from March to April. During this challenge, you are encouraged to gather 40 bags of stuff that you don’t need over the course of 40 days.
I never dreamed that I could gather that many belongings from our home, but it started me on a journey towards realizing how much excess we really did have.
Each morning I started my day with a bag and tried to clear one spot in our house to create a more organized space.
I did not typically have a plan, only a desire to remove anything that I saw throughout the day that we didn’t need anymore.
As each bag was unloaded, it made our space a little less cluttered and a little easier to upkeep.
Utilize this list to help you begin tackling different areas in your home and download the free printable to track your progress as you unload the clutter from your home.
This is an example of a space that needed attention in our home that I worked on in the Spring.
With the 40 Bags in 40 Days Challenge encouragement, I was able to free our shed of unnecessary clutter and transformed it into a dreamy bonus room for our family.
Who would have ever thought that this cluttered and embarrassing space could have ever been an oasis right on our own property?
Perhaps there is an area in your own home like this that with a clutter unload could become a cozy space for your family?
Try this easy challenge to successfully achieve that goal!

Try Project 333: Experiments in Living With Less

Feeling inspired by my journey towards living with less, I began to turn my eye to my closet.
In full confession, I had a lot of clothing in my closet and not a lot of closet space to house it.
I started reading about fashion capsules and thought that minimizing my wardrobe while working on selecting key pieces that worked together would be a great way to continue my journey in decluttering our home of unnecessary items.
Have you heard of a capsule wardrobe before?
A capsule wardrobe is a collection of clothing which is designed using only interchangeable items, in order to maximize the number of outfits which can be created.
The aim is to have an outfit suitable for any occasion without owning excessive items of clothing.
This is usually achieved by buying what are considered to be “key” or “staple” items in coordinating colors.
Project 333 is what I am doing right now which is a minimalist approach to fashion that incorporates a 33-piece capsule wardrobe.
Participants can have 33 items in their closet that they wear for three months.
You are allowed to set aside 3 items that you can weave in as long as you weave items out, keeping the item number to just 33.
Although I have found the planning of my capsules to be a little stressful, once I execute them well, I have discovered that I have plenty of options in my closet to wear and actually get more compliments than I did when I had a closet that was overflowing.
You can view my current capsule as an inspiration for creating your own.
My best advice though is to really create your capsule around YOU and not a capsule that is just copying someone else’s style so you feel your best!

Try the A Bag a Day Challenge

You would think that after participating in the 40 Bags in 40 Days that our home would be completely clutter free.
I fully admit, I am a work in progress and that I still have a ways to go.
This year I am participating in the A Bag a Day Challenge from Inspired Room which is a 12-month decluttering plan to help you reclaim your home.
I like that this challenge isn’t focused on organizing, but simply on ridding the excess from your home.
With a beautiful outlined plan in place and the gentle encouragement of the beauty of Melissa’s stunning home, who wouldn’t want to rid their homes of the clutter?
Over the snowy holiday, I got rid of six bags of clutter and four bags of trash in our home.
It was so freeing to let these items go and reclaim corners in our little house. I loaded these up in the car and took them over to the Goodwill donation bin, conveniently just down our road, and knew that these items would be put to good use in their store.
I hope you will find this post encouraging and hearing feedback from family and friends about our clutter-free spaces makes me even more proud of the journey we have taken towards a life with less.
I hope these ideas inspire you to declutter your space and reclaim your home!  What are some of your favorite ways to declutter?
Leave your ideas in the comments below!
Don’t miss these other great ideas from MomAdvice.com:

My Year of Living Intentionally


Unexpected Blessings of Simple Living


Make the Most of your Capsule Wardrobe


Advice and tips for keeping a cleaner house

How I Learned to Keep a Cleaner House


Sign up for the MomAdvice newsletter

Pin It