Archive for the ‘Celebrations’ Category

Dressing Up Store-Bought Pies: Spiced Whipped Cream Recipe

Monday, November 19th, 2012

I remember when I thought that making whipped cream was a labor-intensive process. Ah, I have had so much to learn in the kitchen. Whipped cream is simply one of these easiest pie toppings to make and spicing up your whipped cream is an easy way to add a personal touch to a store-bought pie.

This spiced whipped cream recipe will bring an extra layer of spice to your pies that your guests will absolutely love. The best part is that this easy spiced whipped cream topping can be created in under 5 minutes and with a couple of items you probably already have lurking in your pantry.

In a perfect world we would all be making handmade pumpkin pies made with homemade crusts. I thoroughly love baking, but I also know that it isn’t for everyone. For those of my friends who prefer to put their love in other elements of the holiday, I am going to show some easy ways to spice up those store-bought pies that will take those pies to another level.

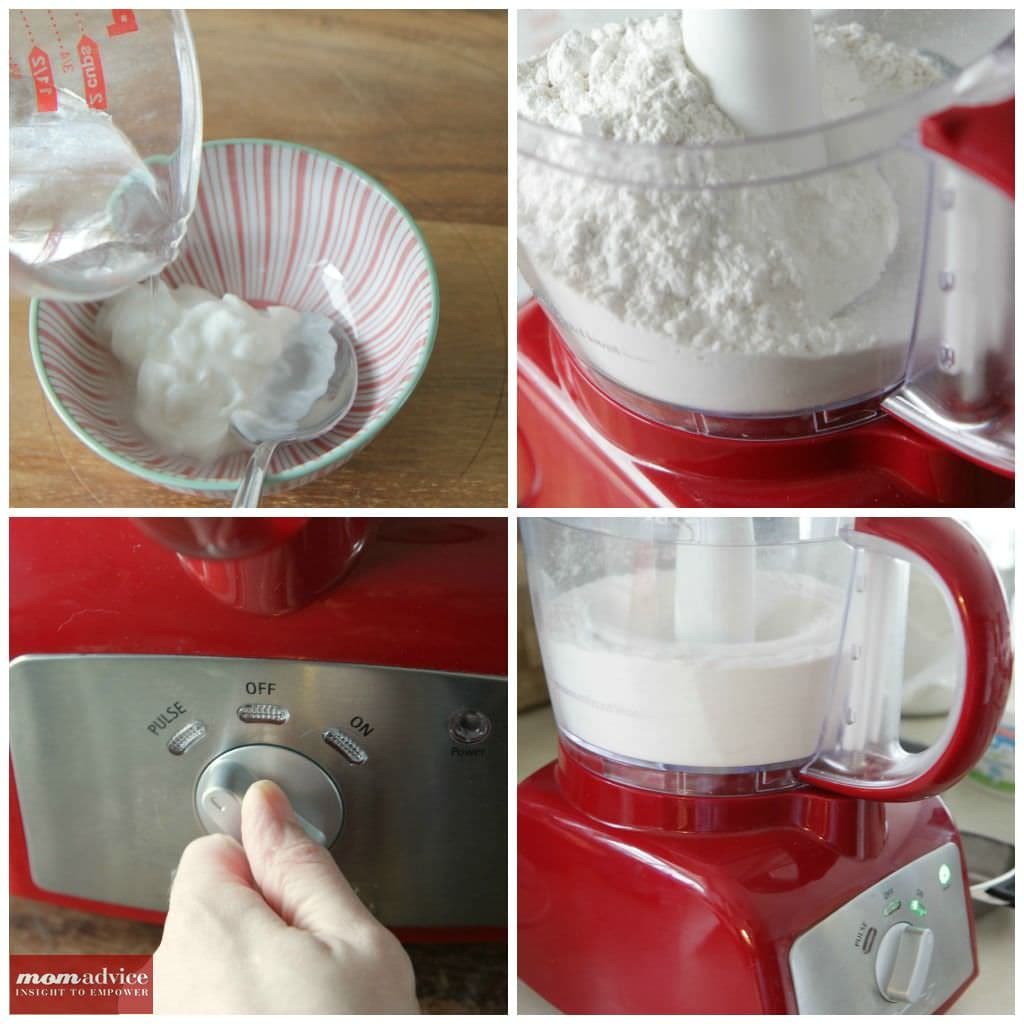
Before I became acquainted with the kitchen, I really thought whipped cream was just Cool Whip and homemade whipped cream was a powder that you added water to that made whipped cream.

I really did.

Yes.

I.

Did.

Of course, I know a few more things than I did 10 years ago, but it still makes me giggle to know how detached I was from the culinary world. Whipped cream is actually just heavy whipping cream, whipped until it forms peaks and you can add your own spin on sweeteners, spices, and extracts to create your own unique combination of sweet and spicy. It’s perhaps the simplest and most satisfying of pie toppings.

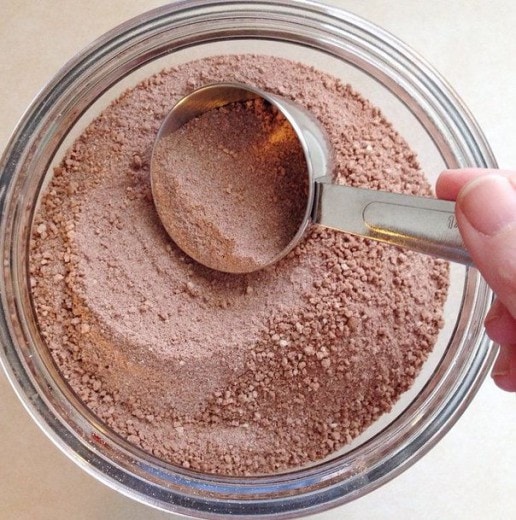
This Spiced Whipped Cream gets its hint of spices from ground cinnamon, ground ginger, and a little sugar. It is the perfect accompaniment to your pumpkin or pecan pies for the holidays.

Tomorrow I will share with you one other fun topping to try on your pies along with some fun ideas for entertaining the kids! 

Spiced Whipped Cream
Author: Epicurious.com
Prep time: 5 mins
Total time: 5 mins
Serves: 4
Spice up your store-bought pies with this easy Spiced Whipped Cream topping!
Ingredients
  • 3/4 cup chilled whipping cream
  • 2 tablespoons sugar
  • 1/2 teaspoon cinnamon
  • 1/4 teaspoon ginger
Instructions
  1. Beat whipping cream, sugar, 1/2 teaspoon cinnamon, and 1/4 teaspoon ginger in bowl until peaks form. Spoon on top of slices of pie.


Pin It

Homemade Pumpkin Pie

Tuesday, November 13th, 2012

If there is one thing that simply screams Thanksgiving to me, it is the humble pumpkin pie. Today I wanted to share with you my recipe for the best homemade pumpkin pie that can round out your Thanksgiving feasting for the holidays. Not only will I be sharing my recipe for this pie, but I also wanted to share with you some fun tools to add to your baking arsenal.

The first pie I ever made was a Pumpkin Pie. With the ease of canned pumpkin and a few other simple ingredients in my pantry and fridge, it was one of the easiest pies to create and gave me confidence in the kitchen. The crust may have been store-bought and the filling was simple and straightforward, but I truly felt like a rock star in my very own kitchen.

Everyone has their own unique spin on this simple recipe, and today I wanted to share with you a filling that is rich on flavor that is unlike any pumpkin pie I have ever eaten. The richness comes from the well-blended cooked filling,the dark brown sugar, and the delicious combination of spices.


Good tools for pie making certainly make the job more fun and just as I shared with you the fun Thanksgiving centerpiece and table I was able to create through my partnership with Pure Charity, today I am making a beautiful dessert for the holidays using tools purchased through the Pure Charity.

If you have been a longtime reader to our site, you know how important giving back to other is to me. Whether it is the giving done in small ways like “found items,” around our home, to the giving of your talents to those in need, to the bigger projects where you gather your community and really feel like you make a difference.

Shopping through Pure Charity is one of those smaller things you can do that is as effortless as those donations of found items around your home. Holiday shopping will be happening for us over the next couple of months, why not make it shopping AND giving to those who need your support in the process? That sounds like  a win-win!

What is Pure Charity?

Pure Charity is a simple, but awesome concept for giving back to those causes you care most about. Basically, you install a simple toolbar into your web browser and then it alerts you with a small banner at the top when a store you are shopping with has a partnership with Pure Charity. Click on that little button and you are making a percentage deposit into your Giving Fund. Your Giving Fund can then be applied to the charities that are important to you and that you have a desire to support.

Pure Charity asked me to show everyone what could be done via their partners and gave me a small budget to get started. Last week I shared ideas for setting the perfect Thanksgiving table, today I am sharing my delicious Pumpkin Pie recipe, and next week I will showcase some fun ideas for keeping the kids entertained. All supplies were ordered through their partner sites and I have created a Giving Fund for the charities that are most important to our family.
I can honestly say that I have never made a pie from scratch so this was not only a challenge for me, but reminded me that I still have so much to learn in the kitchen. This week I have several fun recipes as we enter the holiday entertaining season and I can’t wait to share them with you!

I found gorgeous pie cutters, brushes, pastry wheels, cookie sheets, and an elegant pie server from Williams Sonoma. My pie dishes are already receiving rave reviews and were just a mere $13 from the Paula Deen collection from Walmart.

What is dessert without a little wine? I have a desire to look fancy, but don’t always have the fund to really pay for the fancy in my life. One trick that I love to do when entertaining is to disguise boxed wine or less expensive bottles of wine in an elegant wine carafe. These stemless wine glasses (both red and white) plus my wine carafe makes entertaining look elegant while not spending a lot of money. I found these over at Walmart through Pure Charity.

Did you know you can even order a turkey or ham for your holiday entertaining through their partnership with Omaha Steaks? If that doesn’t scream stress-free entertaining than I don’t know what does? I may have ordered one for myself this year..Hey, it’s for charity! 

With all of the items I bought to prepare my beautiful pie and serve my wine elegantly, the true bonus was that I was able to put an additional $7.69 towards my Giving Fund! 

Head on over and create your own account with Pure Charity and find a cause that is important to you to give back to when doing your holiday shopping this year!

Today I am sharing my new favorite Pumpkin Pie recipe with you! Once you try this pumpkin pie, you will quickly discover why it is my new favorite pie recipe. Be sure to visit this week’s All Butter Pie Crust tutorial that can be prepared in your handy food processor! Happy baking, everyone!

Homemade Pumpkin Pie
Recipe Type: Dessert
Author: America’s Test Kitchen Baking Cookbook
Prep time: 15 mins
Cook time: 25 mins
Total time: 40 mins
Serves: 8
Processing the canned pumpkin yields a smooth and creamy pie texture and cooking the canned pumpkin in the spices & sugar helps take away from the canned pumpkin taste without hassling with fresh pumpkin.
Ingredients
  • 1 recipe for a single-crust pie dough (Be sure to check the link for the All Butter Pie Crust)
  • 1 (15 ounce) can pumpkin puree
  • 1 cup (7 ounces) dark brown sugar
  • 2 teaspoons ginger
  • 2 teaspoons ground cinnamon
  • 1/2 teaspoon ground nutmeg
  • 1/2 teaspoon salt
  • 1/4 teaspoon ground cloves
  • 2/3 cup heavy cream
  • 2/3 cup whole milk
  • 4 large eggs
Instructions
  1. Follow the steps given for the All Butter Pie Crust. Line your chilled crust with a double layer of foil and fill with pie weights (or dried beans). Bake until the pie dough looks dry and is light in color 25-30 minutes.
  2. Increase the oven temperature to 400 degrees.
  3. For filling (while the crust is baking since you want the crust to still be warm when you add the filling), process the pumpkin puree, brown sugar, ginger, cinnamon, nutmeg, salt, and cloves together in a food processor until combined, about 1 minute.
  4. Transfer the mixture to a saucepan and simmer over medium-high heat, stirring constantly, until thick and shiny, about 5 minutes.
  5. Whisk in the cream and milk, return to a simmer briefly, then remove from the heat.
  6. Process the eggs in a food processor until uniform, about five seconds. With the machine running, add about half the hot pumpkin mixture in the feed tube. Stop the machine, add the remaining pumpkin and continue processing until smooth (about 30 seconds)
  7. Immediately pour the warm filling in the warm crust. Bake the pie until the filling is puffed and lightly cracked around the edges and the center jiggles slightly when shaken, about 25 minutes.
  8. Let the pie cool on a wire rack until the filling has set, about two hours. Serve warm or a at room temperature.
  9. To make Pumpkin Pie Ahead- Make your pie dough ahead of time. Once baked and cooled, the pie can be covered loosely with plastic wrap and refrigerated for up to one day. Let the pie come to room temperature before serving or, to serve warm, reheat the pie in a 300 degree oven for about 15 minutes.


Pin It

All-Butter Pie Crust Recipe With Picture Tutorial

Monday, November 12th, 2012

There is nothing like a homemade all-butter pie crust for your pies. Today I wanted to share with you an easy recipe for preparing an all butter pie crust that you can use creating your food processor. I am providing an, “easy as pie,” picture tutorial for pie crust creating and tomorrow I will share my recipe for an absolutely perfect pumpkin pie for your Thanksgiving feasting.

This recipe will yield a double crust which is perfect for those delicious apple pies or you can use your second crust, as shown below, to create cute decorative edges with little pie cutters. I like to call these decorative edges “concealer for the imperfect.”  Let’s be honest, baking isn’t my strongest skill so a girl has to become a whiz at hiding those imperfections. I might do this in a few other areas of my life too…*ahem*.

When it comes to baking, I heavily rely upon my America’s Test Kitchen Family Baking Book. The recipes are reliable and provide consistently great baked goods for our family. I only checked the book out 24 times before I got it for a holiday gift. It really is that good.

Why Sour Cream?

According to the cookbook, the tiny amount of sour cream you add to this dough makes the dough a little easier to work with, more flavorful, and tender. The acid in the sour cream helps to slow down the gluten development which makes for a more tender and flaky crust. Since they probably tested a hundred pie dough recipes to come to these dramatic conclusions, I will take them at face value.

The crust is everything a crust should be- flaky, buttery, crisp, and light. Best of all, it’s easy to roll and comes together in your handy food processor. It really is the perfect crust and I hope these pictures and the recipe will help you with your own pie crust making for the holidays.

How Do You Blind Bake a Pie Crust?

There is nothing worse than a mushy crust on a pie. There is really no sense in going to all of the trouble of making a great crust, if it isn’t cooked correctly.  To blind bake the crust, simply line the crust with a double layer of tin foil and fill it with pie weights. You can buy pie weights, use pennies, or use a bag of dried beans (as I have shown above).   If you use the beans, place them in a zippered bag and label your bag that these are pie weights so you don’t accidentally use them in your recipes.

Bake until the pie dough looks dry and is light in color, 25-30 minutes. Transfer the pie plate to a wire rack and remove the weights and foil.

All-Butter Pie Crust Recipe
Recipe Type: Dessert
Author: America’s Test Kitchen Family Baking Book
Prep time: 15 mins
Cook time: 30 mins
Total time: 45 mins
Serves: 8
“Easy as pie,” pie crust made using all butter and a little secret help from a few tablespoons of sour cream. This dough is a dream to work with and yields a wonderfully flavored and tender crust.
Ingredients
  • 1/3 cup ice water, plus extra as needed
  • 3 tablespoons sour cream
  • 2 1/2 cups all-purpose flour
  • 1 tablespoon sugar
  • 1 teaspoon salt
  • 16 tablespoons (2 sticks) unsalted butter, cut into 1/4 inch pieces and frozen for ten to fifteen minutes
Instructions
  1. Mix 1/3 cup of the ice water and sour cream together in a small bowl until combined.
  2. Process the flour, sugar, and salt together in a food processor until combined.
  3. Scatter the butter pieces over the top and pulse the mixture until the butter is the size of large peas (about ten pulses).
  4. Pour half the sour cream mixture over the flour mixture and pulse until incorporated, about three pulses. Repeat with the remaining sour cream mixture. Pinch the dough with your fingers; if the dough feels dry and doesn’t hold together, sprinkle 1 to 2 tablespoons more ice water over the mixture and pulse just until the dough forms large clumps and no dry flour remains (3-5 pulses).
  5. Divide the dough into 2 even pieces. Turn each piece of dough onto a sheet of plastic wrap and flatten each into a disk. Wrap each piece tightly in plastic wrap and refrigerate for 1 hour. Before rolling the dough out, let it sit on the counter to soften slightly, about ten minutes.
  6. When you are ready to bake it, preheat your oven to 375 degrees. Line the crust with a double layer of tin foil and fill it with pie weights. Bake until the pie dough looks dry and is light in color, 25-30 minutes. Transfer the pie plate to a wire rack and remove the weights and foil.


See you tomorrow with a delicious recipe for Pumpkin Pie that you won’t want to miss! Of course, you can follow all of my shenanigans in the kitchen on Instagram (follow me here). I am quite addicted and love new friends! Be sure to also check out my 7 easy Make-Ahead Thanksgiving Appetizer Recipes and Make-Ahead Thanksgiving Side Dish Recipes (even those mashed potatoes!) Stay tuned for more posts on my pumpkin pie and some fun ways to fancy up those store-bought pies!

Disclosure: The cooking supplies  are an affiliate link and are provided so you can locate what you need quickly and easily!

Pin It

How to Set the Perfect Thanksgiving Table

Tuesday, November 6th, 2012

Setting a great Thanksgiving table is something anyone can do with the right tools in their entertaining supplies, a few new additions, and a little bit of thriftiness. Today’s perfect Thanksgiving tables is particularly important to me because today I am sharing with you a way that you can make your table and earn money for your favorite charities in the process.

This month I am partnering with Pure Charity to share about their incredible mission to give back to charities through the holiday shopping that you already happening to be doing. 

What is Pure Charity?

Pure Charity is a simple, but awesome concept for giving back to those causes you care most about. Basically, you install a simple toolbar into your web browser and then it alerts you with a small banner at the top when a store you are shopping with has a partnership with Pure Charity. Click on that little button and you are making a percentage deposit into your Giving Fund. Your Giving Fund can then be applied to the charities that are important to you and that you have a desire to support.

Pure Charity asked me to show everyone what could be done via their partners and gave me a small budget to get started. This month I am sharing ideas for setting the perfect Thanksgiving table, to sharing Thanksgiving recipes with you, and showcasing some fun ideas for keeping the kids entertained. All supplies were ordered through their partners and I have created a Giving Fund for the charities that are most important to our family. At the end of this series, I will share with you just how much I was able to earn through this spending.

How to Set the Perfect Thanksgiving Table

Mix Texture and Color Into Your Basics- I have always had a fondness for my white dishes simply because they match everything that you want to layer on top of them.  (West Elm Napkins)

Spice up your basics with a bold colored napkin in a fresh autumn shade. I love to mix texture in by tying napkins off with scraps of burlap instead of buying napkin holders. If you don’t have any burlap, a piece of twine or yarn would be just as lovely. 

Mix in One New Element to the Tableware- In a perfect world, we would have loads of storage and dishes for every season. Most families just don’t have this type of limitless space in their kitchen. Instead of buying new dishes for each holiday, focus on adding one new element each year to the existing pieces you already have.

My white dinnerware is perfectly paired with these elegant Thanksgiving dessert plates (West Elm Dessert Plates) as a nod to the season and they take up far less room than an entire set of dishes.

Have Your Kids Create the Centerpiece- My kids love helping me in the kitchen and one way they can assist with the Thanksgiving table is to help create the centerpiece.

I have been dying to have a chalkboard in my kitchen and using this as a centerpiece for our table was the perfect excuse for the purchase. Center this chalkboard (Pottery Barn Small Chalkboard) on your table and then give your kids the assignment to fill this with all of the things that they are thankful for.

Once Thanksgiving is over, this will be proudly hanging in our kitchen for all of our family announcements!

Decorate With Nature- Right now there might not be a lot blooming, but if your yard is anything like ours, there are plenty of rustic and beautiful elements that could be added to your table.

I pruned one of my flowering bushes and used the clippings as a filler for three vases.  (West Elm Vases). I love how these branches add dimension to my table and skip the expensive vase fillers.

Add Your Own Personal Touch- Everyone has their own personal touch that they can add to their centerpieces. For you, it might be your mad spray painting skills. For me, it is the ability to knit yarn into leaves and flowers. It might not sound like a very useful skill, but it certainly helps when it comes to fall centerpieces. I relied upon this knitted leaf pattern and these easy garter stitch flowers for knitted embellishments to my sticks.  It will take me awhile to knit all of this, but I promise to share more once it is done!

My husband may or may not have made fun of me when I said the branches needed “whimsical leaves,” but even he agreed that they looked pretty sweet once I finished this project.

After these purchases to dress up my Thanksgiving table, I was able to bank $7.22 in my Giving Fund for my favorite charities through Pure Charity

I hope you love these ideas for setting the perfect Thanksgiving table and I look forward to sharing more about my partnership with Pure Charity in the coming weeks.

I am working with Pure Charity, and Pure Charity has provided me with compensation for these posts. My participation is voluntary and opinions are always my own.

Pin It

Fun Halloween Costume Ideas For the Whole Family

Tuesday, October 30th, 2012


We are looking forward to another fun Halloween! I wanted to show you our Halloween costumes this year. Outfitting the whole family in costumes can be a challenge, but we tend to embrace it with a lot of enthusiasm.

Emily’s masquerade ballroom gown has to be one of my favorite costumes we have ever gotten her. I found it at Marshall’s for $24.99. I hate spending more than $20 on a costume, but this is one she is planning to use for dress-up play and it is so beautifully made that I am sure we will find many uses for this elegant dress (complete with a hoop skirt, cameo necklace and little masquerade mask).

We found Ethan’s knight costume inexpensively online and I was excited that their requests coordinated this year. Of course, we always manage to make it coordinate for photos, even if it doesn’t always really work!


For a couple that doesn’t really watch a lot of television, we embraced the television themes this year with our costumes. Our favorite show happens to be, “Glee.” I might be alone in this one, but I can’t get enough of that show!  For our couple costume this year, we gleeked it out with a Glee cheerleader costume for me and my husband pulled off the Coach Sue Sylvester costume far better than I could ever imagine.

We partied it up in these hilarious costumes and every time I saw this man out of the corner of my eye, it put me in a fit of giggles. Of course, following this year’s rocking costume party, we were already brainstorming what we would wear next year.

I was able to find these costumes on clearance for $10 each. My best friend altered the costume a bit for me (because one size does NOT fit all). What a rock star best friend to sew my cheap polyester costume for me!


Our Bunco theme this month was also Halloween themed so my best friend and I schemed a costume from our other favorite show, “New Girl,” I have a serious girl crush on Zooey and her character, “Jess,” on this show. For this costume, I just raided my own little retro wardrobe, threw on my nerdy glasses, curled my hair and slipped on a pair of ballet flats. I had the picture frame in my craft supplies and use that like she does in the intro of the show.

Becky went as Cece, Jess’ supermodel bestie  on the show.  Of course she just straightened her hair and wore her most awesome model clothes from her own wardrobe with a killer pair of heels.

You have to love a costume you can create from found items in your closet.

Looking for more last minute Halloween costume inspiration? Be sure to visit my Scary Deals on Halloween Costumes and our easy DIY Halloween Costume round-up with eight great costumes for the whole family. Happy Halloween!

Pin It

Snickerdoodle Cupcakes

Monday, October 29th, 2012

Sometimes old recipes bear a little repeating on MomAdvice. These Snickerdoodle Cupcakes are the type of recipe that deserves its honor on our site over and over again. These Snickerdoodle cupcakes taste just like a fresh baked snickerdoodle cookie and are made from a simple cake mix. If the taste of the snickerdoodle cake isn’t enough for you, these Snickerdoodle Cupcakes are topped with a delicious cinnamon buttercream frosting to round out the cinnamon flavor!

If you haven’t tried this recipe for Snickerdoodle Cupcakes, you must try them because they are the most delicious cupcakes ever. It earns its top spot in my most requested cake category in our family and happens to be my own personal favorite too.  These easy cupcakes are made from a cake mix (you can use white or yellow cake mix) with the addition of a few pantry ingredients that takes the cake to another level.

Struggling with frosting decorating? The best arsenal I have in my cake decorating tools is the Wilton 2D tip. It only costs a few dollars and can make your cakes look professional with just one swirl with this tip.  Start at the edge and swirl towards the center for cupcakes that look like the ones above or swirl from the center to the outside for a simple rose effect. I like to  leave the cinnamon cake edges peeking out of the sides so people can see the brown cinnamon color on these. This sweet and simple swirl is all you need to make these cupcakes look professional and still offer the beauty of a homemade treat.

I hope you can give this recipe a spin! Snickerdoodle Cupcakes are the perfect way to celebrate the big or small things in life! Serve them up plain or add an adorable handmade cupcake topper for any of your holiday occasions!

Snickerdoodle Cupcakes
Recipe Type: Dessert
Author: Adapted from The Cake Mix Doctor Cookbook
Prep time: 5 mins
Cook time: 22 mins
Total time: 27 mins
Serves: 16
Snickerdoodle cupcakes are an easy semi-homemade treat you can make for all of life’s occasions. The best part is they taste just like a fresh baked snickerdoodle cookie.
Ingredients
  • 1 package plain white cake mix or yellow cake mix
  • 1 cup whole milk (I used skim milk and it still tasted delicious)
  • 1 stick of butter, melted
  • 3 large eggs
  • 1 teaspoon vanilla extract
  • 2 teaspoons ground cinnamon
  • Frosting:
  • 1 stick butter
  • 3 3/4 cup confectioners sugar
  • 3-4 Tablespoons milk
  • 1 teaspoon vanilla extract
  • 1 Tablespoon ground cinnamon
Instructions
  1. Preheat oven to 350 degrees and flour & grease or line your cupcake tin.
  2. Place cake mix, milk, melted butter, eggs, vanilla, and cinnamon in a large mixing bowl. Blend for three minutes (stop to scrape once).
  3. Using an ice cream scoop, scoop batter into your cupcake tin and then bake for 22-25 minutes.
  4. Allow the cupcakes to cool completely.
  5. For the frosting, beat butter until fluffy.
  6. Add all other ingredients.

Recipe adapted from The Cake Mix Doctor Cookbook.

Pin It

Easy DIY Halloween Costumes

Friday, October 19th, 2012

Stumped for Halloween costumes ideas this year?

It’s only a couple of short weeks until Halloween, but if you haven’t found a costume yet, have no fear!

Today I want to showcase eight easy DIY Halloween Costumes you can create using items found at Goodwill.

Last year, Americans spent 7 billion dollars on Halloween related expenses!

What was once a time to grab a sheet and be a ghost or peek around your house for easy costumes made from your mom or dad’s wardrobe has escalated into a spending frenzy of decorating, costuming, and trick-or-treat candy madness.

This list of easy DIY Halloween Costumes will hopefully help you gather some great ideas for throwing together a great last minute costume and save you money in the process.


Book Fairy Costume

A couple of hardback books from a local thrift store or garage sale can create a unique and adorable book fairy costume.

Using a hot glue gun, book pages, and the covers of the books to create your fairy wings you can create an entire costume from simply rolling paper for an adorable skirt!

You will love this one (via Lilliedale)


Mary Poppins & Bert Couple Costume

Couple costumes can be challenging, but with few things from your closet, it can be easy to create your look for less.

My husband & I created this costume for less than $20 and absolutely had a blast putting it together. (via MomAdvice)


Homemade Redbox Costume

I had to laugh at this adorable Redbox costume that this family created!

The Redbox costume was created using spray paint, a box, and snagging some of the Redbox images from Google.

I absolutely love this idea and it cost the family less than $5 to create.

The best part is that the whole family can jump in on the creating (Coolest Homemade Costumes)


Baby Cabbage Patch Doll

Looking for a costume that can work around pushing your baby in a stroller?

This Cabbage Patch Doll costume is simply genius and wouldn’t cost a lot to create.

Grab a green fitted sheet to cover your stroller, create the Cabbage Patch box, and then cover your baby in yarn pigtails. (Via Costume Works)


Will Work 4 Candy Costume

The best part about the, “Will Work 4 Candy Costume,” is that you need not buy any supplies at all to create this look.

Paint a beard on your child’s face, dress them in their most tired looking play clothes, mismatch their shoes, and add a cardboard sign from your recycle bin. (via Coolest Homemade Costumes)


Paper Doll Costume

Short on funds for Halloween costumes this year?

This paper doll costume can be created for about $1 using poster board or foam core.

Add your daughter’s laciest socks and a pair of Mary Jane shoes and you have a real-life paper doll to trick-or-treat with.

What little girl wouldn’t love that?  (via slapdashmom)


Baby Aerobics Instructor Costume

Holy cuteness!

This baby aerobics instructor outfit looks like an easy DIY to put together and I promise, it will be a memorable costume.

Create a baby headband from an old t-shirt, cut the bottoms off of a pair of socks to create baby leggings, and use your baby’s onesie and leggings to complete the look.

This mom created an adorable boombox out of felt to complete the look.  (via Primary)


Child’s Superman Costume

Leading a double life can be tough, but it doesn’t need to be expensive.

Grab a tie, shirt, and heavy glasses for Clark Kent, and dress him in a Superman shirt underneath.

This costume is adorable and affordable!


What is the best DIY Halloween costume you have created? Feel free to share your links and ideas below!


This post contains affiliate links.


Don’t miss these other great ideas from MomAdvice.com:


The Best of Fall, Halloween & Thanksgiving-49 Ideas for Decor, Crafts, Recipes, Costumes & More

The Best of Fall, Halloween and Thanksgiving


DIY Thumbtack Pumpkins


Minecraft Costume Ideas


Delicious Drink Mixes: Hot Cocoa and Vanilla Chai 


Sign up for the MomAdvice newsletter


Pin It

Preparing for the Holidays

Thursday, October 18th, 2012

Photo Credit: Nancy Lary Studios

Preparing for the holidays can be a stressful time for families Planning ahead and breaking the preparation down into manageable steps is key to holiday survival.

This year I will be hosting our family’s Thanksgiving, launching a book, celebrating my daughter’s birthday, celebrating Christmas with two sides of the family, and trying to ring in the New Year. Am I scared? You bet!  Just the very thought of all this could make me break into a sweat and cause me to want to throw the covers back over my head until this is all over. I am already working on my timeline to still have a wonderful holiday and accomplish all I need to and I wanted to share it with you.


This week I am sharing my timeline for preparing for the holiday season over on the Kenmore blog! I am offering an easy timeline to help you get things done and actually enjoy your holidays this year!

Head on over to check out my ideas for accomplishing that holiday to-do list! I hope you’ll join me over there!

How to Make a Duct Tape Pumpkin

Sunday, October 14th, 2012

Carving pumpkins isn’t for everyone and I am so excited to share with you this easy craft for a duct tape pumpkin that you can pull out year after year. You may have never even noticed the patterned duct tape lurking in the craft aisles, but this is one easy & inexpensive craft material with endless possibilities for a customized duct tape pumpkin that can match any room in your home.

Supplies Needed:

1 craft pumpkin

1 roll of patterned duct tape (Duck Brand)- available in the craft section of Walmart

1 roll of solid colored duct tape (Duck Brand)- available in the craft section of Walmart

Hot glue gun & glue sticks

Scissors

To create your chevron pumpkin base:

1. Twist off the pumpkin stem to create an even surface on top for covering your pumpkin with tape.

2. Pull a strip of duct tape off the roll that will cover the entire pumpkin. Attach it to the pumpkin, doing your best to try not to wrinkle it.

3. Continue covering the pumpkin until it is fully covered with the duct tape, doing the best you can to line up the patterns. If you have wrinkles, overlap the duct tape to cover any minor flaws.

4. Place a dab of hot glue on the top and reattach your pumpkin stem, holding it  in place for a couple of minutes to secure it.

To create duct tape rosettes for the top of your pumpkin, you will need to do the following:

1. Measure a 10″ strip of your solid-colored duct tape and cut it off the spool.

2. Fold the duct tape in half (sticky sides in), doing your best to line the tape up evenly. If you don’t get the tape perfectly even, just trim the edge until you don’t see the white anymore.

3. Twist the tape to create a tight center to the rosette.

4. Begin twisting your tape as tightly or as loosely as you would like to create your rosette. Add a dab of hot glue periodically between the twists to secure it all together.

5. Once you have finished your rosette, add a dab of hot glue to the bottom and secure it to the top to create a rosette “leaf.”

6. Repeat this process again and create one more rosette. Secure the second rosette next to or slightly overlapping the first rosette to add your second rosette “leaf.”

Create your own pumpkin with your family and you could win $1,000 in the Stick or Treat Duck Brand Jack O’ Lantern Contest. The company offers over 100 colors, prints and licensed prints such as Hello Kitty and each roll of tape retails for $3.37 at Walmart stores!

Looking for more pumpkin crafts? Be sure to check out my tutorial for my Painted Address Pumpkin Topiary and Decoupaged Pumpkins that you can do with more of these fun faux pumpkins!


I am a part of the Walmart Moms program, and Walmart has provided me with compensation for these posts. My participation is voluntary and opinions are always my own.


Pin It

Easy Cupcake Photo Picks

Friday, October 5th, 2012

Halloween is drawing near and along with all of the costume fun comes many opportunities to share treats at school and fun parties. Today I wanted to show you a fun and easy way to dress up a cupcake with your very own personalized photo pick. This craft could not be easier or more cute for dressing up a homemade cupcake or a store-bought one (Shhh…I’ll never tell!)

Begin by going through your Halloween pictures and selecting a favorite one of your children. You could also get a jumpstart on Halloween pictures and have your children dress up in costume and take a picture in their new costume. If your children are anything like mine, they will be more than happy to oblige and get the opportunity to wear their costumes just one more time.

This is a favorite picture of mine from last year of my two goblins.  We decided to stage a Ninja attack on our little princess for some hilarious photos opportunities for Halloween.  This picture still makes me laugh!

Head on over to the Walmart photo site and upload your favorite Halloween photo to your photo account (you can create a new one if you don’t have one). Next just click here to create your own photo sticker sheet. Select CUSTOMIZE, select your album & then your picture, click the MORE tab, and then click MORE STYLES. Under that you will see all of the cute Halloween backgrounds to customize your photo sticker. You can leave them plain or you can add a cute font and message with your sticker.

Once you have created your sticker, you can have them shipped directly to you or pick them up at your store in 2-3 business days.

To create a cupcake photo pick, you will just need your sheet of photo stickers and a package of popsicle sticks (available in the craft supplies at Walmart)

  1. Grab one popsicle stick.
  2. Peel one sticker from your sticker sheet and stick it to your popsicle stick, carefully centering it.
  3. Peel another sticker off your sticker sheet and stick it to the flipside of your popsicle stick, lining the sticker up carefully with the other sticker.
  4. Stick your photo pick into the top of your cupcake.

Aren’t these so cute? I love that this is a craft that anyone can do and that can add a very special and personal touch to your Halloween treats this year.

Happy Halloween, friends!


I am a part of the Walmart Moms program, and Walmart has provided me with compensation for these posts. My participation is voluntary and opinions are always my own.

Pin It