Archive for the ‘Blogging’ Category

DIY Knitted Boot Cuffs With Hazel & Ruby

Wednesday, November 4th, 2015

DIY Knitted Boot Cuffs from MomAdvice.com

Friends, I could not be more excited today to share with you my Knitted Boot Cuff Kit that I have created with Hazel & Ruby for their Holiday Crafternoon line that is available in Jo-Ann Fabric & Craft stores nationwide. It was such a great challenge for me as a crafter to design a kit like this and I have learned so much (and have a new appreciation for) about how people create these kits for the stores.

DIY Knitted Boot Cuffs from MomAdvice.com

What is Crafternoon?


The purpose of these kits is to be able to create a great gift in an afternoon for the holidays. In this kit, we have lovingly prepared everything you need to create a beautiful set of boot cuffs from lace to yarn to buttons. Instead of you spending time hunting down patterns, materials, or trying to muddle through a pattern alone, Crafternoon puts it all together to you in one easy-to-use package! Check out the video above to see what the fuss is all about!

Why I Know You Will Love This Kit

The thing that I believe really sells this kit though is a set of bamboo needles that you can use over and over again for knitting small projects in the round without the need for double-pointed needles. This particular set is typically not available in most craft and yarn stores. In fact, I have had to order my sets overseas and they cost about the price of this entire kit once I factored in shipping and the expense of the needles. This set includes my favorite needles and once you have them, you can use this pattern over and over again, adding your own unique and beautiful details to these cuffs.

DIY Knitted Boot Cuffs from MomAdvice.com

Will This Pattern Challenge Me?

I really hope so! I didn’t want to just a simple knitted pattern, although you can definitely do that with the materials provided too. I wanted to create a pattern that would help you learn a little bit of the lace technique (without that super thin yarn!), but that there are enough basic stitches that you could zone out a bit with a Netflix binge and just enough that will hold your interest and create beauty within the cuff.

DIY Knitted Boot Cuffs from MomAdvice.com

If you have never knit in the round before, these needles make it possible.  Crystal, from Money Saving Mom, shared on her Instagram feed her pride of knitting in the round for the first time thanks to this little kit. I couldn’t have been prouder of her and I know that you can do it too!

The kit not only includes step-by-step instructions, but you can also access a video where I walk you through every step of the way through this process and be accessed with the QR code on the back of your packaging or you can just watch it above! Doesn’t it feel like we are crafting together?

Amy Allen Clark from MomAdvice.com

Now hurry up and order a kit so we can knit together or order one for a holiday gift for a favorite crafter in your life. You can also pick a kit up at Jo-Ann that you can use this weeks 30% of total purchase on Wednesday AND of course they always have a 40% off coupon!

logo_1421272052

Have fun blog-hopping through all of the beautiful Crafternoon projects! Lolly Jane has a beautiful Christmas Art Kit that she would love to share with you so swing by to see her Crafternoon project.  Be sure to check out the entire Crafternoon line from Hazel & Ruby for all of your gifting needs!

xoxo


My Favorite ePantry Items

Thursday, October 29th, 2015

My Favorite ePantry Items from MomAdvice.com.

This week we won’t have our weekly happiness since I will be sharing my favorite reads with you tomorrow for the month! Instead, I thought I would share my favorite items that I order through ePantry. In case you missed my announcement this week, now through November 1st (9PM EST)  you can get a FREE Mrs. Meyer’s Seasonal Scents hand soap, dish soap, and multi-surface cleaner, plus a Full Circle renewable dish brush with any $20 minimum purchase! Not only that, but shipping will also be free (scroll down to cash in on that offer!)

This offer is valid for new ePantry customers only, however, existing customers can add a FREE Mrs. Meyer’s hand soap to your next order through this link. If you already signed up, be sure to snag your freebie! 

Not sure what to spend your $20 on? I have tried just about every item that ePantry offers and I want to share with you my absolute favorites!

My Favorite ePantry Items from MomAdvice.com.

Yes To Blueberries Brightening Facial Wipes

I am big on washing my face every night, but since the evenings have been so chaotic lately, I have gotten out of the habit of a good facial routine. I purchased these Yes to Blueberries Brightening Facial Wipes and I absolutely love them to get my make-up off before I head to bed. I love the smell of these and they do a great job getting my make-up off without drying out my skin. If you have gotten out of a good skin routine, these are awesome! Although I had hoped to like the Cucumber ones, they actually made my skin flare up (I’m not sure why) so I stick with the Blueberries one for my sensitive skin! ($5.49 for 25 wipes)

My Favorite ePantry Items

ACURE Moroccan Argan Oil

My latest obsession is Argan Oil for my sensitive skin and after about a month of doing this, I see an incredible difference in my skin. After  I wash my face, I apply two pumps of Argan Oil to my face while it is slightly damp. I then layer on a thick layer of nighttime cream before I head to bed. I noticed that ePantry started offering Argan Oil recently and I purchased some and I am in absolute amazement at how good my skin looks. Fine lines appear to be more smooth on my face and my skin has never felt softer. The bonus is that you can use this on dry hands, cuticles, and to calm down frizziness in your hair- all especially necessary in these long winter months. I swear, it’s my new beauty miracle! One bottle lasts me about a month with daily use. ($10.95)

My Favorite ePantry Items from MomAdvice.com.

Grove Orange Thyme & Cardamom Candles

If you are looking for a great smelling candle for the holiday season, I am absolutely in love with the Grove Orange Thyme & Cardamom Candles. It really smells like you are baking something absolutely delicious in your kitchen and the scent is powerful, but not overpowering. Although these candles look small, weighing in at just eight ounces, these burn over seventy hours! That is about twice the length of time of most of the candles I have purchased that were much larger than this one. ($12.95)

My Favorite ePantry Items from MomAdvice.com.

Tom’s of Maine Toothpaste

If you would have told me I would become a natural toothpaste lover, I would have laughed. I absolutely made fun of people that purchased this! When my usual toothpaste wasn’t available through ePantry, I substituted with this and now that I have tried it I will never go back.  I have sensitive gums and teeth and this toothpaste delivers on getting clean teeth without the use of harsh chemicals. I worried my kids wouldn’t like the switch, but they haven’t even said one thing about it so I guess we all adapted easier than we thought and I apologize to anyone I may have made fun of for making a purchase like this! I am a believer now!

My Favorite ePantry Items from MomAdvice.com.

Mrs. Meyer’s Laundry Detergent

When I don’t have a batch of my homemade laundry detergent on hand, I have found that Mrs. Meyer’s Laundry Detergent works incredibly well on our clothes. I use this and the Method Fabric Softener (also available through ePantry) in the Lavender scent and everything comes out smelling so good with only a tablespoon of detergent per load! The bottle doesn’t seem that big, but it actually is enough for 68 loads!  In all honesty, I have discovered that if Mrs. Meyer’s makes it, I know I will love it! ($16.64)

That is exactly why I want to be sure you get to take advantage of the Mrs. Meyer’s Seasonal Bundle! 

Mrs-Meyers-Seasonal-Bundle

Cash In On This Exclusive Offer!

Now through November 1st (9PM EST)  you can get a FREE Mrs. Meyer’s Seasonal Scents hand soap, dish soap, and multi-surface cleaner, plus a Full Circle renewable dish brush with any $20 minimum purchase! Not only that, but shipping will also be free.

This offer is valid for new ePantry customers only, however, existing customers can add a FREE Mrs. Meyer’s hand soap to your next order through this link.

1. Sign-up HERE for Cranberry, HERE for Orange Clove, or HERE for Iowa Pine (you can mix & match once your get to your basket, too). Click on the “get started” button (new customers only).

2. You’ll be asked a few questions to personalize your account a little better. (This only takes about 30 seconds.)

3. After answering the questions, a customized dashboard will pop up with a set basket of suggested items for this deal. You’ll see the Mrs. Meyer’s Seasonal Scents and Dish Brush included. On the right, you will see the discounts for the freebies and free shipping.

What the basket will look like upon checkout

4. Modify your basket to your liking and preferences. Your minimum order amount just has to be $20 or more to get the bonus free products. You can choose any combination of seasonal scents for the freebies, too.

5. Shipping is free.

After the freebies, it’s like paying just $2.33 per item shipped!This is a such a great opportunity to save on festive cleaning products for your home during the holiday season!

Here is a breakdown of pricing:

bundlebreakdown

Remember that this offer is valid only through November 1st (until 9PM EST)! Happy Holidays!

ePantry: Free Mrs. Meyer’s Seasonal Scents Pack ($29 Value) + Free Shipping!

Tuesday, October 27th, 2015

Mrs. Meyer's Seasonal Bundle

I am such a BIG fan of ePantry and their green offerings for both home & beauty and I have talked about the value in it for keeping your home stocked especially in these busy seasons of life. Today I have a very special offer (valid for the next six days only!) to give to our MomAdvice readers that I am so excited to share with you!!

Through November 1st (9PM EST)  you can get a FREE Mrs. Meyer’s Seasonal Scents hand soap, dish soap, and multi-surface cleaner, plus a Full Circle renewable dish brush with any $20 minimum purchase! Not only that, but shipping will also be free.

This offer is valid for new ePantry customers only, however, existing customers can add a FREE Mrs. Meyer’s hand soap to your next order through this link.

There are three different delicious-smelling seasonal scents to choose from: Orange Clove, Iowa Pine, or Cranberry. You can grab your freebies all in one scent or mix & match to try all three scents!

Mrs. Meyer's Seasonal Scents

Cash In On This Exclusive Offer!

1. Sign-up HERE for Cranberry, HERE for Orange Clove, or HERE for Iowa Pine (you can mix & match once your get to your basket, too). Click on the “get started” button (new customers only).

2. You’ll be asked a few questions to personalize your account a little better. (This only takes about 30 seconds.)

3. After answering the questions, a customized dashboard will pop up with a set basket of suggested items for this deal. You’ll see the Mrs. Meyer’s Seasonal Scents and Dish Brush included. On the right, you will see the discounts for the freebies and free shipping.

What the basket will look like upon checkout

4. Modify your basket to your liking and preferences. Your minimum order amount just has to be $20 or more to get the bonus free products. You can choose any combination of seasonal scents for the freebies, too.

5. Shipping is free.

After the freebies, it’s like paying just $2.33 per item shipped! This is a such a great opportunity to save on festive cleaning products for your home during the holiday season!

Here is a breakdown of pricing:

bundlebreakdown

Remember that this offer is valid only through November 1st (until 9PM EST)! Happy Holidays!

This post contains affiliate links! We only recommend what we love!

How to Easily Stain Furniture

Tuesday, October 27th, 2015

While I usually use paint to makeover furniture, I tried my hand at staining furniture – this sweet table I found that needed a ton of help to be beautiful – and I love how it turned out! It’s been one of my favorite transformations ever, so of course I wanted to share it for our Transforming Your Space M Challenge.

How to Easily Stain Furniture by MomAdvice.com.

Staining furniture seems like a pretty intimidating project if you have never stained before. Today’s tutorial is going to showcase how to easily stain wood furniture and how you can turn a tired piece into that piece of furniture you have been dreaming of with a simple stain technique.

Today I am working with Cabot Wood Stain to share their new Premium Wood Finish, a stain + sealer product that you can use to restore the finish on your furniture. This H2Oil™ formula provides the best of oil and water-based stains and makes for easy clean up with just a little soap and water!

What I really love about it most though is that it conditions, seals and protects in one step and doesn’t require primer or wood conditioner. You can find this stain at your local Lowes store and the stain color I am working with today is their Espresso finish.  Don’t feel like you have to be committed to just the traditional stain though because it can be tinted to nearly thirty different colors including non-traditional colors like teal and purple!

Premium Wood Finish Colors

Let’s get started on our fun project- I can’t wait for you to see the results!

How to Easily Stain Furniture by MomAdvice.com. How to Easily Stain Furniture by MomAdvice.com.

I headed over to our local thrift store and found this beat-up wooden table for $50. I sent a picture of it to my husband and he replied, “Please tell me you didn’t bring that home.” Yes, you know that you have picked the perfect piece if your husband requests that you not bring it home.

As you can see on the top, this was in extremely bad condition. The top of it looked irreparable and the drawers were deeply damaged. I knew that I would have to be creative with this piece, but the legs and pretty drawers made it a piece worth working on for our office. Because this piece is so damaged, my process took a few extra steps, but even with all the damage, I was able to finish it in a mere 24 hours. You won’t believe this transformation.

How to Easily Stain Furniture by MomAdvice.com.

Supplies Needed

Cabot Premium Wood Finish Stain + Sealer (in your color choice- I have used espresso)

Optional : Cabot Pre-Stain Wood Conditioner (I used this because my piece was so incredibly damaged, but it is an unnecessary step if your piece is in better condition)

Wood Filler

Medium & Fine Grit Sandpaper

Sander (or you can do this by hand)

Rags

Gloves

Drop Cloth

Painting Supplies (if adding painted details like me. The drawers are spray painted using this technique here)

New Hardware or Spray Paint for Old Hardware

How to Easily Stain Furniture by MomAdvice.com.

How to Stain Furniture

1. Begin by thoroughly cleaning your piece well with a clean rag. Once the piece has been cleaned, apply stainable wood filler to any gashes you may see on your piece. Allow the wood filler to dry (two hours) and then using your medium grit sanding paper to smooth and make the filler level to the rest of the surface.

2. Using a sander (or you can do this by hand), sand the piece to remove any old stain and any scratches. Due to the damage on my piece, this took a half hour to do which gave me a chance to begin painting the drawers to this piece.  Make sure that you have on gloves and a mask when sanding your piece and once finished that you clean it well with a clean tack cloth to remove any of the sanding particles before staining.

3. Because of the condition of my piece and how uneven the top still looked on this, I decided to brush on some Cabot Pre-Stain Wood Conditioner (be sure to do this with the grain of the wood)  to make sure that my stain really took evenly. If your piece is in better condition though, you can definitely skip this step. 

On larger surfaces, you will want to work quickly in small sections. Saturate wood with a uniform coat of Pre-Stain Wood Conditioner using a clean brush or sponge. Allow no more than 5 minutes for penetration. Then wipe off all excess. Immediately after removal of Conditioner, apply your Cabot Wood Stain If you are pre-conditioning DO NOT allow the Conditioner to dry. Surfaces which are allowed to dry will not accept stain!

How to Easily Stain Furniture by MomAdvice.com.

4. Now we are ready to stain and seal our piece. Before you begin, make sure your piece is clean and free of any debris using a clean tack cloth.  Again, using a foam brush apply the stain with the grain of the wood. Raw wood is very thirsty so it will absorb the stain quickly. After five minutes, using a clean tack cloth, and wipe it down to remove any stain that hasn’t been absorbed.

How to Easily Stain Furniture by MomAdvice.com.Here is what my tabletop looked like after the first coat. You can see that there is definitely still some unevenness to it, but we are off to a good start. Allow this to dry for 2 1/2 hours before applying the next coat.

How to Easily Stain Furniture by MomAdvice.com.

Sand very lightly with 600 grit sandpaper to smooth wood grain. Remove sanding dust with tack cloth and apply a second thin coat. For full color and maximum durability, apply 2 or more coats. For a muted, distressed look apply 1 coat.  For my table, I applied just two coats so I still had the distressed look that I was after. Since I am impatient, I really love that the Cabot Wood Stain is a fast drying formula that dries in 2-1/2 hours between coats and fully dries in only 6 hours.

Since I also have two kiddos that are rough and tough on my furniture, I also love that it offers a durable finish that will hold up to our abuse and that it protects against spills, water rings and even household chemicals like bleach, alcohol, and nail polish remover.

How to Easily Stain Furniture by MomAdvice.com. How to Easily Stain Furniture by MomAdvice.com. How to Easily Stain Furniture by MomAdvice.com. How to Easily Stain Furniture by MomAdvice.com. How to Easily Stain Furniture by MomAdvice.com.

How to Easily Stain Furniture by MomAdvice.com.

Hello beautiful new table of mine! I am absolutely smitten with this piece and I can’t believe the transformation. We updated the hardware with a couple of new drawer handles since the previous handles were falling apart. The drawers were distressed and antiqued up to match their chippy former days and then I applied my decorative glaze over these spray painted drawers to antique them up a bit more.

How to Easily Stain Furniture by MomAdvice.com.

I swear that this new-to-me table looks just like a table I was coveting in my West Elm catalog, but at a fraction of the price. This has become my new favorite corner in our house and I can’t believe the transformation! For other indoor stain ideas, check out Cabot’s Indoor Inspiration Pinterest board and be sure to follow me on Pinterest for more DIY inspiration! 

Have you ever stained furniture before? What are your tips and advice for updating a piece?

This post is sponsored by Cabot Wood Stain.  I’ve received product samples and compensation for my time and effort in creating this post. All thoughts and opinions are my own.


Pin It

How to Makeover a Shed Into a Bonus Room (Tour Our Shed!)

Tuesday, October 20th, 2015

How could I not share my “She Shed” with you again to go along with our Transform Your Space M Challenge? It remains my favorite transformation. ever. I hope you are inspired to take back space and make it work for you!

she-shed-makeover

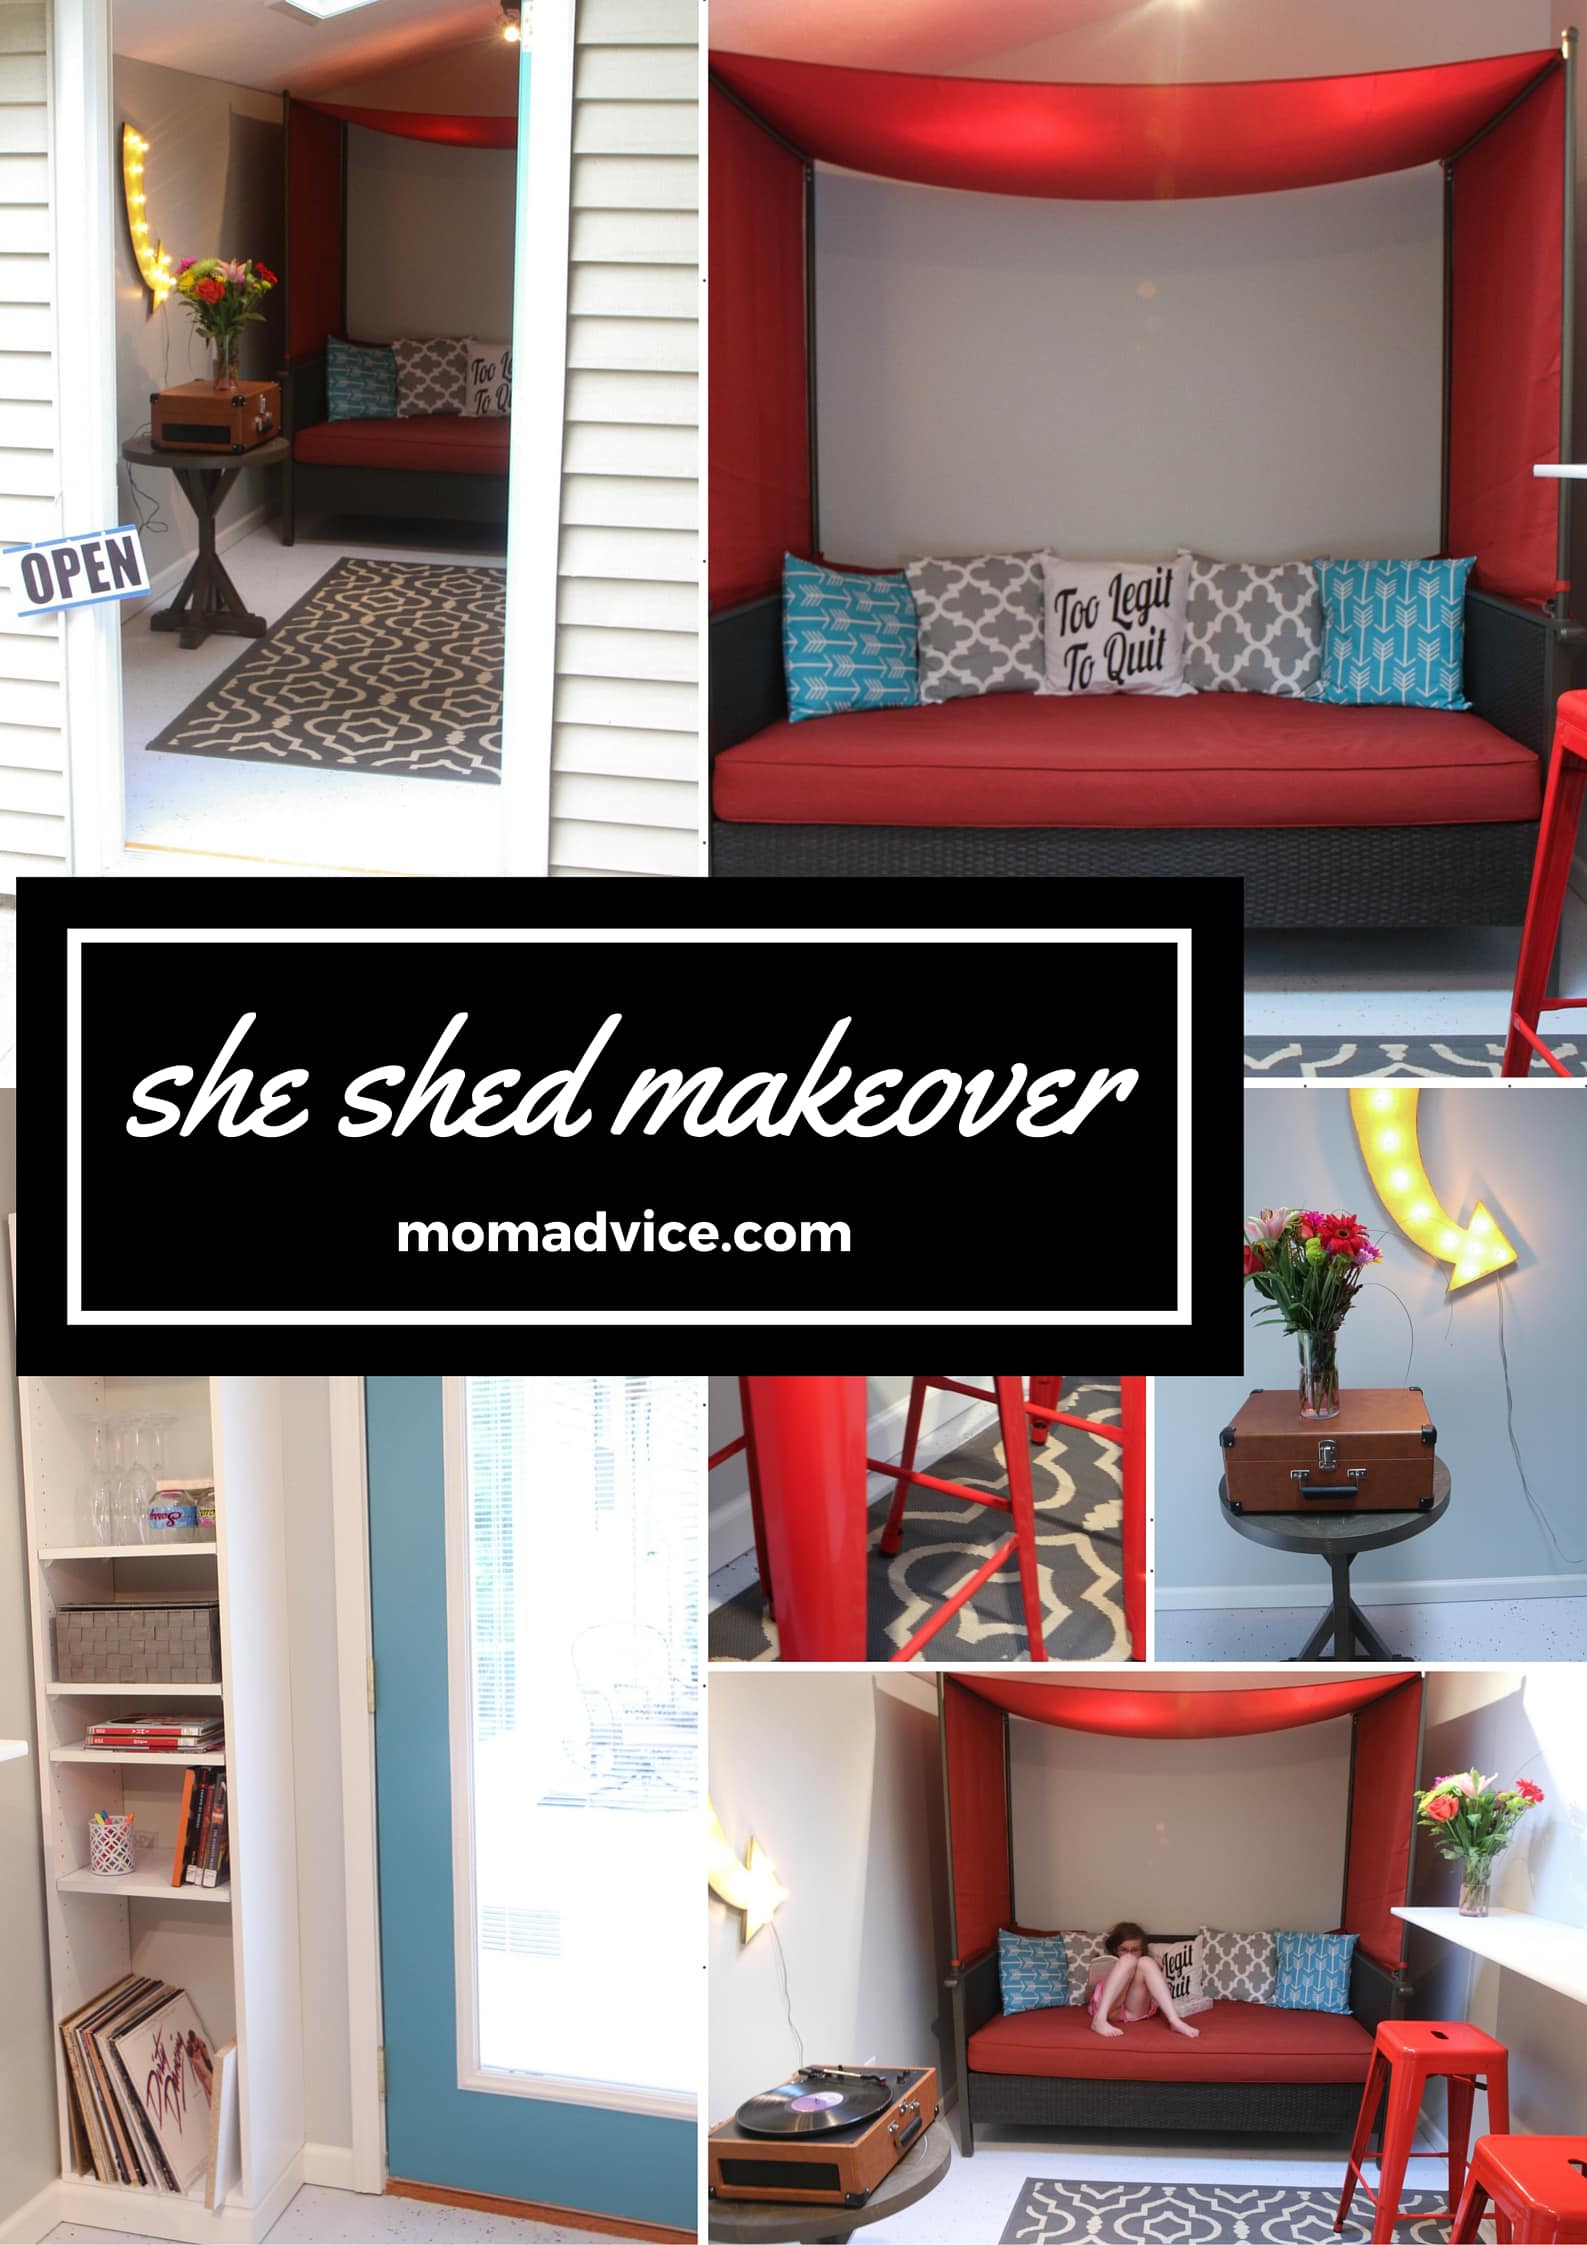
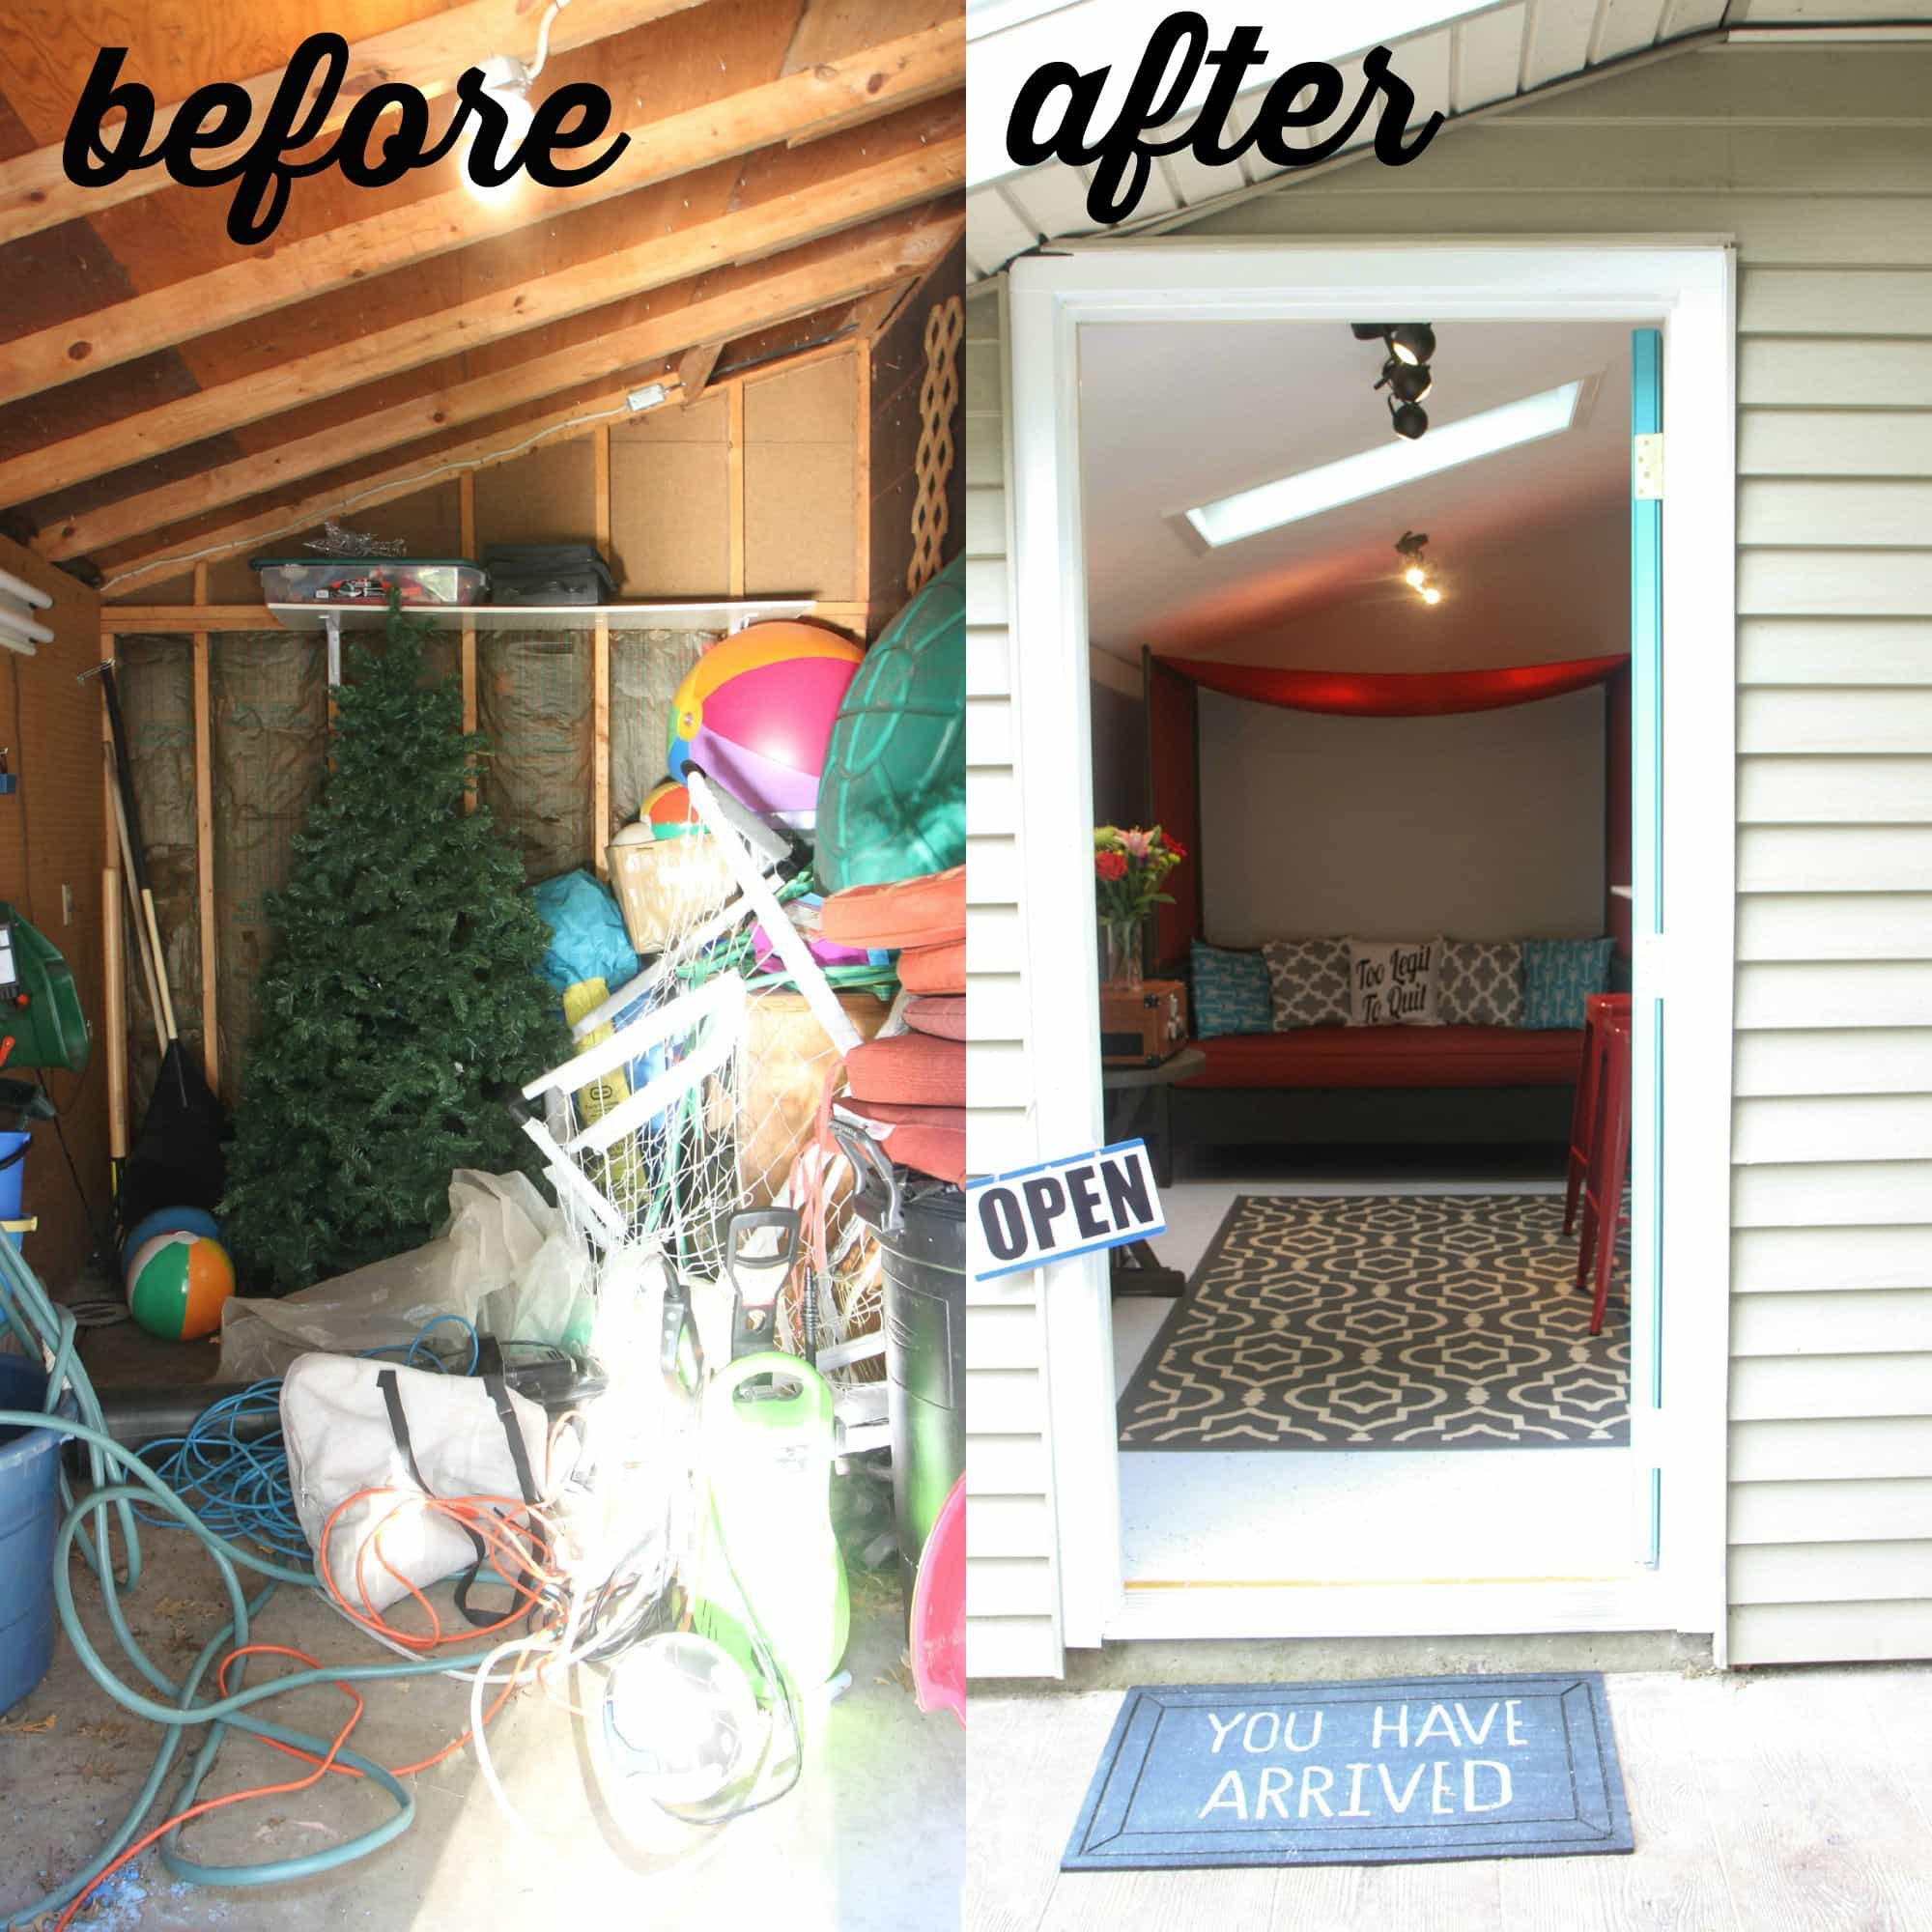
Today I wanted to share with you how we transformed our outdoor shed into a bonus room. Shed makeovers are one of my favorite things to look at, but I had never considered our own shed a bonus room until this summer.  This transformation from a shed that housed our chaos and clutter into a multi-purpose retreat is one of my proudest makeovers we have ever done on our home.

I partnered with Walmart on this project to showcase a unique idea for outdoor living. Since they partnered with me, I did my best to utilize items from their store while weaving in handmade items from some of my favorite Etsy sellers.

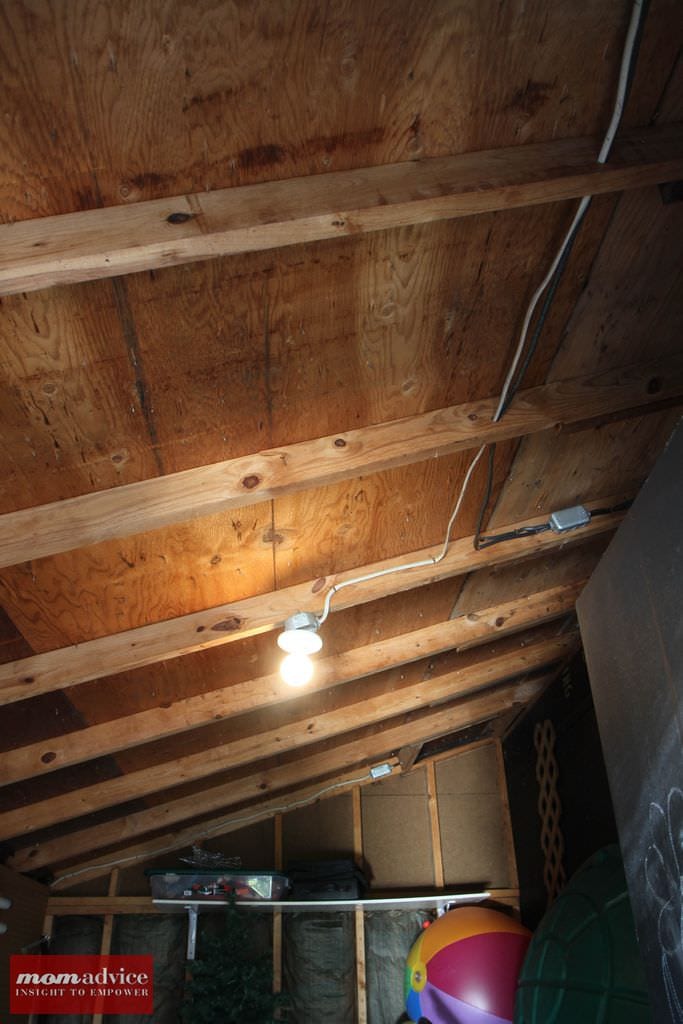
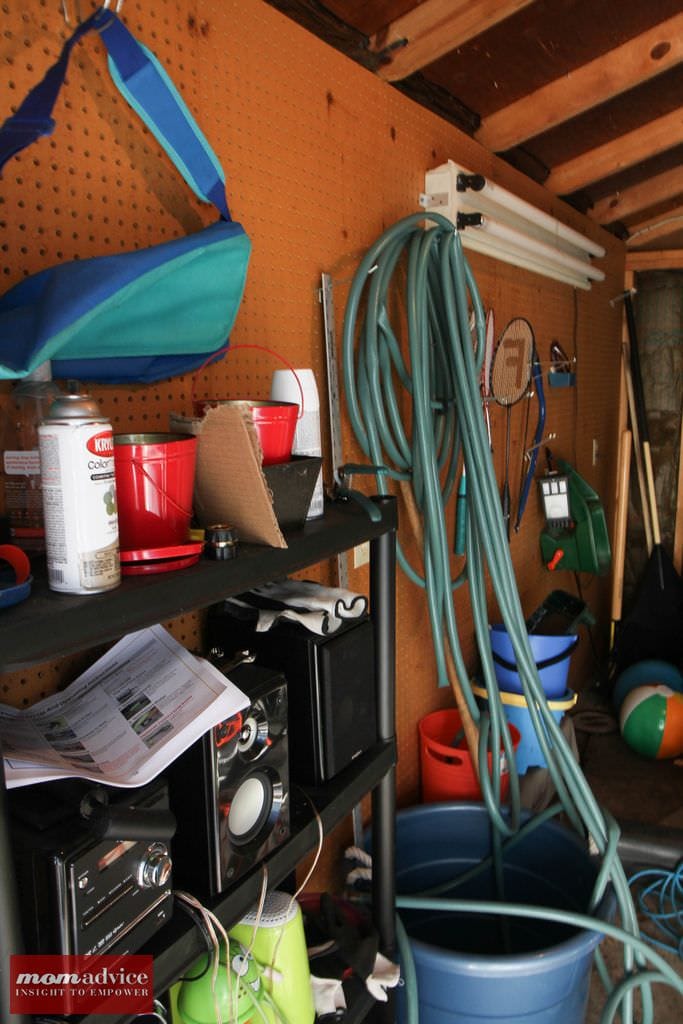
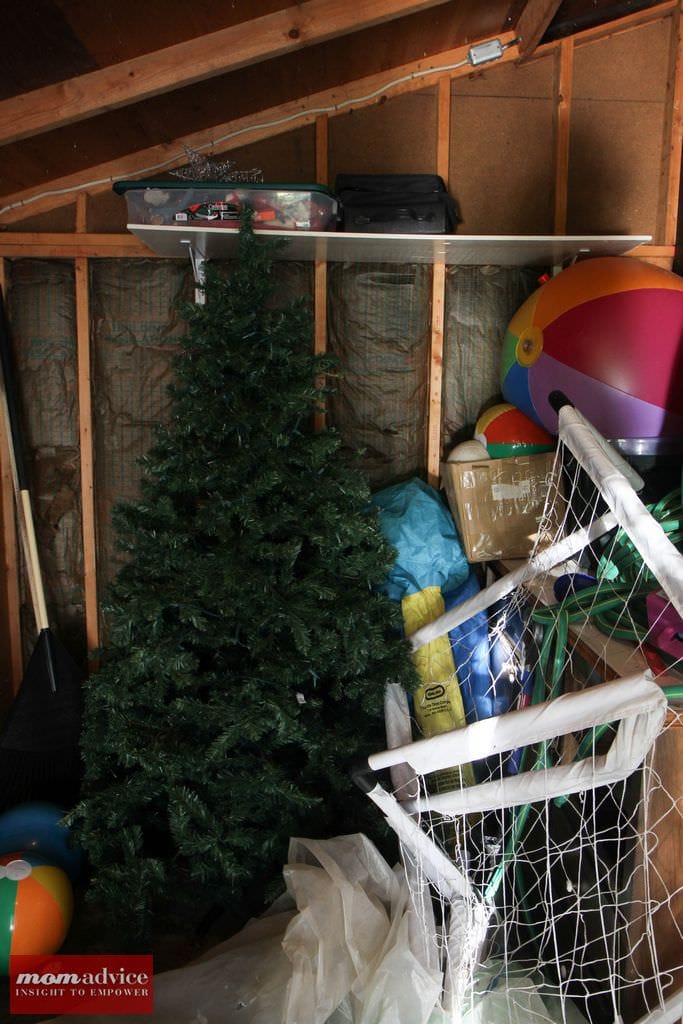
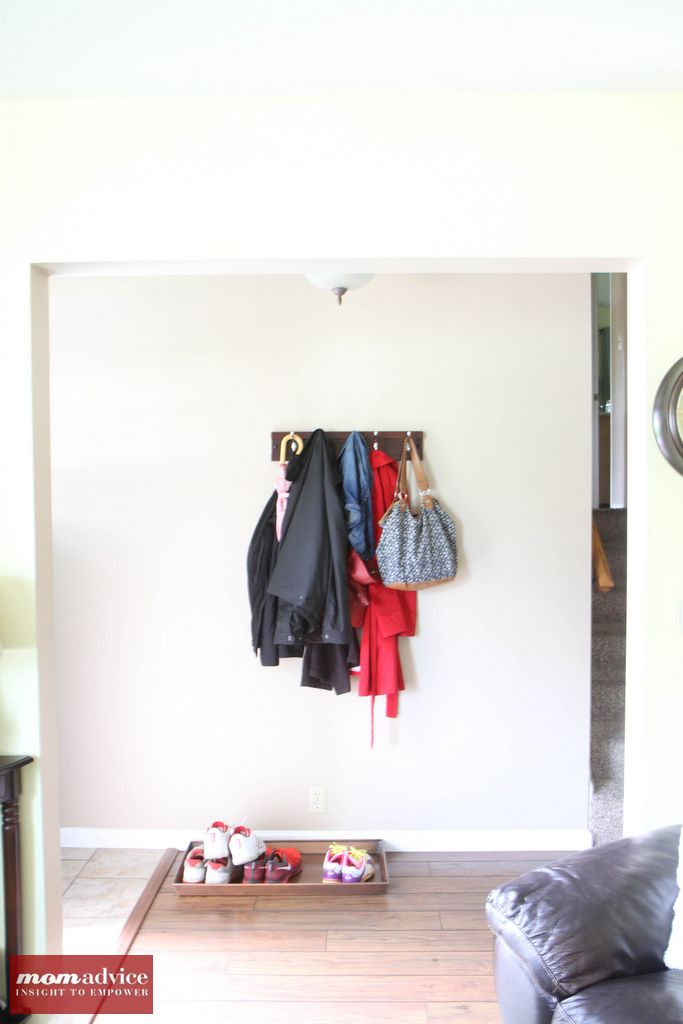
Before I get ahead of myself though, let’s take a tour of our shed before the makeover. As an FYI,  I did not gloss this up for you one bit. This is exactly as awful and as embarrassing as it looked. It took me twelve hours to organize our garage, six donation runs, and a whole day to empty this shed. I am ashamed how bad it had gotten, but I wanted to be honest about all of that with you. This took a lot of preparation for me to empty this and rid my life of a lot of junk to execute this space. It was worth every moment of effort.

Shed Before Pictures

Shed Before Pictures

Shed Before Pictures

Shed Before Pictures

Shed Before Pictures

Shed Before Pictures

Shed Before Pictures

Shed Before Pictures

Shed Before Pictures

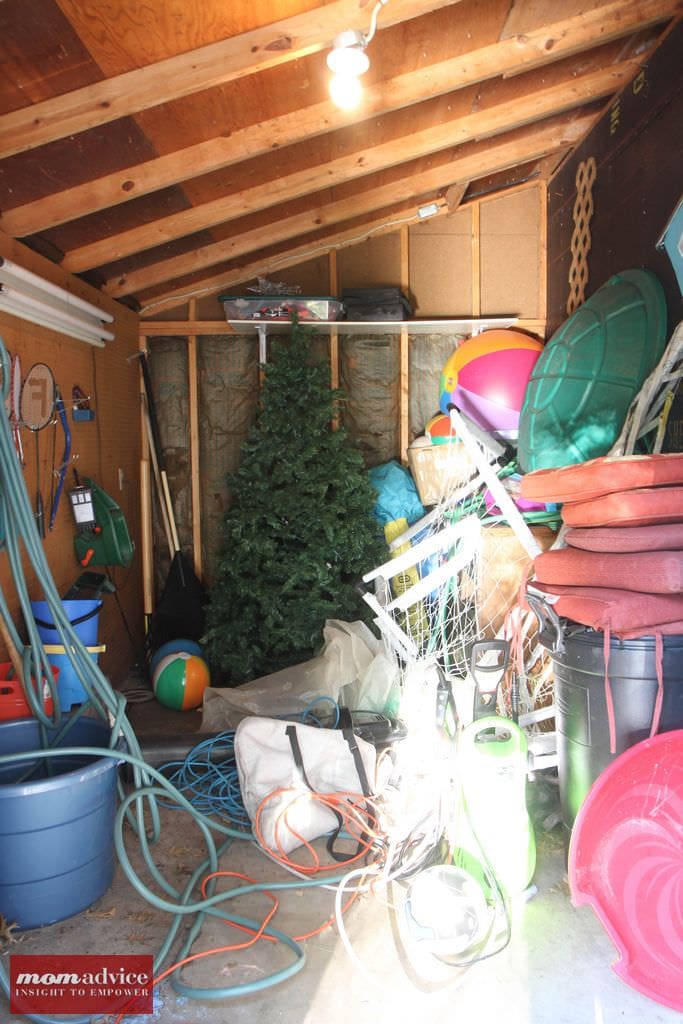
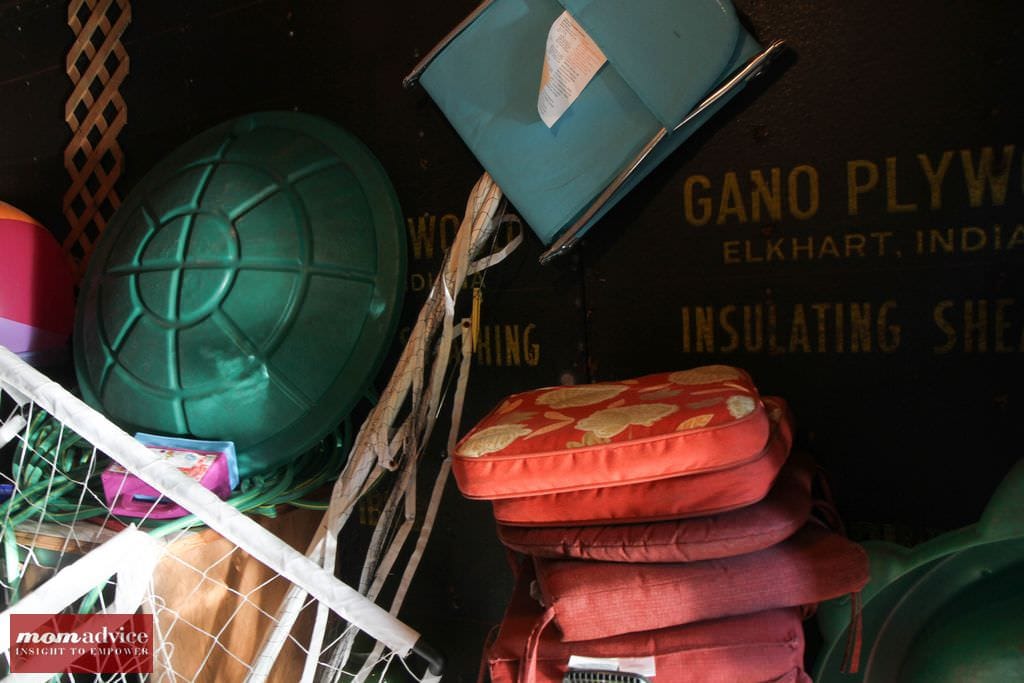
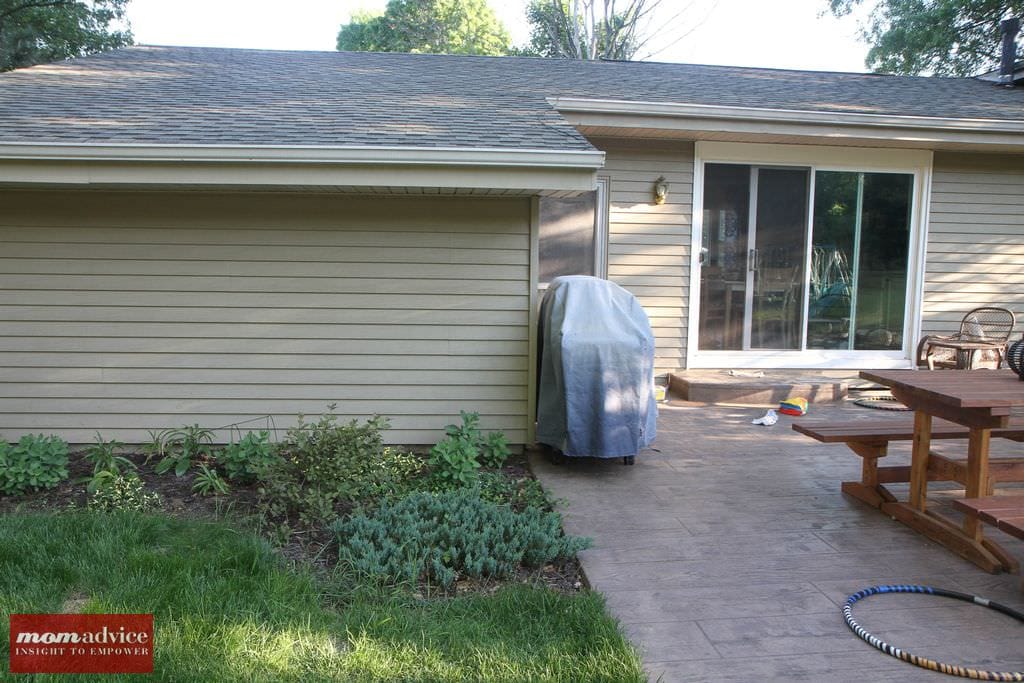
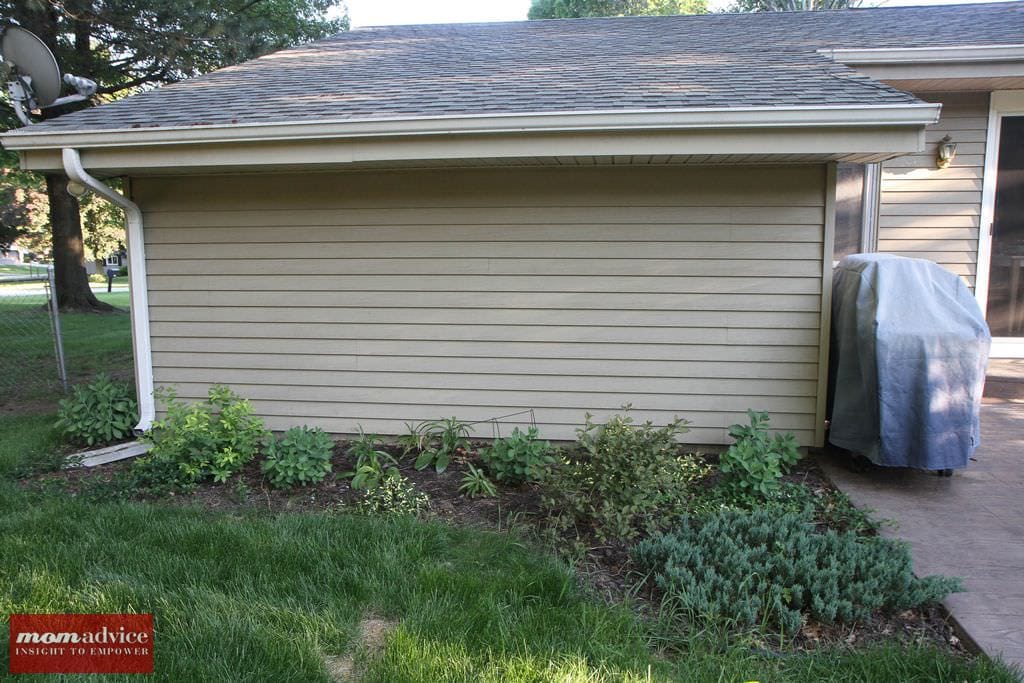
Our home is a late-sixties tri-level that had an attached shed on the home.  Although the shed is attached to our home, you do have to step outside to access it, but it is close enough that easy access is possible. This might be unlike  other sheds that might be residing further out from your property. After talking with our neighbor who has been a longtime resident here,  I understand that this wasn’t originally part of the home, but was an addition that had been made later to our house. Over the years, as other homeowner’s owned it things like insulation and electrical were added. The space had good bones to be a room, but no one had gotten any further than that. We have resided in this home 12 years and it only occured to me this summer that maybe we were missing out on a golden opportunity to have a unique bonus room.  After getting estimates and ideas from a few contractors, we hired All Pro Renovations to assist in transforming this dumping crowd of chaos into the room of my dreams.  They were able to address getting our space up to code and also got my vision for what I wanted to accomplish with this room.

My idea for the space was that it could be a retreat for my children during the day and a fun entertaining spot in the evenings. The most important aspect for this project was that we utilize every single inch of this 8×12 space in a thoughtful way. I wanted a bar that could fold down, flush to the wall when it was not in use. I wanted to utilize all the space that we could behind the door to house storage. I wanted furniture that could be stacked or wall mounted for entertaining.  Most of all, I wanted it to feel very modern and light-filled with a glass door and a window.

How to Makeover a Shed Into a Bonus Room

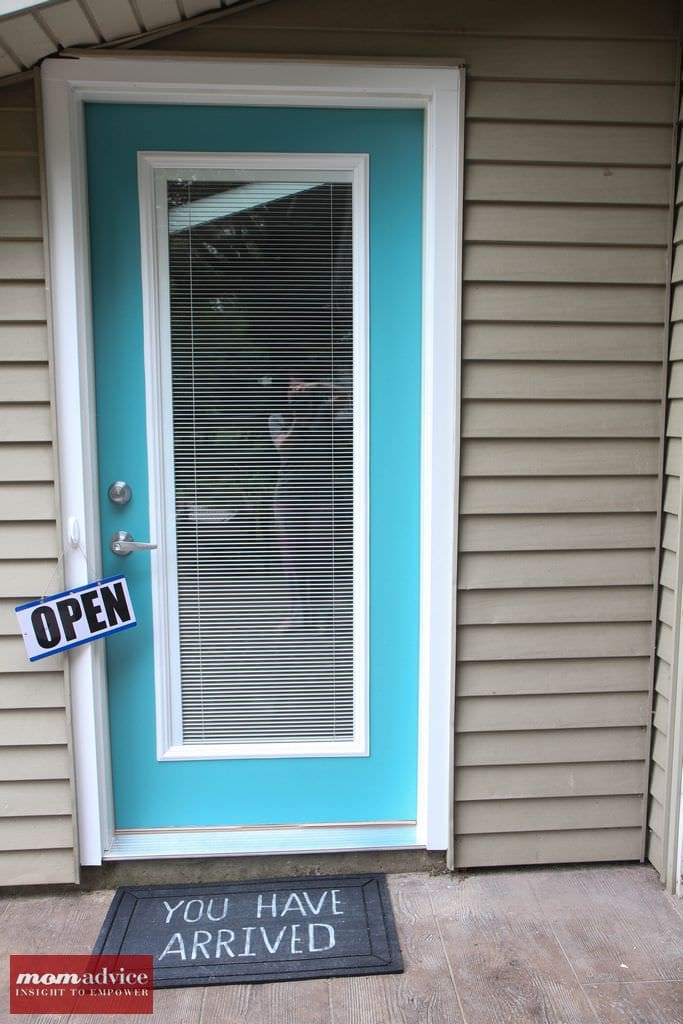
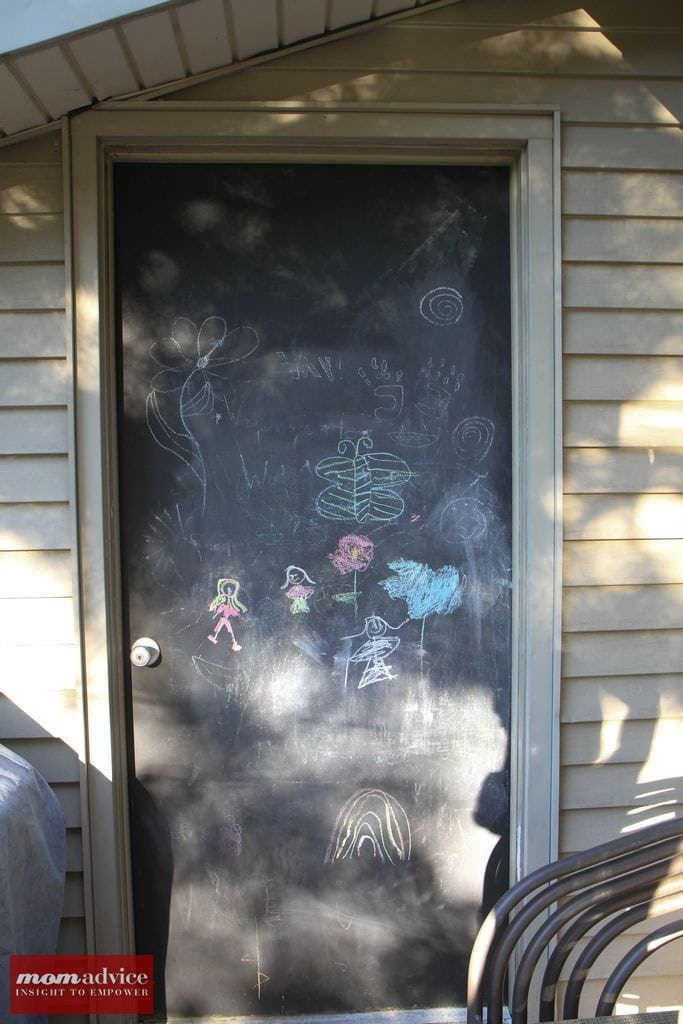
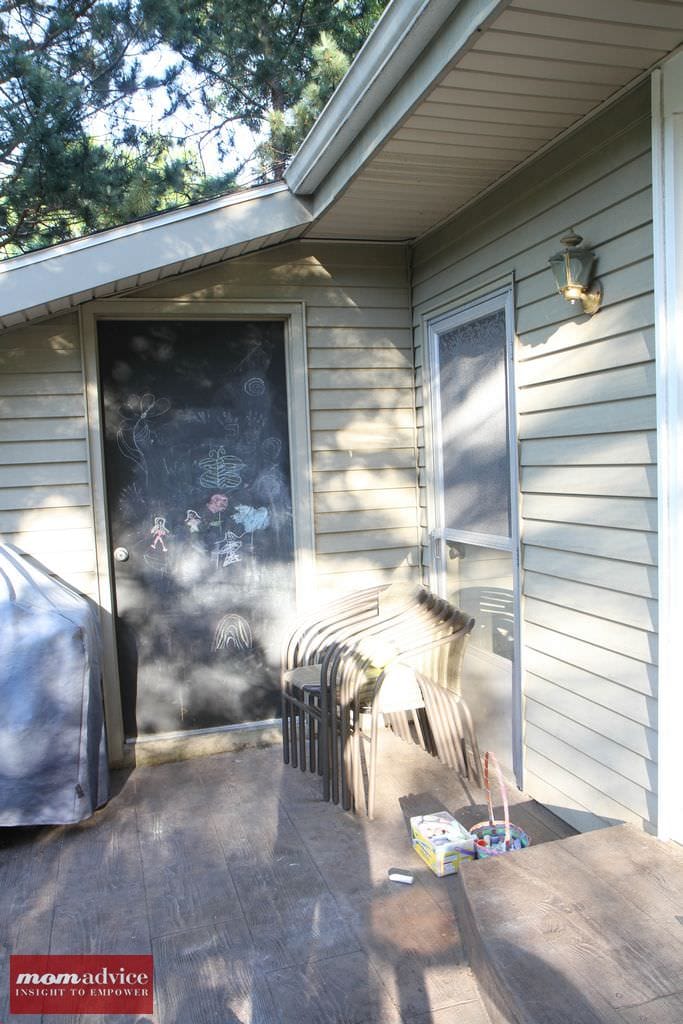
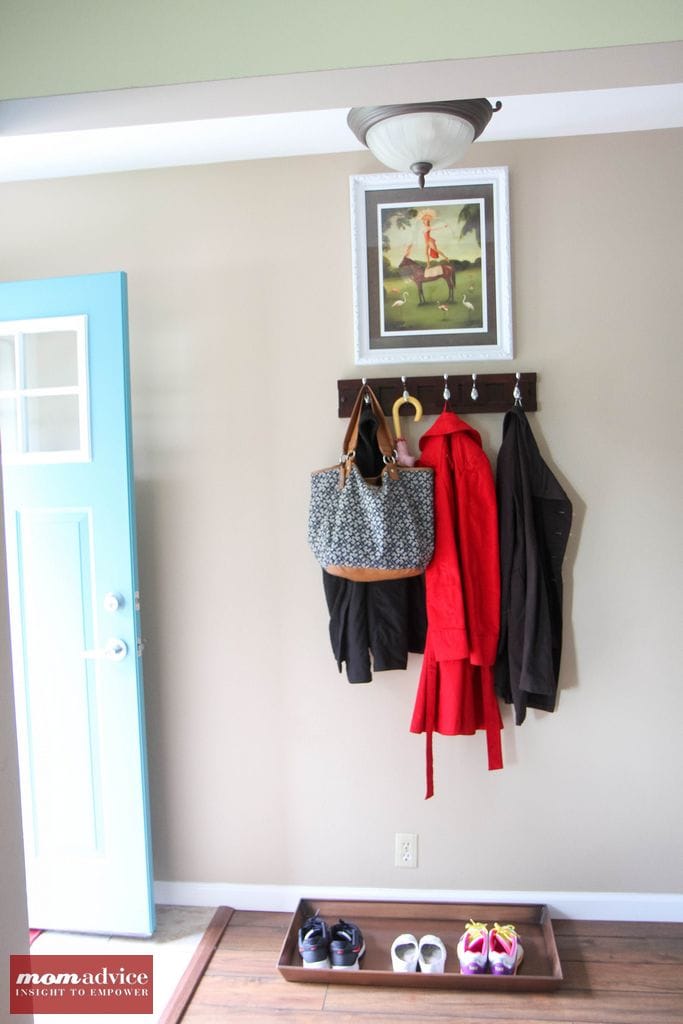
We painted the door with a bright coat of teal paint that I loved so much that we decided to paint the front door too.

How to Makeover a Shed Into a Bonus Room

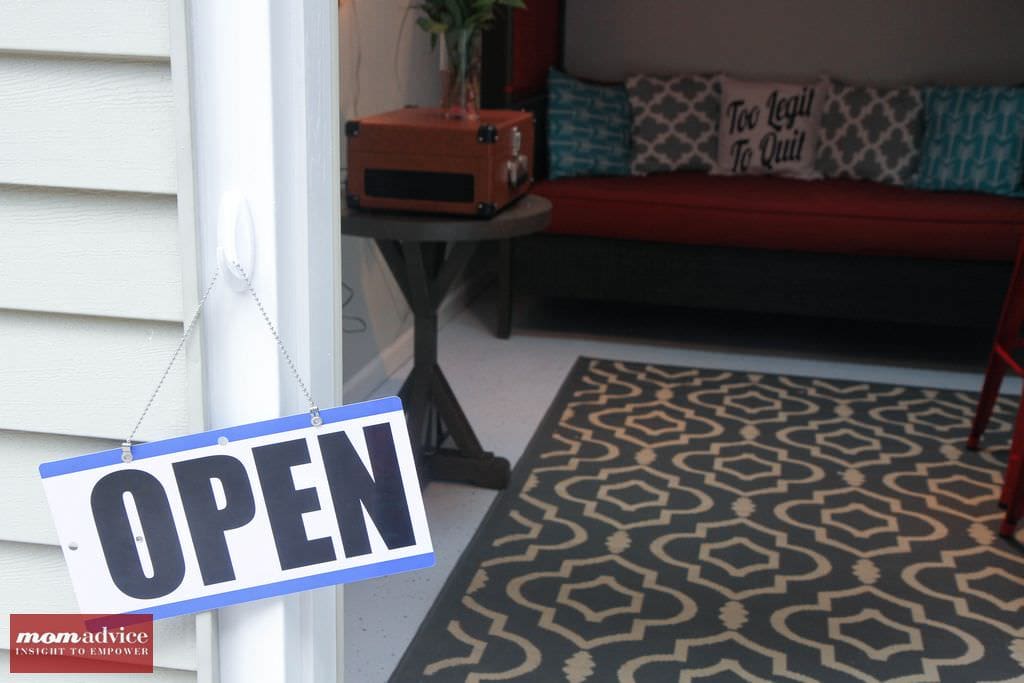
We quickly figured out that when the kids were in this room that I couldn’t necessarily see that they were in there and would be hunting in the backyard for them. I added a plastic Open/Closed Sign from Walmart that I attached to the trim of the door with a 3M hook so the kids could let me know if they were in there. If they are inside it is open if they go back out to play in the yard, they flip it to closed. My daughter loves to also leave a time on the clock to let me know when she will be back.

How to Makeover a Shed Into a Bonus Room

How to Makeover a Shed Into a Bonus Room

How to Makeover a Shed Into a Bonus Room

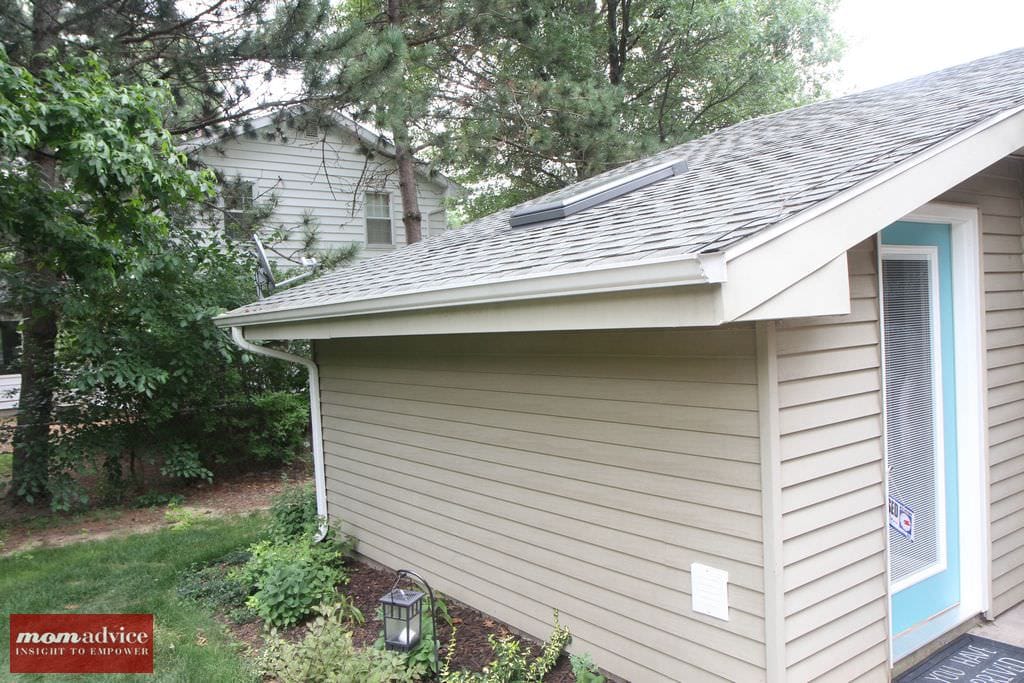
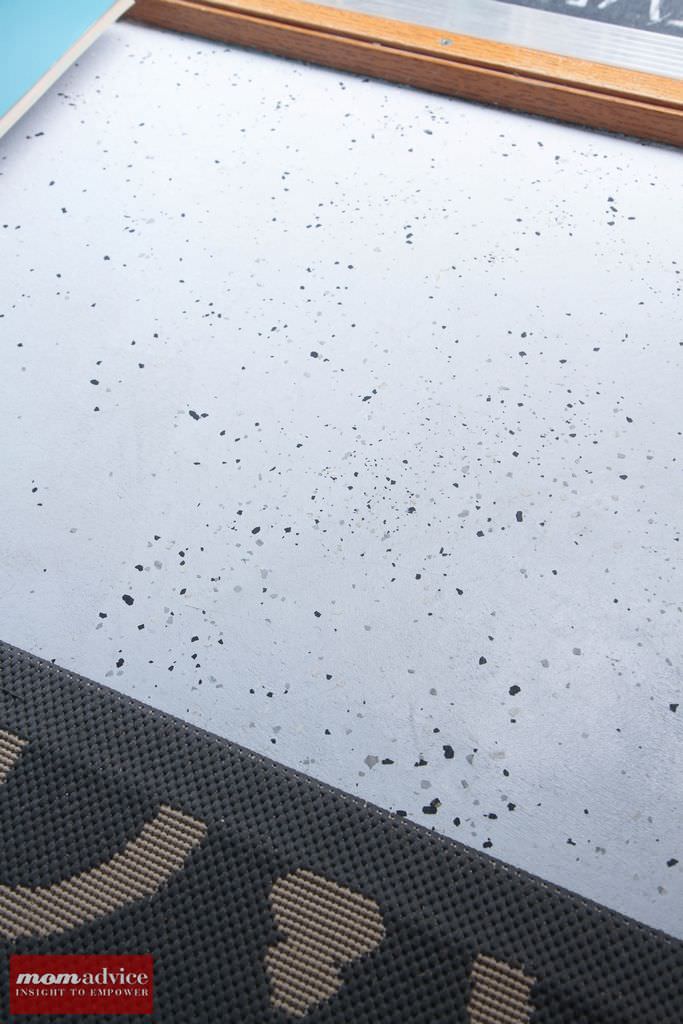
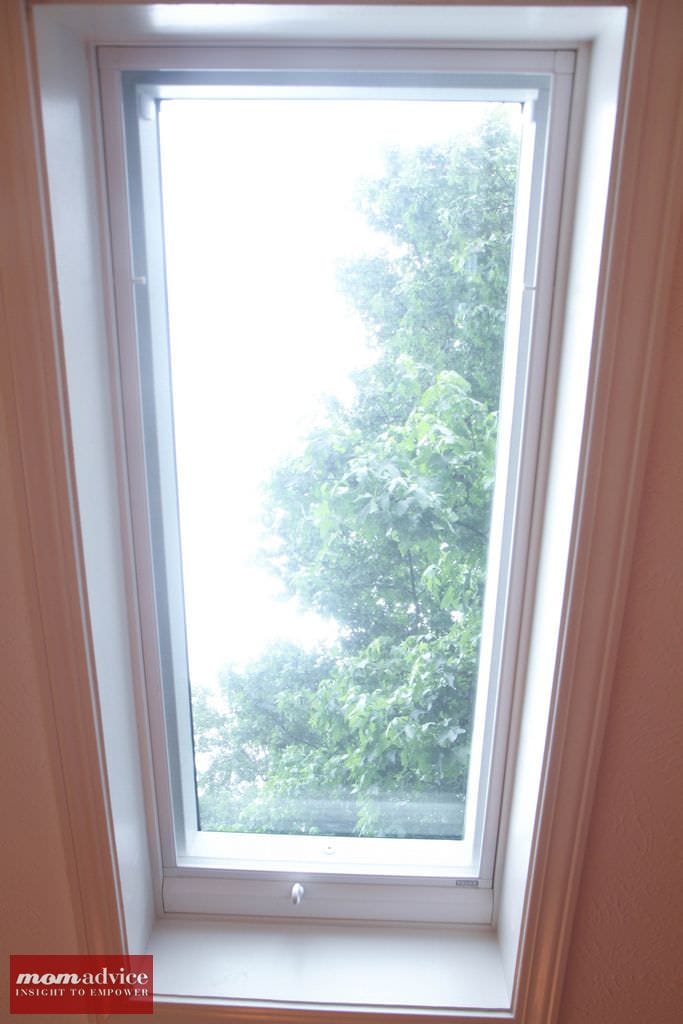
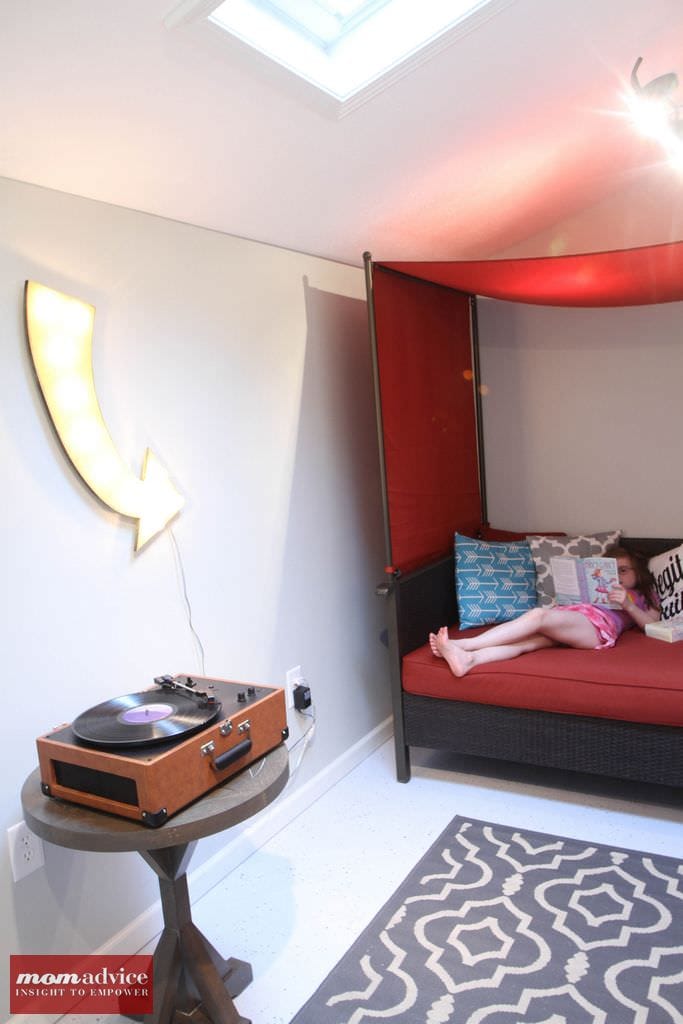
Since our home had aluminum siding, All Pro recommended adding light with a skylight (which cost the same as adding a window), because if we damaged our siding, we would not be able to find matching aluminum siding for this home. They found a glass door that we could use for the space. They recommended doing an epoxy-paint floor with neutral tones that would be durable and ideal for this outdoor space. To warm up the floor, I added this outdoor rug in a 5’3×7’7 (an absolute steal at $77.58)   The room was drywalled, painted, and trimmed to finish out the bones of this room.  My color choice for this space was Benjamin Moore’s Gray Owl for the walls (which I now what to paint my entire house in) and Benjamin Moore’s glossy White Dove for all of the trim.  Although the original intent was to add canned lighting, our ceilings were too low for the space so track lighting was installed which adds to that modern retro feel that I was going for.

How to Makeover a Shed Into a Bonus Room

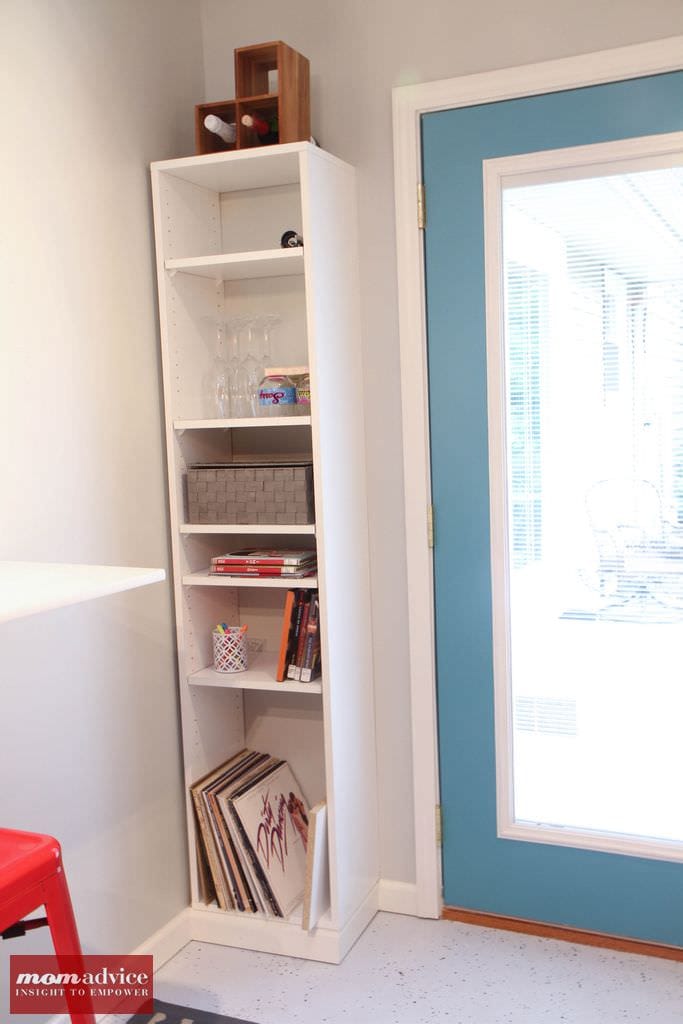
A built-in was added behind the door to make sure that every inch was used. Wine glasses, a rack, and opener are on the top shelves for evening entertaining. On the lower shelves, we have coloring books, crayons, and books. I also added a few of my favorites from our record collection and they fit perfectly on the bottom so we can use our turntable out there.

How to Makeover a Shed Into a Bonus Room

How to Makeover a Shed Into a Bonus Room

How to Makeover a Shed Into a Bonus Room

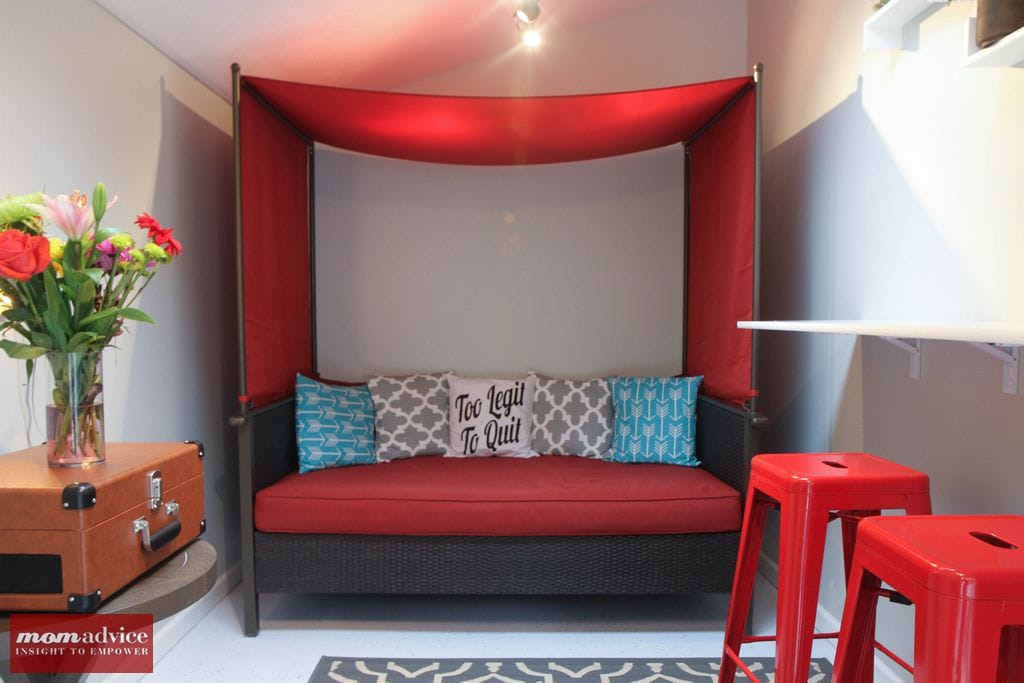
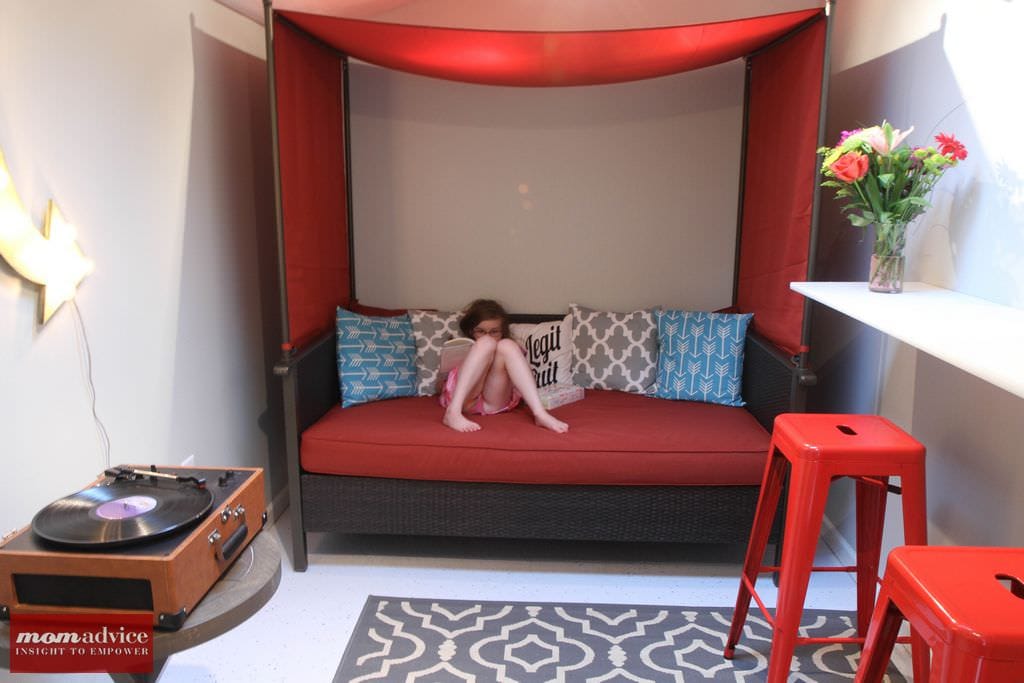
The focal point of the room is this beautiful Providence Outdoor Day Bed (priced at $399) from Walmart for the back wall.  This canopy bed is so beautifully made that I almost fall asleep every night on it while I am out there. It is generously deep and the canopy element really adds an eye-catching detail to the room. I switched out the pillows with a more modern printed pillow covers that I scored on Groopdealz as one of their deals-of-the-day. I also added this Too Legit To Quit pillow from Michelle Dwight Designs to add a splash of fun to the bed. I found inexpensive pillow forms from Walmart to create cushions with style for the back of this bed.  The pillow forms are two for $5.15 and feel like expensive cushions.   This bed not only is the perfect spot for a reading nook, but it also can double as a guest room year-round for our guests. I kind of want to stay here as a guest myself.

How to Makeover a Shed Into a Bonus Room

How to Makeover a Shed Into a Bonus Room

How to Makeover a Shed Into a Bonus Room


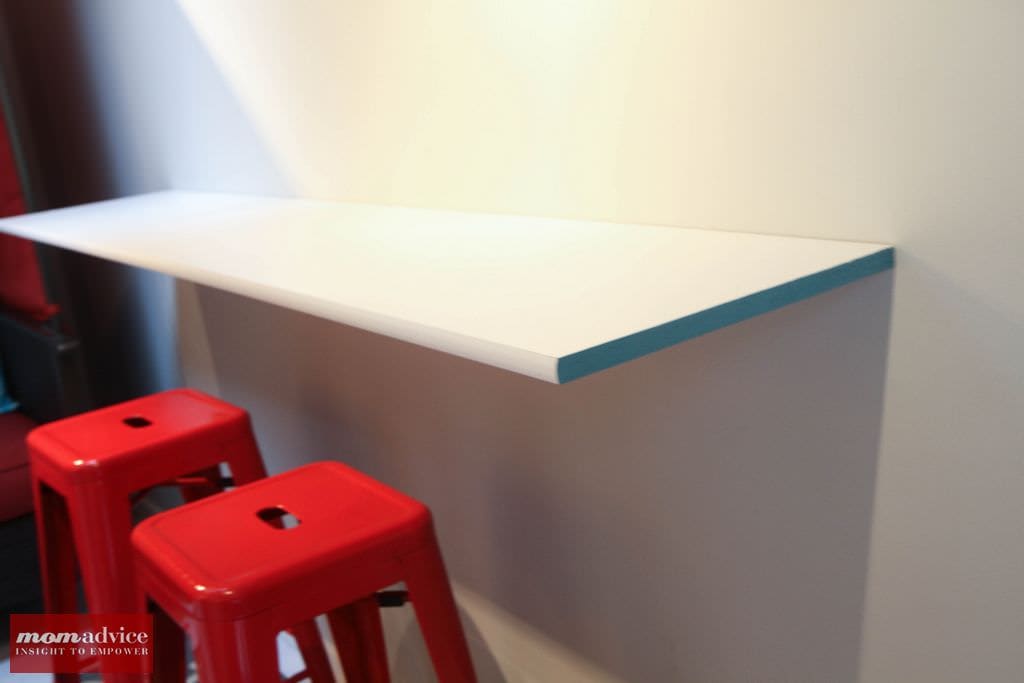
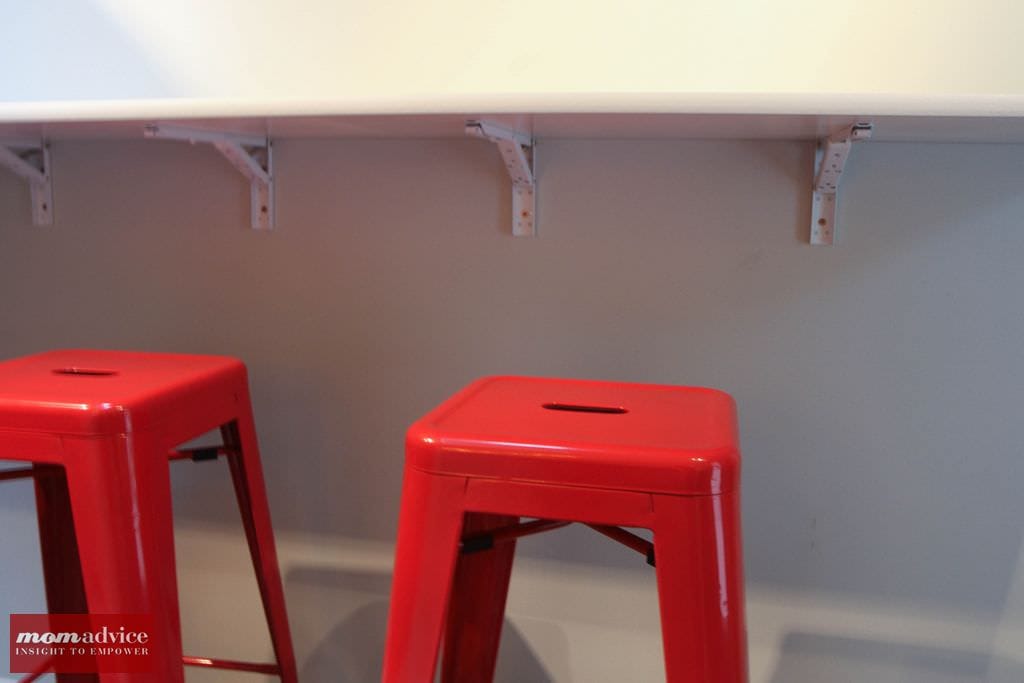
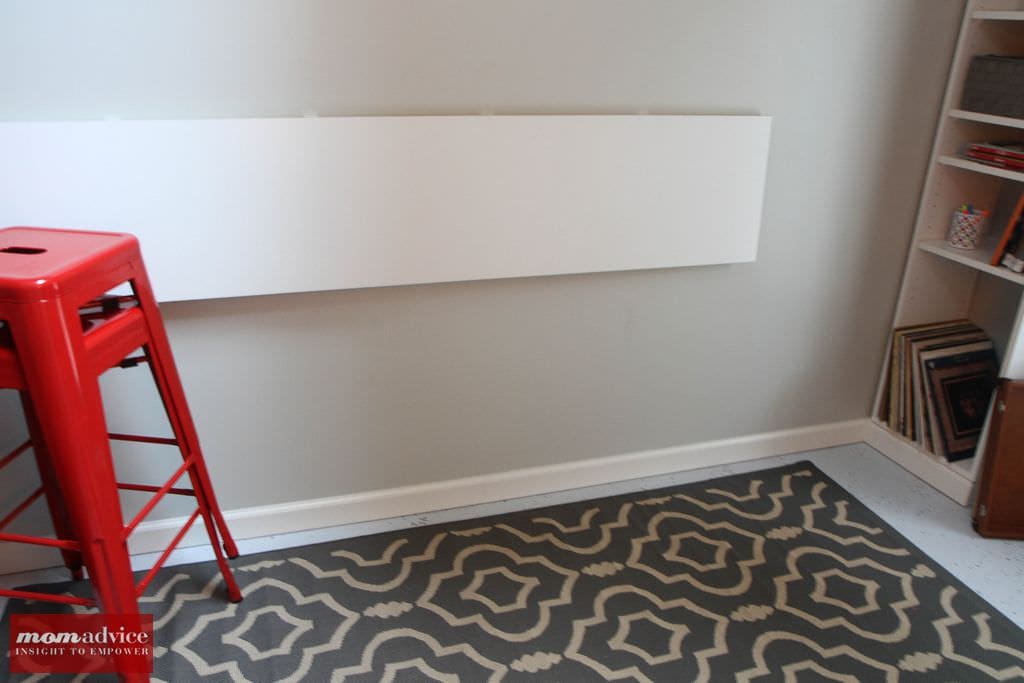
The bar can comfortably seat four people and I found retro Amelia Metal Cafe Bar Stools in red (2 for $159) from Walmart to complete the look.  I actually placed an additional order for two more now that I could see how many I can fit here.  All Pro Renovations created a bar that could be folded down and added a stripe of teal on the edge of my bar to add a little splash of color.

How to Makeover a Shed Into a Bonus Room

How to Makeover a Shed Into a Bonus Room


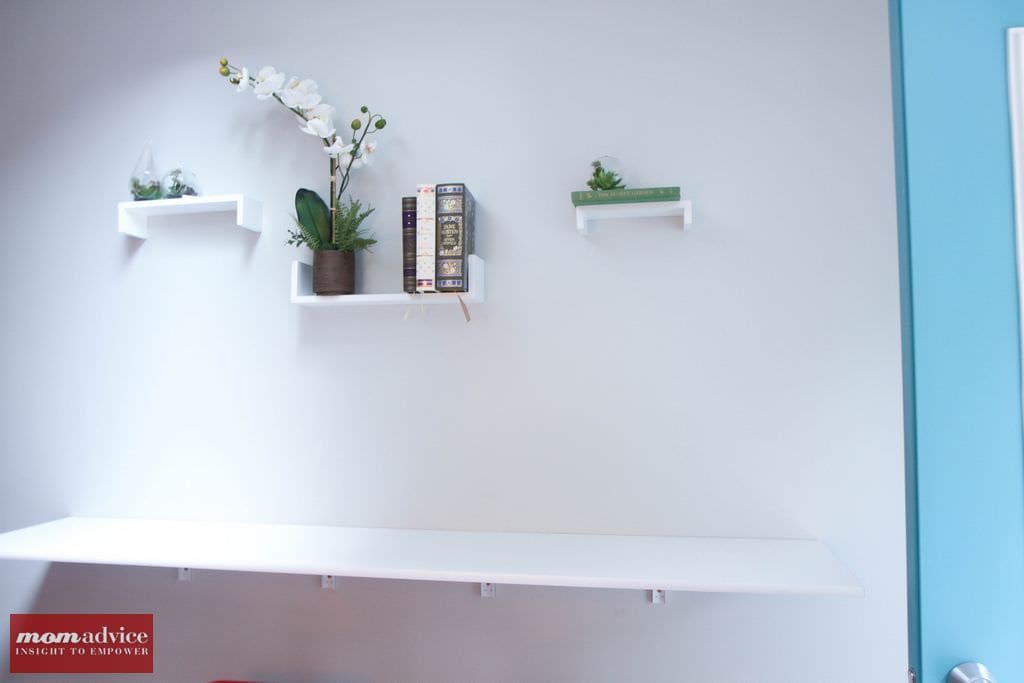
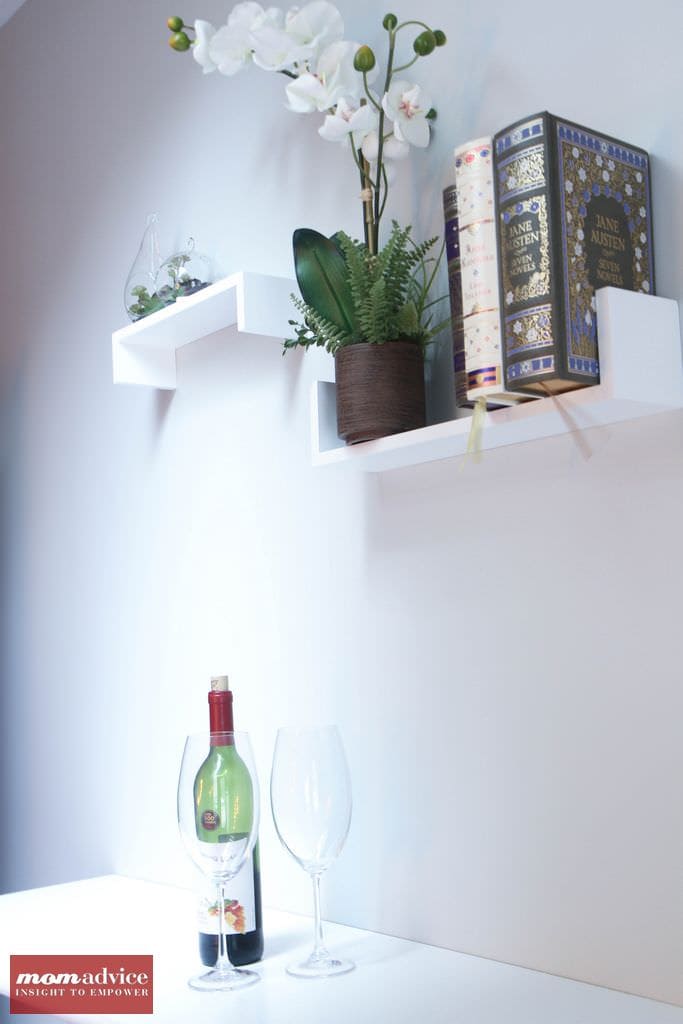
We added these modern floating shelves (only $19.95) and I filled them with a few fake succulents and wove in a few of my favorite books and a fake orchid.  It creates a soothing and maintenance-free splash of color over there.

How to Makeover a Shed Into a Bonus Room

How to Makeover a Shed Into a Bonus Room

The turntable I was gifted from my amazing girlfriends was placed on this pedestal table from Home Decorators and it was just the right size for this small space. I added this beautiful 30″ handmade arrow from Junk Art Gypsyz to the wall. We also added a beautiful typography piece that has the lyrics from Elton John’s, “Tiny Dancer,” to that wall.

How to Makeover a Shed Into a Bonus Room

Your question might be how we are keeping the room cool in the summer and warm in the winter? I have a great solution for you. We discovered that Walmart offers a Newair NewAir AC-10000H Portable Air Conditioner & Heater unit that not only act as an air conditioner, but a one piece solution for air conditioning, heating, and dehumidifying. The best part is that it can be set on a timer so you can set it for the day and it will automatically shut itself off.  All-Pro got the unit to drain outside of our home and installed a flap for the hose so that the unit is maintenance-free. This was the priciest of the purchases at $471.81, but eliminated the need for multiple units in such a small room.

How to Makeover a Shed Into a Bonus Room

Shed Makeover Shopping List

1. 30″ Marquee Arrow {Junk Art Gypsyz}

2. Too Legit To Quit Pillow {Michelle Dwight Designs}

3. Arrow Apache Blue  & Fynn Cool Grey Pillows {Groopdealz}

4. Tiny Dancer Typography {Concepcion Studios}

5. Safavieh Courtyard Outdoor Rug {Walmart}

6. Chloe Side Table {Home Decorators}

7. Amelia Metal Cafe Bar Stools {Walmart}

8. Newair NewAir AC-10000H Portable Air Conditioner & Heater unit {Walmart}

9. Providence Outdoor Day Bed {Walmart}

10. Danya Floating Shelves {Walmart}

11. Pellon Homegoods Decorative Pillow Inserts {Walmart}

12. Open/Closed Sign {Walmart}

Benjamin Moore Paint Choices


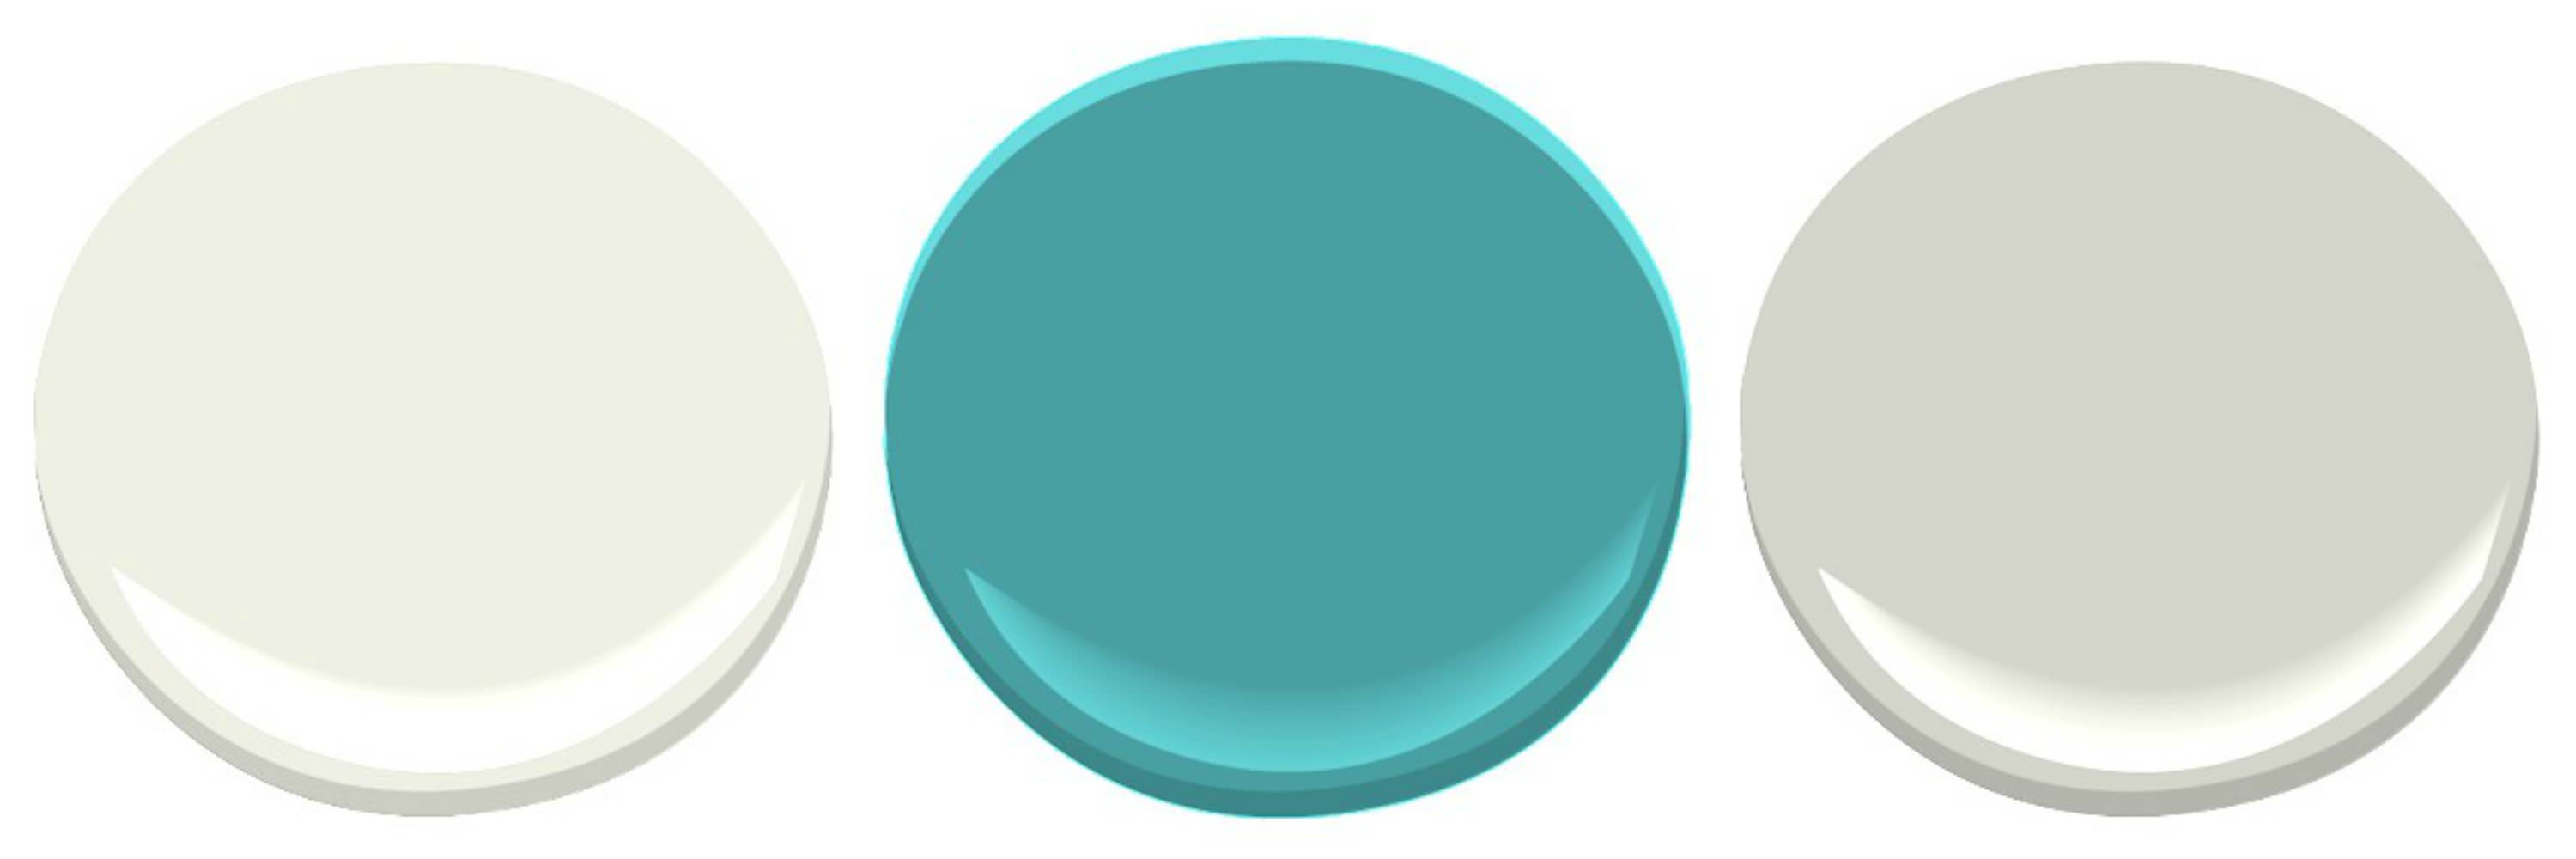
Paint Colors Used In Our Shed

1. Benjamin Moore White Dove (Glossy, Trim)

2. Benjamin Moore Blue Spa (Exterior, Door & Edge of Bar)

3. Benjamin Moore Gray Owl (Semi-Glossy, Walls)


I hope you enjoyed touring our shed.  I have found this room to be so good for my soul. It is so quiet and peaceful in there and is my new favorite place to unwind. Since the room is designed so differently from our home, it truly feels like I am going somewhere else in the evenings. The absence of clutter and our busy everyday life has been very calming to me.  I have been counting down the hours until my kids go to bed so I can escape. I also look forward to entertaining in here with my girlfriends, hosting book clubs, sharing a cup of coffee with good friends, writing alone,  and having a retreat for our kids on rainy days.

I’m thankful to All Pro Renovations for making all my dreams come true and exceeding my expectations for our former junky shed. Professional, courteous, on time (or early) every day, and quick to create smart solutions for this design challenge.  In ten short days, they created a space that I am so proud of and were as equally excited seeing it all come to life. They even came to my rescue when my daughter had a meltdown that her chalkboard door was disappearing and cut it to size for our garage door to surprise her while we were on vacation.  How amazing is that?

How to Makeover a Shed Into a Bonus Room

I could not have asked for more! I am already working on vision boards for other rooms in our home I would like to tackle with them again.

I hope this space inspires you and I’m thankful that Walmart gave me the chance to share about their beautiful outdoor options with you!

walmart_mom_disclaimer

Pin It

Ideas for Transforming Corners In Your Home

Thursday, October 15th, 2015

In honor of our Transforming Your Spaces M Challenge, I’m republishing one of my favorite posts about transforming small areas of our home using a combination of what we have, a few new inexpensive items, and some new fun art!

Transforming Corners In Your Home from MomAdvice.com.

I can’t believe that we have lived in our home 11 years now. What I saw as just our temporary residence until something better came along has now become our forever home as we inch closer and closer towards paying it off.  This is the longest I have lived anywhere and I am so proud of the updates that we have made to our space and creating a place that we can be proud of and share with our family and friends.

Tackling a big renovation on your space can feel daunting and overwhelming. When I look around there is so much that I wish I could do, but just isn’t in our budget. The good news is that small switches in your home can still make improvements to your space that can sit sweetly in your budget and time constraints.

Transforming Corners In Your Home from MomAdvice.com.

Walmart challenged me to refresh a corner in my home using some items from their store and I knew exactly which corner in my home I wanted to tackle. This corner is where I live during the school year. You will find me happily flipping through library books between getting my kids off to school and on their buses or spending my evenings knitting and sipping tea in this chair in the evenings.  The wall has had these three black-and-white pictures of shoes on it for ten years and I find that as I get older and develop my style more, I am drawn to lighter and brighter things in my home, rather than the masculine tones and colors that I was drawn to before.

Transforming Corners In Your Home from MomAdvice.com.

I decided to brighten up the space with a few things we had around our house (rearranging, after all is always the most budget-friendly option), to add a few fresh picks from Walmart that would fit in my budget, and then combine it with our love for great art.  At Walmart, I found two throw pillows for my chair, beautiful picture frames for under $20, a fiery red flower pot, and a small succulent that would require very little watering. I pulled in a light throw I had to bring in the lighter tones and moved a wreath that I had from our kitchen into the spot next to our clock.

Transforming Corners In Your Home from MomAdvice.com.

The entire color scheme hinged around some beautiful prints I found from Janet Hill Studio on Etsy. If you haven’t heard of her, I would just run right over and spend your afternoon coffee with her shop.  We had so much fun picking art for our wall and her pictures were so amazing that it took my husband & I almost three weeks to come to an agreement together on which prints to select. These prints brighten up the space so much more than my black-and-white photos and are a beautiful conversation piece. I love them so much that I have asked my husband if I can have a print for my birthday each year. I want to fill my home with her art, it really makes me that happy.

Transforming Corners In Your Home from MomAdvice.com.

Of course, once you start, it can be difficult to stop.  For me, it is a never ending process of rearranging and adding and taking away items in our home. My view from  the chair was rather uninteresting too so we went ahead and ordered one extra print.
Transforming Corners In Your Home from MomAdvice.com.

Transforming Corners In Your Home from MomAdvice.com.

I now have a pretty view of this beautiful piece titled, “Tallulah Shaw Rehearses Before Her Final Show. 1959.”  With our new front door and the pop of color we embraced while turning our shed into a bonus room, it is a very different hallway view from a few weeks ago.

I hope this inspires you to makeover a corner in your own home.  The beauty for me is that next week this corner could look entirely different because the joy is in the rearranging, the repurposing, and the frugal additions that can make your space so fun!

walmart_mom_disclaimer

Pin It

Gluten-Free Meatball Sub Game Day Appetizer

Monday, October 5th, 2015

Gluten-Free Meatball Sub Game Day Appetizer from MomAdvice.com

*This post is sponsored by Walmart. Thank you for supporting the companies that support this site!

Gluten-free and game day parties? Oof. Not fun, friends, not fun at all! I have learned a lot about social engagements like this though and know the best defense to any social gathering is to carry around my own dishes and drinks so I never go hungry or thirsty again. You will rarely see this girl without her own food!

Game day food is delightfully rich and comforting which is why I love it so darn much.  Today I wanted to create an appetizer that echoed those feelings of comfort and what could be more comforting than a pile of homemade meatballs? This meatball sub appetizer is gluten-free, but I promise you would never know it. It’s got everything I love in a meatball sub simply minus the bread.

Gluten-Free Meatball Sub Game Day Appetizer from MomAdvice.com

I’ve made meatballs a lot over the years (here is one of our favorite dinner dishes that we created together using my standard meatball recipe), but this was my first time trying to create a meatball without the addition of breadcrumbs or panko. With a blend of turkey sausage and ground turkey, I then mixed in fresh parsley, parmesan cheese, a little tomato sauce, and two eggs to bind it all together. I have a cookie dough scoop that I used to make sure all the meatballs were roughly the same size (and so they would fit on my toothpick).

These meatballs are a little more delicate without the breadcrumb binder so I baked them on a parchment-lined cookie sheet so that they would lift easily and not fall apart. Not only does this help the meatball hold its shape, but it also helps cut down your kitchen clean-up time. I would call that a game day win!

Gluten-Free Meatball Sub Game Day Appetizer from MomAdvice.com

Canned crushed tomatoes, garlic, salt, and a dash of sugar yield a vibrant sauce to nestle this appetizer in. I have tried a million different brands of canned crushed tomatoes over the years and I swear by the Great Value brand ones at Walmart. I don’t know why, but it always yields the best pizza sauce for me! I try not to use anything else.

What’s Your Favorite Game Time Recipe?

Are you feeling inspired? Do you have an incredible dish that everyone looks forward to on game days? Walmart happens to be running a GameTime Recipe contest and would love for you to post a photo of your favorite game time recipe on Instagram or Twitter using #WalmartMVPContest. By doing this, you will be entered to win a trip to LA to go to the YouTube studios to have a pre-Superbowl party and create content with some big YouTube stars. How cool is that? Read here for all the official rules! Need some inspiration? Check out all of the great GameTime Recipes that have been posted!
In the meantime, I hope you will enjoy this gluten-free game time creation I have created for you!
Gluten-Free Meatball Sub Game Day Appetizer from MomAdvice.com

Gluten-Free Meatball Sub Game Day Appetizer from MomAdvice.com

Gluten-Free Meatball Sub Game Day Appetizer from MomAdvice.com

Gluten-Free Meatball Sub Game Day Appetizer
Prep time:
Cook time:
Total time:
Serves: 33 meatballs
Ingredients
  • 1 pound ground turkey
  • 1 pound Italian turkey sausage
  • 1/4 cup Parmesan cheese
  • 1/4 cup parsley
  • 1/4 cup tomato sauce
  • 2 eggs
  • Salt and pepper
  • 2 packages baby mozzarella balls (over in the specialty cheese cooler by the deli)
  • 1 can crushed tomatoes
  • 2 tablespoons olive oil
  • 2 teaspoons minced garlic
  • 1 teaspoon sugar
  • 1 teaspoon salt
  • toothpicks
Instructions
  1. In a medium bowl, stir together the ground turkey, parsley, eggs, Parmesan cheese, garlic, salt & pepper, and tomato sauce. Stir gently to combine.
  2. Make your meatballs the standard size and place them on a parchment-lined baking sheet.
  3. Bake at 400 degrees for ten to fifteen minutes (this size took 12 minutes).
  4. Meanwhile, in a pot heat olive oil and add your minced garlic, cooking for just one minute.
  5. Add your crushed tomatoes, the remainder of your small can of tomato sauce, sugar, and salt. Allow this to simmer for ten minutes.
  6. Once the meatballs are done, ladle the sauce into a deep dish or bowl. Skewer one mozzarella ball and one meatball on a toothpick and nestle in the sauce. Serve hot.

As a participant in the Walmart Moms Program, I’ve received product samples and compensation for my time and efforts in creating this post. All thoughts and opinions are my own.


6 Festive Halloween Decorating Ideas

Monday, September 28th, 2015

6 Festive Halloween Decorating Ideas from MomAdvice.com

Halloween is just around the corner and with that season comes all of the fun decorating and costume ideas for your home and family.

Your favorite second-hand store is a top source for materials and costumes for most families.

Don’t forget while putting together your award-winning attire, that you can upcycle a lot of great materials for crafting a festive & spooky home too!

Gathered here are a few of my favorite ideas for decorating for Halloween that I think you will find both fun AND affordable!

Put a Few Skeletons in the Front Yard

I couldn’t stop laughing when I saw this hilarious idea for Halloween decorating from Ruffles & Truffles.
She scored a couple of these skeletons at her local Ross & Target stores and each year has so much fun setting the scene for the Halloween season.
With a couple of second-hand patio chairs, you have a quick and hilarious way to decorate for the season!
This idea is so fun because you could snag just about anything in the store and make it into a funny skeleton tableau.
Since I have a black thumb, I appreciate the exposed skeleton left to linger in the dead flower bed.
How fun is that?

Add Some Spooky Prints

One of my favorite trends right now for Halloween is the addition of a few spooky prints for a tabletop or mantle.
The House That Lars Built shows how easy it is to hunt for a free image to download and to print and get it printed as an engineer print for the mantle.
You could also go small with these prints and make a spooky mantle gathering with a few rummage sale frames spray painted in black.
I love the additions of the black taper candles as a finishing touch to this easy mantle idea!

Make a Candy Corn Treat Bag

I love pillowcases for holding our Halloween treats and I am so inspired by this super cute candy corn treat bag that Rit Dye made on their website.
I am such a big fan of the product for transforming everything from table linens to restoring color in my clothing, but I never thought to create a cute treat bag for my kids with the dye product.
The tutorial could not be easier and the results are picture perfect for a special trick-or-treater in your life!

Add a Witch to Your Fireplace

I feel like a good witch craft is mandatory when it comes to Halloween decorating. With a couple of pool noodles and some shoes purchased from Goodwill, you are well on your way to creating the cutest little witch to peek out of your fireplace.
The skirt was made with a little gathering of tulle and these tights can be found in abundance in the Halloween section of your superstore as well as your local costume shop.
I love that this is something you can do each year and that it can come apart for easy storage!
Visit Crafty in Crosby for the full tutorial on this one!

Mummify a Throw Pillow

I am a big fan of any cute home project that doesn’t require sewing and this mummified pillow is a perfectly cute way to decorate for the Halloween season with just a few simple craft materials.
This idea was inspired by Pottery Barn. Material can be found with the table linens/sheets and you could slipcover a throw pillow from the store to keep this adorable craft on budget!
Visit handmade mood for the tutorial on this super cute pillow!

Decorate Your Kids

All of you out there still getting away with picking your child’s Halloween costumes, I just couldn’t be more jealous.
I just love visiting Goodwill for fun Halloween costumes and prop ideas and this list wouldn’t be complete without one super cute costume idea for you to indulge in.
Skirt As Top has the sweetest little hipster Moonrise Kingdom costume idea I have ever seen.
Please tell me this is a favorite film of yours too!!
With a few fun props from Goodwill to complete this handmade adorableness, your kids are sure to win all the costume awards (and wow other parents in the process).
I will have to be content living vicariously through you this year now that I have a tween and teen on my hands!

I hope you leave this post feeling inspired to tackle a fun Halloween project of your own! Happy Halloween, friends!

This post contains affiliate links


More spooky crafts from MomAdvice:


Knitted Baby Viking Hat


Autumn Burlap Wreath Tutorial


Doughnut Hole Ghost Cake


DIY Thumbtack Pumpkins


Sign up for the MomAdvice newsletter

Pin It

Make-Ahead Breakfast Burritos

Friday, September 11th, 2015


Make ahead  and freeze these breakfast burritos from MomAdvice.com


Here’s one of our favorite breakfasts that helps our mornings run smoother – easy burritos that can be pulled from the freezer whenever you need them. It doesn’t hurt that they’re delicious and customizable, too!


Make-Ahead Breakfast Burritos

Back-to-School requires a lot of planning and getting back on track with a healthy breakfast is one thing I want to work on this year.

Today I wanted to show you a recipe for Make-Ahead Breakfast Burritos that can be made ahead and also created for your gluten-free or dairy-free family members.  

One batch of these freezer breakfast burritos can yield 15-18 burritos, depending on how you stuff  ’em, and they are filled with everything your kids need to start their day on the right foot.

I am partnering with Walmart on this back-to-school idea today so you can snag all the supplies you need right at their store.


Make-Ahead Breakfast Burritos


What I love about these burritos is that they are not only filled with fresh whole foods, but also that they are inexpensive to create.

With kitchen staples like eggs, cheese, potatoes, and tortillas, it is likely you already have a few things on hand for this back-to-school breakfast.

Create an assembly line of ingredients in the kitchen and have your kids jump in on the fun.


The potatoes are tossed in paprika and garlic powder for a tasty topping to the eggs.

I love a little Italian turkey sausage, red peppers, and cheddar or colby cheese for these burritos.

You can create your own flavor combinations or consider clearing out items from the fridge and making a unique combination all your own.


Make-Ahead Breakfast Burritos


Be careful to not overstuff the burritos so they can be wrapped easily and place them on a parchment-lined cookie sheet to place in the freezer until frozen.

Once these are frozen you can tuck them in a freezer bag and just grab them when you need them.

Do you know how to wrap a burrito?

 If not, I love this tutorial for perfectly wrapped breakfast burritos!


Make-Ahead Breakfast Burritos


With one kid in middle school (GASP!) and a daughter who prefers not to eat in the morning, I am hoping that these burritos will be the perfect way to get them motivated to eat a healthy breakfast.

Just grab one from the freezer and wrap it in a dampened paper towel for the microwave for three minutes (flip it halfway through).

Wrap in foil and let them eat them on the way to the bus or in route to school.  

These also make a great after school snack,  after sports activities, or an impromptu dinner with their pals while doing homework.

To make them dairy-free substitute the cream with almond milk (which is what we did) and add a vegan cheese to them or leave them cheeseless.

For a gluten-free burritos, Walmart offers this option in their stores.

We hope you love this delicious breakfast as much as we did.

We have already started raiding our make-ahead breakfast burritos for quick lunches this week.

I am shocked how beautifully these reheat and taste.

There are no excuses why you can’t tackle a healthy breakfast.

Be sure to check out my recipe for Slow Cooked Honey Crisp Apple Oatmeal for another fun breakfast treat!


Make-Ahead Breakfast Burritos

Make-Ahead Breakfast Burritos
 
Recipe Type: Breakfast
Prep time:
Cook time:
Total time:
Serves: 18
A make-ahead breakfast burrito that you can tuck in your freezer for a healthy breakfast, snack or meal.
Ingredients
  • 2 tablespoons olive oil
  • coarse salt and freshly ground pepper
  • 3 large russet potatoes, peeled and diced
  • 1 teaspoon garlic powder
  • 1/2 teaspoon paprika
  • salt & pepper
  • 1 lb Italian Turkey Sausage
  • 1 dozen eggs
  • 2 tablespoons cream (or milk substitute)
  • 1 red bell pepper, cored and diced
  • 1/2 pound cheese of your choice (or vegan cheese)
  • 18 tortillas, soft-taco size (8-inch), whole-wheat, flour, or gluten-free tortillas
Instructions
  1. To roast potatoes, preheat your oven to 475 degrees. Line a cookie sheet with parchment paper. Drizzle diced potatoes with oil and season with salt, pepper, paprika, and garlic powder. Toss the potatoes together to evenly coat in oil and seasonings, and spread out into a single layer on the parchment. Roast until browned on the bottom and tender, about 20-25 minutes.
  2. Brown your sausage. Once it is cooked through, set aside in a large bowl, leaving about a 2 tablespoons of drippings in the pan for the eggs.
  3. In a medium bowl, whisk the eggs with the cream (or milk substitute) and pour into the sausage skillet. Cook over medium heat until just set, stirring as needed. season with salt and pepper and stir to combine, and transfer to the bowl with sausage.
  4. In the same skillet, cook your red peppers over medium heat until fragrant and softened, about 10 minutes.
  5. Make an assembly line- tortilla, cheese, followed by a small handful of potatoes and a scoop of the egg/sausage mixture. Roll the tortilla up.
  6. For freezing, place burritos on a wax- or parchment-lined baking sheet and place in the freezer until firm, at least an hour. Transfer to large freezer bags and keep frozen for up to one month.
  7. For reheating, place a frozen burrito in a dampened paper towel and microwave for three minutes, turning halfway through.
 
Recipe Adapted From: Dinners For Winners


Easy freezer recipe for breakfast burritos from MomAdvice.com


Make ahead and freeze this easy breakfast burritos from MomAdvice.com


walmart_mom_disclaimer


Meal Prep: Breakfast Sandwiches Recipe from MomAdvice.com

Make Ahead and Freeze Breakfast Sandwiches


DIY Breakfast Caddy

DIY Breakfast Caddy


Applesauce Cinnamon Breakfast Muffins

Honey Sweetened Applesauce Cinnamon Breakfast Muffins


Quinoa Berry Breakfast Bowls

Quinoa Berry Breakfast Bowls

Pin It

Warm Up Your Outdoor Space for Fall

Tuesday, September 8th, 2015

Warm Up Your Outdoor Space for Fall from MomAdvice.com

This post is sponsored on behalf of BHG at Walmart.

Fall is just around the corner and today I wanted to share a few ways to personalize your outdoor space for the autumn season by bringing in some warm textures to your outdoor decor. This month I am partnering up with the BHG Live Better Network to show how we personalize our outdoor space with a few items that you can find at your local Walmart store.

Warm Up Your Outdoor Space for Fall from MomAdvice.com

The first step towards warming up our outdoor space was selecting an outdoor rug to go underneath our picnic table. Outdoor rugs have come such a long way, as I discovered when creating my own little she-shed this past year. They really hold up well to the elements and they add such warmth to the space that it almost feels like you are dining inside with these beneath your feet. After endless browsing, I settled on this BHG Medallion Rug in an 8×11 size, for just $159.

Warm Up Your Outdoor Space for Fall from MomAdvice.com

Warm Up Your Outdoor Space for Fall from MomAdvice.com

I’m pretty terrible at caring for plants, but I am a collector of pumpkins. To anchor the corner of my table, I filled this 16″ Bombay Decorative Planter with a few pumpkins from my growing faux pumpkin collection. I love the twiggy pumpkins against my DIY dollar store thumbtack pumpkins that I made last fall. To prop them up, I filled the bottom with paper so the pumpkins could peek out a little higher in this pretty pot.

This pot is the ultimate fake-out too because it looks like a heavy breakable ceramic pot and it is, in fact, PLASTIC and unbreakable. I can’t wait to fill it with plants that care for themselves in the summer!

Warm Up Your Outdoor Space for Fall from MomAdvice.com

Warm Up Your Outdoor Space for Fall from MomAdvice.com

Of course, nothing says warm and beautiful like the twinkle of outdoor lights. I did a ton of research on how we could mount outdoor lights over our picnic table when we didn’t have any trees to anchor them. I read this fantastic article and then was like, “I need pipe and a clasp.” I then hit myself in the head and remembered that we had two fantastic poles that were already ready on our lemonade stand that I could detach and use to hang our lights, clasp even included!

Have you ever hung outdoor lights over your table before? I’d love to hear how you anchor them if you don’t have trees! For now, this set-up worked out beautifully and you can’t beat the fact that I didn’t have to buy anything.

Warm Up Your Outdoor Space for Fall from MomAdvice.com

I am a big fan of utilizing the items we already have to charm up our outdoor space for guests. This knitted leaf centerpiece made from my yarn scraps continues to be a favorite in our home and it adds the perfect Fall touch to our outdoor table.

Warm Up Your Outdoor Space for Fall from MomAdvice.com


I hope these ideas inspire you to warm up your own outdoor space for Fall! I love these sweet and simple affordable touches that can be found at Walmart with a few of my favorite handmade accessories! I hope they inspire you too!


Live-Better-Network-Badge

In accordance with the FTC Guidelines, I am disclosing that I received compensation from BHG at Walmart for my time and participation in the BHG Live Better Network. Although we have material connection to BHG, any publicly stated opinions of BHG and their products remain my own.

Pin It