Archive for the ‘My Work’ Category

How to Make Chalkboard Pumpkins

Monday, October 15th, 2012

If there is one thing you know I love around here it is chalkboard paint. Chalkboard painted pumpkins are a fun way to avoid the pumpkin carving and allow your kids to unleash their inner Picasso. Chalkboard pumpkins are easier to make than you might think and today I wanted to show you how to transform ordinary pumpkins into Chalkboard Pumpkin People that lets your kids be creative while creating a unique accessory to your front step!

Let’s get started with creating your very own Chalkboard Pumpkin People.

Supplies Needed (all found at Walmart):

1 real pumpkin

1 can of chalkboard paint (over in the hardware department)

Masking or electrical tape (this is optional, I ended up not covering my stem)

Wet wipe

White Chalk

1 Skeleton or Witch Body (these are found in the Halloween supplies by the pumpkin carving tools, $7.97 each)

How to Create Your Chalkboard Pumpkin

1. Wipe down your pumpkin well with a wet wipe or damp paper towel to remove any dirt or debris.

2. Hold your can 10-14 inches away from your surface and spray in a sweeping motion side to side with a slight overlap around your entire pumpkin. Follow this pattern horizontally and then vertically. Wait fifteen minutes or so and then apply another coat. You need two coats to create your chalkboard surface.

3. Allow your pumpkin to cure. Do not use any chalk on this for 24 hours! The chalkboard paint will need to harden and will not be ready until then. If you try it before it is ready, it will just scratch the paint through, creating marks and exposing the orange on your pumpkin.
Let your little artists go to work with their chalk. Before giving it to them, make sure to rub down the corners so that they don’t scratch their pumpkin’s surface. I also reminded them to draw gently on these so their paint would remain intact.

Mistakes made? No problem! These can easily be erased and started over again. We had many false starts before deciding on our perfect faces.

Here are our finished faces that the kids drew (the witch’s creator might have had a little help from her Dad). We really loved these cute little faces and couldn’t wait to put them on the pumpkin bodies.

The best part about these though is that you can erase these and use them over and over again through the Thanksgiving holiday with written notes of thankfulness or a countdown to the holidays.

Of course, if you are more of the carving pumpkin type, Walmart has you covered with loads of great carving tools this year!


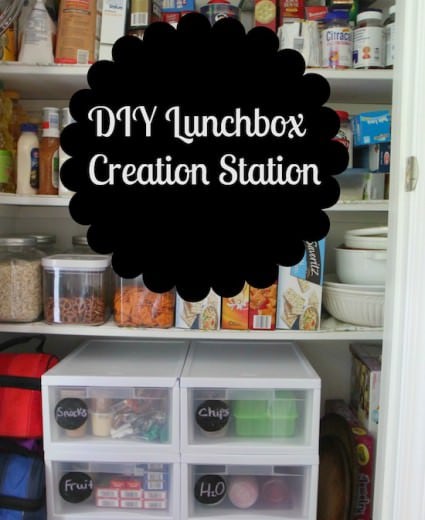
Don’t know what to do with the rest of that can of chalkboard paint? How about a DIY Lunchbox Creation Station, Chalkboard Food Label Frames, or Conversation Bubble Cookie Jars…just to name a few!


I am a part of the Walmart Moms program, and Walmart has provided me with compensation for these posts. My participation is voluntary and opinions are always my own.

Pin It

How to Make a Duct Tape Pumpkin

Sunday, October 14th, 2012

Carving pumpkins isn’t for everyone and I am so excited to share with you this easy craft for a duct tape pumpkin that you can pull out year after year. You may have never even noticed the patterned duct tape lurking in the craft aisles, but this is one easy & inexpensive craft material with endless possibilities for a customized duct tape pumpkin that can match any room in your home.

Supplies Needed:

1 craft pumpkin

1 roll of patterned duct tape (Duck Brand)- available in the craft section of Walmart

1 roll of solid colored duct tape (Duck Brand)- available in the craft section of Walmart

Hot glue gun & glue sticks

Scissors

To create your chevron pumpkin base:

1. Twist off the pumpkin stem to create an even surface on top for covering your pumpkin with tape.

2. Pull a strip of duct tape off the roll that will cover the entire pumpkin. Attach it to the pumpkin, doing your best to try not to wrinkle it.

3. Continue covering the pumpkin until it is fully covered with the duct tape, doing the best you can to line up the patterns. If you have wrinkles, overlap the duct tape to cover any minor flaws.

4. Place a dab of hot glue on the top and reattach your pumpkin stem, holding it  in place for a couple of minutes to secure it.

To create duct tape rosettes for the top of your pumpkin, you will need to do the following:

1. Measure a 10″ strip of your solid-colored duct tape and cut it off the spool.

2. Fold the duct tape in half (sticky sides in), doing your best to line the tape up evenly. If you don’t get the tape perfectly even, just trim the edge until you don’t see the white anymore.

3. Twist the tape to create a tight center to the rosette.

4. Begin twisting your tape as tightly or as loosely as you would like to create your rosette. Add a dab of hot glue periodically between the twists to secure it all together.

5. Once you have finished your rosette, add a dab of hot glue to the bottom and secure it to the top to create a rosette “leaf.”

6. Repeat this process again and create one more rosette. Secure the second rosette next to or slightly overlapping the first rosette to add your second rosette “leaf.”

Create your own pumpkin with your family and you could win $1,000 in the Stick or Treat Duck Brand Jack O’ Lantern Contest. The company offers over 100 colors, prints and licensed prints such as Hello Kitty and each roll of tape retails for $3.37 at Walmart stores!

Looking for more pumpkin crafts? Be sure to check out my tutorial for my Painted Address Pumpkin Topiary and Decoupaged Pumpkins that you can do with more of these fun faux pumpkins!


I am a part of the Walmart Moms program, and Walmart has provided me with compensation for these posts. My participation is voluntary and opinions are always my own.


Pin It

Easy Cupcake Photo Picks

Friday, October 5th, 2012

Halloween is drawing near and along with all of the costume fun comes many opportunities to share treats at school and fun parties. Today I wanted to show you a fun and easy way to dress up a cupcake with your very own personalized photo pick. This craft could not be easier or more cute for dressing up a homemade cupcake or a store-bought one (Shhh…I’ll never tell!)

Begin by going through your Halloween pictures and selecting a favorite one of your children. You could also get a jumpstart on Halloween pictures and have your children dress up in costume and take a picture in their new costume. If your children are anything like mine, they will be more than happy to oblige and get the opportunity to wear their costumes just one more time.

This is a favorite picture of mine from last year of my two goblins.  We decided to stage a Ninja attack on our little princess for some hilarious photos opportunities for Halloween.  This picture still makes me laugh!

Head on over to the Walmart photo site and upload your favorite Halloween photo to your photo account (you can create a new one if you don’t have one). Next just click here to create your own photo sticker sheet. Select CUSTOMIZE, select your album & then your picture, click the MORE tab, and then click MORE STYLES. Under that you will see all of the cute Halloween backgrounds to customize your photo sticker. You can leave them plain or you can add a cute font and message with your sticker.

Once you have created your sticker, you can have them shipped directly to you or pick them up at your store in 2-3 business days.

To create a cupcake photo pick, you will just need your sheet of photo stickers and a package of popsicle sticks (available in the craft supplies at Walmart)

  1. Grab one popsicle stick.
  2. Peel one sticker from your sticker sheet and stick it to your popsicle stick, carefully centering it.
  3. Peel another sticker off your sticker sheet and stick it to the flipside of your popsicle stick, lining the sticker up carefully with the other sticker.
  4. Stick your photo pick into the top of your cupcake.

Aren’t these so cute? I love that this is a craft that anyone can do and that can add a very special and personal touch to your Halloween treats this year.

Happy Halloween, friends!


I am a part of the Walmart Moms program, and Walmart has provided me with compensation for these posts. My participation is voluntary and opinions are always my own.

Pin It

The Good Life for Less: My First Book Available NOW!

Friday, October 5th, 2012

After much waiting and years of hard work, I am so excited to share with you that, “The Good Life for Less,” (my first book, published by Penguin) is now available in bookstores nationwide. This is, perhaps, one of the most surreal moments of my life and I am so proud that I finally get to share it with all of you. It is such an honor to have my family on the cover (shot by Nancy Lary Studios) of this book and it was one of the most special days of our lives and one I will forever remember.

This book is the handbook that I wish someone had given to me when I started my family. It is a book rooted in great family traditions on a dime, how to get delicious and inexpensive meals on the table, how to care and decorate your home for less, how to have fabulous family celebrations without spending a lot, and truly living the good life for less!  It is nine years of hard research and sharing the very best gems of wisdom I have learned over the years, much learned  through my own trial and error, as well as the beautiful words of wisdom you have shared with me over the years that have helped to shape our family.

Even as a child, I also wanted to be a writer and to write my own book. I used to type furiously on an old typewriter in my parent’s basement, writing my own little books of stories of my own imagination.  I am fascinated with writers and have often admitted out loud that the main reason I have a Twitter account is simply to talk to my favorite writers. I am the girl that sends fan mail to my favorite writers. I am forever a bookworm. To be among them, is a childhood dream come true.

We so appreciate your love and support. Without you, a moment like this would have never been possible. This is one of those projects though that I truly need your help supporting- please share about it with your friends, tweet it, pin it, Facebook it, share it, buy it, etc… It would mean so much to my family!

The book is NOW AVAILABLE for ordering, both print and digital versions!  Here are some options for great places to order it! I also encourage you to hit your local bookstore to pick it up! 

Amazon

Barnes & Noble

Walmart

Powell’s

Indiebound

I am so thankful for you and your belief in me over the years. Nine years ago, I would have never envisioned where this journey would take us and it has far surpassed anything I could have ever dreamed.

I thank you and love you all dearly!

xo,

Amy

Pin It

Spaghetti Cupcakes

Tuesday, September 25th, 2012

Tired of the same old weeknight food routines?  I have the perfect kid-friendly and fun recipe that your kids will absolutely love and so will you. Today I am sharing a recipe for Spaghetti Cupcakes that will put those taco and potato bars to shame. This dinner idea is one the whole family will love and can be ready in about fifteen minutes.

Gather up all of your favorite spaghetti toppings to top each of your noodle cupcakes. For my cupcake toppers I have shredded carrots, baby peas, ricotta cheese, turkey meatballs, and Ragu Old World Style tomato sauce.

Cook your pasta as directed on the package and drain the pasta in a colander. Do not rinse your pasta because it will help the pasta hold its shape better in the cupcake liner.

Twist your pasta noodles around a fork until you have a good forkful of noodles. Gently place the noodles in a foil-lined cupcake liner. I would say that three to four of these spaghetti cupcakes would feed one person once it has been topped with its toppings.

Top each spaghetti cupcake with Ragu sauce. Once it has been topped on these cupcakes, it will ooze into the crevices of the noodles with ease. Repeat this step on each of your cupcakes.

Top each cupcake with your favorite toppings and finish each cupcake with a turkey meatball. This is a fun food activity to let your kids do and is also a creative way to get your kids to eat their vegetables.

I can’t take the credit for the fun food that was featured today. These Spaghetti Cupcakes are featured on a great site that offers inspirational ideas for meals to share with your family.

You can visit the Meal Inspirations site to find loads of great ideas for meals, demos on how to create the recipes, and even print out coupons for your favorite products. For example, this week you can grab a coupon for $1 off of Hellman’s mayonnaise!

I hope you love these fun Spaghetti Cupcakes and I hope you can take a moment to head over to the Meal Inspirations site to get even more great ideas to enjoy around the dinner table with your family!

If you love this idea, I am betting you will love my Mac & Cheese Bites too! Happy cooking, friends!

Spaghetti Cupcakes
Recipe Type: Main
Prep time: 5 mins
Cook time: 10 mins
Total time: 15 mins
Serves: 4
Spaghetti cupcakes are a fun way to get your kids to eat their veggies and to be master of their own creations. I guarantee your kids will love this one!
Ingredients
  • Ragu® Old World Style® Spaghetti, cooked and drained
  • Ragu® Pasta Sauce, heated
  • Whole kernel corn, drained
  • Green peas
  • Shredded carrots
  • Part-skim ricotta cheese
  • Grated Parmesan cheese
  • Frozen fully-cooked low fat cocktail-size meatballs, heated
  • Foil cupcake liners
Instructions
  1. Arrange sturdy foiled cupcake liners on serving plates.
  2. Fill each with fork-twirled hot spaghetti and top with heated Ragú® Pasta Sauce. For best results, do not rinse the pasta after draining.
  3. Decorate with your kid’s favorites like corn, peas, shredded carrots, part-skim ricotta cheese, grated parmesan, or hot cooked mini meatballs.


 This is a sponsored post as a part of my role in the Walmart Moms program. I am a part of the Walmart Moms program, and Walmart has provided me with compensation for these posts. My participation is voluntary and opinions are always my own.


Pin It

Painted Address Pumpkin Topiary

Tuesday, September 25th, 2012

One of my favorite things about Fall is the fun crafts that I get to do with all of those beautiful Fall pumpkins! Today I wanted to showcase an easy painted address pumpkin topiary that you an create with just a few supplies from your local Walmart store. This painted address pumpkin topiary would the be the perfect way to dress up your porch, porch step, or a little corner in your room.

Craft Supplies Needed

2- 75 inch pumpkins (any color)- $4.87 each

8″ pumpkins (how ever many you need to complete you house number)- $4.87 each

Black Plaid FolkArt acrylic paint (I chose the shiny variety)- $1.77

4″ Plaid letter stencils ($3.77)

Stencil Brushes ($5.47)

Clear tape (in supplies)

Hot glue gun & glue sticks (in supplies)

8″ pot (I found mine in the clearance section of the store for $11.96)

1. Begin by twisting off the stems on all of the pumpkins that will be going on the bottom of your topiary. You will want to leave your top pumpkin (the 75″ one) with the stem intact. All the other stems can come off.

2. Center your stencil on your pumpkin and attach it with clear tape. Make sure when positioning your numbers that when you stack the pumpkins, you will be able to see the number clearly in the center. You will especially want to do this for your bottom pumpkin since it will be wedged in your pot.

3. Trace your number with a pencil. Remove your stencil.

4. Pour your acrylic paint in a disposable cup or bowl. Using a small paintbrush, carefully paint your number on your pumpkin. If you make an error, use a cloth or a damp Q-tip to remove any painting errors. Set your pumpkin aside, and repeat the process on each of the other pumpkins until you have stenciled your address number.

5. Wedge your 75″ pumpkin into the pot. This should be a tight fit so you will not need to glue or attach your pumpkin into the base. Stack your next pumpkin and carefully hot glue in each spot where the pumpkins are joined together. Hold the pumpkins together to secure for a minute or two. Repeat this process until you reach the top of your pumpkin stack!

Stand back and behold your pumpkin glory! Isn’t this just the cutest thing ever? I know all of my neighbors are going to be so jealous!

I hope they are half as impressed as my cat.

Seriously.

Looking for more Fall crafts? Be sure to check out my round-up of the Best Fall Crafts on MomAdvice. I hope you will find it inspiring, friends!


Pin It

Throw a Board Game Party with Goodwill

Monday, September 17th, 2012

I am so excited to share with you today some easy craft projects you can do to create a beautiful board game party theme for a fun game night with your friends.

I recently hosted a board game party and created all of my fun decorations from supplies I found at our local thrift store and the dollar store.

The total cost spent on all of these decorations was a mere $30 and I am so proud of how this theme turned out.


I hit our local thrift on a half off sale day to score these three vintage board games for a total of $2.44 (for all three)!

What a steal!


The first thing I did with my supplies was to create a board game banner to edge my party table.

For this you will need board game paper cards, a deck of cards (optional), play money, extra wide bias tape, and a hot glue gun with glue sticks.

Using your hot glue gun, add two drops of glue on each side of the front of your board game piece and secure it to the inside front of the bias tape.

For the reverse, add one drop of glue and then secure again to the opposite inside of the bias tape.

Repeat this in a sequencing pattern all down your banner.


I decided to create two of these, one to edge my table and one above my table on my ledge.

To secure it to your table, just use safety pins or straight pins to pin it to your tablecloth.

Isn’t that the cutest?


I had a lot of food to serve and not a lot of platters to use.

Good thing we have those board games, right?

Pick up three clear glass candlesticks in the same size. If you can’t find them there, you can grab them at the dollar store.

Using a primary spray paint color, spray paint these with your favorite color.

Let them dry for an hour.

Clean off your board game with a Clorox wipe (we will be serving food on it).

Invert your candlesticks upside down because we want the wide side of the candlestick to secure to the board game to create a more stable surface.

On that side, apply your hot glue all along the edge and secure it to your board game on the bottom to create a base for your serving platter.

Hold it secure for a couple of minutes.

Repeat this process with the two other candlesticks, creating a triangle base on the bottom of your board.


Isn’t this the cutest serving platter?

By raising your food up, you will have more room to add platters below and create interesting levels to your food.


You can also use other board games without a stand to place your food on lower levels.

Doesn’t that look awesome?


To add some more interest to my table, I also created hurricanes to display the smaller board game pieces.

Again, you just need clear glass candlesticks or even brass ones, that are often in abundance at Goodwill.

Spray paint these your favorite color and then add glass bowls or containers on top to finish them off.

If you can’t find these at your store, you can also check the dollar store for small glass fishbowls and vases that can be used.

Using an epoxy glue intended for glass (I used an Elmer’s epoxy glue that I picked up from my hardware store), secure the glass bowl to the top of your candlestick (just as shown above using a hot glue gun).

Fill it with you favorite vintage board game pieces from the board games you bought.


I absolutely love the vintage pieces that you can find in old board games.

Just remember, these hurricanes can be reused for other parties and spray painted again in whatever your party theme colors might be.


Since I was on a spray painting frenzy and I had so many great dishes to share for this party, I also created these DIY chalkboard food label frames.

You can grab the tutorial for this project as well as the recipes for all of the dishes I created for this party to replicate what was created here.


Now grab your best girlfriends, have everyone bring their favorite beverage and board game (check out this list for great games to grab at your favorite thrift store), and have a fun board game party evening that your friends will always remember!

What happens to be your favorite board game?

This post contains affiliate links.


Don’t miss these other great posts from MomAdvice.com:


How to Organize Your Family’s Game Collection


DIY Roll-Up Puzzle Mat


DIY Outdoor Movie


7 Tips for Hosting a Successful Book Club


Sign up for the MomAdvice newsletter

Pin It

12 Great Tailgating Recipes

Thursday, September 6th, 2012

12 Great Tailgating Recipes
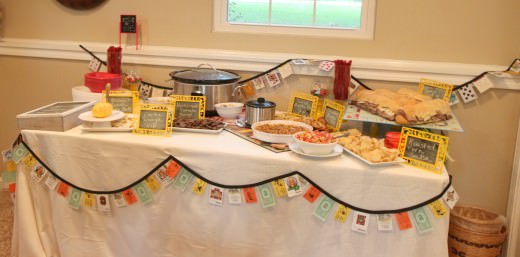
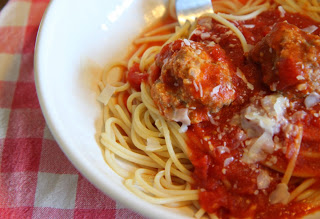
Hip-Hip-Hooray! Tailgating season is finally here and today I wanted to showcase to you twelve great dishes you can take with you to your next tailgating event. After all, what tailgating event would be complete without a great dish to share with friends?

It may surprise you that I don’t care a thing about football…Oh, who are we kidding? I am sure you already knew this about me. I will admit that I may not love the game, but I am all about the yummy food, drinks, and festivities with friends that surround the games.

Here are my top twelve choices for taking to your next tailgate:

1. Roasted Corn Salsa  Fresh chopped tomatoes, roasted corn, and parsley are tossed with just a little red wine vinegar, olive oil, hot sauce, salt, and pepper to create this unique and easy appetizer. What makes this appetizer unique is the process of broiling your corn under the broiler to add a smokey flavor that will have your friends begging for the recipe!

2.  Cheddar Apple Pie Dip–  One of my favorite combinations for fall eating is cheddar and apples. If you haven’t tried this before, it is the perfect balance of sweet and savory and they all come together in this easy dip to tailgate with.  Diced on top  is a mixture of red and green apples that have been tossed with brown sugar, cinnamon, and coarsely chopped walnuts. The layer underneath offers a surprise of cheddar cheese mixed with cream cheese and sour cream, cooked until hot and bubbly. Serve with your favorite cinnamon chip or cracker.

3. Lentil Soup– Looking for a wallet-friendly soup to feed a big crowd? Lentil soup is the perfect answer to feasting on a budget.  If you haven’t cooked with lentils before, you should really give them a try! Unlike dried beans, lentils do not require any pre-soaking overnight prior to being cooked. Instead, most cooks recommend that you first pick over these legumes, and remove any that look broken or damaged. A quick rinse after you have picked out the damaged lentils, and you are ready to go. The ease and minimal prep time for cooking these is why lentils are a wonderful and easy addition to any soup and the perfect soup to tailgate with!

4. Pesto Chicken Tortellini Soup–  This tortellini soup brings together all of the flavors that my family loves, but is a versatile recipe that could be created with what is at your supermarket that day. For our vegetarian readers, the chicken tortellini and chicken broth can easily be switched to a cheese-filled tortellini with vegetable broth instead. I used basil pesto in this, but you could also try a sun-dried tomato pesto or omit the pesto altogether if it is not a favorite of your family. Versatility is the beauty of a good soup recipe  and this recipe is quite versatile! Not only is this sup a crowd pleaser, but it also is an easy soup to double or triple for your tailgating needs.

5. Homemade Tomato Soup– This tomato soup is all of our favorite flavors in the perfect merriment for our family.  Chicken stock, whole tomatoes, crushed tomatoes, and a little heavy cream are all mixed together. To cut the acidity, a pinch of sugar and a healthy dose of pesto round out the flavors. Be warned, a single batch makes enough to serve a small army. I love to serve this soup with a variety of fun crackers, croutons, or shredded cheeses for topping.

6. Cookie Dough Dip This dip was nicknamed “Crack Dip” after the bowl was scraped clean when I brought it for Thanksgiving one year. I love to bring a sweet dessert dip that can be an unexpected surprise among the savory dips that are usually offered for tailgating spreads.

7. Bacon & Ranch Cheese Ball This cheese ball is so embarrassingly easy, but is always a showstopper when I bring it to any get together. I try to always keep these ingredients on hand in my fridge or pantry for the unexpected get together for the games!

8. Double Tomato Bruschetta– This bruschetta is a double tomato bruschetta which combines the super sweet and chewy flavors of the sun-dried tomatoes with the delicious juiciness of the Roma tomatoes. The flavors together are phenomenal and are mixed with just a little balsamic vinegar,olive oil, garlic, and a little fresh garlic.  You can prepare this one a few hours in advance, allowing the flavors to marinate together and break down the tomatoes a bit, or you can prepare it and eat it within ten minutes of preparation. I promise it won’t last long wherever you take this one!

9. Black Bean & Roasted Red Pepper Soup– Looking for a soup that will stick to your ribs through the whole day? I happen to have just the soup for you! The spices in this soup are perfect , the roasted red pepper adds a beautiful color and flavor to the soup, the sour cream adds that perfect balance of creaminess, and the beans add that filling soup combination to help keep you full throughout the day, while the chicken broth makes this soup light enough that even black bean soup haters could learn to love it… well, most black bean soup haters. This is a great soup to double or triple depending on the crowd that is gathering!

10. Baked Apple Pie Donuts– I love baking donuts and these Baked Apple Pie Donuts are the perfect treat to take to your next tailgate! The dominate flavor in this one is definitely the apple followed by the earthy and nutty flavor of ground nutmeg that helps round out the flavor profile of these donuts.  Once these delicate donuts are done baking, they are brushed lightly with butter and then dipped into a cinnamon and sugar coating that helps bring all of those delicious fall flavors together and that little bit of gritty, yummy crunch that just so happens to be my favorite thing about donuts. I guarantee that not a single one will be left within minutes of their arrival!

11. Pumpkin Cornbread Muffins Pumpkin Cornbread Muffins are my family’s favorite side dish if it is fall or the dead of summer. I try to make sure to stockpile pumpkin for just this reason and you might be doing the same after making a batch of these for tailgating season. These are best served at room temperature which is just the right temperature for your next tailgate!

12. Sub Sandwiches- Walmart gave us a chance to throw a game party with their subs to showcase what an affordable tailgating party option these are. For $28, you can get a six foot sub with your favorite meats and cheeses and all of the toppings.

As you can see from the way that these subs got plated, I took the opportunity to throw a GAME party quite literally and hosted a board game night with my best girlfriends.

Here is a little sneak peek at my table and the spread that I did with my tailgating recipes for a fun board game night with friends. Be sure to check back next week for ideas on how to decorate, board game ideas, and other fun crafty projects you can incorporate within your own game party. This might be a fun one to throw for the wives while the husbands are enjoying the game!

Be sure to check out my tutorial this week for those cute DIY Chalkboard Food Label Frames! Those would make a fun addition to any game day party table that you might be creating!

Happy tailgating, friends!


I am a part of the Walmart Moms program, and Walmart has provided me with compensation for these posts. My participation is voluntary and opinions are always my own.


Pin It

Creating Your Own Back to School Traditions

Tuesday, August 28th, 2012

In less than one week, my two sweet kids will be boarding their bus and heading off to their first day of school.

It is hard to believe that another fun summer is behind us, but if this picture offers any indication, I am just a tiny bit enthusiastic about getting back to our daily routines and having time to work without carving time away from my attention to them.

We truly have much to celebrate and be thankful for in our family – including our school milestones – and I always try to make these days as special as possible with a fun celebration dinner for the kids.

Today I want to share some easy ideas for fun school-year celebrations you’ll enjoy all year long.


Create a School Picture Tradition

I love to see how much my children grow each year and I’m always trying to think of a new way to capture this big moment in their life.

Create a sign that says what year they are going into school or search on Pinterest for free back-to-school printable signs to use for your big day.

To really take your sign to the next level, find a cute picture frame to put your sign in and spray paint it for a pop of color.

You could also hunt for a small chalkboard or create your own chalkboard using chalkboard spray paint and jot down their school year.

Try to capture the big things, like that growth spurt that seemed to happen overnight, and then capture the little things like their fancy new school shoes or their cool character backpack.

Even if you might have missed the moment on the first day of school, there is an opportunity to capture this all year long and no one will be the wiser that it wasn’t your kid’s first day back.

I promise that these pictures will later be a treasure to you and to your kids when they can look back and see how much they have grown and changed.


Create a Celebration Plate Tradition

One of our wedding gifts when we got married was a Celebrate plate that my mom picked up at our local greeting card store.

This tradition was handed down to me because when I was growing up, any time we had a celebration in our family, the special recipient got to eat on the special plate.

You can create your own Celebration plate that you decorate together using a plate from your local Goodwill store and a porcelain paint set that you can find at the craft store.

Use a waterproof marker pen to jot down the date and the exciting occasion you’re celebrating together on the back of your plate for a sweet tradition that can sit sweetly in your family budget.


Create a Fun Decorating Tradition

Our balloon wreath isn’t just for celebrating birthdays anymore.

I now hang this wreath in our doorway anytime there is a celebration to be had in our house including those school year celebrations.

You can make your own balloon wreath by covering a straw wreath with two large packages (of 72) balloons and attaching them with greening pins (in the floral aisle of your craft store).

This wreath can be used for any of life’s little celebrations… big or small!


Create a Fun Meal Tradition

Nothing says celebration like a big plate of your favorite food. In our house, the most requested dish is my spaghetti and meatballs.

When celebrations arise, whether it’s a great report card or the first day back to school, let your children make the dinner selection for the night.

We have had everything in our house requested, from our favorite sub sandwiches to a taco bar night to homemade pizza.

Not only will you not have to plan dinner one night, but the bonus is your kids will eat it and love it!

Whatever you do, I can assure you that your children will long remember and appreciate!

I wish you many celebrations all school year long!

Looking for the perfect recipe for homemade spaghetti & meatballs to celebrate your kids and their first day back? I have you covered with this easy sauce and baked meatballs that rival any Italian restaurant. Double or triple the sauce and meatballs for delicious meals that you can eat all week long! 


Homemade Spaghetti & Meatballs

For Sauce:
3/4 cup chopped onion (we omitted because we don’t like onions)
5 cloves garlic, minced
1/4 cup olive oil
2 (28 ounce) cans whole peeled tomatoes, undrained
2 teaspoons salt
1 teaspoon white sugar
1 (6 ounce) can tomato paste
3/4 teaspoon dried basil
1/2 teaspoon black pepper
For Meatball (this recipe will make enough for a double batch, half to eat and half to freeze):
1/2  cup plain bread crumbs
1/2 cup chopped fresh flat-leaf parsley
4 large eggs, lightly beaten
2 tablespoons whole milk
2 tablespoons ketchup
1 1/2 cups grated Romano (or Parmesan)
1 1/2 teaspoons salt
1  teaspoon freshly ground black pepper
1 pound Italian turkey sausages (remove the casings)
1 pound ground beef
To make sauce: Saute onion and garlic in 1/4 cup olive oil until onion is translucent. Stir in tomatoes, salt, and sugar. Cover, reduce heat to medium-low and simmer one hour and thirty minutes. Stir in tomato paste, basil, 1/2 teaspoon pepper, and meatballs and simmer thirty more minutes. Gently break apart the tomatoes with the back of your wooden spoon.  Five to ten minutes before serving, add in your meatballs and then serve over a big bowl of your favorite pasta.
To make meatballs: In a medium bowl, stir together the bread crumbs, parsley, eggs, milk, ketchup, Romano cheese, and the salt and pepper. Add the turkey & ground beef, then gently stir to combine. Make your meatballs the standard size and put them on a baking sheet. Bake at 400 degrees for ten to fifteen minutes. When done cooking, drop in the baked meatballs for a few minutes. This will be just as delicious with a lot less mess and fewer calories.
This post contains affiliate links
Don’t miss these other great posts from MomAdvice.com:

Back to School Meal Prep Ideas


21 School Organizing Ideas

21 Amazing School Organizing Ideas


DIY Lunchbox Creation Station :: MomAdvice.com

DIY Lunchbox Creation Station


5-Ingredient Sheet Pan Salmon Meal


Sign up for the MomAdvice newsletter


The Best Steak Marinade Recipe for Grilling

Monday, August 27th, 2012

The Best Steak Marinade Recipe for Grilling Header

Looking for an easy steak marinade for your next cookout? These steaks can marinate in a freezer bag while you prepare your side dishes. This recipe elevates any cut of steak so no need to spend money on a filet mignon.

Adding flavor and tenderness to an inexpensive steak is so easy to do with a simple steak marinade.

If I am spending a lot of money on a more expensive cut, like a gorgeous filet mignon, I skip the marinating and allow this cut of meat shine.

The truth is, we don’t often purchase filets though. We, instead, rely heavily on the old, “who has steak on sale this week?” method for selection instead.

One technique that I’ve mastered over the years is thinly cutting my beef to disguise any toughness in texture.

It is why you often see inexpensive cuts, like skirt or flank steak, cut very thin strips for tacos.

Which steak is best for this recipe?

I happened to hit a great sale on NY strip steaks, but normally I would use this recipe on tougher cuts of beef that would benefit from being tenderized.

This recipe is great for cuts of beef like chuck steaks, hanger, skirt, or flank.

Consider any tougher cuts of beef that you might prepare in your slow cooker too.

New York Strip Steaks from Grocery Store

marinated steaks on open grill

Should you marinate a New York strip steak?

I did marinate my New York strip steaks, but this is definitely not necessary! This cut of meat is tender and flavorful without a lot of intervention.

What is the best way to cook New York strip steaks then?

Fancy cuts of meat don’t require a lot.

Since New York strip steaks are so tender, they don’t require anything beyond a pat of butter.

steaks on the grill with vegetables

What cooking method is best for each cut of beef?

I recommend taking a peek at this article on 4 expensive cuts of beef that are big on flavor. This guide should help explain which cooking method is best and help you understand the difference in flavor profiles between different cuts of meat.

For example, how ribeye and New York strip steak differ?

That, and all your burning questions about the difference between filet mignon and top sirloin are worth reading so you can adapt your cooking techniques based around steak sales.

I really think this is an incredible guide for beginner and experienced cooks.

If you use this method to make a medium rare New York strip steak, you will want to cook it to 140 degrees and then allow it to rest before cutting.

Speaking of New York strip steaks, I can’t wait to try this frozen New York strip steak technique in my kitchen soon.

Cooked Filet in Cast Iron Skillet

I don’t want to grill. How do I cook a steak like a restaurant does?

Tired of paying premium prices at your local steakhouse?

One of the best time investments I have made has been learning to make our steak dinners at home.

The trick is starting the steak on the stovetop and then finishing it in the oven.

The best part is that everything can be done in ONE cast iron skillet.

Did someone say LESS DISHES?

Count me in!

Once you master this cast iron skillet method, you can enjoy a weekly steak without the guilt.

I can’t recommend my pan seared oven roasted steak recipe enough.

This is my recommendation for that restaurant experience in your own kitchen.

The Best Steak Marinade Recipe for Grilling finished

The Best Steak Marinade Recipe for Grilling Plated

What can I marinade my beef in that isn’t made of plastic?

Consider purchasing one of these reusable glass dishes for your marinades.

The Best Steak Marinade Recipe for Grilling

Today I wanted to share with you a recipe I tried for a steak marinade.

I am no stranger to marinated steak and the beauty of creating a great steak meal at home. In the past, I have relied on a little balsamic vinegar and olive oil marinade.

I was looking for a fresh marinade recipe and stumbled upon this one.

Honestly, I have never tried a better steak marinade recipe than this one and it is made from ingredients you probably already have in your pantry.

For the best results, you will want to marinate your steaks for 24 hours.

Simply add steaks to a gallon size bag (I double bag these or use a freezer bag instead) and then add marinade ingredients to the bag. Seal the bag, removing the excess air, and store it in the fridge until it is time to grill.

Now that I have tried this recipe, it is highly likely I will never make my steak any other way again. You won’t believe the flavors in this and none of them overpower the delicious taste of the meat itself.


Best Steak Marinade in Existence  
Recipe Type: Main
Author: Adapted from AllRecipes.com
Prep time: 5 mins
Cook time: 10 mins
Total time: 15 mins
Serves: 6
A flavorful steak marinade that will enhance the flavor of any cut of meat you might find on sale at your local supermarket.
Ingredients
  • 1/3 cup soy sauce
  • 1/2 cup olive oil
  • 1/3 cup fresh lemon juice
  • 1/4 cup Worcestershire sauce
  • 1 1/2 tablespoons garlic powder
  • 3 tablespoons dried basil
  • 1 1/2 tablespoons dried parsley flakes
  • 1 teaspoon ground white pepper
  • 1 teaspoon kosher salt
  • 1 teaspoon minced garlic
Instructions
  1. Place the soy sauce, olive oil, lemon juice, Worcestershire sauce, garlic powder, basil, parsley, minced garlic, salt, and pepper in a mixing bowl and whisk well.
  2. Pour marinade over desired type of meat.
  3. Cover, and refrigerate overnight. Grill meat as desired.

As an Amazon Associate I earn from qualifying purchases.

Looking for great grilling side recipes? Check out these easy side ideas!

corn on the cob on the grill recipe corn on the cob on the grill

Grilled brussels sprouts grilled brussel sprouts

three cheese grilled potatoes

quinoa salad in a jar quinoa salads in a jar (with spinach & tomatoes)

Happy grilling!

The Best Steak Marinade Recipe for Grilling Header