Author Archive

Hazelnut Soup Recipe

Tuesday, October 8th, 2019

It's Hazelnut Soup | momadvice.com

This is a rustic hazelnut soup made with parsnips and roasted hazelnuts. It is a quick weeknight soup and the recipe can easily be made vegetarian. Make a batch today and have a taste of Autumn in a bowl for dinner!

From our food contributor, Diana Bauman.

Rapunzel, It’s Hazelnut Soup! 

Sorry, I couldn’t help myself.

Whenever I think of hazelnut soup, I’m reminded of one of my favorite Disney movies about a beautiful princess and her long silky hair.

Along with a dreamy guy, a cast iron skillet, and parsnips… what’s not to love?

Honestly, the first time I saw this movie I was more intrigued with the mention of hazelnut soup than the rest of the movie.

Rapunzel’s fake mother brought home parsnips after a trip to town in order to make her hazelnut soup. 

I happen to love parsnips and hazelnuts so I knew this was a soup I had to recreate… animated or not.

Parsnips are carrot-like root vegetables that contain vitamins, minerals and nutrients, most notably fiber, folate, potassium and vitamin C. 

They’re in season during the late fall and winter.

They’re sweet, yet can have a bit of bite to them.

Large parsnips can have a bitter center which is best removed before cooking.

They taste great mixed into stews, soups, and any other way you would normally use a potato or other root vegetable.

I tell you what, when I saw one of my favorite vendors at my farmers market selling freshly harvested parsnips in the fall, I stocked up and purchased about 15lbs of them to carry me through the winter.

They keep wonderfully in the crisper and actually get sweeter over time.

When I purchased them, I knew right away that I was going to be using some of them to make a comforting batch of hazelnut soup.

I usually make this rustic hazelnut soup once or twice during the winter season – thick and silky, just the way I like it.

In order to create complexity, I start by sautéing onions in a cast iron dutch oven until they’re caramelized, deep and sweet.

While the onions are caramelized, I roast the hazelnuts to deepen their flavor.

Once the onions are caramelized, I deglaze the pot by adding a bit of homemade beef broth.

To the pot, I then add the parsnips, carrots, a potato, some of the roasted hazelnuts, seasonings, and a fair share of more broth.

If you decide to use store bought organic broth, be aware that it won’t have as much depth and character as one made over a stovetop and simmered for 24 hours.

If something like this intimidates you, I promise, you’ll be surprised at how simple it is to make and the nutrients inside will be unlike anything that can be purchased at a store.

Once the additional broth has been added, the vegetables are covered and simmered until tender.

Once tender, a bit of milk or cream is added to the soup and is then ready to be served with a dollop of sour cream and sprinkled with roasted hazelnuts.

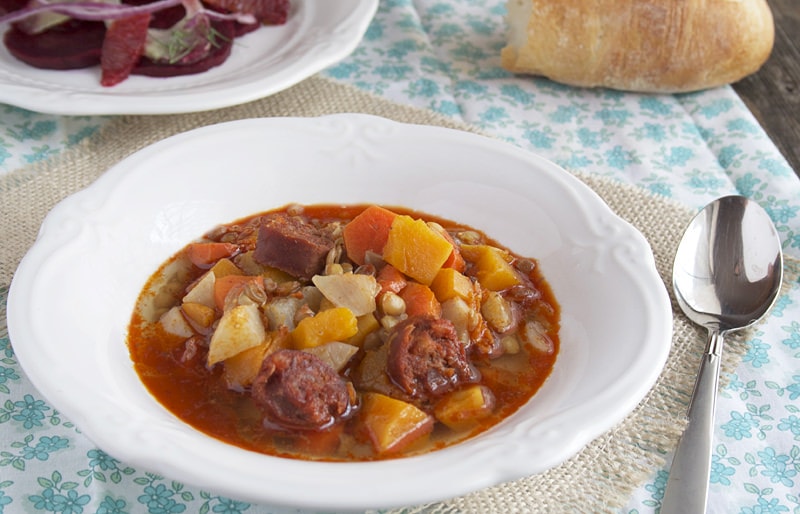
This soup serves beautifully with a green salad and a hunk of crusty bread (or not… if you’re gluten free).

Hazelnut Soup Recipe

Hazelnut Soup Recipe
 
Recipe Type: Vegetarian Soup
Author: Diane Bauman
Prep time:
Cook time:
Total time:
Serves: 4-6 servings
This is a rustic hazelnut soup made with parsnips and roasted hazelnuts. It is a quick weeknight soup and the recipe can easily be made vegetarian. Make a batch today and have a taste of Autumn in a bowl for dinner!
Ingredients
  • 2 large yellow onions, sliced
  • 3 tbsp butter
  • 3 parsnips, roughly chopped
  • 1 potato, roughly chopped
  • 2 carrots, roughly chopped
  • 1 cup hazelnuts, roasted, divided
  • 4¼ cups beef broth, divided (sub vegetable broth for vegetarian option)
  • 1 tsp salt
  • dash of fresh cracked pepper
  • 1 tbsp fresh thyme leaves
  • 1 cup milk
  • chopped hazelnuts to garnish
  • sour cream to garnish
Instructions
  1. In a large pot or dutch oven, over medium heat, melt the 3 tbls butter and add the onions. Stir the onions into the butter and allow to gently cook for 20-25 minutes or until the onions caramelize to a deep golden brown, stirring them along the way.
  2. Once Caramelized add ¼ cup beef broth to deglaze the pan.
  3. Once deglazed, mix in the parsnips, potato, carrots, ¾ cup hazelnuts, the rest of the broth, salt, pepper, and thyme leaves. Bring to a boil, lower the heat, and then cover and simmer for 20-25 minutes or until the vegetables are tender.
  4. Once tender, with an immersion blender or working in batches using a blender, puree the contents of the pot. If using a blender, return the puree to the pot over medium heat.
  5. Add 1 cup milk and stir through. Simmer for an additional 5 minutes.
  6. Serve with a dollop of sour cream and sprinkled with roasted hazelnuts


Love this recipe? Don’t miss these other great posts from MomAdvice.com:


28 Instant Pot Soup & Stew Recipes 28 Instant Pot Soup & Stew Recipes


Gluten-Free Chicken Noodle Soup Gluten-Free Chicken Noodle Soup


Pizza Quinoa Mushrooms Pizza Quinoa Mushrooms


Homemade Chai Tea Latte 
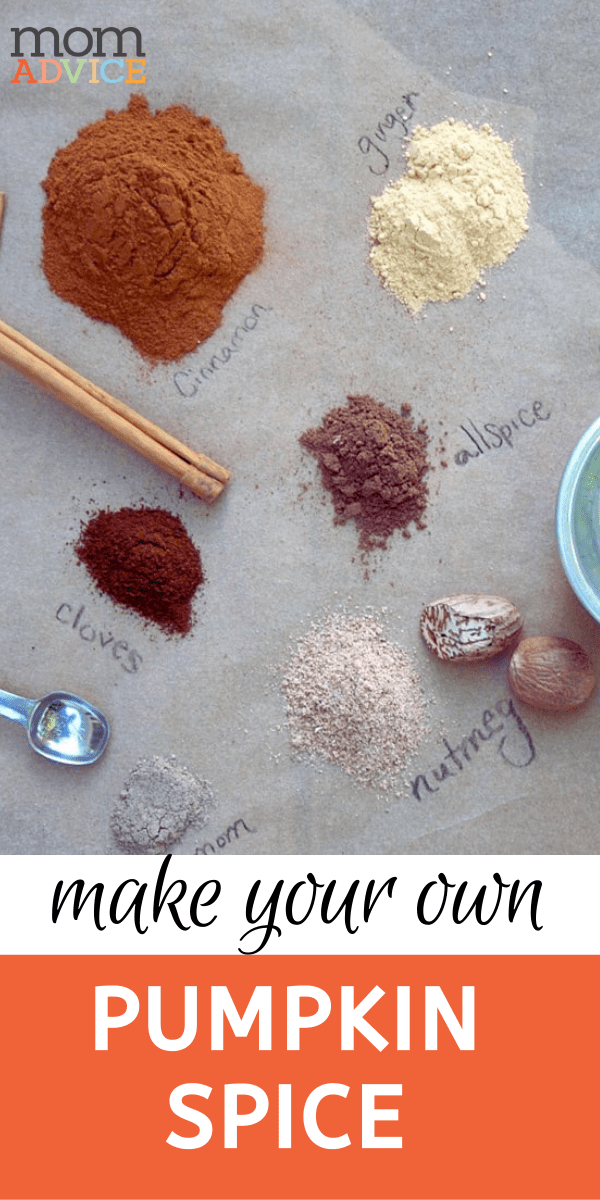
Homemade Vanilla Chai Tea Mix


https://www.momadvice.com/post/easy-homemade-gluten-free-pumpkin-bread-recipe Easy Homemade Gluten-Free Pumpkin Bread

Sign up for the MomAdvice.com Newsletter!

Do you enjoy soups? Share with us, what’s your favorite comforting soup during this season?


Pin It

Homemade Pumpkin Pie Spice

Monday, October 20th, 2014

From our food contributor, Diana Bauman.

Homemade Pumpkin Pie Spice | momadvice.com

In the Midwest, the fall is probably the most stunning time of year. 

The weather has cooled to a relaxing temperature and the vibrant colors of reds, yellows, and oranges are emerging in the canopy of trees while slowly taking their turn fading to brown and falling, one leaf at a time, to the ground below.

It’s brilliant, heartwarming … comforting.

Of course, when the change in creation starts to become evident that yes, fall is here, it also signals to every woman that it’s time to pull out boots, scarves, chunky sweaters, and leggings.

Yes, I love the fall.

It’s also during this time of year that I’m sure every stew, soup, and treat is filled with pumpkin.

Oh yes, I love to incorporate pumpkin into my dishes during this season and with the farmers market still open for another month, I’ll usually buy about 6-8 pumpkins and keep them in the coolest part of my home where they’ll last me into the winter.

Pumpkin bars in January, oh yeah, stocking up is worth it!

With everything pumpkin during this time of year, of course one is going to need pumpkin pie spice.


Make Your Own Pumpkin Pie Spice with MomAdvice.com


Now, one thing, pumpkin pie spice does not have pumpkin in it.

Instead, it’s called pumpkin pie spice simply because it’s the blend of spices that is traditionally used in pumpkin pies.

The spice blend can vary by brand but it’s usually a mixture of cinnamon, ginger, cloves, allspice, and nutmeg.

Me, I like to add a bit of cardamom as well.


Homemade Pumpkin Pie Spice | momadvice.com

I’m sure many of you may be thinking, why make your own when you can buy it already blended.

Well, you can make a bigger batch for less money and you can grind your own nutmeg and cinnamon for an even brighter flavor profile.

One of my favorite things about making my own spice blends is that I can also add or omit spices just like the addition of cardamom in this recipe.

Homemade Pumpkin Pie Spice | momadvice.com


The pumpkin pie spice is very versatile.

You can, of course, use it to spicen up your pumpkin pies, to sprinkle onto roasted pumpkin and other squashes, to incorporate into pumpkin custards, or to sprinkle onto coffee.


Homemade Pumpkin Pie Spice | momadvice.com


Really, you can use it in so many ways. So, this year, why don’t you give homemade pumpkin pie spice a try.

I’m sure you’ll love to have it on hand during this comforting time of year.


Homemade Pumpkin Pie Spice
 
Author: Diana Bauman
Pumpkin pie spice is a simple combination of sweet smelling spices including cinnamon, ginger, allspice, cloves, nutmeg, and cardamom.
Ingredients
  • 2 tbls ground cinnamon
  • 2 tsp ground ginger
  • 1 tsp ground nutmeg
  • 1/2 ground allspice
  • 1/2 tsp ground cloves
  • 1/4 tsp ground cardamom
Instructions
  1. In a small bowl, Mix all spices together and store in an air tight container for up to one year.
 
3.2.2708

DIY Pumpkin Pie Spice Recipe from MomAdvice.com

Have you ever made your own homemade pumpkin pie spice? Tell me, what kind of dishes do you like to add pumpkin pie spice into?


Other great things for Fall


homemade vanilla chai mix recipe

DIY Chai Mix


Homemade Salted Caramel Mocha Latte Recipe from MomAdvice.com

Salted Caramel Mocha Latte Recipe


Instant Pot Chicken Noodle Soup

Instant Pot Chicken Noodle Soup


7 easy scarves and cowls to knit this fall

Scarves and Cowls to Knit for Fall


https://www.momadvice.com/post/how-to-make-a-blanket-scarf

No-Sew Blanket Scarf


Date you Hubby this Fall

Date Your Husband in the Fall

Pin It

Honey Sweetened, Applesauce Cinnamon Breakfast Muffins

Monday, September 22nd, 2014

From our food contributor, Diana Bauman.

Honey Sweetened, Applesauce Cinnamon Breakfast Muffins #recipe via momadvice.com

Now that school is in full gear, I like to make sure to feed my children nourishing breakfasts to keep them alert and energized throughout the day. Although I educate my children at home, there are still quite a few days during our school week that we need to head out early. Wether it’s for our co-op days, horse riding lessons, exploration days, or other field trips, a quick, on the go healthy breakfast is a must.

For days like these I enjoy baking breakfast muffins that are a cinch to make and travel beautifully.

Honey Sweetened, Applesauce Cinnamon Breakfast Muffins #recipe via momadvice.com

What I love about breakfast muffins is that you can be pretty flexible with them by adding a variety of nutrient dense ingredients of your liking, making them a great healthy food to serve to your family in the morning. I usually like to add oats, nuts, seeds, and a variety of wet and dried fruits or vegetables to up their nutrient content. In my home, I don’t use very much white sugar; instead, I opt for natural sweeteners like honey, pure maple syrup, coconut palm sugar, and fruit to gently sweeten my breakfast muffins. This, too, adds additional vitamins and minerals.

As I shared with you earlier this year, I’ve grown to really enjoy using einkorn flour in my home. Einkorn flour is more nutritious than modern varieties of wheat. It’s high in thiamin, fiber, and a number of b vitamins. It also contains a significant amount of the the powerful antioxidant, lutein. As compared to modern varieties of wheat, it’s higher in protein and has a lower percentage of nutrient loss during processing. As you can tell, these breakfast muffins are not just tasty but healthy too!

Honey Sweetened, Applesauce Cinnamon Breakfast Muffins #recipe via momadvice.com

Now that apples are in high season, I decided to make a batch of honey sweetened, applesauce cinnamon muffins. Really, these are so easy to make and they turn out delightfully moist so that they will keep well for a few days on the counter or can be frozen to be eaten throughout the week. In addition to the applesauce I also added pecans and cranberries for good nutritional measure. I think once you bake these, you’ll find that they are perfectly sweet, moist, and just the right size to grab on the go!

Honey Sweetened, Applesauce Cinnamon Breakfast Muffins #recipe via momadvice.com

Also, these muffins are great to add to your children’s lunches or served as an after school snack!

Honey Sweetened, Applesauce Cinnamon Breakfast Muffins
Recipe Type: Breakfast
Author: Diana Bauman
Prep time: 10 mins
Cook time: 20 mins
Total time: 30 mins
Serves: Makes 12 muffins
Honey Sweetened, Applesauce Cinnamon Muffins. Perfectly sweet, moist, and just the right size to grab on the go!
Ingredients
  • 1 1/2 cups einkorn flour
  • 1/2 tsp baking soda
  • 1 tsp ground cinnamon
  • 1/2 tsp ground ginger
  • 1/2 tsp salt
  • 1/2 cup (1 stick) butter, just barely softened
  • 1/2 cup honey
  • 1 cup applesauce
  • 1 egg
  • 1 tsp pure vanilla extract
  • 1/2 cup chopped pecans
  • 1/4 cup dried cranberries
Instructions
  1. Preheat your oven to 350F. Line a muffin pan with 12 paper liners and set aside.
  2. In a small bowl, whisk together the flour, baking soda, cinnamon, ginger, and salt.
  3. In the bowl of a stand mixer, fitted with the paddle attachment, mix the butter, honey, applesauce, egg, and vanilla extract on medium-high speed for 3 minutes.
  4. After 3 minutes, lower the speed to low, and 1/3 cup at a time, add the flour until just mixed. Do not overmix.
  5. Gently, fold in the pecans and cranberries.
  6. Divide the batter evenly among the 12 muffin cups. Bake at 350F for 20-22 minutes or until a toothpick inserted into the middle of a muffin comes out clean.
3.2.2708

Do you enjoy baking breakfast muffins? Tell me, have you ever had an applesauce cinnamon muffin? Please share with us in the comments below your favorite muffin to make for your family.


Pin It

Refrigerator Pickles – Canning Made Simple

Monday, August 18th, 2014

From our food contributor, Diana Bauman.

Refrigerator Pickles - Canning Made Easy | momadvice.com

Okay, so a raise of hands: who here loves the icy cold crunch or sour pucker of a dill pickle on a hot summer day? Me too! Really, nothing says summer like a steaming footlong hot dog or a savory bbq pulled pork sandwich served with a cold pickle on the side. With cucumbers growing in abundance during this season, let’s make some pickles to enjoy at your next family bbq.

Dill pickles, made tangy and sour, are a cinch to make. I make them in a couple of different ways with no canning equipment required. I put up most of my cucumber harvest by fermenting them – brine cured pickles. They’re easy enough to make at home, requiring no vinegar to make, and the end result is a good old fashioned sour pickle filled with probiotics. I love the flavor of a fermented, brine cured pickle. The downside is that although you don’t need any canning equipment to make these pickles, they do need to ferment at room temperature for a good 1-2 weeks. If you’re having a family bbq soon, well, they just won’t be done in time. This is why whenever I make a large batch of fermented pickles, I also put up a few pints of refrigerator pickles that I know my family will be able to enjoy right away.

Refrigerator Pickles - Canning Made Easy | momadvice.com

Refrigerator pickles are easy to make and don’t take much time at all. What’s great about them is that you can use this same simple recipe and pickle any kind of vegetable you may have in abundance. Cauliflower, asparagus, zucchini, carrots, green beans, okra, hot peppers, and one of my favorites… red onions. Really, whatever you may have growing or bits and ends you have leftover from cooking will make great refrigerator pickles.

To make them, all you need to do is cut up the vegetable of your choice and layer them into a pint sized mason jar. I used pickling cucumbers.

Refrigerator Pickles - Canning Made Easy | momadvice.com

Then, add a couple cloves of smashed garlic, about a teaspoon of pickling spice, and then some dill weed, or if you’re growing them or can find them at your farmers market, the head of the dill weed with seeds. Not too much, about a couple teaspoons worth.

Refrigerator Pickles - Canning Made Easy | momadvice.com

Once you’re jars are packed, all you need to do is make a quick brine with apple cider vinegar, water, and salt, and fill the jar.

Refrigerator Pickles - Canning Made Easy | momadvice.com

For refrigerator pickles, I like to use un-pasteurized, raw, apple cider vinegar since it’s filled with immune boosting probiotics. These pickles aren’t just tasty but nourishing. Just make sure to bring the brine just to a simmer, not a full boil. You can find raw apple cider vinegar at any natural food store or the natural food section of your local grocer.

That’s the entire process. Like I said, they are super simple to make, are full of crunch and mouth watering pucker, and will last a few months in your refrigerator…. unless you have a house full of boys that love pickles.

Refrigerator Pickles – Canning Made Simple
Author: Diana Bauman
Prep time: 15 mins
Cook time: 5 mins
Total time: 20 mins
Simple to make, refrigerator pickles recipe that is full of crunch and mouth watering pucker, and will last a few months in your refrigerator.
Ingredients
  • 9-10 small pickling cucumbers
  • 6 garlic cloves, smashed then peeled (2 per jar)
  • 3 teaspoons pickling spice (1 tsp per jar)
  • fresh dill weed or dill heads (about a good 1-2 tsp per jar)
  • 1 1/2 cups raw, apple cider vinegar
  • 1 1/2 cups water
  • 2 tablespoons large granule sea salt (kosher or pickling salt)
Instructions
  1. Gently clean and remove any dirt and debris from the cucumbers.
  2. Slice the ends off of the cucumbers and quarter each one.
  3. Pack them into 3 pint sized mason jars.
  4. To the jars add the garlic cloves, pickling spice, and dill.
  5. In a medium sized heavy bottomed pan, bring the apple cider vinegar, water, and sea salt just to a simmer.
  6. Pour the brine into the jars, leaving about a 1/2″ headspace.
  7. Screw the lids onto the jars and allow them to cool completely on the counter. Once cooled place the jars in the refrigerator. Let them sit for 24-48 hours before eating.
3.2.2708

Have you ever made refrigerator pickles? Tell me, what vegetables have you used?

Pin It

A Sensational Beet and Strawberry Summer Salad

Monday, July 28th, 2014

From our food contributor, Diana Bauman.

A Sensational Beet and Strawberry Summer Salad

Summer is the season of abundant vegetables. My family eats such a wide variety of vegetables in this season that my husband often jokes with me and asks if we’re becoming vegetarian. We are certainly not but I do take full advantage of the abundance of vegetables in this season, both in my garden and at the farmers market, to cook them in many different ways.

Although I love to experiment and develop new recipes using vegetables, an incredibly easy way to incorporate more of these nourishing ingredients grown from the earth is to make salads out of them. So often we think of salads as just greens tossed with tomatoes, cucumbers, and cheese; however, salads can be made from a variety of vegetables tossed in a simple oil and vinegar vinaigrette – in Spain, this type of salad is called an aliño.

An aliño is just vegetables, cooked or cut up raw, and then tossed in a simple vinaigrette and seasoned with a large granule sea salt. It’s super simple to make and with the addition of fresh grown herbs, the salads become something to swoon over. Let me show you just how simple this beet and strawberry salad is to make:

A Sensational Beet and Strawberry Summer Salad

Step 1. Boil the beets, peel, and dice. Toss into a bowl.

A Sensational Beet and Strawberry Summer Salad

Step 2. Thinly slice some red onions and add to the bowl.

A Sensational Beet and Strawberry Summer Salad

Step 3. Slice up some perfectly ripened strawberries and add to the bowl.

A Sensational Beet and Strawberry Summer Salad

Step 4. Add in a bit of herbs of your choice, olive oil, red wine vinegar, and sprinkle with a large granule sea salt.

A Sensational Beet and Strawberry Summer Salad

Step 5. Toss together and serve.

Salads of this nature can be made from any vegetable you may have on hand. Here are a few tips for making sensational summer salads.

  • Red onions generally go really well in most salads. They’re sweeter and compliment vegetables and fruit well.
  • Add in seasonal fruit as it comes into season. It gives salads a touch of sweetness without having to add sugar or honey. I’ve been known to add blueberries, raspberries, strawberries, sliced peaches, and even watermelon to summer salads.
  • Don’t be afraid to experiment. I’ve tossed cauliflower salads, cucumber and tomato salads, beet and watermelon salads, roasted red pepper with red onion salads, etc…
  • Large granule sea salt is for more than flavor. It’s surprising how amazing salads can taste by the simple addition of a large granule sea salt. It gives them texture –  a delightful crunch.
  • Herbs can make a salad. It’s amazing how one salad can taste many different ways by using different herbs. Again, experiment with herbs. Some of my favorites are mint, cilantro, summer savory, marjoram, and lemon balm.

Now the key to a fabulous summer salad is in the vinaigrette. Often times we think we need to concoct a dressing made of 10 different ingredients to enjoy a salad but really it’s much simpler than that. As long as you have the seasons freshest fruit and vegetables all you need is a simple vinaigrette. On hand, I always have balsamic vinegar, red wine vinegar, and apple cider vinegar. The following is my ratio for a simple vinaigrette.

  • 1/4 cup good quality extra virgin olive oil
  • 2 tbls of vinegar (red wine, balsamic, or apple cider)
  • 1/2 – 1 tsp large granule sea salt

That’s it. As soon as you start experimenting making salads with a variety of fruits and vegetables I’m sure you’ll memorize that ratio as I have.

A Sensational Beet and Strawberry Summer Salad
Recipe Type: Salad
Author: Diana Bauman
Prep time: 10 mins
Cook time: 30 mins
Total time: 40 mins
Serves: 4
A simple summer salad made with the seasons finest beets and strawberries dressed in a simple vinaigrette.
Ingredients
  • 3-4 large beets, boiled, peeled, diced, and cooled
  • 1/2 red onion, thinly sliced
  • 1 cup strawberries, sliced
  • 1 tbls marjoram (or any other variety of fresh herb like mint)
  • 1/4 cup extra virgin olive oil
  • 2 tbls red wine vinegar
  • 1/2 tsp large granule salt.
Instructions
  1. In a large bowl, toss together all of the ingredients.
  2. Chill or serve at room temperature.
3.2.2708

Do you enjoy trying new summer salads? Please let us know in the comments below some of your favorite recipes for summer salads.


Pin It

5 Things You Can Get for FREE at a U-Pick Farm!

Monday, June 2nd, 2014

From our food contributor, Diana Bauman.

5 Things You Can Get for FREE at a U-Pick Farm! | momadvice.com


The U-Pick Season has begun.

It’s during this time of the year that my entire family gets excited to hit the u-pick farms and indulge in the juiciest, sweetest candy that we’ve been dreaming about since the summer before.

You see, in my family we intentionally eat fresh fruit in its season.

Sure, we can buy fresh berries in the winter months, but they’re void of flavor and anything good that it was created to have.

So instead we wait patiently, salivating for that first juicy bite of the sweetest strawberry picked in June.

5 Things You Can Get for FREE at a U-Pick Farm! | momadvice.com


Or the pucker of a tart cherry, ready to be made perfectly sweet when made into pies or  jam.


5 Things You Can Get for FREE at a U-Pick Farm! | momadvice.com


As the strawberries dwindle down from large, juicy berries that can fit into the palm of your hand to the smallest of cones, still sweet and great for jam, blueberries and raspberries surge into season in the sweltering heat of July and August.


5 Things You Can Get for FREE at a U-Pick Farm! | momadvice.com


Again, my family hits the u-pick farms to gather as many buckets of fruit that we can that will eventually be made into jam, pies, and sprinkled in our pancakes throughout the winter.

As much as we enjoy the flavors in freshly picked fruit grown locally by family farmers, we really enjoy that we not only save money by picking our own fruit and purchasing it in bulk but also that we’re able to get the following 5 things for FREE. 


1. You Can Get a FREE Sense of Community!

5 Things You Can Get for FREE at a U-Pick Farm! | momadvice.com

To my family, community is important.

Supporting one another in our endeavors and celebrating with each other in everything good that nature provides teaches us to respect and be mindful of creation and in each other.


2. You Can Capture FREE Memories That Will Last a Lifetime!

5 Things You Can Get for FREE at a U-Pick Farm! | momadvice.com


One of the things that I most enjoy about heading out to the u-pick farms is the opportunity to spend intentional time with my family.

As most children do, they come up with their own stories, their own thoughts on what they can make with the fruits of their labor, and all sorts of other sweet sayings that I’ve been able to capture in my memory… forever.


3. You Can Get a FREE Family Outing with FREE Berries As You Pick!

5 Things You Can Get for FREE at a U-Pick Farm! | momadvice.com


Visiting a u-pick farm with your family makes a great FREE outing.

The kids have fun and what they enjoy the most is being able to eat berries as they pick.

Now, I’m not sure exactly what the written rule is about eating while you’re picking but seriously, when you have kids, it’s going to happen… and they’re going to love it!


4. You Can Get a Tan and a Great Workout for FREE!

5 Things You Can Get for FREE at a U-Pick Farm! | momadvice.com


It’s true, you can get a free tan and great workout while picking fruit.

Squats while your picking, heavy buckets and trays filled with fruit works the biceps, and on top of that, you’ll be doing a lot of walking up and down rows.

After an hour, I’d say you just had a great workout and you’ll be tan to boot!


5. You Can Get a FREE Therapy Session!

5 Things You Can Get for FREE at a U-Pick Farm! | momadvice.com


There is nothing that relaxes me more than being outdoors in the natural world.

Visiting a u-pick farm can be meditative and therapeutic and in my opinion, is a great way to de-stress from the busyness in our lives.

I’ve been known to leave the kids with a sitter in order to pick some berries alone to unwind and enjoy a bit of peace and quiet while picking berries for my family.

In order to find a local u-pick farm near you, visit localharvest.org or visit your farmers market and ask some of the local vendors.

I’m sure they’ll be able to steer you in the right direction.


Have you ever visited a u-pick farm? Tell me, what’s your favorite fruit to pick at u-pick farms.


The Best Free Items at U-Pick Farms from MomAdvice.com

Pin It

A Self Crusting, Dark Leafy Green Quiche Recipe

Monday, May 26th, 2014

From our food contributor, Diana Bauman. A Self Crusting, Dark Leafy Green Quiche | momadvice.com Spring is my favorite season of the year. Being from Iowa, it’s a breath of fresh air, literally, to be able to spend time outdoors as the weather warms and the cycle of life begins anew. As much as I enjoy spring time and all that it brings, it also happens to be a busy season in my life. With 2 boys and a husband in baseball and an urban homestead to keep up on, I intentionally seek out and prepare meals that come together quickly. One spring ingredient I take full advantage of are eggs. I know what you’re thinking, “eggs are available year round.” Well, yes they are; however, having raised backyard hens for 5 years, I’ve come to learn that they are indeed seasonal. In the winter, hens need to conserve body heat and so they produce fewer eggs. When spring arrives and the weather warms and the daylight increases, their egg production soars. I’m currently getting around 10-11 eggs per day whereas in the winter my hens would only lay about 2-3 eggs per day. Their egg production usually stays up until the heat of summer kicks in around July and August. At that time, their egg production slows and gradually increases as the weather cools in fall. Then when winter arrives, their egg production is nearly halted until the spring comes again. The reason hens raised commercially are able to produce eggs year round is that they are kept in an environment that is neutral with heat, light, and grains so that they are able to lay continually, year round. Isn’t it neat to be in touch with the seasons and cyclical patterns of life? For now, my family is living in an abundance of eggs and nothing makes me happier since they are a traditional source of complete protein and nutrition.

A Self Crusting, Dark Leafy Green Quiche

A Self Crusting, Dark Leafy Green Quiche | momadvice.com 
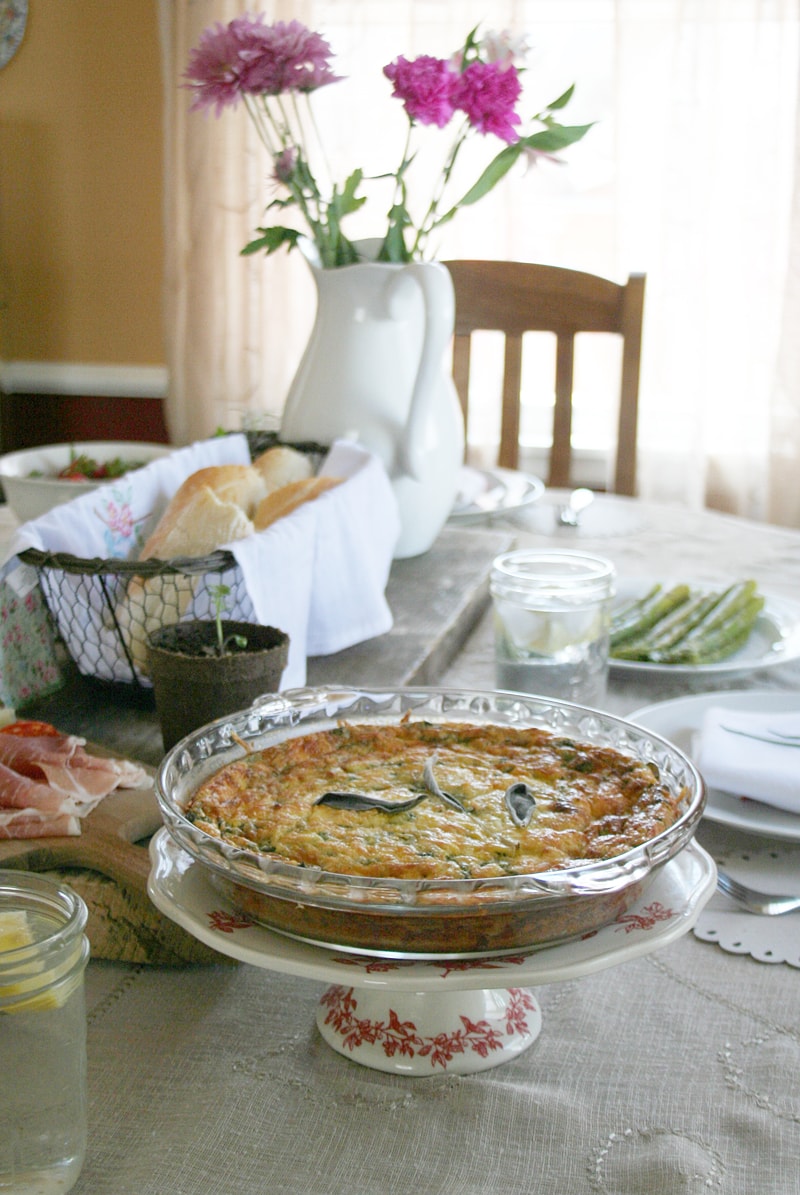
One of my favorite way to use our abundance of eggs packed full of nutrients is by making a quiche – a light dish, perfect for a spring time brunch or supper. self-crusting-quiche4 A quiche is essentially a custard that is made with milk and eggs and then poured into a pastry crust to be baked. As delightful as a traditional quiche is, I’m oftentimes to busy in this season to make the crust, allow it to firm up in the fridge, roll it out, and then mold it into a pie dish. Instead, on busy spring days, I usually make a self crusting quiche that forms itself by the addition of flour and a bit of baking powder. It creates its own darkened type crust right in the oven as it’s baking. It saves me so much time and makes this dish come together in literally minutes! self-crusting-quiche5 
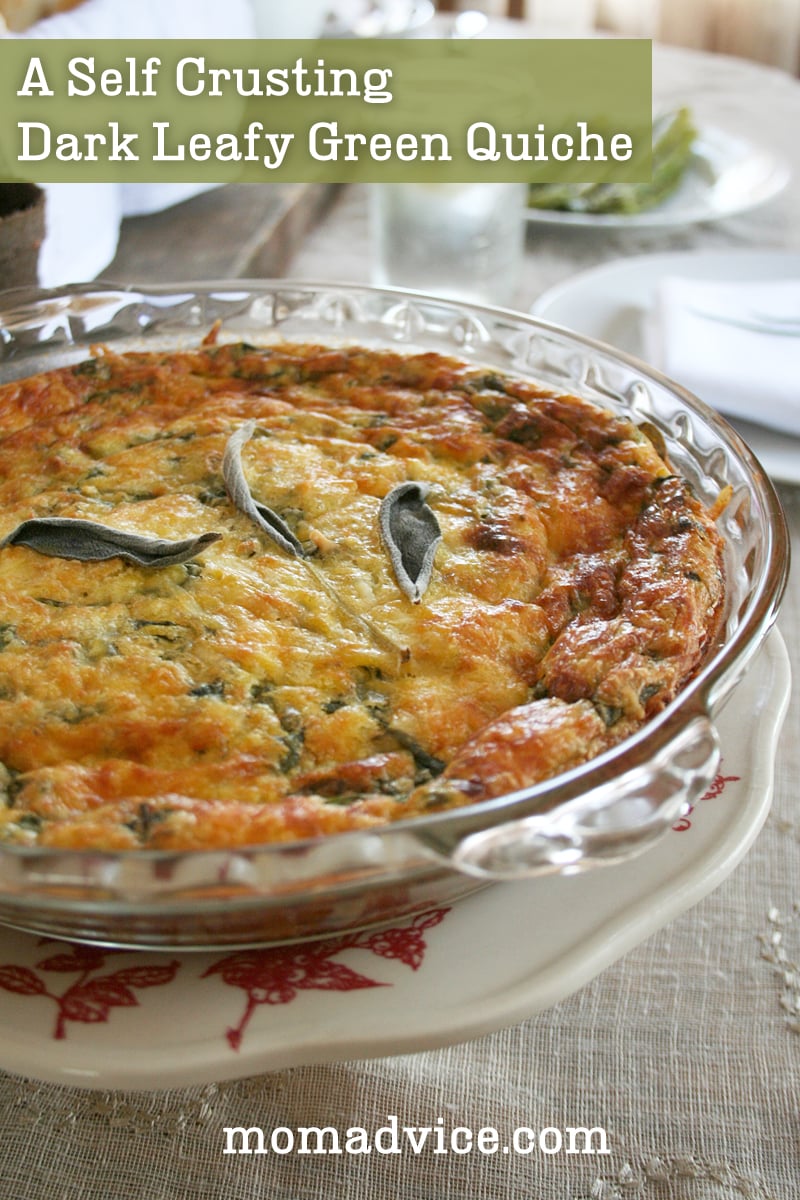
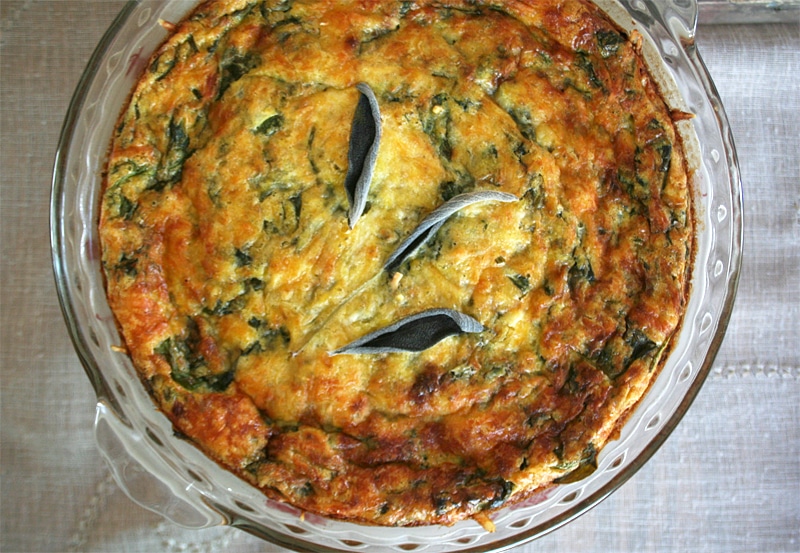
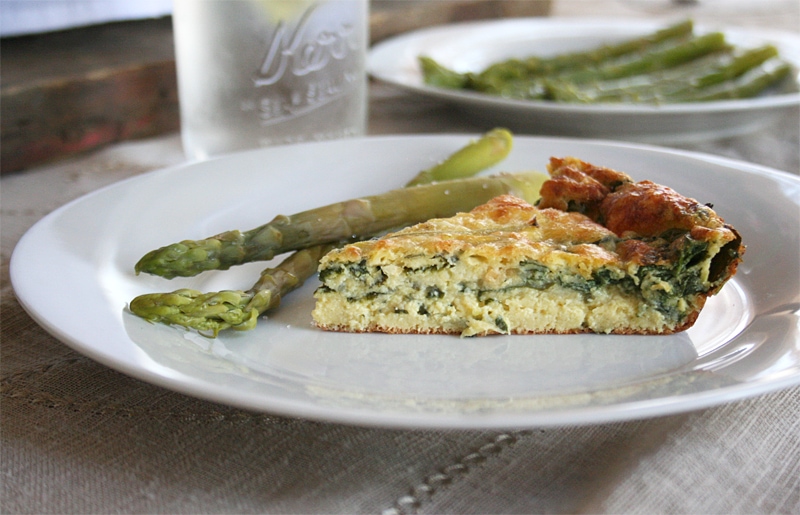
For this particular quiche, I added dark leafy greens of swiss chard, kale, and spinach. Together with cheddar and pecorino romano cheeses, this quiche is light, creamy, and savory. What’s great about a quiche is that it can be eaten warm, at room temperature, or cold. On days that my family has ball games to play, I’ll usually whip up a self crusting quiche during the day and refrigerate it to eat cold later in the evening. A quick, nourishing, and satisfying spring meal.

A Self Crusting, Dark Leafy Green Quiche
Recipe Type: Dinner
Cuisine: French
Author: Diana Bauman
Serves: 4-5
A self crusting, dark leafy green quiche. A perfectly light, quick to make spring meal your entire family will enjoy.
Ingredients
  • 2 tbls extra virgin olive oil
  • 1/2 medium yellow onion, diced
  • 2 cups packed dark leafy greens (like spinach, swiss chard, kale)
  • 1/4 cup water
  • 4 eggs
  • 1 cup milk
  • 1/2 cup cheddar cheese
  • 1/2 cup flour (for gluten free, sub oat flour)
  • 1/2 tsp baking powder
  • 1/2 tsp salt
  • 1/4 cup Pecorino Romano Cheese or Parmesan
Instructions
  1. Preheat oven to 400F.
  2. Lightly butter a 10-inch pie plate
  3. In a skillet or cast iron pan, heat 2 tbls of extra virgin olive oil and saute the onion until translucent. Add 2 cups, dark leafy greens and the water. Cook until the greens just start to wilt; 3-4 minutes. Set aside to cool.
  4. In a large mixing bowl, whisk together the eggs and the milk. Add the cheddar cheese and mix though. Add the flour, baking powder and salt; whisk through then stir in the greens and onions.
  5. Pour the contents of the bowl into the pie plate. Top with the Pecorino Romano cheese.
  6. Bake for 35-40 minutes, or until the center is set and the outside edges are golden brown.

What are your favorite meals to whip up on busy days?


Pin It

A Lentil Stew – Anyway You Want It

Monday, April 28th, 2014

From our food contributor, Diana Bauman.

A Lentil Stew - Anyway You Want It | momadvice.com

Am I ever excited to talk lentils today! Being that I’m part Spanish, lentils are a staple in my home. My mother is from Sevilla, Spain. I’ve spent many summers abroad visiting my family there and one meal that I could never get enough of was lentejas con chorizo, lentils with Spanish chorizo sausage. Lentils, to a Spaniard, is just as comforting as a warm bowl of homemade mac and cheese is to an American. The great thing about lentil dishes is that kids love it just as much as adults. Whenever I prepare lentejitas, as I call it, my kids gobble it up and I’m sure yours will to.

A Lentil Stew - Anyway You Want It | momadvice.com

Lentils are legumes (beans) that are quick and easy to make. They readily absorb flavors from other foods and spices making them a bean that many people enjoy to eat. Lentils also pack a healthy punch. They contain high levels of soluble fiber which lowers cholesterol and helps in reducing your risk of heart disease and stroke. Also, because it contains so much soluble fiber it stabilizes your blood sugar levels making this a great food for diabetics. Lentils are also a good source of folate and magnesium which contributes to heart health. They’re also a good source of B vitamins. It’s been found that many people with depression, stress, and anxiety have low levels of B vitamins and magnesium. Adding lentils to your diet can help alleviate physical symptoms and lift your spirits. Let’s not forget, lentils are also packed with protein! Out of all the legumes and nuts, they contain the third-highest level of protein.

So, if you were ever squeamish to try lentils, all of these nutritional benefits should make them a staple in your home.

My favorite way to prepare lentils is by making them in a stew. The greatest thing about a lentil stew is that all you have to do is place all of your ingredients in a pot, add water, and cook. It couldn’t be easier. When making a lentil stew, you can make it with any vegetable that happens to be in season.

From zucchini, carrots, and dark leafy greens…

A Lentil Stew - Anyway You Want It | momadvice.com

to pumpkin, turnips, and rutabaga.

A Lentil Stew - Anyway You Want It | momadvice.com

In Spain, the most comforting way to eat lentil stew is by adding Spanish chorizo sausage (not to be mistaken for Mexican, uncured, chorizo). This cured meat gives the stew depth in flavor and adds a bit of piquant by the Spanish paprika (pimenton) seasonings within it. Both the chorizo and Spanish pimenton used to be difficult to source in the United States but is now readily available in most specialty stores. If you can’t find the sausage, no worries, It tastes just as good by adding any other type of sausage including bacon or even by omitting the meat all together.

Today, I’m going to share with you the lentil stew recipe I typically make at home. I usually add chorizo sausage, a bit of rice, potatoes, and dark leafy greens.

A Lentil Stew - Anyway You Want It | momadvice.com

It’s simple to prepare, comforting, and the entire family enjoys it. I hope yours will as well.

A Traditional Spanish Lentil and Chorizo Stew
Recipe Type: Dinner
Cuisine: Spanish
Author: Diana Bauman
Prep time: 5 mins
Cook time: 40 mins
Total time: 45 mins
Serves: 4-5
This is a nourishing lentil stew made with Spanish chorizo sausage that the entire family will enjoy.
Ingredients
  • 1 cup dried lentils
  • Spanish Chorizo Sausage, sliced in coins (about 1 1/2 cups)
  • 1/2 green pepper, roughly chopped
  • 1/2 white onion, roughly chopped
  • 3 garlic cloves, whole and smashed
  • 2 roma tomatoes, whole
  • 2 bay leaves
  • 3 tbls extra virgin olive oil
  • 1 tsp Spanish paprika, pimenton
  • 3 russet potatoes, roughly chopped
  • 1/2 cup white Basmati rice
  • 1 tsp salt
  • 3 large handfuls dark leafy greens
Instructions
  1. In a large pot or dutch oven, add the lentils, chorizo sausage, green peppers, onions, garlic, tomatoes, and bay leaves. Cover all the ingredients with water so that it covers them by 1-2 inches.
  2. Add the olive oil then bring to a boil over high heat. Once boiling, lower the heat to medium and simmer, uncovered for 25 minutes.
  3. After 25 minutes add the potatoes, rice, and salt and simmer for an additional 20 minutes or until the potatoes are tender and the rice is cooked through.
  4. As soon as all the ingredients are cooked through, add the dark leafy greens and serve right away.
3.2.2265

Does your family enjoy eating lentils? What’s your favorite way to prepare them?

Pin It

Einkorn Flour Naturally Sweetened Pumpkin Bars

Monday, February 24th, 2014

From our food contributor, Diana Bauman.

Can I just say that I am humbled that Diana, from My Humble Kitchen, agreed to share her voice on our site? Diana’s food background is so much more diverse than my own and she knows about foods I have never even heard of. Not only that, but her recipes are so very nourishing to our bodies. I cannot wait to learn more about food from her.

Naturally Sweetened, Einkorn Pumpkin Bars | momadvice.com

Hello – what a blessing to be here as part of the MomAdvice contributing team! I’m excited to get to know you all a bit better and feel privileged to be able to share my food recipes with you.

I’m a real foodie at heart… built on grace.  As much as I enjoy serving up my family savory meals using vegetables from my gardens, I also enjoy baking sweet treats made with nourishing ingredients and natural sweeteners.

Naturally Sweetened, Einkorn Pumpkin Bars | momadvice.com

I know Amy has turned to a gluten-free lifestyle, so I thought I’d introduce all of you to an ancient grain that has 3 times less gluten than our modern hybridized wheat of today.

It’s called einkorn. It’s the first grain to have been domesticated from the wild. Its never been hybridized so it was fascinating to me when I found out that many people with a gluten intolerance can tolerate this ancient grain. It still has gluten so if you have celiacs disease, then this is still off limits.

In my research, I’ve also found out that einkorn is more nutritious than modern varieties of wheat. It’s high in thiamin, protein, fiber, and a number of b vitamins. It also contains a significant amount of the the powerful antioxidant, lutein. As compared to modern varieties of wheat, it’s higher in protein and has a lower percentage of nutrient loss during processing.

Since einkorn has a lot less gluten, baking with it can be a bit tricky if grinding your own wheat berries at home; however, I’ve found incredible success using organic high extraction einkorn flour that’s already been milled.

In using einkorn flour, so far, I’ve had great success – all of my baked goods have turned out lovely. I’ve also enjoyed that I’ve been able to substitute it 1:1.

Naturally Sweetened, Einkorn Pumpkin Bars | momadvice.com

To share with all of you, I decided to roast the last of my pumpkins I had stored in my basement and make a batch of naturally sweetened pumpkin bars.

Who says pumpkin bars are just for the fall, right?

No pumpkin? No worries… if you don’t have any pumpkins in your basement or can’t find any at your local grocery store, feel free to use an organic canned variety.

My husband loves it when I surprise him with a batch of pumpkin bars. I sweeten them with honey. The flavors are gently sweetened and allow the flavor of the roasted pumpkin to shine through. The use of the honey makes this an incredibly moist bar that your family will love.

For the cream cheese icing, I add 3 tbls of maple syrup allowing me to cut down on the organic powdered sugar. You’ll never notice the difference.

Naturally Sweetened, Einkorn Pumpkin Bars | momadvice.com

Now, let me ask you, what can be better than a nourishing dessert?

Naturally Sweetened, Einkorn Pumpkin Bars
Recipe Type: Dessert
Cuisine: American
Author: Diana Bauman
Serves: 8-10
Einkorn pumpkin bars are a completely nourishing dessert make with the ancient grain einkorn and gently sweetened with honey.
Ingredients
  • For the Pumpkin Bars
  • 2 cups einkorn flour
  • 2 tsp baking powder
  • 2 tsp ground cinnamon
  • 1 tsp ground all spice
  • 1 tsp baking soda
  • 4 eggs
  • 1 cup honey
  • 1 cup butter, melted
  • 1 1/2 cups pumpkin puree
  • For the Cream Cheese Frosting
  • 8-ounce package cream cheese, softened
  • 1/2 cup butter, softened
  • 1 tsp pure vanilla extract
  • 3 tbls pure maple syrup
  • 1 cup organic powdered sugar
Instructions
Pumpkin Bars
  1. Preheat the oven to 350F.
  2. Butter and flour a 9″ x 13″ baking pan.
  3. In a large bowl, whisk together the einkorn flour, baking powder, cinnamon, all spice, and baking soda; set aside.
  4. In the bowl of a stand mixer fitted with the paddle attachment, mix together the eggs, honey, butter, and pumpkin puree over low speed. A 3 on my KitchenAid.
  5. /4 cup at a time, add the dry ingredients until just combined. Do not overmix.
  6. Pour the batter into the prepared 9″ x 13″ pan and bake for 22-25 minutes or until a toothpick inserted into the middle comes out clean.
  7. Transfer to a wire rack and allow to cool completely.
Cream Cheese Frosting
  1. In the bowl of a stand mixer fitted with the paddle attachment, add the cream cheese and butter. Mix together over medium speed until smooth.
  2. Add the vanilla extract, maple syrup, and powdered sugar. Mix on low until mixed through then raise the speed to medium to cream together.
  3. Spread on cooled pumpkin bars.
3.2.2265

I’m sure that once you try your hand at baking with einkorn or natural sweeteners, you’ll feel great serving your family some sweet treats every now and then.

So, what are your favorite sweet treats to eat during this time of year?