Author Archive

Back-to-School Lunch Ideas

Monday, August 7th, 2006

Wow, is it already that time of year? Time to break out your trusty lunch pails and get to work on lunches! If you are fresh out of ideas for what to pack, the Carnival of Recipes is actually doing a back-to-school edition and in it are lots of great ideas for main dishes & treats! This included our post on making pizza in your bread machine (worth a read if you haven’t been here before!)

I make lunches for both my husband and our son (who attends preschool). For my husband, I just box up whatever we are having that evening for dinner, for his lunch the next day. I purchased sectioned containers from the Dollar Tree and fill it with lots of different foods for him. I also try to purchase him twelve packs of off-brand soda that he can take to work and drink at his desk. He is one of the few, at his job, that actually pack food to eat. The savings for him to eat those lunches is huge! Most people average around seven dollars a day to eat out at lunch (that would be the cheap dishes!) and he saves that money for our family each day. What a man! We do have a little money set aside that he can use to eat lunch out (if that is how he wants to spend it) so once in awhile he joins the gang at work, but for the most part we reap the rewards financially by him eating at work. The funny thing is, people always want to know what he is eating and I think some even may be a teeny bit jealous (I am just speculating OF COURSE!) that he eats so well.

As for our son, his lunch is easy to pack. He likes peanut butter and jelly…just about every single day. Sunday night, I just make up a week’s worth of peanut butter and jelly sandwiches and pop them in the freezer. In the morning, we get one of those out and it is unthawed by lunch time. This saves me from trying to make a sandwich every single day. Another time saver is to have baggies of chips, carrots, raisins, etc… already prepared so that I can just grab and go.

Other great lunch ideas are:

1) Make your own Lunchables. Cut, with a small cookie cutter, out cheeses and meat to fit on crackers. Purchase sectioned containers and have your child make their own stackable lunch.

2) Hard boil eggs to take to school. These are such a great source of protein and these also can be made ahead and kept in the fridge (just be sure to keep them separated from the raw eggs!!)

3) Pita pizzas- cold or hot (depending on if your school offers a microwave) can be a delicious treat for school. Use whole wheat pitas and low-fat cheeses on these to cut down on the calories.

4) If you have a preschool age child, try and cut their sandwiches out in different shapes. We keep a set of cookie cutters in our silverware drawer and I use these a lot to make things more fun.

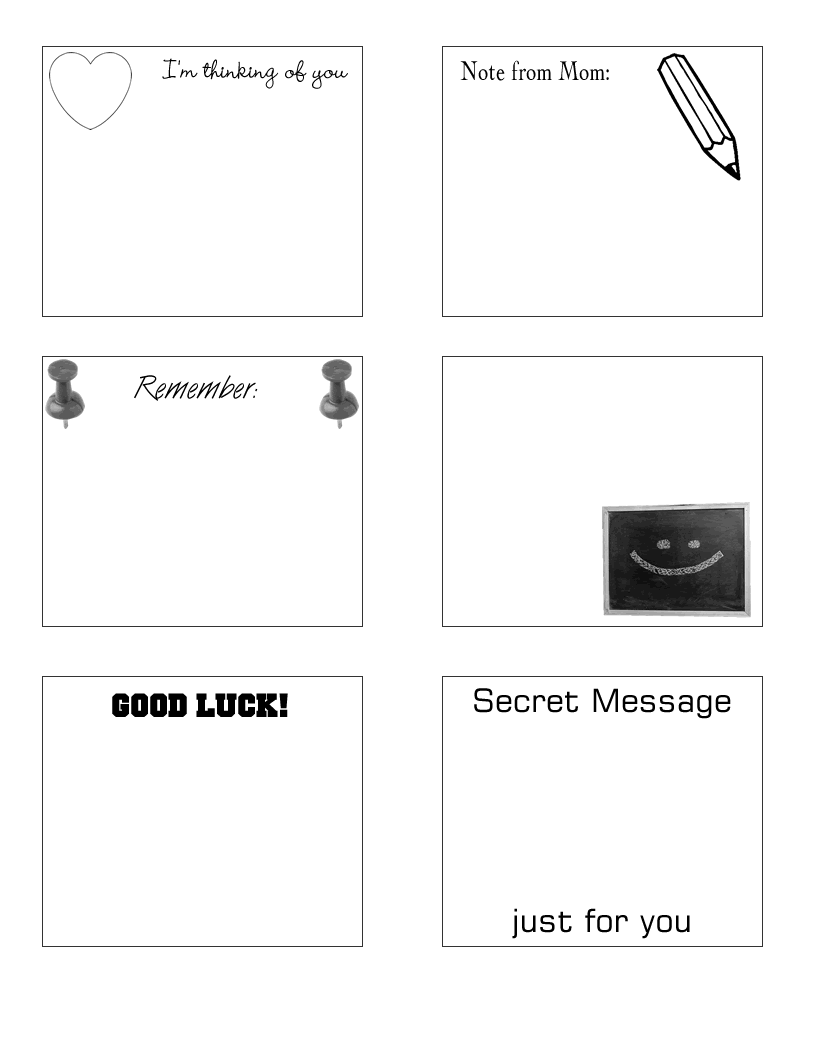
When my son first started school, it was hard on me (more than him) so I would stick a picture of myself & his dad in his lunchbox. He looked forward to opening that and seeing a picture of us and it made me feel close to him, when I wasn’t. For older kids, a sweet note can be a wonderful addition to their lunch. We have free lunchbox notes that you can print out and write special messages to them. Don’t limit these just to your children though, sometimes it is nice to tuck a note in for your hubby too! Like, “I totally love it when you take the trash out! You are the man!” or “Thanks for putting the seat down on the toilet- I love that about you!”

If you are looking for more back-to-school ideas, visit my article on streamlining your morning routine and how to stay organized once the papers start rolling in!!

Finally, does your lunchbox stink? Sometimes if it has been sitting a long time closed, it can take on a..not so pleasant odor. Pop it in the top shelf of your dishwasher and run it. It will take that smell right out.

Feel free to share your lunchbox favorites in our comments section. I need the inspiration too!

Monday WAHM Spotlight: T-Shirts ‘N More

Monday, August 7th, 2006

Here is this week’s featured work-at-home mommy! Thanks to Brenda & T-Shirts N More for applying to be part of our Monday Spotlight.

Name: Brenda Kerezsi

City/State: Hamilton, Ontario, Canada

Name of Company: T-Shirts N More

Two or Three Sentences About Your Company:

I design t-shirts for adults-babies. I also offer advocacy shirts, bags, aprons and magnets.

Two Tips for Moms Trying to Work-At-Home (these tips can be how you stay organized, how to be successful, how to get started- anything that you feel would help someone just starting out):

I found that being organized is the best thing. and the hardest! Also try as hard as you can to get your name out there. Go to WAHM sites, advertise there. Make up flyers and hand them out all over. The more effort you put out the better the response in my opinion.

**If you are interested in being featured, we will be selecting a mom for each Monday of my blog. You can read more and apply. Email confirmations are sent to each mom if they are chosen. Please remember to do your own research on these companies. If there are obvious red flags on BBB, I do not post them. Check my scam article to find out more about the potential dangers of work-at-home businesses.**

Friday Freebie: Free Museum Passes

Friday, August 4th, 2006

Looking for a family trip that will only cost you gas? I have one planned for your family! How about taking your whole family to the museum for absolutely free? On September 30, 2006, for one day only, museums across the country will join the Smithsonian Institution in its long-standing tradition of offering free admission to visitors.

For the first time though, Museum Day is open to the general public as well as Smithsonian magazine’s subscribers!

The only restrictions included within their guidelines are:

General admission only
Not valid for special exhibits, IMAX screenings or for use with any other offer
Only valid (one time use) on September 30, 2006

For a list of participating venues, please visit this site to view the participating locations and to print out your passes for the day.

How much we will save? Well, I have made plans for our family to go to the Air Zoo in Michigan. Total cost for our family to be admitted into this museum (even with the two kids in for free) is $39.00! We will pack a lunch and snacks, have a day at the museum where the admission will include all the rides, theaters, and simulators in the Air Zoo & Flight Education Research Center and only have spent money for the gas. What is not to love about that?

Now I just need to find out how to get that gas for free…Hmmm…Maybe I need to reread my blog entry on how to save on gas again. At that time the gas was only $2.22 per gallon. What the heck was I complaining about? Not enough reading material? Well, here is more reading material on surviving the gas hike. Sometimes I really need a refresher course.

Enjoy your free day and feel free to share if you are able to take advantage of this opportunity and how much money you will be saving in your neck of the woods.

Frugal Momma’s Test Kitchen: Pizza Dough Revisited

Thursday, August 3rd, 2006

Welcome to my little test kitchen, where I attempt different recipes in hopes that I can share something that will appear on your dinner table. Please let me know, in the comments section, if you try one of these recipes and your own personal review of the recipes. It is such an honor & a pleasure to read your reviews and to know that you have enjoyed something from my blog!

Last week I discussed a recipe (for slow cooked hot dogs) that I had gotten from a not-so-little cookbook called, “Not Your Momma’s Slow Cooker Cookbook.” I have been enjoying this book a lot and am intrigued by many of the recipes in it. I hope that you can either buy this one or pick it up at your local library. I have definitely benefitted from it during the time I have been borrowing this book.
In the book was a recipe that was not a slow cooker recipe, but a recipe that I am always trying to perfect in our house. The recipe was for bread machine pizza dough. In a past entry, I discussed my favorite pizza dough recipe and the best way to store and prepare your dough. Despite having a favorite dough recipe already, I really do enjoy trying things out and this recipe did NOT disappoint at all!

They included a recipe for Slow Cooked Pizza Sauce (which I haven’t had an opportunity to try yet, but will let you know how it turns out in next week’s edition) and bread machine pizza dough that yields two balls of dough. This dough had many variations on it, but I am a stickler for a classic dough recipe so I have only attempted their Pizza Dough Master Recipe.
This dough was the best dough that I have ever prepared in my bread machine to date. It was a breeze to throw into the machine, rose beautifully, and was so easy to roll out that I literally just rolled the dough directly onto my pizza stone.

I am no expert dough roller, in fact, I hate rolling dough at all. If the dough is too difficult to roll out, I have been known on occasion to just toss the dough out and hit the McDonald’s. I can’t stand it when dough does not roll with ease and I don’t have the time or patience to work with it. This will probably never change…ever. Please do not lecture me on the beauty of rolling out dough or how much better bread tastes when not done in the bread machine- this will not happen in our home. I enjoy homemade bread and pizza, but I will not invest the time (at this point in my life) to knead & roll dough for hours. I think that is why I appreciated this recipe so much- it was easy for even the novice dough roller…or whatever you would like to call me!

I hope you enjoy this recipe as much as we did and that you can give this one a shot. I doubt that this recipe will disappoint you. Happy cooking!

Pizza Dough Master Recipe from Not Your Mother’s Slow Cooker Cookbook

1 1/3 cups water
¼ cup extra virgin olive oil
4 ½ cups unbleached all-purpose flour
1 tablespoon sugar
1 ½ teaspoons salt

2 teaspoons bread machine or instant yeast (I used instant and it worked wonderfully)


Combine all the ingredients in the pan according to the manufacturer’s instructions. Program for the dough or pizza dough cycle and press start. When it is ready the dough will be soft.

After the rising cycle ends, at the beep, immediately remove the pizza dough and place on a work surface lightly sprinkled with yellow cornmeal, semolina, or rice flour. Divide into the desired number of portions or leave whole. With a rolling pin or pressing with your fingers and the heels of your hands, roll out the dough from the center outward, rotating the dough as your roll or press to get an even circle. Lift up the dough and pull to get the desired size. Place the dough on a cornmeal or semolina sprinkled pizza pan, pressing a ½” rim around the crust. For a thin crust, proceed directly to the next step (This is exactly what I did. See above about my impatience with dough). For a thick crust, cover the curst with a clean tea towel and let rise at room temperature until puffy and doubled in bulk, 30-40 minutes, before topping and baking.

Spread with sauce almost to the rim with a large rubber spatula, sprinkle with some cheese and arrange any other toppings on top. Finish with a big more melting cheese. Fresh cheeses that melt well are best for pizza, such as mozzarella, (is Aldi shredded mozzarella a “fresh” cheese. Nope, but that is what I used and it worked just fine!) Gorgonzola, provolone, Monterey Jack, fontina, Brie, feta, & fresh goat cheese. Top with a drizzle of olive oil.

Immediately place the assembled pizza in its pan directly on the stone in the oven and bake until the crust is brown and crisp, 12 to 15 minutes (5-8 minutes longer for a thin crust) at 450 degrees. Check the underside of the crust by lifting with a metal spatula to be sure it is browned enough. With heavy oven mitts, transfer the pizza to a cutting board and slide off the pan. Cut into wedges with a pizza wheel, kitchen shears, or a serrated knife. Eat it hot!

* This recipe yields 1 ½ pounds of dough, enough for two thin 12-14-inch rounds, on ¼ inch-thick round or deep dish crust, four 8-inch crusts, six individual mini-crusts, or one crust to fit into an 11×17-inch rectangular baking sheet.*

WFMW: Adventures in Shipping

Wednesday, August 2nd, 2006

Welcome to this installment of Works-For-Me-Wednesday. Please visit Shannon’s blog for some really amazing solutions for your family. If you have a blog and want to take part in the fun, head on over! There are almost a hundred participants each week (and growing) and the tips have been so beneficial for our family.

Today I am going to focus on shipping and shipping costs. Recently, I blogged about a great cost comparison site that you can use when shipping your packages. This site basically does all of the comparing for you so that you know right away which is the cheapest shipping option.

I decided that since I have been doing a lot more shipping lately, that it would be a sound purchase to invest in a good quality postage scale. I went shopping to the big discount chains and could not find a scale anywhere. The scales available at the post office were very pricy and only went up to five pounds. More hunting and thinking later, I decided to check Ebay and their prices. I hit the jackpot. This week I received a thirty-five pound postage scale for a mere twenty-two bucks (this included shipping costs). I figured that combining this with my cost comparison site, that I could just start doing all of my shipping from home. This would save me the hassle of driving everyone over to the post office and I could do this on my own time…maybe when the children are napping or my son is in time-out? That is always a good time to get things done.

Now please bear with me, for those of you who are Ebay Queens and ship regularly, but I was not aware of some of the freebies you can get by shipping through USPS. For absolutely free you can do the following with the USPS site:

Print a shipping label
Schedule a Pickup (I mean schedule a pickup to your front door!)
Boxes (all shapes & sizes) – both flat rate and regular
Address Labels

What I want to know is, why the heck am I using all of my own boxes when I can get these for free?

Finally my last little tip, in this segment today, is regarding that handy little postage scale. Guess what else I am going to be using that little scale for? I am going to measure my food with it. It measures both pounds and ounces so I will be able to buy my chicken or beef in bulk, and divide into exact one pound packages. This will save our family more money because we will be able to be more accurate with the amount of food we are using. The chicken breasts I buy seem to have been injected with a super-duper dose of steroids. These suckers are huge. I will now be able to know that one chicken breast equals a pound, not three chicken breasts like I had originally thought.

I hope that you found this information somewhat beneficial. Give me a shout out and share your tips or, if you feel so inclined, feel free to tell me how great I am. I need a self-esteem boost today.

To my new visitors- take a peek around! My blog dishes up great money-saving solutions for your family every single day! Enjoy!

This Week in Festivals & Carnivals

Tuesday, August 1st, 2006

The Carnival of Debt Reduction is over at Consumerism Commentary.
Must Read Article: How We Paid Down Our Debt & Saved Money At the Same Time…It Can Be Done!

The Festival of Frugality is located at My Financial Journey.
MotherLoad Article: Frugal Exercise Solutions
Must Read Article: Save Money on Groceries With This Hamburger Tip

The Carnival of the Recipes is appearing at Men In Aprons.
MotherLoad Recipe: Sunday Supper- Yeast Waffles
Recipe to Try: Manly Appetizer- Sausage! I think I might try to make these with Sweet Italian Turkey Sausage- that is a favorite in our house.

The Carnival of Family Life is at Everything Under the Moon
MotherLoad Article: Broken Crayons Equal Good Fun
Must Read Article: 21 Ways to Be More Creative

Monday WAHM Spotlight: Texas Trail Web Design

Monday, July 31st, 2006

Thanks to Laura Kirkland for being part of our Monday WAHM for MomAdvice.com. We wish her much success in her business and with her family.If you are interested in being featured, we will be selecting a mom for each Monday of my blog. You can read more and apply. Email confirmations are sent to each mom if they are chosen. I still have many people to reply to on these so please be patient waiting for my reply. I promise to get back to you guys soon! Also remember to do your own research on these companies. If there are obvious red flags on BBB, I do not post them. Check my scam article to find out more about the potential dangers of work-at-home businesses.Thank you to Laura and her WAHM business, Texas Trail Web Design, for taking the time to apply and be a part of my Monday feature.

Personally, Laura’s tips have really struck a chord with me & my heart. There is much to be gained by reading them- it is invaluable advice to any work-at-home mommy. Thanks to Laura for sharing such heartfelt advice- I know many will have much to be gained from reading these tips!

Name: Laura Kirkland

City/State: Canton, Texas

Name of Company: Texas Trail Web Design

Two or Three Sentences About Your Company:

I specialize in doing funky, bold web sites for businesses who like to stand out from the crowd. I love to hear the “Wow!” over the phone when a client sees their new web presence. It’s been my experience that professional web site makes each business owner feel confident that what they are doing matters and gets them ready for success.

Tips for Moms Trying to Work-At-Home (these tips can be how you stay organized, how to be successful, how to get started- anything that you feel would help someone
just starting out):

1. No Money? Prepare Anyways.

I’ve heard it said that When opportunity comes, its too late to prepare. I want to encourage the moms who are stuck in between thinking and doing to get out there and get ready! You may not have the money yet, or any idea of how it will all come together. Prepare anyways. Brainstorm. Get excited. Throw the doubts out. We all need inspiration and giving yourself permission to dream breathes life into your soul!

2. Have Fun with Your Kids in between working

I’ve had days where my project consumes my thoughts and I’ve been grumpy and not fun for my kids. They fed right off my attitude and they felt horrible- and everything seemed to break down. I had no creativity to work, no desire and my poor kids felt bad too.

It’s been a hard lesson for me and my kids, but I learned to PLAY. It’s not an option. I can’t skip it because work is waiting. Play is as nourishing to my attitude as it is theirs. We play loud music, dance, do whatever we need to laugh and be free with each other. We all have fun and then I really am refreshed to work again.

3. Be Patient with Yourself and Your Kids

I’ll be honest- starting my own business has had its stressful moments in our house. We have all had to sacrifice to some extent and it took focused determination and my faith for me to not give up. I felt fears and doubts that I wasn’t a good mom if I didn’t give my kids 100% of my attention, that no one would hire me, that I wouldn’t be able to get the job done. It seemed like every hurdle I made it over, another doubt was waiting to get me to quit the race.

I threw all those fears out and did what God lead me to do. It has not always been cookies & smiles, but I am highly motivated and still committed to success even when I skin my knees along the way. I remind myself “I know more than I did yesterday” and I keep going.

More on Online Grocery Shopping

Sunday, July 30th, 2006

CBS News just did a report on online grocery shopping. They actually tried out several of the big name grocery stores and reviewed the pros & cons of each place. It is definitely worth reading, particularly if you have entertained the idea of doing your grocery shopping online.

For more information on online grocery shopping, visit my post about Amazon & Peapod. I also blogged on how I do my shopping online through Sam’s Club via their Click ‘N Pull feature (no fees attached!)- this can save you a lot of time & money. We do not live in a big city so I am not able to take advantage of the online grocers, although we used them for business purposes when I lived in Massachusetts.

If you have thoughts on the buying groceries online craze, feel free to share!

Broken Crayons Equal Good Fun!

Sunday, July 30th, 2006

My son is a repeat offender of breaking his crayons. Every time I give him a box of crayons and a pad of paper, I am guaranteed at least half of the crayons to be broken, by the time he is done coloring. Instead of tossing them, I have been saving them so that we could do a fun project that I had read about.

Yesterday I noticed that our bag was full of broken crayons. My husband, myself, & our son all worked on pulling all of the wrappers off of the crayons and our son got to pick where he wanted each of the colors to go in our muffin tin. I lined the muffin tin with paper wrappers, but the wax somehow still seeped through. Next time I will spray the pan with nonstick cooking spray, to make sure that none of the waxy residue sticks. These were junky muffin tins that had been sitting in our garage though, so I didn’t really care that they got a little messy.

Ideally, you should stick colors together that will make a colorful design- red/yellow/orange or yellow/green/blue. All black and all white crayons should be in their own little tin, as they dominate the other colors and can be used as their own color.

I said this was ideal though! My son was not interested in forming unique colors so all of the tops of our crayons turned out like giant Reese’s cups. When flipped over though, these were very colorful and beautiful. There is a great picture here that you can look at and see exactly what these turn out like.

If you were searching for a (practically) free party favor for your next birthday party, these would make lovely party favors.

The perfect rainy day activity- enjoy!

Frugal Momma’s Rainbow Jumbo Crayon Recipe

Ingredients:
Broken Crayon Bits
Nonstick Cooking Spray
Metallic or Paper Muffin Tin Liners
Mini-Muffin Tin or regular Muffin Tin

Directions:
Preheat the oven for 350 degrees. Spray your muffin tin lightly with a nonstick cooking spray. Insert your muffin tin liners. Peel all paper off of the broken crayons and arrange into the muffin tins. Fill to 1/4-1/2 full. Try to stick with similar colors, to avoid a muddy looking crayon. Red/yellow/orange or yellow/green/blue- colors that are next to each other in the color wheel are ideal. Place muffin tins in the oven- watch carefully! It will take about ten minutes for the crayons to melt down. Once the crayons are melted, you can turn the oven off and let the crayons harden inside the oven, or you can pull them out (carefully so that the colors don’t mix into one color) and allow them to cool (I popped ours in the freezer once they were becoming solid to quicken the cooling process). Pop the crayons out of the muffin tin and place in a container (we used an old plastic ice cream tub).

Friday Freebie: Free Samples & Subscriptions

Friday, July 28th, 2006

Whirlpool is running a sweepstakes right now. Enter to win a Whirlpool Gold Dishwasher with PowerScour option and get a FREE OPI Nail Laquer, just for entering. The color is, “I Don’t Do Dishes” (how funny is that?) Sign up here– hurry, only while supplies last!

I signed up for a one year free subscription to Family Fun magazine. This is my favorite magazine and it had expired. This site has lots of free subscriptions. Unfortunately, most of them made you sign up for stuff or take a survey. The Family Fun one was really free though, so take advantage of it. The others…enter at your own risk!!

Get a free Schick Quattro Titanium Razor by signing up here– hurry, only while supplies last!

Get a free half gallon of milk. This one is only for residents of Los Angeles, Las Vegas, & San Diego. If you live there and are drinking free milk, I am officially jealous of you! Sign up here.

Free sample of Biz- click “Take the Stain Challenge.” There should be a little soap bubble that says free sample on it. This will get you a free sample of six ounces of detergent. Sign up here.

Try Poise Panties for free. These are the kind that are not supposed to not show your whosits and whatsits and rid you of that panty line. Only smalls and larges are available. Sign up here.

Complete a short survey for Pfizer (regarding your heart health) and get a free pedometer for answering the questions. Sign up here.

Visit this page, to print out a free coupon for one hot 12 ounce beverage from Borders. This offer expires on 08/15/2006. It says you need a Rewards card, but that is also free (unlike Barnes & Noble).

Enjoy, everyone!