Author Archive

How to Make a Succulent Centerpiece

Saturday, May 3rd, 2014

How to Make a Succulent Centerpiece from MomAdvice.com

You may think, “Who am I reading? I thought she couldn’t take care of anything (even herself?)!  Well, surprise, SURPRISE, I am showing you an easy DIY succulent centerpiece today and wanted to share with you a few tips on caring for succulents. I think I got my confidence back this year after creating that terrarium for you all and now I think I am some kind of green-thumb-ish-person and I want to take you along on my journey. In all honesty, I worked many a summer in a greenhouse, but I had lost my love of plants when I started changing diapers, cleaning a house, and feeding a family. Maybe you felt the same way?   Today’s project was sponsored by Walmart and they asked me to showcase a fun creation you can make for your own backyard from their gardening department and I thought I would highlight a plant I am kind of crazy about right now…the succulent.

Painted Succulent Pictures

Have you seen a painted succulent before?  True green thumbs may cringe at the painted plants, but (as I illustrated above) I am a newbie to the houseplant world and I love anything that is painted. These succulents have been painted which I think can add a pop of color to your home or as an outdoor centerpiece for your outdoor table, as I am showing off today.

How to Care For Your Succulents

Succulents don’t need a lot to survive, but they do have some small requirements- a lot of light, thoughtful watering, and a little plant food every couple of weeks.

A  succulent is any plant with thick, fleshy (succulent) water storage organs. Succulents store water in their leaves, their stems or their roots. These plants have adapted to survive arid conditions throughout the world, from Africa to the deserts of North America.These plants can take many different leaf forms and plant shapes, including paddle leaves, tight rosettes, and bushy or trailing columns of teardrop leaves.

Light- 

The one requirement I worry about in my home is the lighting conditions because my house doesn’t get a ton of light in it. If you have a home with bright sunny windows, succulents are a perfect houseplant option.

Succulents prefer bright light, such as found on a south-facing window. Succulents will let you know if you are not putting them in an ideal location. Some species will scorch if suddenly exposed to direct sunlight. Their leaves will turn brown or white as the plant bleaches out and the soft tissues are destroyed. If the plant is not getting enough light, succulents will begin to stretch, with an elongated stem and widely spaced leaves. Many varieties of succulents will thrive outdoors in the summer and, depending upon your weather, this might be a better option.

Water-

Most people think that they don’t need to water their succulents very often, but in the Spring & Summer months, succulents actually need more water than they do in the Winter & Fall. Make sure to water your succulents often in the summer.  Allow the potting mix to dry between waterings, but do not underwater. During the winter, when the plants go dormant, cut watering back to once every other month. Really, the watering is probably the most tricky part about succulents!

Fertilize-

Make sure that you purchase some houseplant fertilizer while you are at the store. In the Spring & Summer months, fertilize your plant every two weeks.  Just make sure you stop fertilizing in the winter months.

How to Make a Succulent Centerpiece from MomAdvice.com

Now that we know all about succulents, let’s make a cute centerpiece for our outdoor table!

Supplies Needed

3-4 Succulents (painted or not)- these are priced at $6.88 each

Gold Spray Paint

White Spray Paint

Inexpensive Pizza Pan (this was just $.92)

Painters Tape

How to Make a Succulent Centerpiece from MomAdvice.com

Directions

1. Remove plant in plastic pot from the clay pot. Remove stickers. Hold your can 8 inches away from your surface and spray in a sweeping motion side to side with a slight overlap. It has always been my experience to go thin with the paint, allow it to dry, and then to add another layer for the best results and minimal drip. Allow the paint to dry for one hour.

2. Using your painters tape, tape off anywhere you would like to have some gold peeking through. You can do a paint dipped pot and do the bottoms, trim the top in gold, or create your own unique paint effect with geometric taping. Spray paint those parts gold and allow your pots to dry.

3. Finally, spray paint your pizza pan gold.

4. Once it is dry, pull everything together and display it on your outdoor table for a unique centerpiece.

How to Make a Succulent Centerpiece from MomAdvice.com

How to Make a Succulent Centerpiece from MomAdvice.com

How to Make a Succulent Centerpiece from MomAdvice.com

How to Make a Succulent Centerpiece from MomAdvice.com

Have any tips for succulent care or selection? Feel free to leave them here- I’d love to hear about your experience with these plants!

walmart_mom_disclaimer

Pin It

It’s The 3 Little Things: Retro Swimwear, Beach-Scented Products, & Free Eyewear

Friday, May 2nd, 2014

3_little_things


Happy Friday, friends! It’s time for our list of the 3 little things that are making me happy this week!  I hope you guys are enjoying these as much as I enjoy sharing them with you!  Let me know in the comments what is making you happy this week!

Rey_Swimwear

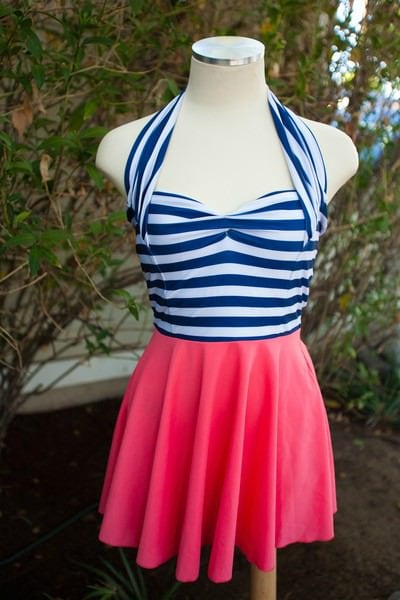
Modest Retro Swimwear

Each year our family gets a community pool membership for the summer so, in order to get our money’s worth, we spend a lot of time at the pool. I should rephrase that and say that I spend a lot of time *by* a pool in a shady spot reading my library books. Each year I try to get one modest swimsuit that I can wear and I have had luck finding them at places like Sears & Target. This year I just couldn’t find anything, but I remembered this speech I saw on Rey Swimwear, their company tagline being “who says it has to be itsy-bitsy?”  and decided that I would check there.

Although the pricing is on the higher end for me, I just received this swimsuit that I had ordered and  I am in HEAVEN. It looks like one piece, but the bottom is separate and it is a full bottom so no worries about bits and pieces hanging out that is better left tucked in.  They have beautiful stuff and I will probably order one suit from there each year.

If you have little girls, they are also starting a kids line.

method_beach_sage

Beachy Cleaning Products

I somehow ended up on a mailing list for Method cleaning products and for the last couple of years I have been enjoying trying out their new stuff as they come out with it.  This month’s shipment was unbelievably awesome.  For their Spring line they launched Lime + Sea Salt Dish Soap, Beach Sage Cleaning Spray, & Sunset Breeze Laundry Detergent.

I hate cleaning up the kitchen at the end of the day, but I hate waking up to a mess of dirty counters and dishes. It actually feels like more of a treat when I use this dish soap and cleaning spray. The Beach Sage, in particular, is heavenly. I still hate cleaning and doing laundry, but at least everything smells beachy while I am doing it.  You also can’t beat that it is priced at around $3  for the soap/cleaners, which is a lot cheaper than a flight to the beach!

Sadly, it’s limited edition so I am going to have to stock up on a few extras before they take it off the shelves. Which makes me wonder why everything I love always limited edition?

Sundays_With_Writers-1_Final

Free Glasses

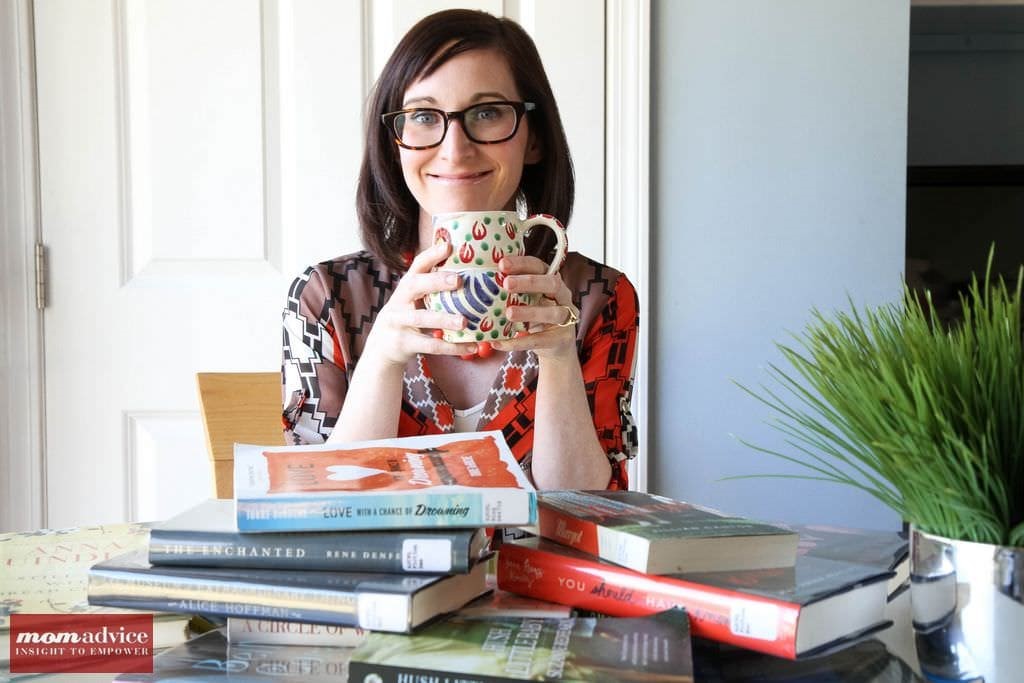
I’m really sorry if you are tired of this picture of me, but you are going to be seeing it every time I can score an interview with an author on here. I kept getting questions about these frames and I just want to tell you that these glasses make me SO happy and they were FREE. It was my first time ordering through Coastal so I was a little nervous that they were going to be cheap and poor quality.

They offer their first pair of glasses to you for free and I picked out these frames after reading through all the reviews and sizing. The frames came and the company included a really nice case and a little eyeglass kit to care for them. I almost never take them off anymore and just had them adjusted at the eye clinic because I wear them so much that I sometimes fall asleep in them.

I can’t rave enough about how much I love these glasses, in fact, my brother ordered a geeky pair himself and now we feel like hipsters with our cold brew coffee, spinning our vinyl, and rocking our free geek frames!

Lastly, if you want to make your kids happy this Friday, show them this video- guaranteed belly laughs for everyone! Bonus mom points, if you show them these cute sloth pictures. My kids loved the sloths that were celebrating their birthdays!

WHAT DOES THE SLOTH SAY? 🙂

Sloth Squeak! from Lucy Cooke on Vimeo.

*this post may contain affiliate links- I only recommend what I love though. Check out past editions of  It’s the 3 Little Things

Now it’s your turn, what makes you happy this week? Feel free to share in our link up below and link back to this post to participate!

Share 3 things that are making you happy today!

How To Print Waterlogue Pictures

Thursday, May 1st, 2014

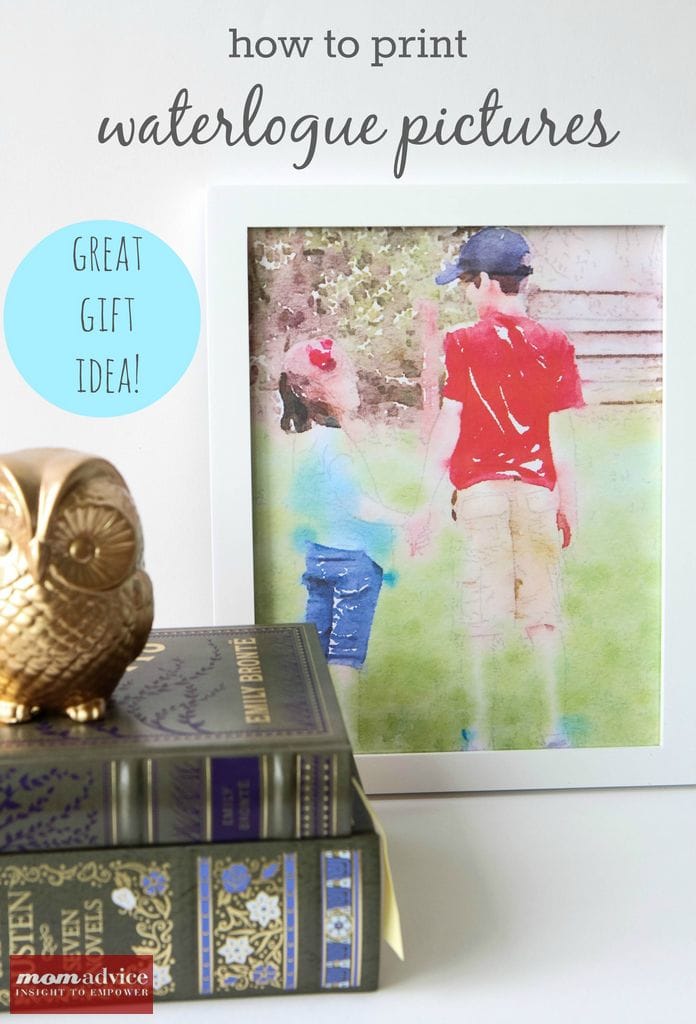
How To Print Waterlogue Pictures from MomAdvice.com.

I am so excited to share with you today’s tutorial on how to print Waterlogue images for easy and beautiful gifts for someone special in your life. With Mother’s Day just around the corner, the Waterlogue app is a great way to make beautiful watercolor prints for a favorite mama in your life.

Walmart challenged me to showcase a budget-friendly gift to give for Mother’s Day and I just knew that I had to show you how to do this so you can make beautiful images for a special lady in your life or as a gift to yourself. To get started, you will need to download the Waterlogue App ($1.99). The app is compatible with the iPhone, iPad, or iTouch. Once you have downloaded it, we can begin creating our art.

How To Print Waterlogue Pictures from MomAdvice.com.

How To Print Waterlogue Pictures from MomAdvice.com.

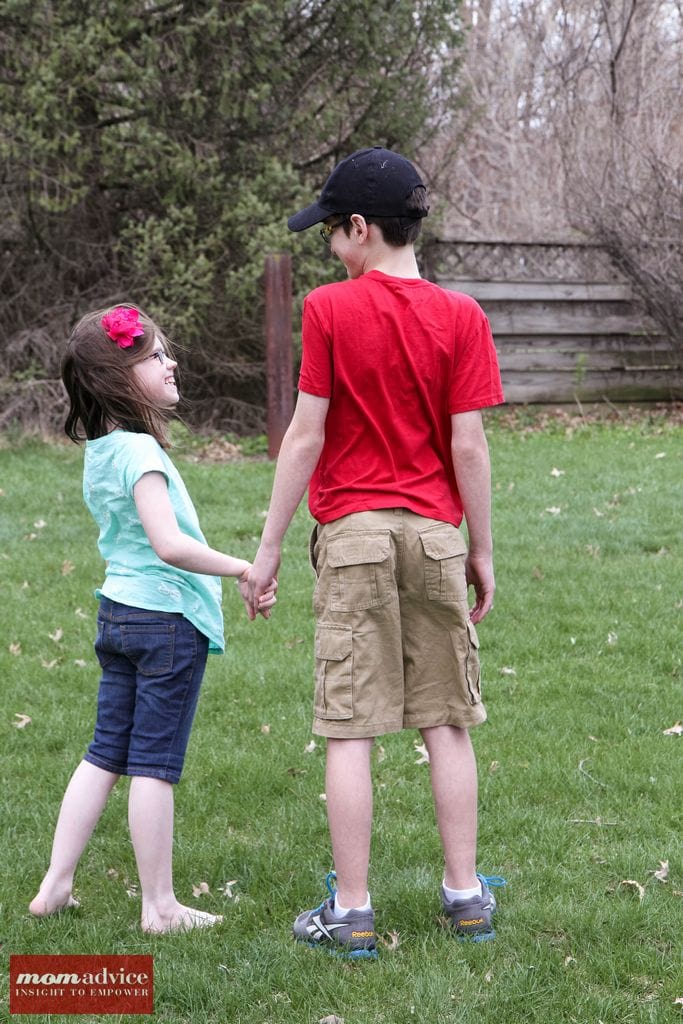
I took my kids in the backyard and had them pose for me. I wanted to get one of the back of them or a side angle. Although sometimes the app looks amazing with faces directly to the camera, I find that it can be a little tricky picking the right filter and I wanted to insure we had good success. I suggest trying a couple of different angles so you can play with the filters until you find the perfect one.

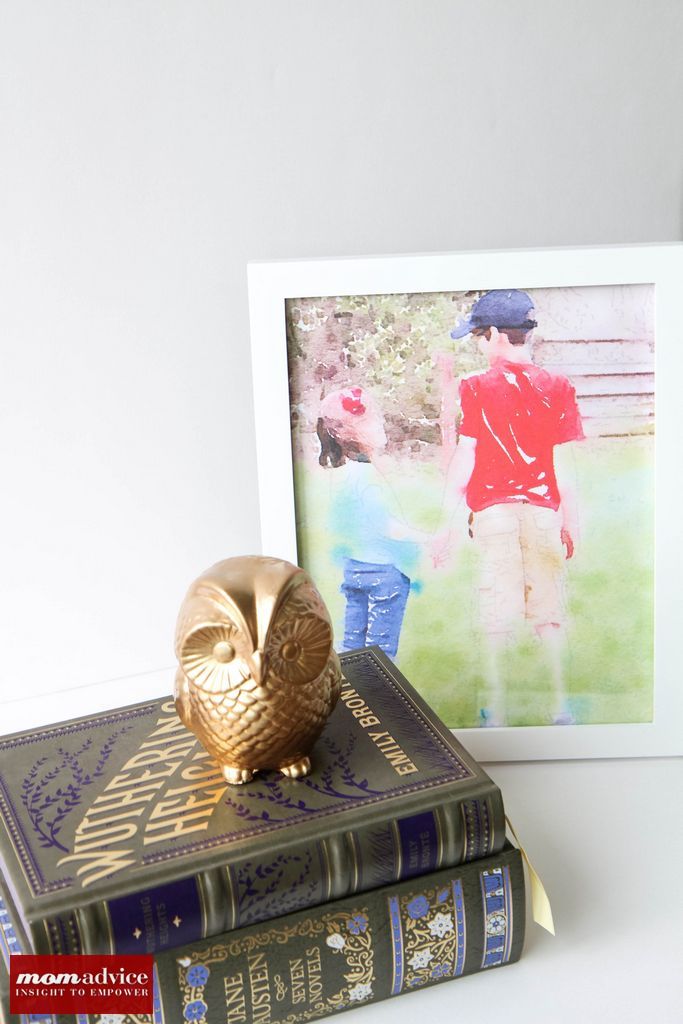
This is the picture that I took with my DSLR, but I did not make any edits to the image. I just wanted to make sure that it was nice and crisp for the app, but you can definitely just shoot with your iPhone too!

How To Print Waterlogue Pictures from MomAdvice.com.

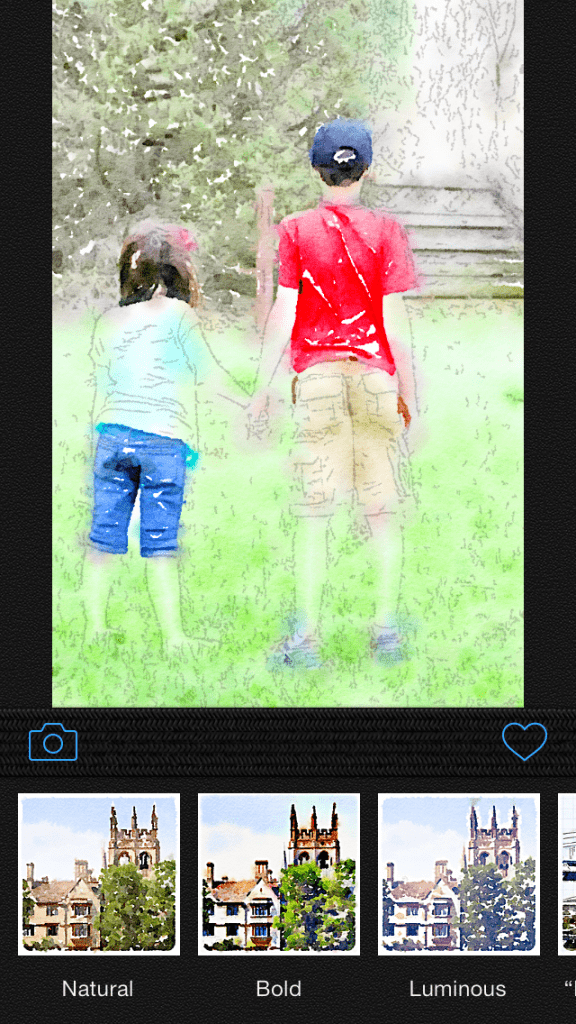
To begin, tap on the camera to take a picture or import from your library. Since I took my photo with my DSLR, I emailed the photo to myself and then saved it to my phone to use for this. Next, you will want to select a filter. Each of the filters offers a different feel to your photos so have fun playing around with all the different options- there are twelve in all!

How To Print Waterlogue Pictures from MomAdvice.com.

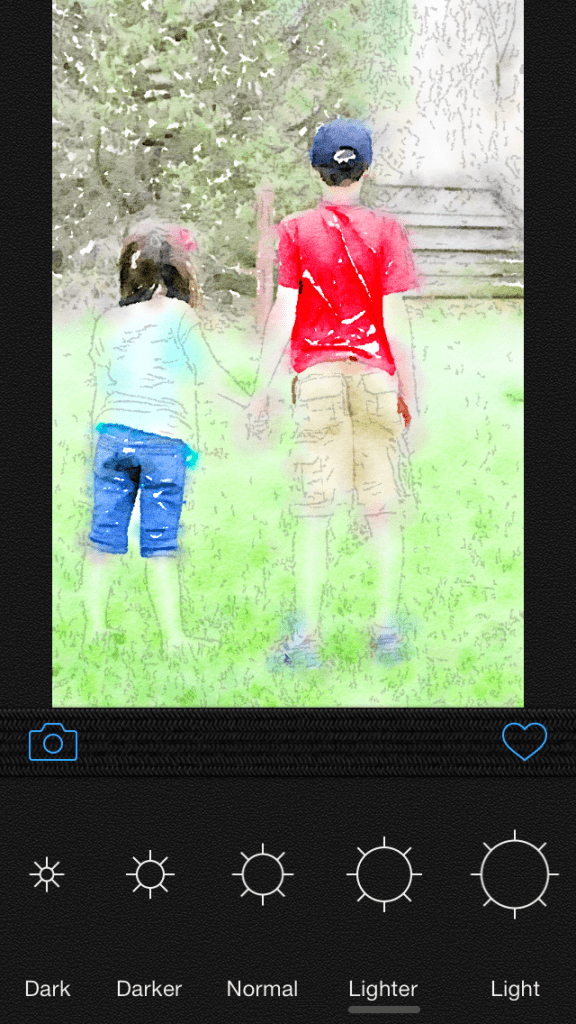
As you scroll through the film strip at the bottom, you will have a couple of other options for making your picture. One is how dark or how light the brushstrokes are in your photo. Try out the different options before finalizing your picture.

How To Print Waterlogue Pictures from MomAdvice.com.

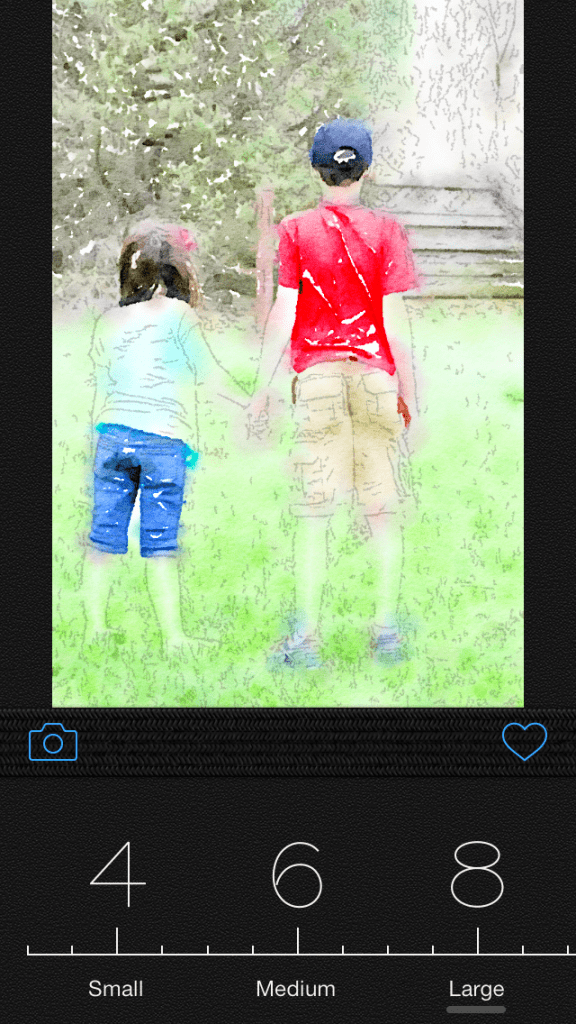
As you continue to scroll through the film strip, you will also see the option to select the size of the brushstrokes.  This is not the file size, this is just the size of the brushstrokes which can be a little confusing.

The final selection you can make on the film strip is if you would like a border or not on your image. I decided to leave the border off.

Click the HEART (above the filmstrip) to head to SETTINGS (you will need to scroll all the way to the other end of the options on the bottom row.  Click SETTINGS and then change your file size to LARGE.  From this menu you can SAVE TO PHOTOS or just click MAIL to email the file to yourself. 

How To Print Waterlogue Pictures from MomAdvice.com.

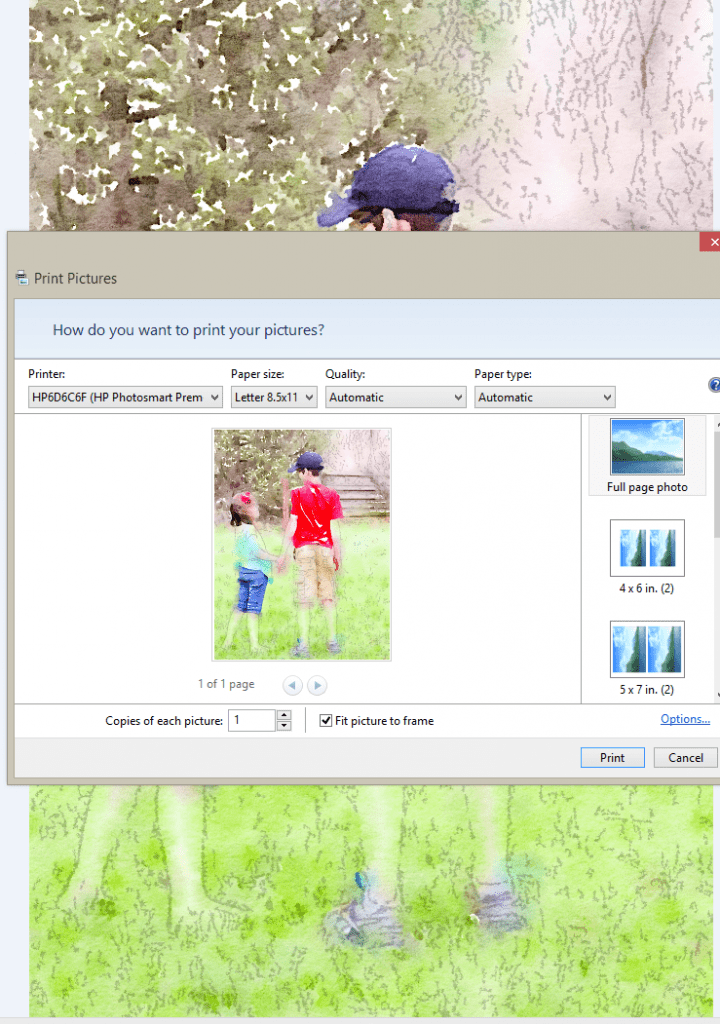
Once you have emailed the file to yourself you can open and print it just like a regular picture since it is in JPEG format.  Click the size of picture you want to print and simply print it on heavy-duty cardstock. You can find this over by the printer paper in the office supplies section of the store.

How To Print Waterlogue Pictures from MomAdvice.com.

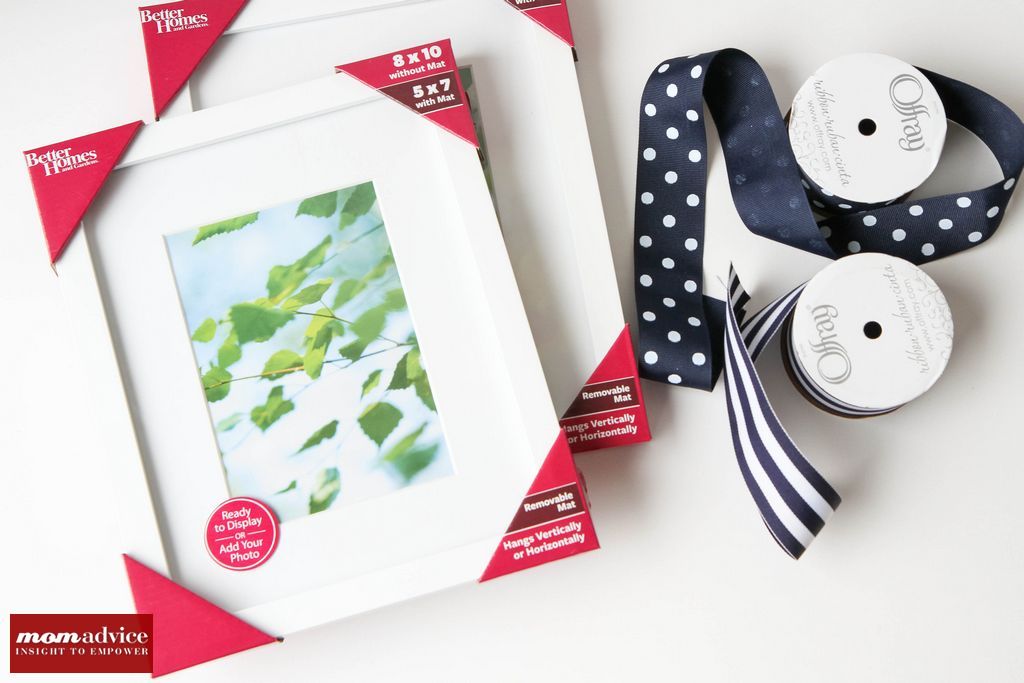
Now that you have your picture,  you can place it in an inexpensive frame. I found these Better Homes & Gardens frames for a little less than $10 in the housewares. You will need to trim your image a bit, and you can use your removable mat to help figure out how to center and trim it. Place the picture inside and tie it with a little grosgrain ribbon for mom with an inexpensive bouquet of flowers.

How To Print Waterlogue Pictures from MomAdvice.com.

I hope you guys have the best time creating your own artwork and I hope this idea inspires you for an easy gift for someone special in your life!

For more great Mother’s Day gift ideas, check out these easy DIY Mother’s Day Gift Ideas!

Have you used the Waterlogue App before? What are you doing with this fun app?

walmart_mom_disclaimer

Pin It

Amy’s Notebook 04.30.14

Wednesday, April 30th, 2014

High-Low Geometric Lamp

Source: I Heart Organizing


Isn’t this diy geometric lamp amazing? So cool – and the fact that you can have a high-end look for less.

So loving these adorable crafts made with recycled tin cans.

I’m pretty sure these tips to pack for a road trip will come in handy for the trips we’re planning for this summer!

There’s a ton of great ideas in this Frozen themed birthday party that my kids would flip for!

Artichoke & leek frittata sounds about perfect now – a light and springy meal.

Um, sure, I’d like to know 10 ways to stuff your face with asparagus, wouldn’t you?

And this modernized Mexican 7-layer dip? Oh yes.

amys_notebook

I hope you enjoyed this collection of gathered links to DIY crafts, food projects, and thrifty ways to spruce up your home. Nothing brings me more joy then to highlight other fabulous bloggers. Follow me on Pinterest for daily inspiration!

April Book Club Discussion With the Author: The Bear

Tuesday, April 29th, 2014

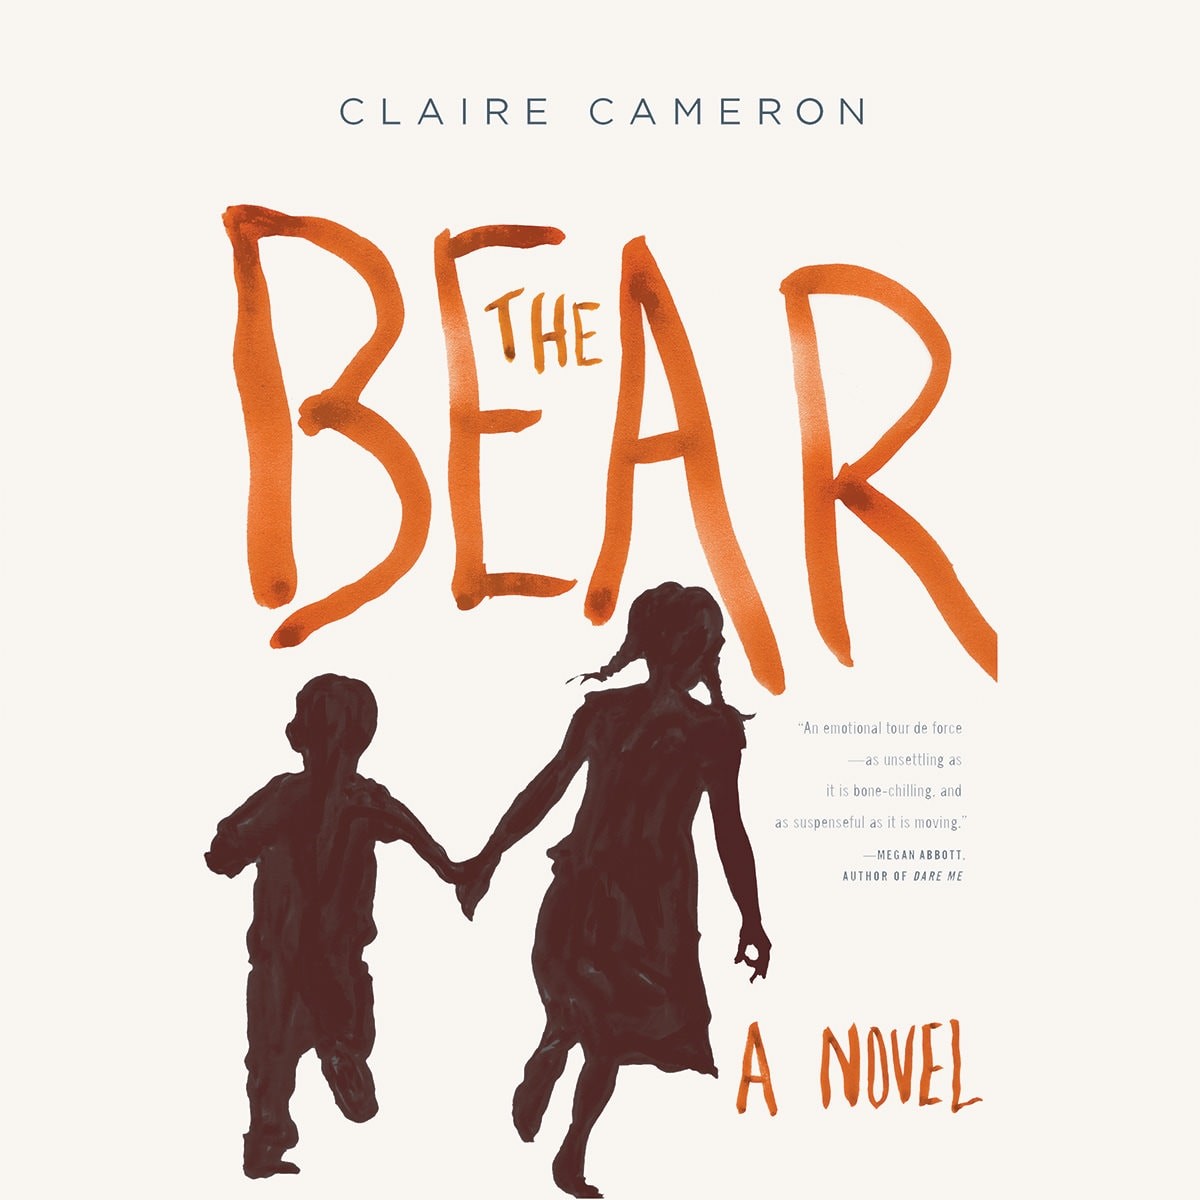
The Bear by Claire Cameron

Welcome to our April Book Club! I am so excited to be talking about this month’s selection, “The Bear,” by Claire Cameron.  Claire has truly been such a generous author to share in our book club discussion today and her book was so beautifully written that I could not wait to talk about it today.

Just as a recap from our announcement last week, here is a little on the basic premise of this book.

While camping with her family on a remote island, five-year-old Anna awakes in the night to the sound of her mother screaming. A bear has found their campsite and her parents become the bear’s victims.

As her mother lays injured on the ground, she convinces Anna to take her brother in the canoe, getting them away from the bear and (hopefully) to safety. Anna & Sticky must fight for survival as they are lost and alone in the wilderness.

Told through the eyes of five-year-old Anna, we see the struggles and triumphs as she tries to find safety with her brother.  A survival story unlike any other I have read, it is one that you just won’t be able to put down because you must know what happens to these children.

Wow, I don’t know about you, but this novel kept me on the edge of my seat until I finished it. I could not close the final pages until I knew if Anna & Sticky were safe.

As readers, we are swept away in the suspenseful story of Anna & her brother Alex (nicknamed Sticky). While their family is camping on a remote island, five-year-old Anna awakes in the night to the sound of her mother screaming. A bear has found their campsite and her parents become the bear’s victims.

As her mother lays injured on the ground, she convinces Anna to take her brother in the canoe, getting them away from the bear and (hopefully) to safety. Anna & Sticky must fight for survival as they are lost and alone in the wilderness.

Told through the eyes of five-year-old Anna, we see the struggles and triumphs as she tries to find safety with her brother.

Although telling the story through the eyes of a five-year-old can get a little old, I think it lends itself well in this survival story because we have to understand what Anna’s motives are for keeping her brother safe.

In the author’s note, we learn that in October of 1991, Ryamond Jakubauskas & Carola Frehe pitched a tent on Bates Island on Lake Opeongo in Algonquin Park and were attacked by a large male black bear.

Both of them died from injuries inflicted by the bear and there were no clear reasons why this bear attacked, other than hunger.

The author worked as a counselor at a summer camp at the park and used these stories and theories about what happened as a basis for her novel, adding in the children.

Since this story is only about the children, it is told through Anna’s eyes and her interpretation of what happened to her parents, who attacked them (referred to as a dog), and, ultimately, how they will survive.

Of course, since it is told through a child’s eyes, we also sometimes follow along confused about what is happening to them and what is real versus what is imagined. This helps us to truly understand Anna’s own confusion about the situation.

I loved that the story, in the end, had them come back to the place where the attack happened, in a small ceremony bringing a little more peace to them both.
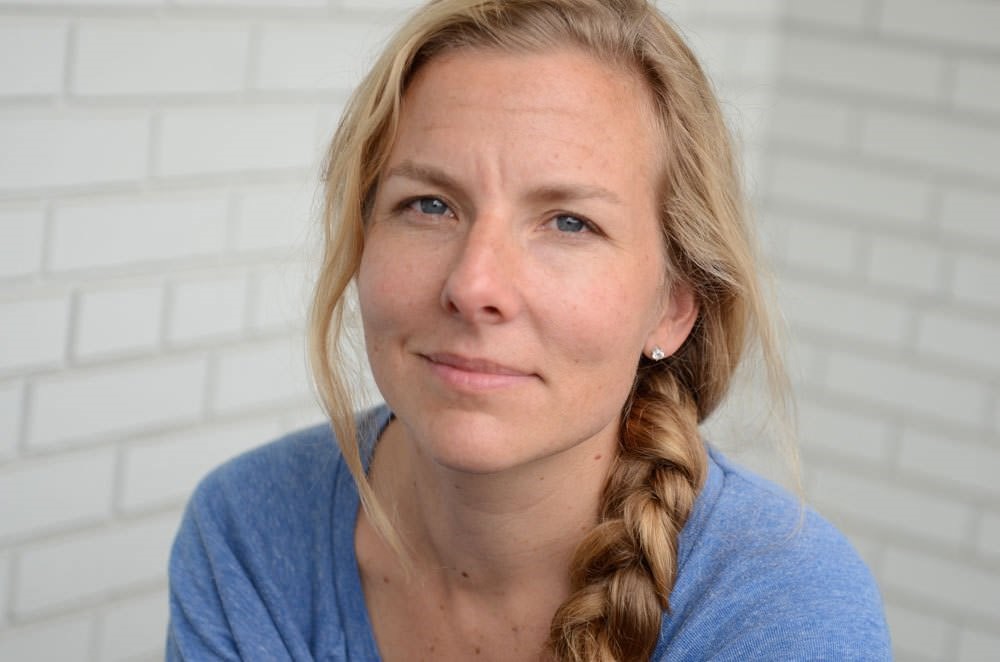
Claire Cameron

Born in 1973, Claire Cameron grew up in Toronto. She studied History and Culture at Queen’s University. She then worked as an instructor for Outward Bound, teaching mountaineering, climbing, and white-water rafting in Oregon. Next she worked in San Francisco for Pearson Plc before moving to London in 1999. There she was director of Shift Media, a consultancy whose clients included the BBC, McGraw-Hill, and Oxford University Press. Her first novel was the taut thriller, “The Line Painter.”  Claire lives in Toronto with her husband and two sons. You can become a fan of Claire Cameron on Facebook, follow her on Twitter, follow her on IG, and on GoodReads.

bookclublogo (1)


Getting in the head of a five-year-old voice can’t be easy. Who was your inspiration and how did you capture it in this novel?

It might not surprise you to hear that my son was five when I started writing the novel. He was in a really talkative stage and I used conversations with him to establish the emotional scope and ability of the character. The first draft was actually about two little boys. At some point in the endless rewrites, I realized there was a lot of me in Anna. That’s when she became a girl. I let her be me.

 I read an interview where you shared that, “the bear,” symbolizes our fears at parents. What is, “the bear,” to you as a mother?

Writing the novel was emotionally challenging as, in some ways, I was typing out my greatest fears. It was hard to live that way. In retrospect, though, it helped me relax as a mother. My story ended up being about how kids can be resilient and how they can cope. When I finished, I knew that was true and that they would be fine, whether or not I was there to help.

I suppose that’s ‘the bear’ to me, the idea of not being there to help my kids when they are in trouble.

 Have you camped at all since writing this book? Do you think it has made you nervous or added another perspective on camping?

Last summer I took my family on a canoe trip back to the island in Algonquin Park where the bear attack that I reimagined in The Bear took place. I did think about the attack, but I also found that I’ve slept in a tent so many nights before that I knew we were fine. It helped that it was a great blue berry season. The bears were full!

The first night we were back home, I tucked my son into bed and asked him if he felt safer in his bed, rather than sleeping in a tent. He said no, it’s scarier at home. Why? Because when camping we were all together in the same tent, but in our house we sleep in different rooms so his Dad and I are farther away. It helped me realize that feeling scared is different for everyone. Fear is a perspective and a mindset, not a set thing.

Did the father leave the family during arguments or did I misinterpret that part of the narrative? (from reader, Sarah)

I purposely left the details of Anna’s family situation in the state that 5 year olds often experience them, a bunch of vague details that don’t quite make sense because I child is rarely told the whole story. My hope is that a reader will use her experience to fill in the details (sorry that is probably a frustratingly vague answer).

Some of the scariest scenes for me are the ones where Sticky disappears and Anna isn’t watching him. As a mom, I think I held my breath until he came back. Of course, there are terrifying moments like that peppered throughout the book. What were some of the most difficult scenes for you as a mom?

The scariest scene to write was the same, when Sticky disappears. I know this because I skipped over it in the first draft. It was my editor, Sarah Murphy at Little Brown, who pointed it out–that I had worked up to this moment and then only vaguely sketched it in. When she said this I thought, “oh no, I’ve been caught out. Now I’m going to have to buck up and write it.”

That is the definition of a great editor, I think. Someone who is so in tune with the story that they can see the emotional gaps.

In, “The Room,” by Emma Donoghue, she utilizes a young narrator to tell a story of survival and a reader can’t help but notice the similar theme in your book. Have you read this book and what do you think makes your narrator different than Donoghue’s?

The book that was the bigger influence at the beginning of writing THE BEAR was LORD OF THE FLIES. I re-read it and, having boys of my own, couldn’t accept the mean take on human nature it shows. When I was about 1/3 of the way through the first draft. I got tired and wondered who would want to read a story told in a 5 year olds voice. That’s when I thought of ROOM. I read it and loved it, so I knew it was possible and I got a lot of strength to keep going from that. Both books have a child in a survival situation, but Anna is a very different child with more varied experience than the child in ROOM, Jack. Her voice reflects that. She needs to make a new normal after her rescue, whereas Jack has to find out what normal might be for him.

If you could tell anyone to read one book (other than your own) what would that book be?

Such a hard question! Maybe TREASURE ISLAND by Robert Louis Stevenson because it is such a great adventure story. I love Long John Silver as he’s the best kind of bad guy–one that feels so complete that you can’t help rooting for him.

What do you have in store for us with your next project?

I am writing a lot at the moment, but I’m not entirely sure what the book will be just yet. It will involve the wilderness, as that is a long time passion. I am interested in capturing the amazing things that happen in the outdoors between people. That’s at the heart of my interest. When you go through a survival situation with another person, you get to know them in a whole new way.

What did you think of The Bear?  Share your thoughts on our  book club pick below and offer recommendations for what you might like to see on our list in the upcoming year!

Our book club will now be going to a quarterly selection. Be sure to pick up our summer selection, “Love With a Chance of Drowning.” In the meantime, catch up on what is happening this year and explore our past book club selections here!


Pin It

Slow Cooker Mexican Black Beans

Tuesday, April 29th, 2014

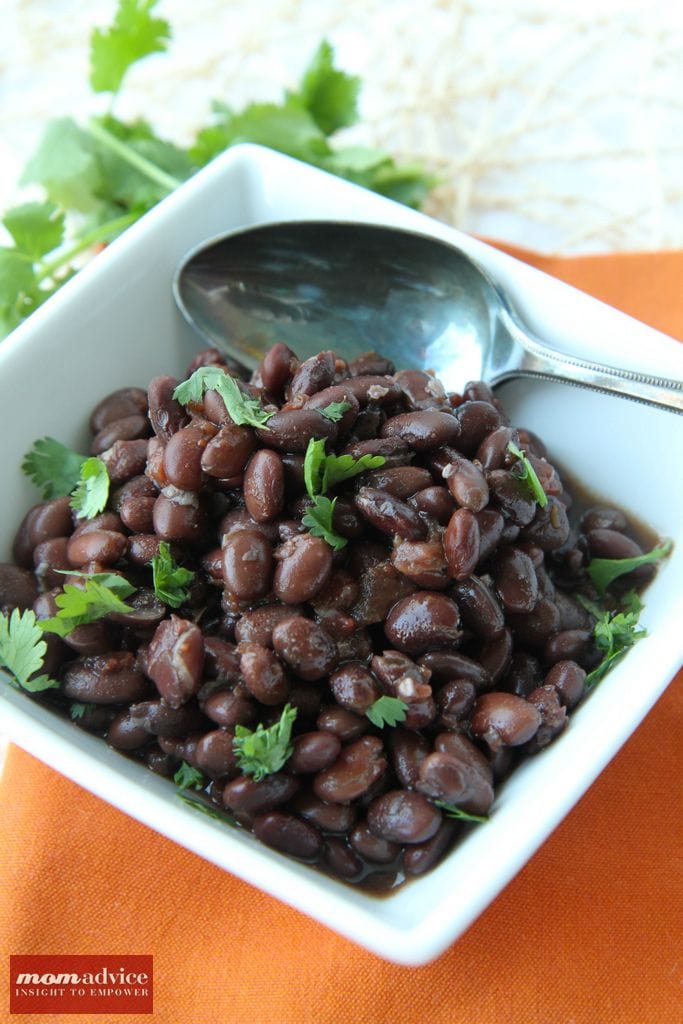
Slow Cooker Mexican Black Beans from MomAdvice.com.

For years I have been wanting to make beans in the slow cooker, but was intimidated with the process. Beans in the slow cooker though are surprisingly easy and frugal to create in large batches for your family. Today I wanted to show you a foolproof and delicious recipe for Slow Cooker Mexican Black Beans for all of your Cinco de Mayo fun, or as a frugal side dish for your next taco night. Today’s cooking tutorial is going to take you through the in’s and out’s of how to cook beans, how to freeze them, and then in the comments below you can share your views on bean preparation. Everyone has a theory, a trick, and a recipe. Let’s share what we know works best for us!

Bean Cooking 101

How to Cook Dried Beans

Why Should You Trouble Yourself With Dried Beans?

There is true convenience in grabbing a quick can of beans for your dishes out of your pantry. Although it is still a frugal staple, dried beans are oh-so-much cheaper and they have much more flavor than the canned variety. Dried beans typically cost two to three times less than canned beans and they have the added benefit of less sodium, more flavor, and can save you a lot of room in a small pantry. Did I mention that they can be made while you are sleeping in your slow cooker? Now that’s a beautiful thing.

When I posted that I was working on this on Instagram, many people commented on their techniques as well as their failures in cooking beans. I guess I am not the only one a little intimidated by the process. Now that I have made them though, I will be making this a regular habit because it saves me a lot of money and is a very filling protein for someone who is on a gluten-free diet and always hungry.

A Little Sorting Never Hurt Nobody

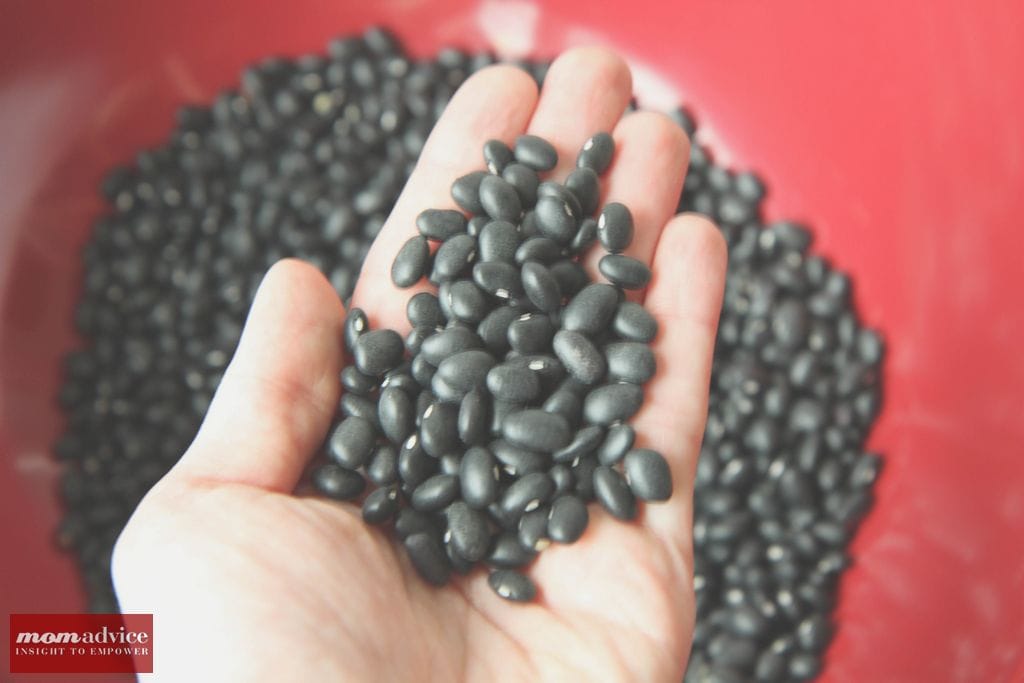
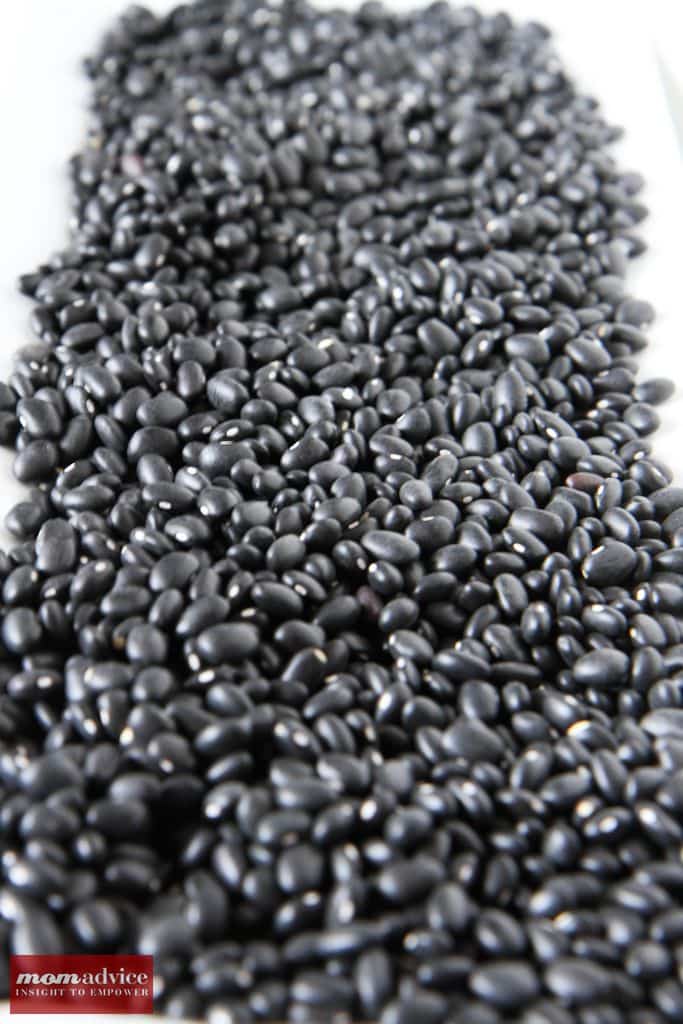
Once you purchase your beans, make sure you sort them out. Arrange dried beans on a sheet pan or clean kitchen towel and sort through them to pick out any shriveled or broken beans, stones or debris. This is not an all-day affair, just a quickly peek and move on to the next steps.

Rinse It, Rinse It Good

Always make sure you rinse your beans really well before beginning. Make sure you also rinse them well after our salt brine (below).

Slow Cooker Mexican Black Beans from MomAdvice.com.

To Soak or Not to Soak

Sounds like a great Shakespeare line, doesn’t it? I know that many people skip the soaking process and opt to just throw them right into the slow cooker after a rinse.  I always consult the experts when it comes to cooking and according to Cook’s Illustrated, quick soaking can be effective, but their proven method of soaking beans in a brine, yields a bean that a girl can really be proud of.  Just as a brine on a bird can yield tasty results, beans can benefit from salt too. The salt soak prevents magnesium and calcium from binding to — and, subsequently hardening — the cell walls on your beans. When people  complain that they can never get the beans to soften, you can be assured that a brine can help with that, while maintaining the shape of your beans.

Cook’s Illustrated recommends, for 1 pound of dried beans (about 2 cups) dissolve 3 tablespoons of salt in 4 quarts of water. Add the rinsed beans and let them soak at room temperature for at least 8 hours or up to 24 hours. (If you’re short on time, quick-soak the beans: Place the beans in a large heatproof bowl. Bring 2 quarts of water and 3 tablespoons of salt to a boil. Pour the water over the beans and let them soak for 1 hour before draining and rinsing.)

As far as salting goes for your beans for seasoning though, it is advised to wait until the end and salt once they are cooked and season to taste. You also want to be sure that you are rinsing that brine off before you get started with your recipe.

Slow Cooker Mexican Black Beans from MomAdvice.com.  Cook Them Low & Slow

Since beans need to be cooked low and slow, the slow cooker is ideal for cooking your beans. Once you have rinsed these after the salt brine, add them to your slow cooker along with liquid and seasonings of choice and turn your slow cooker on Low and head to bed.  Skip the addition of anything acidic though because the acid can prevent those beans from breaking down and it’s all about getting these beans to break down.

I cooked mine in my Ninja Cooker and set it for six hours and it set’s itself to warm after that.  The beans should take roughly six to eight hours to cook and slow cookers can be the ideal tool for cooking them. According to The Kitchn, it’s adviseable to pick a slow cooker that fits best with the amount of beans you are cooking. They advise that for small batches of beans, a pound or less, to rely on a 3 1/2-quart or smaller slow cooker. If cooking 2 pounds or more, you can use your 7-quart slow cooker.

Slow Cooker Mexican Black Beans from MomAdvice.com. Freeze Those Beans

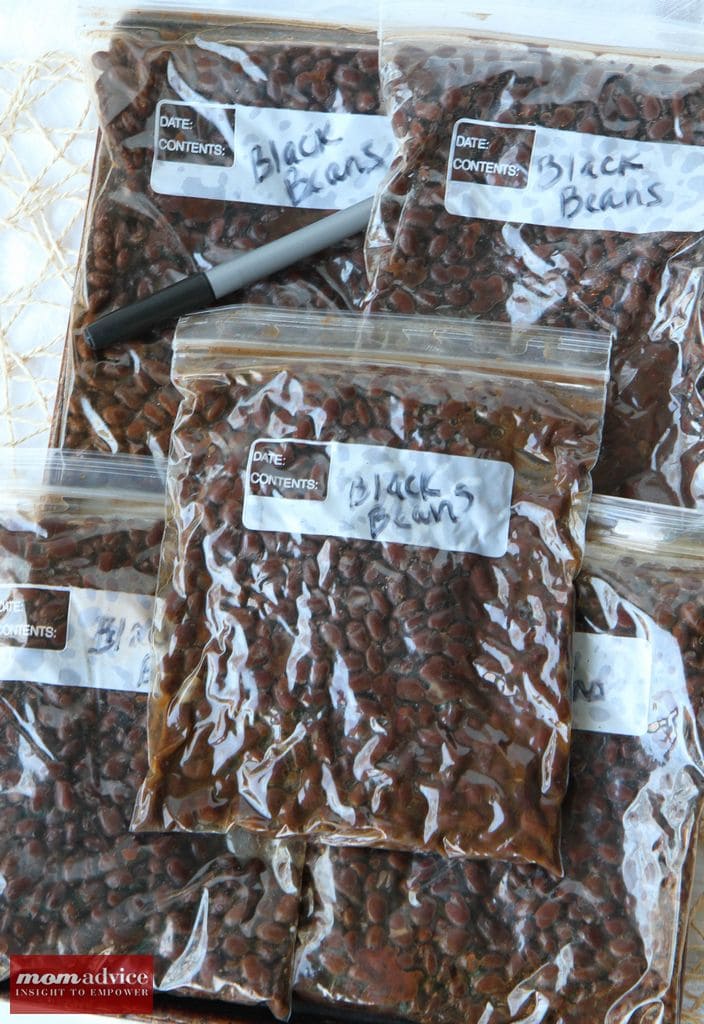
Once the beans are done, divide them up into two cup portions in freezer bags and put them in the freezer.  You can now enjoy the savings all month long and enjoy these beans as a side or accompaniment to any of your favorite Mexican dishes.

I hope this tutorial helps and I can’t wait to read your own tips for cooking beans in the comments below! These would be delicious paired with my favorite 10-minute fish tacos, our chicken enchiladas (made with homemade enchilada sauce), my roasted corn salsa, and a tall margarita or mojito…just in case you are looking for a few great dishes for Cinco de Mayo!

Slow Cooker Mexican Black Beans from MomAdvice.com.

SAFETY NOTE: If you are cooking kidney beans, boil them for 10 minutes before cooking. This neutralizes a toxin called phytohemagglutinin that can cause acute digestive distress.

Slow Cooker Mexican Black Beans
Author: Amy Clark
Prep time:
Cook time:
Total time:
Serves: 6
Be sure to read our Bean Cooking Tutorial before you begin! These beans make the perfect side dish for any meal!
Ingredients
  • 1 pound dried black beans
  • 6 cups chicken or vegetable broth
  • 6 cloves garlic, smashed and chopped
  • 1 tablespoon cumin
  • 1 tablespoon chili powder
  • 1 (14.5-ounce) can diced tomatoes, or 2 cups fresh chopped tomatoes (ADD AT THE END)
Instructions
  1. Follow the instructions for sorting, rinsing, brining, and then rinsing again as I have outlined above.
  2. Put the drained beans into your slow cooker, then add the chopped garlic, broth, cumin, and chili powder. Stir well to combine.
  3. Set on LOW for six to eight hours in your slow cooker (see above for recommended slow cooker sizes based on pounds).
  4. Once they are done, stir in diced tomatoes and season.
This post contains affiliate links.

What’s your favorite way to cook beans? Any tips, tricks, or techniques that work well for you?

Pin It

Apron Full of Giveaways 04.29.14

Tuesday, April 29th, 2014

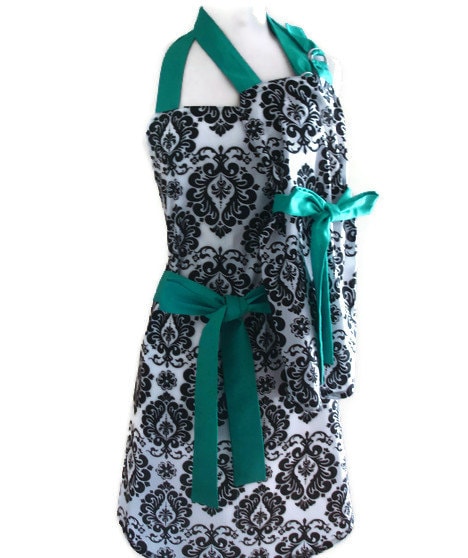
MommyandMe Apron

Source: Mommy & Me Set, Debz Doodles,  $35.00


Welcome to our Apron Full of Giveaways! I hope everyone is having a great week this week! As we do each week, here is our round-up of giveaways for our readers. We hope that this is beneficial to you and your family! Please let us know if you guys win anything- I love to hear the success stories!

Below are the contest links-if you are hosting a contest please link it up below. Sorry, we are not giving away the aprons just showcasing them! Please put your site name and then what type of contest you are hosting. For example, “MomAdvice (Kid’s Movies).”

Good luck to each of you!

Pin It
Sundays With Writers: Margot by Jillian Cantor

Sunday, April 27th, 2014

Sundays_With_Writers-1
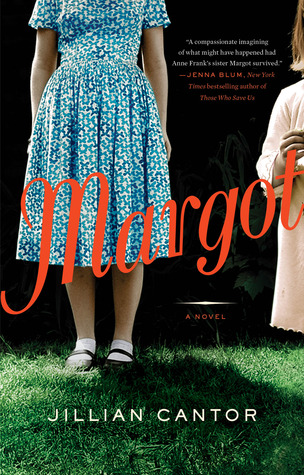
I am always so excited when I can feature beautiful books in our Sundays With Writers series. Today’s book, Margot by Jillian Cantor, explores a fictional account of what it would be like if Margot Frank, Anne Frank’s sister, actually lived and had to carry the secret of her escape.

In the spring of 1959, The Diary of Anne Frank has just come to the silver screen to great acclaim, and a young woman named Margie Franklin is working in Philadelphia as a secretary at a Jewish law firm. On the surface she lives a quiet life, but Margie has a secret: a life she once lived, a past and a religion she has denied, and a family and a country she left behind.

Margot

Margie Franklin is really Margot Frank, older sister of Anne, who did not die in Bergen-Belsen as reported, but who instead escaped the Nazis for America. But now, as her sister becomes a global icon, Margie’s carefully constructed American life begins to fall apart. A new relationship threatens to overtake the young love that sustained her during the war, and her past and present begin to collide. Margie is forced to come to terms with Margot, with the people she loved, and with a life swept up into the course of history.

I was captivated by the premise of this book and it brought to light some things that I had not thought of for those that did escape the Nazis. We witness a very real reaction to the post-traumatic stress that one would suffer if they escaped and what it would be like to live day-to-day with a number from a concentration camp tattooed on your arm.

When I finished this book, I just knew that I needed to interview Jillian and learn more about what moved her to create this fictional life for Margot and how she developed an entirely fictional concept while staying true to the life of Anne Frank’s family and history.

Grab your coffee and let’s sit down this Sunday with Jillian and talk about her amazing book, “Margot.”


Jillian Cantor

One of my favorite writers is Melanie Benjamin because she always finds some of the most unique historical characters and builds a story around them in a fresh way.  The story of Margot Frank reminded me of a character she might pick. What made it truly exceptional though is that you created a storyline around someone who had passed away without her story really being told. Do you think it was harder to build a storyline when the character was, in fact, deceased?

The real Margot Frank died in Bergen-Belsen with her sister, Anne, in 1945. But in my novel, my fictional Margot escapes from the Nazis and moves to America to begin a new life. My novel takes place largely in 1959, the year when the movie version of Anne’s diary came out in the US — fourteen years after the real Margot Frank died. My fictional Margot has changed her name to Margie Franklin and she lives in Philadelphia where she works as a legal secretary. As a writer of fiction, I think it was somewhat easier to write about Margot Frank in this capacity because my Margie Franklin truly is a fictional character. At the same time, I wanted to make sure to stay to true to what I believed the real Margot Frank might have or could’ve become if this had actually happened, so it was a little tricky to try to strike the balance between the truth and fiction.

 The fact that Margie hides her tattoo with the number she was issued by the Nazis is a very important element to her story. We discover that Margie always keeps her arms covered, even in the stifling heat of summer, so no one will know her secret.  Did you read of others who hid this and how did this inspire you?

I didn’t read anything specific about anyone hiding a tattoo with a sweater, though, I did read about Jews who moved to the US after the war and changed their identities in one capacity or another. I also read that some people had their tattoos removed once they moved to the United States, and I thought a lot about this with my character of Margie. Even though she didn’t want anyone to see her tattoo, I also couldn’t see her having it removed. Margie’s tattoo is so visible and so permanent, and yet it is undeniably such a part of her and her history.

Margie is clearly suffering from some severe post-traumatic stress and we witness this when she visits the Rabbi, when the car backfires, and when anyone tries to get close to her. What type of research did you do to prepare for these moments for Margie?

I didn’t specifically read up on PTSD while I was writing. I’ve read a lot in the past about post-traumatic stress, especially in soldiers, so I had an idea of what PTSD was, and I’ve experienced it in small ways in my own life. Shortly before I started writing MARGOT, Gabrielle Giffords was shot in a shopping center near me, and six people were killed – I was in the shopping center at the time, though very luckily I was not involved or hurt. For weeks afterwards I was nervous and jumpy every time I left the house. For Margie, I felt that the small bit of fear and anxiety I felt would be enormously magnified, and that living through such a horrific time and losing her family is something that would stay with her forever. As I wrote, I tried to put myself in Margie’s shoes, to think about how I would’ve reacted in those situations after living through such horrors.

 As children, many of us read or watched the movie of The Diary of Anne Frank. Was this something that you remember from your own childhood and was it a story that always stuck with you?

I read the The Diary of a Young Girl in seventh grade, and it did always stick with me. I felt connected to Anne at the time – I was about her age when I read it, Jewish, and I wanted to be a writer. What I didn’t remember, years later, was that Anne had an older sister, Margot. When I picked up the book again in my 30s to reread it, I noticed Margot but I had no memory of her from my earlier reading. I tried to do some research about her, and I found very little. But I did find that Margot Frank had kept her own diary (though hers was never recovered after the war). I grew up the older of two sisters myself, and I started to think about what Margot’s story might have been and how her point of view might have been different than Anne’s. I started to think about Anne and Margot as sisters, and that was the starting point for this novel for me.

 Is this your first historical fiction piece you have written and do you plan to write more? What other historical fiction characters would you love to write about?

This is my first historical fiction novel, but I have another one coming out some time next year.  My next historical novel revolves around Ethel and Julius Rosenberg. It’s told from the point of view of a fictional neighbor who befriends Ethel and becomes caught up in everything surrounding her arrest, trial, and execution. It’s very much a book about friendship, and mothers and sons, but there’s also spy intrigue and a love story.

If you could tell anyone to read one book (other than your own) what would that book be?

That’s a tough question! I don’t know that I can pick just one book. But my favorite author is Anna Quindlen. I read Black and Blue years ago and it has always stayed with me. Every time she has a new book out, I buy it right away!

*This series may contain affiliate links!


Pin It
It’s the 3 Little Things: Green Smoothies, Nude Heels, & Tan Legs

Friday, April 25th, 2014

It's The 3 Little Things

As I write this, I am picturing myself in a conference room making a million new friends at the SNAP Conference in Salt Lake City!  Conferences can be so expensive and I am so grateful to Walmart for sponsoring me this weekend so I can grow, learn, & hopefully come back renewed & inspired for this website (and for you!)  I am also very thankful to our site sponsor, Flourish Boutique, for their assistance with my wardrobe for these events.

Even though I am off, I still wanted to make sure I made my happy list of three for you and can’t wait to see your lists this week!

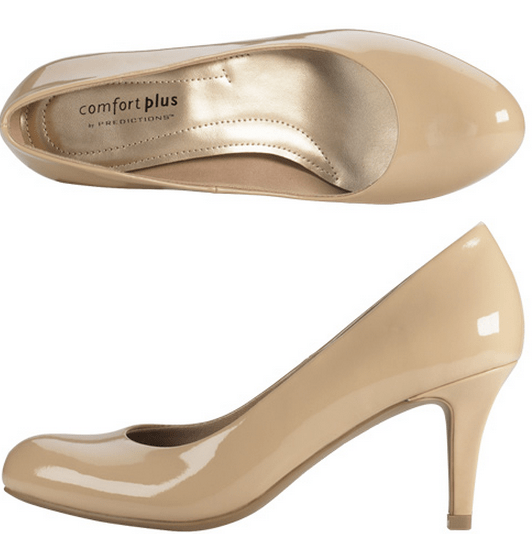
Comfortable Nude Heels

Comfortable Nude Heels

I have a hard time finding affordable shoes that are comfortable and so each year, I treat myself to one really good pair of Naturalizer shoes. I had treated myself in the fall though and as Spring rolled around, I really needed a basic heel to wear for church and conferences. I went to Payless and found these super comfortable nude heels and the best part, for me, is that they come in a wide size.  Doesn’t everyone have as wide of feet as long? Maybe that is just me. The heel is just the right height, they don’t feel like an inexpensive shoe, and they come in a few great basic colors. Since I am the size of a child, they also make me feel like I have long legs and they go with everything in my closet.  When I went to our store, they had them on sale for $14.99. If they aren’t on sale for you though, I find their email newsletter and mailers usually offer some great coupons.  ($24.99)


Sally Hansen Airbrush Legs

Sally Hansen Airbrush Legs

I don’t want to brag, but when I was a kid the kids at school used to call me Casper. Well, who is laughing now, friends? This girl. Because I am TAN…on my legs… with make-up. So.

In all honesty, this stuff is heaven-sent for a really white girl like me. It comes in an aerosol can and, yes, it can make a big mess if you are not careful. You shake the can and then spray it on your lightly moisturized (but dry) legs. Then just use your hands to spread the make-up on your legs and it all air dries in one minute. It is truly an airbrushed leg experience and, provided you blend well and pick the right shade for your own coloring, it gives a beautiful finish to your legs. It has a little shimmer to it too, but not overly noticeable.

I love this stuff so much that when I travel, I spray it into a baggie (I don’t check in luggage so the ounces are too high on this) and take it with me when I have events that I am headed to.  Between this and my nude heels, I am feeling very confident about wearing dresses this year!

The best part is that it is waterproof so if you are even at the beach, you will be fine. You need soap to get it off, otherwise it stays right where you put it. Since it has good staying power, one bottle usually gets me through the entire summer!

Life's Basics Plant Protein Mix

Life’s Basics Plant Protein Mix (in Vanilla)

Since I gave up dairy, I thought I would have to give up my favorite green smoothies. Fortunately, I discovered there are lots of vegan protein powders on the market and after reading a ton of Amazon reviews (both comparing price & taste), I decided to give this Life’s Basic Plant Protein Mix a try in the blender. It took me a week or so to get used to the texture, but now that I have finally perfected the ratios on this smoothie, it tastes just like a yummy milkshake to me.

Here is my green smoothie recipe that I used before with dairy. With this protein powder, I do one cup of almond milk, 1/2 cup mixed frozen berries, 1 banana, 1 scoop of this protein powder, 4 ice cubes, and I fill the rest of the blender up with spinach. When I first was getting used to the taste, I also added a drizzle of honey, but now I don’t need it. My daughter and I split this smoothie and it leaves me feeling full minus the dairy belly-ache I used to get.

*this post may contain affiliate links- I only recommend what I love though. Check out past editions of  It’s the 3 Little Things

Now it’s your turn, what makes you happy this week? Feel free to share in our link up below and link back to this post to participate!

Share 3 things that are making you happy today!

Amy’s Notebook 04.23.14

Wednesday, April 23rd, 2014

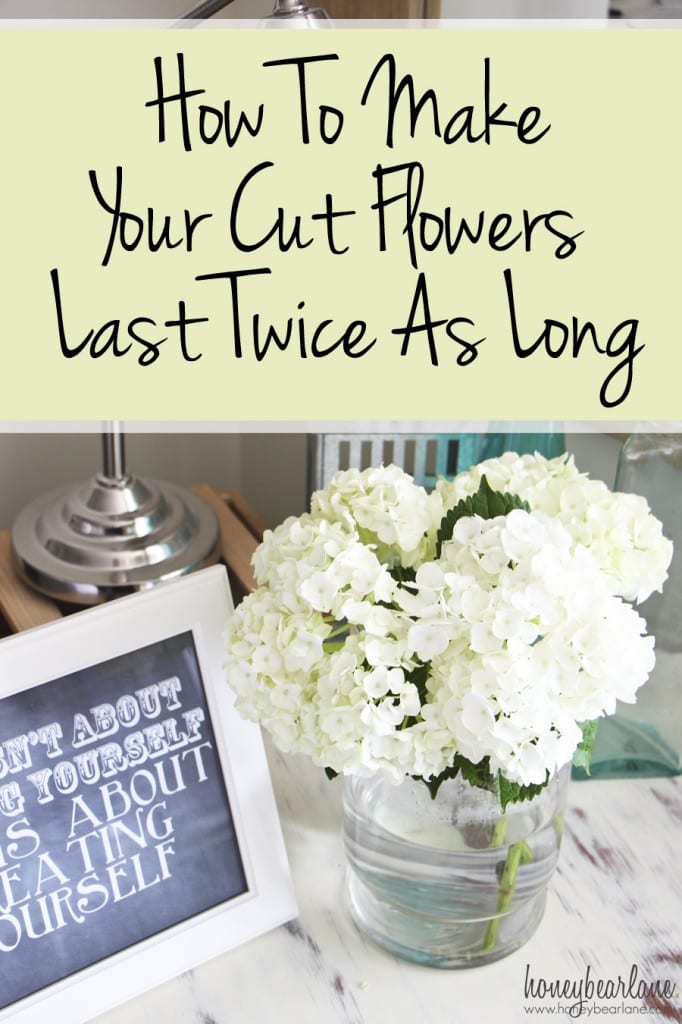
make your cut flowers last longer

Source: Honeybear Lane


I’m definitely going to use these 10 tips to help cut flowers last longer – they can make me happy that much more!

I found this post all about how to make homemade nut butters, which includes a picture tutorial that shows what the nuts look like at different stages of processing, to be super helpful.

These tips on how to get your kids to drink more water are terrific and will come in handy at any time of the year.

Banana cream pie overnight oatmeal? Um…yum!

It’s no secret we enjoy making our teachers feel special and appreciated around here – and I’m crushing on the idea of giving them a no sew teacher banner for their rooms!

So excited for asparagus season – and to try pistachio crusted asparagus with feta.

You’ll be amazed at how big this 250 square feet studio apartment  lives – and the fun design ideas to maximize your living space.

amys_notebook

I hope you enjoyed this collection of gathered links to DIY crafts, food projects, and thrifty ways to spruce up your home. Nothing brings me more joy then to highlight other fabulous bloggers. Follow me on Pinterest for daily inspiration!