It is hard to explain what a day looks like with chronic pain, but I will do my best to try. Imagine that you are in a quiet and pleasant room and you begin to hear the buzzing of a fly. You are trying to read a book, but all you can hear is this soft buzz and it is distracting you from this beautiful story. You try to deal with it, but can’t locate where the heck it went and it continues to buzz all day long.
You try a variety of homeopathic methods of ridding yourself of the fly, but it has found its way in somewhere and it won’t go away.
You go about your day and the fly is still buzzing along while you are trying to concentrate on your job. Instead of focusing and producing good work, you find yourself on Google trying to find a solution AGAIN.
If you could just find the source, you could swat it out of your life.
You will try anything at this point.
Tonight you are supposed to have friends over and you have this lovely evening built up in your mind, but you are afraid that they will notice the fly too. Why can’t you just have one normal evening without this annoyance? You enjoy your company so much so the buzzing deadens a bit, but that fly is still in the room.
You go to bed and it is now it has followed you to your bedroom. You lay there tossing and turning and praying for this thing to get the hell out of your life, but you wake up and guess what?
That jerk is still there.
Yeah, chronic pain is like that annoying fly that will never leave.
In an answer to many a prayer though, I finally have found relief and a solution that I can live with. You see, I was at the end of the interwebz when I happened upon a device called Quell that has been transformative for my day-to-day existence and I am SO excited to share about it with you.

Before I begin sharing my story, I should probably let you know a few things (especially if you are new here!):
1. I am in no way affiliated with this company at the time I am writing this. That means I purchased this product with my own money and all of these thoughts are my own personal experience with it. As always, I write from an authentic place, but I think it is important to share that today especially because most of the reviews that I read were from bloggers that were given the device by the company. I will say since I love the product so much, I’d love to reach out for their ambassadorship to see what new features they decide to test launch so I could be a part of that process as they develop it. Fingers crossed on that!
2. I am not a doctor and I don’t even play one on television! You guys, bloggers are awesome, but doctors are a better source for medical information. If you are considering using this device than please discuss this with a medical professional for your own personal pain relief needs.
3. My chronic pain is linked to a condition called Ehlers-Danlos Syndrome, Type 3. Due to my joints being overly flexible, it causes a great deal of pain and discomfort since the joints are loose and unstable. This means they are prone to frequent dislocations and/or subluxations and that I don’t always have a normal range of motion since my joints are hyperextensible and can move beyond those normal ranges. If you want to learn more about my diagnosis, I shared about it over here.
4. I am 39 (!!!) and was relatively healthy before diagnosis last year. I also had tried EVERYTHING including OTC meds, Vicodin, steroids, and prescription anti-inflammatories all with little success. I also tried homeopathic things with mild relief, particularly from CBD oil, massage, and acupuncture. Most options were expensive as were the co-pays for all these doctor visits and fancy massages.
Let’s also note, I was probably doing a bit of damage to my bones and organs to be taking so much medication and I was getting less relief on the lower dosages that were prescribed.
Basically, I was at the end of my pain rope when I went searching on Google for pain relief that wouldn’t involve drugs. Thanks to my most recent joint issues, I was down to typing with just my middle finger because all my other fingers hurt too much. My elbow pain also had increased to an uncomfortable level so sitting at my desk was unbearable. I even had to order a device to hold my books for me because it hurt so bad.
It was a late night search (pounded out with that poor middle finger) that lead me to a pain relieving device called Quell.
Specifically, I watched this video on YouTube and thought maybe this device might be able to help me too. Although the person in this video is dealing with different issues, she is young and dealing with widespread pain throughout her body that causes joint pain.
I am lucky to know several doctors and nurses (including my incredible sister!) and asked their opinion and if this device might be worth a try. The consensus was…it could work or not. Basically, there was no guarantee it would help with MY pain or how my body would respond to this type of pain relief. The company even shares that it has helped 81% of people manage their pain and 67% reported a reduction in pain medication use. That means it doesn’t work for everyone.
I just knew with my luck, I’d be the one that it didn’t help with.
I was so very wrong.
Fifteen minutes after I slipped this device on my leg, my pain levels went from an 9 to a 3. Was it because I wanted it to work so bad or was it real? After a few weeks of wearing it, I am telling you it is real and it has been life-altering.
I am sitting here typing with all my fingers while this little gadget is doing pain therapy and I haven’t taken any meds since I got it.
I am in awe of this technology and how much it has changed my day.
I want to dive deep for those of you that are struggling with pain and explain what Quell is, how I am using it, and a few hurdles I have had with the device.
What is Quell?
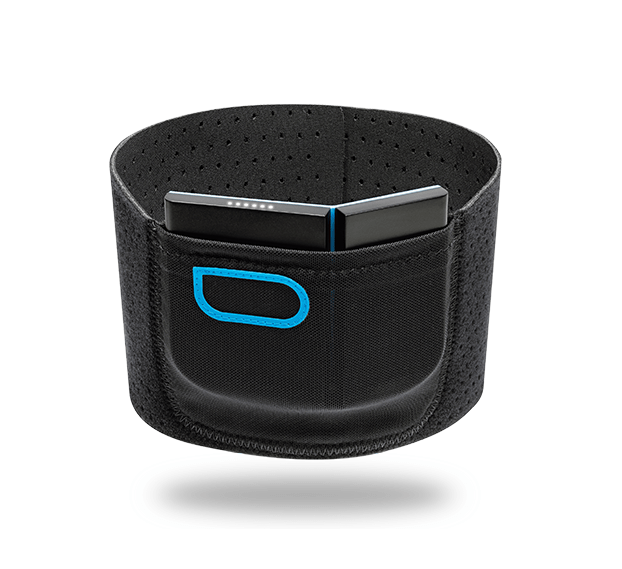
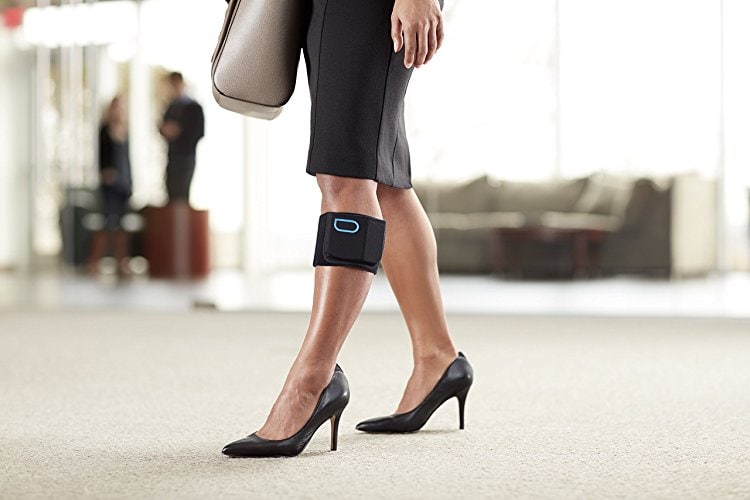
Quell is a newer technology, a wearable intensive nerve stimulation device, that is clinically proven to help manage chronic pain. It is 100% drug free, doctor recommended, and FDA cleared for 24/7 use, during the day while active and at night while sleeping, so you can get relief when and where you need it.
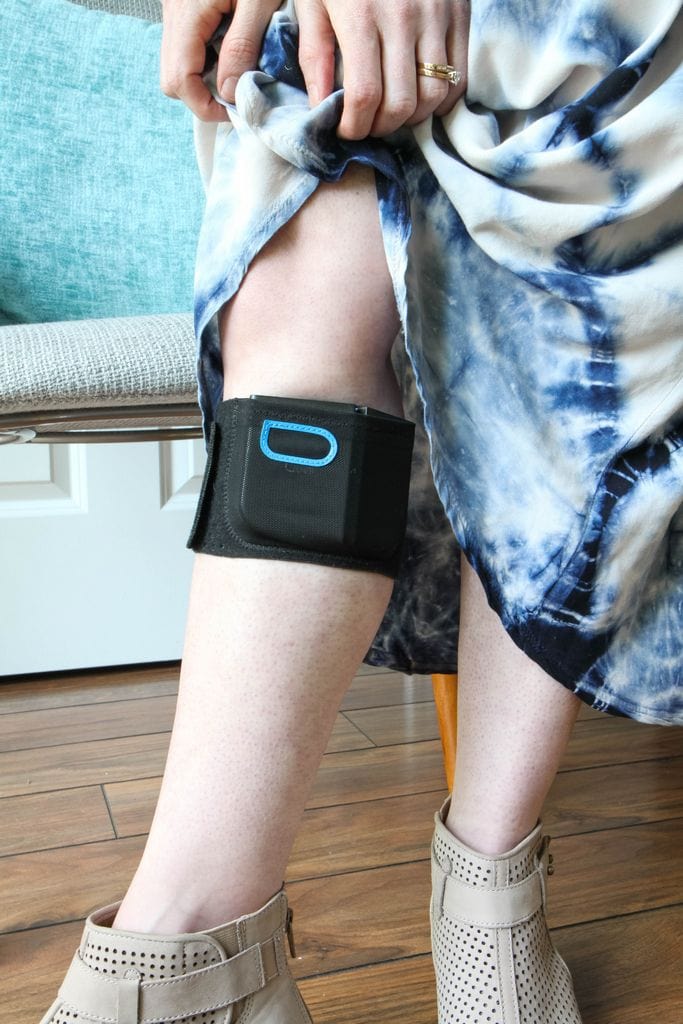
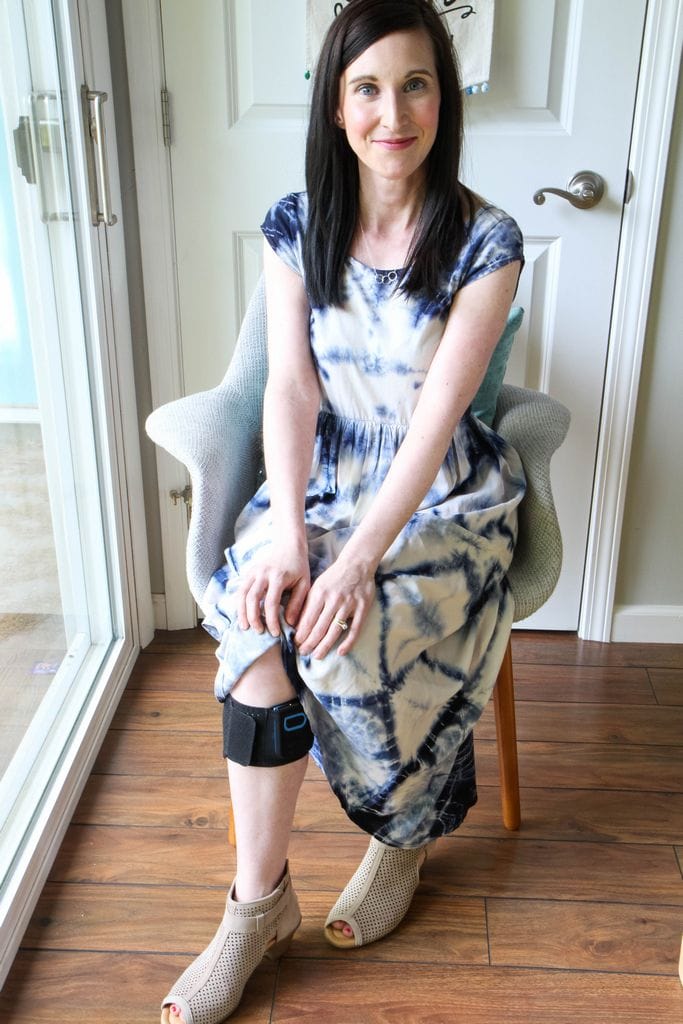
This device is worn just below the knee and activated by simply clicking a button. This position (on the calf) is where a lot of the sensory nerves are located so the pain can be blocked at the spinal cord, which helps you feel widespread relief from your pain and not just relief in a specific part of your body. These sensory nerves send neural pulses to your brain that then trigger a natural response that blocks pain signals, leading to widespread pain relief for many people.
The company refers to it its intuitive abilities as “OptiTherapy” technology that can automatically adjust therapy and dose to ensure you receive optimal pain relief.
The best part is that you can start and stop therapy sessions, as well as adjust the intensity of therapy from the Quell app on your smartphone (app works for both iOS and Android). You can also review therapy and sleep trends over time. Advanced sleep insights allow you to monitor 8 important dimensions of sleep such as sleep quality and time asleep as well as your body movement and position during the night, giving you even more insight into your chronic pain management.
If you aren’t a smartphone user, they also have ways that you can manage your device just from the button on the side with instructions on that too.
What does the Quell App Look Like & What Does It Tell You?
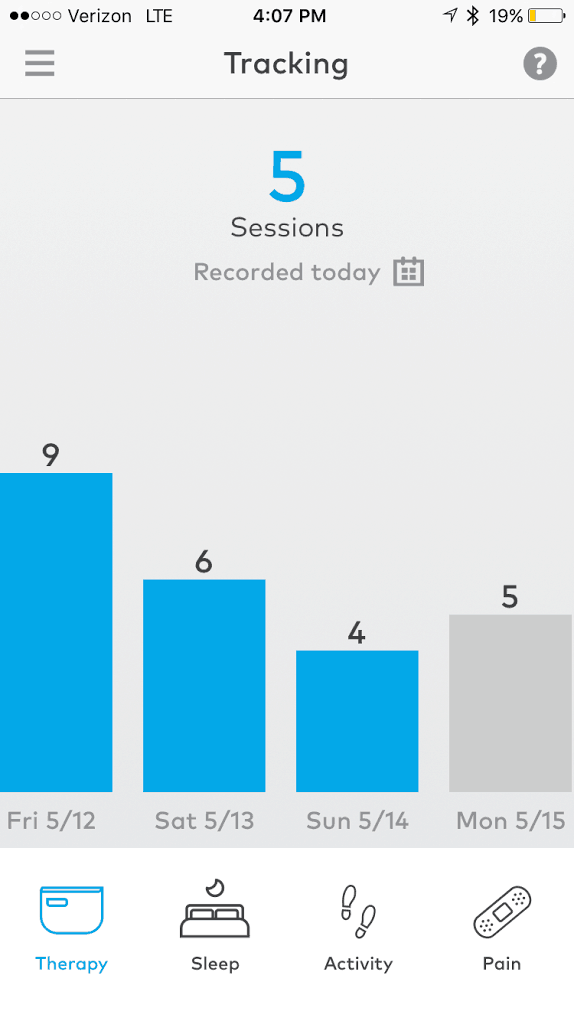
Let’s take a peek at a few things I took a screenshot of from the app on my phone…
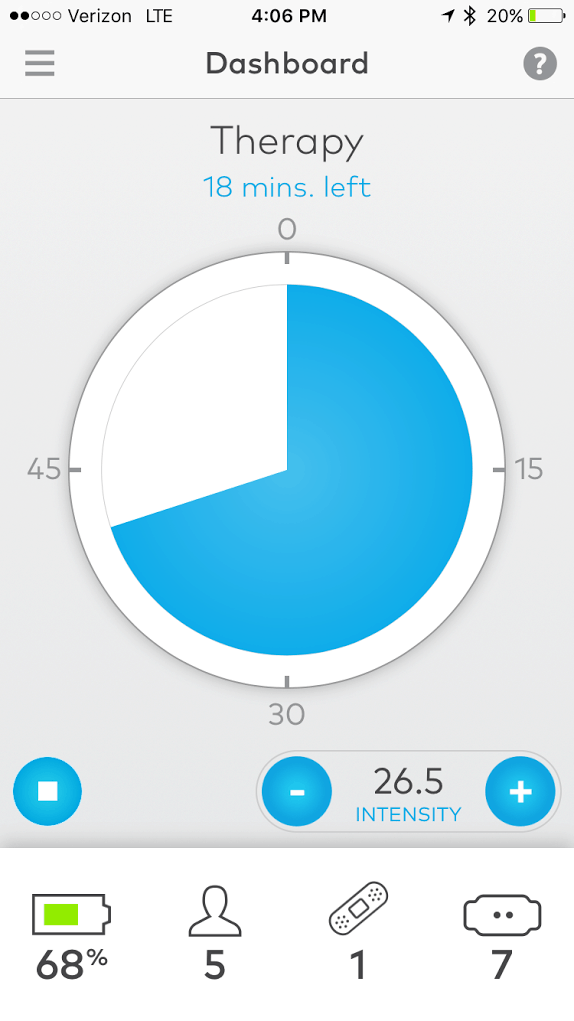
Here is a screenshot of a session that I was in the middle of when I was grocery shopping. I have my settings set so I can visually see the level of intensity instead of just a plus or minus for intensity.
Going along the bottom of the screen, the far left is the battery life. The battery has lasted four days for me before I had to plug it in for a charge. It is easy to do and takes a couple of hours to fully charge with a cord, kind of like your phone!
The person icon is telling me that I have completed five sessions that day. Most days I am averaging about seven sessions. The sessions are for one hour on and then one hour off. They say that the positive effects of the therapy usually carries over for about 40 minutes so there are about 20 minutes where I start to feel like crap. Every single time, I look and it says 20 minutes ON THE DOT. It’s manageable though because I know relief is coming in 20 more minutes.
The bandage icon is telling my pain levels. It also has lots of other things you can input in the tracking screen that can help you analyze the good and the bad days. On this day, I was at a level one so that’s pretty incredible for someone who has been between a 7-9 on a pain skill.
The last icon is how many more days I have on the electrode I am using. We will talk about that a little later because that is one thing you do have to maintain.
Here is that tracking screen I was telling you about. I can look at this and tell you why my levels were this way.
Thursday I drank too much wine with my husband (hahaha!) so I slept like crap. We also had a lot of family stuff going on that day. The next day was my daughter’s dance recital which was beautiful, but tiring. Sunday was MY DAY (yay for Mother’s Day!) so I took a nap and felt awesome because I did nothing. Monday was back to the grind and another family thing came up so I was tired.
This documentation tells me 1) stop drinking so much wine 2) that would have been a hard week for any mom 3) Every day should be Mother’s Day.
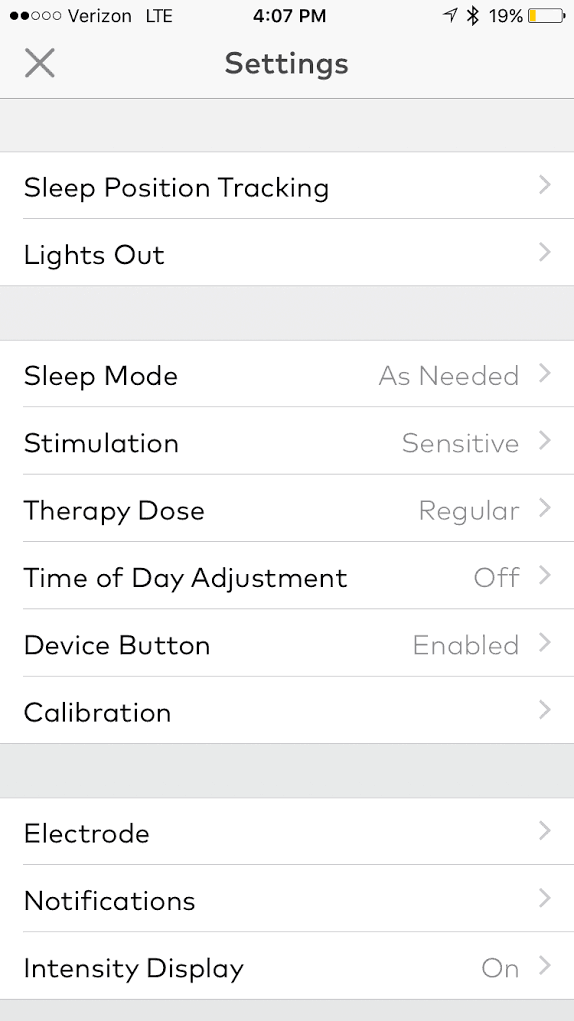
You can customize it a lot and one of the things you can do is put it on Sleep Mode and set it up to the intensity levels you need. I tried sleeping with it and it drove me crazy since I sleep on both sides and I found the device to be too bulky for sleeping. The analytics didn’t really tell me enough or help my quality of sleep enough to wear it so I slip it off at night and this is when I can charge it if needed.
What Is the Cost of Quell and Is It Covered By Insurance?
This device is not covered by insurance. The starter kit comes with everything you need for one month and costs $249. The electrodes last for two weeks each and come with a reusable liner that you can also jot down the date of when you started to use the liner so you know how many days, particularly if you aren’t using the app. I have found the durability on these to be great, BUT I am not sleeping in mine and I also have adjusted my wardrobe a bit to accommodate the device.
I would imagine if you sleep in it, the electrodes might pull a bit and the same would be the case in a tight pair of skinny jeans so to help these last the full two weeks, I choose to do neither.
It is important to register your device because the company does offer a sixty day return policy. That means if you discover this device does not work for you, you can contact customer service for a refund. Please don’t send your requests to me, I cannot help you!
Who Can This Device Help?
They clearly state that it will not help migraine sufferers so I am sorry if that is the type of pain challenge you are dealing with. On the site it says it helps with chronic nerve pain, chronic joint pain, leg and foot pain, lower back pain, and widespread pain for people like me!

What Are the Negatives With This Device?
Well, as streamlined as it is, for a girl who lives in skinny jeans and short a-line dresses this has been a bit of an adjustment. As you can see, it is peeking out on the right of my leg in our family photo. Yes, this is a complete vanity thing, but that’s also a dose of honesty. I ended up buying a couple of midi skirts and am looking at pants a little differently to accommodate the side bulk of this device. I know at some point I will feel more confident with wearing it out, I just need to get used to it.
You do need to move the device around and the app will let you know that it is “time to air out,” those electrodes. I did skip it on the recital day and I got a little rashy under those spots where the electrodes were. It’s important to heed their advice on that to avoid a skin reaction.
It has a light-up display that I didn’t realize you could disable that flashes as a session is happening. At my daughter’s recital, it looked like a disco globe going off, under my dress, when the stage went dark. Now that I know I can turn off that display, I’ll feel a little better about going to the movies- ha!
I wish there were no maintenance things to buy, but the electrodes must be replaced every two weeks. Broken down the maintenance cost is roughly over $7 a week and I know I was paying a lot more than that and would have continued to pay more to treat the pain with doctor visits and medications.
This does not cure the pain, it just breaks the pain cycle so you your body can rest and do what it needs to do for the day. It doesn’t mean that I am healed, but it means that I can function. I don’t want to give anyone any false hope that this will rid you of what is ailing you, it just helps you manage and reduce the pain in a drug-free way.
What Are the Positives With This Device?
I have broken the cycle of pain. This weekend I sat through a beautiful graduation, watched with tears in my eyes as my daughter danced, and was present for a family member when they had surgery. I couldn’t have done that if I was still at that level of pain I was in.
Going off medication is rough. I felt blue and foggy before and now I feel like me again.
I’m sleeping better.
I am clear-headed and present again in my daily life with my family.
I feel like I can manage this again.
I am grateful.
Technology, you can be a beautiful thing sometimes!
I don’t know if this will help you, but I pray that if you are dealing with chronic pain that you can find the right answer for YOU.
Please feel free to ask me any questions and I will try to answer them for you!
Please note, this does contain affiliate links that help maintain our site. Thank you so much!
Pin It


 Fabric Flower Wreath for Spring
 DIY No-Sew Reversible Chair Cushions
 Fabric Wreath & Matching Garland
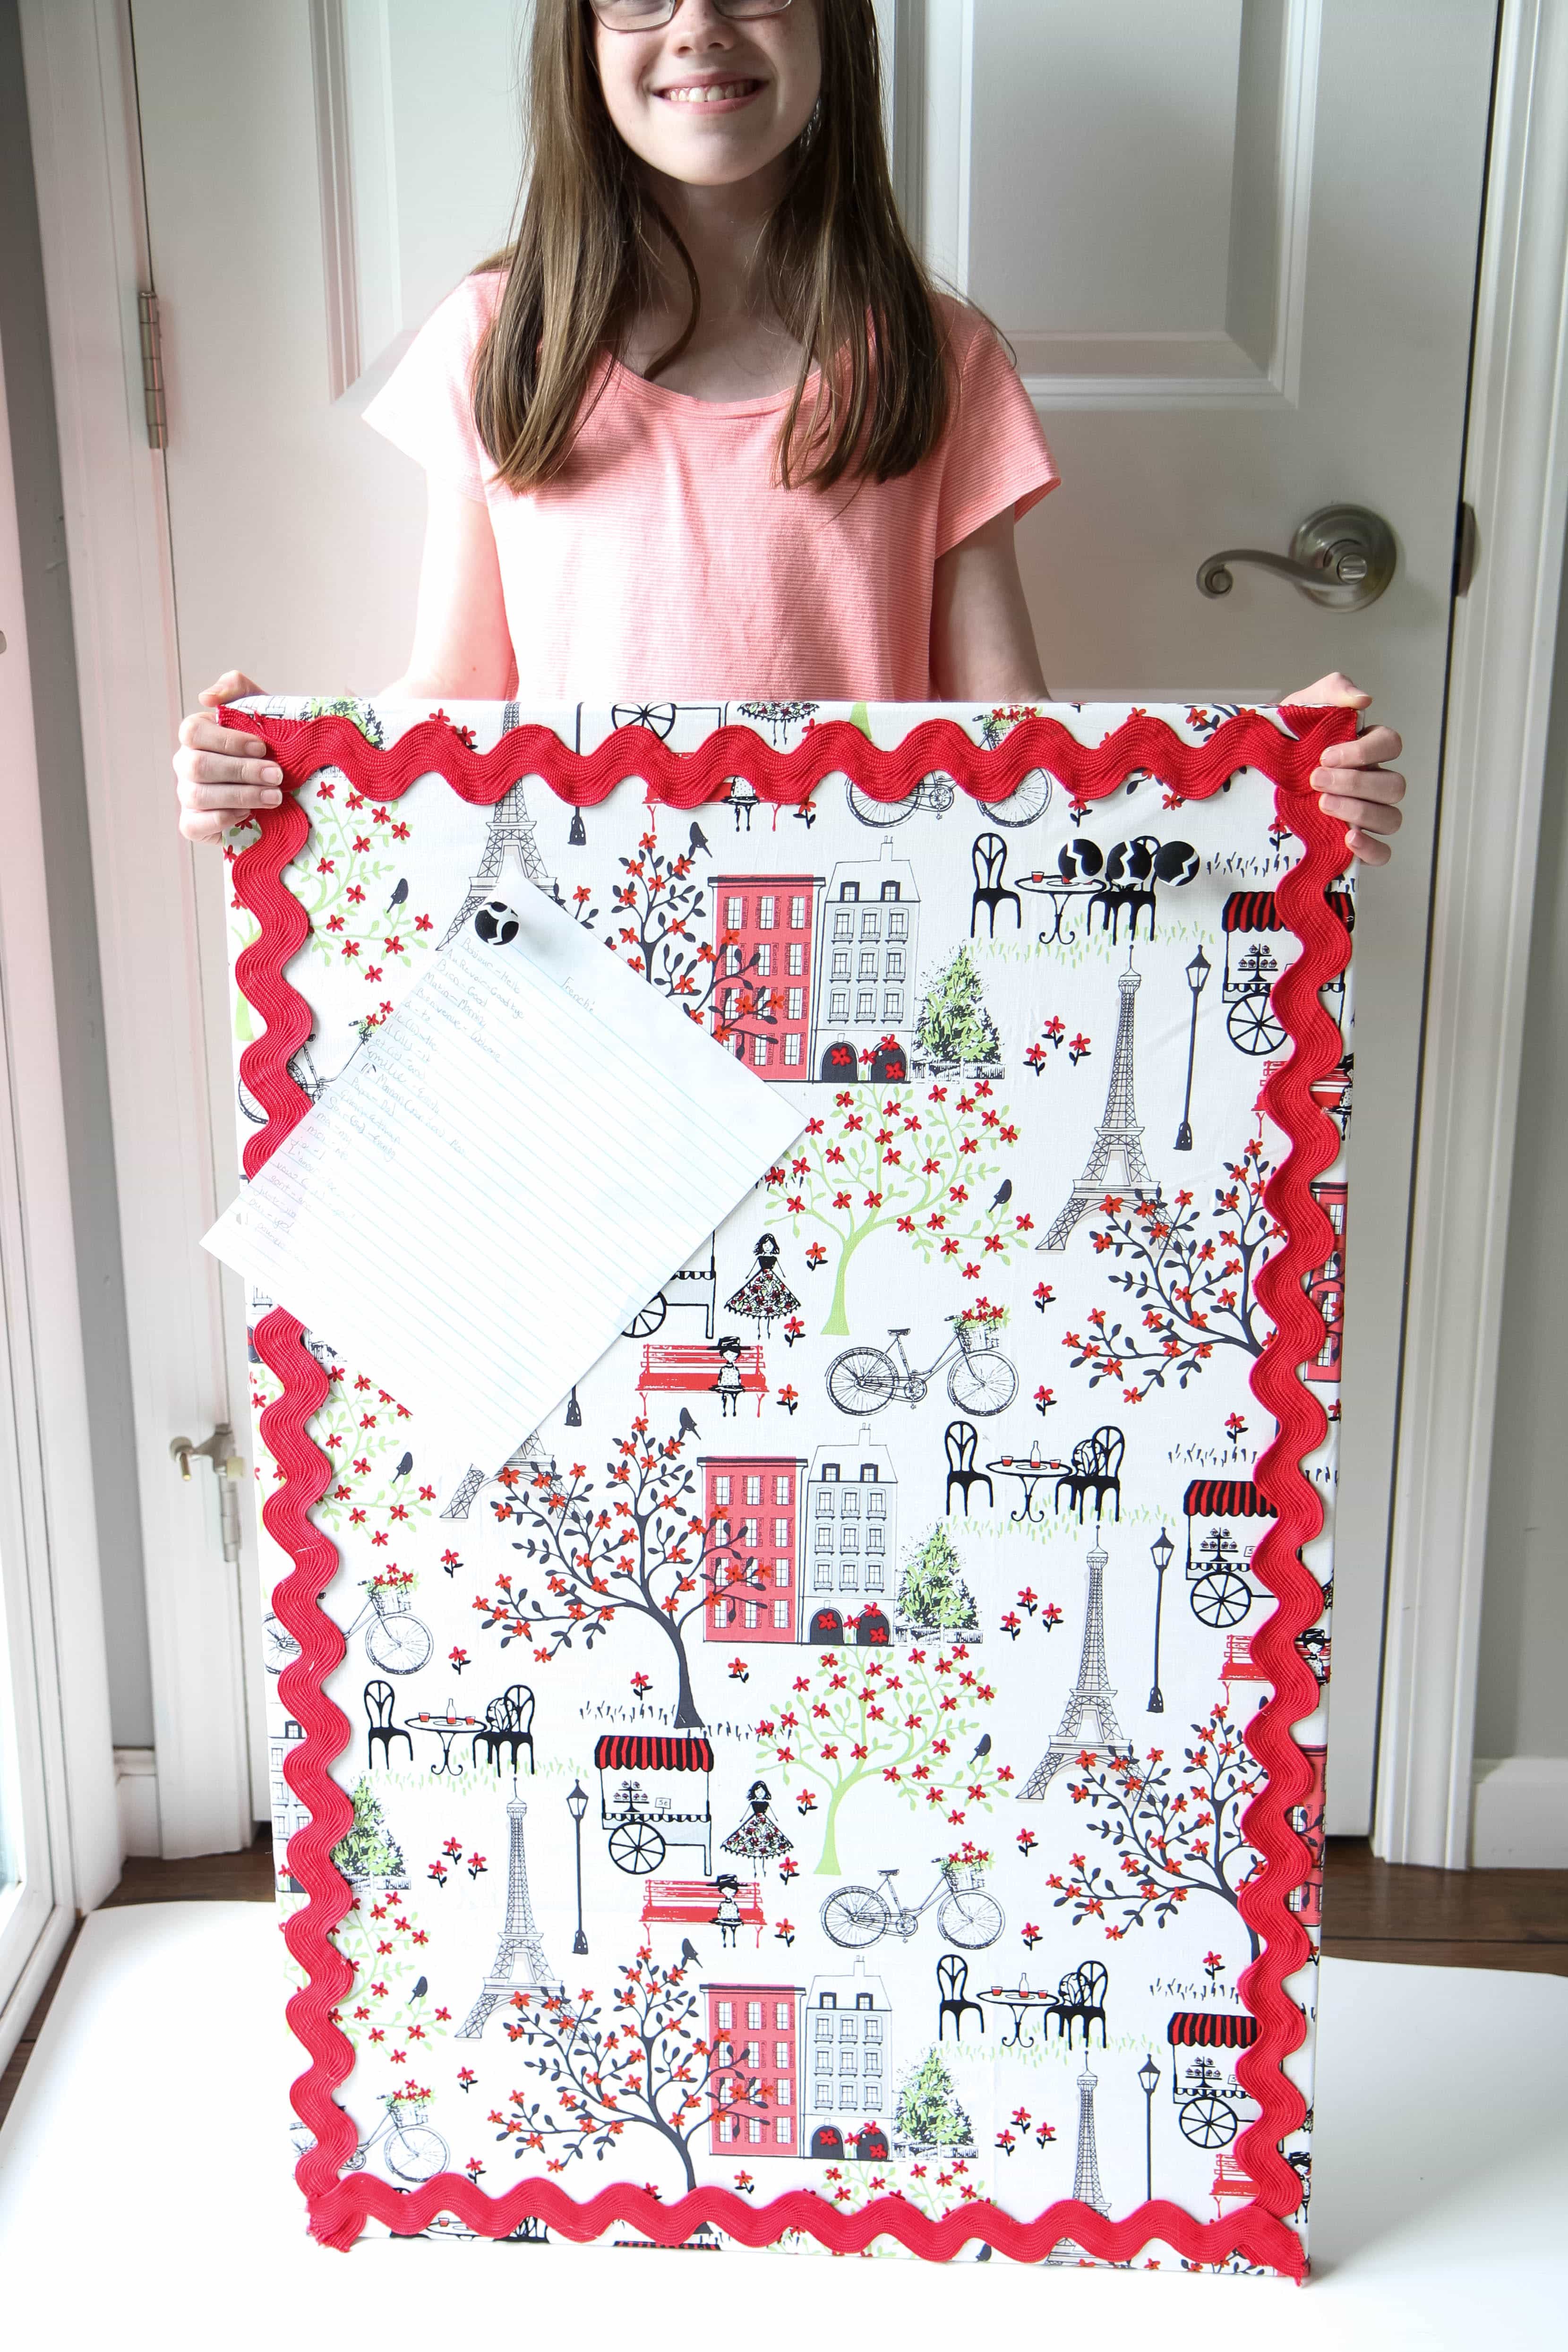 Fabric Bulletin Board Tutorial
 Painting Pumpkins With Acrylic Paints
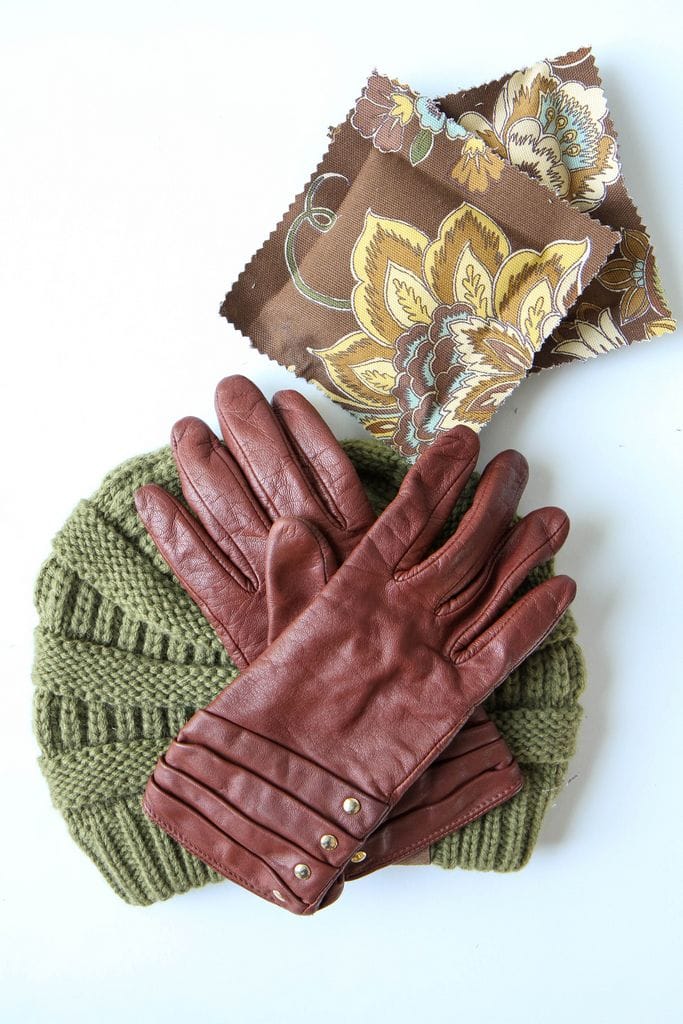 DIY No-Sew Hand Warmers
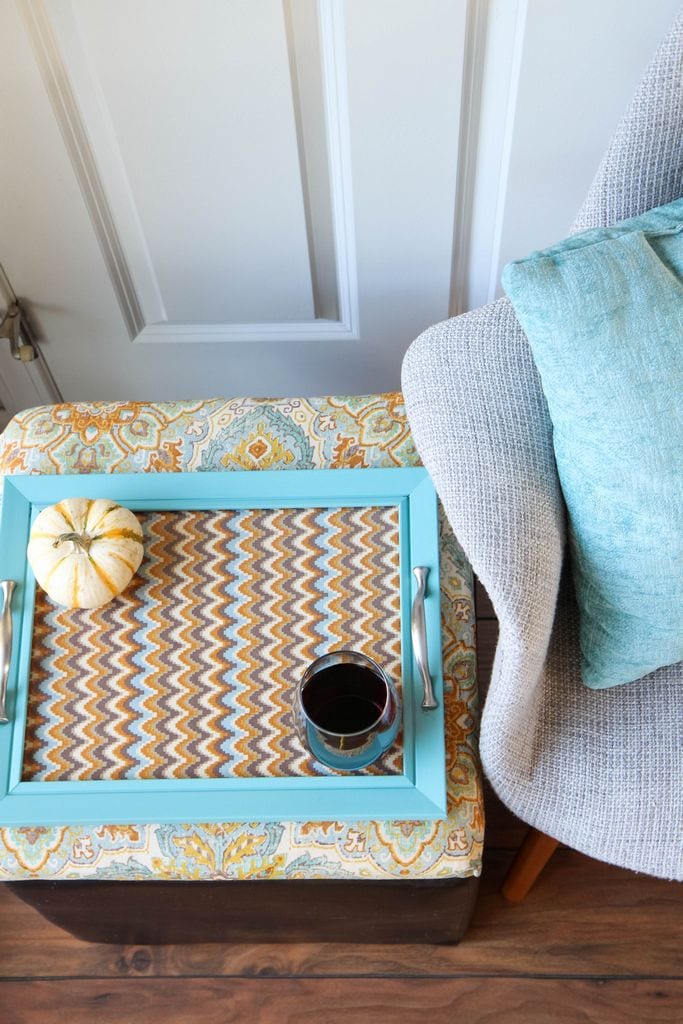 DIY Ottoman Serving Tray
 15-Minute Scrappy Fabric Trees
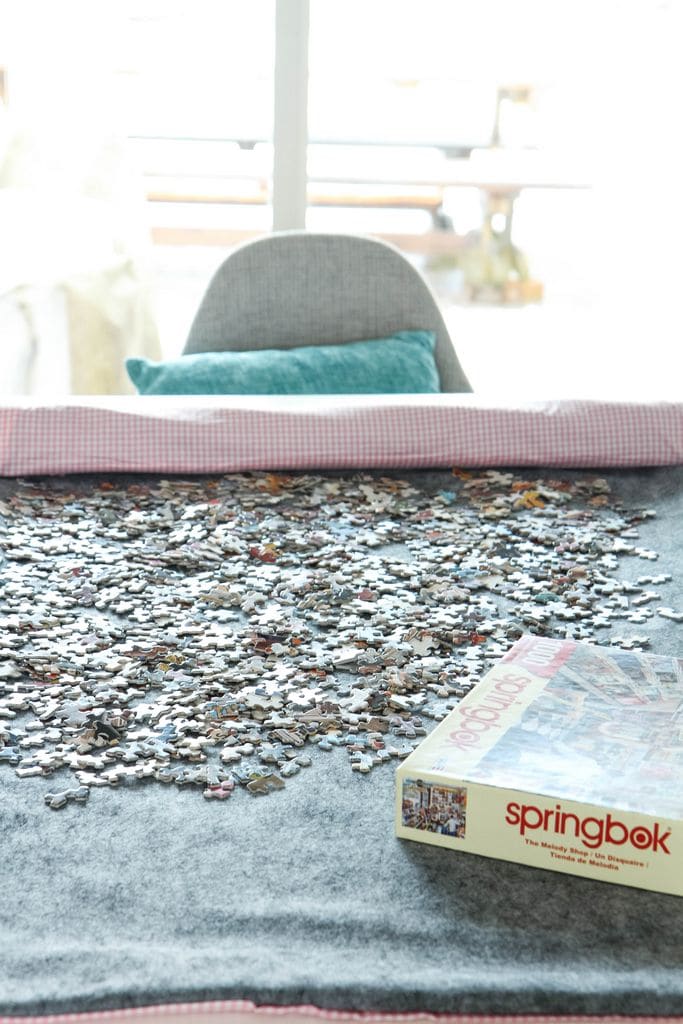 DIY Roll-Up Jigsaw Puzzle Mat


