Archive for the ‘Home & Organization’ Category

7 Things I’ve Learned That Save Us Serious Money

Tuesday, January 16th, 2018

Amy Clark

Hey, hey! Today is my big 4-0 and I keep wondering how I got to this milestone so quickly. In many ways, I wonder when I will feel like an adult. In other ways, I can see how much better I feel in my own skin and the wisdom that has been gained, especially in this last decade of years.

Before I launch into my list, I’d love to share that I am doing a birthday fundraiser on Facebook. I’m asking for donations to Ehlers-Danlos National Foundation. The diagnosis of myself and my children has made the research from this organization an important one for us. I am donating this occasion in hopes that more funding can help provide those needed answers we are in search of.

If you have a buck or two to spare, I’d be thrilled to share this with the Ehlers-Danlos National Foundation

In honor of this day, I wanted to share 7 things that I’ve learned that save us some serious money. As we continue to embrace our simplified path, I can see how being open to learning new skills and continuing to research new strategies has really paid off for us. As I get older, I find more and more joy in the life we have chosen and I’d love to share some of my favorite strategies today. 
birthday reflections

7 Things I’ve Learned That Save Us Serious Money

Restaurant-Style-Steak-Recipe-3

I Nailed a Restaurant-Worthy Steak

Steak dinners and fancy date nights were hard on our budget and learning to master making a perfectly restaurant-worthy steak has saved our family oodles of money. I’m not pro enough that I can touch it and distinguish its degree of doneness, but I do know how to work my digital meat thermometer like a boss and that’s almost the same thing. Our cast iron skillet (another frugal and wise investment) really sears our steaks so beautifully and the butter finish is a decadent treat.

Instead of paying over a hundred dollars for a filet dinner out, my hubby and I take trips to the supermarket and purchase a couple of steaks and a bottle of wine for less than the price of one meal at a restaurant. This recipe has been a go-to for our dates and for special occasions when we are celebrating our kids. It takes about ten minutes to pull this off (with a little roasted asparagus on the side) and everyone gets so excited about this meal.

My secret?

Loads of Kosher Salt, baby, and a screaming hot pan.

Let me know if you can give this technique a spin in your kitchen!

flipster

I Gave Up My Magazine Subscriptions

Magazines have been a weakness of mine and discovering our library has the Flipster app has made me SO incredibly happy this year. Basically, you can get a digital subscription to just about every magazine, check them out digitally, and read your magazines on your tablet or phone.

The best part has been being able to take screenshots of recipes and ideas for myself and as inspiration for our site as I page through them (soooo handy!!)

So far the only catch has been the length of time that you are allowed to check them out (it varies per magazine), but usually I can plow through one in a day and it costs ZERO bucks.
brunch

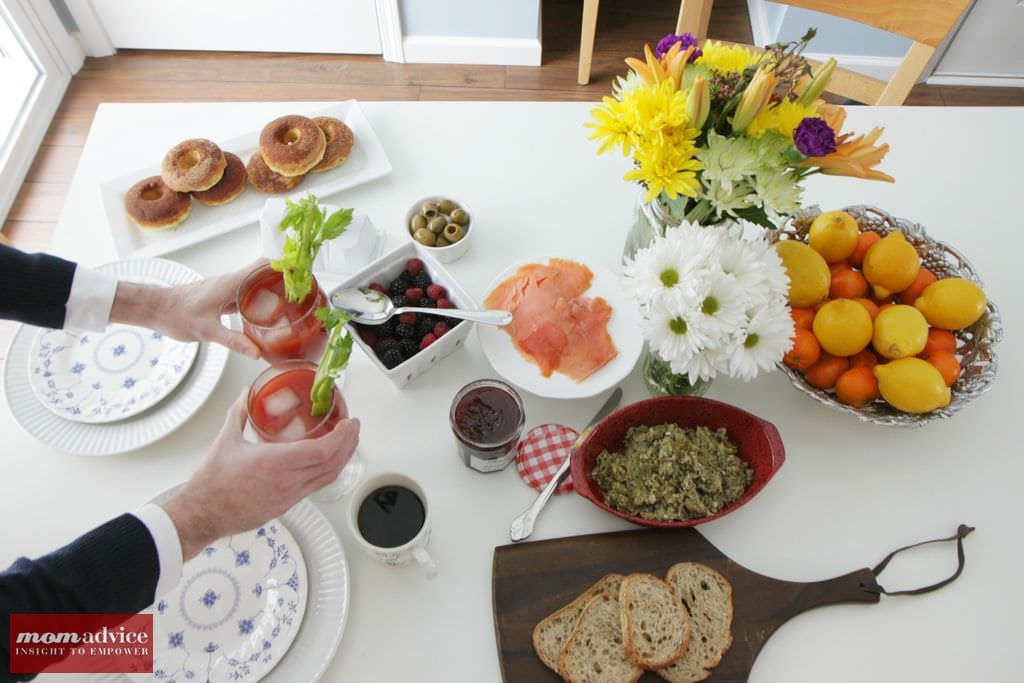
I Brunch Like a Boss…At Home

Brunch used to be a big weakness for me, but we rarely go out to brunch anymore now that I finally have a few smart brunch recipes up my sleeve.

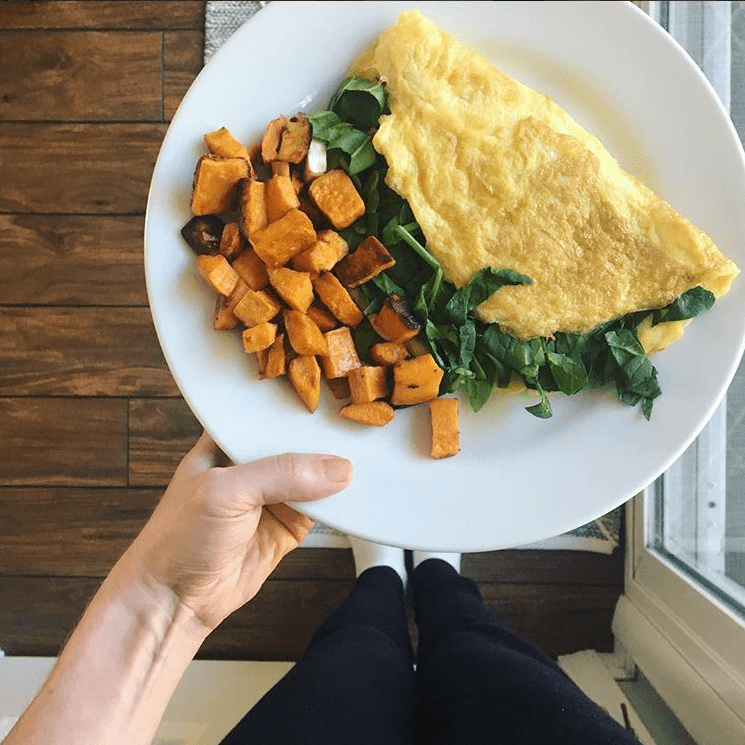
I call this year the year of the egg because mastering a few techniques was on my cooking bucket list. The omelette, for example, was something that I just couldn’t get the hang of. It usually ended up into messy scrambled eggs over here.
brunch

Not anymore though.

Here’s a little picture proof because I know you don’t believe me!

I watched a YouTube video tutorial, found the perfect skillet for the job, and discovered how awesome coconut oil is for creating a nonstick surface for my omelette making. This has become a go-to for busy nights when I don’t feel like making dinner and is the new tried-and-true for a satisfying weekend brunch at home. It’s also a fantastic way to use up the odds and ends in your refrigerator.

If we aren’t in the mood for an omelette, this Chicken Pesto Frittata, Sausage & Vegetable Frittata, Gluten-Free Overnight Waffles, or these Light & Fluffy Pumpkin Pancakes (I just sub with this flour now to make them gluten-free) are all in our brunch rotation.  Don’t forget this diy drink mix recipe for a delicious drink (with or without alcohol!)

Movie Pass

I Go to the Movies All the Time For Cheap-As-Heck

I’m wondering how long this offer will last, but this girl got on the Movie Pass train really early and it has been a highlight of the year. A membership is $9.95 a month and you can see a movie EVERY SINGLE DAY of the month at a REAL theater (should you so choose!) by only paying the membership fee.

If you haven’t heard of it, I’ll try to explain it as briefly as I can. You sign up, they mail a card that looks like a debit card (can take awhile, fyi!), you download the app, head to your theater to check-in on the app, and it says something like, “enjoy the show!” When you head to the counter, you just use the pass instead of your debit card and that’s it.

Obviously, the big catch is being at the theater to check-in and the availability of seats. I aim for the weird times (like 1 PM in the afternoon) and don’t see the movies as soon as they come out. You also can’t see 3D flicks, but that’s NBD because I’m not into action films.

My goal this year is to start feeling brave enough to go to movies ALONE since my work schedule is so quirky.

It is accepted all the theaters near me and I bribed my sister and neighbor to get a pass too so we could have movie dates together for cheap-as-heck.

Capsule Wardrobe

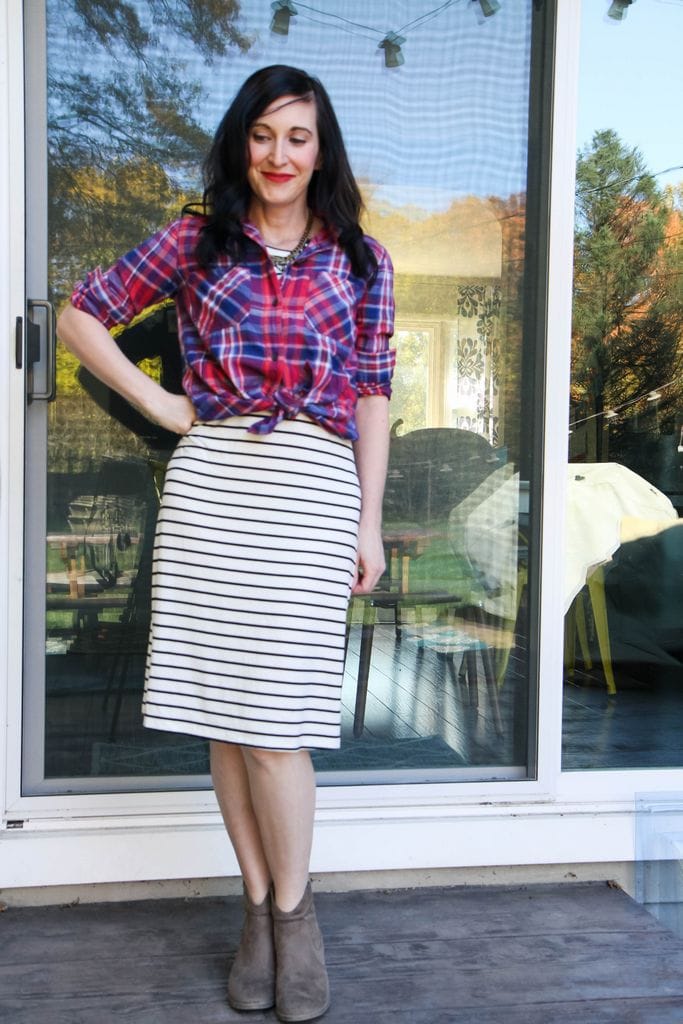
Honey, I Really Did Shrink My Wardrobe

If you would have told me five years ago that I would embrace a minimalist wardrobe, I would have laughed until I cried. Seriously, I was a dedicated fashionista that loved a good deal. What I’ve learned though is that shrinking my wardrobe has brought me a lot of peace and calmness to my mornings. It feels so good to have everything working together and to look in my closet and have it make absolute sense.

Was this hard? Absolutely!

Was it worth it? Absolutely!

One of my biggest inspirations is this lady and her beautiful book just might be the ticket for you to whittle down your wardrobe (and a few other things!) in your life this year.

I have been documenting my journey on the blog and you can see where I started and where I’m at now over here.

My one smart investment has been Rent the Runway for special occasions. This girl isn’t into one-trick-ponies anymore so I enjoyed their Unlimited services for the holidays and it was a blast, without taking up a lot of closet space as a commitment.

blue-apron

I Learned to Cook New Things For My People

If you think bloggers don’t get into meal plan ruts, you are quite mistaken. I think burnout happens a lot with this job and we often ended up repeating the same meals over and over again so we don’t have to invent one more thing for the day. I got a subscription for the summer to Blue Apron and it has widened my perspective on so many things and brought me a ton of joy.

How does spending money on a meal subscription service pay off, right? I know! I didn’t think it was a good use of money either.

I *may* have made fun of people who did these.

The thing is,  it REALLY broadened my perspective on fruits and vegetables we had been neglecting at the grocery store and taught me some valuable cooking techniques that I would have NEVER tried or figured out on my own.

Blue Apron

The night that my kids and hubby were raving about eggplant about knocked me out of my chair. I was like, “WE ARE DOING THIS FOREVER.”

The biggest lesson I learned is how invaluable high heat is for roasting our veggies. I am now cranking my stove up to 450 degrees to roast everything and it has made everything taste like it is roasted and not steamed.

We have taken a break until next summer on this subscription so that I have the time and slowed down day that I need to get my most enjoyment out of this, but I enjoyed almost every minute of it.

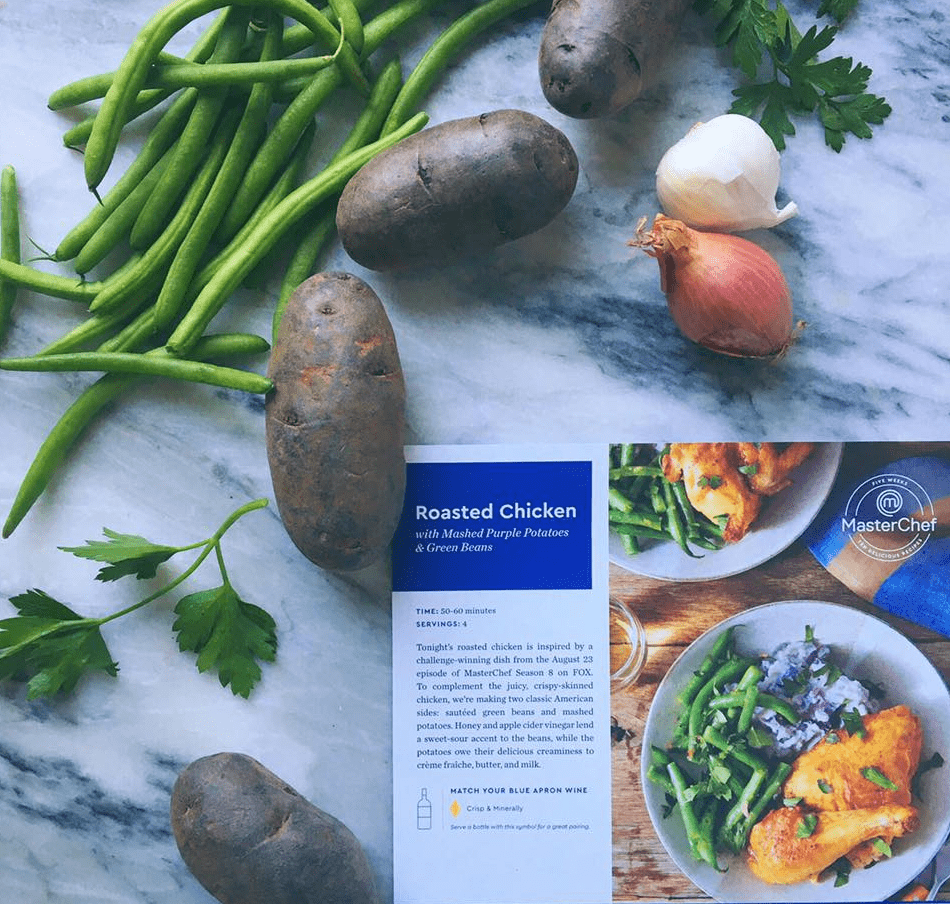
Tackling the challenge that I’m showing you, in the picture above, nearly did me in while they were doing the Master Chef challenges promo for their customers to try at home. This TEAM challenge was pulled off by ONE sweaty mom, but was declared the best meal of the bunch.

I’m not sure if that was true or everyone felt sorry for me after I tackled a TEAM challenge SOLO. I did that challenge though, LIKE A BOSS.

By the way, if you use this link, it should give you $30 off your first box and you can pick all the quick meals so you don’t look crazy like me.

It is almost like it’s your birthday too, amiright?

family

I had coffee with a friend and she shared such a valuable piece of wisdom with me that I wanted to share it with YOU too, as I wrap up my birthday post today. She said that 40 is where you are easing into the second half of your life and you realize who and what is important as you move into this second phase of your life. Who wants to spend the second half of their life keeping up with the Joneses, investing time into shallow relationships, making small talk, and living a life of overcommitment?

Nope, not this girl.

I want all the good stuff- the deep and the meaningful stuff. I want to savor these moments with my kids. I want to be present in this lucky partnership I have with my hubby. I want my friendships to be real and not flighty. I want to continue to give myself grace that life has looked differently, in many sobering ways, but I still have the ability to transform lives by sharing our story. I want to allow people in to see the cracks and brokenness, both online and offline. I want to work on my commitment to believe in God’s plan and timing… even though it looks nothing like the timeline I’ve drawn up.

My word this year is MINDFUL- mindful of my time, mindful of my words, mindful in my role as a mom and wife, mindful of where I invest my time (in my personal life AND business), mindful of our money, and mindfully being my authentic self.

I hope you’ll stick around because having you here has given me purpose in my steps MANY, MANY days!

Can you celebrate with me and share what’s one way you have learned to save your family money or a fun tip that has changed a routine? It would be a fantastic present today!

This post contains affiliate links that help our site! Thank you for supporting me! xoxo 


5 Ways to Make Self-Care a Priority Around the Holidays
Monday, December 18th, 2017

5 Ways to Make Self-Care a Priority Around the Holidays

This blog was sponsored by Florida Department of Citrus. Thank you for supporting the companies that support our site!

The holidays, while lovely, can be a stressful time of year. I don’t know about you, but each day has been filled with a running to-do list, a million activities, and a lot of food preparation.

Oh, and science fair.

For the love.

I will confess that I have NEVER had an issue with self-care, but I will also confess that my idea of self-care has evolved so much over the years.

Today I wanted to share with you 5 ways I make self-care a priority around the holidays and I would love to hear how you make self-care a priority in your life.

Take a “Sick Day” Once a Week

An epiphany came to me the last time I got sick. I spent an entire day at home sleeping, but wished that I was able to have a day like that when I was well and could really enjoy it. I decided to implement a once-a-week “sick day,” where I allow myself to enjoy a day just for me.

On this day, I rarely get out of my pajamas, I read all day, watch my favorite shows, don’t check email, take a nap, and indulge in crafty classes to allow space for creativity. In the evening, I do not do housework or make dinner (thank you, loads of leftovers!).

It is my FAVORITE day of the week and, believe me, if anyone interferes with mom’s “sick day,” it has to be moved to another day. I crave this day to myself.

5 Ways to Make Self-Care a Priority Around the Holidays

5 Ways to Make Self-Care a Priority Around the Holidays

Indulge in a Rewarding Soak

Is anybody else crazy about magnesium and all of its benefits on the body? Adding an Epsom soak to my daily routines has been incredibly beneficial to my body AND to my mental health. Did you know that stress can be a cause of magnesium deficiency, and a lack of magnesium tends to magnify the stress reaction, worsening the problem?

The holidays can be a particularly stressful time on our bodies and contribute towards deficiencies.

In studies, adrenaline and cortisol, byproducts of the “fight or flight” reaction associated with stress and anxiety, were associated with decreased magnesium (source).

I don’t know about you, but that sounds a lot like me around the holidays!

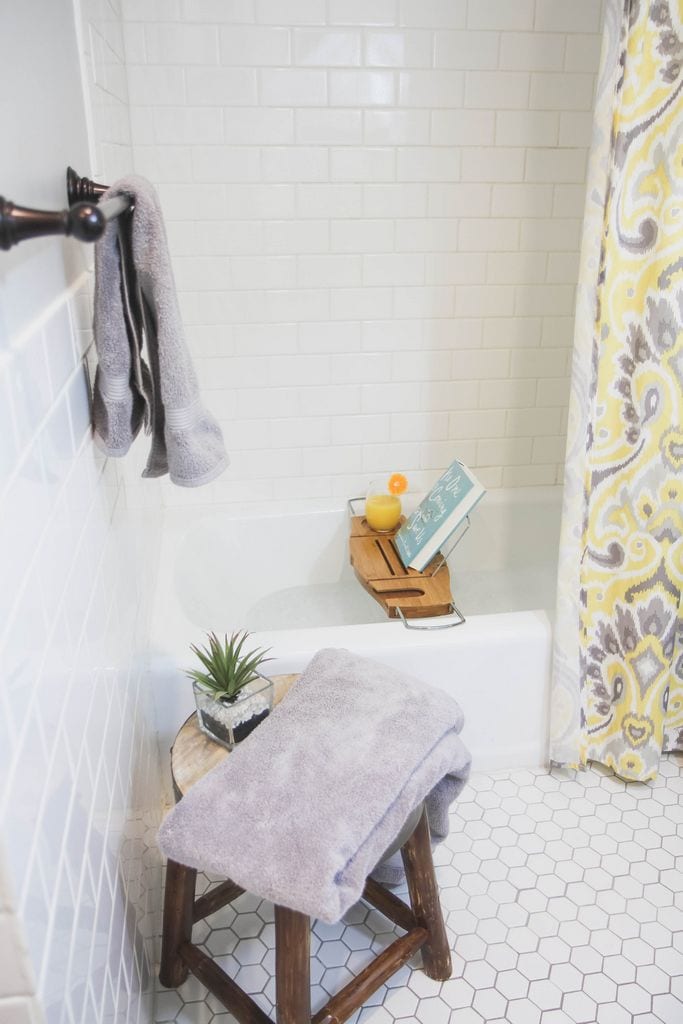
To get the benefits add two cups of Epsom salts to your bath and soak for 15-20 minutes in warm water. While you are doing this, combine it with other healthy habits:

Meditate- Add an app like Headspace to your phone and use this time to deeply breathe and meditate. They have a ten-day free beginner program that you can use to give meditation a try. This is the perfect time to give it a spin!

Add a Smart Beverage to Your Routine- Coffee can dehydrate the body so try replenishing it with a glass of Florida Orange Juice. While you soaking in your magnesium, you can also be enjoying a glass of Florida Orange Juice. Every glass (the recommended daily intake of Florida OJ is eight ounces for adults) of Florida Orange Juice has the Amazing Five. In just one glass you have Taste, Vitamin C, Folate, Potassium and No Added Sugar. Fancy it up with a slice of orange and serve in a pretty glass to add to the experience.

Read a Book- When people ask me how I’m able to read so many books, I have to say that these soaks have been where I have done some of my best reading. A book tray has been a smart investment for this bookworm and it feels like I’m really escaping when I can dive into a little fiction.

5 Ways to Make Self-Care a Priority Around the Holidays

Add Small Indulgences to Your Daily Routines

Wrapping, cooking, organizing, and cleaning are things we are all doing to prepare for the holidays. There is no reason that these routines can’t be coupled with small indulgences though, that can make the experience a little more pleasurable. I love to upgrade my boring routine to-do list items with something that brings me joy.

Wrapping gifts?

Why not belly-laugh to ELF while you are wrapping!

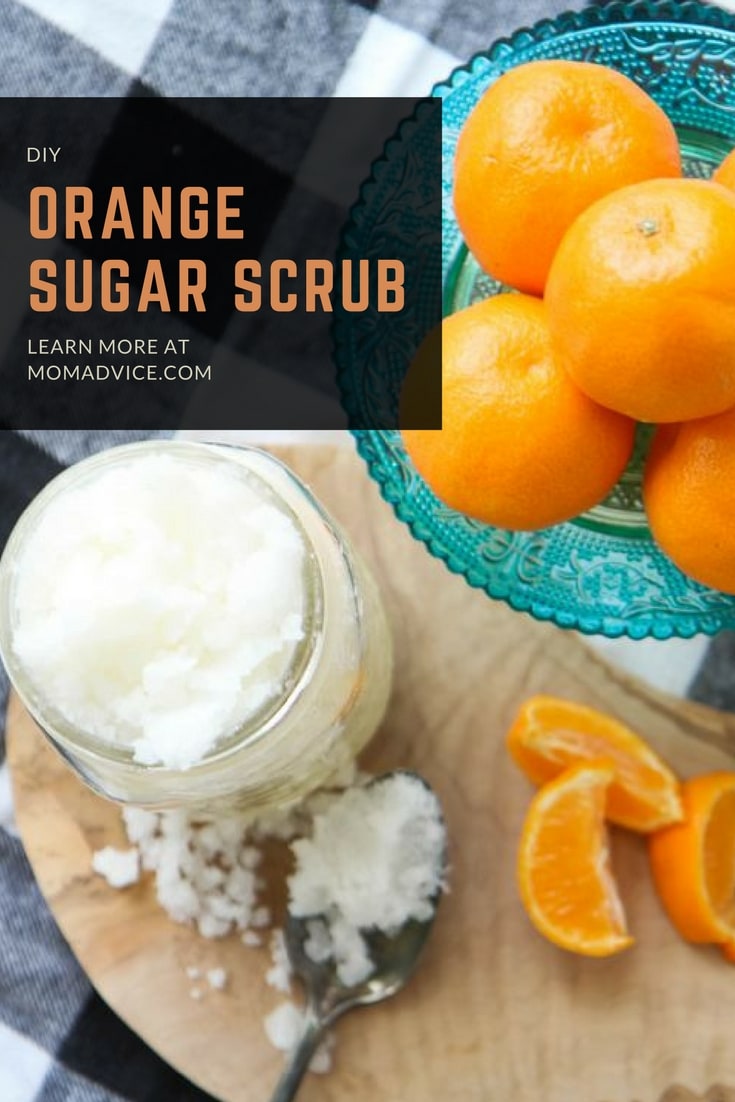
DIY Orange Sugar Scrub

Doing dishes?

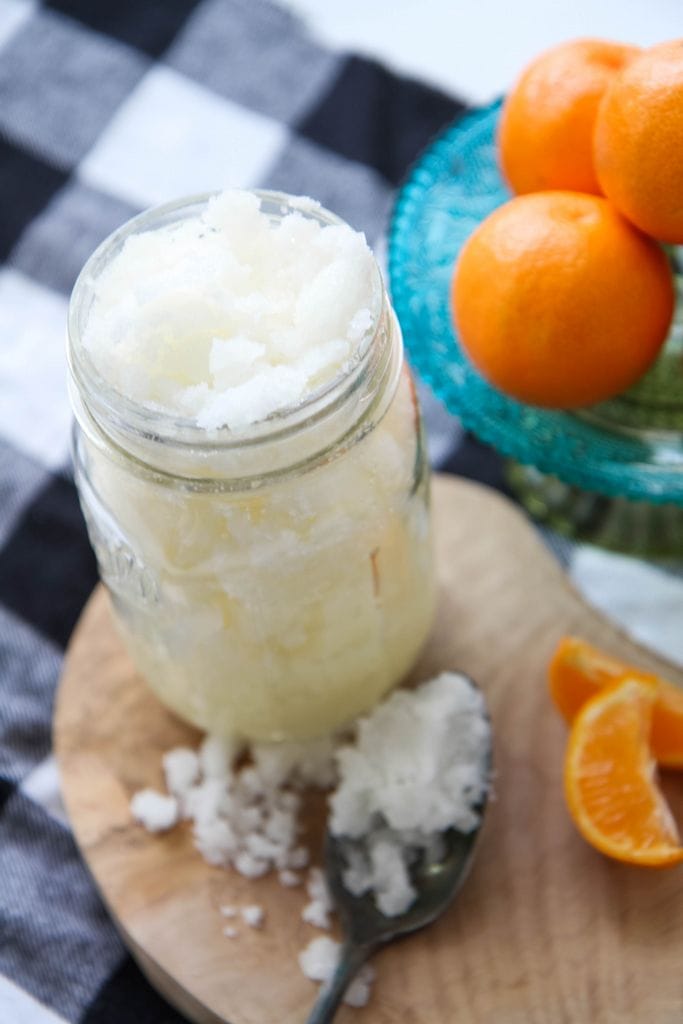
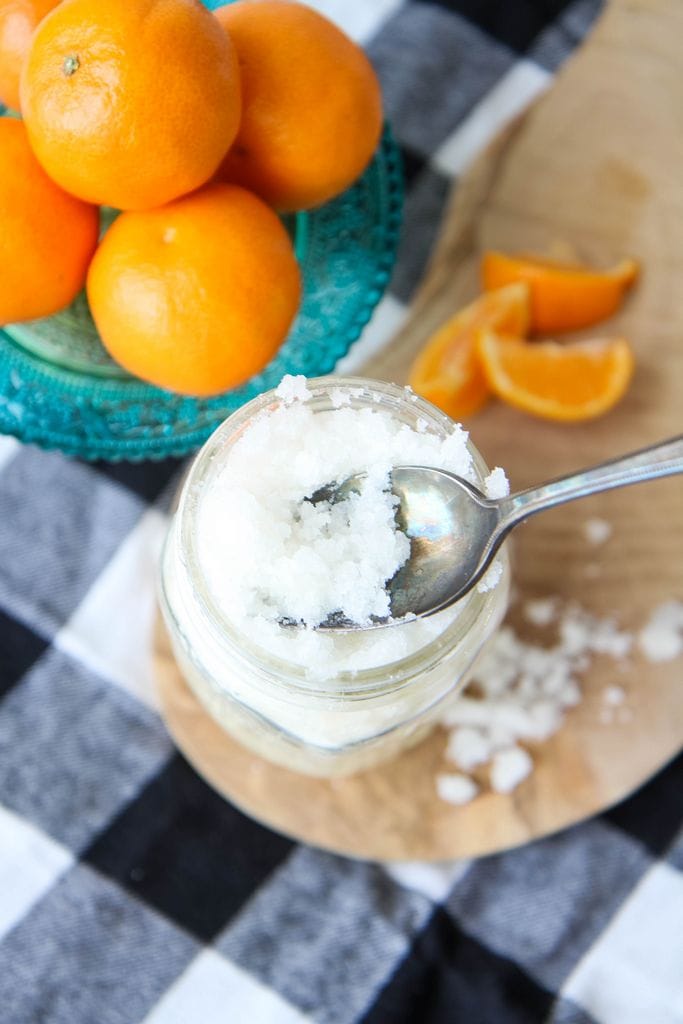
Add a jar of this diy orange scrub (recipe below) to your agenda and give your hands a little pampering.

Cleaning the house?

Snag an audiobook from your library, strap on some wireless headphones and your fanny pack (this is TOTALLY what I do) and listen to a great book while you clean.

Pairing something that’s pleasurable with something that is not makes tasks like these much more bearable!

Marco Polo App

Make Time for People

This is the season where we can get really swept away with spending and shopping. It has a tendency to pull us away from the heart of what the season is about and into a frenzy of bad spending. In fact, an alarming number of shoppers are still trying to pay off their debt from holiday shopping last year. Instead of giving so much, what if we all just spent more time on each other.

Don’t have time? I have the perfect solution!

The Marco Polo app, shared with me by my sister, is my new favorite way to communicate with the people I love. It’s essentially a video walkie talkie that allows you to send a video back and forth to talk to each other, but doesn’t require you to hop on FaceTime or Skype at the same time. When schedules are impossible to coordinate, this can be an amazing solution for a busy mom.

I now talk and see my sister and best friend every day and even have virtual wine dates with my girlfriends in town. You can even do big group video chats if you can’t schedule a coffee together! How cool is that?

I consider time with good friends and family to be an essential part of my self-care, especially as a work-at-home mom.

Focus on people, not presents!

Rethink Your Idea of Self-Care

The last thing that I want to say is that self-care is much more than these acts.  I linked to this article in my notebook and I still am thinking about it. Self-care is setting healthy limitations that require self-discipline, setting healthy boundaries in relationships, not loading our calendar up so we get run down, and ridding our life of things that are negative or drain us.
Self-care means going to bed on time, giving yourself unscheduled spaces during the day, not going overboard on the food and drinks of the season, and saying no (even if we have to experience FOMO).

Did you notice that everything in this list is FREE? Self-care isn’t a treat yo’self experience that costs a lot, it is making time and space for things that help you feel emotionally and physically balanced! 

Thank you to the Florida Department of Citrus for letting me share about these tips with you! Be sure to make Florida OJ a part of your daily routines to help boost your immune system during this fun season!
DIY Orange Sugar Scrub from MomAdvice.com

DIY Orange Sugar Scrub[url href=”undefined”][img src=”http://momadvice.com/blog/wp-content/uploads/2017/12/diy-orange-sugar-scrub.jpg” width=”735″ height=”1102″ class=”aligncenter size-full” title=”DIY Orange Sugar Scrub from MomAdvice.com”][/url]
Recipe Type: Beauty
Prep time:
Cook time:
Total time:
This DIY Orange Sugar Scrub is a wonderful self-care treat for your hands and body! Thank you to Florida Department of Citrus for sponsoring this fun DIY!
Ingredients
  • 1 cup of Sugar
  • 1/2 cup of Coconut Oil
  • 1 teaspoon Orange Essential Oil ([url href=”http://amzn.to/2j6vEM4″ target=”_blank”]like this[/url])
Instructions
  1. In a saucepan, heat the coconut oil over low heat, until it is melted.
  2. In a large bowl, mix sugar, melted coconut oil, and a teaspoon of orange essential oil until fully combined.
  3. Scoop into a mason jar (the one in the picture has been doubled) and store with an airtight lid.
  4. When using, scoop a small amount into your hands, scrub gently (allowing the sugar to exfoliate), rinse, and pat dry.

This blog was sponsored by Florida Department of Citrus. Thank you for supporting the companies that support our site!

This blog was sponsored by Florida Department of Citrus. Thank you for supporting the companies that support our site!

Pin It

5 Natural Ways To Stop Anxiety Quickly

Friday, August 4th, 2017

5 Natural Anxiety Remedies

Do you struggle with anxiety? When we met with the specialist to talk about my diagnosis, she asked me this very question. Embarrassed, I responded that I did.  She quickly assured me not to be ashamed of my anxiety because it is often a symptom that goes along with all my other health issues.

Anytime there are big changes in my routine, it often sends my anxiety into a tailspin. Big things like discovering you have a connective tissue disease definitely sent me spiraling. Little things though, like the start of each school year and doing allthethings, can also send me down the tunnels of anxiety.

An admitted perfectionist and people pleaser with anxiety?

Yep, it is often the reason why I suffer from sleepless nights and stomach aches.

This year I have really been working on my responses to things and have been finding natural remedies to curb my anxiety symptoms. I wanted to share them with you today because they have helped me so much.  Here are 5 things I’ve discovered can stop my anxiety quickly.

mark-twain-quote

Working through the “then what” scenario

I shared that this year I decided to see a counselor to help me get my life back on track. We talked about changing some of my routines and habits to reduce stress and help me be more productive at my job. As a people pleaser, I find it difficult to let people down in my life. He worked with me on talking through these situations and now I use this trick when talking myself through tricky conversations or scenarios I might be faced with.

For example, my body’s new limitations made working and lifting food at our food pantry hard to do. Instead of admitting that it wasn’t a good fit for me, I continued to do it and flare up an elbow issue that I had. I told my counselor how it was causing strain, but I worried that I would let the director down.

Him- Why can’t you tell her that you can’t work the food pantry?

Me- I made a commitment and I know that there aren’t a lot of people to help. I love doing it, but it is causing pain.

Him- What do you think she would say if you told her that you couldn’t work the food pantry?

Me- Well, she will probably be very disappointed in me. She will think I’m a flake. I told her I was going to do something and then I didn’t do it.

Him- Do you think she will be angry?

Me- I don’t know.

Him- What if someone told you that they had an injury and couldn’t do a job for you?  What do you think you would say?

Me- I would be disappointed that I didn’t have help.

Him- Then what?

Me- I would tell them I’m sorry they are hurting and I understand.

Him- Then what?

Me- I would probably find someone else to help.

My initial reaction is everyone will be angry with me if I change a routine or have to bail on a commitment, but a lot of times these scenarios never happen. Of course, as soon as I told her that I couldn’t do it because I had an elbow issue and was starting physical therapy she told me she would miss me, but COMPLETELY UNDERSTOOD. She graciously said she would be happy to have me back whenever I felt better.

Really?

It was NO BIG DEAL.

Working through the then what, then what, then what helps me guess what might happen and put away irrational fears about situations in my life, but it also helps me prepare a response ahead of time for the changes I make that are healthy for me. You can’t plan for everything, of course, but it has helped tremendously.

The stop sign trick

Joanna Goddard, from Cup of Jo, shared a really great trick that she learned from her therapist that helped her with anxiety. Her therapist told her that when her spiraling thoughts started that she should start visualizing a stop sign.

A small switch that is completely free?

Sign me up!

This week, for example, as we prepare for the new school year, my anxiety really starts to ramp up. I will lay awake thinking about the physicals I forgot to schedule, the new bus schedule, the school supplies we haven’t bought, the uniforms…. Once the floodgates are opened, the anxiety of the upcoming year starts pouring out.

Now I have started to use this tip once my mind starts going and it does, truly, help interrupt the anxiety routine.

I didn’t get the school supplies… STOP SIGN

I forgot to schedule physicals… STOP SIGN

I…STOP SIGN.

The 7-second rule

One element of my anxiety is saying the wrong thing in social situations. I will be having a great day with friends just talking and enjoying each other’s company- all in all, a perfect day. On the drive home though, my mind starts thinking again about EVERYTHING I said. Did I say too much? Was that wrong of me to say? What if their feelings were hurt? Why did I share that?

It goes on and on.

I read about the 7-second rule though and I have started to apply it to my life. I’m generally (*ahem*) good people and I try really hard to say the right things. I would never intentionally hurt someone with my words and the things that I typically worry about, I’m pretty sure no one else is replaying over and over again in THEIR mind.

Only allowing myself 7-seconds to replay things has changed this routine of replaying the night over and over and over again in my head to a mere few seconds. I also try to extend the same grace to other people and even share the tip with them when they apologize to me for something they have worried about. Seriously, 7-seconds and moving on.

Stop looking for it

I have a BAD habit of looking for things to become anxious about- do you do this too?

For example, I had a terrible nighttime routine of checking Instagram and Facebook right before I would go to sleep. I would, essentially, look for things to be anxious about and then try to go to bed. Social media, for me, has ALWAYS been a trigger, but it is also a necessary part of my work.

Yet, let’s be honest,  it is not a necessary part of my work to start scrolling at 10PM.

Now I turn off all social media in the evenings and keep normal “business hours” with my time. I also don’t go hunting for things to be upset about (another REALLY bad habit) on my feeds. In the morning, I seem to have the ability to distance myself more from things that cause me anxiety and I can apply that ol’ stop sign rule when my thoughts start spiraling.

Peace Over Worry

Get involved in an anxiety interrupter

I am sure you have heard that yoga is helpful for anxiety, but it isn’t necessarily the movement that helps my anxiety. It is the fact that it is a mind interrupter.

When doing yoga, the instructor is guiding us through movement with directions and oftentimes isn’t demonstrating the movement. I have to think really hard to stay with the flow of the class and remember one pose to the next. I become so focused on moving through poses that I can’t let my mind spiral.

Anxiety interruption also happens when I go to dance class because I’m so focused on following the movement that my brain doesn’t have time to think about anything else. When all my brain cells are dedicated to one thing, there are no brain cells to contribute to my irrational worries.

I have been looking more for healthy anxiety interrupters like this in my life. Walks with husband around the neighborhood, a good book, podcasts, volunteering, a documentary, doing things (and being present) with my kids are all good examples of good things that have helped interrupt my anxiety routine.

Of course, do not be afraid to talk to your physician or a therapist about your anxiety. You don’t have to suffer alone!

Natural Products/Services That Also Help My Anxiety

Calm Now Supplement (I take this in the afternoon)

Natural Calm The Anti-Stress Drink (great bedtime routine)

L-Theanine (I used this with great success before taking the Calm Now supplement)

Calm Meditation App (the sleep stories really help me in the evenings)

Epsom Salts (I buy them in bulk) with 5 drops of lavender oil for a nighttime bath

Sleepytime Extra Tea

Kill News Feed Plugin

Facebook Unseen

What YOU Say Helps

T. says, “I read somewhere when in the middle of an anxiety/panic attack is to tell yourself I can anything for 10 minutes. It’s what got me through a 6 hour drive just hours after we were involved in a car accident that totaled my car.”

J. says, “I  was on medication for anxiety/depression for years and found that while it helped the anxiety, it was affecting other areas of my life so I went off them and started looking for natural options.

I do a lot of the things you talked about in your article, especially the interrupter. I use exercise, and I was thinking that it was the exercise itself that was helpful, but I think it is also the interrupter. I often do a workout on my lunch break at work and it really helps me to shut off the stress of the morning and get back to a more neutral head space.

I am also a creature of routine and habits, which is great for organization and generally keeps the anxiety manageable, but when things throw the routine off, it is often extremely difficult to deal with. Sometimes I get worries that play on a loop in my head, like when I’ve texted my son who is out somewhere and he doesn’t text back when I think he should and I start imagining the absolute worst and it won’t stop until he either texts back or gets home. If my husband is home, I can tell him specifically what is in my head, what the specific worry is and he helps me to break it down and either get rid of it or at least lessen the anxiety a bit.”

H. says,“I replay my conversations or what I post in my head all of the time, like you! When my anxiety gets out of control I have meds, but one time I didn’t have any on me and I was having a panic attack and luckily my husband happened to be with me and he told me to get outside with him and go for a walk. That interrupter (like the yoga you mentioned) really calmed me and stopped the attack from happening. Interrupters are really good for me. I found that coloring in the adult coloring books helps a lot too. I really try and go more natural unless it gets to a point where I can’t control it.  I also use Tulsi Tea and it helps, but it could probably be a placebo thing, but I don’t care!”

M. says,  “I have been trying to get into a routine of meditation. Just 10 minutes a morning. I have been using the app 10% Happier. I love their logical approach and the concept of ‘just begin again.’  Since I have been doing it I’ve noticed that when my mind starts racing later in the day, or even when it wakes me up at night, if I take 30 seconds and focus on my breath it really does reset my brain. I think it is the same idea as the interrupter.”

Katie says, “I take a magnesium supplement before bed that has really helped me with sleeping. Since I started taking it, for the first time in years I am able to fall asleep easily. Another thing I’ve noticed is I get significantly fewer headaches taking magnesium. In general, getting on a vitamin routine has helped in a lot of ways. For example, I found out I tested low for vitamin D and that had a correlation with my stress too. Taking omegas and B12 has helped managing moods when I’m stressed.

Another trigger for me is if I am not drinking enough water or eat meals too late. My husband is really good at letting me know that I need to eat or drink something when he can tell I’m getting stressy and it’s a nice gentle reminder to take care of my physical needs but also “check myself” on my emotional state. It works well for us because I know he is doing it out of love and not to poke at me.

I love my essential oil diffuser with lavender or other calming blends in the evening in our bedroom.

I have moved the FB and Instagram icons off the front page of my phone and put them in a separate folder on a page I have to scroll to at times to help break the habit of getting on just because I pick up my phone.”

Another J. says, “I’ve had success in managing my anxiety with various herbal tinctures and elixirs, which I always fear makes me sound all “woo-woo crazy”, but I’m so much more consistent about taking them than sipping tea. They’re fast! 🙂 My favorites are Motherwort (<– the real workhorse of the bunch!), Borage Flower elixir (calming and mellowing), Milky Oats tincture (<– also a great one for dulling intense responses), Wild Rose Elixir (awesome for brightening mood and promoting optimism), and Skullcap tincture (my go-to for stopping racing thoughts in their tracks at bedtime.)”

A. says, “One thing that my therapist worked with me on was journaling, which I use not only as a way to get my thoughts out, but as a way to keep myself organized. When things get chaotic and disorganized I can always feel the anxiety start to ramp up.”


5 Natural Anxiety Remedies

If you liked this article you might enjoy my natural ways to relieve joint pain article! I’d love to hear from you some natural ways you have found to reduce anxiety in your life?

DIY Breakfast Caddy

Monday, June 19th, 2017

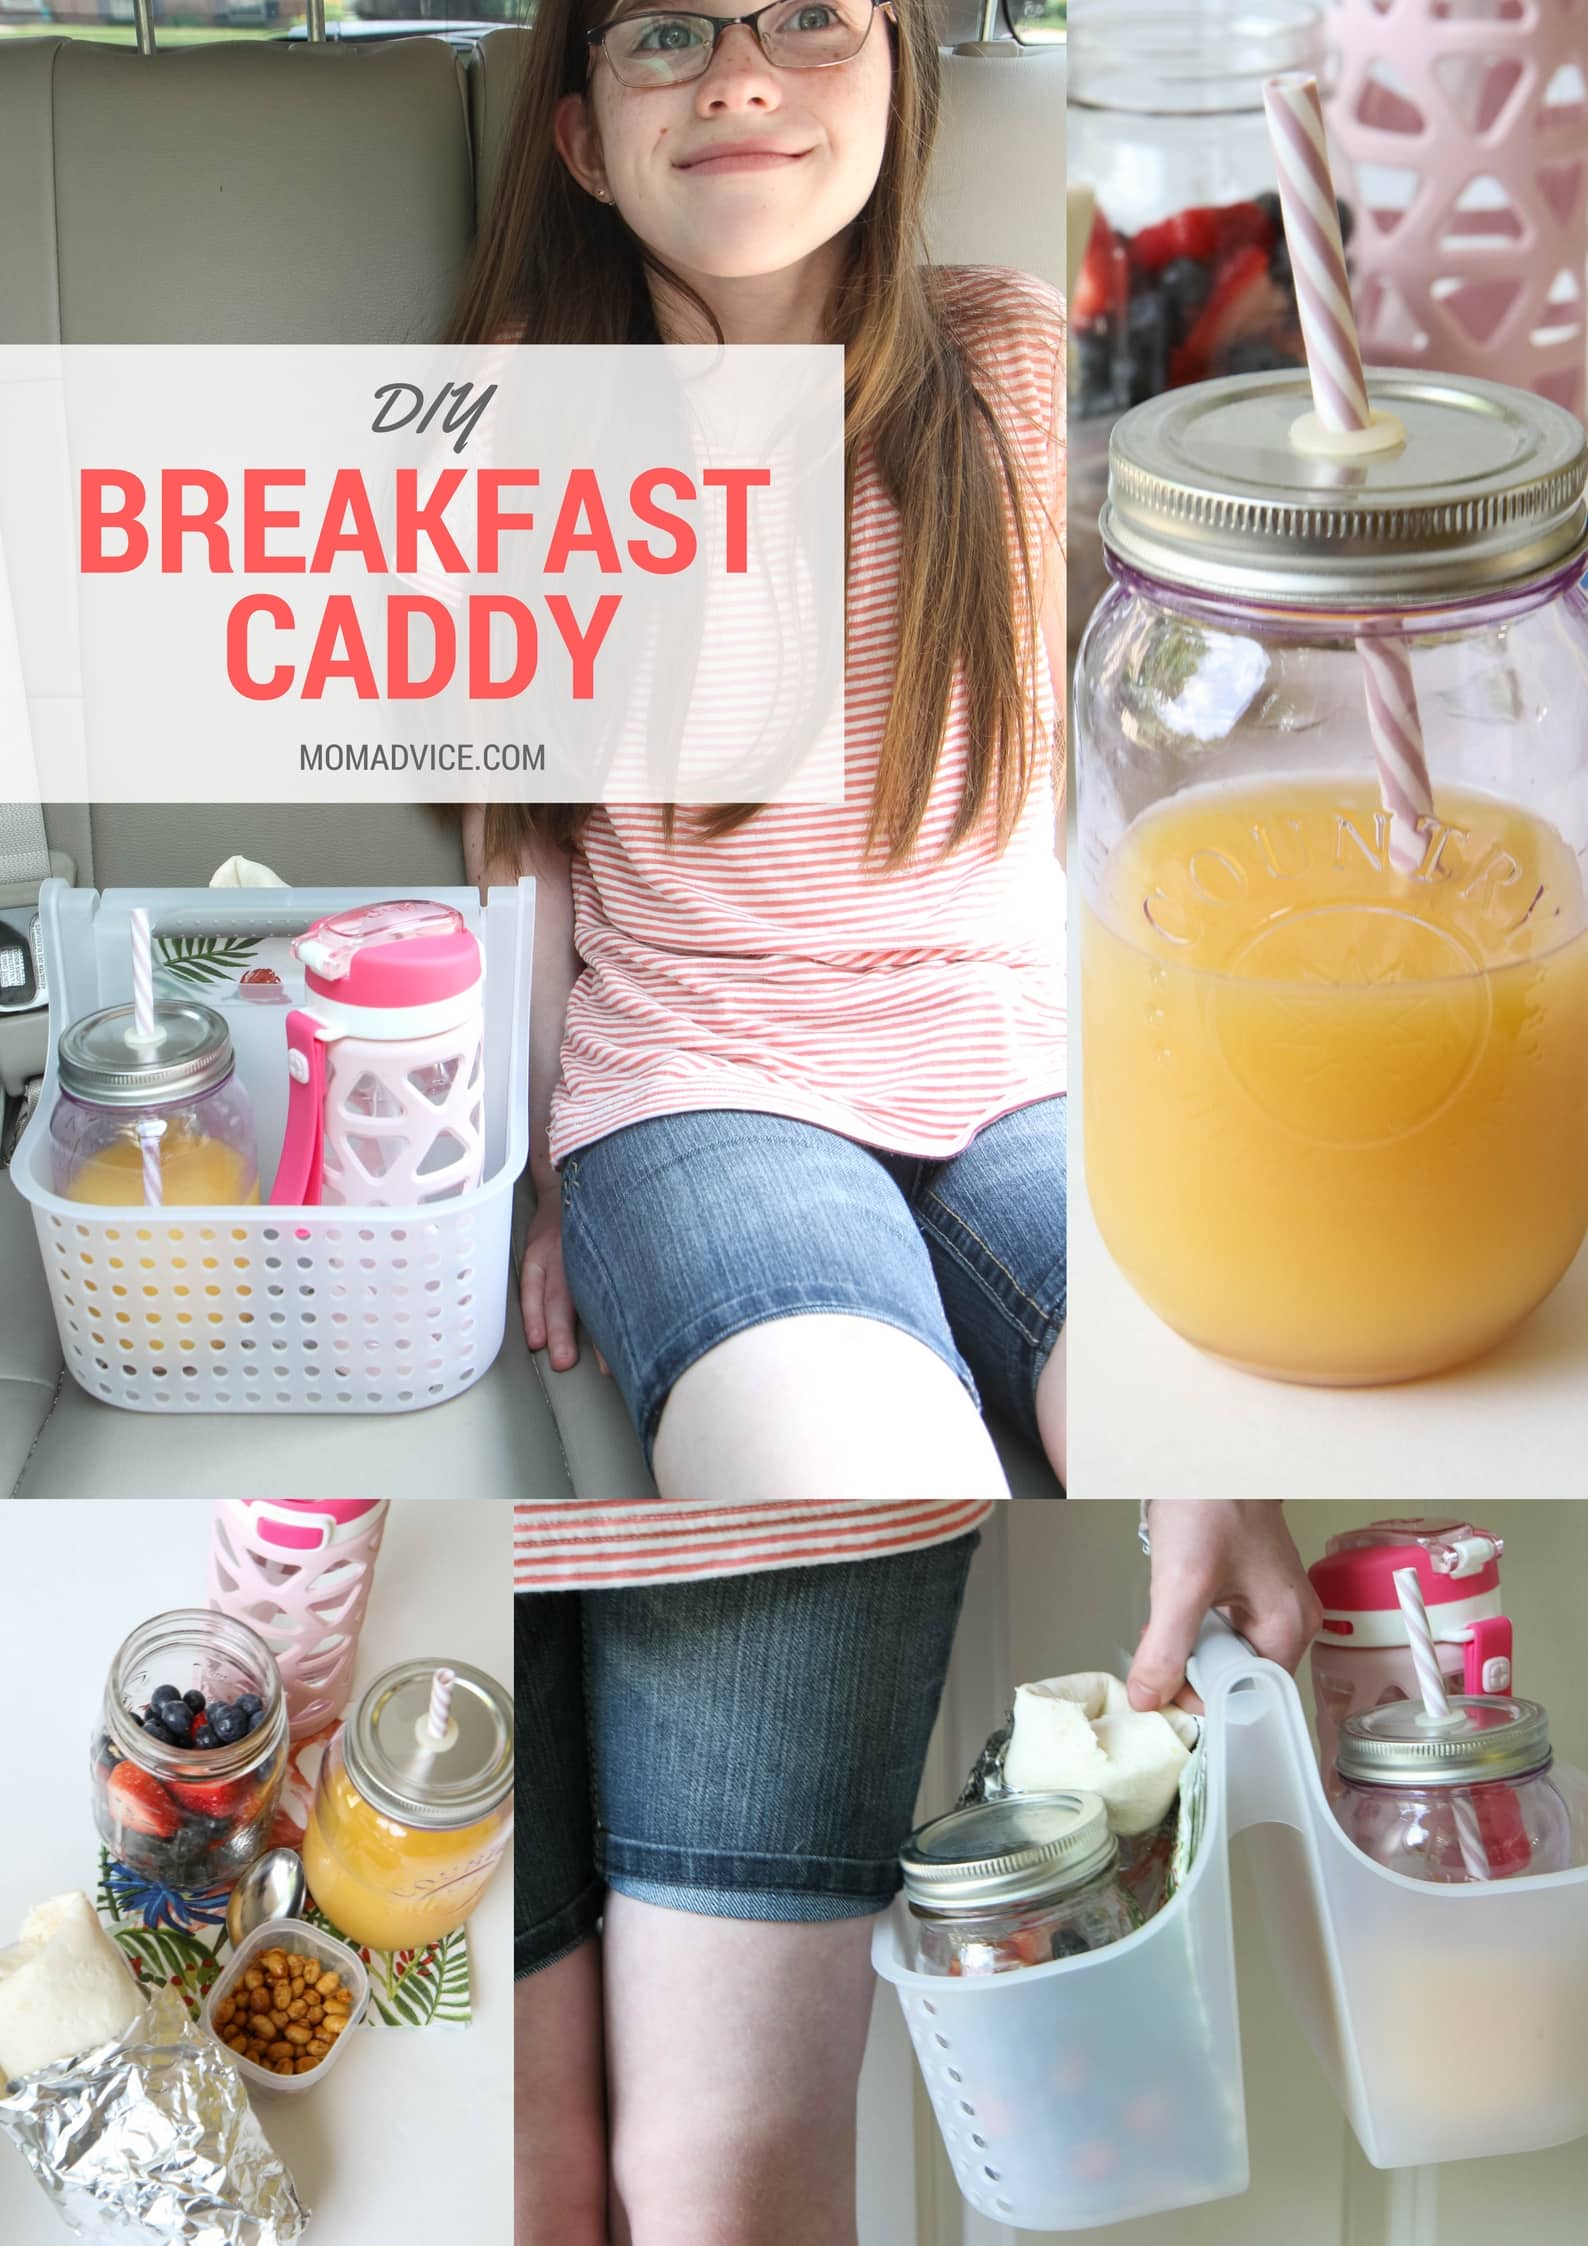
DIY Breakfast Caddy for Car from MomAdvice.com

This blog was sponsored by Florida Department of Citrus. Thank you for supporting the companies that support our site!

Well, hello there! I hope your summer is off to a lovely start! We are trying to soak in as many carefree and unscheduled days as we can, but it is funny how life gets in the way of this. This week we tackled doctor’s appointments, the dentist, running a kid back and forth to a sleepover, and we are signing up for a couple of fun summer programs and camps that are happening around town.

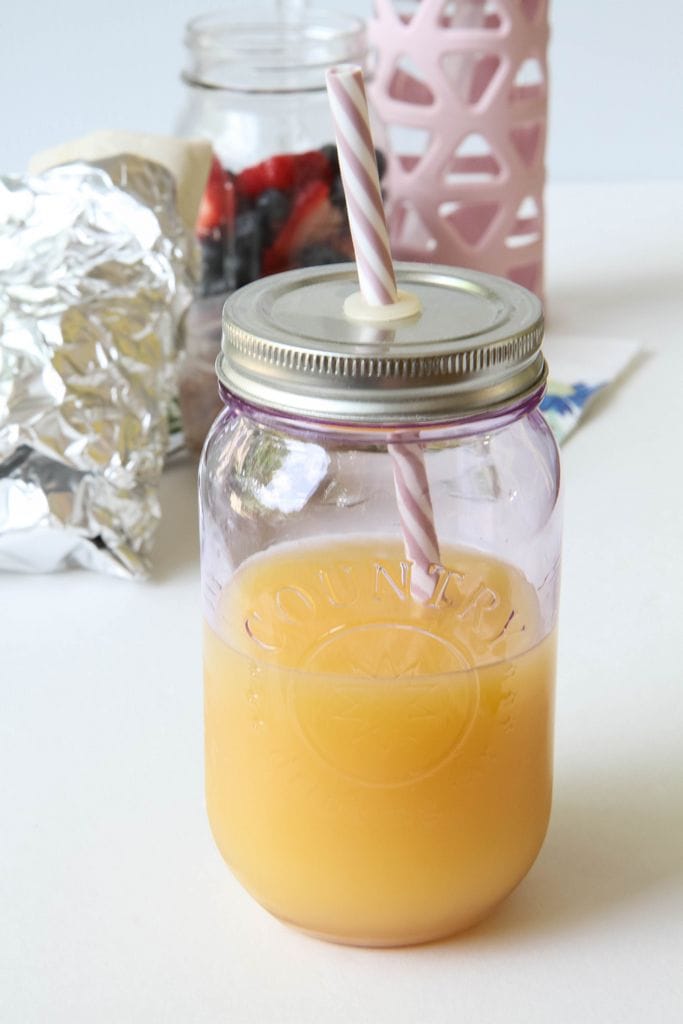
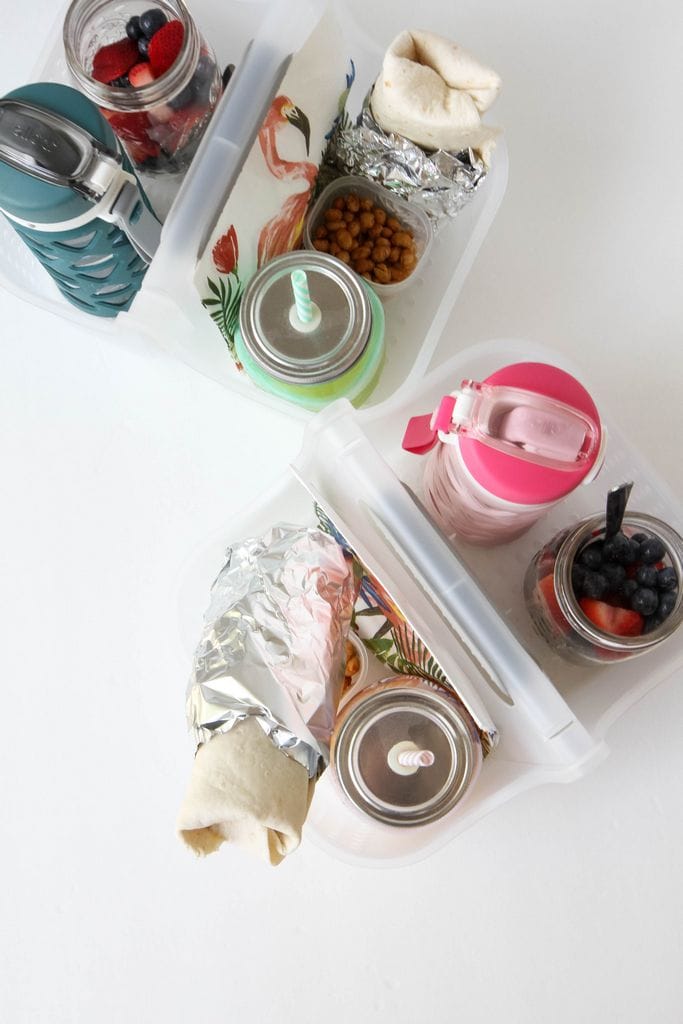
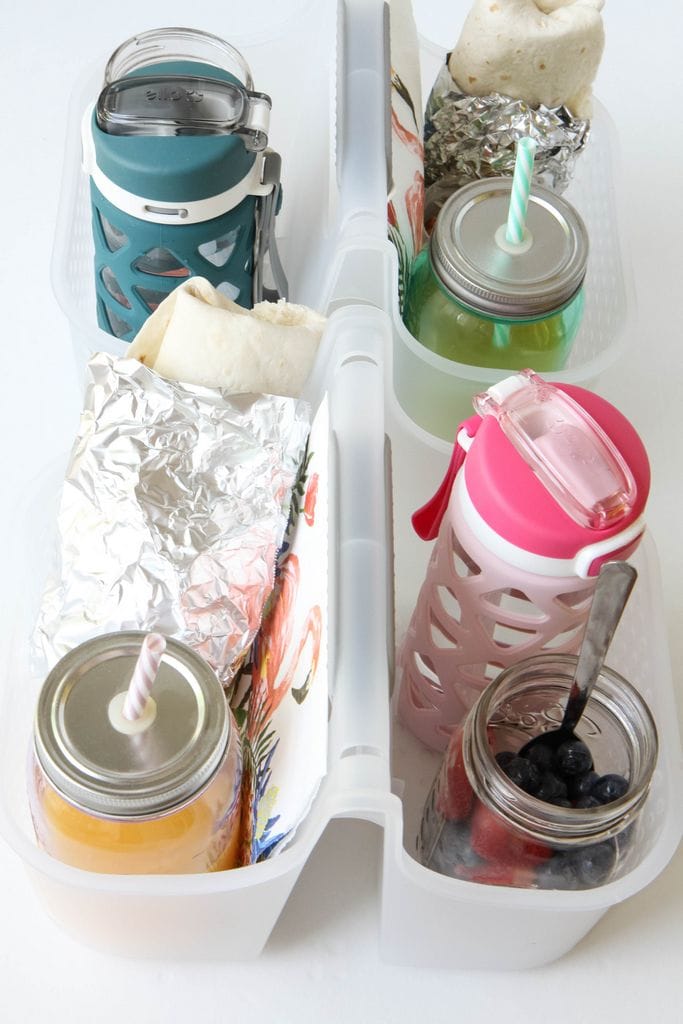
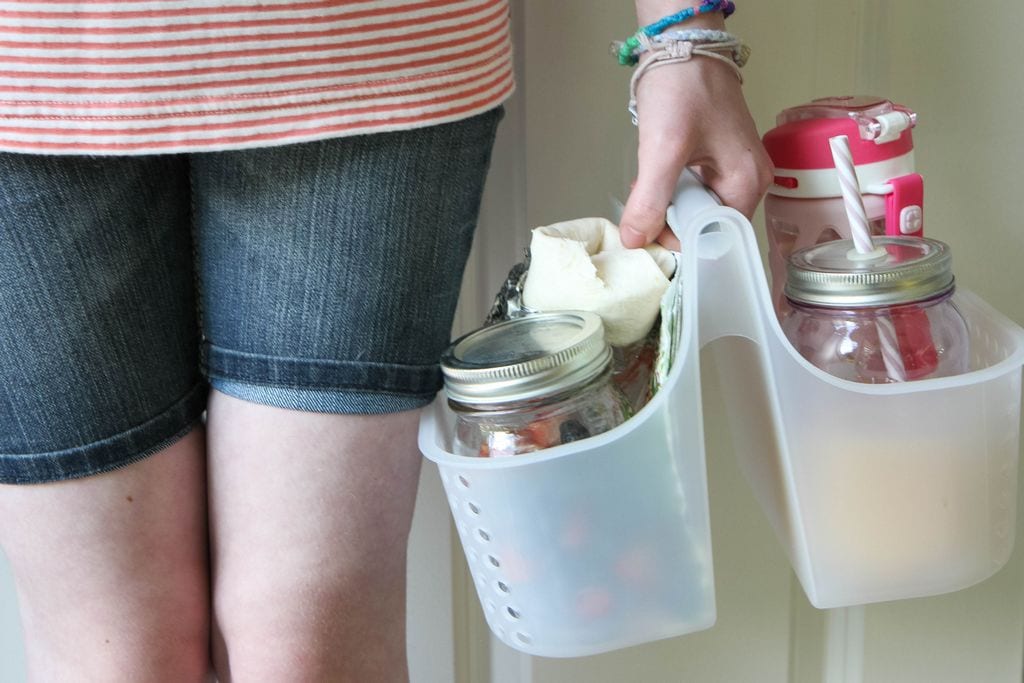
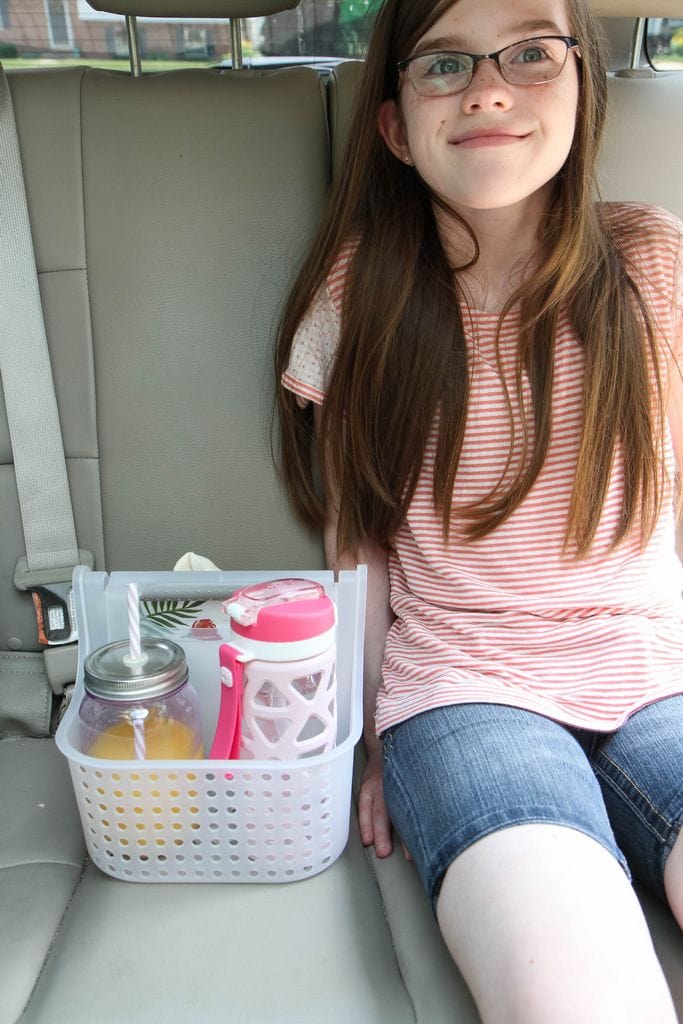
All of that leads to busy mornings so today I am partnering with  Florida Department of Citrus to show you how to enjoy your breakfast on-the-go, complete with a glass of Florida Orange Juice! We are sharing a breakfast caddy idea that you can assemble on the weekends to get your kids off to a great start, no matter what is on the to-do list!

I will admit, I got the inspiration for this from Pinterest where there were numerous pins of fast food meals in totes to make it easier for kids to eat their meals. I wanted to translate that idea into a healthy one that is perfect for busy mornings.

Supplies Needed

Lightweight Plastic Shower Caddy (exact, similar, similar)

Small Plastic Containers or Jars for Food Assembly

Drink Holder

Water Bottle

Food Supplies (as listed below)

DIY Breakfast Caddy for Car from MomAdvice.com

diy-breakfast-caddy-for-car-4

Directions for a DIY Breakfast Caddy

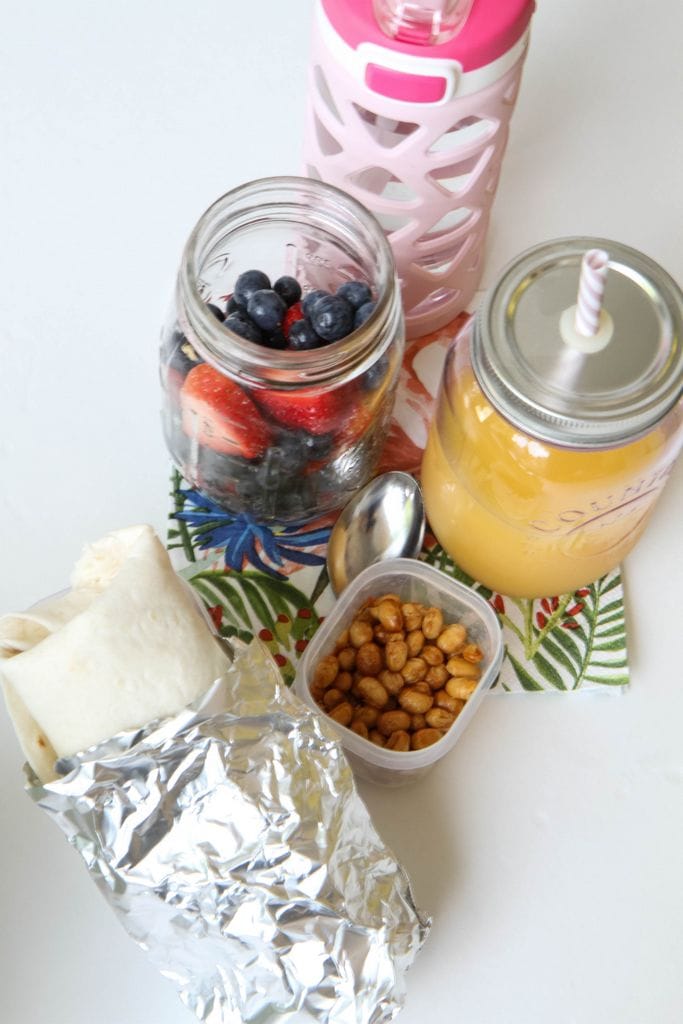
The beauty in this project is that you can fill your tote with whatever you think will help fuel your kids that day.  I can’t stress enough how much I LOVE these make-ahead burritos because they save me on many busy mornings in our house. Once heated, they can be wrapped in tin foil to keep them warm. Of course, if burritos aren’t your thing, a breakfast sandwich made on an English Muffin,  peanut butter on rice cakes (a favorite in our gluten-free home), or even a slice of frittata (try this one, or this one) can be other great options for the main course.

For fruit, I follow the rule that it must be in season and on sale that week to make it in our produce drawer. Today’s fruit selection are blueberries and strawberries in mason jars, but grapes, bananas, cantaloupe, or watermelon also make great options. You could also do a package of easy-to-eat veggies like baby carrots, celery sticks, or red & green peppers if you struggle to get your kiddos to eat fruit.

DIY Breakfast Caddy for the Car from MomAdvice.com

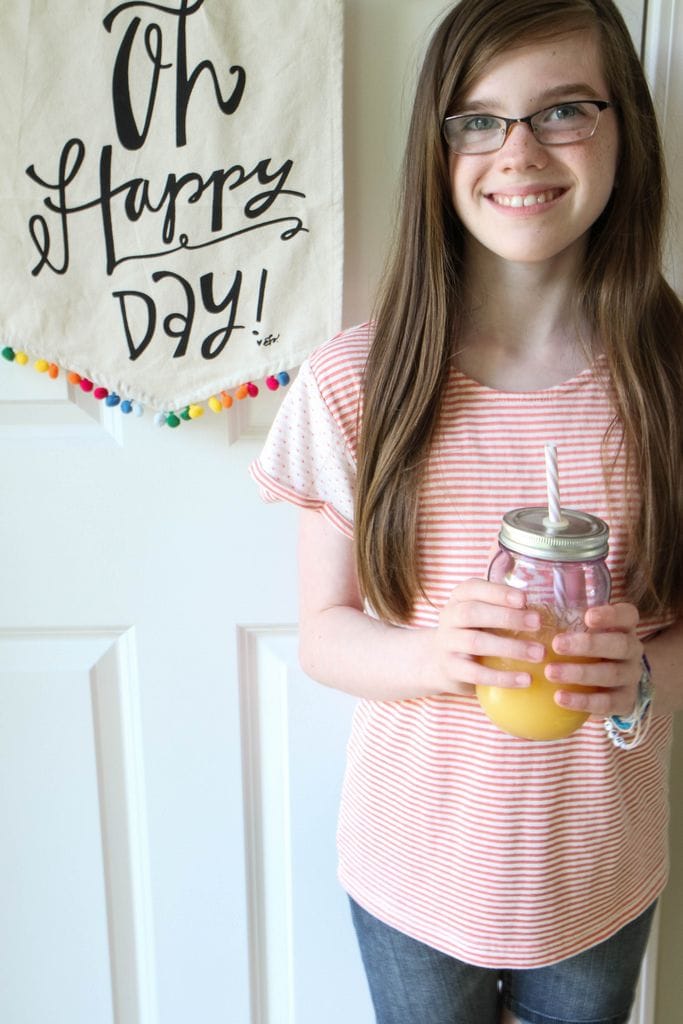
Of course, a surefire way to get your kiddo’s to consume fruit is a little juice, isn’t it? Did you know that an 8 oz. glass of 100% orange juice counts as one of your daily recommended servings of fruit? Pretty cool! Not only that, Florida Orange Juice provides 5 amazing nutrients in every glass: Taste, Vitamin C, Folate, Potassium and No Added Sugar.

Since mornings can be long in the car, I added toasted edamame in a small container for munching before or after our morning activities. You could also do nuts like almonds or cashews to add a healthy crunch to round out the meal or as a great in-between snack once hunger strikes again. You just know it will!

Oh, and don’t forget the water! It has been a scorcher out there so we are trying our best to stay hydrated. It’s also so nice to have a water bottle in case we forget it for the next thing on the agenda.

DIY Breakfast Caddy for the Car from MomAdvice.com

diy-breakfast-caddy-for-car-2

diy-breakfast-caddy-for-car-7

diy-breakfast-caddy-for-car-9

diy-breakfast-caddy-for-car-10

Wouldn’t this be so great for your next family trip too? I have a feeling that our mornings would start out a lot better on trip days if I had a few of these items prepped and ready to go in my fridge for our next adventure.

Well, we are all packed up and off to our next thing probably. I just want time to s-l-o-w down, but I blink and another summer is over. Do you feel that way too?

I hope this idea can be one you can use to fuel the family and maybe squeeze in a good chat with your kids while they are enjoying their breakfast on-the-go. I have, honestly, had some of my best talks with them in the rearview mirror. It is one of those ways that I have found it helps to keep an open dialogue between us as we navigate these new waters of being teens and tweens.

Thank you so much to Florida Department of Citrus for letting us share our fun little diy breakfast caddy with you. We hope you find this idea inspiring.

Cheers, mama, to surviving another summer!

PS- I hope that you made some room for some FLOJ in that mimosa over there!!

Love this idea? Be sure to visit these fun posts too!

Funny Faces Printables

Gluten-Free Orange Creamsicle Pancakes

Make-Ahead Sleepover Breakfast Buffet

Follow the rules below to enter to win a HUGE prize pack from Florida Department of Citrus today!! Follow the rules in the widget below- good luck!

a Rafflecopter giveaway

DIY Breakfast Caddy for Car from MomAdvice.com

This blog was sponsored by Florida Department of Citrus. Thank you for supporting the companies that support our site!

Pin It

Living in the Gray

Monday, May 1st, 2017

living-in-the-gray

Last week I had another little health setback. My body has been unreliable so I often feel like I am moving two steps forward and then five steps back. One of my big pain issues stems from my elbows and if my elbows are hurting then the hand pain worsens to the point that sitting at a desk and typing hurts with each keystroke.

I couldn’t do my usual ALDI route since I needed to rest my arms so I took advantage of the groceries-to-go instead so I didn’t have to lift bags. In a total God moment, a girlfriend pulled up next to me to pick up her groceries too.

First of all, steroids are THE WORST so I was a big sobby mess when I saw her, but the conversation I had with her was the stern-I-love-you-but-this-can’t-continue conversation that I needed to hear. As a nurse, she talked me through changes that I needed to make in my life.

I needed to acknowledge that this disease is not going away and that it may be progressive.

I needed to go to physical therapy and not talk about doing it someday.

I needed to structure my workday in a way that makes sense for my body and for my business, utilizing the hours that I feel best.

I needed to save my typing hands for the important stuff and let social media be more for my business.

I needed to start finding shortcuts for work, speech recognition programs on days that are hard, an assistant for the site, and just being okay that someone else might need to help me.

I needed to make rest a priority and not push myself through pain when I shouldn’t.

She’s good, right?

The next day, I started putting in calls to get lined up with physical therapy, I put my phone on do not disturb so I could work in the daytime hours when my hands felt their best (it is a quick decline), and I made one other call…

To a counselor.

He actually suggested that I open up a bit more to you because being vulnerable is a lot more attractive sometimes than being perfect.

We shall see!

I felt like I had worked through these health issues, but I haven’t. I can’t seem to ride the wave of setbacks and chronic pain in the way I want to. I want to put this BEHIND me because I don’t even want to talk about this anymore. I don’t want to be a burden to the people that love me so, frankly, I’d rather pay this guy to listen to my whining for an hour and have a better time with the people I love.

I actually had no idea how all pent-up this was until I started hiccup-sobbing in his office before I even sat down.

There was a lot of blubbering and personal stuff, but I will try to give you a less exciting example of one thing that upset me to demonstrate what we talked about.

“I can’t even go to the (hiccup) gym because of my elbows.”

“Why not? Did you talk to your instructors and see if you could modify? Do you think they would understand if you needed to take a breather or skip the things you couldn’t do? You see things as black-and-white, but they don’t have to be that way.

Living in the gray is not something that I can naturally do. I’m a go-getter, a perfectionist, a people pleaser, a goal setter, and an overcommitter (not a word, but it should be!)

Today I started making a list of the things that I do where a gray hue could exist.

Black- I make a fantastic meal to wow my whole family.
White- We eat cereal and I feel like garbage.
Gray- I start stocking up on a few convenience food items so I have a few nights off from cooking.

Black- I manage my time really well and feel productive.
White- I don’t work and watch Netflix, stressfully doing my deadline on the day of the project due date.
Gray- I work for a few hours and then let my body rest. I can come back to it the next morning because I plan ahead.

Black- I maintain a pristine home.
White- I let it go to hell in a handbag.
Gray- I try to pick up, but hire someone to help me clean every other week.

Black- I do everything because I am the only one who does everything the right way.
White- I can’t do everything so nothing gets done. I resent all the sloths in my home.
Gray- I make a list and ask everyone to help me. It isn’t the way I do it, but I have to be okay with that. THIS ONE IS HARD!

Black- I spend my week socializing with friends and get behind on my work.
White- I spend my week working at home alone feeling isolated.
Gray- I schedule more meaningful times with friends having coffee and still manage my work.

Black- I push through my pain so I can have an incredibly productive week.
White- I don’t do anything because I’m having a bad day.
Gray- I do what I can, but I don’t push through creating another setback for my life.

Black- My body feels great and I go to the gym.
White- My body doesn’t feel good so I sit on the couch all day.
Gray- My body doesn’t feel good, but I plan walks with family and friends. I get fresh air and keep my old joints moving.

You get the idea!

Pulling back the curtains is always humbling.

It also, I hope, makes me more human.

I share this because maybe I’m not the only one with black-and-white vision.

Perhaps, there is a whole new world waiting for you too in the gray.


Fabric Flower Wreath for Spring

Wednesday, March 1st, 2017

Fabric Flower Wreath for Spring from MomAdvice.com

This post was created in partnership with Waverly Inspirations. Thank you for supporting the companies that support our site! 

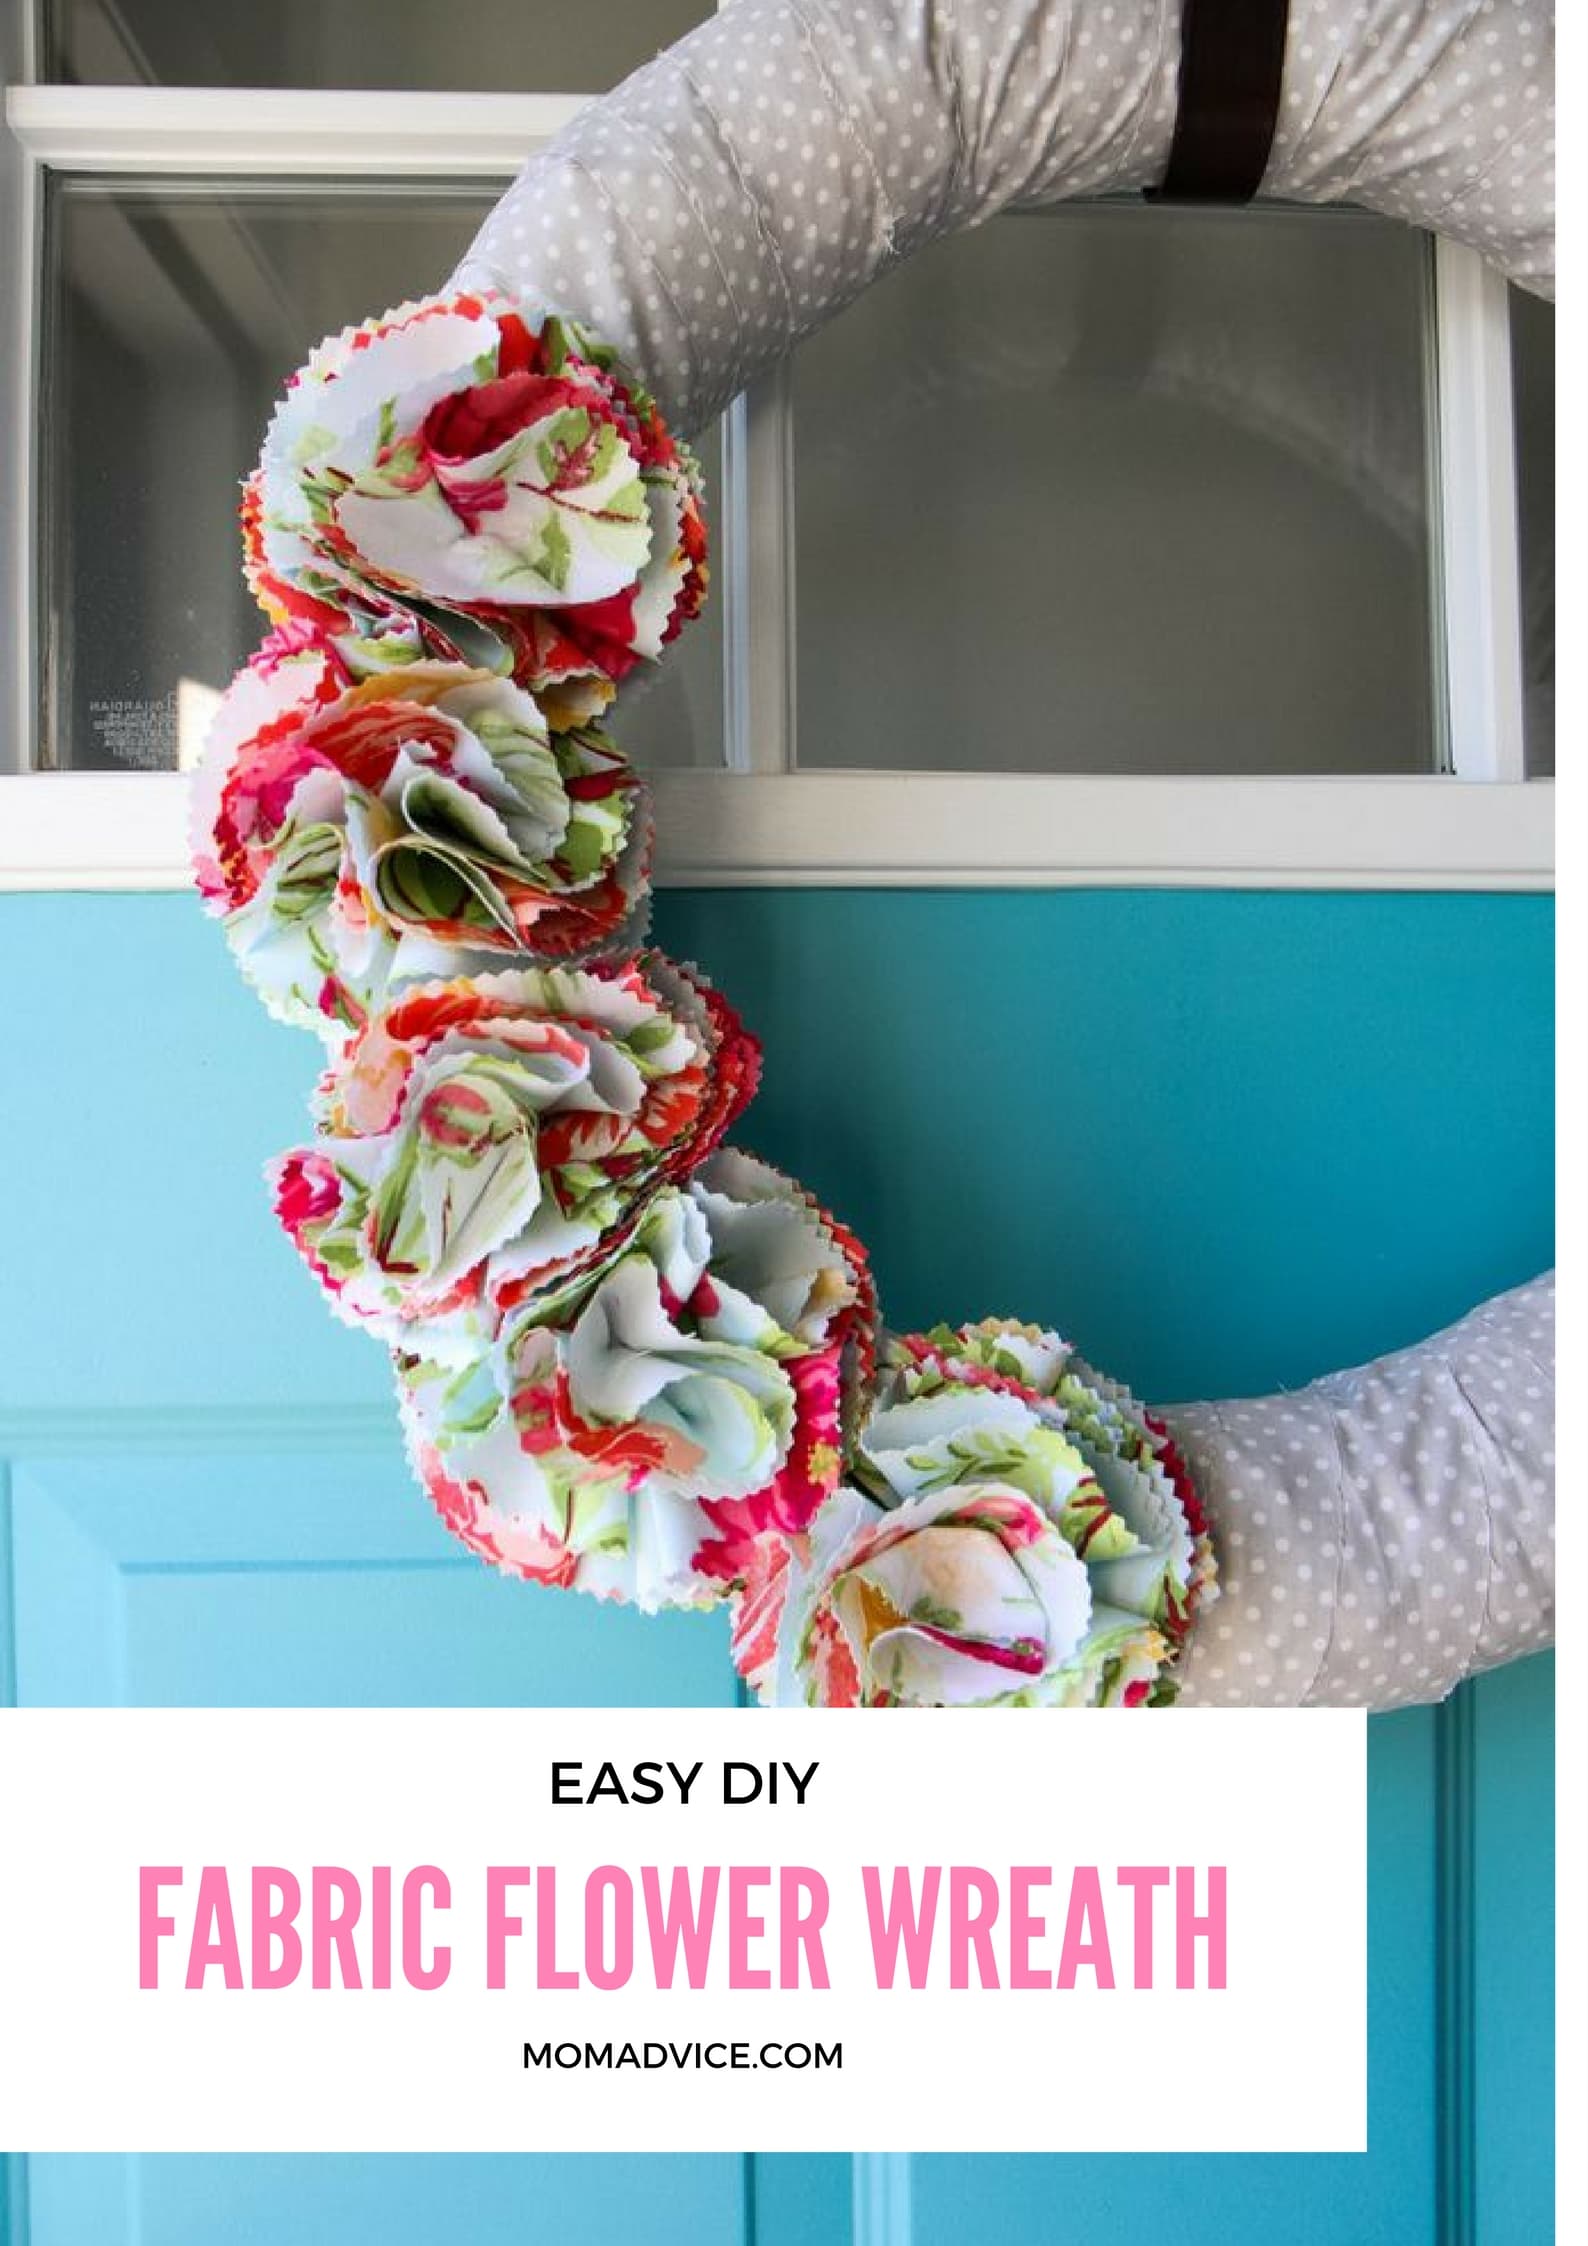
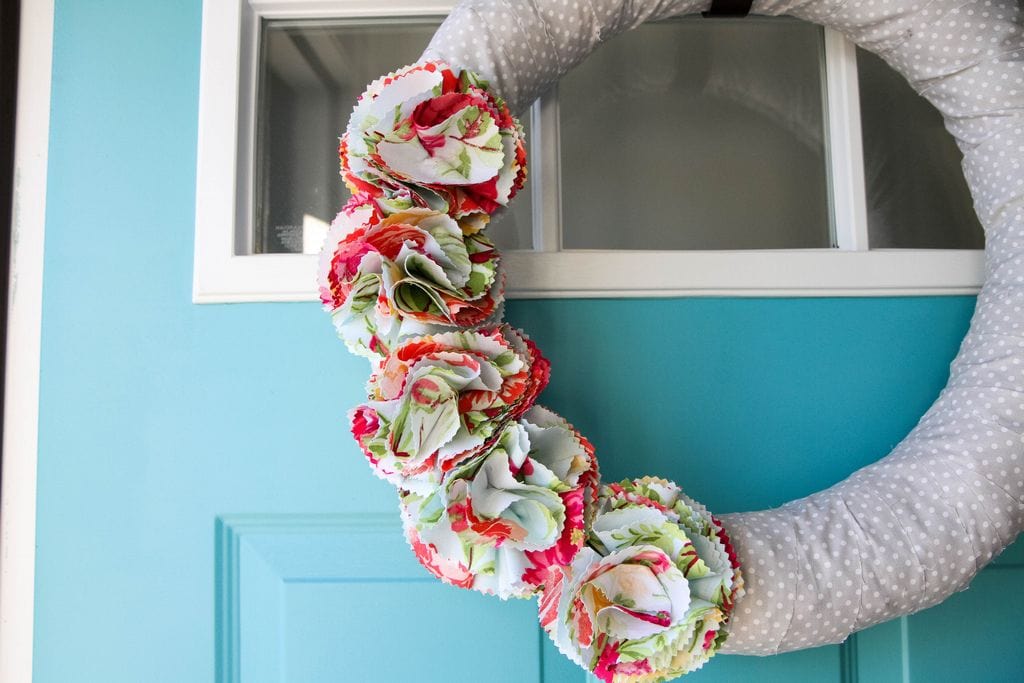
You will rarely come to my house and not find a wreath on the door, but I must admit that my DIY wreaths (after MANY years of use) are looking a little shabby. Working with Waverly Inspirations was just the push I needed this month to spruce up my front door. This fabric flower wreath tutorial is just what you need to get your door ready for spring. If you haven’t made fabric flowers before, I’ve got you covered with a step-by-step picture tutorial.

I am a big fan of recycling and reusing my craft materials so I cut all of the materials off this DIY yarn wreath and reinvented it into a spring wreath. Six years ago I purchased that straw wreath for $4 and it is STILL going strong.

Pretty amazing!

Also, if you have ever priced out purchasing a wreath, you know how much you are saving by making your own for your front door.

Today I wanted to put some of their fresh spring fabric to work to wrap and decorate our wreath. Although I will be doing these fabric flowers with a needle and thread, they can also just as easily be pulled together with a little hot glue. The best part? This is a craft you can do while getting in a good Netflix binge.

This craft was cranked out with a little American Crime Story. PS- LOVING it.

Fabric Flower Wreath for Spring from MomAdvice.com


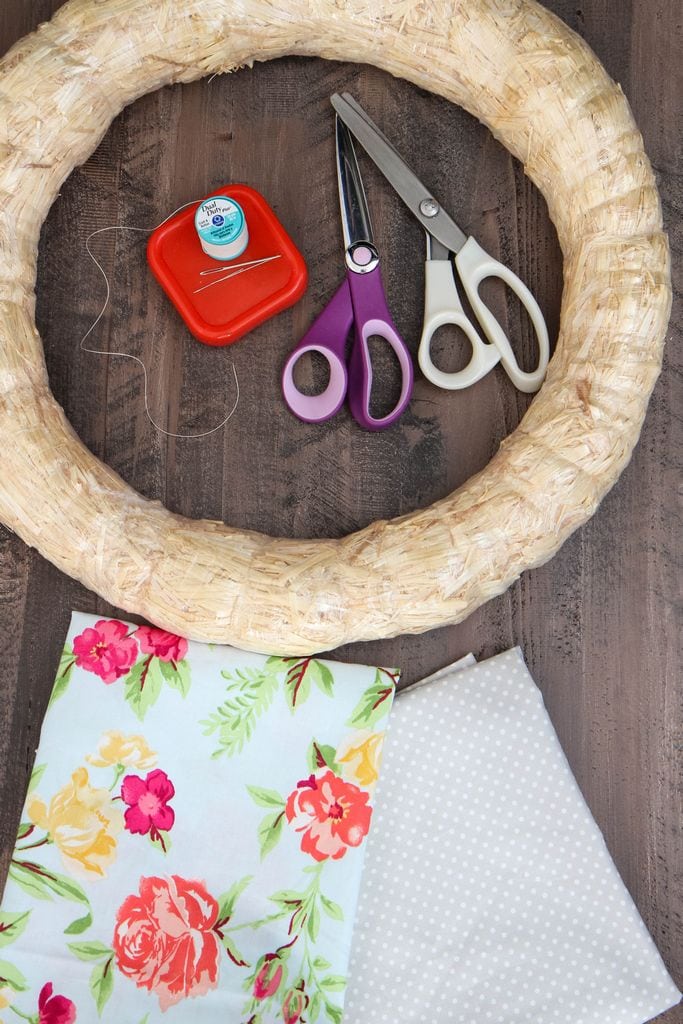
Supplies Needed (all of these supplies can be found at Walmart!)

1/2 yard of two (or more!) Waverly Inspirations Fabric in coordinating patterns

Straw Wreath (whichever size fits your door the best!)- leaving the plastic intact on the wreath to cut down on the mess.

Needle and strong thread

1 piece of cardstock and a circular object (I used an oatmeal canister) to create your flower template

Straight Pins

Fabric Rotary Cutter (or you can use scissors)

Rotary Mat

Pinking Shears

How to Make a Spring Fabric Flower Wreath

Fabric Flower Wreath for Spring from MomAdvice.com

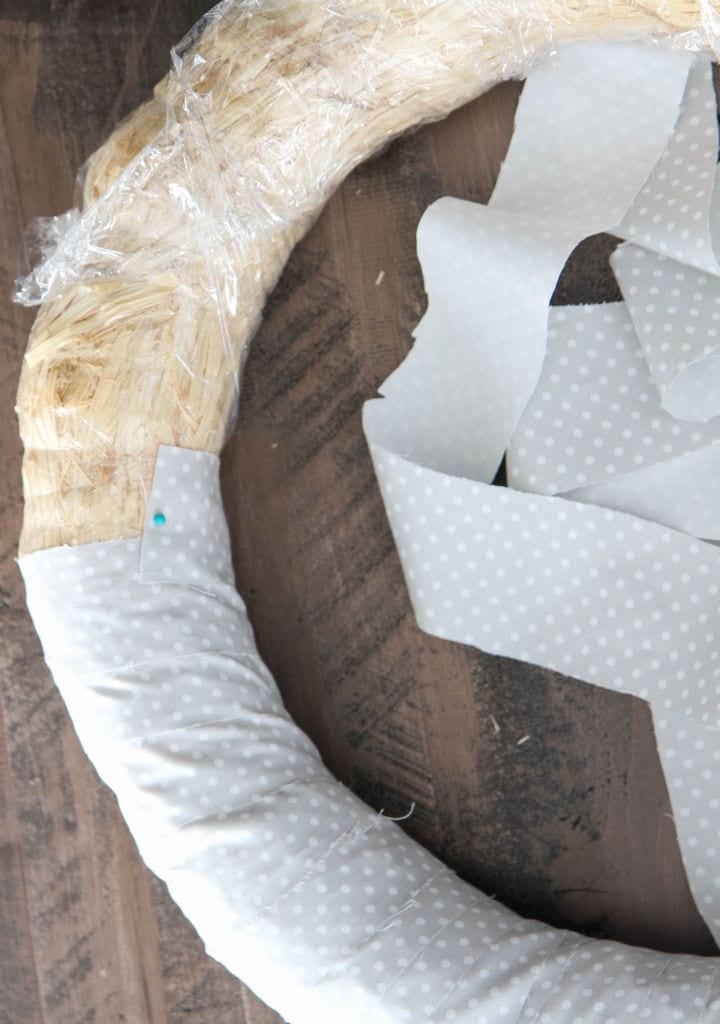
1. Begin by cutting fabric into 1 1/2″ strips with scissors or a rotary cutter. Wrap the fabric around the wreath, securing with straight pins. Once you come to the end of a strip, simply overlap with the next strip to try to camouflage those pins. Repeat this until the entire wreath is covered and set this aside.

How to Make Fabric Flowers from MomAdvice.com

2. Using a round object in your home for a template, trace a circle on cardstock to create your template for your fabric. The larger the diameter of the item, the larger your flower so size it according to your wreath or how dramatic you want to go!

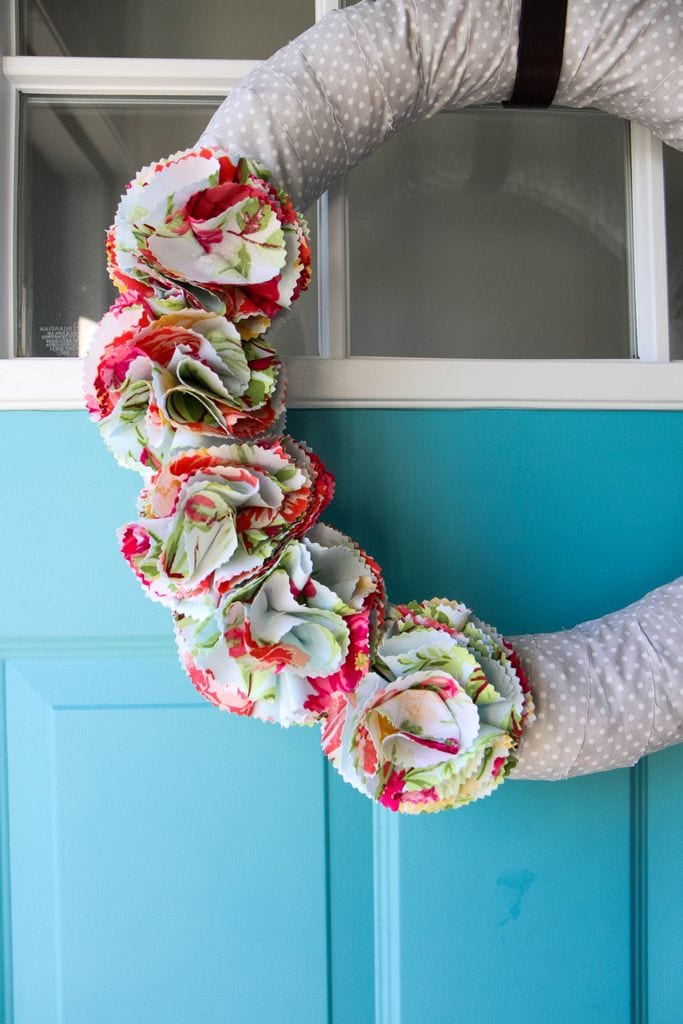
3. With pinking shears, cut 9 fabric circles for each fabric flower you will be making. I made five of these flowers (that means 45 cut circles) for my wreath. In floral design, it is always advised to go with an odd number to create a good design for your project so I stuck to the odd number of 5.

4. With one fabric circle as a base, begin creating the petals for your flower by folding a circle in half and then in half again (it will look like a little triangle)  and aligning it to the fabric circle. Using your needle and thread (or a glue gun) secure this in place with a stitch. Repeat all the way around the flower for the base of these petals.

How to Make Fabric Flowers from MomAdvice.com

5. Layer another layer of petals on top and finish with the last one being in the center and swirled, as it would in a rose. Tie off and cut the end of your thread to finish these. Using a straight pin, pin your flower into place and then repeat with the rest of the flowers.

Fabric Flower Wreath for Spring from MomAdvice.com

Fabric Flower Wreath for Spring from MomAdvice.com

Fabric Flower Wreath for Spring from MomAdvice.com

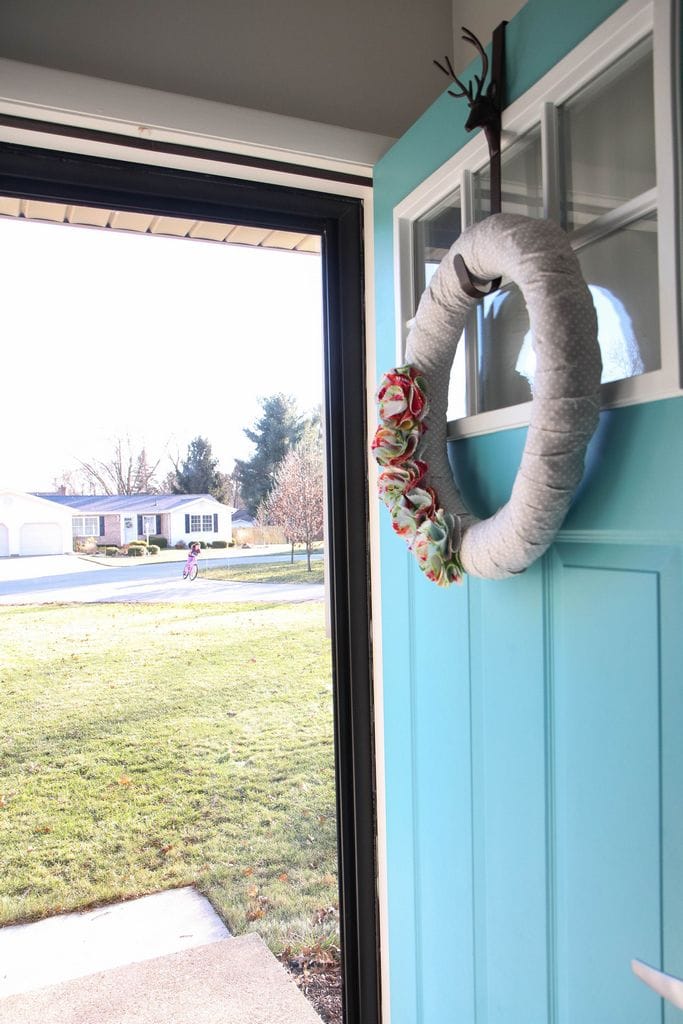
You guys! I’m in LOVE! This is such a fun pop of color on my door, cost practically nothing, and I can switch out materials with the seasons if I get bored. I hope you love it as much as I do and feel inspired to make a wreath of your own.

My door is awfully happy this month!

Fun Wreath Ideas from MomAdvice.com

Want to try some other DIY wreaths? Check out these tutorials for decking your door!

diy peep wreath

easy burlap wreath tutorial

how to make a yarn pom pom wreath 

handmade autumn burlap wreath

fabric wreath with matching garland

yarn wreath for all seasons (fun felt flower tutorial on that one!)

How about more craft inspiration from Waverly? Try these!

DIY No-Sew Reversible Chair Cushions

Fabric Wreath & Matching Garland

Fabric Bulletin Board Tutorial

Painting Pumpkins With Acrylic Paints

DIY No-Sew Hand Warmers

DIY Ottoman Serving Tray

15-Minute Scrappy Fabric Trees

Kid Craft: Easy Technique for Painting Gift Wrap

DIY Phone Charging Station

DIY Roll-Up Jigsaw Puzzle Mat

Fabric Flower Wreath for Spring from MomAdvice.com

This post was created in partnership with Waverly Inspirations. Thank you for supporting the companies that support our site! 

Pin It

DIY Phone Charging Station

Monday, January 2nd, 2017

DIY Phone Charging Station from MomAdvice.com

This post was created in partnership with Waverly Inspirations. Thank you for supporting the companies that support our site! 

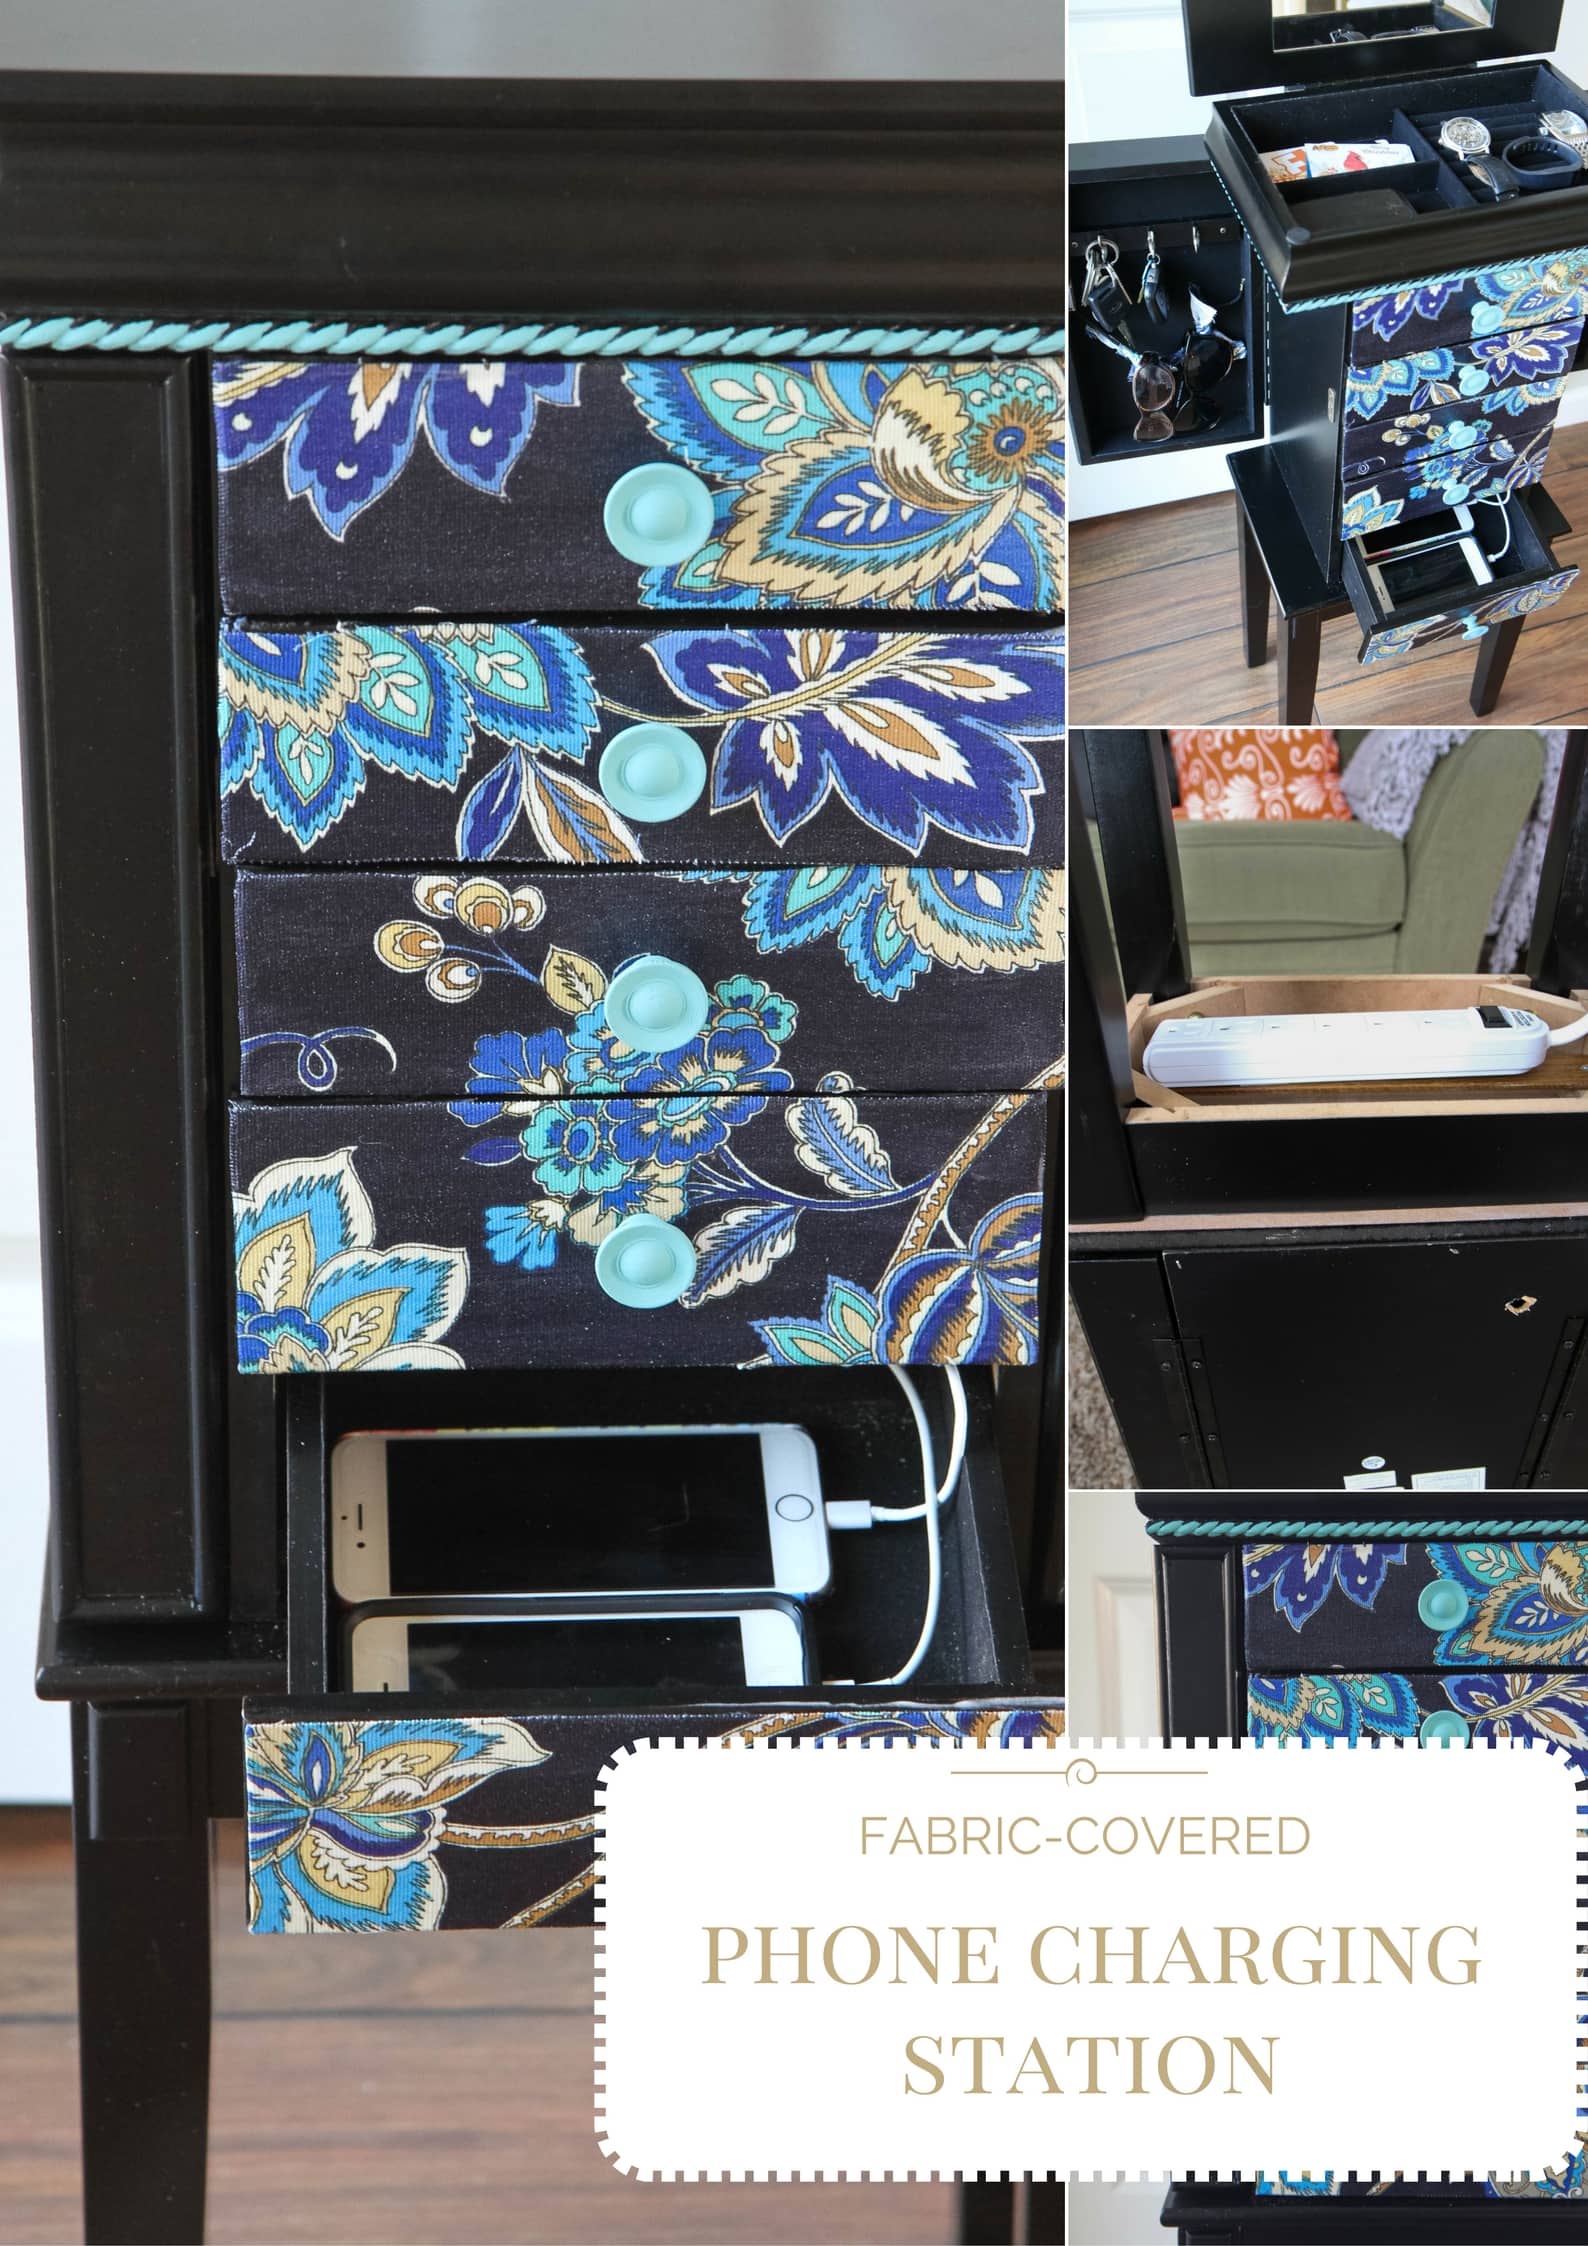
A  new year typically brings along new organizing techniques in our home. We have been struggling with keeping track of phone chargers, remembering where we left these poor devices to charge, and figuring out a system that doesn’t require taking up my valuable counter space. I decided I wanted to create a phone charging station that could house all of these devices and be our new landing spot for our home.

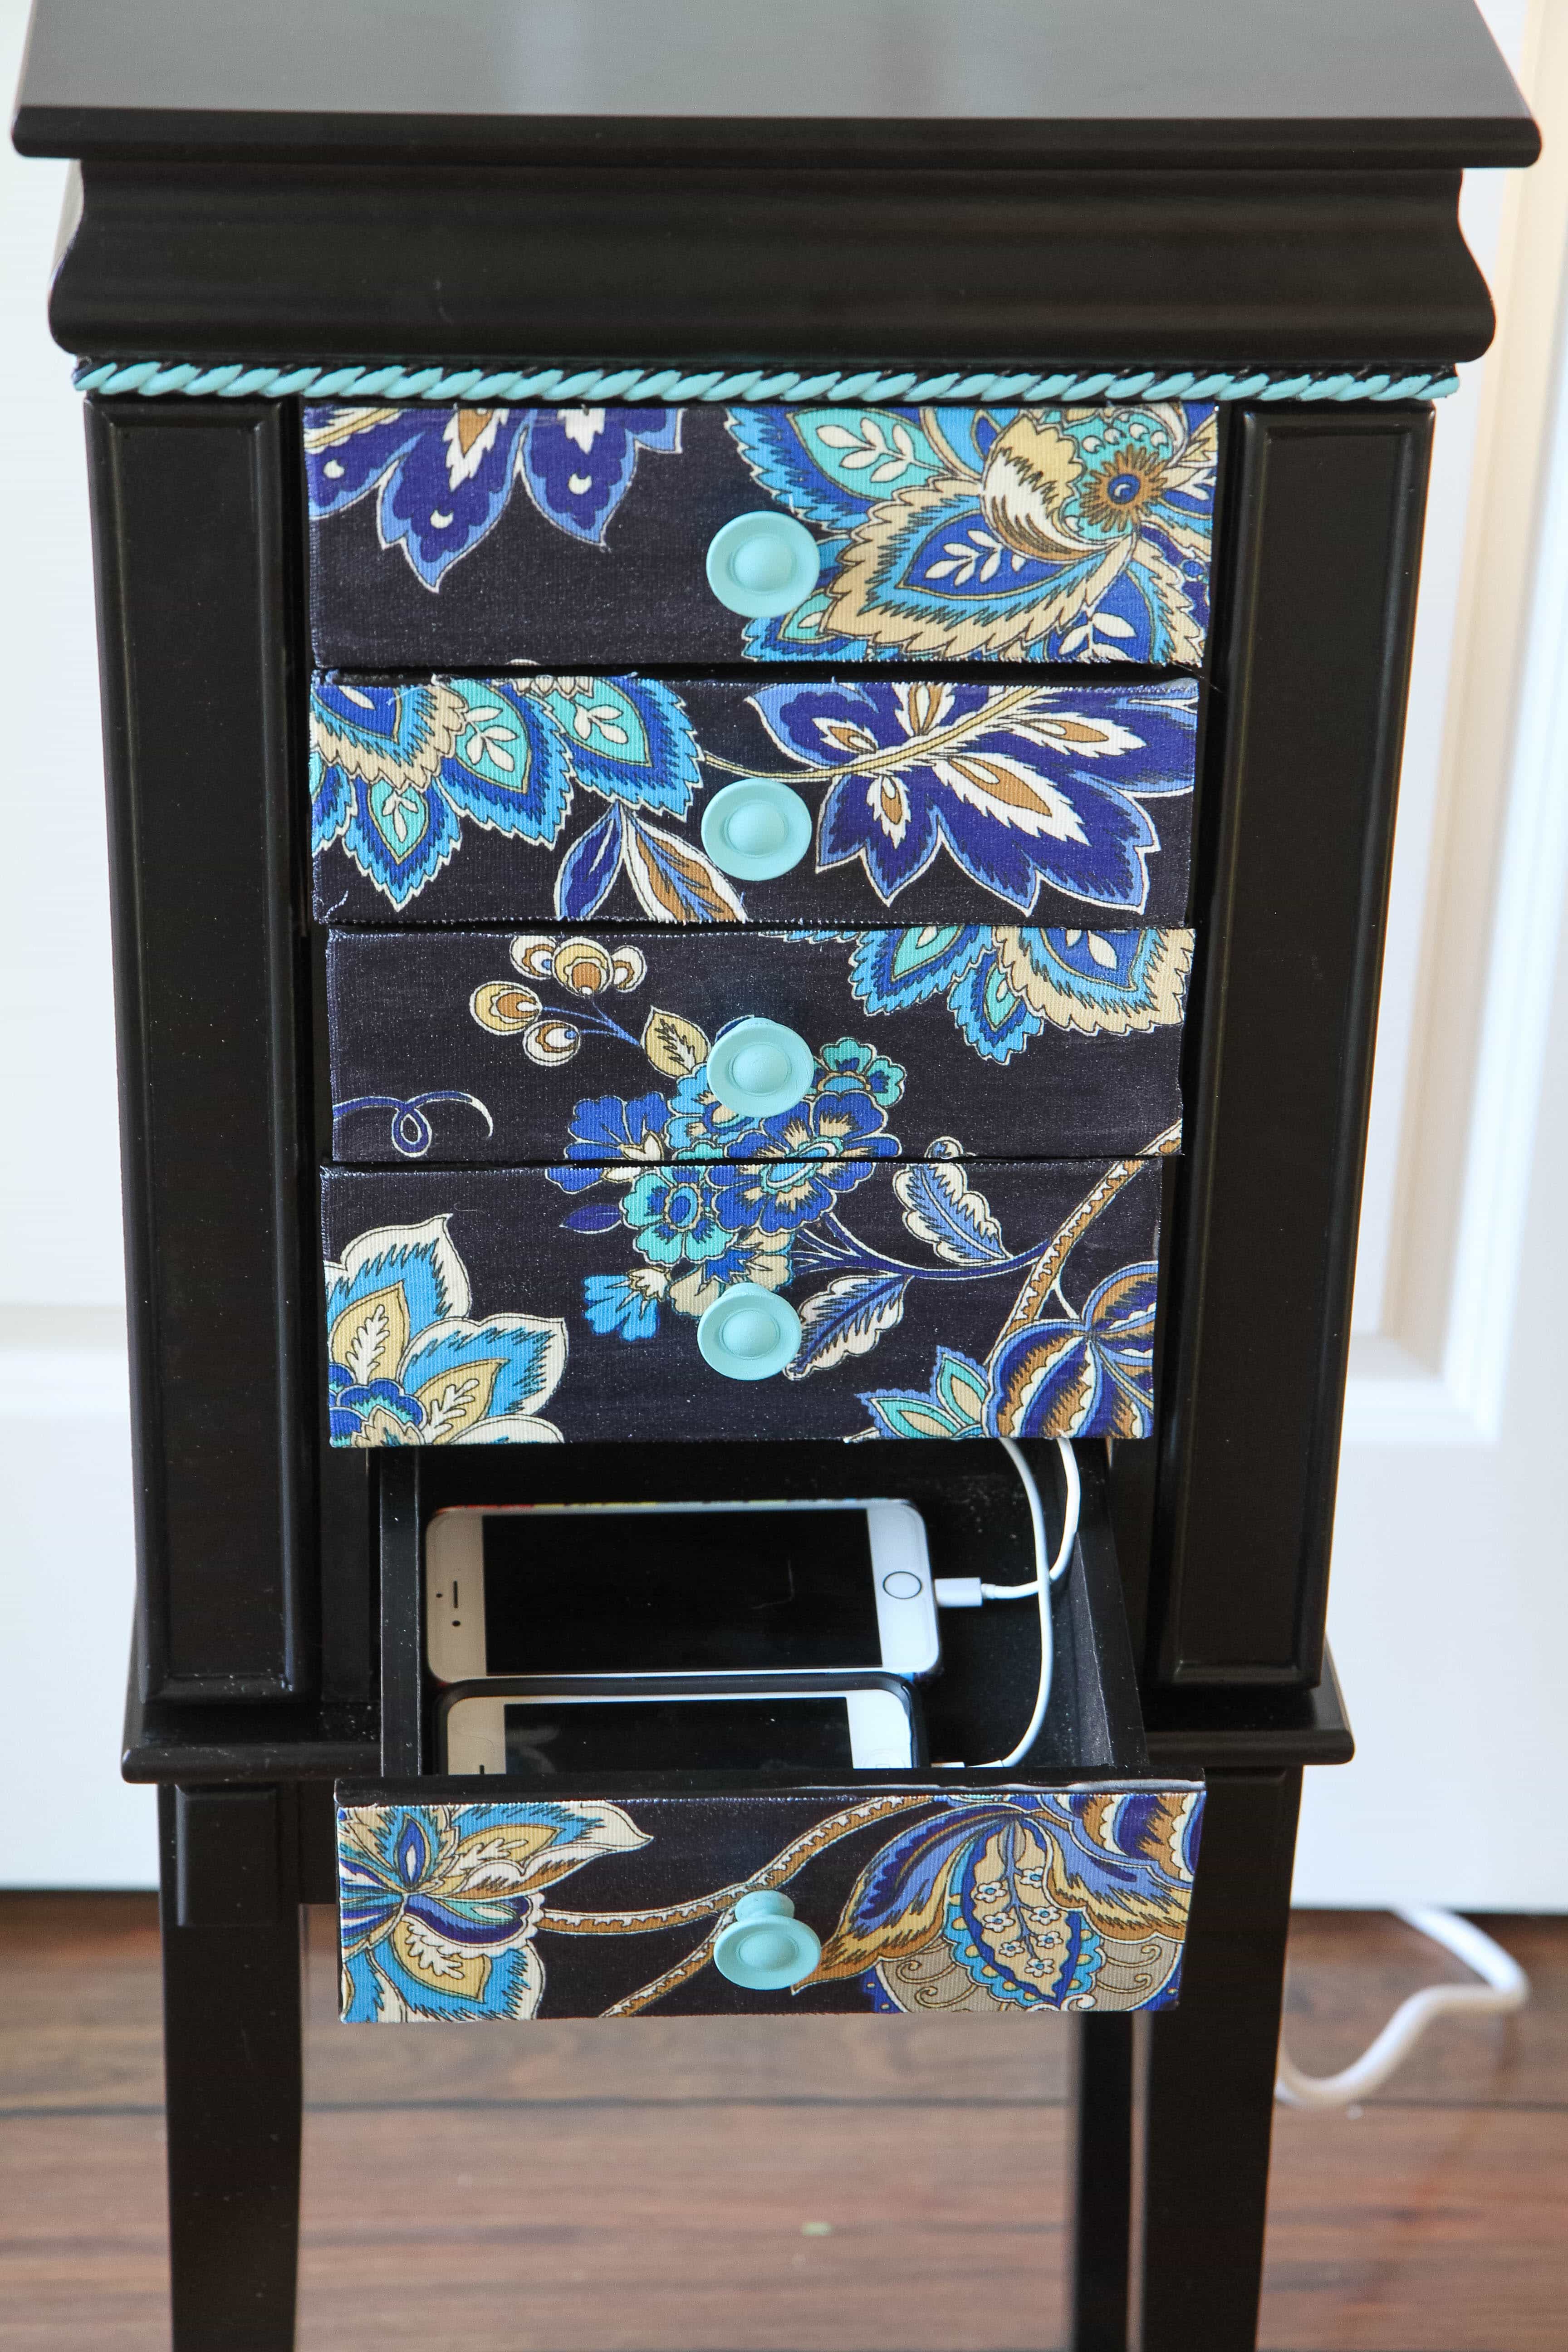
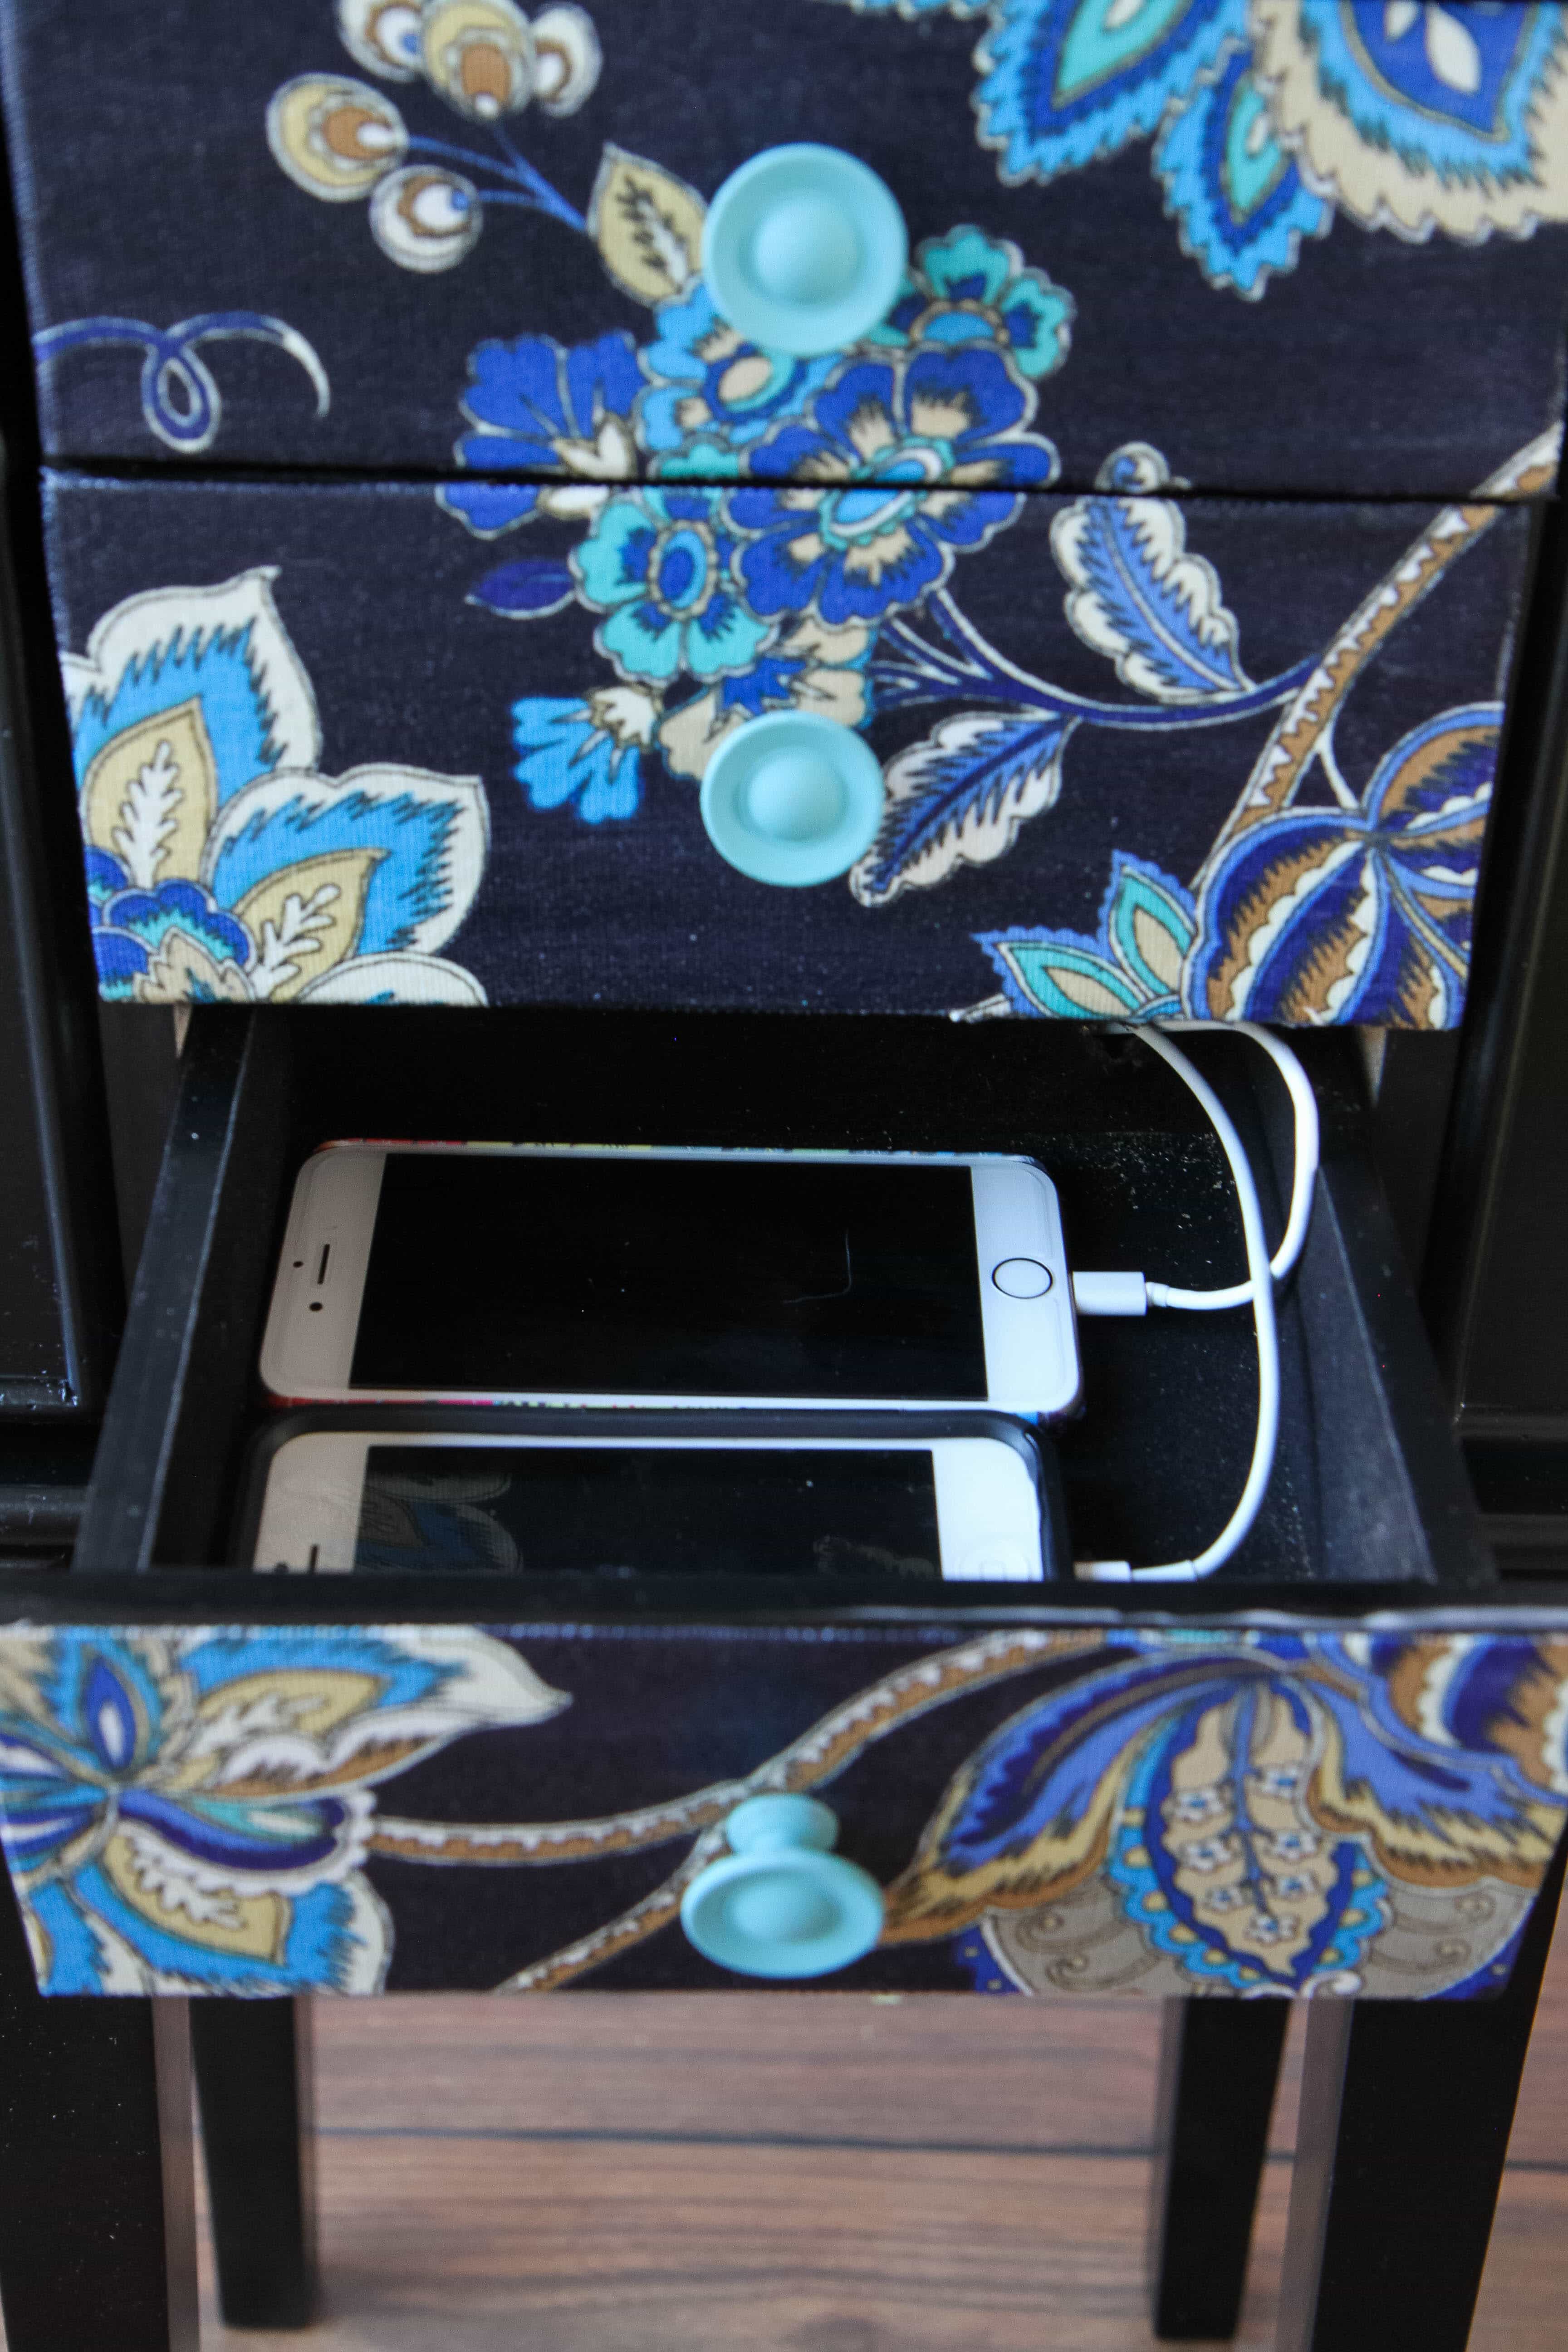
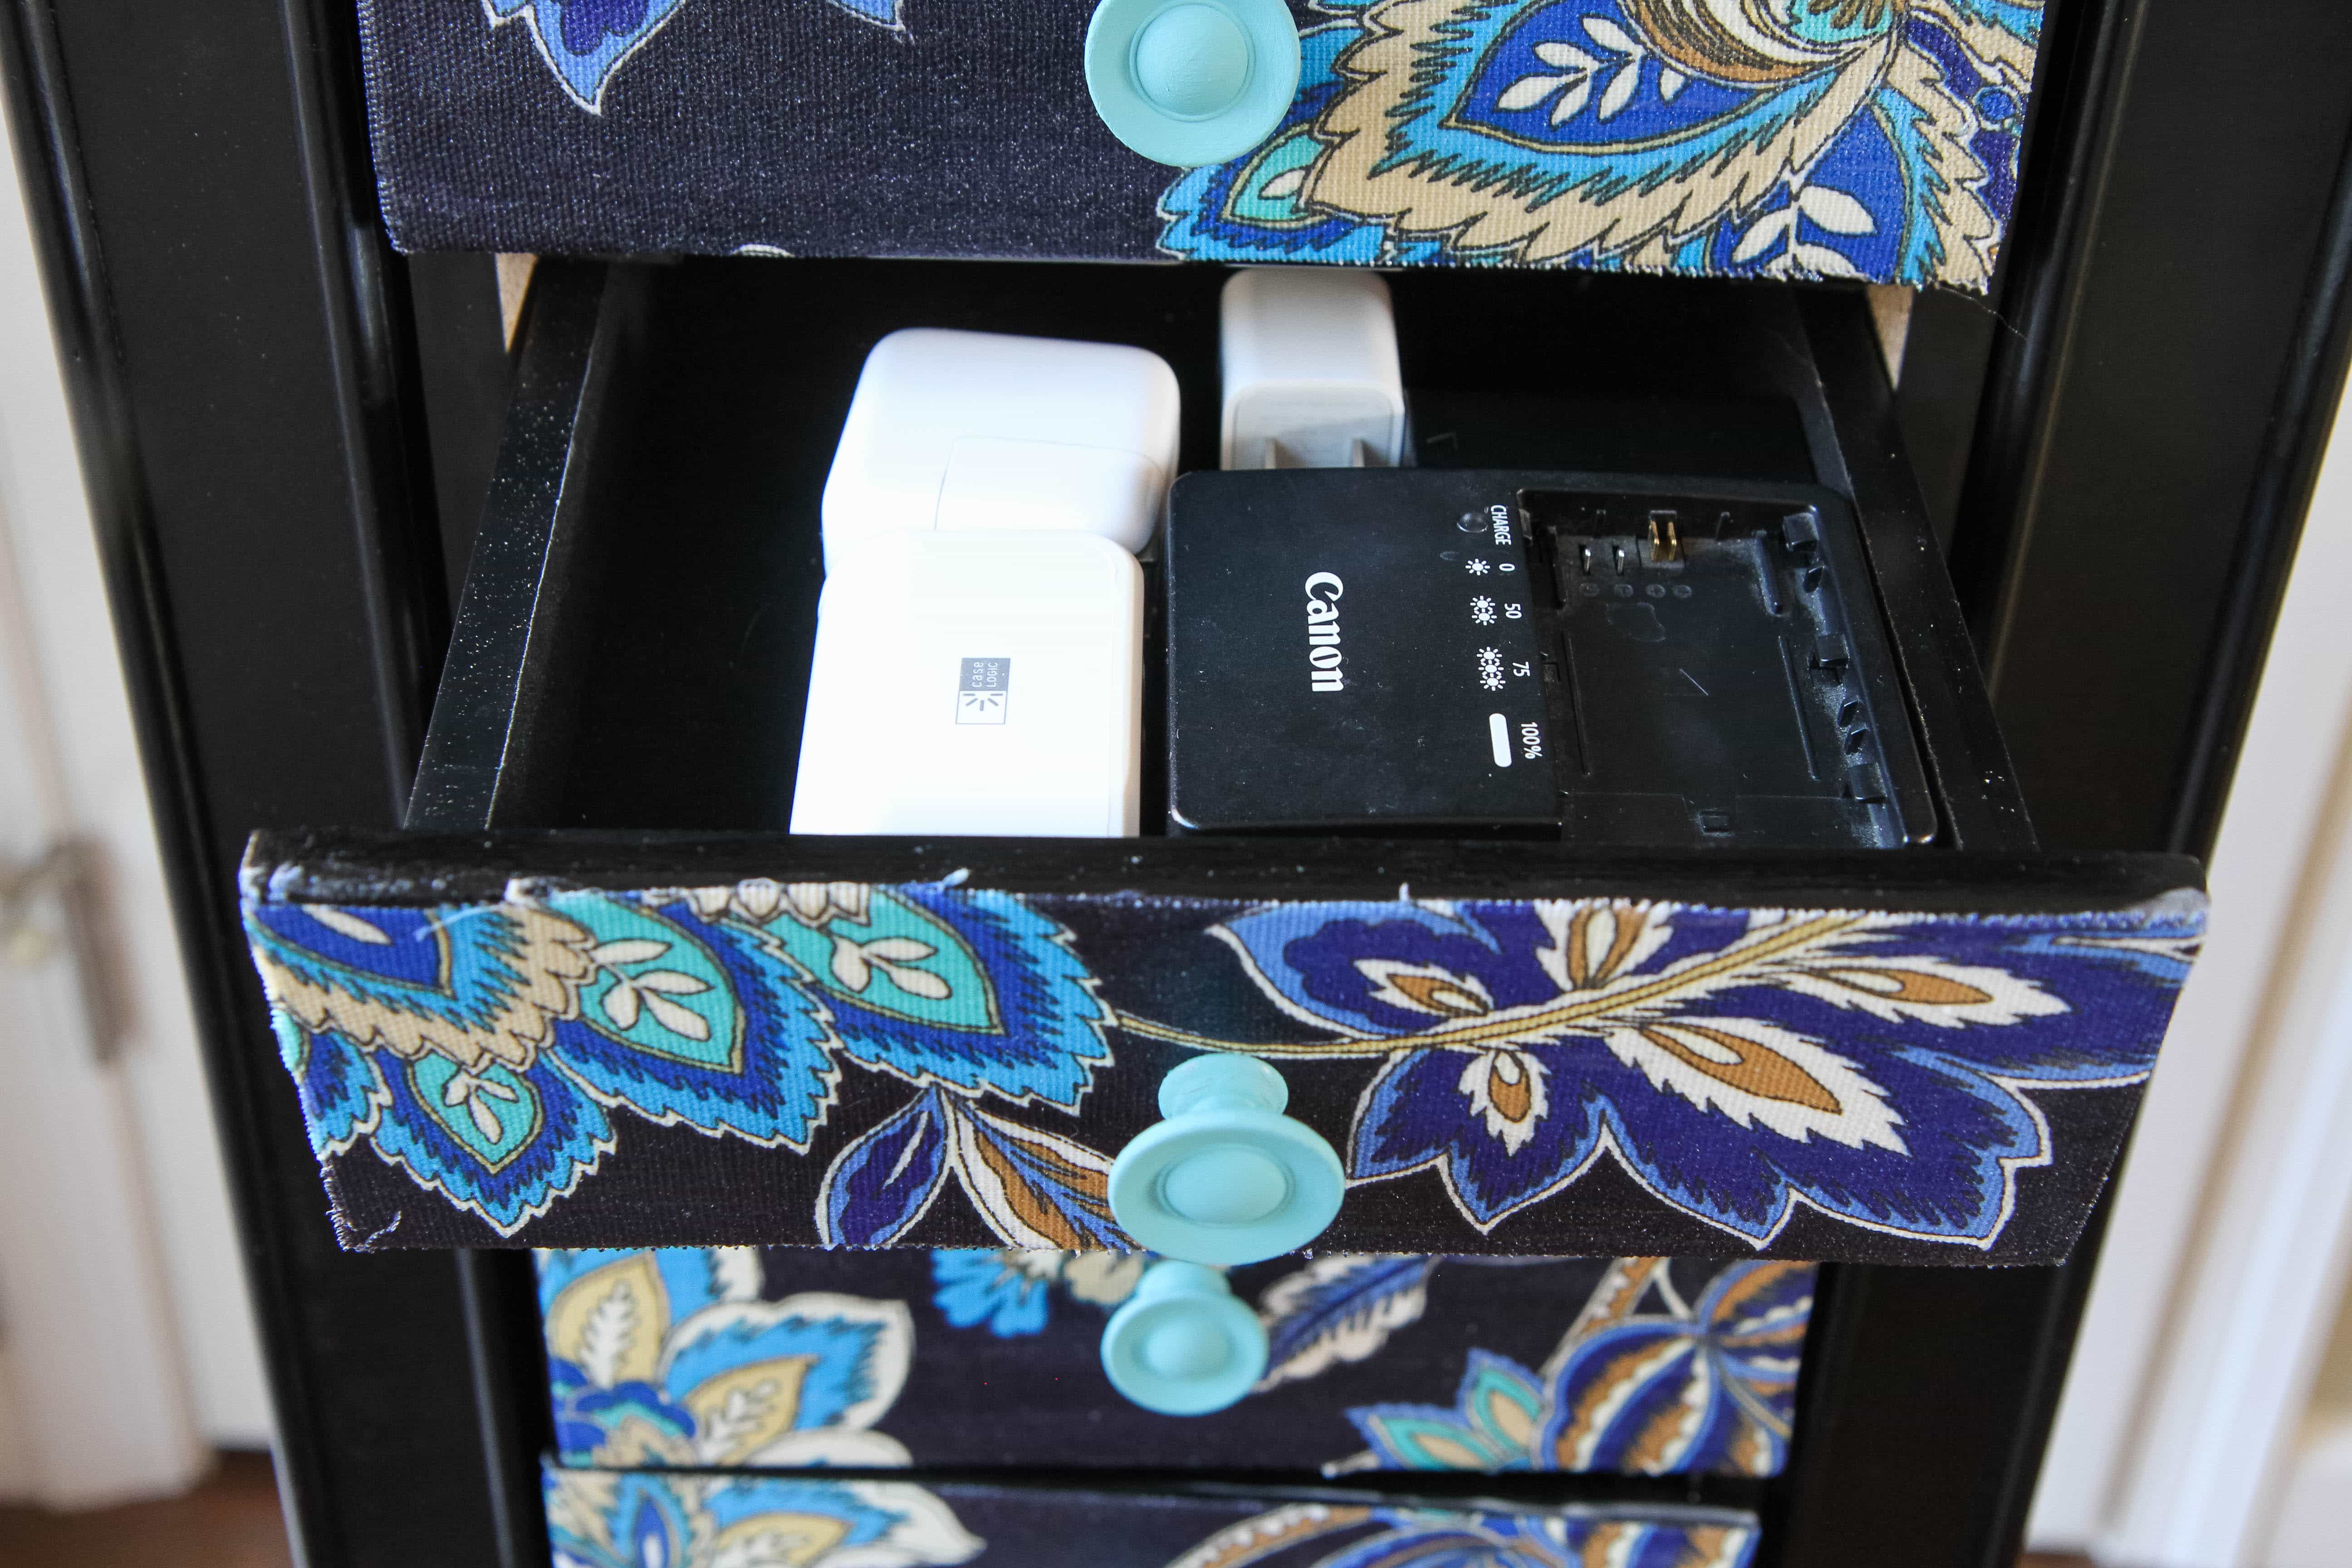
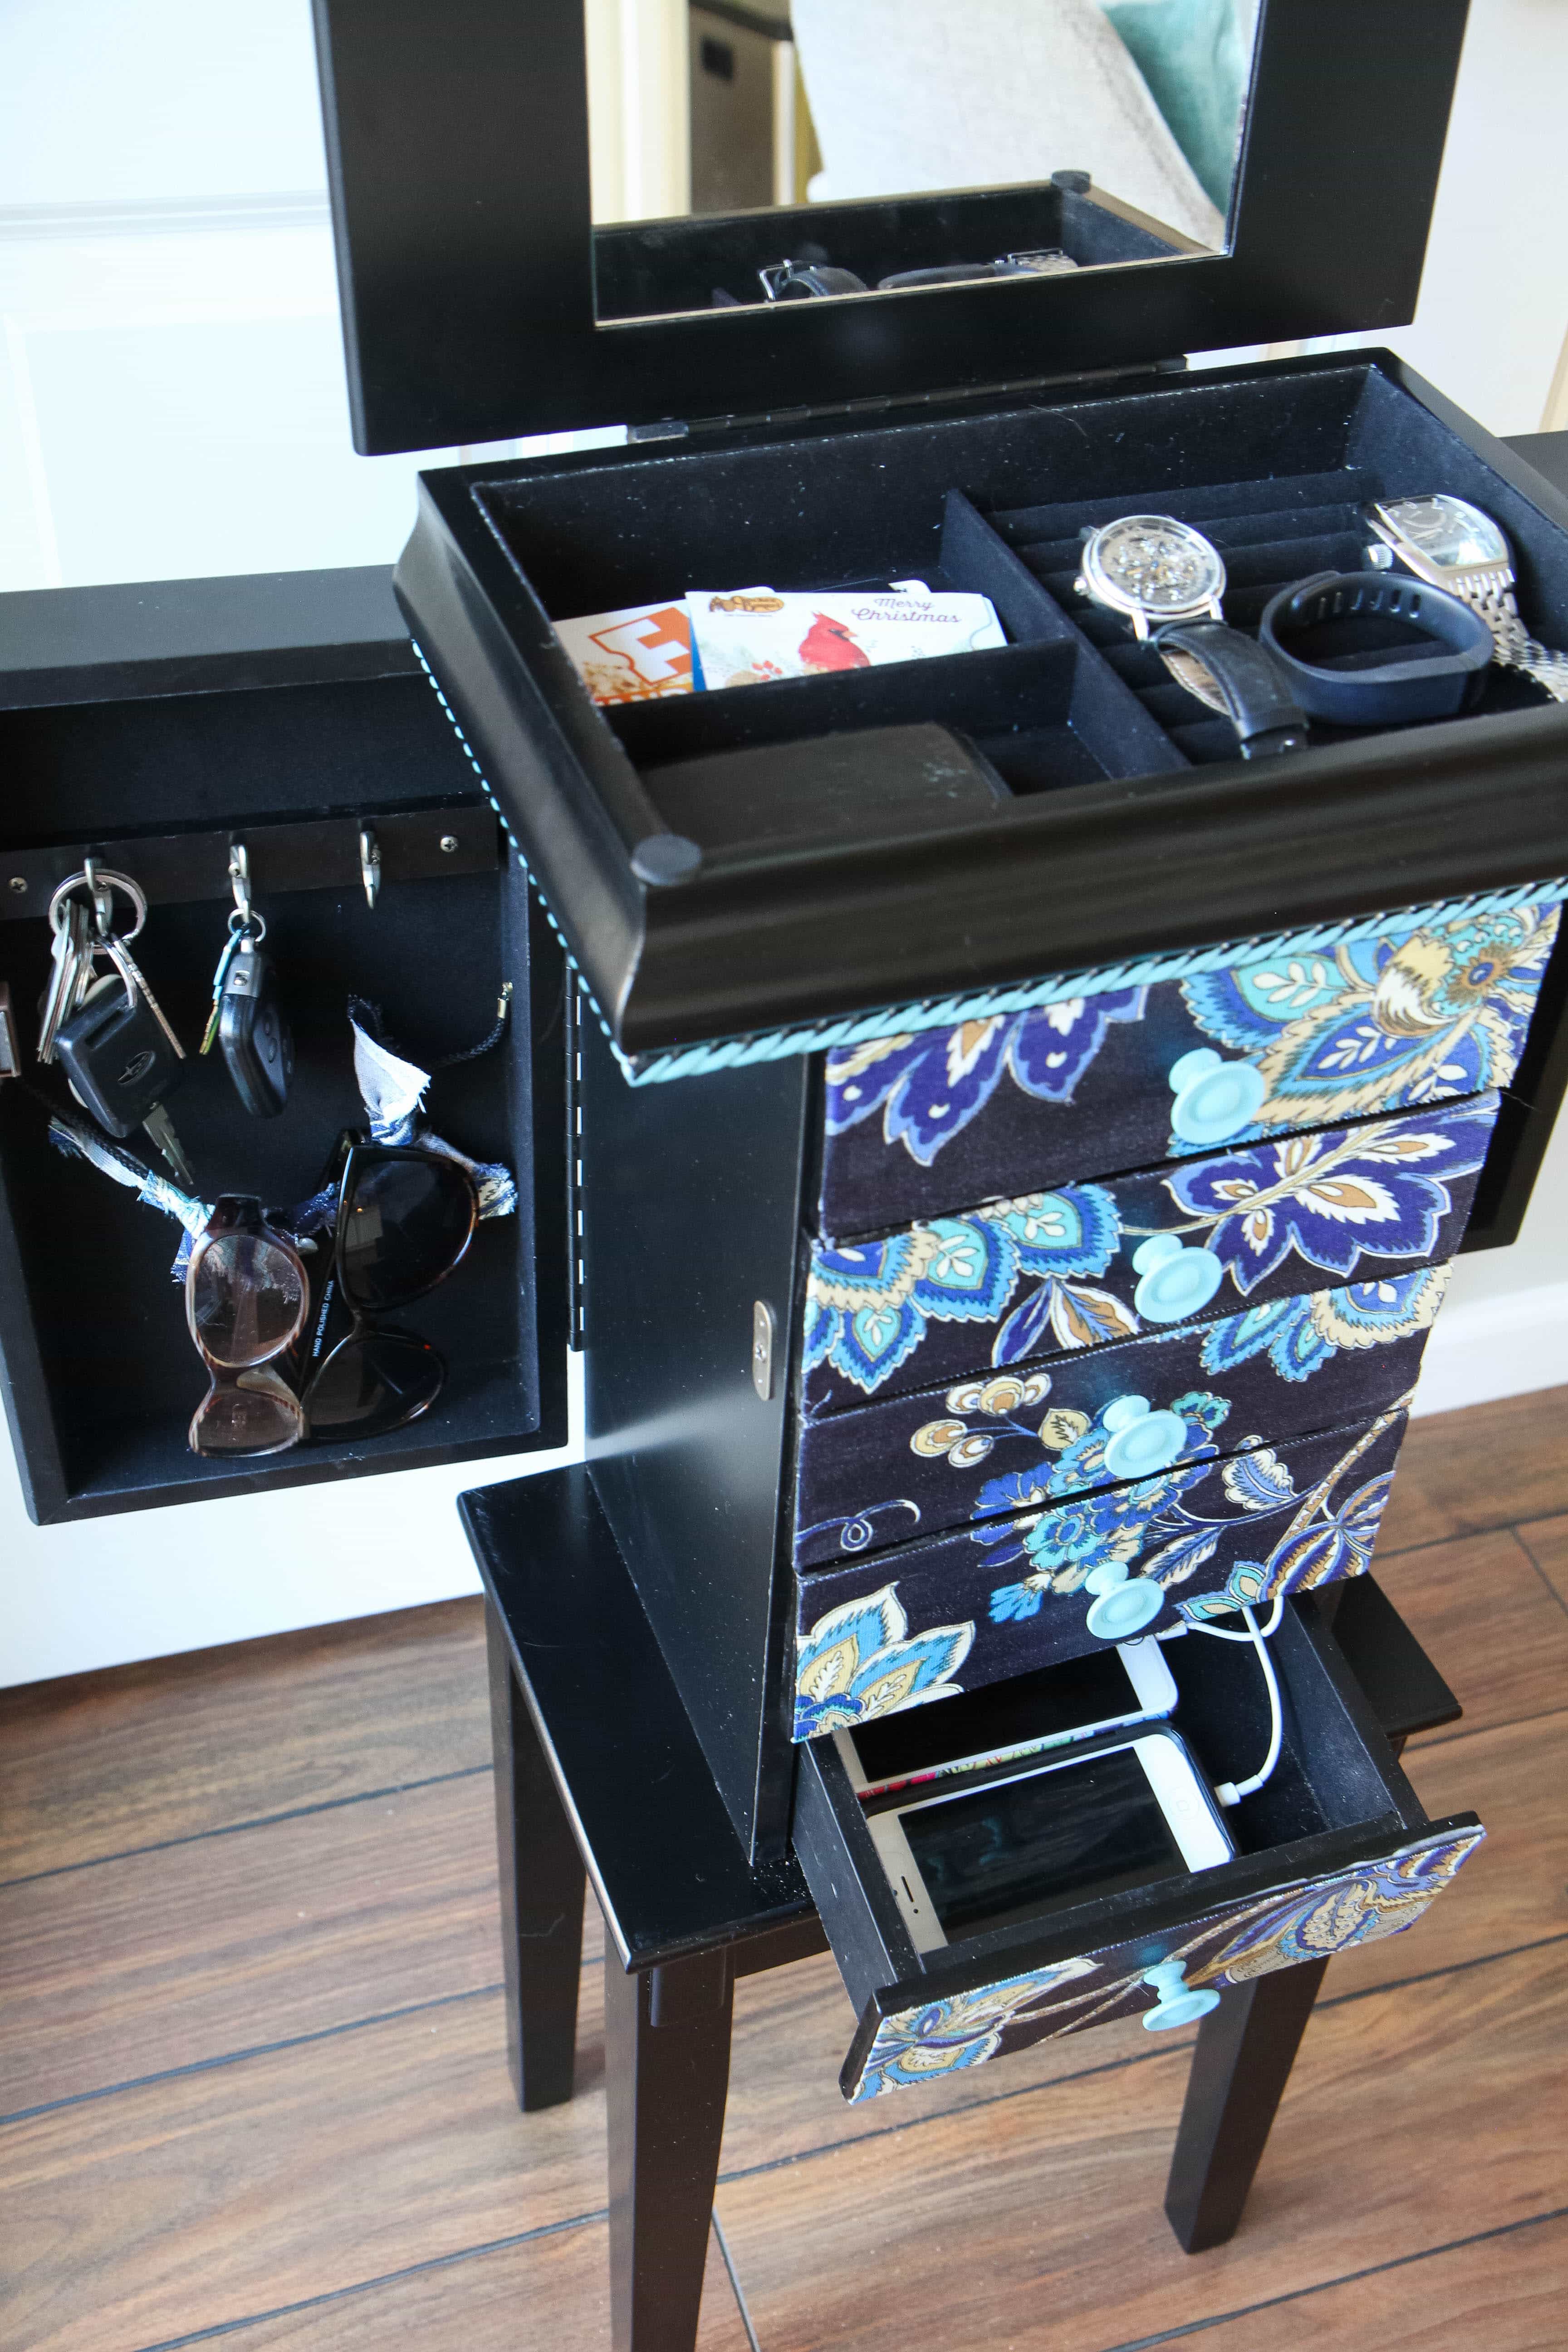
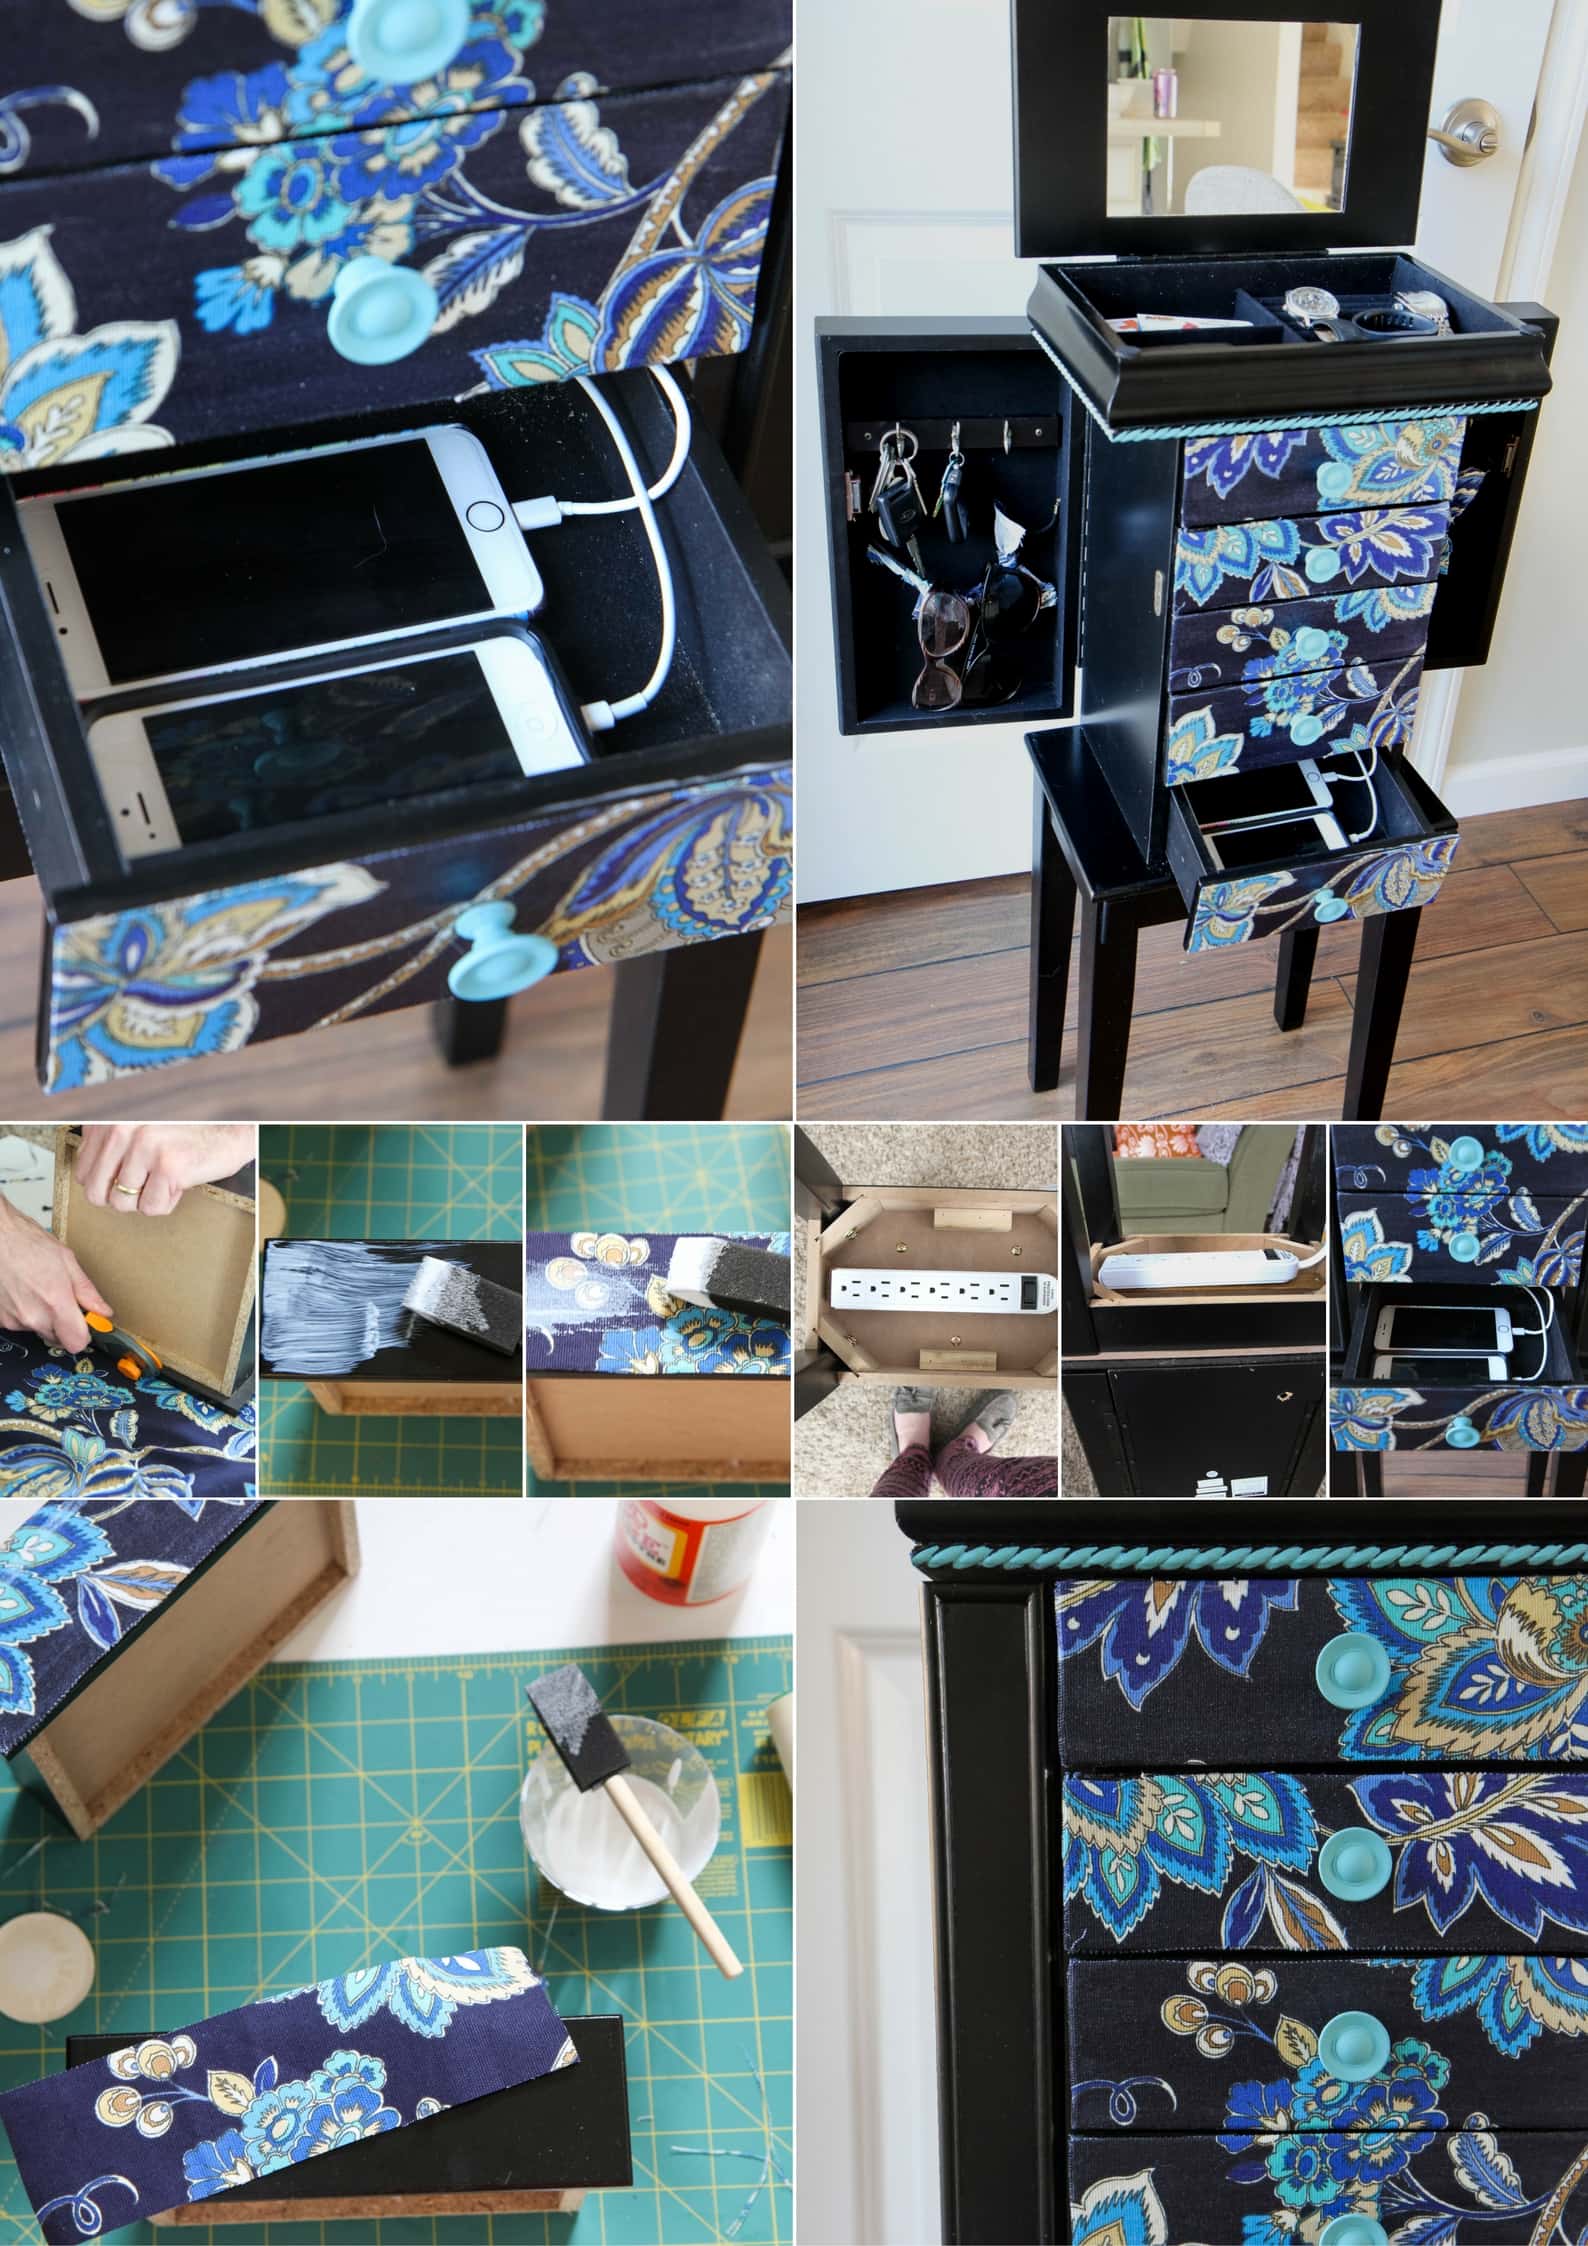
This DIY phone charging station is made out of a jewelry armoire and, not only will it house all these phones, it can also be the perfect organizing spot for keys, sunglasses, watches/Fitbit devices, & a place to keep those gift cards we got for the holidays. Wait until you see how we make the most of this little piece!

I also wanted to add a unique touch to this station with some of the beautiful Waverly Inspirations Fabric that I was sent this month. I have never added fabric to a furniture piece before, but not only is it super easy, it also adds a gorgeously unique detail that makes an inexpensive piece look a little more high end. It’s been on my craft bucket list to try this and now I want to add this special touch to a few more pieces in our home.

DIY Phone Charging Station from MomAdvice.com

DIY Phone Charging Station from MomAdvice.com

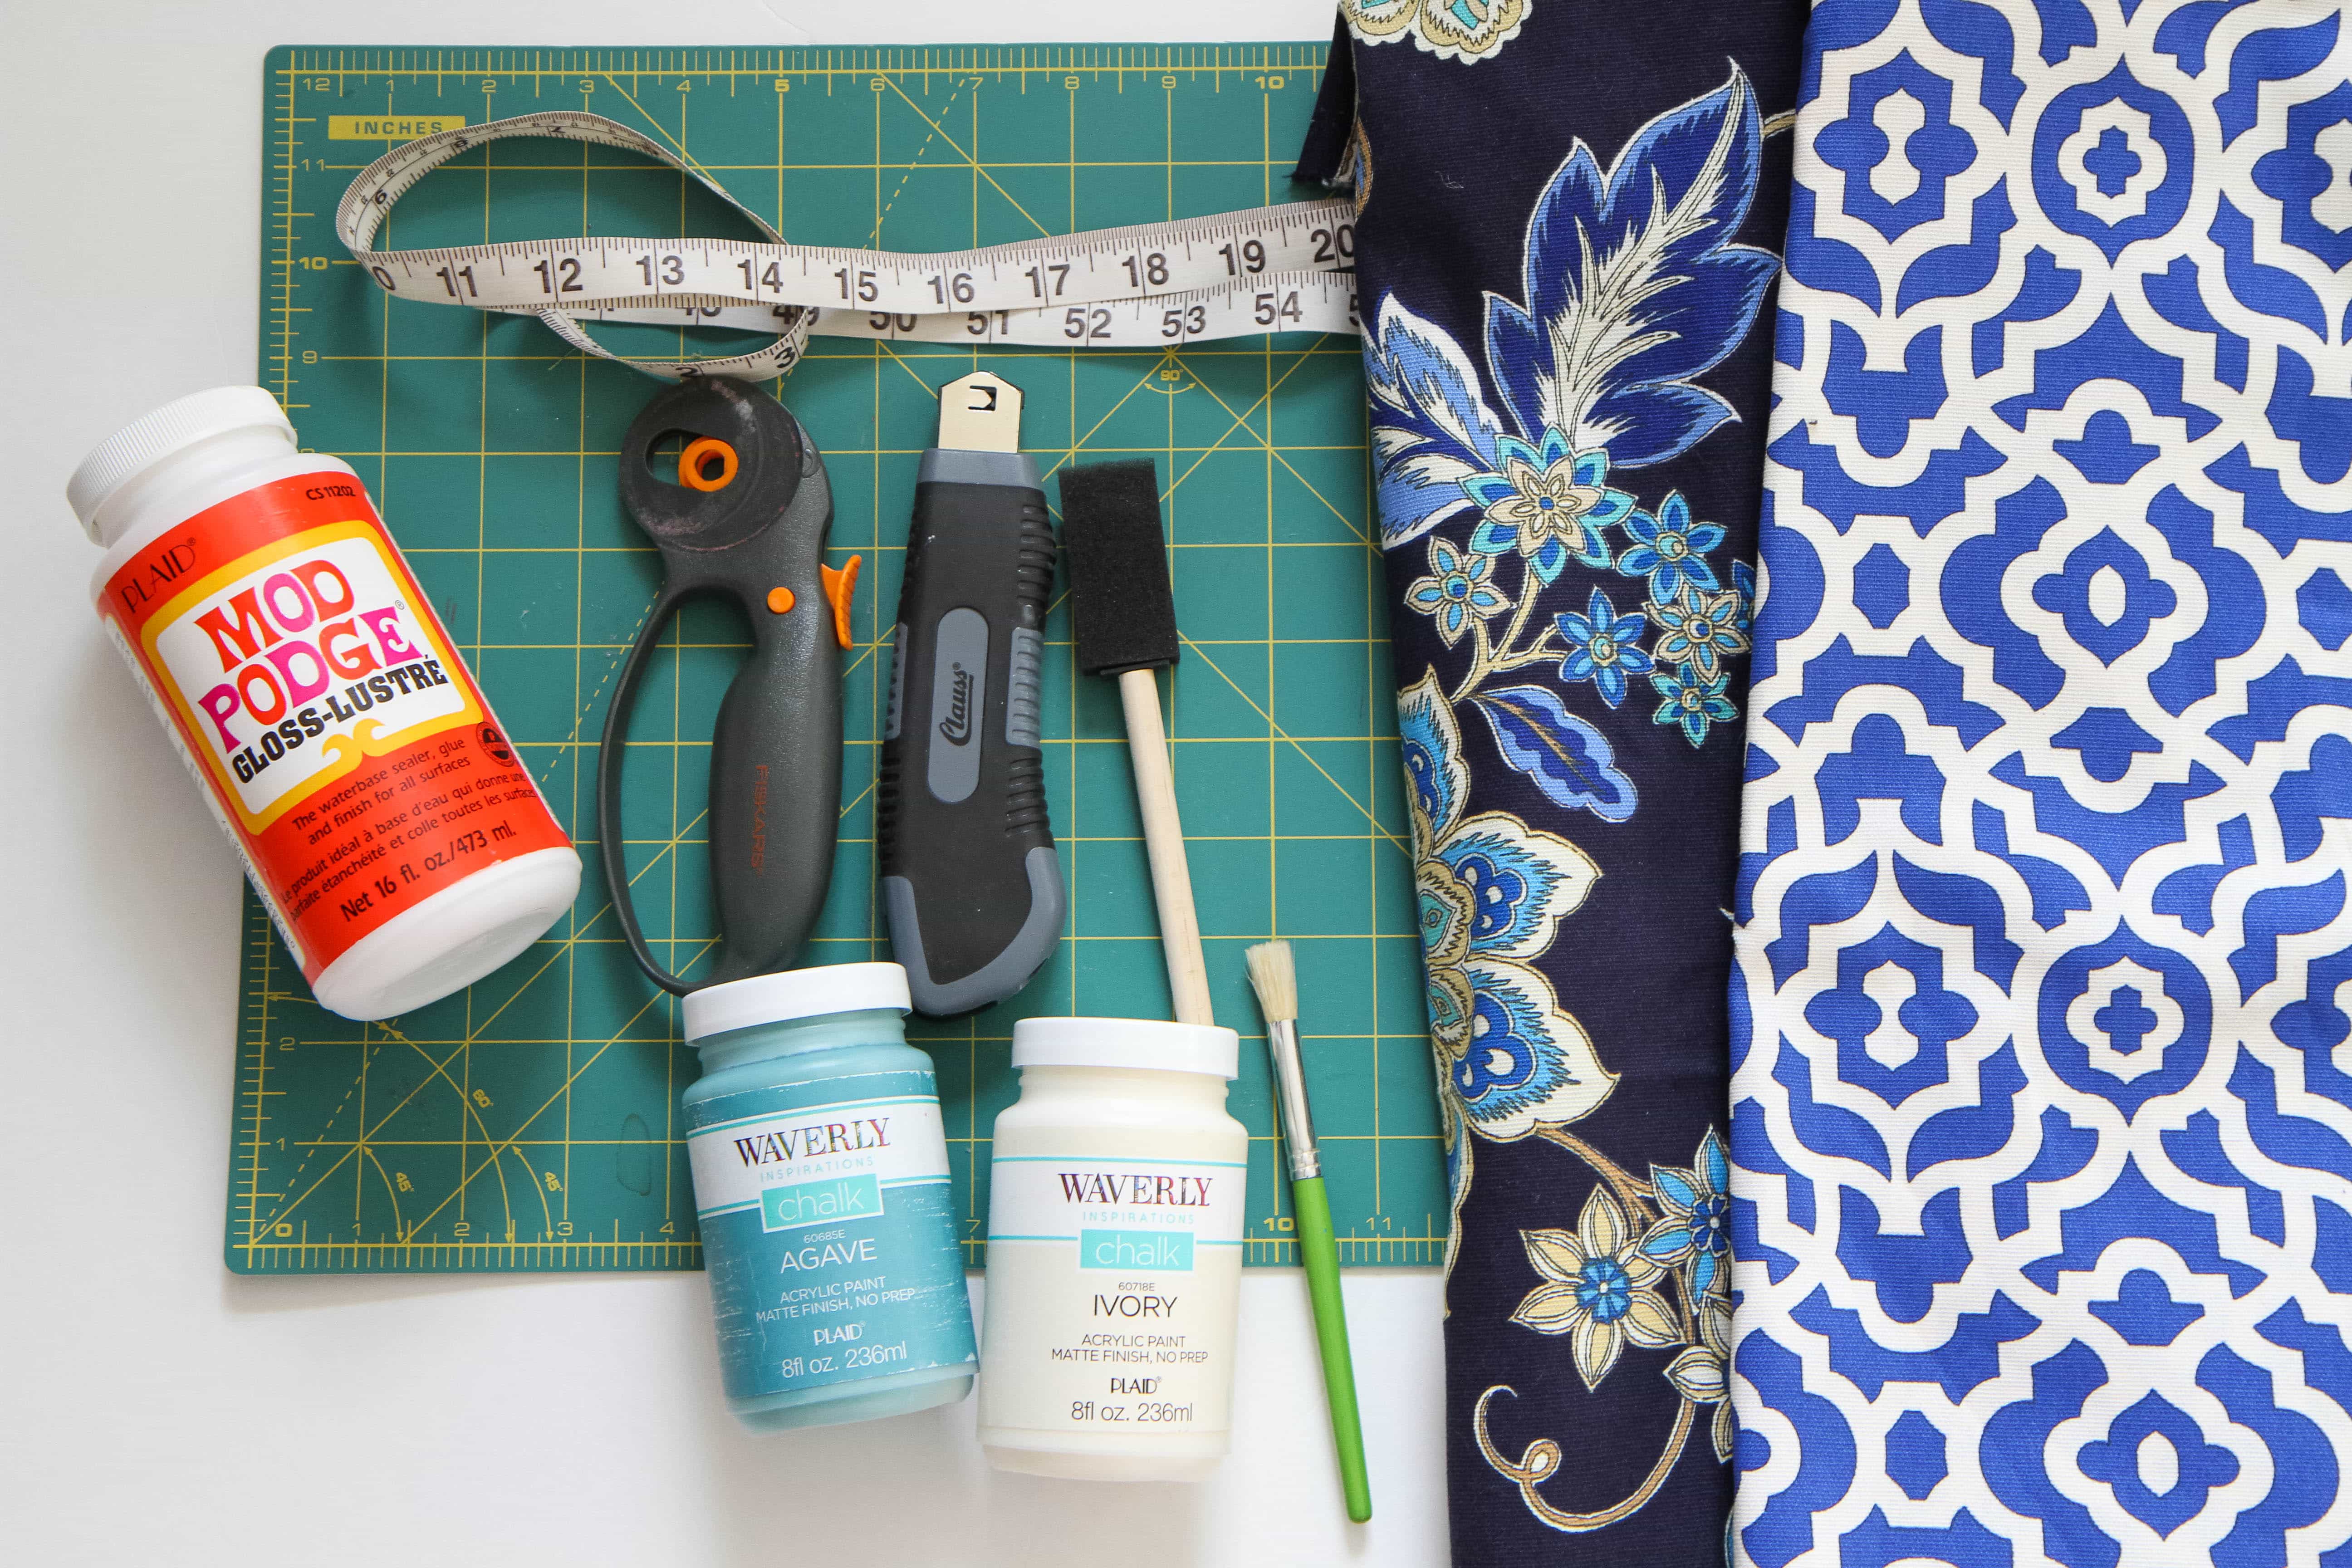
Supplies Needed (all of these supplies can be found at Walmart!)

Jewelry Armoire (you can browse all the options here)

Waverly Inspirations Fabric  (I used the 100% cotton duck fabric available at the store)

Waverly Chalk Paint in a coordinating color (I am using Agave)

Mod Podge

Paint brushes & Foam Brush

Fabric Rotary Cutter (or you can use scissors or a razor blade for trimming)

Rotary Mat

Drill

Scrap Wood

Screws

Surge Protector

DIY Phone Charging Station from MomAdvice.com

How to Make a DIY Phone Charging Station

1. Begin by assembling your jewelry armoire, but leave all of your knobs off the fronts of the drawers for now.

2. Using your chalk paint and a small paint brush, paint all of the knobs with a coat of chalk paint. Set aside to dry and then add a second layer of paint.

DIY Phone Charging Station from MomAdvice.com

DIY Phone Charging Station from MomAdvice.com

DIY Phone Charging Station from MomAdvice.com

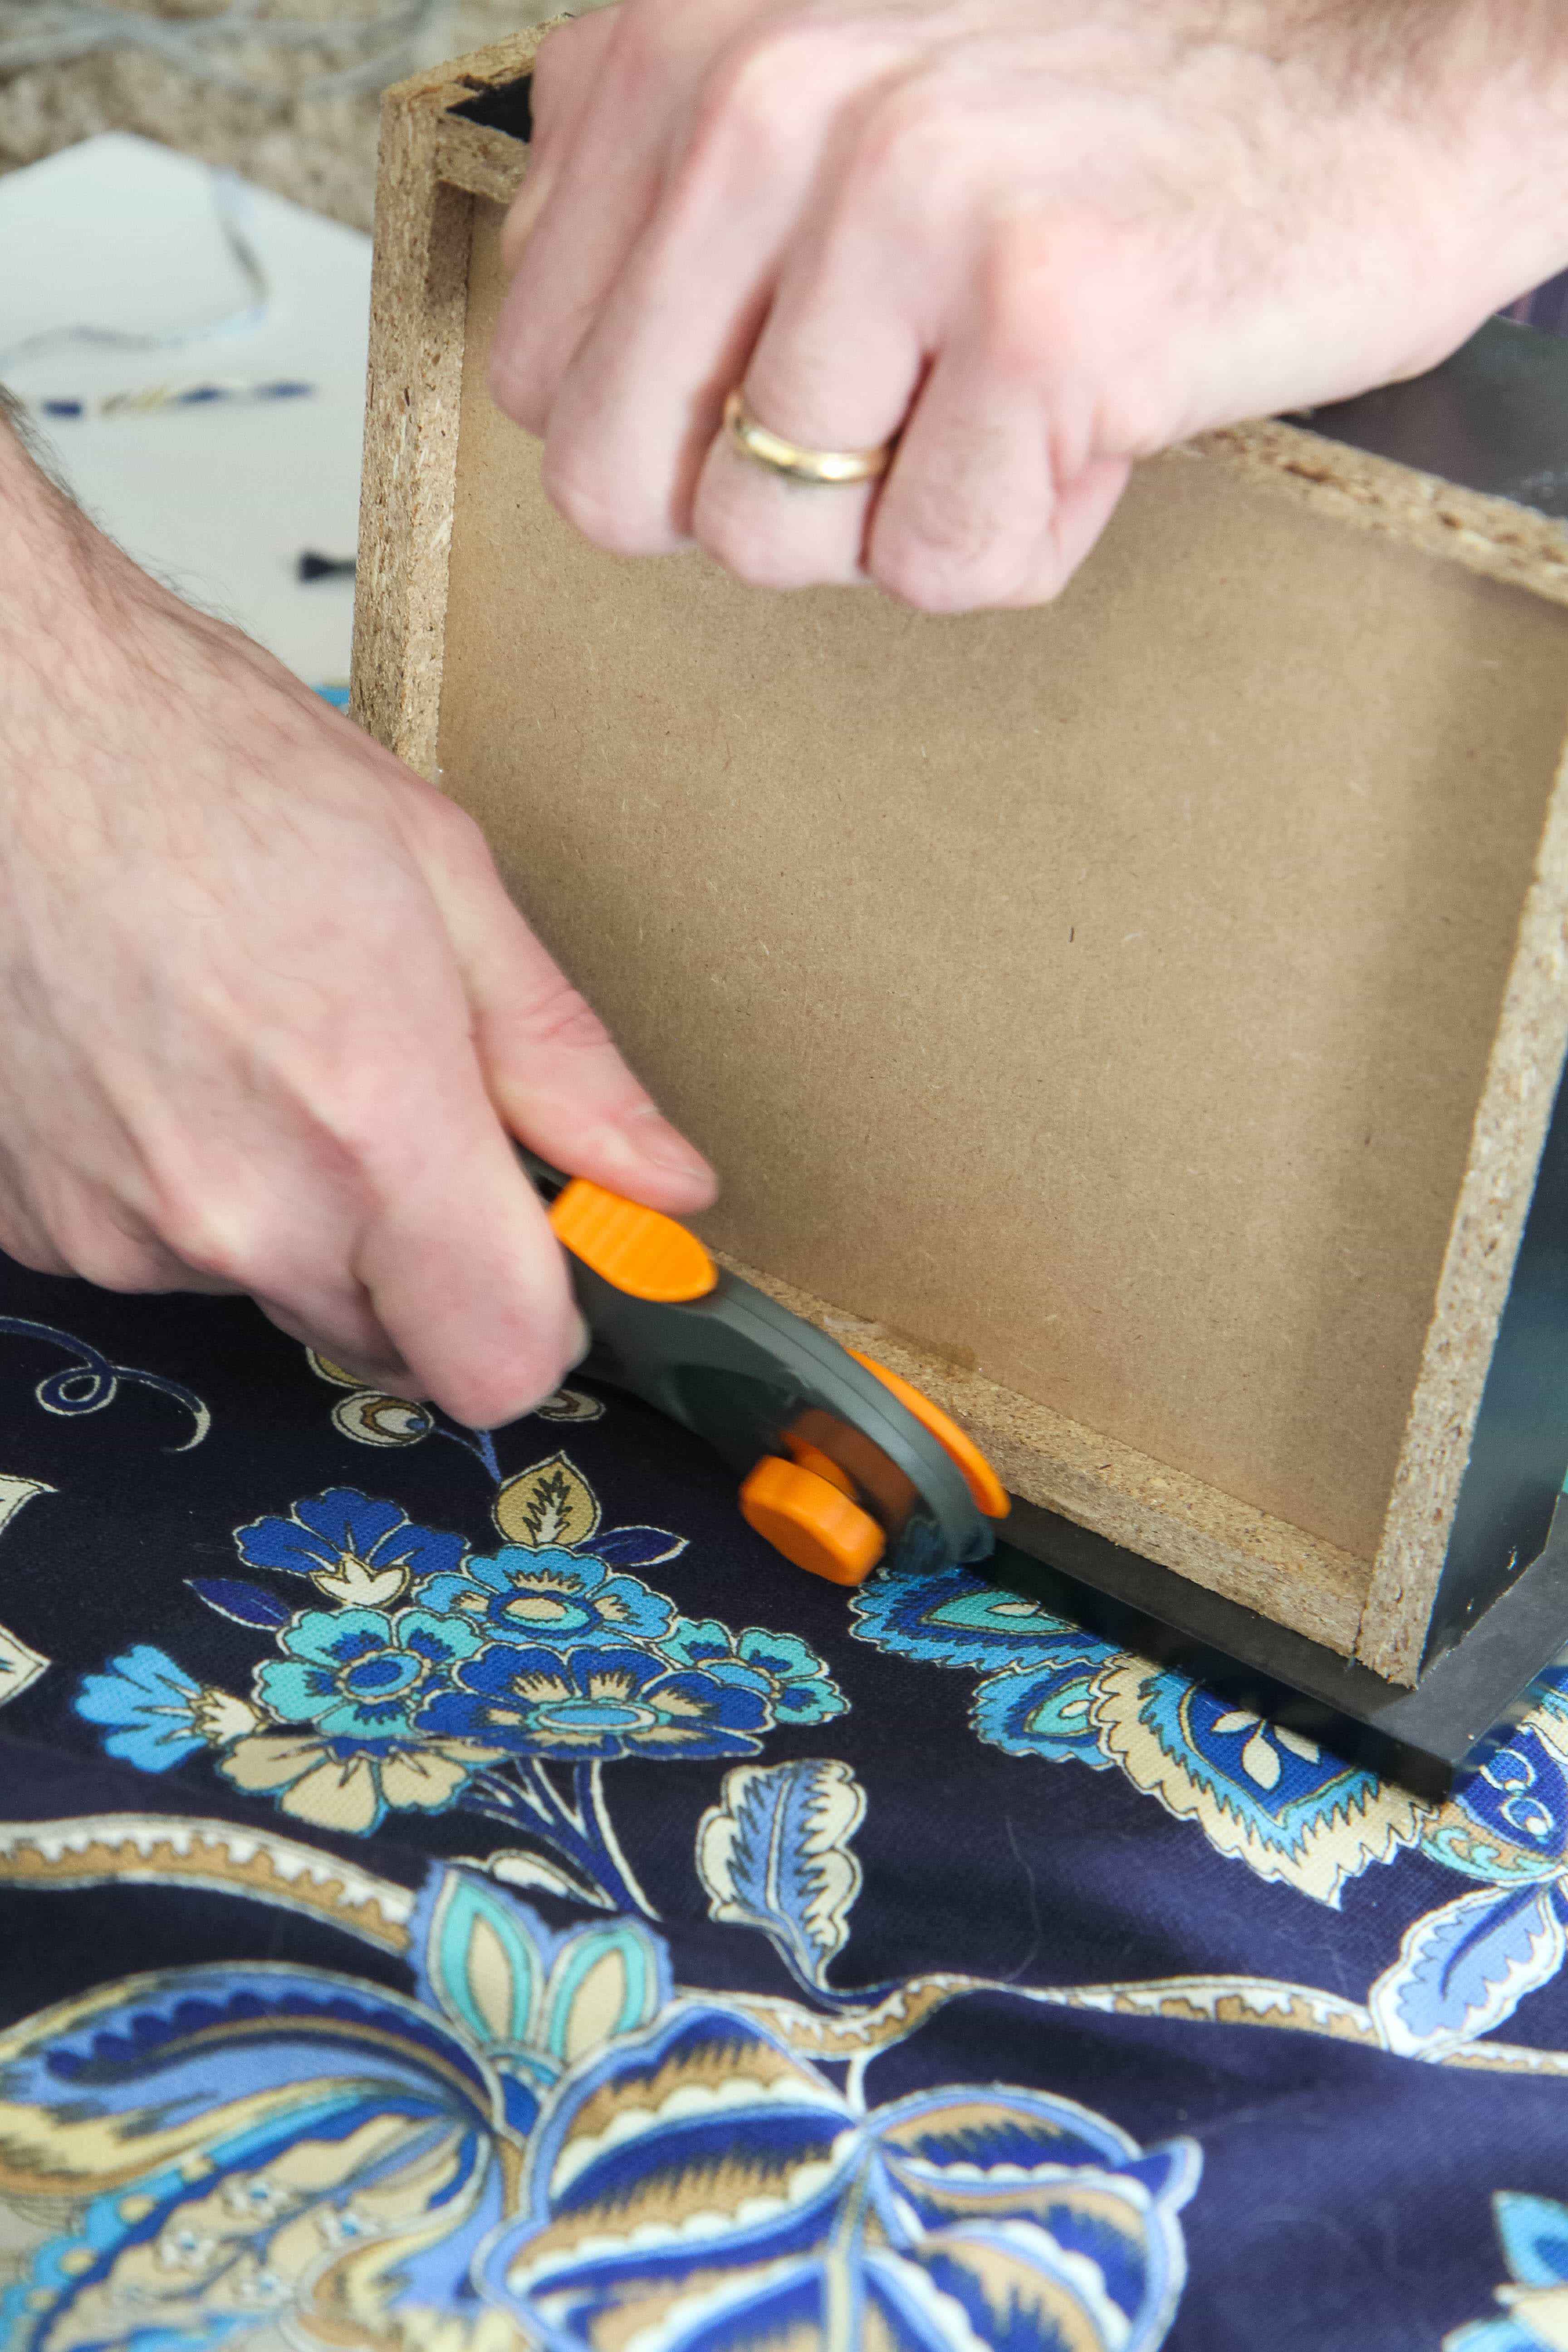
3. Using the front of your drawer as a guide, cut the fabric carefully and as closely as possible, around the drawer. Repeat with all of the other drawers.

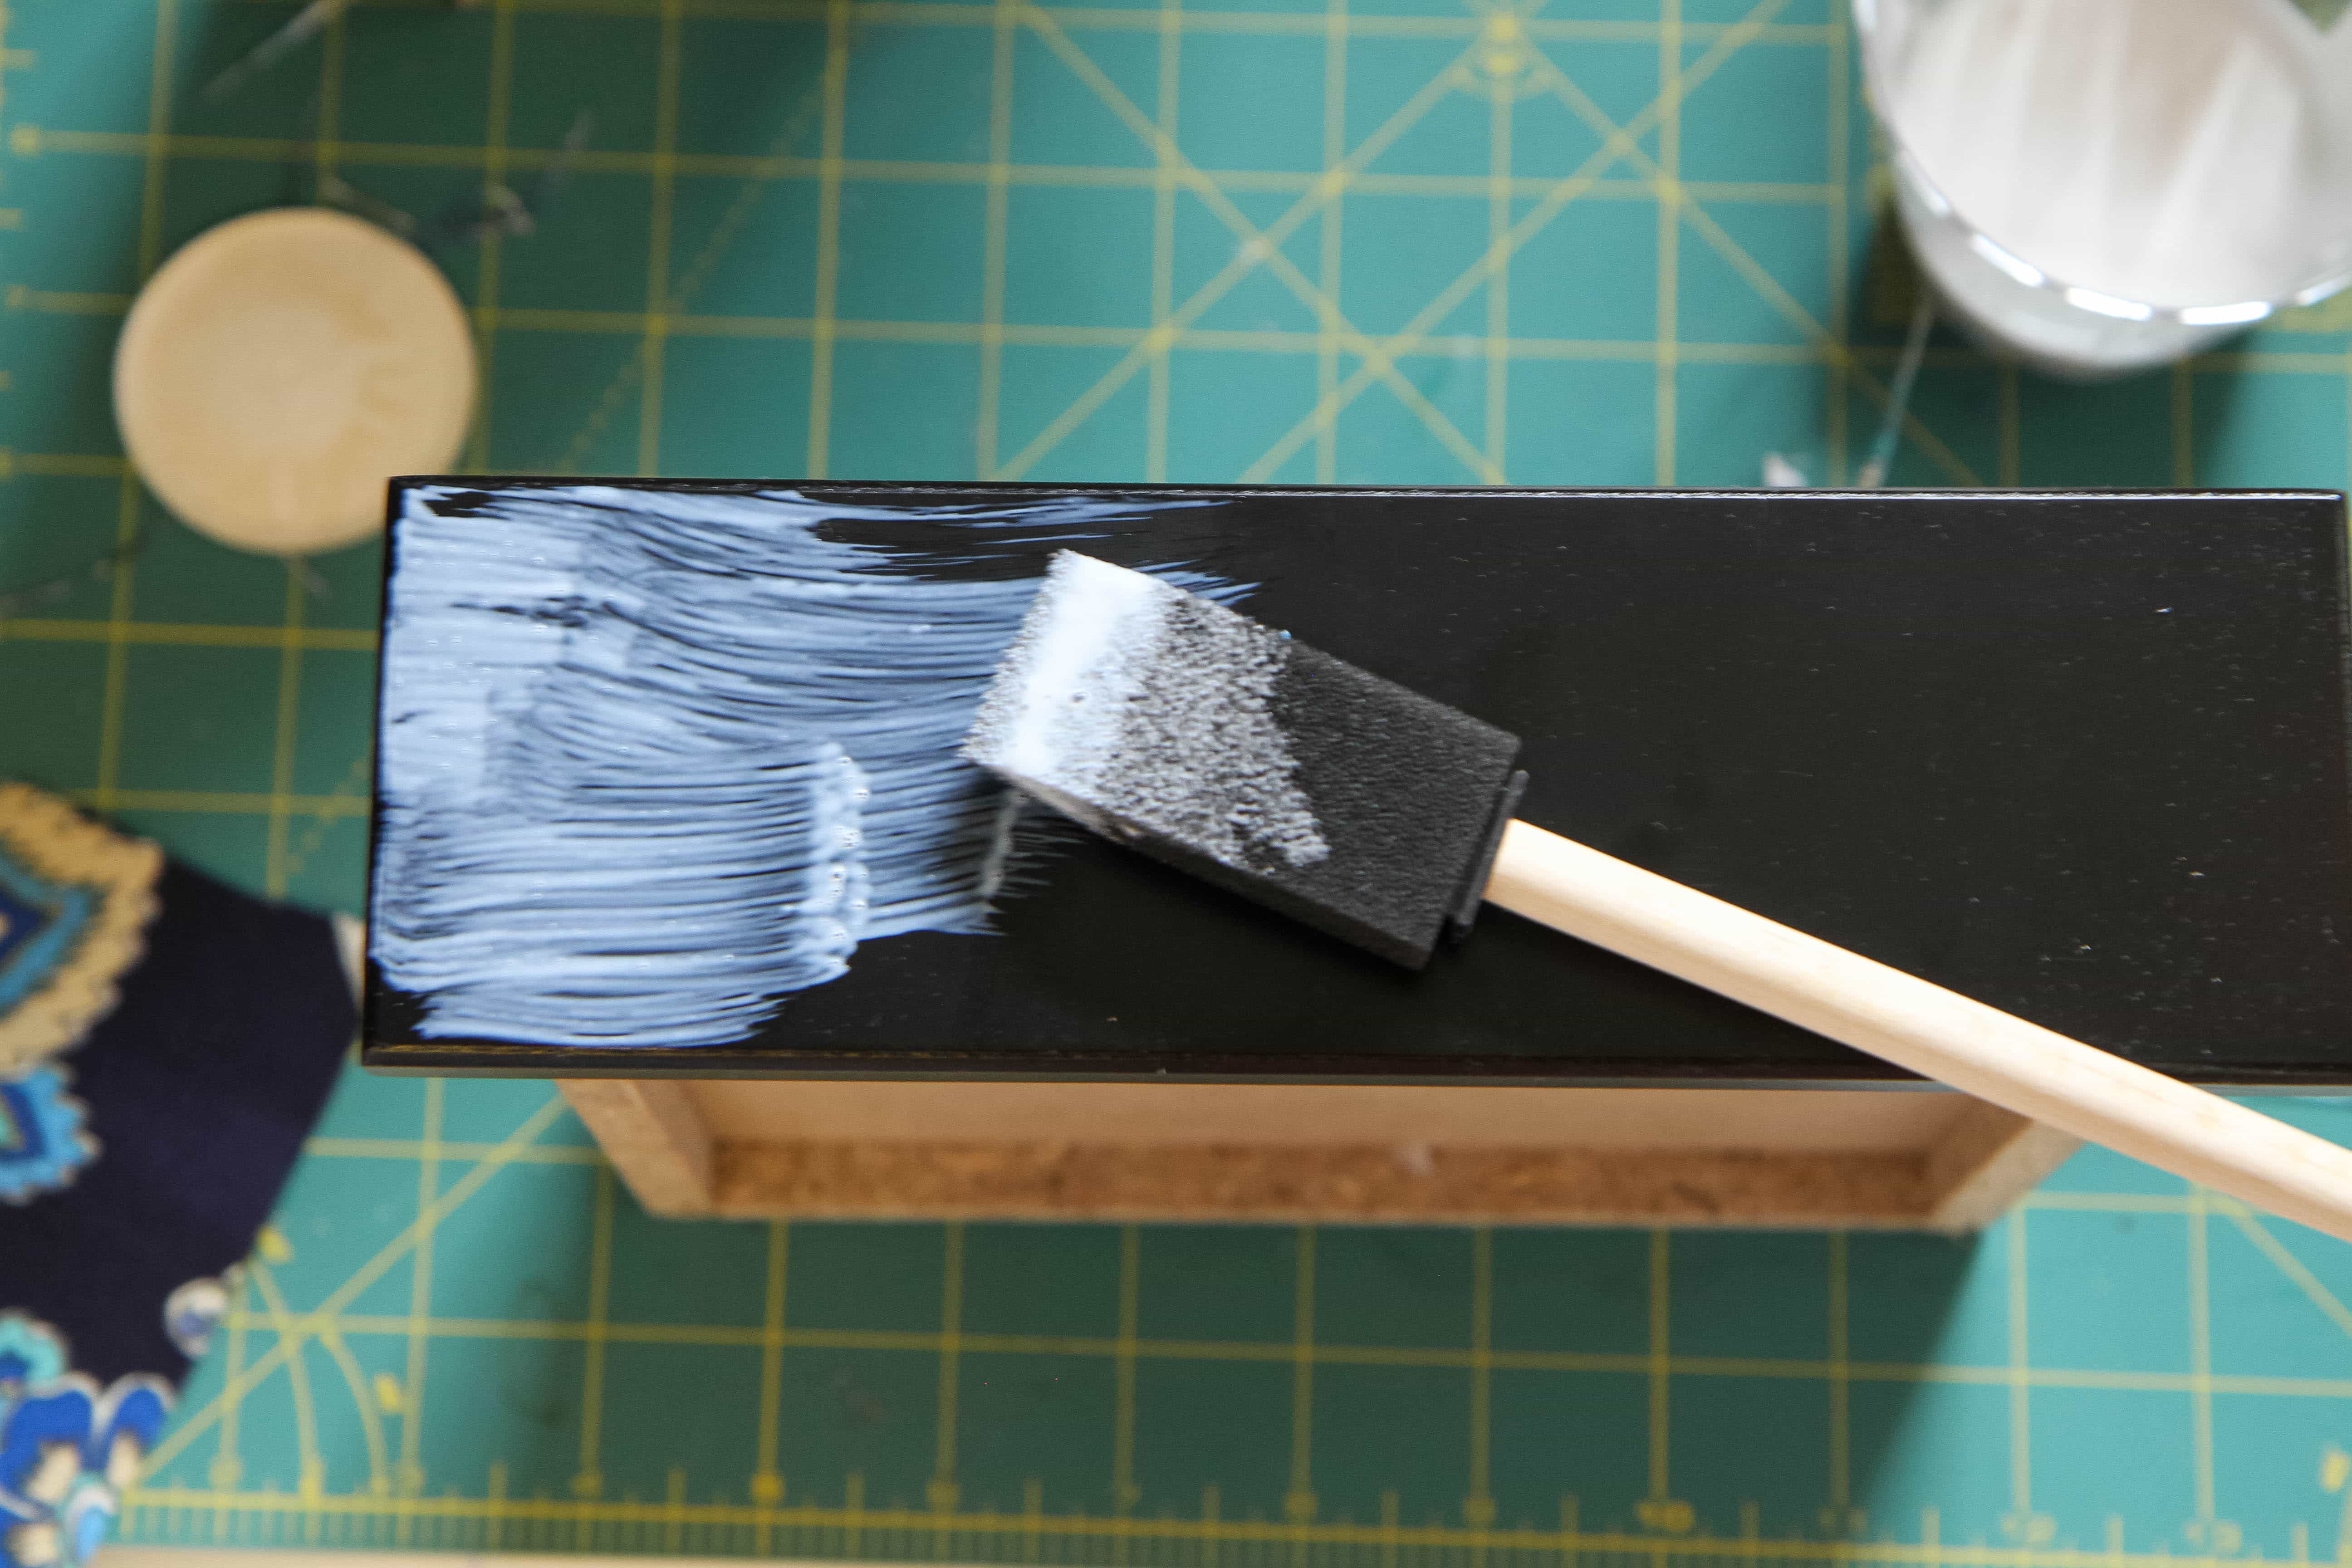
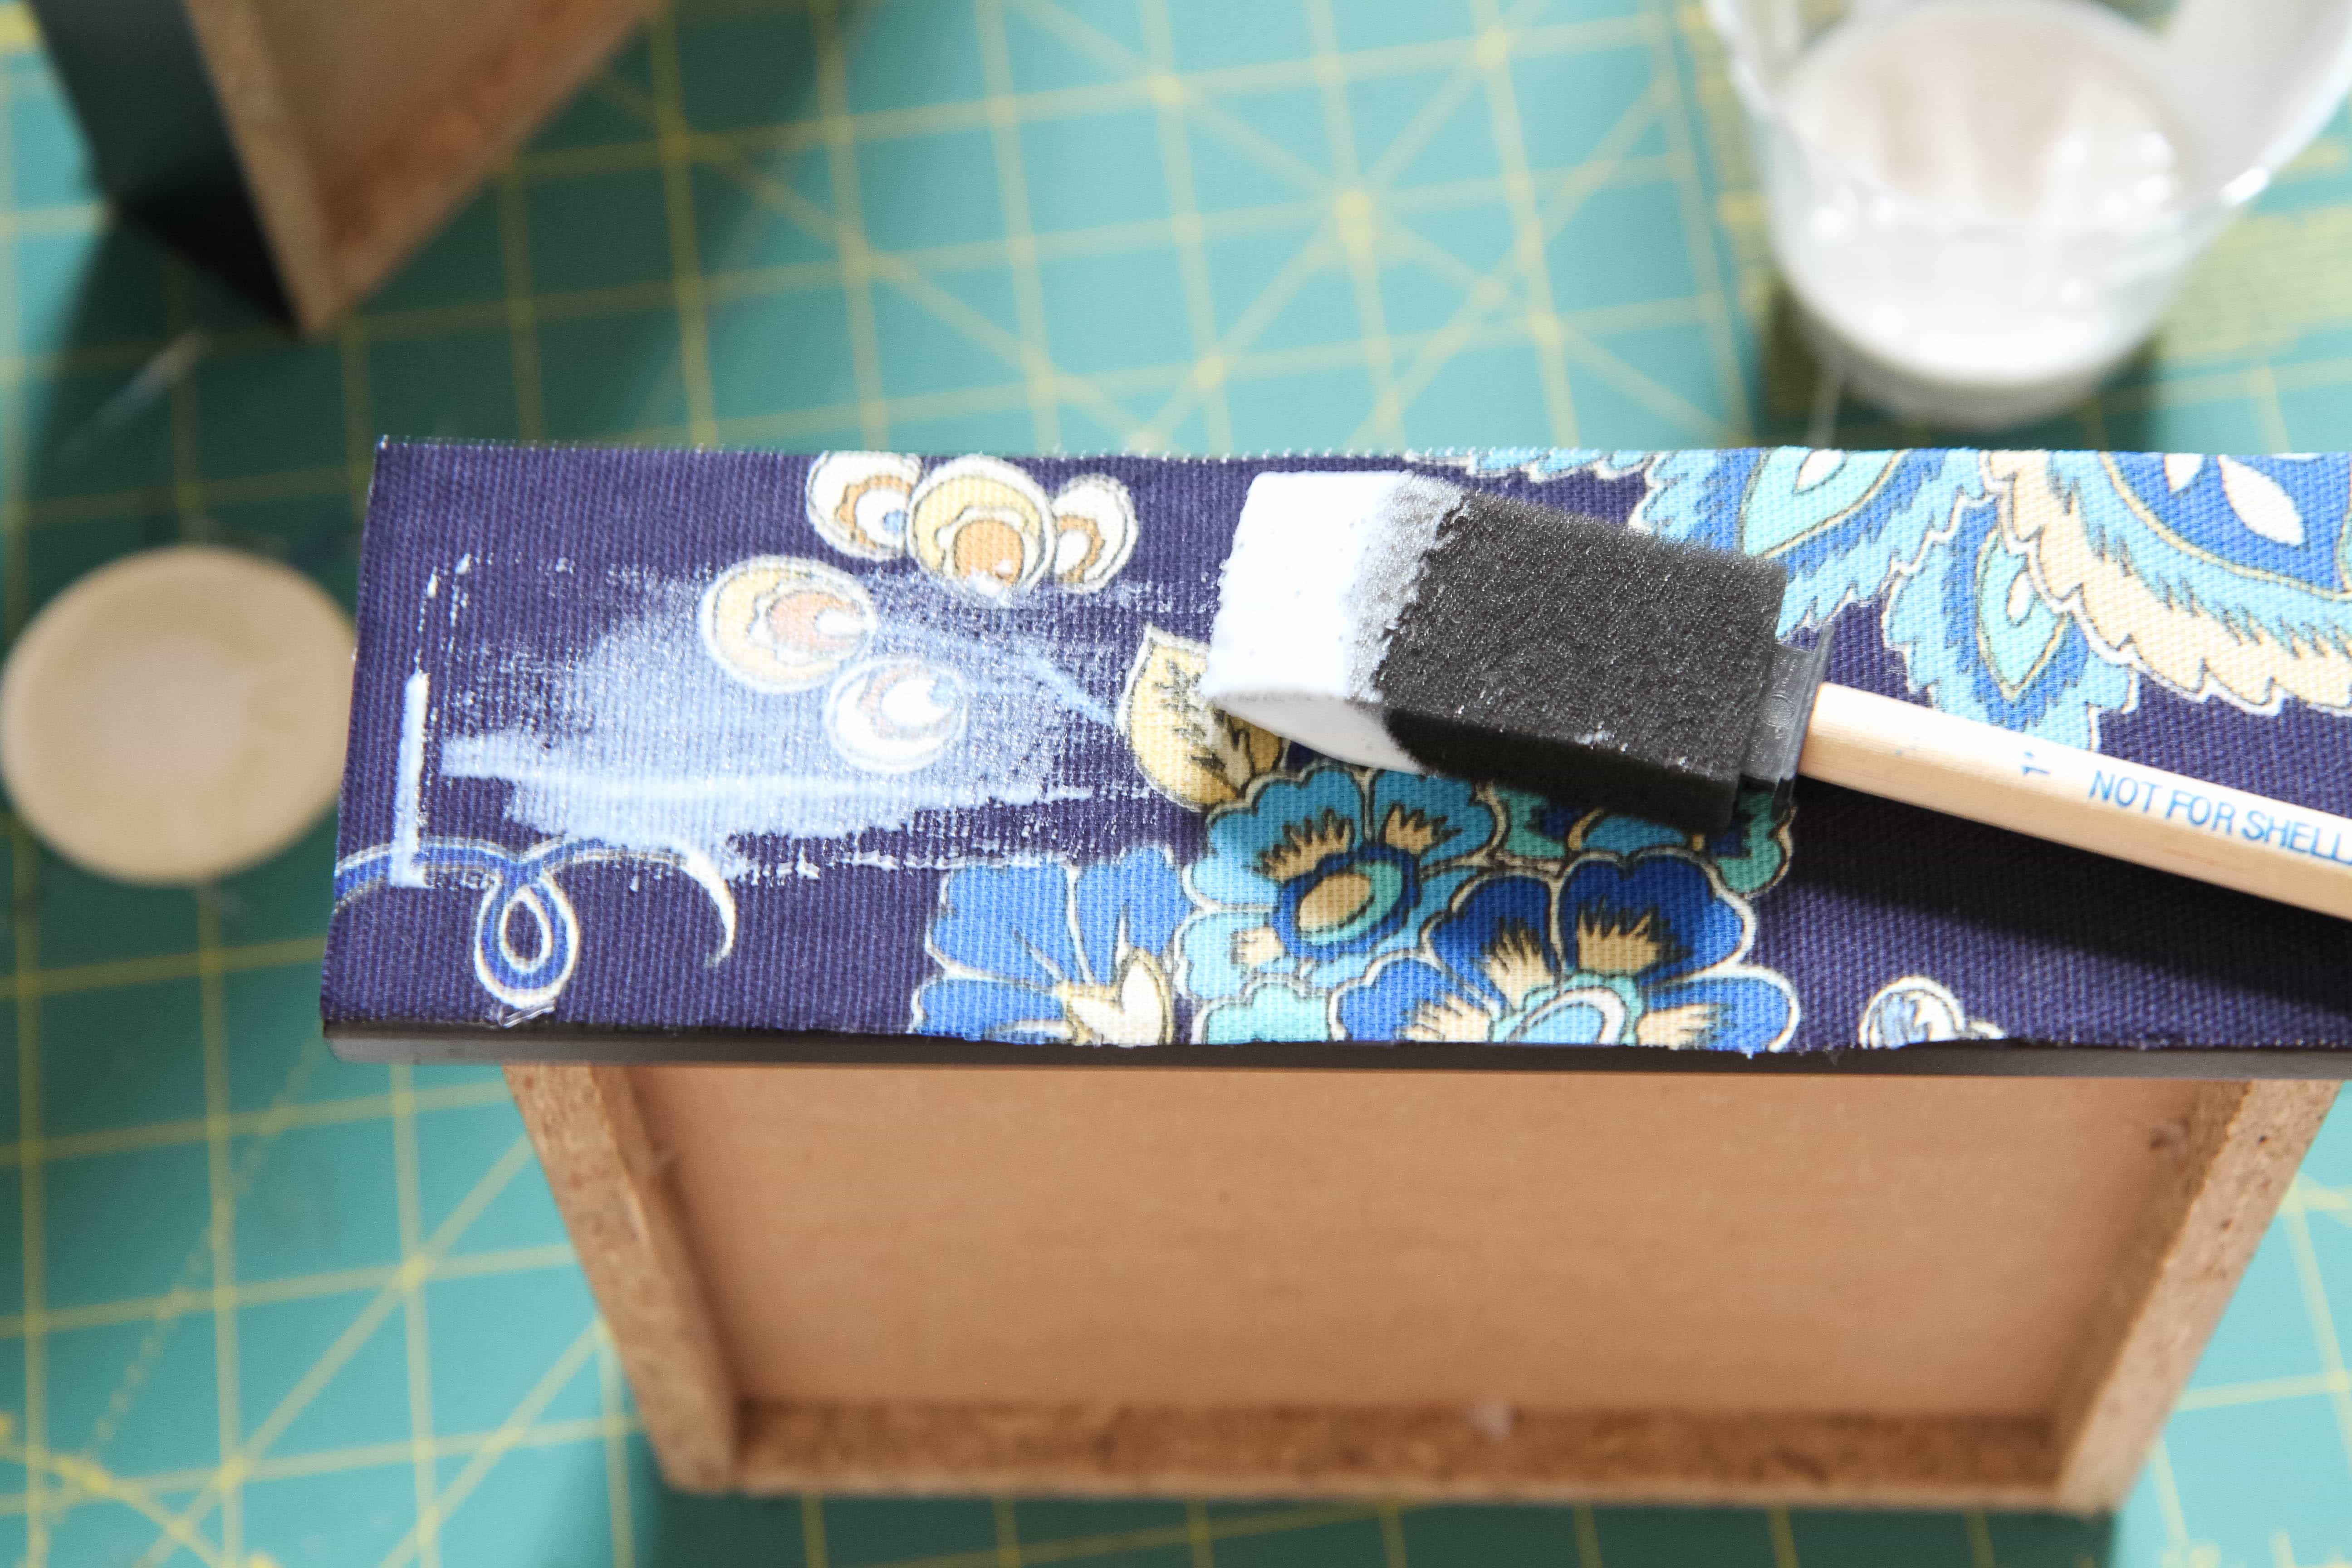
4. Before you attach your fabric to the drawer front, make sure any loose threads and lint are removed from the piece (I went over mine with a lint roller to make sure the surface is clean). Dip your foam brush in the Mod Podge and add a thin layer of glue on the front of the drawer. Carefully line the fabric up on the front of the drawer. Once again, add a layer of Mod Podge OVER the fabric, making to seal all along the edges and across all the fabric. Repeat on all the drawers and then repeat with a second layer.

5. Add your painted knobs on the front of the drawers.

DIY Phone Charging Station from MomAdvice.com

DIY Phone Charging Station from MomAdvice.com

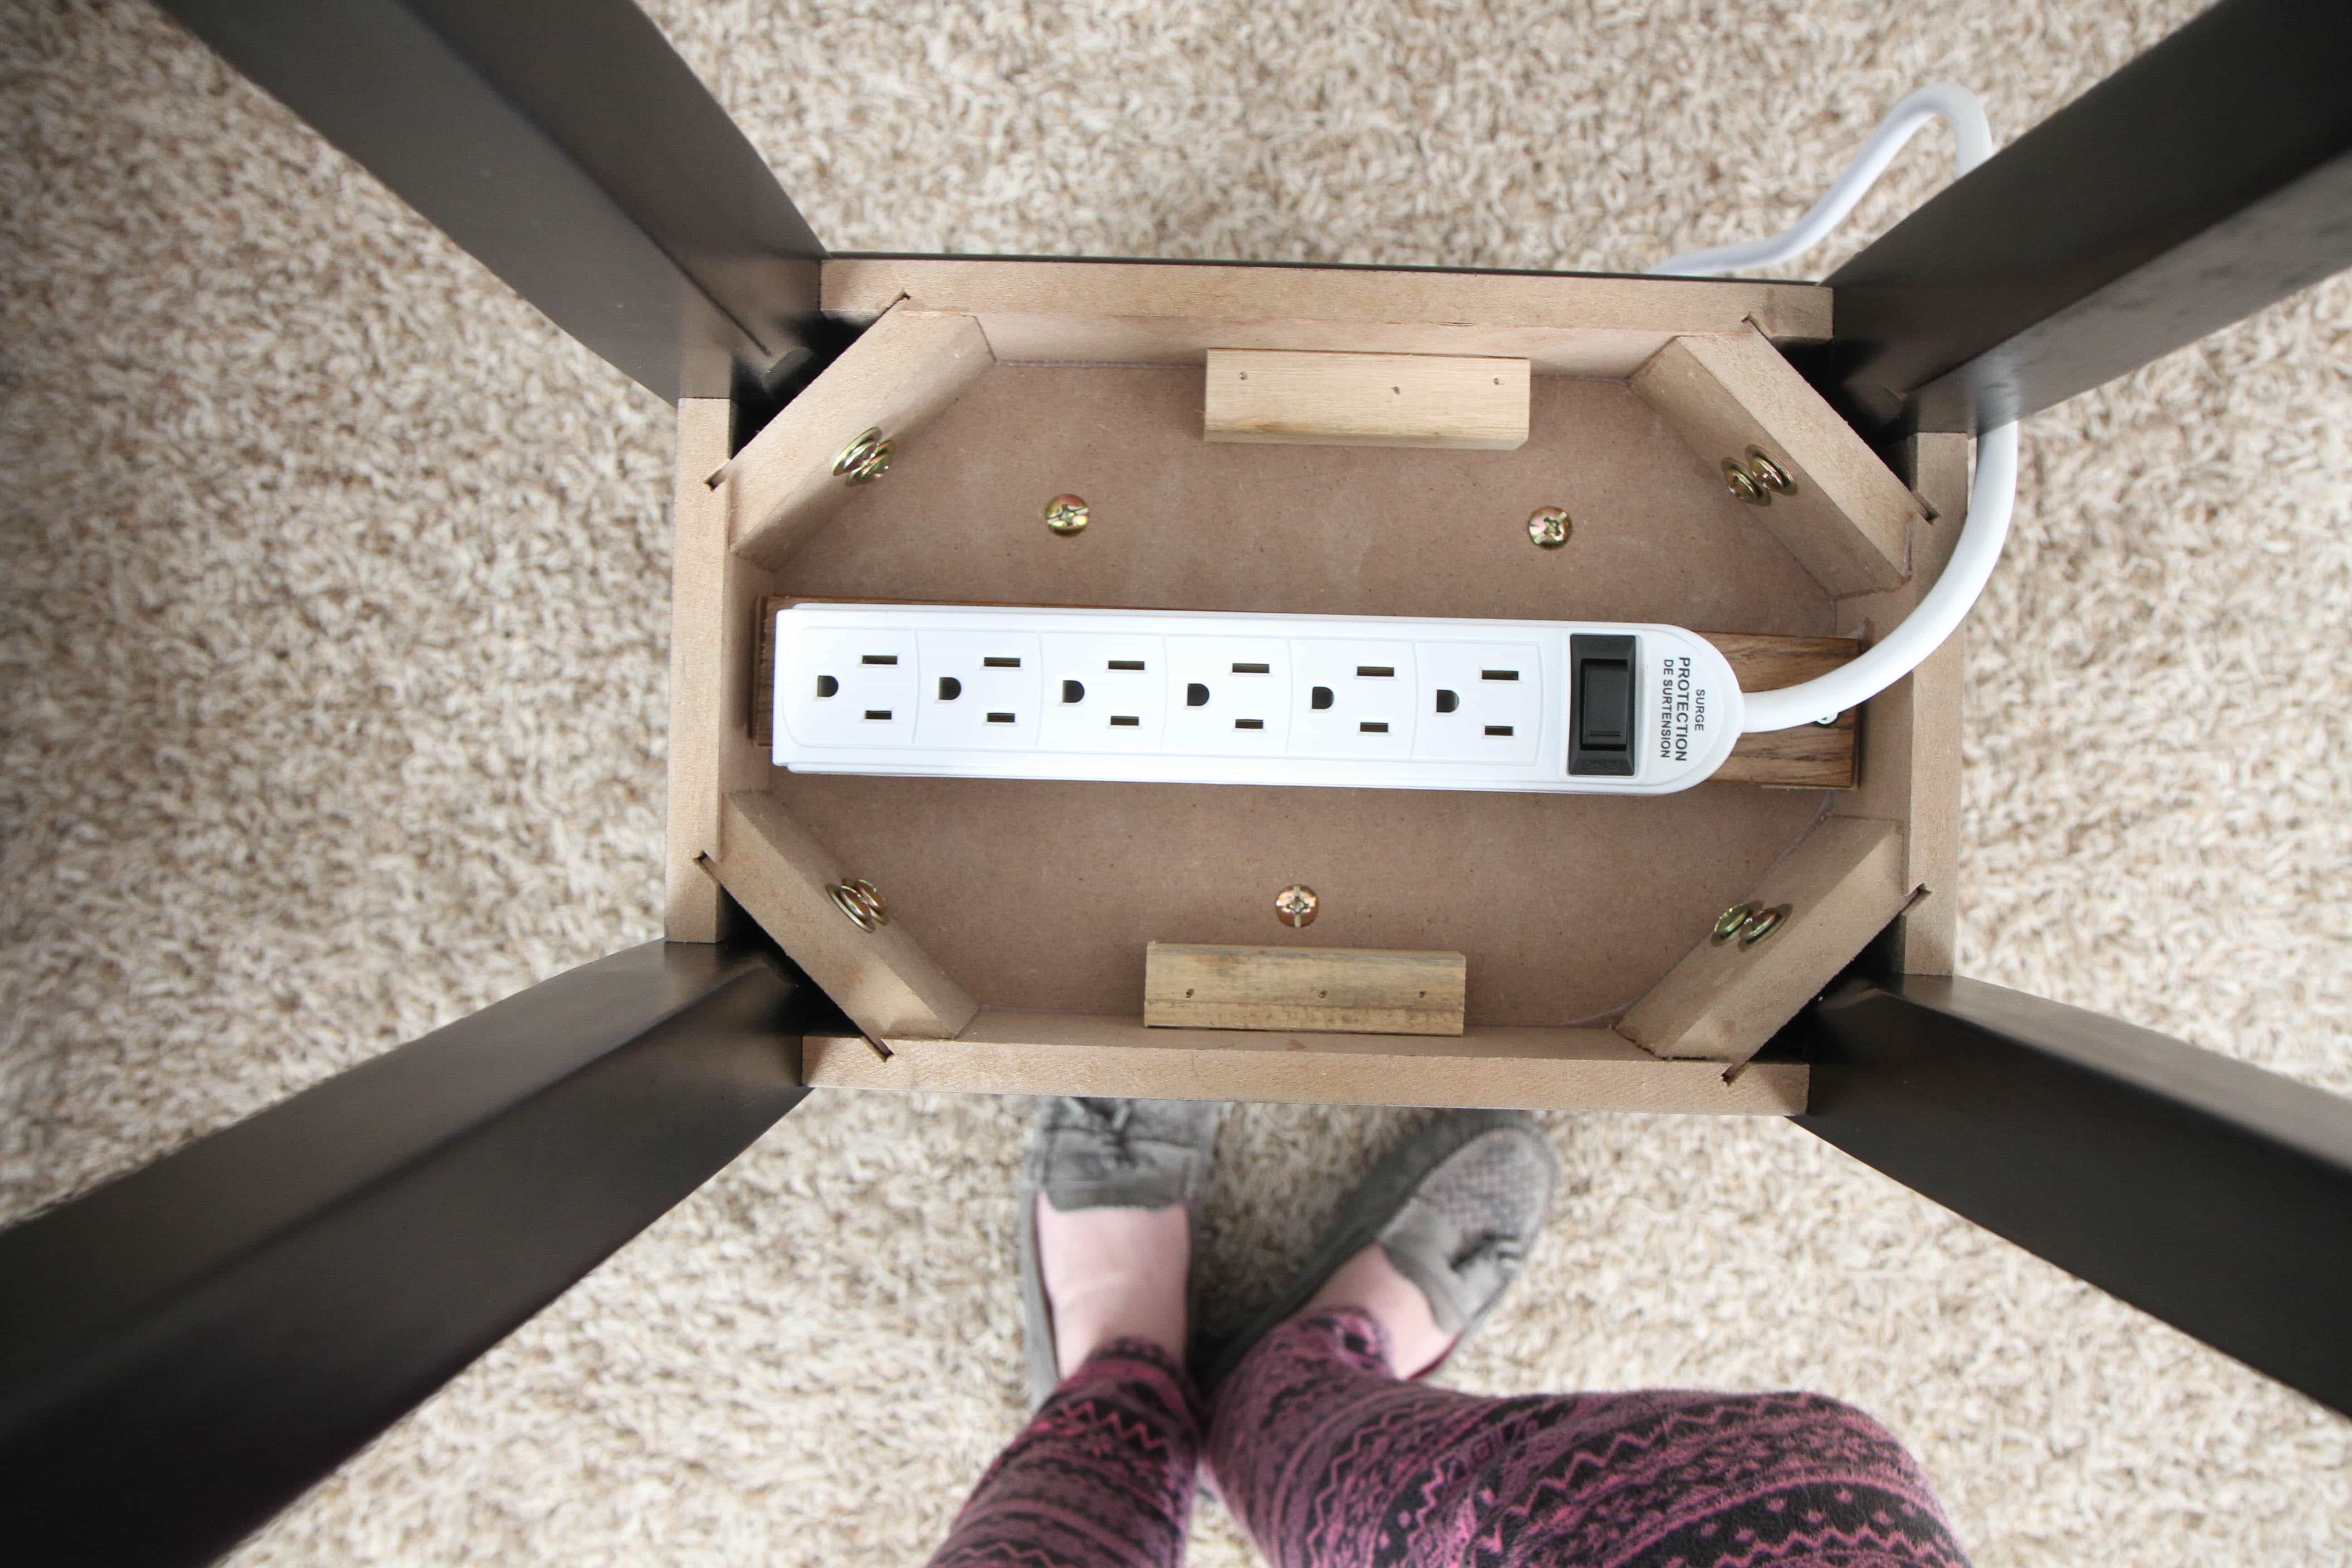
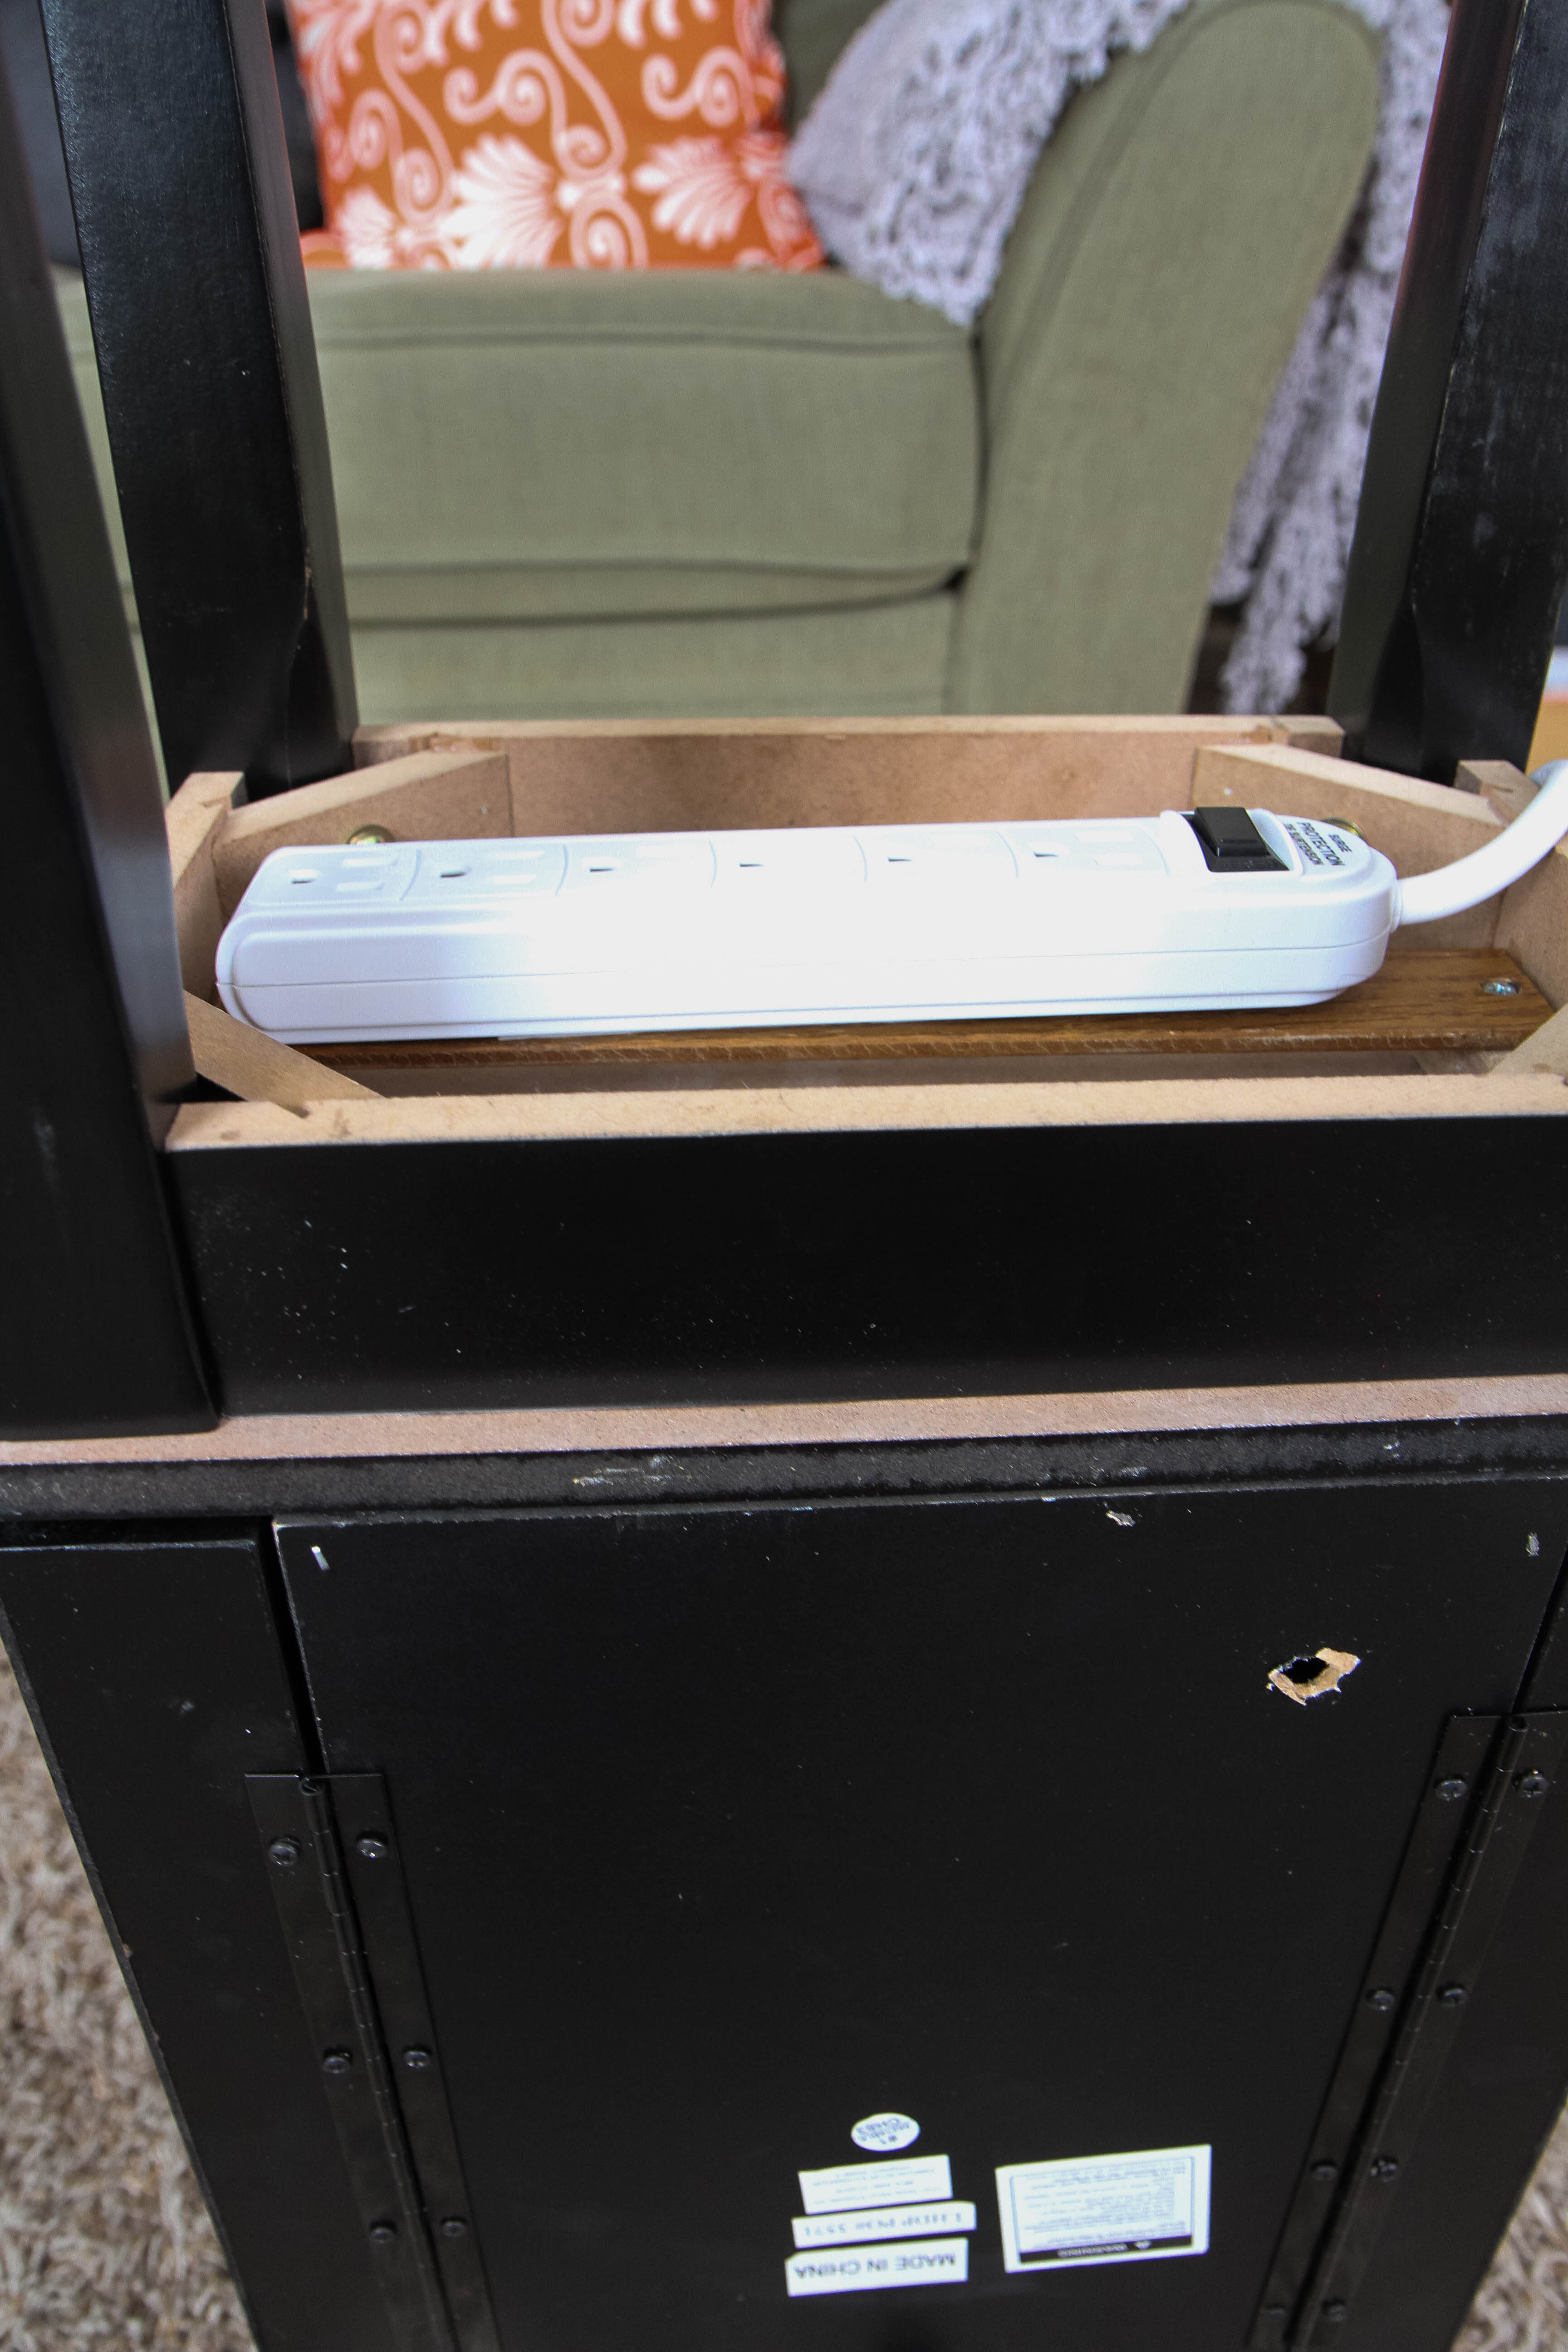
6. Drill holes in the back of your drawers and then a hole in the back of the piece. The size and amount of holes needed will depend entirely on how many devices you have and how wide your charger end is.

7. On the bottom of the unit, attach a scrap piece of wood that can be used to attach your surge protector. We attached the surge protector with a couple of screws to mount this scrap wood.

DIY Phone Charging Station from MomAdvice.com

DIY Phone Charging Station from MomAdvice.com

DIY Phone Charging Station from MomAdvice.com \ DIY Phone Charging Station from MomAdvice.com

DIY Phone Charging Station from MomAdvice.com

DIY Phone Charging Station from MomAdvice.com


I realized after we took the pictures how much it could benefit from a little dusting with all our drilling we were doing.

Stretch your imagination a bit for that part as we are still dismantling our home from all these festivities!

I wonder if you are in the same boat today?

Seriously, how cute is this fun diy phone charging station to act as an inexpensive organizing solution for a small space? I decided to tie in those painted handles with a little color on the trim of this piece.  I really think the paint and fabric details really make this piece feel really unique and I love how practical this is for helping everyone stay organized!

A huge thank you to my hubby for his assistance on this DIY.

There is nothing like crafting in your pajamas and coffee with someone you love!

Do you want more craft inspiration from Waverly? Try these!

DIY No-Sew Reversible Chair Cushions

Fabric Wreath & Matching Garland

Fabric Bulletin Board Tutorial

Painting Pumpkins With Acrylic Paints

DIY No-Sew Hand Warmers

DIY Ottoman Serving Tray

15-Minute Scrappy Fabric Trees

Kid Craft: Easy Technique for Painting Gift Wrap

This post was created in partnership with Waverly Inspirations. Thank you for supporting the companies that support our site! 


Scrappy Fabric Trees in Just 15 Minutes

Thursday, December 1st, 2016

Scrappy Fabric Trees in Just 15 Minutes from MomAdvice.com

This post was created in partnership with Waverly Inspirations. Thank you for supporting the companies that support our site! 

I love adding a few homemade touches to our home each year for the holidays and especially those items that can be repurposed in a variety of ways.  For example, one year for Valentine’s Day I made a festive tree from cupcake liners and it got lots of love during that season. Perhaps, a bit TOO MUCH love (ahem!) as they began to wilt and wrinkle.  The beauty in that project though,  and in today’s project,  is that the materials were pinned to the same styrofoam base which allows you the opportunity to reuse this same tree year after year in brand new ways.

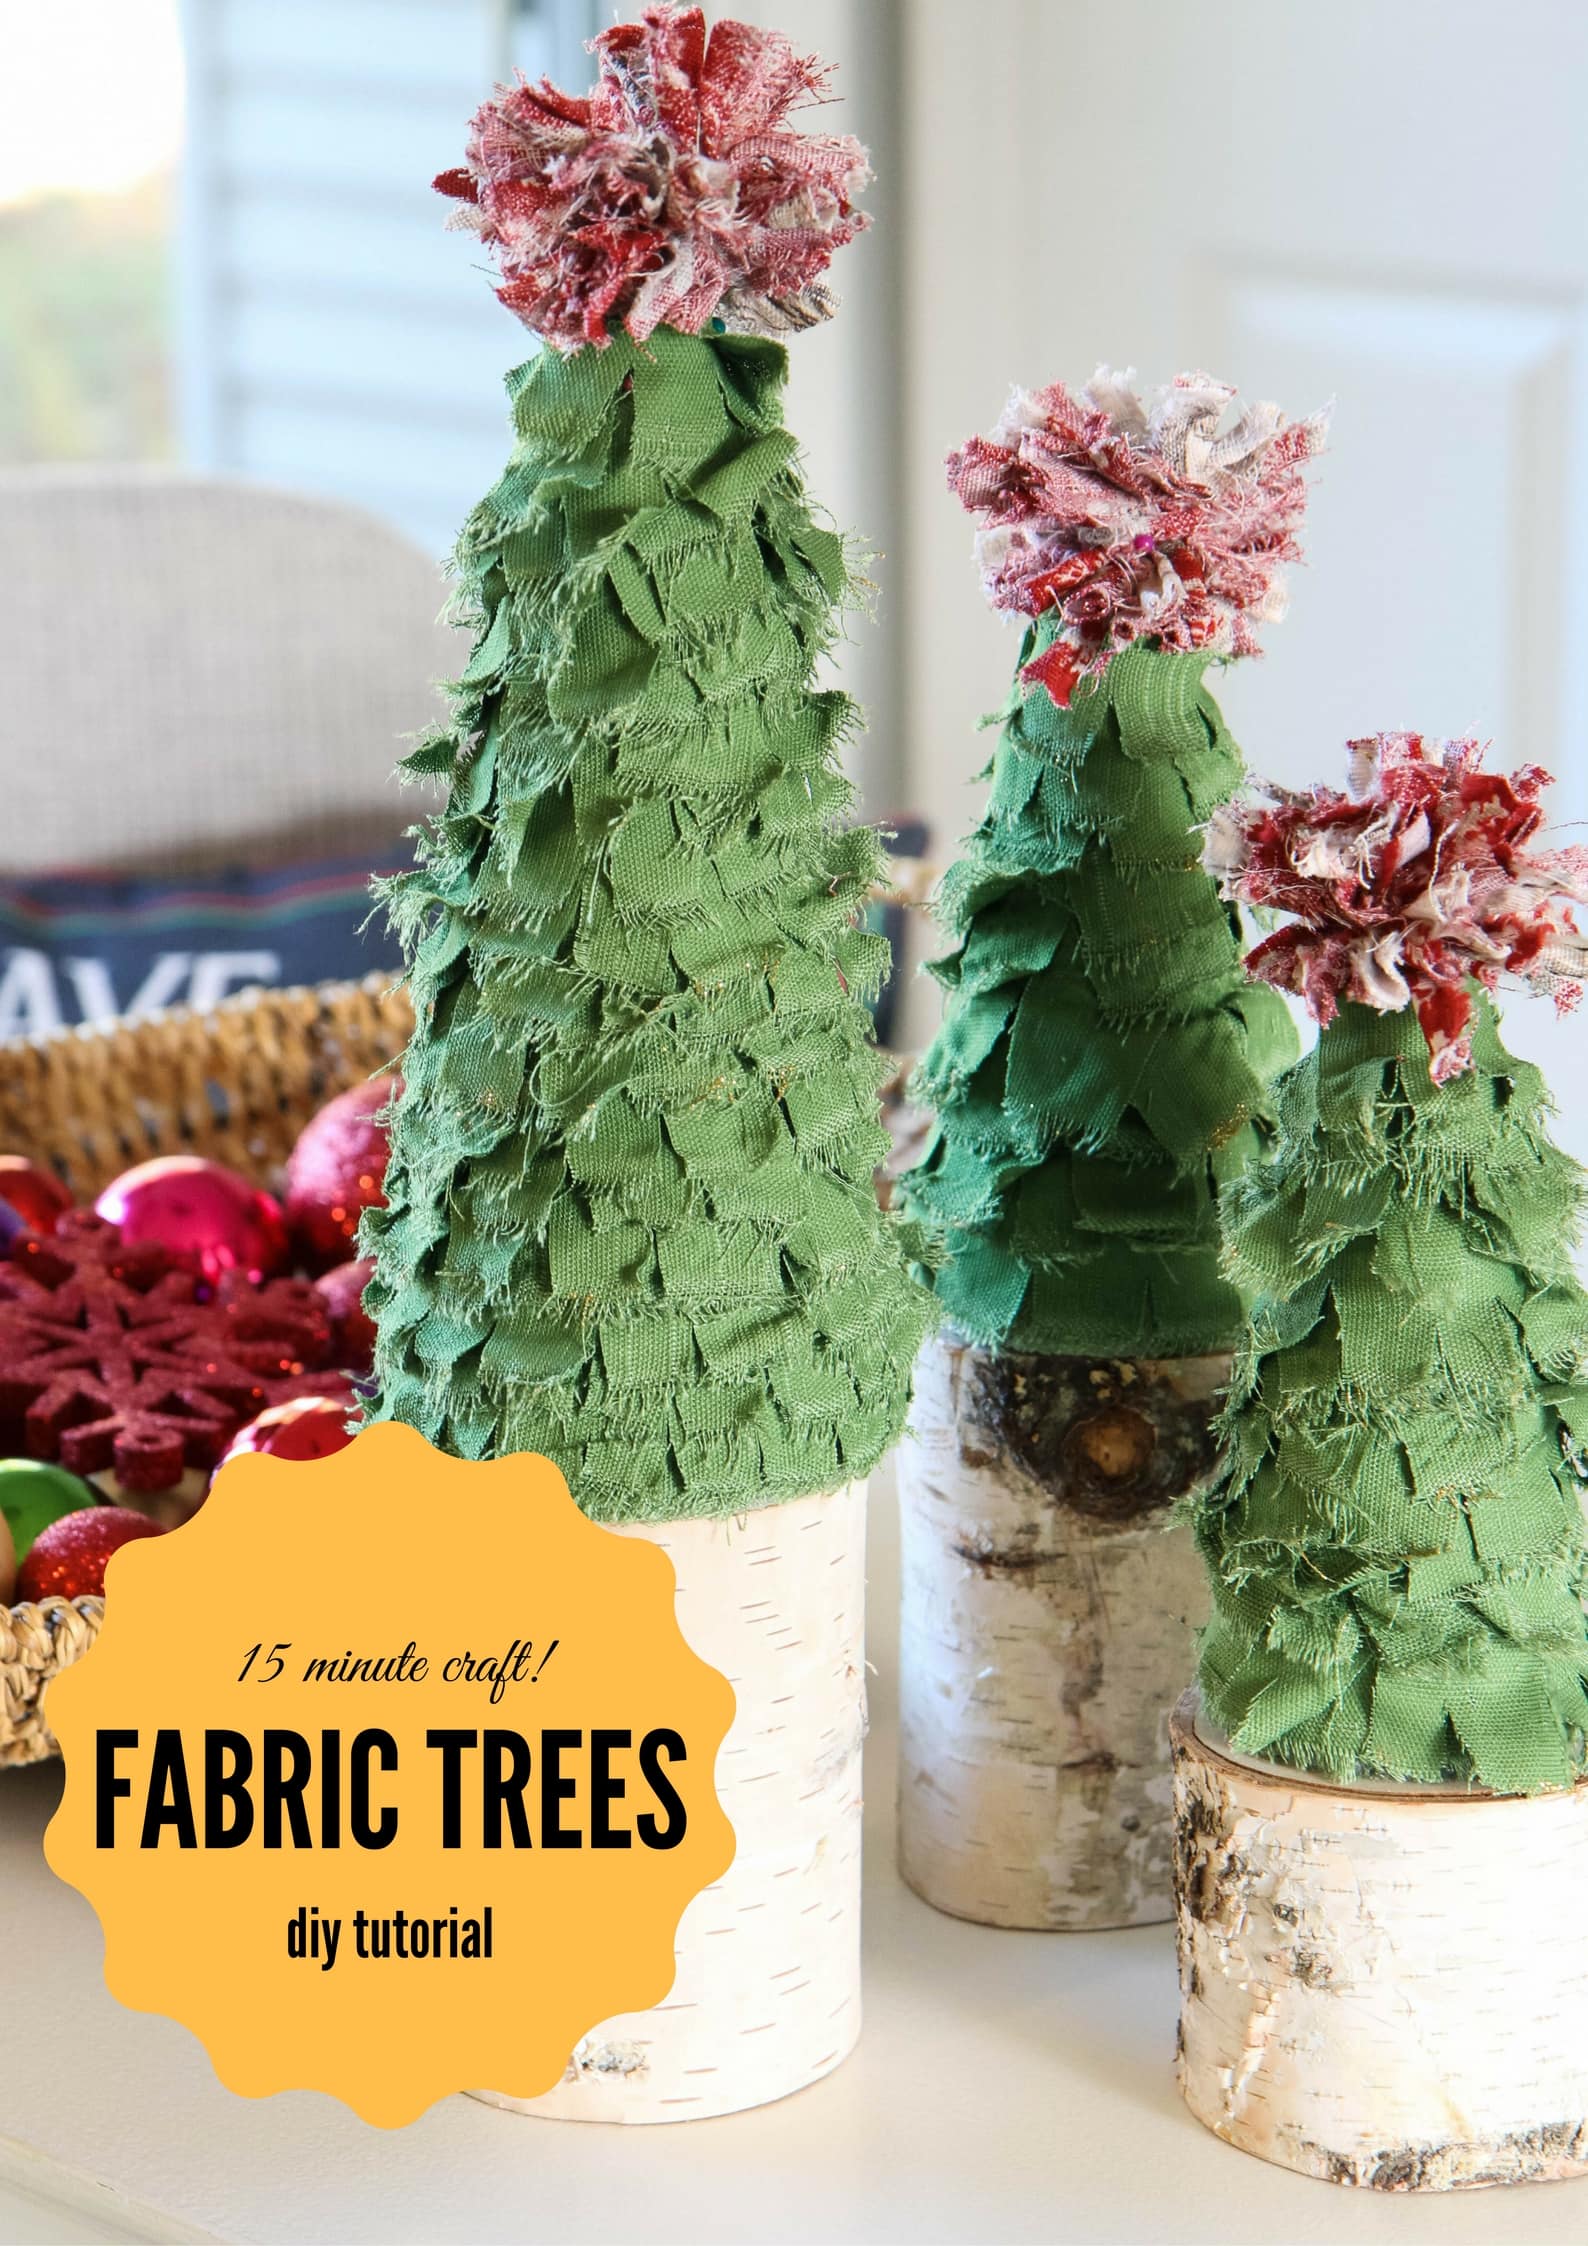
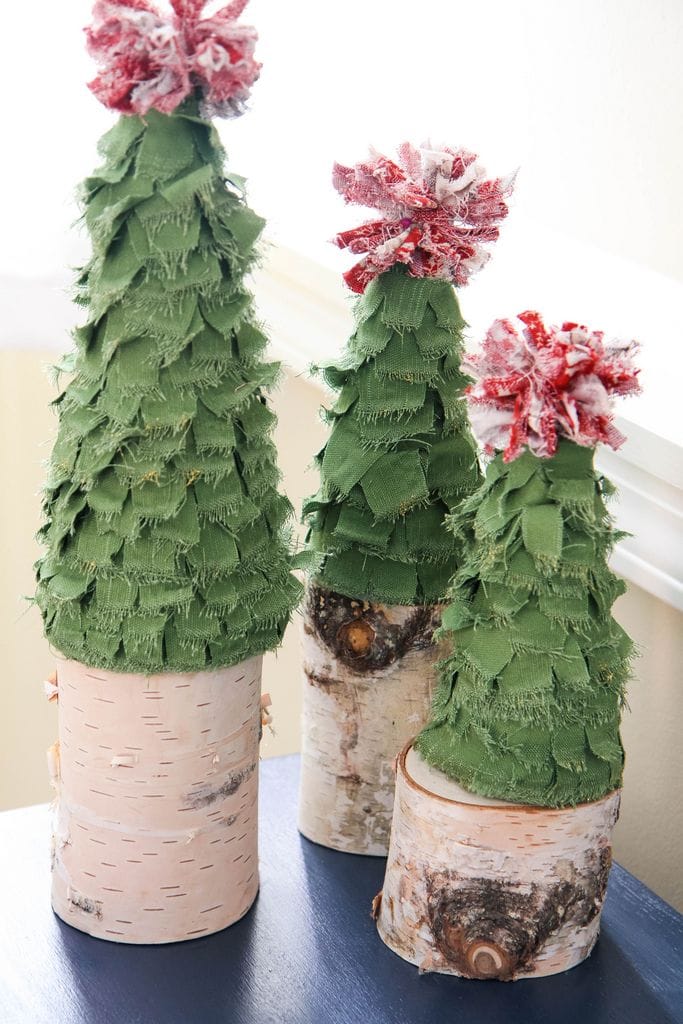
I wanted to create some festive holiday fabric trees to fill an empty space in one of our corners so I created this easy 15-minute fabric tree that is so simple that you could have your kids even do it for a holiday craft.  I just know you are going to love these fabric trees as much as I do and I’m really loving the finishing touches on this one with a fabric pom-pom and a touch of shimmer on the edges.

How to Make a Scrappy Fabric Tree

Scrappy Fabric Trees in Just 15 Minutes from MomAdvice.com

Supplies Needed (all of these supplies can be found at Walmart!)

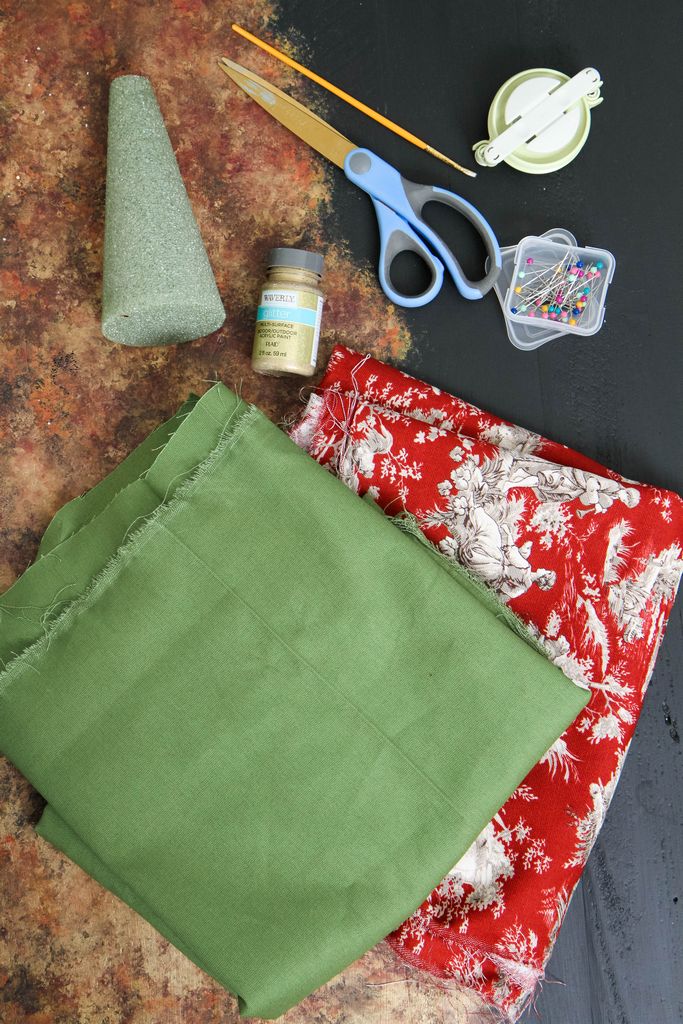
2 kinds of Waverly Inspirations Fabric in coordinating fabrics (I used the 100% cotton duck fabric available at the store)- this craft does not require a lot of fabric so even 1/4 yard should be plenty!

Small or Large Clover Pom Pom Maker (I used the large option for my trees)

Styrofoam Cones (any size!)

Straight Pins

Waverly Glitter Paint (in stores)

Paint Brush

Directions for Scrappy Fabric Trees

Scrappy Fabric Trees in Just 15 Minutes from MomAdvice.com

1. Begin by cutting into the long-side of your fabric by an inch or an inch and half. Once you have your cut, begin pulling the fabric with your own bare hands (ROAR!!! TAKE OUT THOSE HOLIDAY FRUSTRATIONS HERE AND IMPRESS YOUR KIDS WITH YOUR HULK STRENGTH!) and ripping it all the way down until this strip of fabric is completely separated from the fabric. If you have any loose strings (and you will!) pull them off the strip before beginning the next step.

2. Take this strip and pin it along the bottom edge of the cone to cover the styrofoam core.

3. With the remainder of your fabric strip, begin cutting notches into it, as evenly as possible, as I have shown above in the picture. Do this down the entire length of your fabric.

4. Starting at the very bottom, and layering over that first layer we laid, begin wrapping the tree, cutting once it has met the other side, and pinning into place.

Scrappy Fabric Trees in Just 15 Minutes from MomAdvice.com

4. Continue doing this layering over each layer to cover those pins and also staggering the pieces so that each layer has a little leaf peeking through. Do this until you get to almost the top of the tree. You may need to cut and repeat this process again if you have run out of material to work with. REPEAT HULK MOVES.

5. Once you get close to the top of tree, rip another strip of fabric and use that to cover the top of the tree as I have shown you in the picture. You want to criss-cross the material so that you don’t have any of that styrofoam cone showing. Now wrap more of your layers over that to disguise the pins and to continue the ruffling on the tree.

6. In your other fabric, tear a 1/2″ strip just as you did with the tree, but this time we are going to be making a pom-pom out of it. If you have not used the Clover Pom-Pom Maker before you are going to love it. It’s very easy to use and I have a great step-by-step tutorial if you are new to pom-pom making. When making this, take care to not wrap numerous times or get the material so thick that you are unable to cut it. Just a nice even layer down each side should work. Cut the pom pom out and then use another fabric strip to tie it tight to secure.

Scrappy Fabric Trees in Just 15 Minutes from MomAdvice.com

7. Pin your pom-pm to the top and check to see if you need one more layer underneath to complete the tree. I liked adding just one more ruffle to finish.

8. Using your Waverly glitter paint and a tiny paintbrush, dip the paintbrush in the glitter paint and paint just the edges of the torn fabric on the pom-pom and on the tree to add a finishing shimmer.

Scrappy Fabric Trees in Just 15 Minutes from MomAdvice.com

Scrappy Fabric Trees in Just 15 Minutes from MomAdvice.com

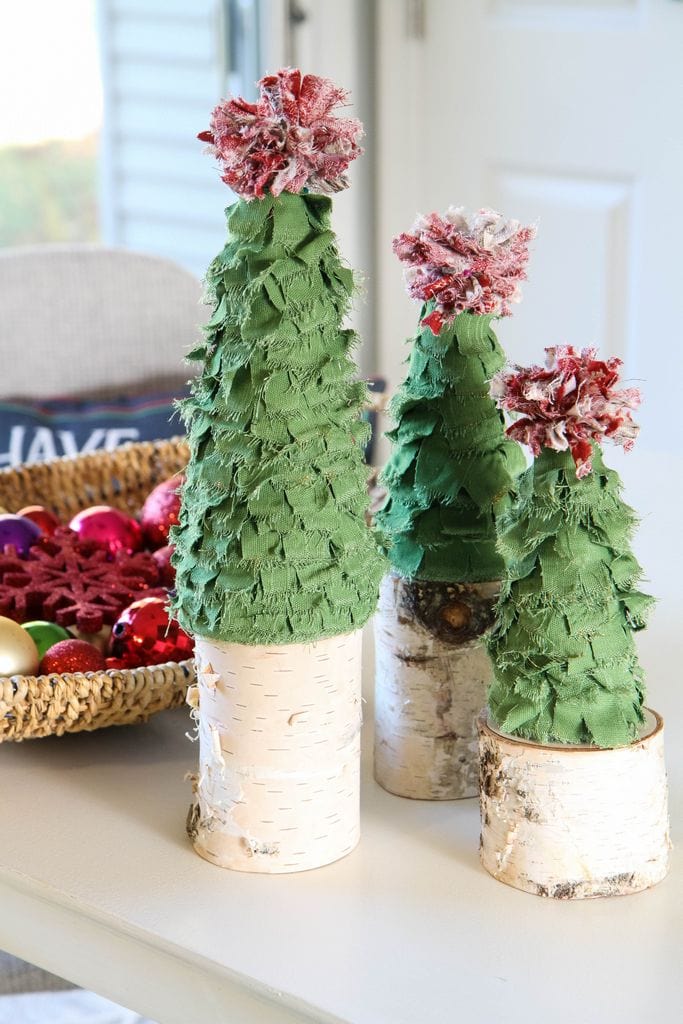
Why make one when you can make three?

I’m in love!

The best part is that you can switch these materials out with the seasons and make this same object look different from season to season. Who knows? You just might see these out again around Valentine’s Day with a brand new look on the site!

Do you want more craft inspiration from Waverly? Try these!

DIY No-Sew Reversible Chair Cushions

Fabric Wreath & Matching Garland

Fabric Bulletin Board Tutorial

Painting Pumpkins With Acrylic Paints

DIY No-Sew Hand Warmers

DIY Ottoman Serving Tray

This post was created in partnership with Waverly Inspirations. Thank you for supporting the companies that support our site! 

Pin It

DIY Ottoman Serving Tray

Monday, November 14th, 2016

DIY Ottoman Serving Tray from MomAdvice.com

This post was created in partnership with Waverly Inspirations. Thank you for supporting the companies that support our site! 

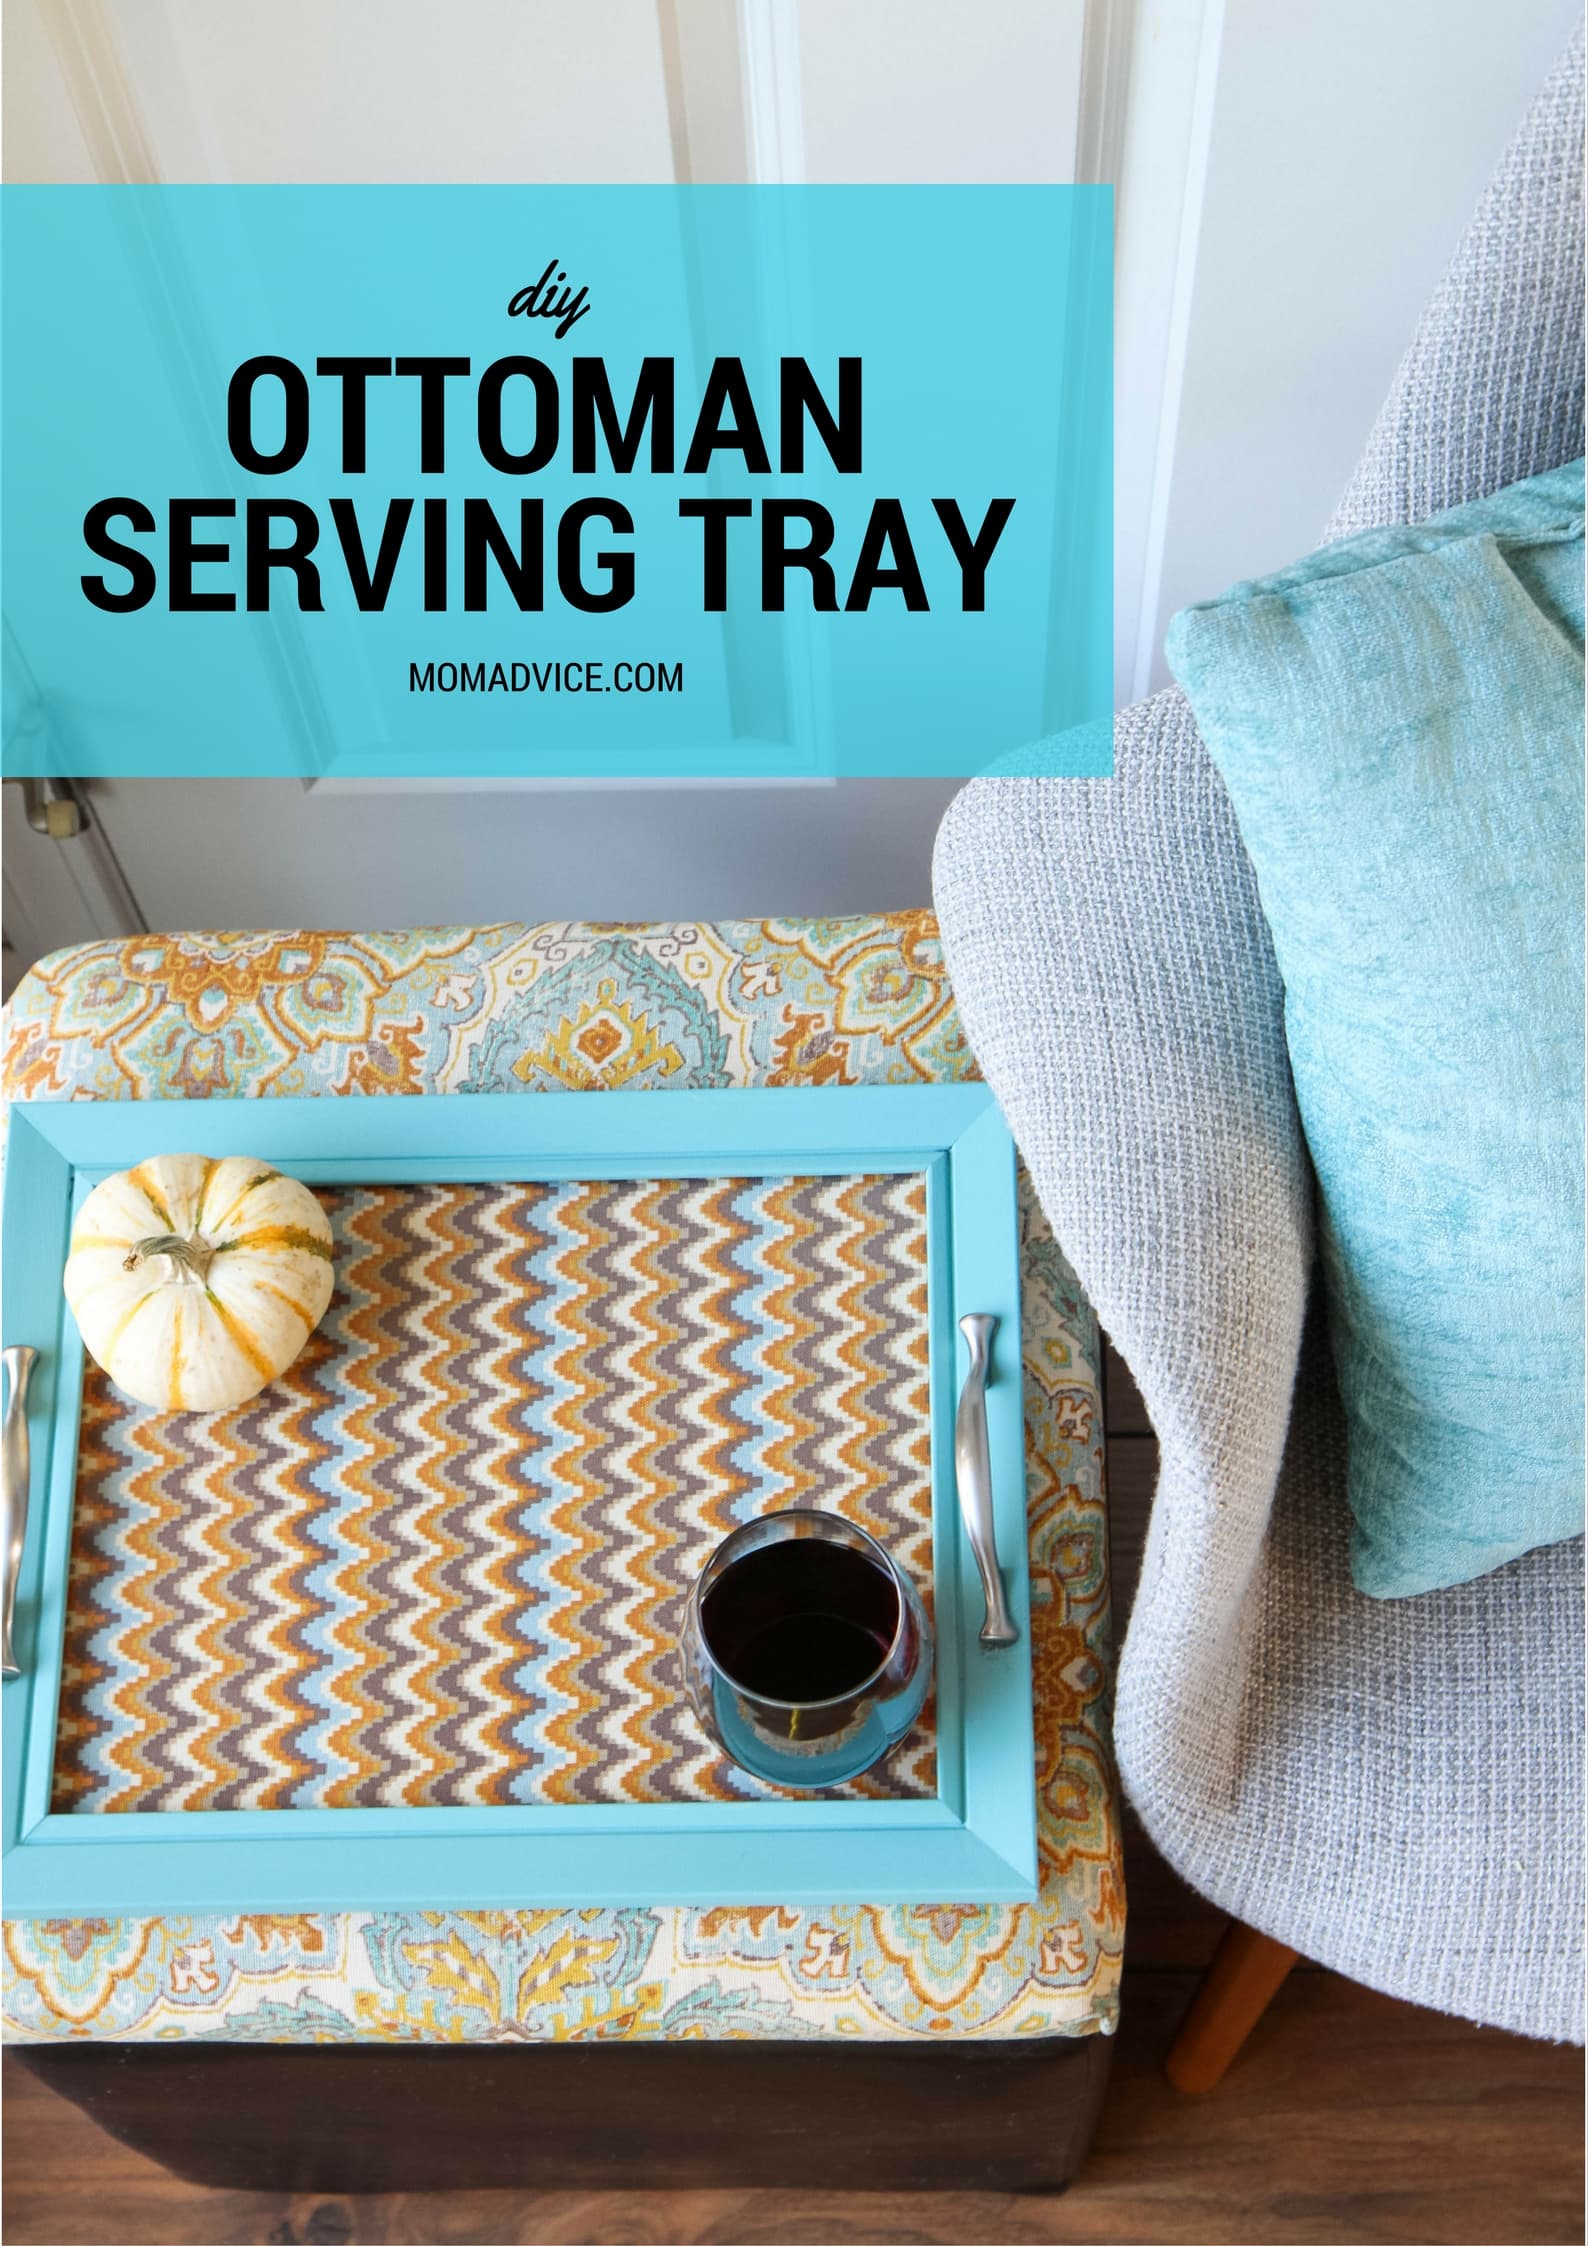
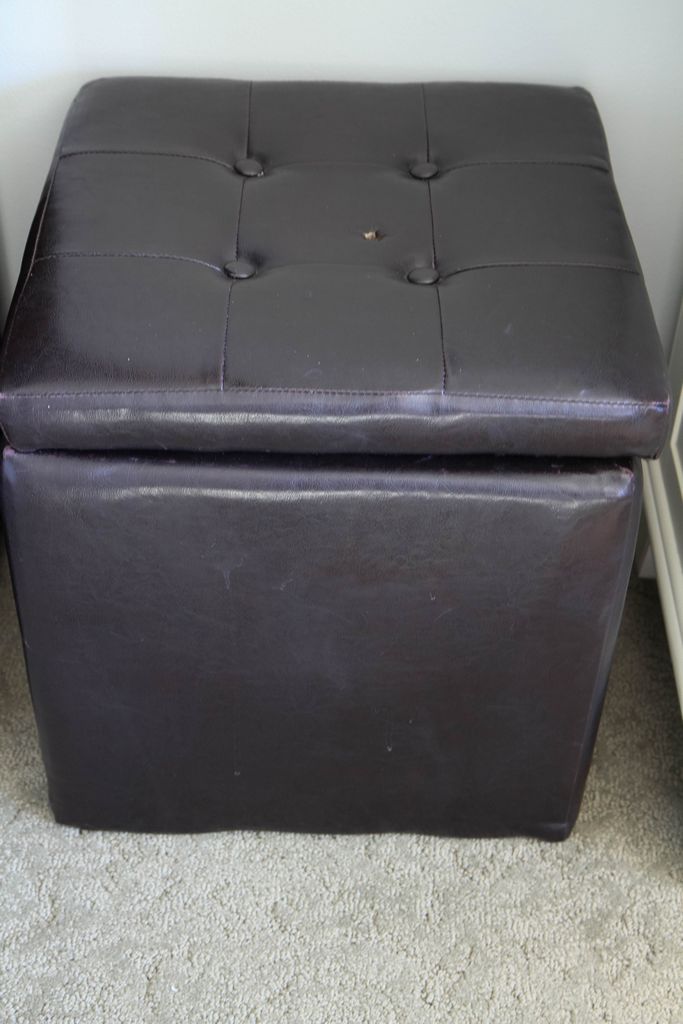
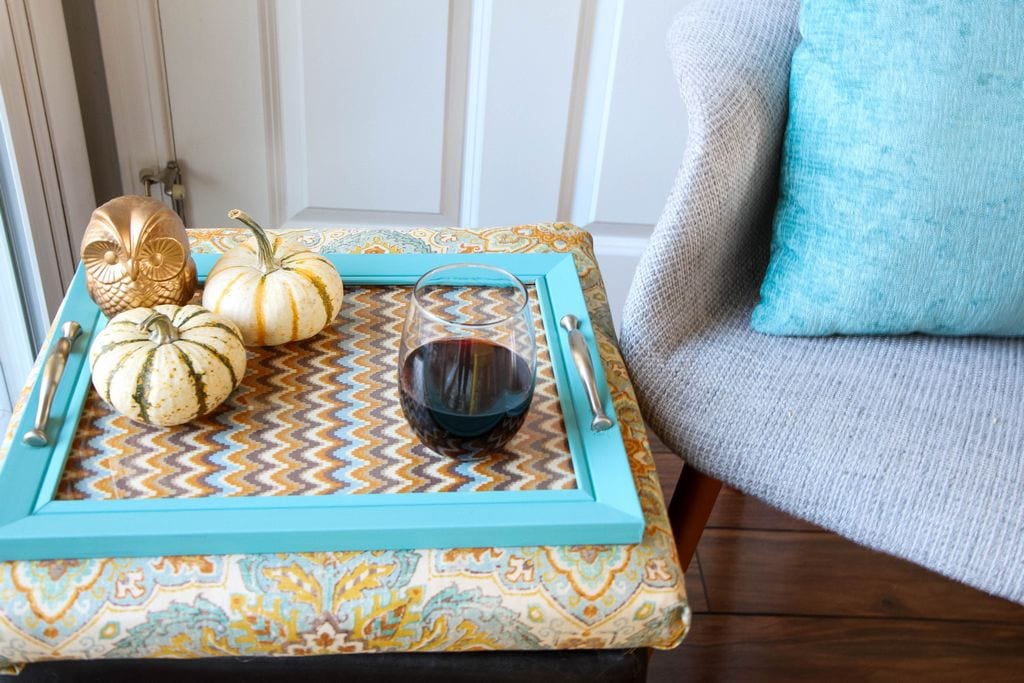
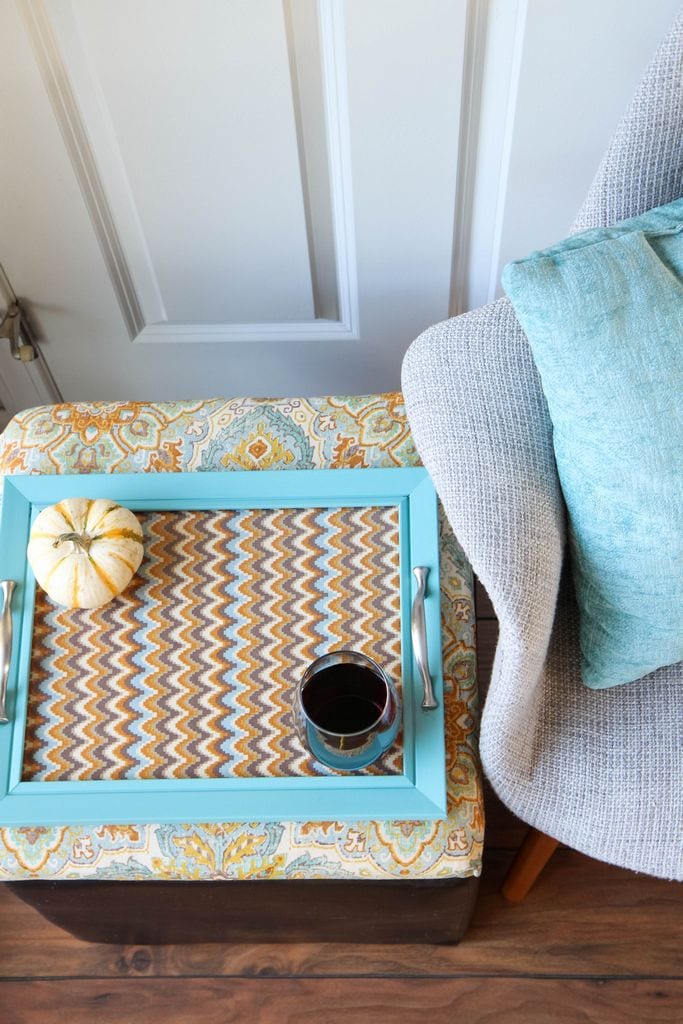
The holidays are upon us and with that means lots of entertaining. I frequently host large holiday and family meals, but our home lacks the space to always seat everyone at the same table. I thought a DIY was in order to transform a neglected ottoman in our home into an additional table for our guests. This DIY Ottoman Serving Tray craft is easy to do and a great way to make the most of one of those storage ottomans that many of us have in our home. Sandwiched between two chairs, guests have a place to prop their drinks or the ottoman can be placed in front of a guest like a television tray would.

Table for one or two? Right this way!

How to Make a DIY Ottoman Serving Tray

DIY Ottoman Serving Tray from MomAdvice.com

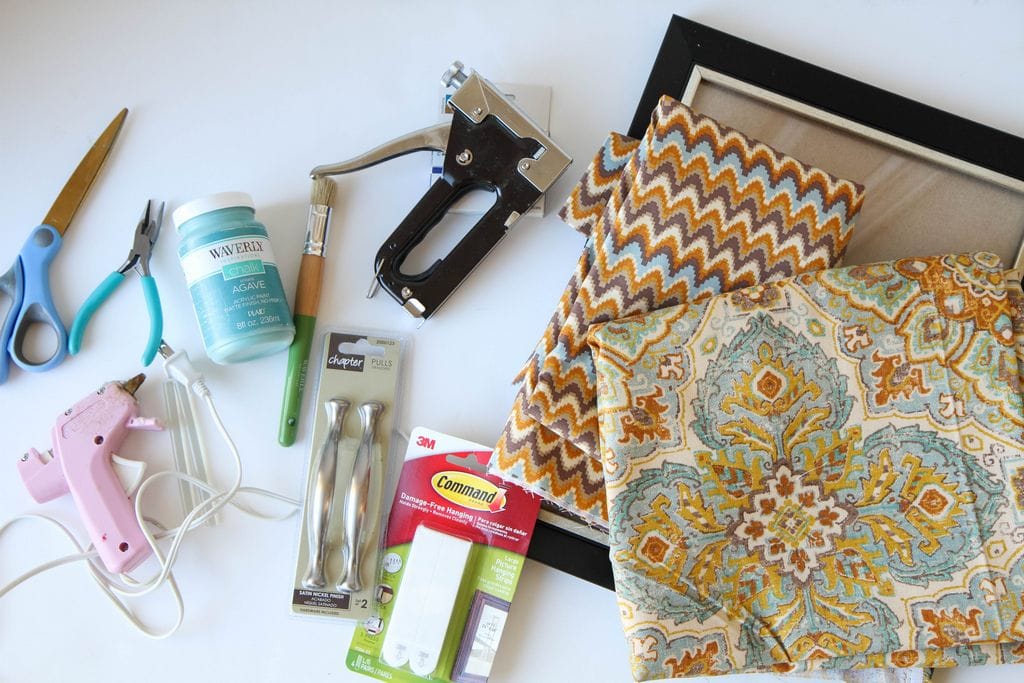
Supplies Needed (all of these supplies can be found at Walmart!)

2 kinds of Waverly Inspirations Fabric in coordinating fabrics (I used the 100% cotton duck fabric available at the store)- measure your ottoman to get the correct amount of fabric

Upholstery Stapler

Upholstery Staples

Hot Glue Gun

Hot Glue Sticks

Scissors

10×13 Diploma Frame

Waverly Chalk Paint

Paint Brush

1 1/2 Waverly Ribbon (I needed 3 yards, but it will depend upon your ottoman sizing)

2 drawer pulls

Note- Please ignore the Command Strips- that didn’t work out so well! Always an experiment- ha!

Directions for DIY Ottoman Serving Tray

DIY Ottoman Serving Tray from MomAdvice.com DIY Ottoman Serving Tray from MomAdvice.com DIY Ottoman Serving Tray from MomAdvice.com

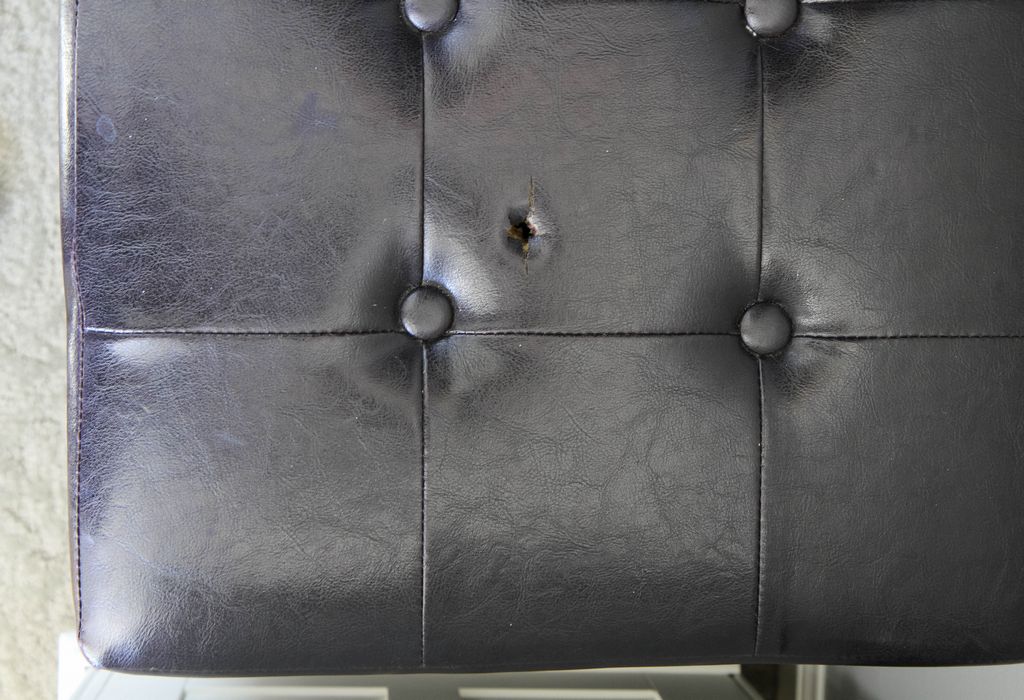
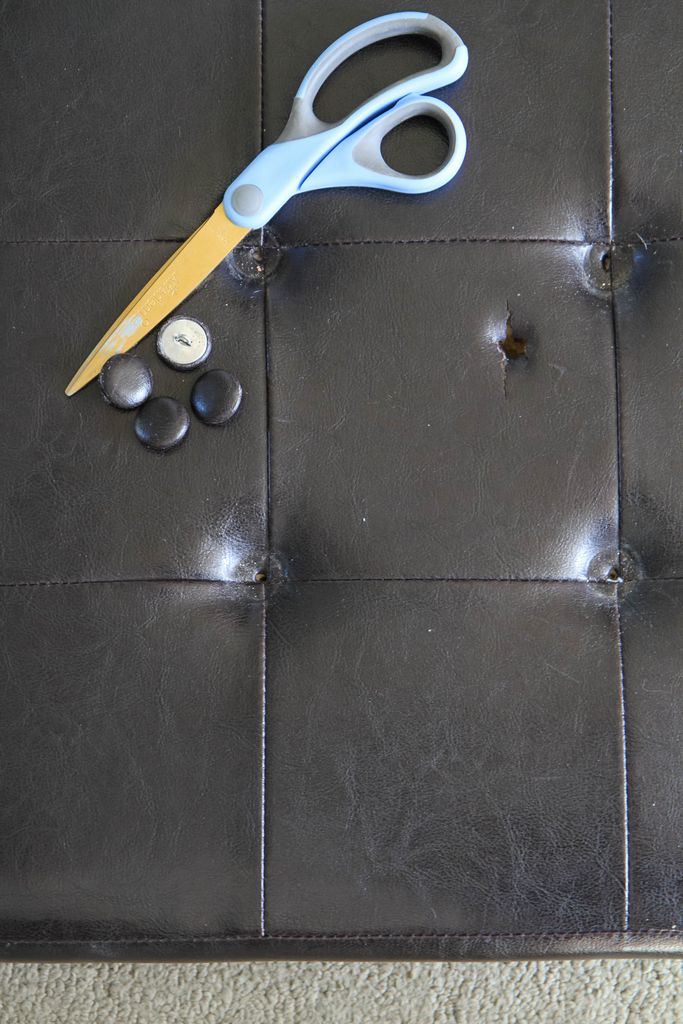
Just a few weeks after purchasing this ottoman, my daughter came to tell me that she had found the perfect “fairy wand holder,” in our living room. Proudly, she showed a wand standing straight to attention in the top of our brand new ottoman.

It became a regular joke when buying furniture, after that moment, to ask the salespeople things like, “Do you have any insurance to protect this couch if your child STABS IT? I mean, just takes something and plunges it through?!”

Oh, the fear and bewilderment in their eyes.

They clearly do not have children and we have learned, moving forward, that furniture insurance is worth its weight in gold.

Now that my daughter is ten, I’m both 1) embarassed that I have thought of repairing this for ten years, but did not do anything and 2) a little misty-eyed covering up our fairy wand days. They grow up so fast!

There are ottomans now that can be bought with a built-in tray, but what if you already bought one and want to make the most of it? This DIY is for you!

DIY Ottoman Serving Tray from MomAdvice.com

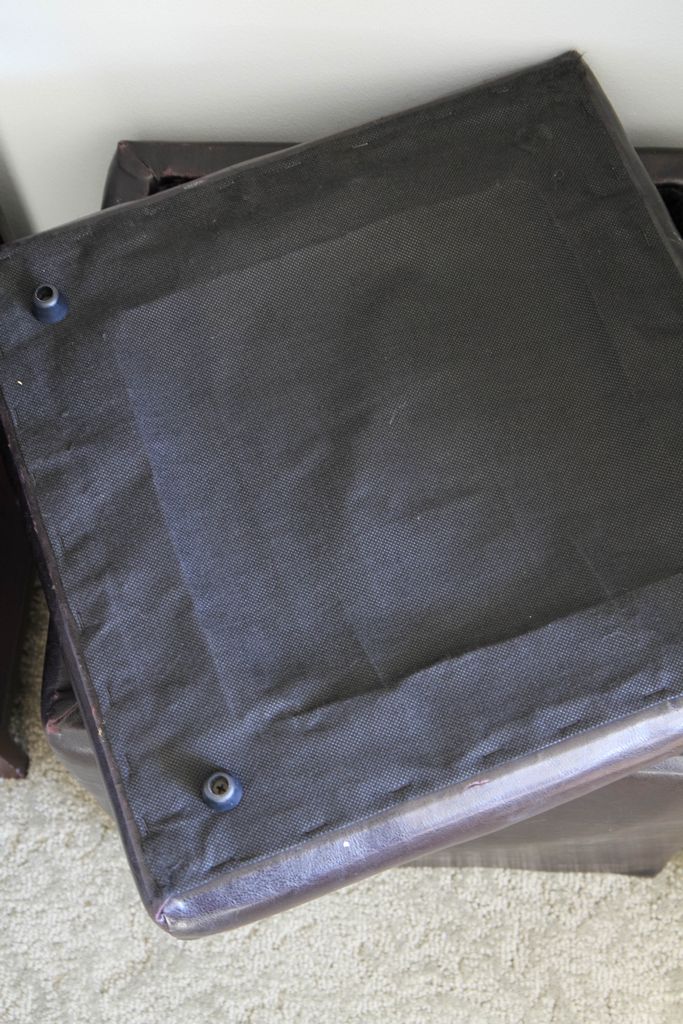
1. Begin by removing any hardware on the bottom of the top of your ottoman and any buttons from the top. Using this as a guide, cut a piece of fabric, making sure to give room around each side for covering and stapling.

DIY Ottoman Serving Tray from MomAdvice.com

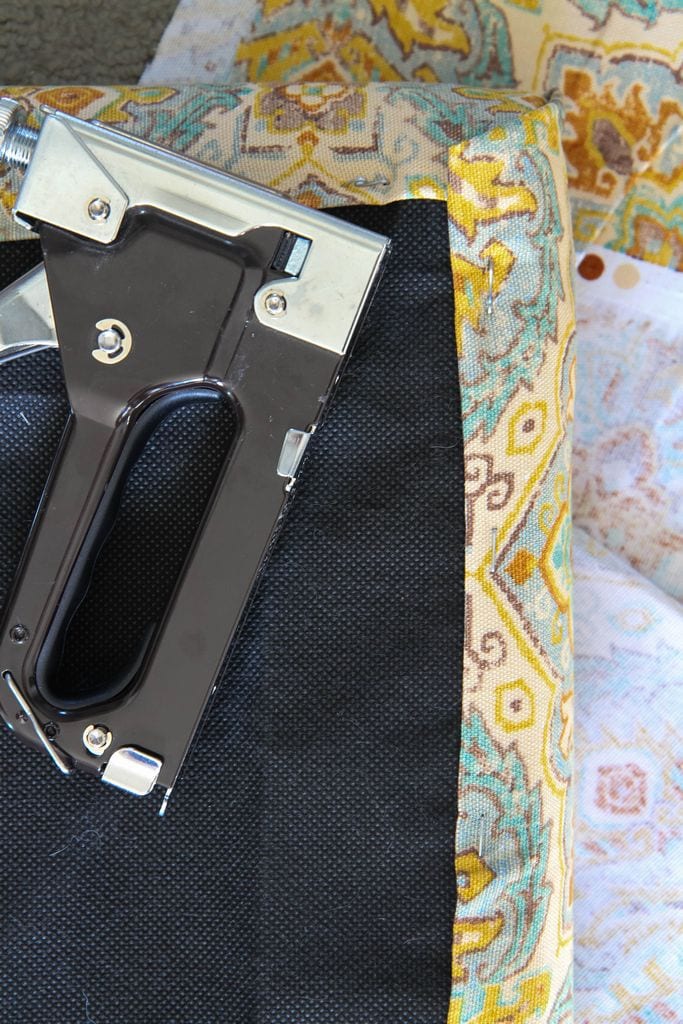
2. Folding under the raw edge of the fabric, begin stapling the fabric down the two shorter sides. Two words- PULL TIGHT. You want a nice smooth surface and no loose fabric. Folding the corners like a package, repeat the process on the two longer sides.

DIY Ottoman Serving Tray from MomAdvice.com

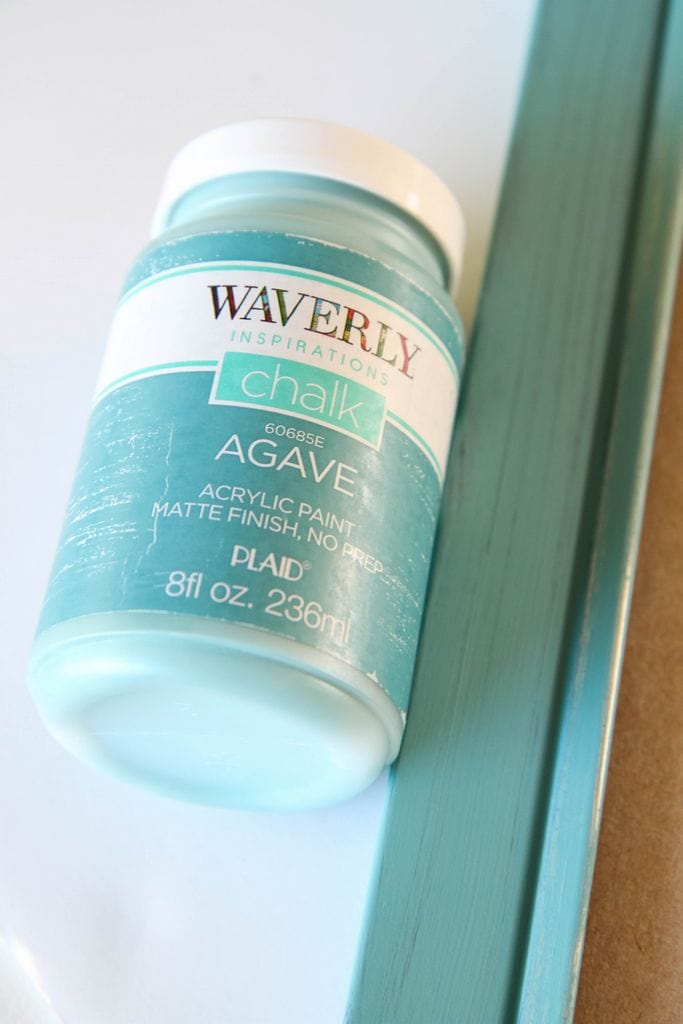
3. Remove the glass and any materials inside the diploma frame. We are using this type of frame because it is very lightweight and has no hardware on the back. Using a paint brush, paint the entire frame in chalk paint and let dry. Repeat with one more additional coat.

DIY Ottoman Serving Tray from MomAdvice.com

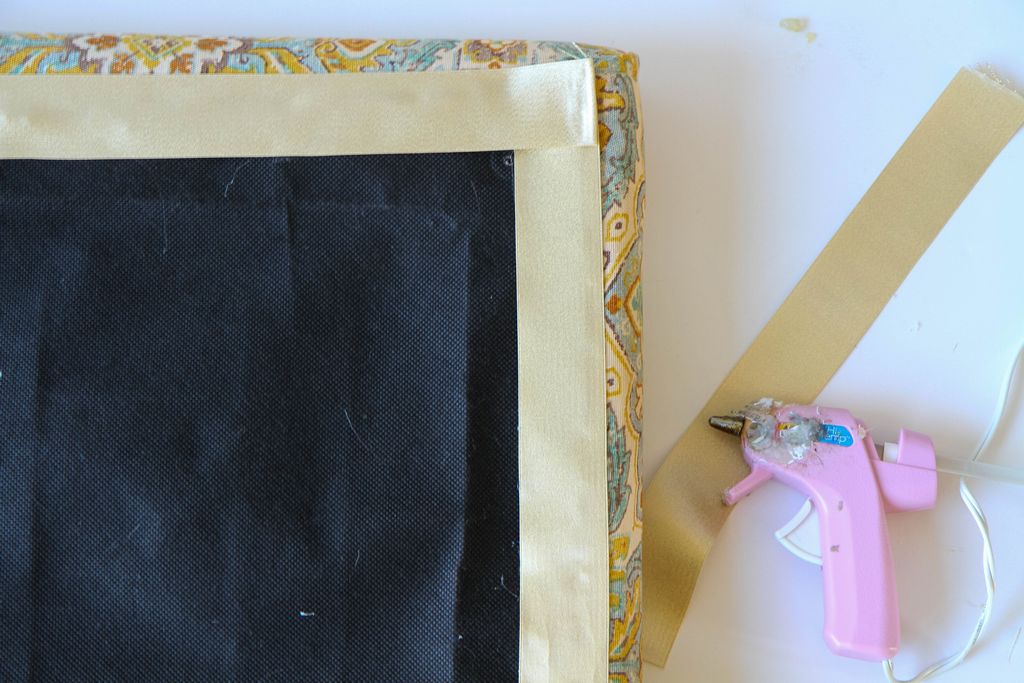
4. To give the ottoman a clean finish, grab your ribbon and outline the bottom of the stapled fabric, folding down the raw edges with a dab of glue, and hot gluing this ribbon all the way down the four sides. This helps cover up the majority of the bottom when the tray is mounted on top.

5. Using the paper from inside your frame as a guide, cut your second fabric to size and then tuck inside the frame.

6. Hot glue drawer handles on the top of the frame to finish.

DIY Ottoman Serving Tray from MomAdvice.com

DIY Ottoman Serving Tray from MomAdvice.com

How cute is that? The perfect tabletop for your guests! Store the tray on the inside of the storage ottoman and place the top back on as you usually would. With this small addition it’s like you have a brand new table!

Do you want more craft inspiration from Waverly? Try these!

DIY No-Sew Reversible Chair Cushions

Fabric Wreath & Matching Garland

Fabric Bulletin Board Tutorial

Painting Pumpkins With Acrylic Paints

DIY No-Sew Hand Warmers

This post was created in partnership with Waverly Inspirations. Thank you for supporting the companies that support our site! 

Pin It

DIY No-Sew Reversible Chair Cushions

Thursday, September 1st, 2016

DIY No-Sew Reversible Chair Cushions from MomAdvice.com

This post was created in partnership with Waverly Inspirations. Thank you for supporting the companies that support our site! 

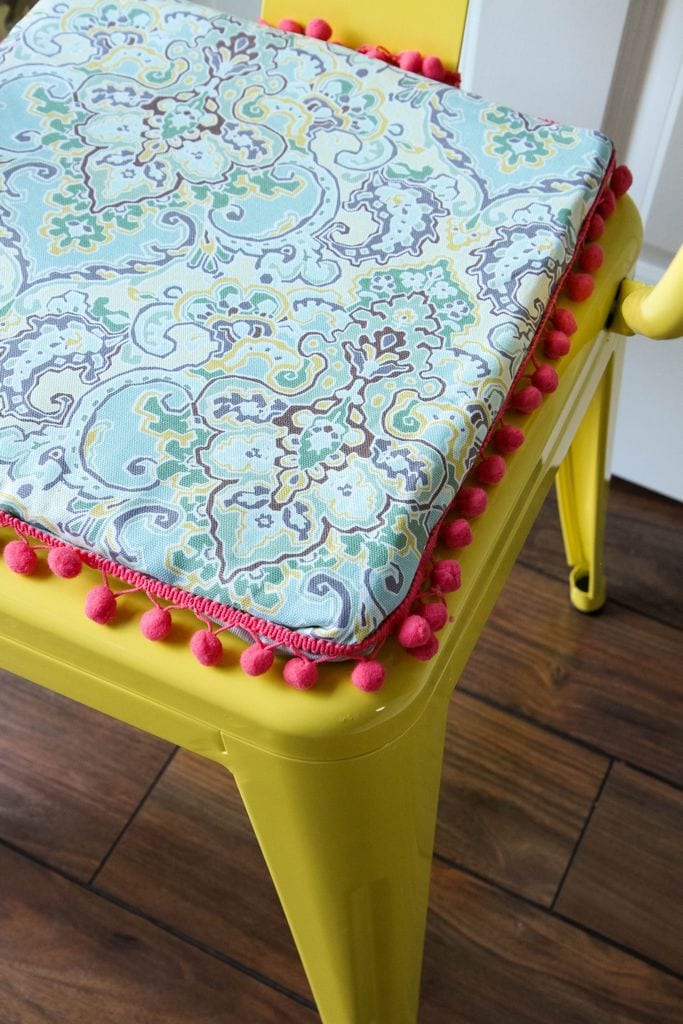
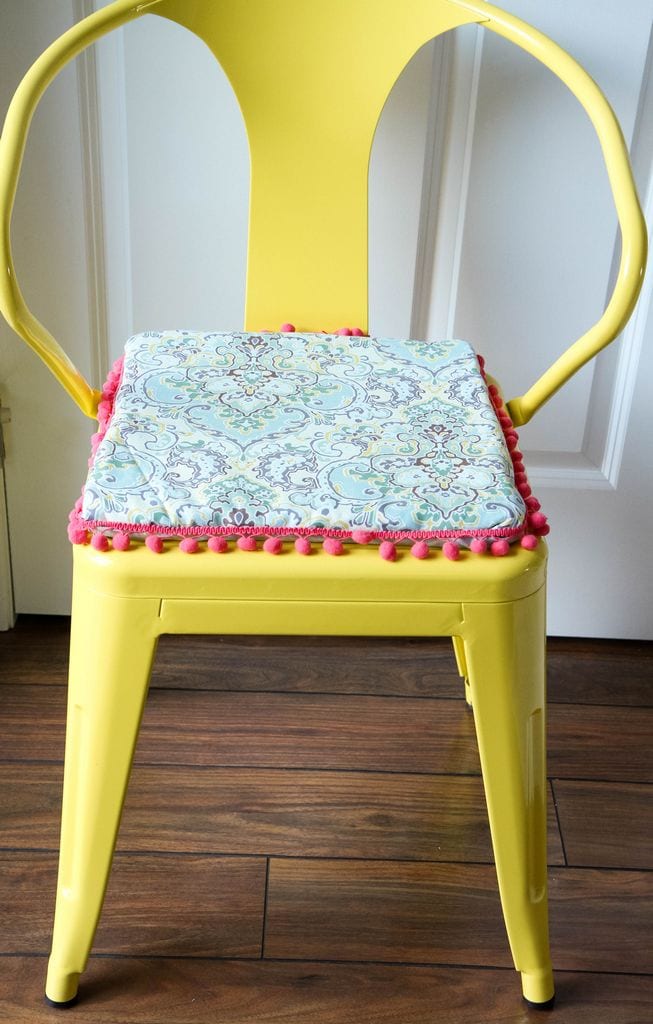
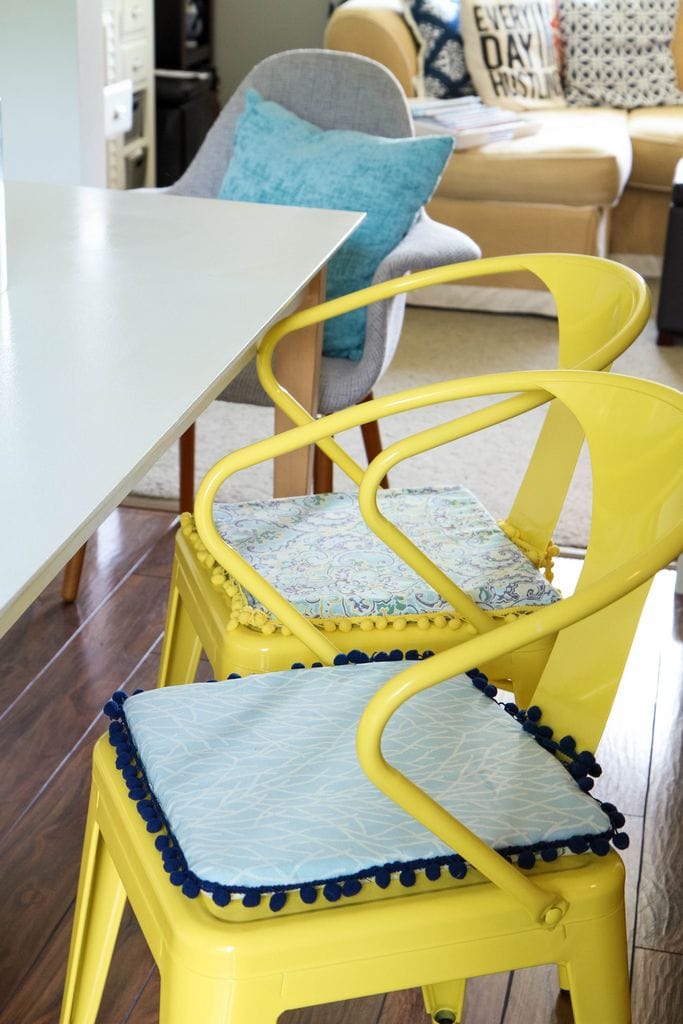
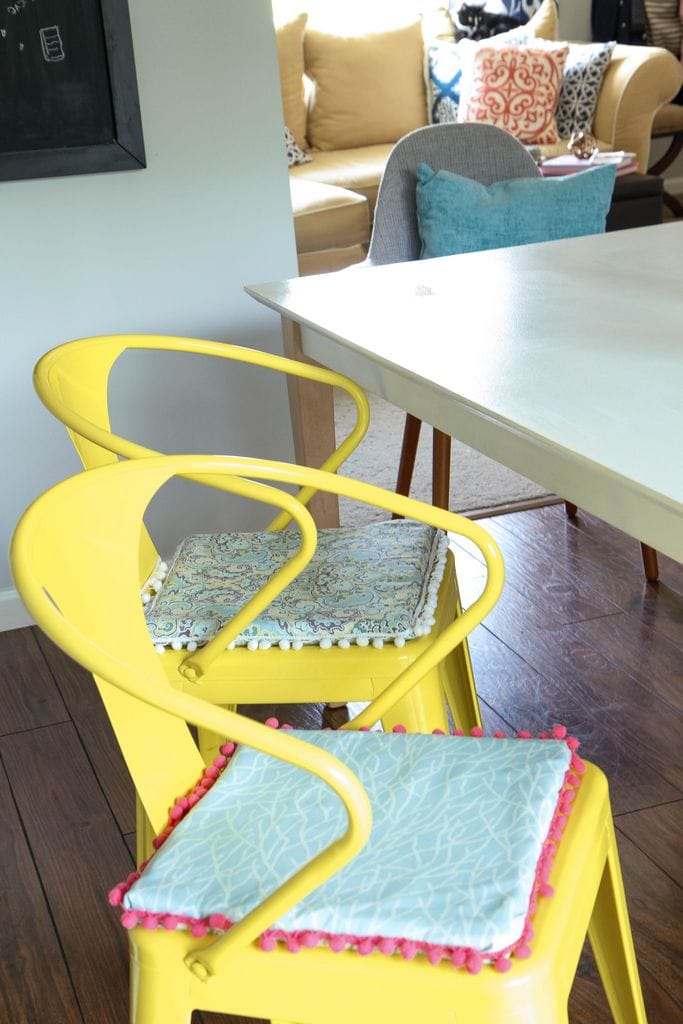
I am so excited to share with you these DIY No-Sew Reversible Chair Cushions I made today for our kitchen. While we have loved the aesthetics of our metal chairs in our kitchen, some of the bony bottoms in this house haven’t wanted to spend too much time in them. Lest you feel lead astray, it is not my rear that is struggling, thanks to a healthy dose of Sir Mix-A-Lot genes. I just get to hear from other people in my house about their discomforts.

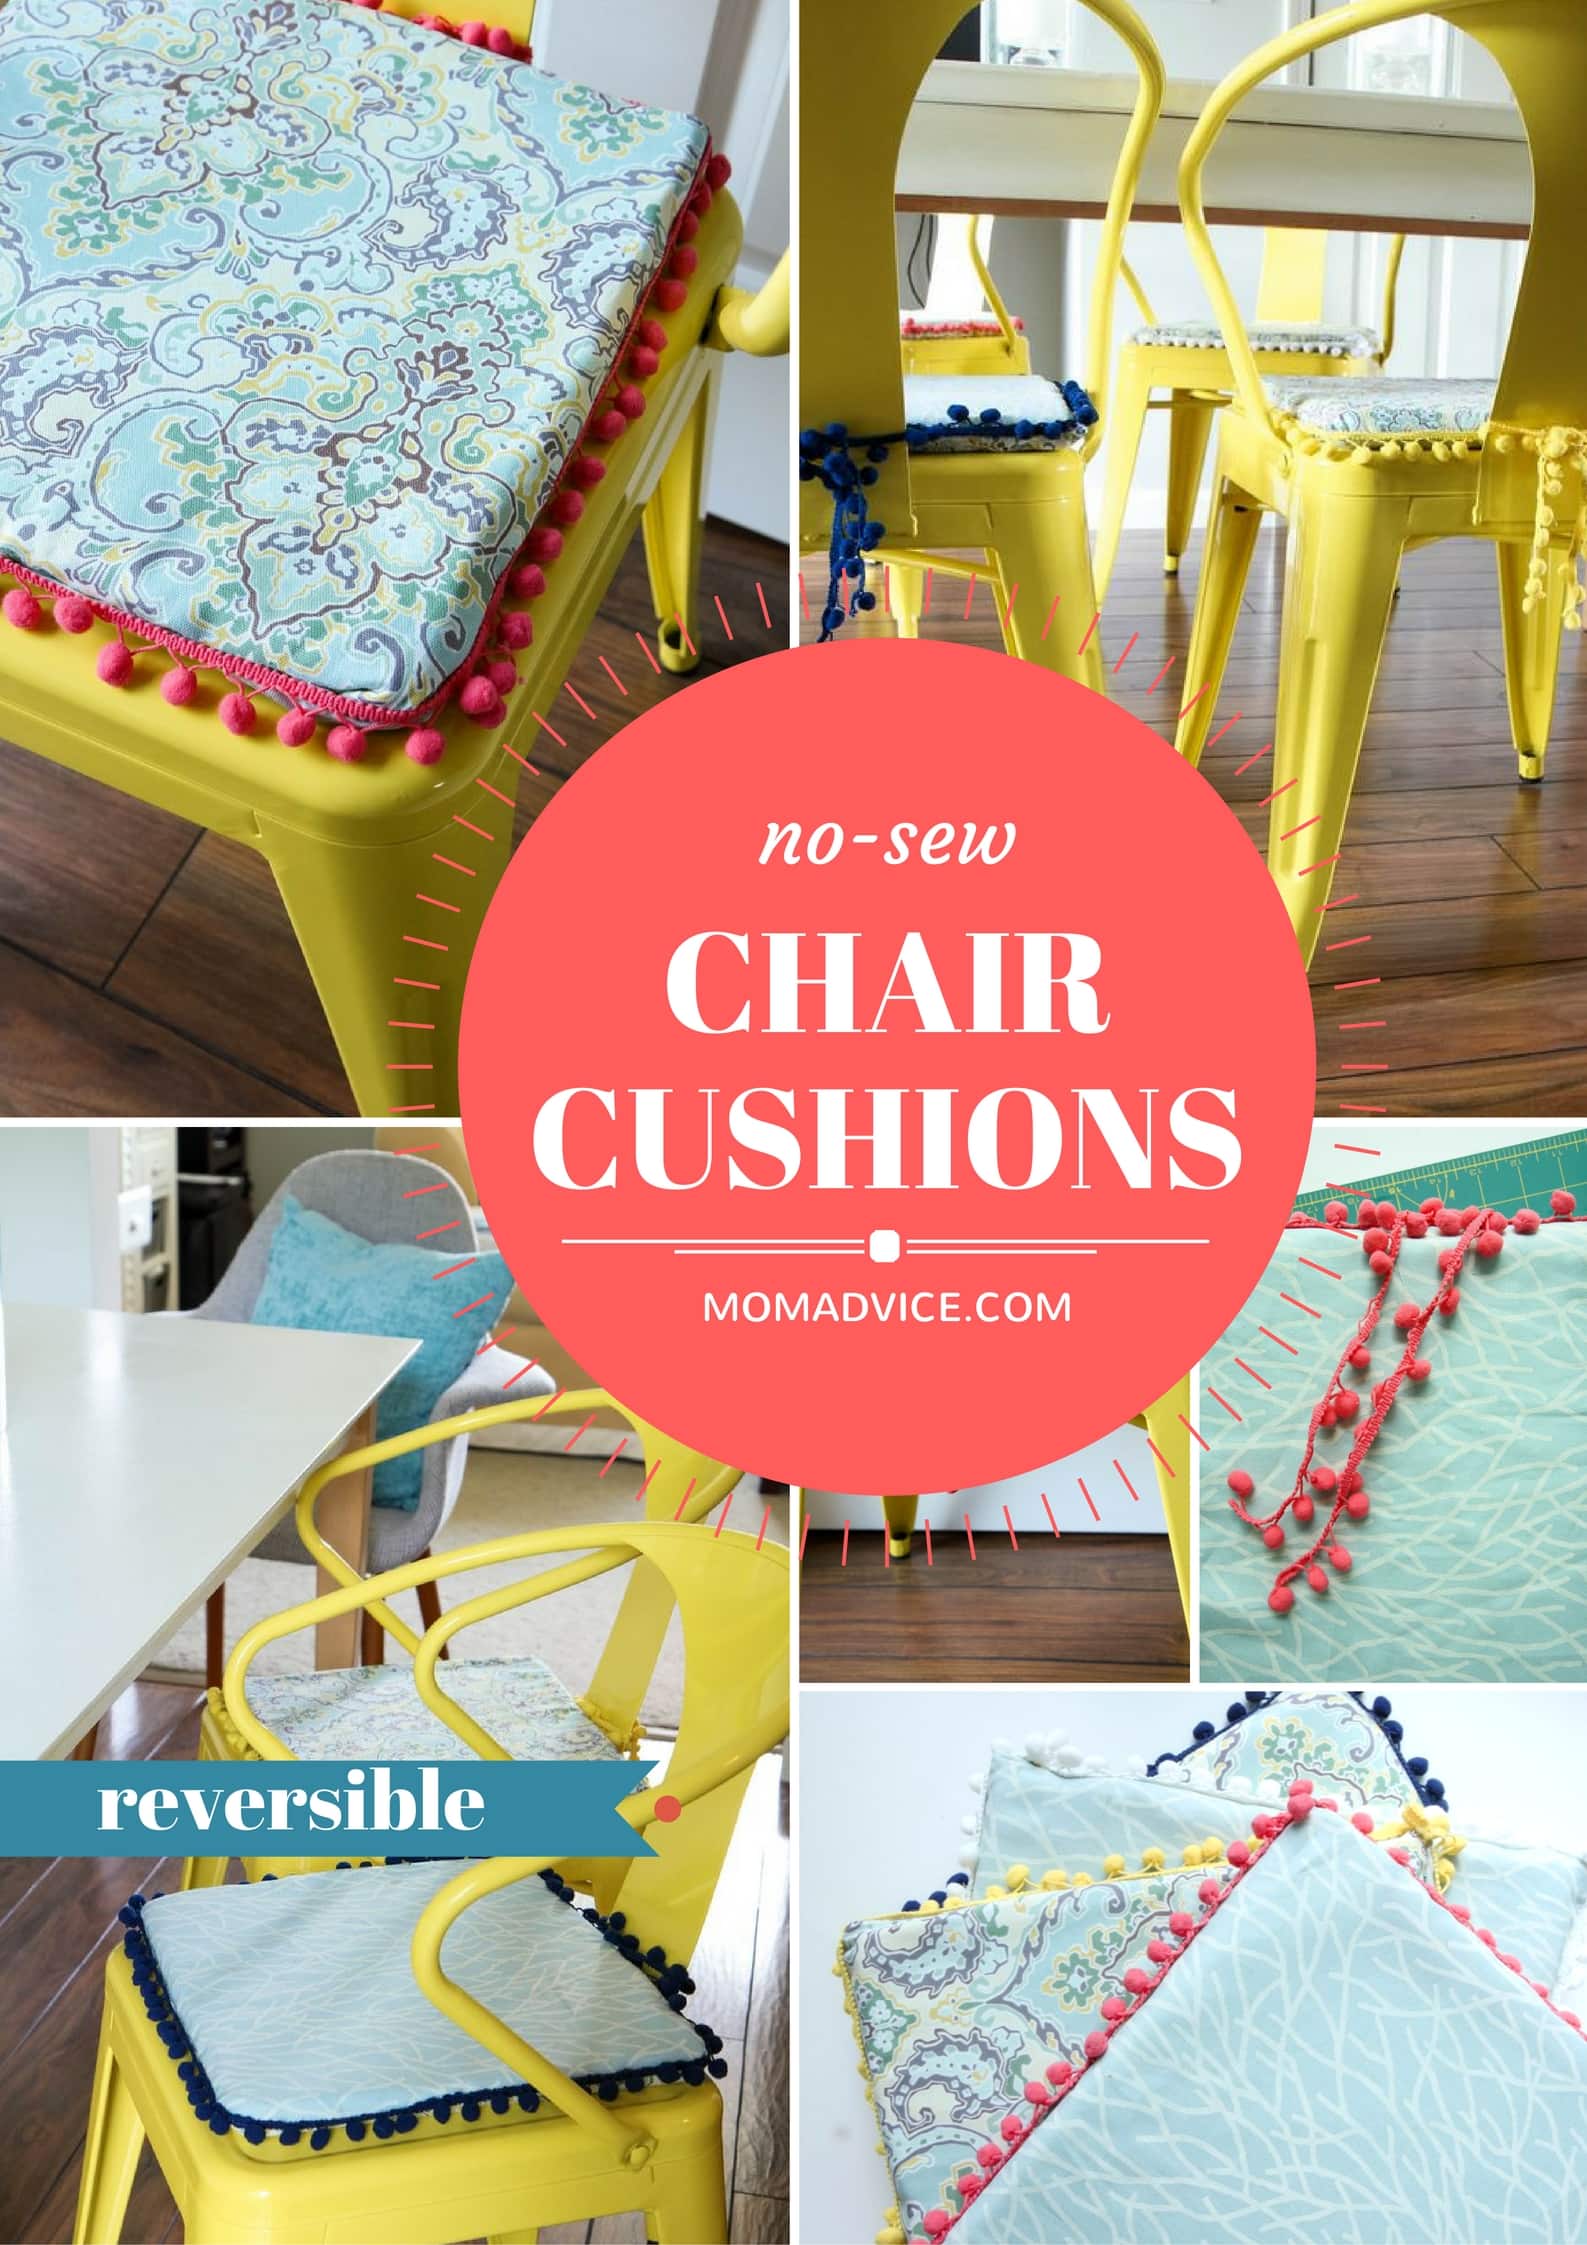
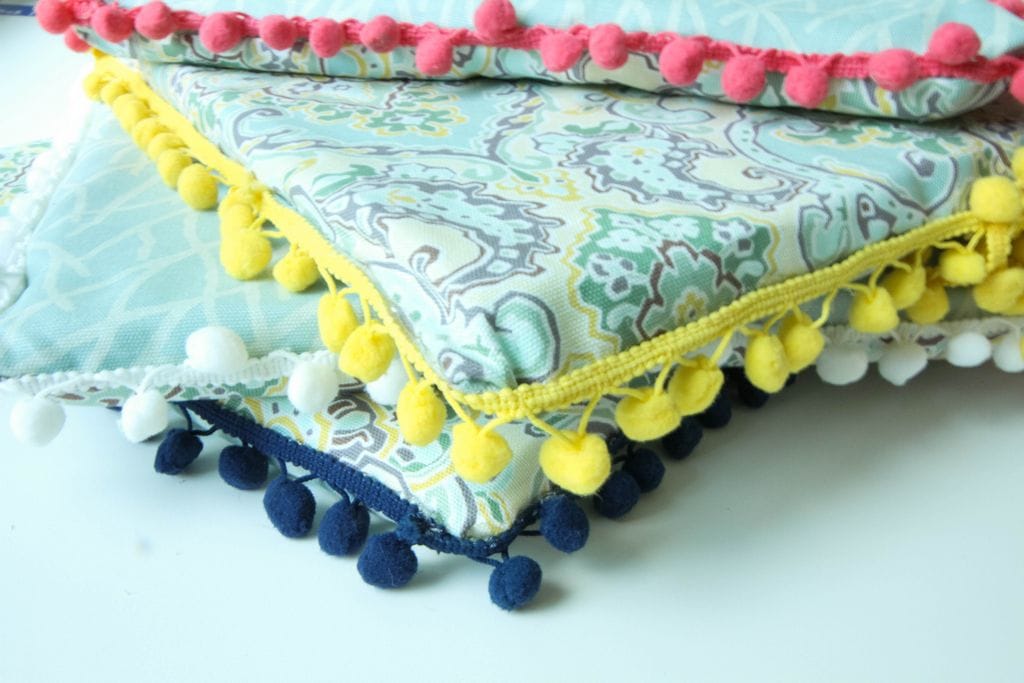
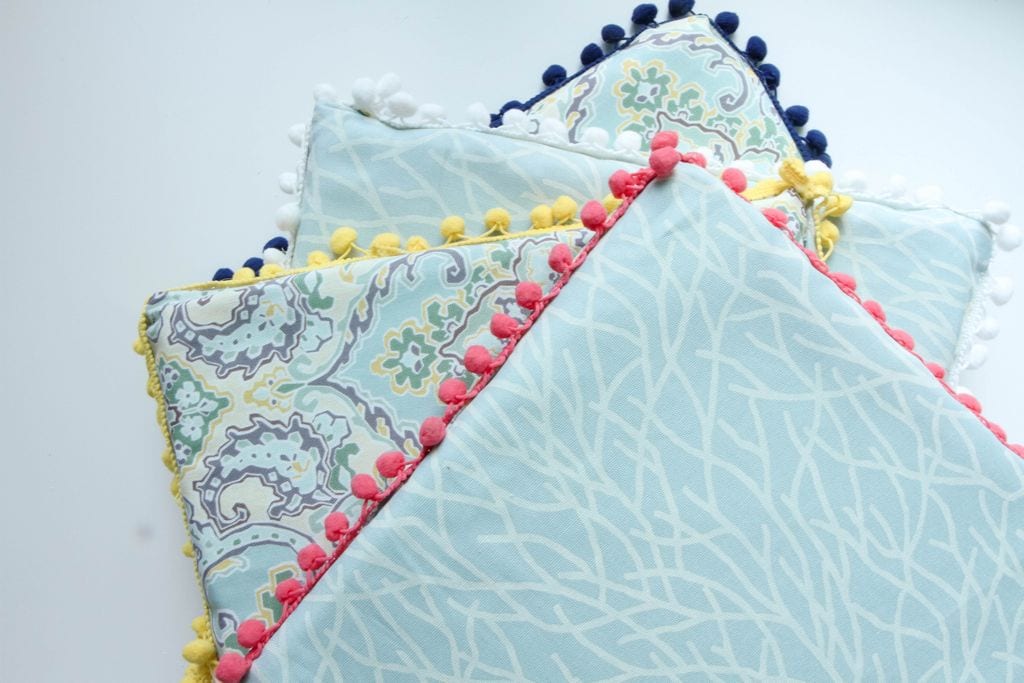
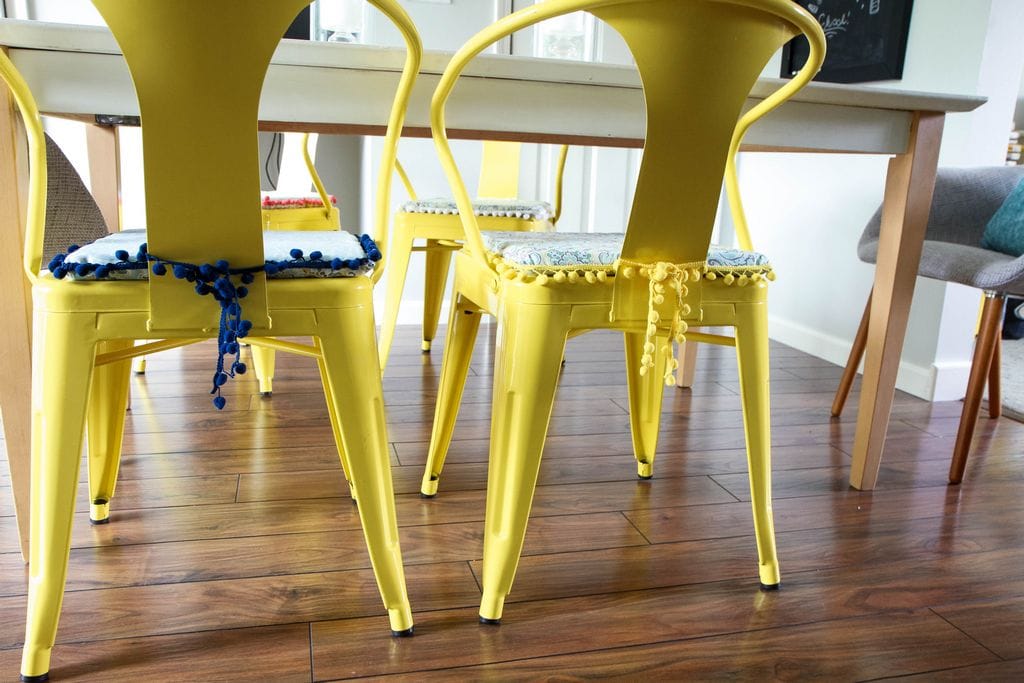
Since I don’t sew pillows (and struggle with exactness and measuring of materials) I wanted to create these DIY chair cushions to comfy up your metal chairs AND I wanted that seat cushion to be able to have two prints so we could switch them around. This great idea is so easy to execute and no sewing machine is even required. Not only does this give you two choices, but if you get tired of the print, you can reuse your cushion materials inside and recover them again with a fresh print.

I don’t want to brag, but I also think these are SUPER cute too!

Don’t think of these as just an accessory for metal dining chairs though. I have found that these seat cushions can also double as bench cushions for our outdoor picnic table benches too.  

Want a longer cushion? Use this tutorial to make gorgeous bench seat cushions that span the width of your benches. Thanks to their lightweight materials and how thin they are, these are also great to transport to any picnic gathering…somewhere else or even in your own backyard. With coordinating throw pillows, you have everything you need to make seating in your home feel beautifully cohesive.

Grab your glue guns and let’s get to work!

DIY No-Sew Reversible Chair Cushions from MomAdvice.com

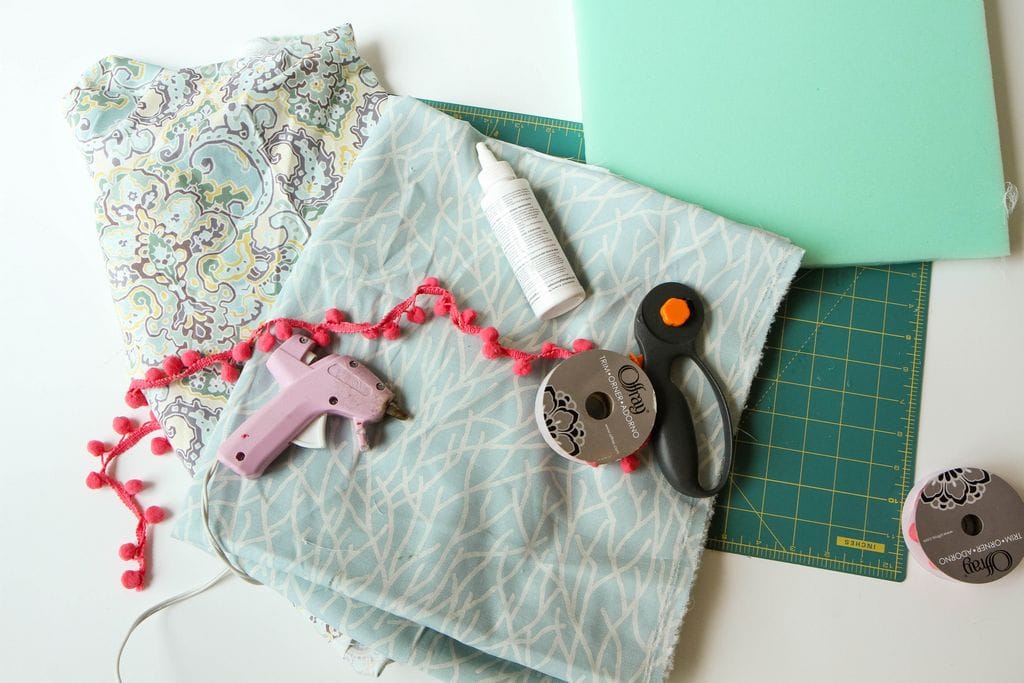
Supplies Needed (everything including these gorgeous fabrics are found at Walmart!!)

Your choice of matching Waverly Inspirations Fabric (measure the dimensions of your chairs to figure out your yardage)

Trim (I purchased two yards for each chair, but this will also depend on your own chair size!)

Fabric Glue

Fabric Rotary Cutter

Rotary Mat

Hot Glue Gun & glue sticks

Foam Cushion

Scissors

DIY No-Sew Reversible Chair Cushions from MomAdvice.com

Directions for No-Sew Chair Cushions

1. Begin by placing a large piece of parchment over your chair seat to create a template of the sizing of the seat of your chair. Mine had a lip that outlined around it that I followed for tracing. Cut this out and use this as your guide for cutting your foam. Using scissors, cut to the size of your template (Note- if you are worried about your template holding up, you can trace it on heavier paper and then use that as your guide).

2. Grab one of your fabrics and place the foam cushion on top. Cut (with your rotary cutter and on your mat) around the cushion, giving yourself 2″ of wiggle room around the cushioning. Repeat this same step with your second piece of fabric.

3.  Now it is time to glue your pieces. You want one fabric with the print out and one fabric on top with the print in. We will be turning these inside out once they are dry so you want to be sure your fabric is facing the correct direction. Also be mindful what direction your print is going so you can repeat that on each cushion.

DIY No-Sew Reversible Chair Cushions from MomAdvice.com

4. Using your fabric glue, glue around the entire square, leaving an opening to slide in your cushion on one side. Repeat this on all of your cushions. Set the cushions aside and let them dry for 24 hours.

5. The next day, carefully open up and turn the cushion covers to the right side. Slide your foam cushion in and then either sew the opening with a needle and thread or (this is my lazy girl way!) line up the fabrics folding it in to match and hot glue that seam shut.

6. Grab your trim and carefully apply your hot glue and then secure your trim. Do this all the way around your cushion. If you have any excess, line the cushion up and figure out where to secure a tie (or two!) for it. You can either secure this to the cushion with a bit of hot glue or you can grab a heavy thread and needle and stitch it to the back.

DIY No-Sew Reversible Chair Cushions from MomAdvice.com

DIY No-Sew Reversible Chair Cushions from MomAdvice.com

DIY No-Sew Reversible Chair Cushions from MomAdvice.com

DIY No-Sew Reversible Chair Cushions from MomAdvice.com

DIY No-Sew Reversible Chair Cushions from MomAdvice.com

DIY No-Sew Reversible Chair Cushions from MomAdvice.com

DIY No-Sew Reversible Chair Cushions from MomAdvice.com

I hope these fun cushions bring your bony butts as much joy as they have to our house. We all agree that this also warms up the space a bit and makes it feel a little more homey. I added these coordinating pillows to the end chairs to add a little more warmth to them.

Do you want more fabric craft inspiration? Try these!

How to Make a Blanket Scarf

Fabric Wreath & Matching Garland

Fabric Bulletin Board Tutorial

This post was created in partnership with Waverly Inspirations. Thank you for supporting the companies that support our site!