Archive for the ‘Knitting’ Category

Round-Up of Knitted Pumpkin Hats

Tuesday, September 13th, 2011

It is not only the time for pumpkin eating in our house, but it is also the perfect time for pumpkin knitting. I decided to whip up a few of these wee pumpkin hats for a few special newborns for the fall season. My pattern came from a book that I have in my knitting library, but I wanted to round up a few free pumpkin hat patterns you can use to create the same thing for free, if you don’t have my book.

Are you my friend on Ravelry? If not, I would love to be friends! My username is momadvice on there and I am always looking for new friends to knit with and share project ideas!

Wee Pumpkin Hats

Pattern: Little Pumpkin by Susan B. Anderson from Itty-Bitty Baby Hats

Needle Size: US 6 (for smaller hat), US & for slightly larger hat  (12″ circulars)

Yarn: Loops & Threads Impeccable Solids (in Pumpkin, Lush, & Chocolate)

Notes: This knitted up quickly, but also a bit bigger than I was expecting. I decided to do this with a needle size down (to a US 6) which helped alleviate the larger sizing issue.  The pattern is so easy to follow and I absolutely love the chocolate stem and sweet leaf on top. This would make a wonderful baby gift for an autumn baby!

Here are a few free options that are available to you, if you would like a free pattern:

Kürbis* Baby Hat

Eat Your Veggies Baby Hat

Pumpkin Hats by Sarah Hood (free Ravelry download for members)


Punkin Head

**************************************

If you are just beginning the world of hats, these are the three things that really helped me have success getting comfortable with double-pointed needles and knitting in the round.

3 Things That Helped Me With Making Wee Baby Hats

1.Bamboo 12″ circulars– Here is the honest truth. If you are super coordinated with double pointed needles, you can skip buying these and knit the wee baby hats in the round. I have found that knitting baby hats in the round was more of a challenge than I expected, and my mother-in-law recommended purchasing 12″ circulars so the hats do not have to be started on the DPN’s. These were a lifesaver and I will always use these for starting my hats. They do require a bit of coordination since they are shorter & smaller than your normal circulars, but they are worth the effort.  I applied my Swagbucks towards Amazon gift cards to help reduce the cost on these.

2. Bamboo 9″ Double Pointed Needles– Again, these are an off-brand needle and they were extremely rough so they held my stitches really well. As a beginner on these, these rough double pointed needles were key for me to get the hang of it without dropping stitches. It was a lot cheaper to buy these as a set and I did apply my Swagbucks towards the Amazon gift cards so I didn’t have to dip in my pocket to pay for them. You could go with a different length on these, but I opted for these 9″ ones and they still work great for the baby hats as well as the adult hats I knit.

3. A Good Ring Marker- I was using the kind that you just slipped over the needles and was finding that I was losing my starting stitch marker for knitting in the round. Look for ones that will slip onto the yarn and put that at the beginning of my round. It will really help you not lose your pace and keep you on track with your knitting.

*******************

Disclosure: The links to books and supplies are affiliate links and are provided so you can locate what you need quickly and easily. Feel free to order a book, but we encourage utilizing the library system and buying me some yarn instead.  Wouldn’t that just be so much more lovely?

What craft projects have you been working on? Feel free to share any links to what you are working on and be sure to friend me on Ravelry if you happen to be a knitter too! Access all of our craft fun on MomAdvice by visiting our Craft Section. Happy crafting, friends!

Oh, Baby: Sweet Knitted Baby Hats

Tuesday, May 17th, 2011
Photo Credit: Nancy Lary Studios

Baby hats are my latest knitted obsession since they are so easy to create and to give. I admit, I used to lovingly knit baby blanket after baby blanket for my friends. Those, unfortunately, require a lot of sweet love and endless amounts of free time. I decided I wanted gifts that could be knit in a couple evenings worth of television shows and that their mommies could actually use instead of storing them away. Hats really seem to fit the bill and their are endless patterns for adorable baby patterns out there.

Once you get the hang of knitting in the round, baby hats are a piece of cake! I will share with you my new favorite patterns and a few tools that can help you achieve baby hat success when knitting!  I usually try to highlight only free patterns, but these were a few that I did pay for. I do promise that the patterns are well-written and are the type that can be  made over and over again for gifts. I hope that this post will still inspire and give you a fun new gift to knit for a special little one in your life.

If you are a knitter, I would love for you to be my friend on Ravelry. My username is momadvice and I try to keep my little notebook updated with the current projects.


Photo Credit: Nancy Lary Studios

cherry tomato hat (in red) & sprout hat (in green)

Pattern: Greenleaf Baby Hat by Evelyn Uyemura (available for $1.00 as a Ravelry Download- join Ravelry.com to access the pattern)

Needle Size: US 8 (I purchased this set of 12″ circulars for these hats)

Yarn: Naturally Caron Country (Claret) & Caron Simply Soft in Dark Sage for stem. The green hat is done only in Caron Simply Soft in Dark Sage

Notes: If you are looking for a great beginner pattern for making hats then this is the perfect pattern for you. This simple roll brim hat is simply knit in the round until you get to the top and then you create a basic i-cord to create the stem of the flower.  An easy set of increases and then decreases creates the leaf at the tip of the hat.

I did the roll brim pattern and made the i-cord about a 1/2” longer than the pattern specified. I also knit this hat on size 8 needles (for a 0-6 month size versus the newborn size).

This pattern could be knit into a variety of cute fruits and vegetables or in a solid color as I did for the second hat pictured above. Fall hats could be created into pumpkins, red and green would look adorable for a Christmas baby, and I can’t wait to try other fun additions to this adorable pattern.

The beautiful model in these photos is my sweet friend Andrea’s beautiful baby girl, Evey. She was so kind to let me share her photos on the blog. I could not have asked for a prettier model to model them!

Photo Credit: Nancy Lary Studios

brunhilde hat

Pattern: Viking Girl Hat by Sara Fama; Pattern is $7.50, but you can use a coupon code (“Ravelry10”) to receive 10% off the pattern. Pattern kits can also be ordered with the yarn used in the pattern, but I was able to find similar colors of yarn at our local craft shop.  The pattern included the pattern for the boy hat as well as the hat in different sizes.

Needle Size: US 6 (I purchased this set of 12″ circulars for these hats)

Yarn: (Charcoal), Loops & Threads Charisma (Yellow), Hobby Lobby I Love This Cotton! (Ivory)

Notes: Ever since I learned how to knit, I have been dying to make this hat. This has literally been bookmarked for over a year, in hopes that one day I would feel brave enough to knit it. A baby shower gift was the perfect opportunity to splurge on the pattern and give it a try. I can’t begin to tell you how much pride I had making this hat.

This hat really taught me a lot of new techniques, but the piecing of it was a little tedious. Beginning knitters will need to know how to knit bobbles (brief description is available in the pattern), create i-cords, knit on dpn’s, and knit in the round. Luckily, YouTube offers great video tutorials on these techniques to make creating this a little easier.

I made the Brunhilde pattern, but once I made the little wings for the hat, I did not think they looked like a Viking hat. It may have been to the stretch and give of the cotton yarn, but they just did not stand to attention like I had hoped. I opted to make the boy version of the horns and liked them much better. These were whip stitched in the same cream color).

The braids were really fun to knit and are knitted in three separate i-cords (attached by two rows of knitting at the top). I finished them with tightly knotted yarn and then grosgrain hot pink ribbon bows from my craft suppplies.

There is a lot of freedom with this pattern and it was written well, with a lot of comedic style and fun mixed into it. I am really proud of how this hat turned out and still can’t believe I actually made it!

purple pom pom hat & pom pom gray baby bear hat

Pattern: Pompom Bear by Amanda Keeys; I purchased this Baby Beanies Book to get the pattern. This is one of only three knitting books I own- I promise, it was a worthy investment if you are looking for easy hats to knit for baby gifts.  I have already knitted four hats from it and plan to knit many more patterns in this one.

Needle Size: US 8 (I purchased this set of 12″ circulars for these hats)

Yarn: Caron Simply Soft in Heather Gray (for the boy version) & Naturally Caron Country in Dark Purple (for the girl version)

Notes: This hat is so fun to knit and is as cute as could be. In fact, each time I make this hat, I get an order request from another friend who wants one for her own little one. The hat has an easy ribbed edge and then is made into a garter stitch from there by just alternating rows of knitting and purling in the round.

It really is the most perfect hat for a beginning knitter because you don’t have to ever decrease this hat or use double-pointed needles to finish it. It is made even easier with a three needle bind off….which has changed my knitting world. I will link to a tutorial on this to help explain it, but if there is ever an opportunity for a three needle bind off in any of my projects, I am doing this. I used the circulars as though they were two straight needles and then used a DPN to knit them together and then bind of the stitches.

**************************************

If you are just beginning the world of hats, these are the three things that really helped me have success getting comfortable with double-pointed needles and knitting in the round.

3 Things That Helped Me With Making Wee Baby Hats

1.Bamboo 12″ circulars– Here is the honest truth. If you are super coordinated with double pointed needles, you can skip buying these and knit the wee baby hats in the round. I have found that knitting baby hats in the round was more of a challenge than I expected, and my mother-in-law recommended purchasing 12″ circulars so the hats do not have to be started on the DPN’s. These were a lifesaver and I will always use these for starting my hats. They do require a bit of coordination since they are shorter & smaller than your normal circulars, but they are worth the effort.  I applied my Swagbucks towards Amazon gift cards to help reduce the cost on these.

2. Bamboo 9″ Double Pointed Needles– Again, these are an off-brand needle and they were extremely rough so they held my stitches really well. As a beginner on these, these rough double pointed needles were key for me to get the hang of it without dropping stitches. It was a lot cheaper to buy these as a set and I did apply my Swagbucks towards the Amazon gift cards so I didn’t have to dip in my pocket to pay for them. You could go with a different length on these, but I opted for these 9″ ones and they still work great for the baby hats as well as the adult hats I knit.

3. A Good Ring Marker- I was using the kind that you just slipped over the needles and was finding that I was losing my starting stitch marker for knitting in the round. Look for ones that will slip onto the yarn and put that at the beginning of my round. It will really help you not lose your pace and keep you on track with your knitting.

*******************

Disclosure: The links to books and supplies are affiliate links and are provided so you can locate what you need quickly and easily. Feel free to order a book, but we encourage utilizing the library system and buying me some yarn instead.  Wouldn’t that just be so much more lovely?

What craft projects have you been working on? Feel free to share any links to what you are working on and be sure to friend me on Ravelry if you happen to be a knitter too! Access all of our craft fun on MomAdvice by visiting our Craft Section. Happy crafting, friends!

Green Spring Cleaning Craft: Knitted Dishcloths & Homemade Cleaning Recipes

Tuesday, March 29th, 2011

It is that time of year again, as we move into the beautiful season of Spring. Around this time of year, I usually start working on a batch of fresh new dishcloths to do the dishes with. If you could see how pitiful the rags I have been using are, you would understand why this is not only a hobby, but also a necessity!

As I mentioned last month, I get to share fun DIY projects as part of the Walmart Moms team, and when I was challenged with making something from the store for the spring cleaning season, I knew that I couldn’t wait to tackle some new dishcloth patterns made from the inexpensive Sugar ‘n Cream Yarn that you can pick up over in the craft section of the store. These balls of cotton yarn (in the knitting/crochet supplies) only run $1.57 per ball and you can usually get two generous sized washcloths out of them.

If you are new to knitting, dishcloths are the perfect project because they are like swatches of pattern rather than tackling a larger project piece. On top of that, it can make you feel braver doing patterns with more complexity and learning new knitting techniques. For the first few months after I learned how to knit, I knit a lot of dishcloths.

All of these patterns can be found on Ravelry, and you can find me there too! If you are a knitter, I would love for you to be my friend on Ravelry. My username is momadvice and I try to keep my little notebook updated with the current projects.

Here are four free fun new patterns to try to add an element of beauty and fun to your spring cleaning:

double bump dishcloths

Pattern: Double Bump Dishcloth Pattern by Missy Angus

Needle Size: US 7 Needles

Yarn: Lily Sugar ‘n Cream Yarn- Pictured above is Country Red with Robin’s Egg Blue (accenting) &  Hot Blue with Summer Splash (accenting)

Notes: My girlfriend, Renee, alerted me to this pattern and I am so glad she did! This pattern makes the most perfect dishcloth and can be whipped up in an hour or so. If you know how to knit and you know how to purl, those are the only stitches that you need to know to create this.

While some patterns curl up on the edges or require a little blocking, this pattern knits up evenly without any curled corners, thanks to the slipping of the first stitch in each row.

These are highly addictive to make and I am already working on another one because it is an easy pattern to memorize and to knit while watching a few of your favorite television shows! I would highly recommend this pattern!

cottage ballband dishcloth

Pattern: Ballband Dishcloth by Pisgah Yarn & Dyeing

Needle Size: US 7 Needles

Yarn: Lily Sugar ‘n Cream Yarn- Pictured above is Country Red & Cottage Twists (Twists Chalet)

Notes: This is the free website link to the original pattern for Ballband Dishcloths, featured in the Mason Dixon Knitting Book by Kay Gardiner & Ann Shayne, the founders of MasonDixonKnitting.com

This pattern is beautiful worked in solids and variegated. Endless combinations of colors and variegated can be created using this pattern. Since you are using two different yarns for this cloth, it is a great one to use when stash-busting your yarn collection or for using different colors of yarn scraps you might have on hand that you can’t really make anything out of on their own.

When doing this pattern, I have found that knotting in the different yarns is the best way to go instead of just weaving in the new color because of the endless amount of abuse and washes that these dishcloths get in our house. I have lovingly weaved in many washcloths with no knots and the stitches have ended up falling out on these patterns. Live and learn!

sunshine & stars dishcloth

Pattern: Open Star Dishcloth by Dishcloth Boutique

Needle Size: US 7 Needles

Yarn: Lily Sugar ‘n Cream Yarn in Sunshine & Warm Brown

Notes: I really loved this pattern because of how the simple yarn overs create a nubby pattern to this dishcloth and give it such a beautiful look and feel to the yarn. This pattern does not look as nicely when it is held open, but could be corrected if  it is blocked. The only time I would do that though is if it was a gift for someone.

This pattern is easy enough for a beginner and is a great beginning pattern for understanding yarn overs. I can’t wait to make more of these in other colors from my leftover yarn!

lavender squidge

Pattern: The Squidge Cloth by Sasha

Needle Size: US 7 Needles

Yarn: Lily Sugar ‘n Cream Yarn in Soft Violet & Warm Brown

Notes: The alternating rectangles of knit and purl give the ultimate squidge factor for a fabulously fondle-able cloth. The pattern is easy since you only need know how to knit and purl. It gives you a thickness to the pattern and would be perfect, not only for your dishes, but perfect as a face cloth too!

Not enough dishcloth patterns for you? Be sure to check out my Circle Cloth & Chinese Waves patterns or the Wedding Washcloth patterns that I have created in past entries!

Pair these with a few of these homemade cleaner recipes or a little of the fun Mrs. Meyers Cleaners (available at Walmart too) and you are ready to do a little spring cleaning of your own!

My Favorite Homemade Cleaner Recipes

All-Purpose Cleaner

Mix together two tablespoons of mild dishwashing soap and two cups of water in a spray bottle and give it a shake. Use these anywhere that you would use a commercial all-purpose spray. This cleaner is particularly great for countertops, bathroom surfaces, and high chairs.

Glass Cleaner

Mix together one part white vinegar to one part water in a spray bottle. Spray this solution on your mirrors and windows and dry your windows with newspaper.  The newspaper is great for lint-free drying and is a great way to repurpose some of those old papers you have laying around.

Homemade Oven Cleaner/ Deep Kitchen Cleaner

Mix a paste of three parts warm water to one part baking soda to clean away kitchen stains or to clean your oven.

Bathroom Cleaner

Mix dishwashing liquid with baking soda until you have a thick paste and use this throughout your bathroom.

Toilet Bowl Cleaner

No measuring is required with this recipe. Sprinkle a little baking soda into your toilet bowl and then pour a little vinegar in and watch it fizz it up. Give it a swish with your toilet brush and then flush.

Floor Cleaner

Add ½ cup of vinegar to a gallon of water.  The scent of the vinegar will fade in approximately an hour, but you can also add a couple of drops of essential oil to help with the scent. I like the smell of Tea Tree Oil, but you can buy any essential oil that smells best to you. Essential oils can be picked up at stores offering nutritional supplements or can be purchased online.

Furniture Polish

Mix ¼ cup olive oil with four tablespoons of vinegar and two teaspoons of lemon juice. Pour into a spray bottle and shake well before using.  If you do not use all of it in one cleaning session, store the remainder in the fridge, as the lemon juice can go sour. You can also substitute the lemon juice with twenty to thirty drops of lemon essential oil and then you won’t have to refrigerate it. Using the essential oils though will up the price a bit on your homemade product.

Silver Cleaner

Although I don’t polish silver very frequently, this is a great to have in your bag of tricks. This will clean all of those nooks and crannies that are hard to reach in more detailed pieces and is great if you have a big batch of silver that needs cleaning. In a large bowl (or you can use your kitchen sink) place strips of aluminum foil in and place the silver pieces on top. Cover the silver with boiling water and then add three tablespoons of baking soda and soak for ten minutes.

Do you have any fun green spring cleaning recipes or knitted patterns you are loving? Do you spring clean your home? Feel free to share those ideas here!

I am a part of the Walmart Moms program, and Walmart has provided me with compensation for these posts. My participation is voluntary and opinions are always my own.

All Knitted Up: Knitted Headbands for the End-of-Winter Blues

Tuesday, February 15th, 2011

After my holiday knitting marathon, you would think that I would want to take a little break on the knitting. I can admit it though, I am addicted to my knitting needles, but I have been attempting smaller scale projects this month instead of my usual larger scaler ones. The best part about smaller scale projects is that they offer instant gratification and they offer an opportunity to tackle new skills that you might not think you have. It is much easier to give up on a smaller scale project if the going gets to tough, unlike those larger projects where you have a sense of commitment to them. This month has been a month of tons of little projects that I am looking forward to sharing with my knitting friends on MomAdvice.

I am hoping for the end of winter, but if you are feeling a little blue about winter’s never-ending days, these knitted headbands can add a fresh new look to your tired winter coat, and make the perfect accessory to keep your ears a little warm and your hair still looking cute!  I whipped these headbands up in an evening of sitcom-watching and they offered a great opportunity to do a little stash-busting in my yarn collection (also a horrible addiction of which I suffer).

If you are a knitter, I would love for you to be my friend on Ravelry. My username is momadvice and I try to keep my little notebook updated with the current projects.

Here are two fun headbands to try that will add a little sparkle to these end-of-winter days!

shades of gray headband

Pattern: Spiral Ribbed Headband by Allison Hogue (free Ravelry Download) with  Lydia Flowers (optional, for embellishment). These were all three sizes (Large, Medium, & Small) stacked in alternating colors. I am sorry, I understand that the pattern is down, let’s hope it will come back up soon!

Needle Size: US 7 (16″ circular needles– these are the ones I purchased. Don’t waste oodles of money on needles at the craft stores!)

Yarn: Naturally Caron Country (Charcoal) & flowers were created from Naturally Caron Country (Charcoal) & Caron Simply Soft in Heather Gray, alternately.

Notes: This spiral-ribbed head wrap is a beautiful pattern that can be done very easily while watching a little television. There are no tricky stitches in this pattern so it is a great one for a beginner and for knitters who are just getting familiar with knitting in the round.

I chose a merino wool blend for the yarn because it is light-weight while still being a little warm. It is the perfect yarn for the project and the bonus was that I got it on sale for $3.99 a ball (after the holidays) so it was a very thrifty knit too!

The flower is the Lydia Flower (large, medium, and small) stacked and used some of my Simply Soft in Heather Gray for the large and small flower from my yarn stash to add a little dimension to the headband.

ivory cabled headband

Pattern: Vanessa Headband by Nancy Ricci (free pattern)

Needle Size: US 11 (straight needles)

Yarn: Premier Yarns Serenity Chunky Weight in Pristine (stash-busting)

Notes: Are you falling over right now? I am cabling!  I have never cabled before so this is my first project with cabling. This was a great introduction into cabling with very simple cables. Cabling sounds & looks much more difficult than it is. It is simply pulling stitches off your needles and pulling them into the front or the back of your work and then working them back into the pattern so they twist and vine around your project. If you can knit and purl, you definitely can cable!  If you have never cabled before like me

The pattern offers a wide band as well as a more narrow version of the same band. I chose the narrow version, but it is still plenty wide if you wanted to cover your ears with it thanks to the large needles and chunky yarn. If you use a thinner yarn, you may want to go for the wider pattern to achieve the same look.

Below is a  video on how to cable. I am telling you, it is so easy! I can’t wait to practice more cabled patterns! I will be back next month with a gazillion baby hat patterns that I have been working on…another instant gratification project that is great for practicing pattern!

***********************

Looking for more knitted projects to cure the winter doldrums? I recommend throwing a few of these projects on your needles for an instant pick-me-up in our Crafting section and Gifts section of the site!

What craft projects are you working on now that the holidays are over?

***********************

Holiday Crafting Inspiration or the Amy Clark Craft Factory of 2010

Tuesday, December 21st, 2010

There has been a lot of holiday crafting happening this year and I can’t wait to show you some of the things I have been working on! First up, is this beautiful yarn ball wreath! Does anybody remember seeing this one in our notebook? I thought this would be the perfect craft to do a little stash busting in my yarn collection and a great wreath that would look cute even after the holidays.

day one

four hours later, off to bed with glitter in my hair and third degree burns.

the next day, three more hours of gluing to go!

I did not anticipate how long this wreath would take, the amount of supplies that I would need, or the cost of all those ornaments and Styrofoam balls.  It took about seven hours of hot gluing with lots of time spent making the little yarn balls.  It also took about twice the amount of supplies that I had anticipated. That said, isn’t it stunning and worth every ounce of effort?

Looking for more holiday wreath ideas? I have hung my beautiful Kimba-inspired wreaths for the holidays again. When spring comes my little sugared lemon drop wreath will be hung again for another year on my front door. What can I say? Handmade wreaths make me so happy!

I am so proud of how the wreath turned out and a huge thank you to life through the lens for the crafting inspiration.

I had my best friend over for a holiday craft night and we cranked out dozens of these rolled rosette hair accessories and felted loopy flowers that were featured in our notebook. I bought a little fabric for these, but also decided to use fabric from Emily’s worn out and stained summer dresses from last year. The same idea could be applied with fabric from thrift store finds that don’t fit your child, but would be the perfect material for a cute embellishment in her hair.

I made her a few headbands, but we soon found out that headbands and glasses don’t go together so good, especially the wide headbands I bought for her hair.  They are cute enough though that I just might have to wear the headbands for myself. I decided to use some of the clips I had leftover from my hair bow making days and apply them to those instead. They worked out beautifully. I was able to make a few of these to go with her holiday dresses this year.

Thanks to Happy Together for helping us look a little fancier this holiday season!

We also cranked out tons of these easy No-Slip Bookmarks for gift-giving this year that were also featured in the notebook. I use my bookmark daily and I have to say that it truly holds the pages of my book well without wrinkling my books.  It helps to have a friend that can operate a sewing machine too since I am a sewing school drop-out.

These would make beautiful stocking stuffers or are a perfect gift to keep on hand for last minute giving. I gave these to the kids I read to each week with a book for the holidays. These are so fast to make and are a great way to use up any leftover ribbon you might have laying around.  The most expensive part are the cute buttons, but they are a fun way to personalize these bookmarks.

Thanks to Maryjanes and Galoshes for this easy craft that has added a little something special to my gift-giving this year!

I made this beautiful red scarf for my brother who had gotten a new gray winter coat this year. I am going to have to cast another one on the knitting needles for my husband who was so kind to model it for me.  For more pattern inspiration, be sure to check out my Knitting Trendy Gifts of Warmth.

Merci Scarf

Pattern: Merci Scarf by Susan Rainey

Needle Size: US 8 Needles (I used size US 9 needles, which created a little bit wider scarf, but you could use the US 8’s that are recommended)

Yarn: Premier Yarns Serenity Chunky Weight in Molten Lava (2.5 skeins)

Notes: This scarf is so simple and fast to whip up that it would make the perfect gift to give to any man in your life. The pattern is one that you can complete while watching your favorite shows on television and is almost impossible to get off track.  This yarn was also perfect for creating a really warm scarf, perfect for our Midwest winters.  This pattern is perfect for a beginning knitter or for a last minute gift for someone special in your life!

I knitted two more ruffled scarves and another Republic Hat for gift-giving. I forgot to take a picture of the hat and other ruffled scarf, but they did turn out so pretty! These ruffled scarves are definitely a statement piece, meant to add a punch of femininity to your winter coat! I made one in this light gray for my best friend and then one in a charcoal gray for my sister.  Now I want to make one in a couple other colors for myself!

Beautifully Ruffled Lace Scarves

Pattern: Ruffle Lace Scarf by Suzie Blackman

Needle Size: US 10 Needles (40″ circulars)

Yarn: Caron Simply Soft in Heather Gray

Notes: If you want a scarf that is wildly impressive, can be created with a single ball of yarn, and looks like a million bucks than this would be the perfect gift to give this holiday season. It is a very mindless knit, but is an INSANE amount of stitches, especially in the last two rows (over one thousand stitches!). The beauty of this scarf though is that you only need to know how to knit, purl, and yarn over to create it.

The twisting is created by knitting the scarf length-wise, rather than width-wise and through the series of yarn overs. As pictures above, you can see that it is really hard to see your stitches, let alone if it is actually going to twist. The good news is, as you cast off, you will see that scarf naturally twists, making that beautiful ruffled twist.

This one is definitely a statement piece and is also a statement of your absolute love for whoever you might make it for!

I followed the pattern that is linked above, but added four more rows to give the scarf a fuller appearance. I repeated rows 11-14 two times before I started rows 15-16. I am really glad I did and love the lush fullness of this scarf.

Here are the finished teacher scarves that I made! Each one had a $5 Starbucks gift card tucked into the pocket that was created in the scarflet. Next time I make this, I will have to write on the label though that these were scarfs. The teachers thought they might be hats…which I guess you could do too!  Regardless, I got such wonderful compliments and tried to make each of them unique with flower embellishments or different unique buttons and colored embroidery threads on each one. We also made one for our babysitter who has been a true Godsend to my family and helped me manage the day-to-day of my site by caring for Emily one afternoon a week. She is my secret weapon of productivity on the site. I wish you all could have a Miss Janie for Christmas!

Anthropologie-Inspired Scarflets

Pattern: Anthro-Inspired Scarflet (available as a free Ravelry download with your free Ravelry membership) by Kim Seio & Lydia Flowers (optional, for embellishment) or cute buttons.

Needle Size: US 8 Needles (straight) for both the flowers and the scarflet

Yarn: Premier Yarns Chunky Weight in Pristine (scarf) & Yarn Bee Boucle Traditions in Black

Notes: I followed the sizing and increases that ilikecookies(another Ravelry member)  had shared in her pattern. She said, “Increased until 30 stitches, worked 15 rows even until ribbed section and knit 15 rows of ribbing to make a slightly larger scarflet.”

I added a black Lydia Flower (size small) with a red button center to finish it or colorful buttons with contrasting embroidery thread to finish! For more pictures of these, please visit this post.

I finished all of my knitted gifts with these homemade gift tags. I used my Silhouette Craft Cutter and used the rounded rectangle template to make these simple tags out of ivory cardstock that I had leftover from our treasure boxes we made this year. As a holiday treat to myself, I bought myself a personalized stamp from Babyjewels (an Etsy seller) and I have to say, it really added that professional touch to my gifts!  They have one for knitters and one for crocheters too. She is on holiday vacation, but you can be emailed when she comes back.

Here the gifts are all lined up. Next year I will have to do a video tutorial on my signature bow. Every gift should have signature bow on them and I have perfected my signature bow over the years. When I ran out of ribbon this year my husband proclaimed a “state of emergency.” He sure is a funny guy.

The gift factory is closed until next season!  I hope you have had great success crafting your own gifts and are continuing to get lots of handmade inspiration on MomAdvice for your holiday giving needs!

Knitting Trendy Gifts of Warmth for the Holidays

Tuesday, November 9th, 2010

It is that time of year again where I am kicking my knitting needles into high gear to create beautifully knitted gifts to give for the holiday season. In my opinion, nothing could say I love you more than something that you have weaved together with your knitting needles. I have a lot of top-secret projects in the works, but I wanted to show a few ideas and patterns for some lovely knitted gifts that would be perfect for this holiday season’s time of giving!

These ain’t your grandma’s knitted gifts though! These are trendy & cute knits that anyone would love to wear and own. I vow to never make my friends and family wear ugly or itchy knitted items. With all the effort that goes into knitting, you might as well make something beautiful!  These are just a few projects that I am working on right now and almost all of the patterns are free and easy for a newbie knitter!

Be sure to join Ravelry for fun & free patterns for your knitting & crochet projects! I love staying connected with my readers so you can find me on Facebook, Twitter, GoodReads, and, of course, Ravelry…just to name a few! Chances are, if you search for someone named momadvice, you will likely find me there!

Beautifully Ruffled Lace Scarves

Pattern: Ruffle Lace Scarf by Suzie Blackman

Needle Size: US 10 Needles (40″ circulars)

Yarn: Caron Simply Soft in Off-White (On sale at Michael’s for $2.50!)

Notes: If you want a scarf that is wildly impressive, can be created with a single ball of yarn, and looks like a million bucks than this would be the perfect gift to give this holiday season. It is a very mindless knit, but is an INSANE amount of stitches, especially in the last two rows (over one thousand stitches!). The beauty of this scarf though is that you only need to know how to knit, purl, and yarn over to create it.

The twisting is created by knitting the scarf length-wise, rather than width-wise and through the series of yarn overs. As pictures above, you can see that it is really hard to see your stitches, let alone if it is actually going to twist. The good news is, as you cast off, you will see that scarf naturally twists, making that beautiful ruffled twist.

This one is definitely a statement piece and is also a statement of your absolute love for whoever you might make it for!

I followed the pattern that is linked above, but added four more rows to give the scarf a fuller appearance. I repeated rows 11-14 two times before I started rows 15-16. I am really glad I did and love the lush fullness of this scarf.

Anthropologie-Inspired Scarflets

Pattern: Anthro-Inspired Scarflet (available as a free Ravelry download with your free Ravelry membership) by Kim Seio & Lydia Flowers (size small)

Needle Size: US 8 Needles (straight) for both the flowers and the scarflet

Yarn: Premier Yarns Chunky Weight in Pristine (scarf) & Yarn Bee Boucle Traditions in Black

Notes: These little scarflets are my teacher gift this year because they knit up so quickly and are perfect for anyone who doesn’t like to wrestle with a scarf.  You can see in the center picture that you create a little knitted pocket to tuck one side of the scarf into. My plan is to stick a $5 Starbucks gift card in the little pocket as a fun little surprise for gifts this year.

I followed the sizing and increases that ilikecookies(another Ravelry member)  had shared in her pattern. She said, “Increased until 30 stitches, worked 15 rows even until ribbed section and knit 15 rows of ribbing to make a slightly larger scarflet.”

I added a black Lydia Flower (size small) with a red button center to finish it.
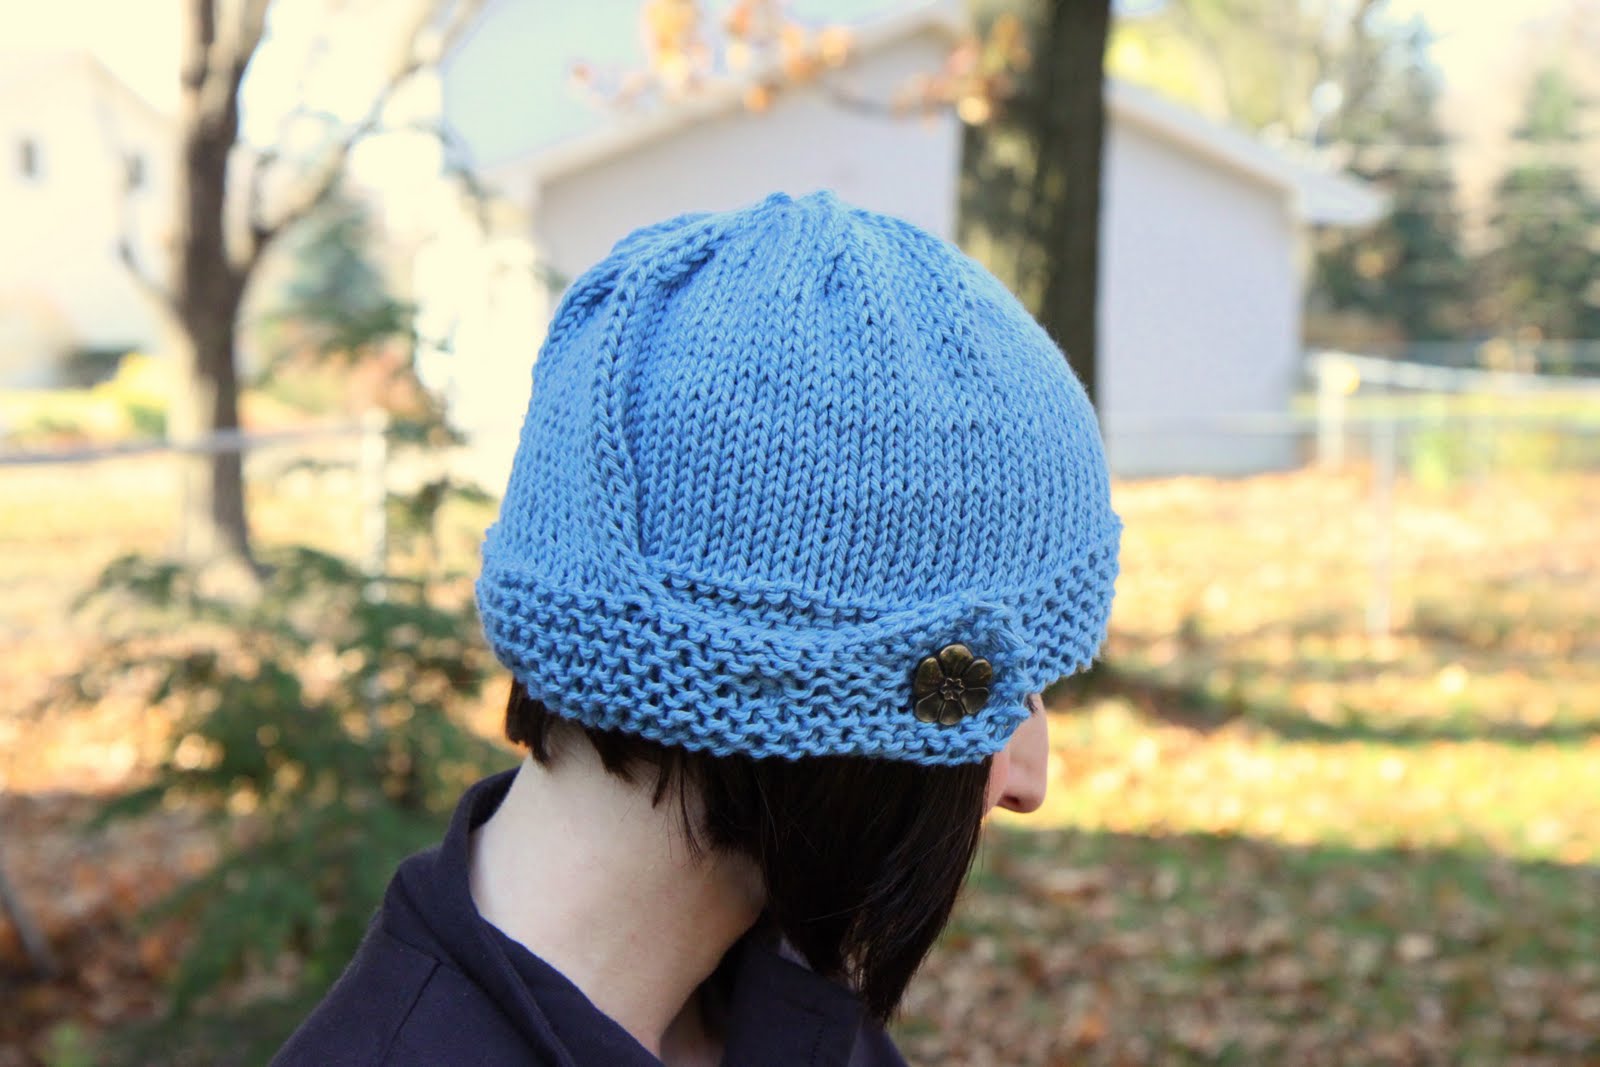
Republic Hats

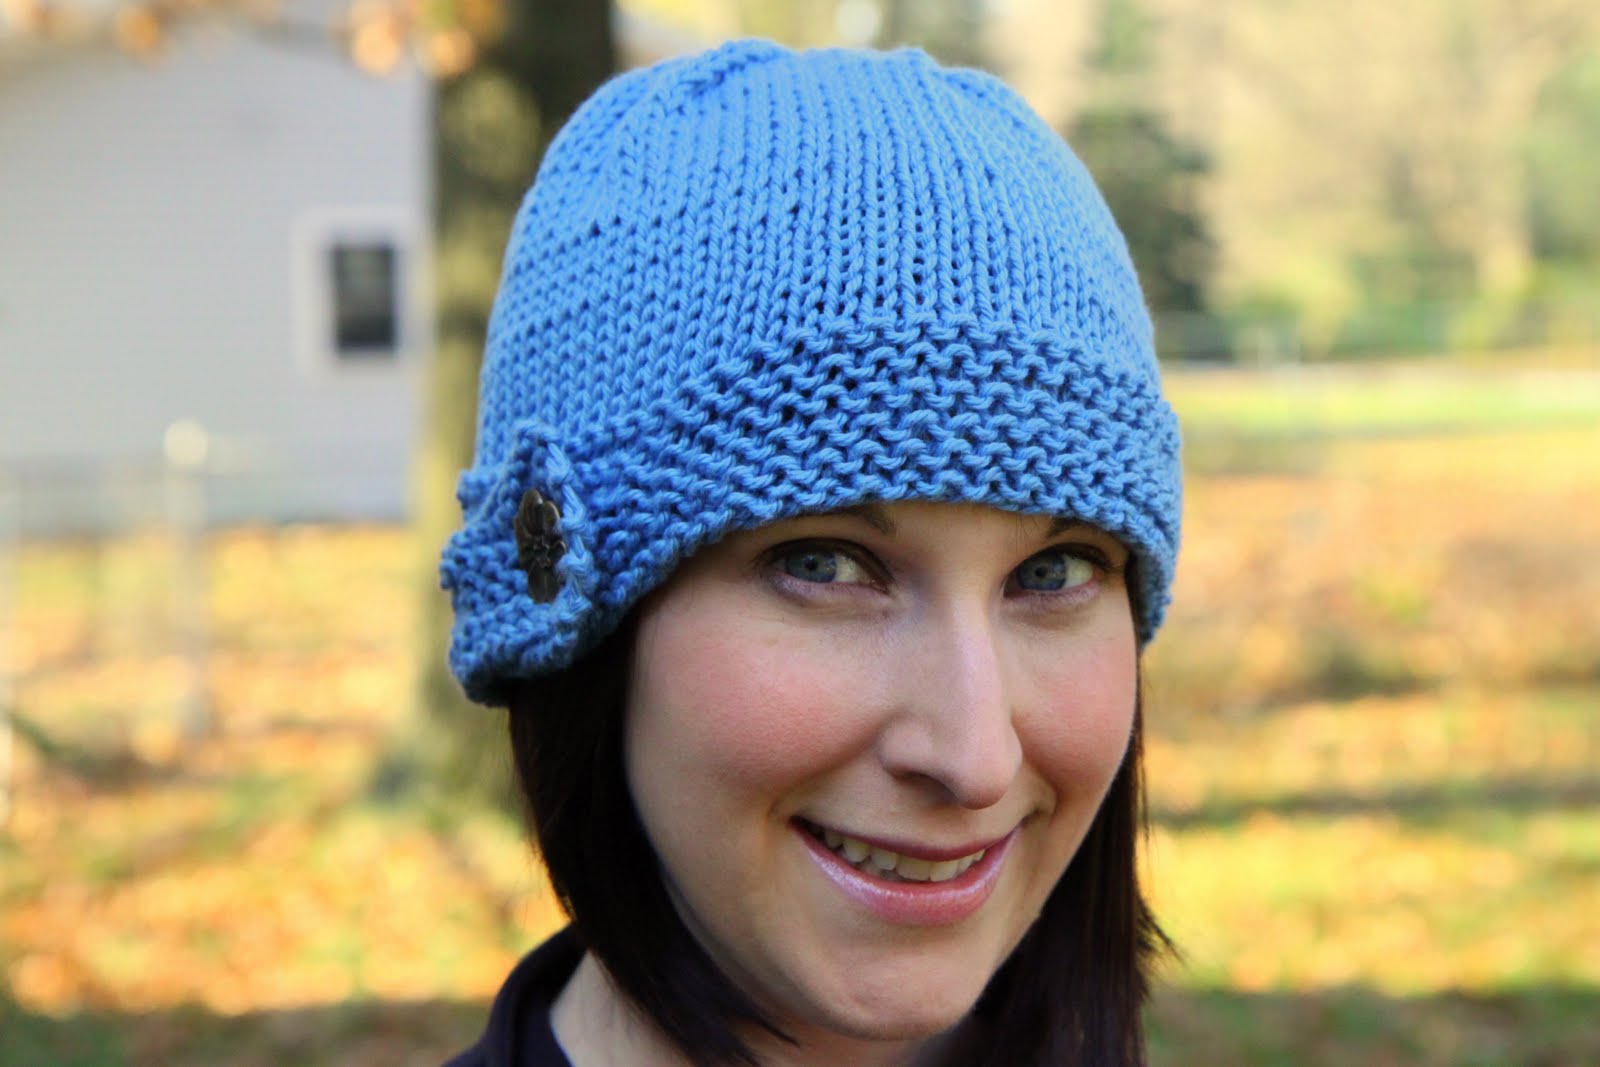
Pattern: Toddler Republic Hat or Adult Republic Hat (you can find the pattern in the side bar) with Lydia Flowers (Size Medium & Small)

Needle Size: US 5 Needles (circular) & US 8 (straight) for the hat embellishment

Yarn: Malabrigo Yarn Merino Worsted (for hat) &  I Love This Cotton! in Ivory for the flowers

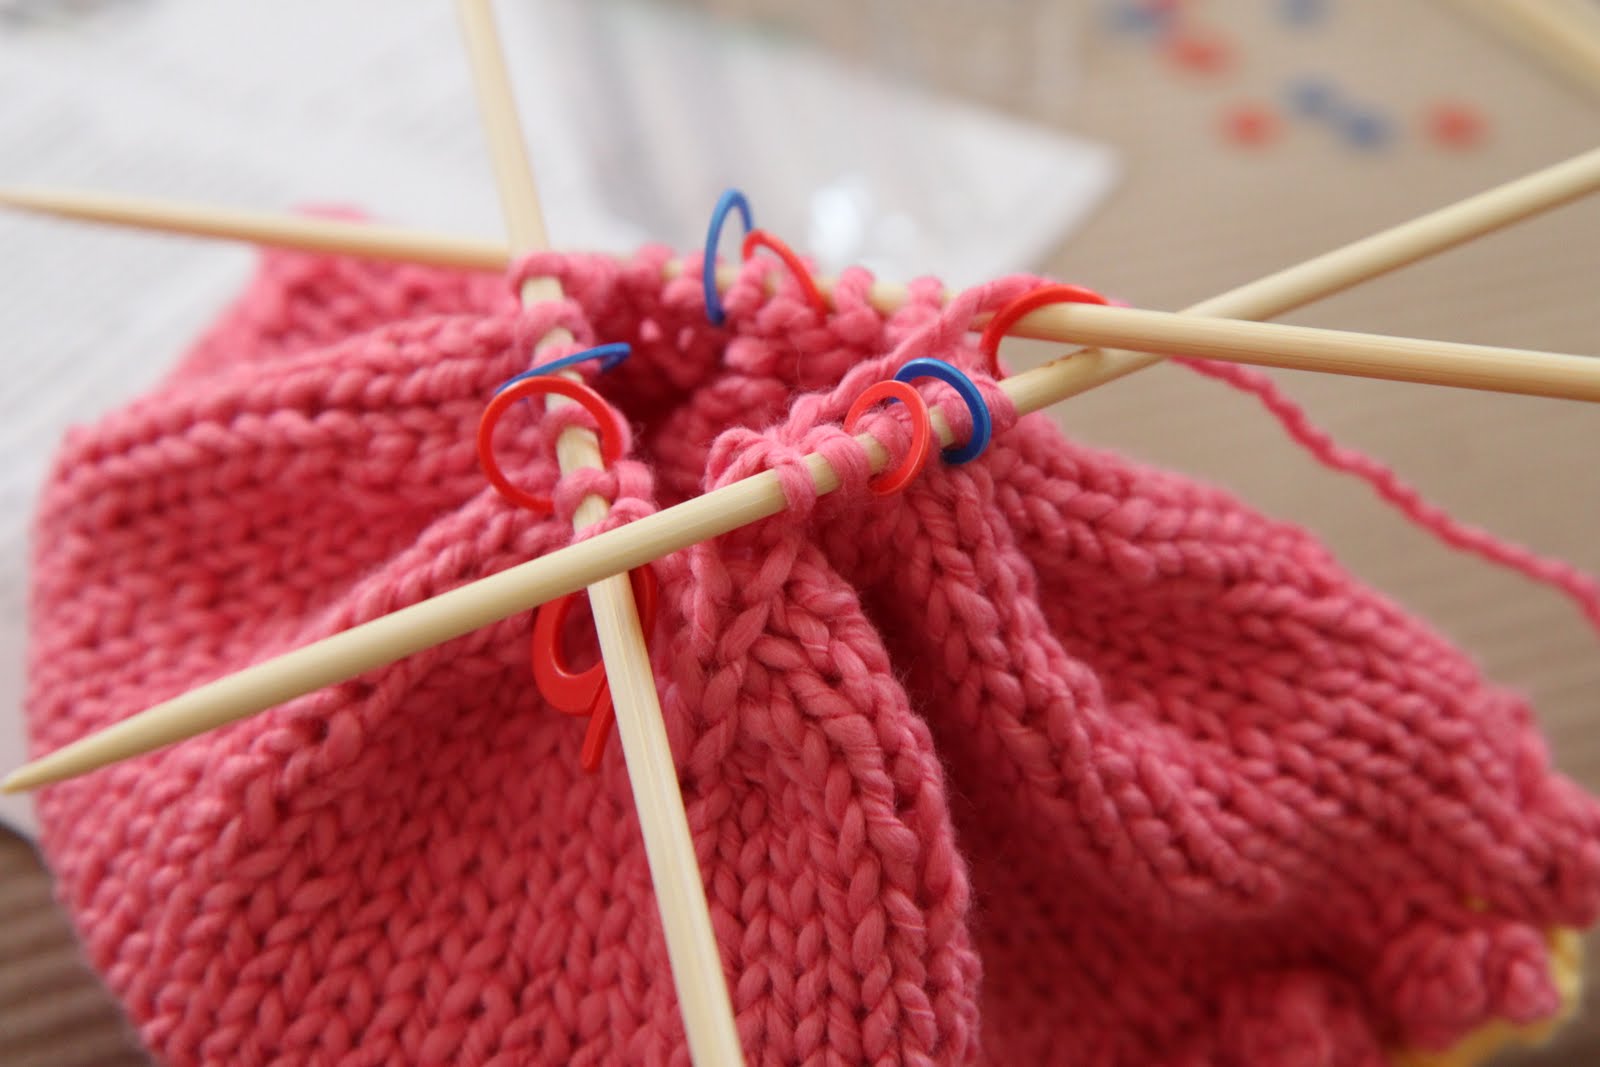
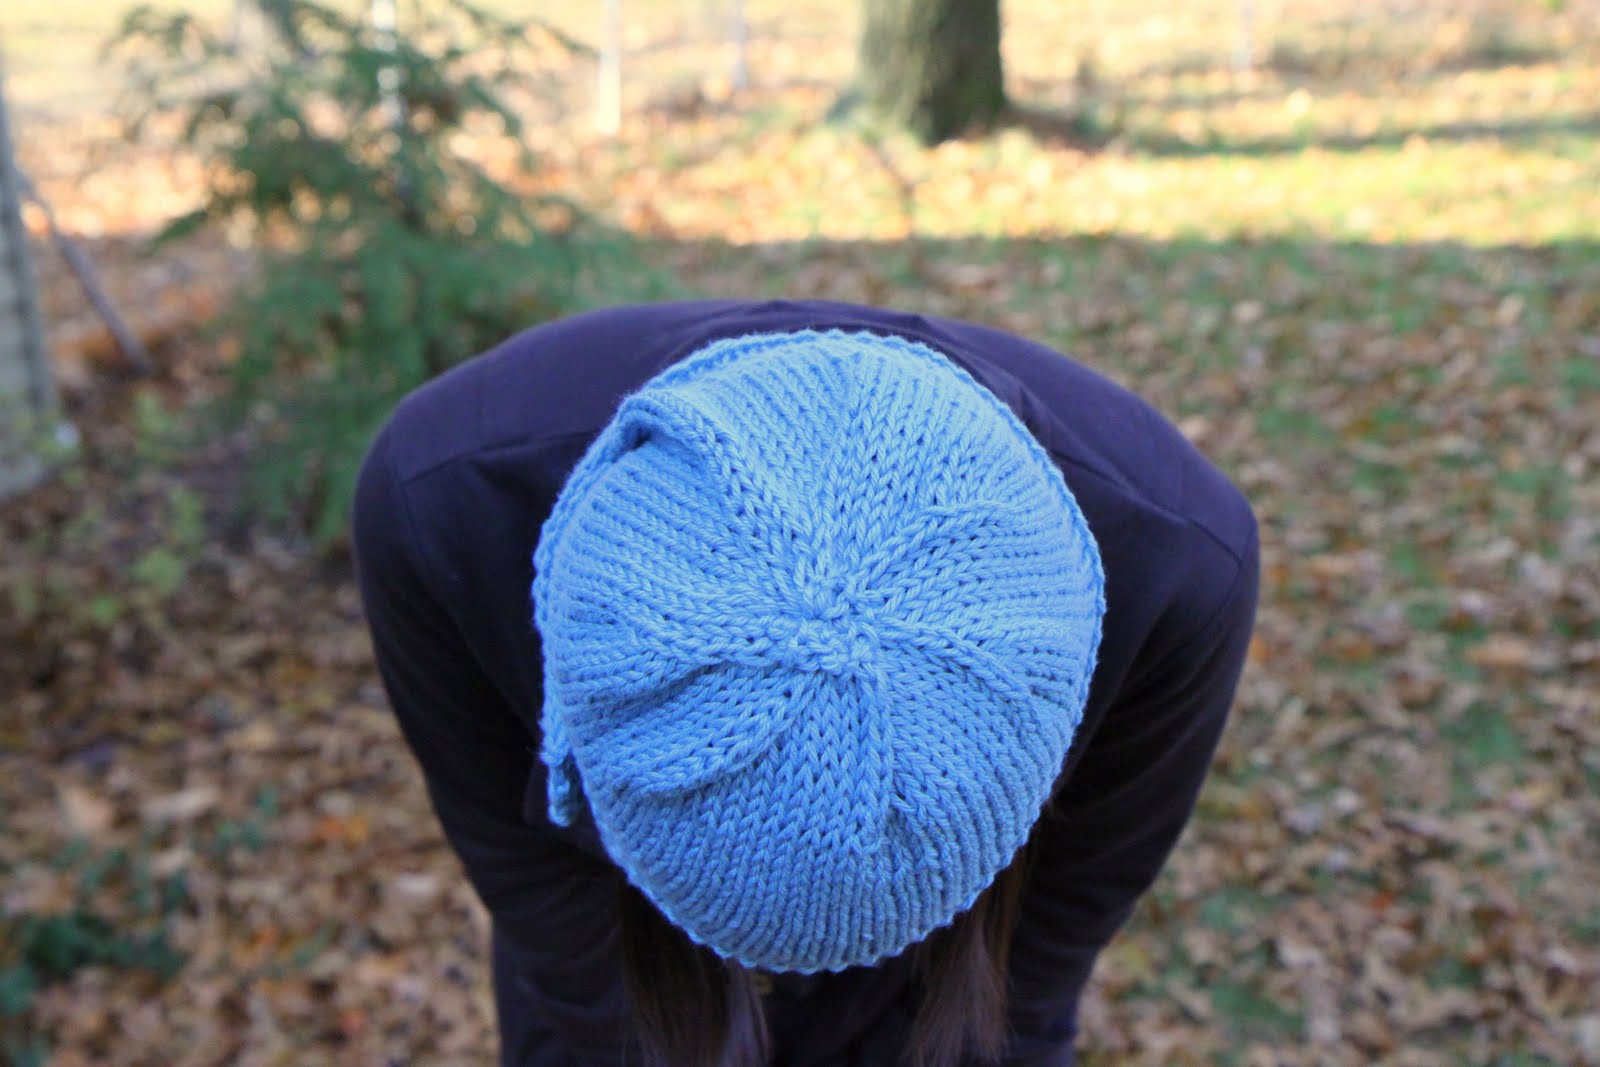
Notes: If you are looking for a perfect hat pattern for a novice beginner who is learning how to knit in the round, then these patterns are the perfect patterns for you. In the pictures above, I actually used the Toddler Republic Hat pattern for myself since I have a smaller head than most normal adults. I adjusted the length to 5 1/2 inches long. Linked above is also the adult-sized version that would be a perfect holiday gift for just about any girlfriend or sister to wrap underneath your tree this year!

The embellishment is the Lydia Flower in both the medium & small sizes, stacked using size eight straight needles. If you don’t feel ambitious enough to knit a flower, you can finish it with a simple button and skip that step altogether!

Gorgeous Gathered Scarves

Pattern: Gathered Scarf by Maryse Roudier

Needle Size: US 4 & US 7

Yarn: Lion Brand Cotton Ease in Lime

Notes: I didn’t get a chance to show you what I created for my sister & best friend last year for Christmas. Pictured above is my stunning sister wearing one of my gathered scarves!  Since they both read the site regularly, I had to keep these gifts under wraps and knit them when they weren’t around. I knitted these gathered scarves as holiday gifts to give with a set of fingerless gloves.

This pattern is so easy for a beginner and was a gift that was loved by both of them.  You actually use two different needle sizes to create the gathered effect on these scarves which added beautiful detail and a bit of ruffling to the scarves. I loved that the cotton is so stretchy and soft. I would definitely recommend this pattern especially to a beginner who is looking to add a little variation to the traditional scarf!

Waffle Stitch Fingerless Gloves

Pattern: Waffle Stitch Fingerless Gloves by Jill Toporkiewicz

Needle Size: US 7

Yarn: Lion Brand Cotton Ease in Lime

Notes:I made a set of these fingerless gloves to go with the gathered scarves that are pictured above. The girls that I gave them to have tiny hands and wrists like myself so I modified the pattern to accommodate a smaller hand (after realizing just how huge these were after making a sample glove). I reduced the CO to 28 stitches and then only repeated the waffle pattern four times to reduce the length a bit on these. They turned out absolutely perfect and were a fast and easy knit!

This fingerless glove pattern is ideal for someone who hasn’t mastered knitting in the round yet because you simply seam these to create the glove. These are a really fast knit and are perfect for my coffee-loving friends who like to have their fingers free for their coffee chugging in the morning!

Super Cozy & Fast Fingerless Gloves

Pattern: Cosy Knitted Hand/Wrist Warmers

Needle Size: US 5

Yarn: Malabrigo Yarn Merino Worsted

Notes: Fingerless gloves are great for layering underneath gloves or worn alone in chilly weather. I have been dying to make a pair for myself to keep my hands warm in the chilly morning air when taking my kids to school.  This was my first time starting on double-pointed needles so I was worried that I wouldn’t be able to do these, but this pattern was so simple that it made it a great pattern to get the hang of knitting in the round!

These look so tiny off your hands, but stretch perfectly to accommodate your hands. The pattern is so quick that you could easily knit these in an afternoon of knitting. I have a feeling I am going to be making a lot more of these as holiday gifts this year!

I did the pattern just as directed except using size 5 needles and they were the perfect size!

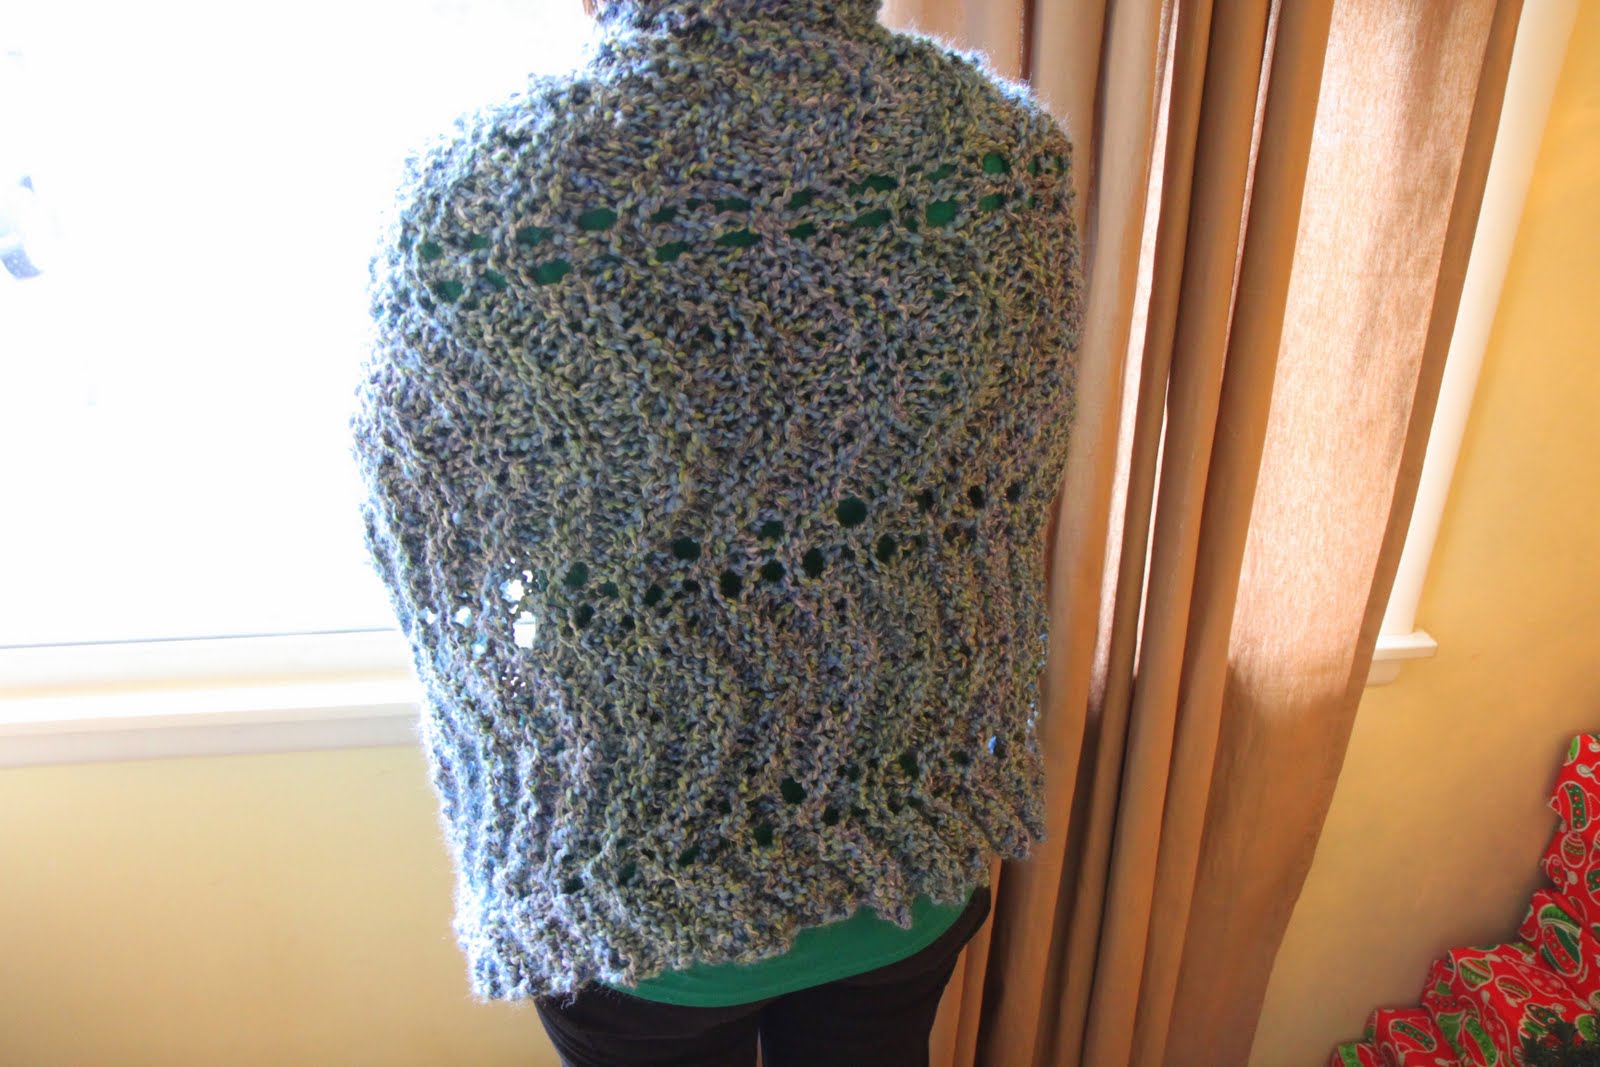
Prayer Shawl for Comfort

Pattern: Alice’s Lace Shawl in The Prayer Shawl Companion

Needle Size: US 13

Yarn: Lion Brand Homespun in Granite

Notes: Holidays can be so hard for those who have lost someone and prayer shawls are a wonderful gift to give to comfort them through the holidays. While perhaps not as trendy as some of the projects above, it is a gift that will be appreciated nonetheless!   I have made this lace shawl so many times and you can read more about the shawls that I made for my grandma & mom last year.

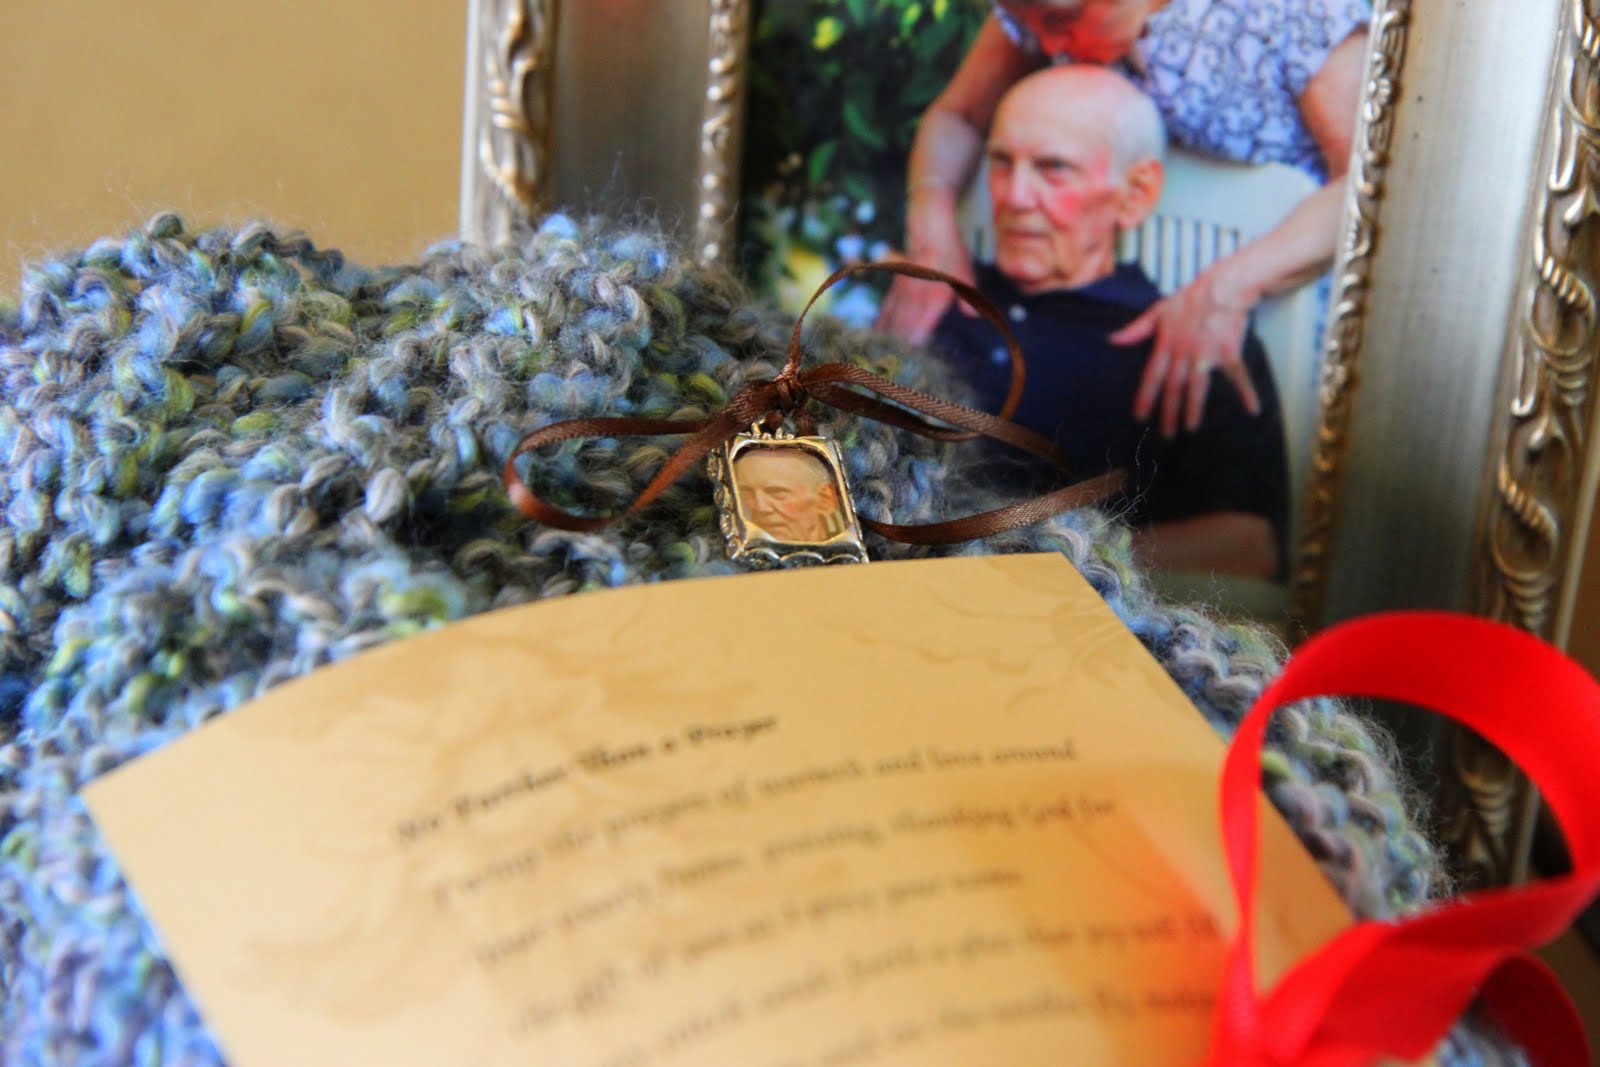
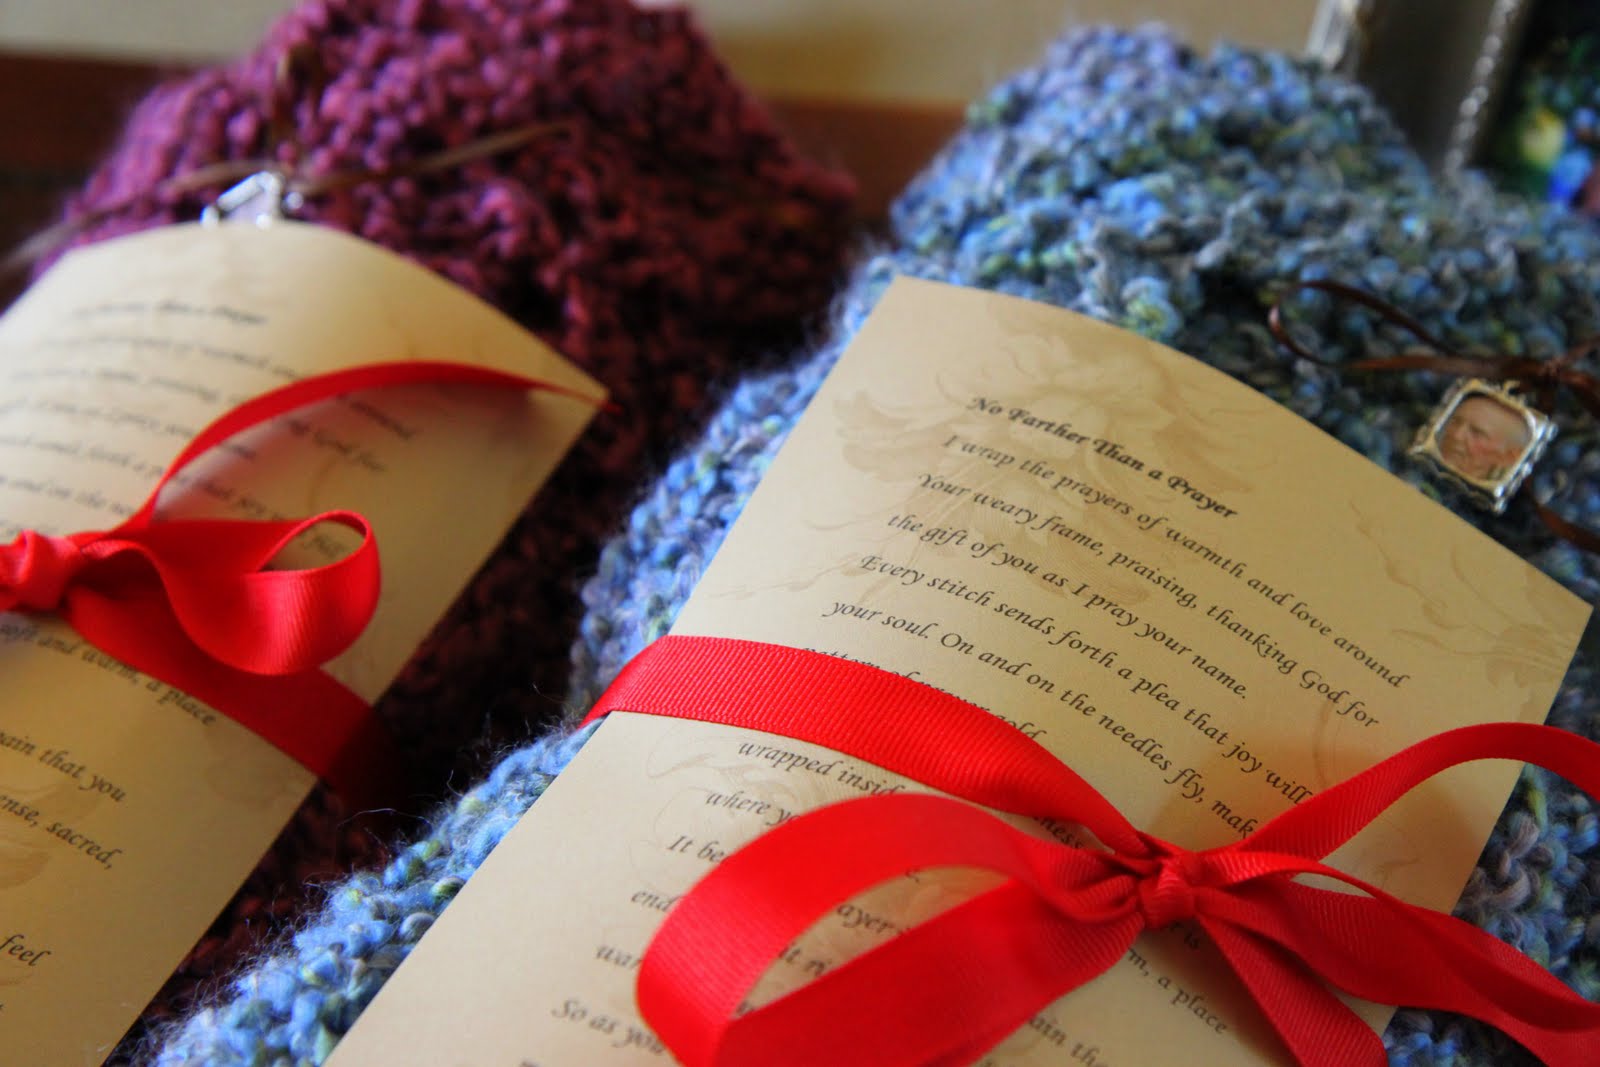
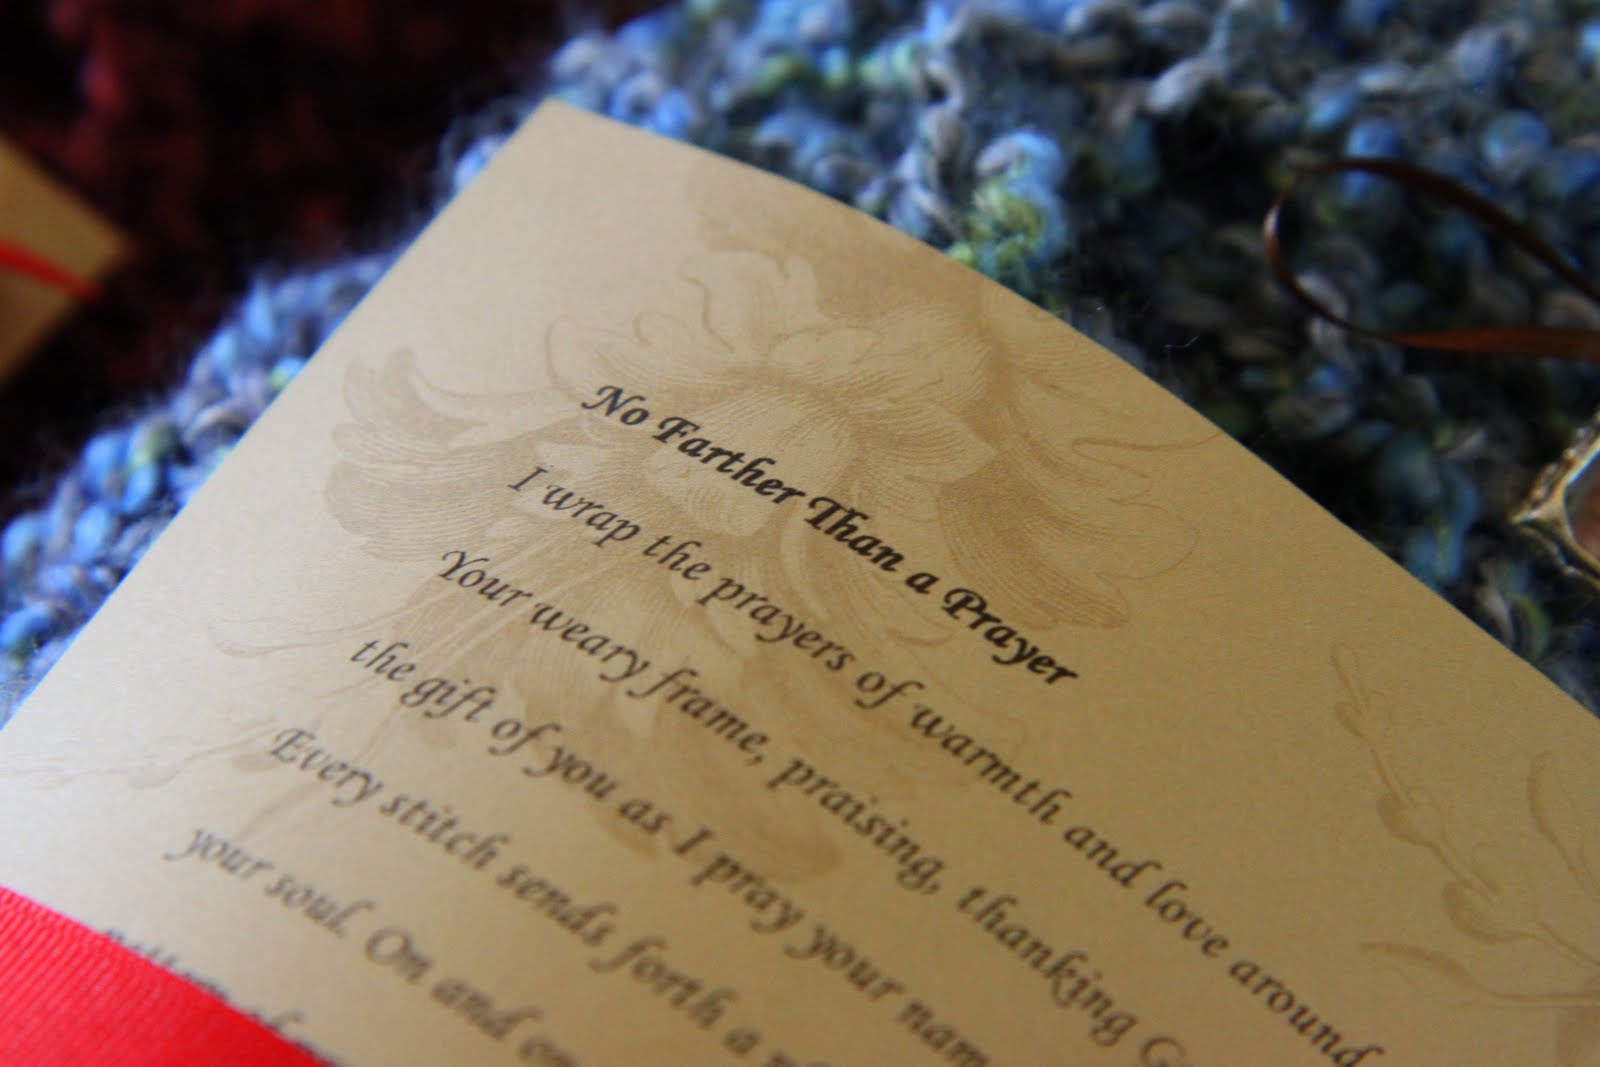
These are beautiful gifts that can be personalized and tailored for that special person who might need a little extra comfort during the holiday season. I highly recommend, “The Prayer Shawl Companion,” because it offers patterns, prayers, and even the importance of color choices and what they symbolize when creating your gift. I love to add pictures, charms, and symbolic colors into each of my shawls as gifts.

It is one of those gifts that will be long remembered and appreciated!

***********************

Looking for more knitted gift ideas for the holidays? I recommend throwing a few of these projects on your needles for the holiday giving season and also visiting our Crafting section and Gifts section of the site for more gift-giving inspiration!
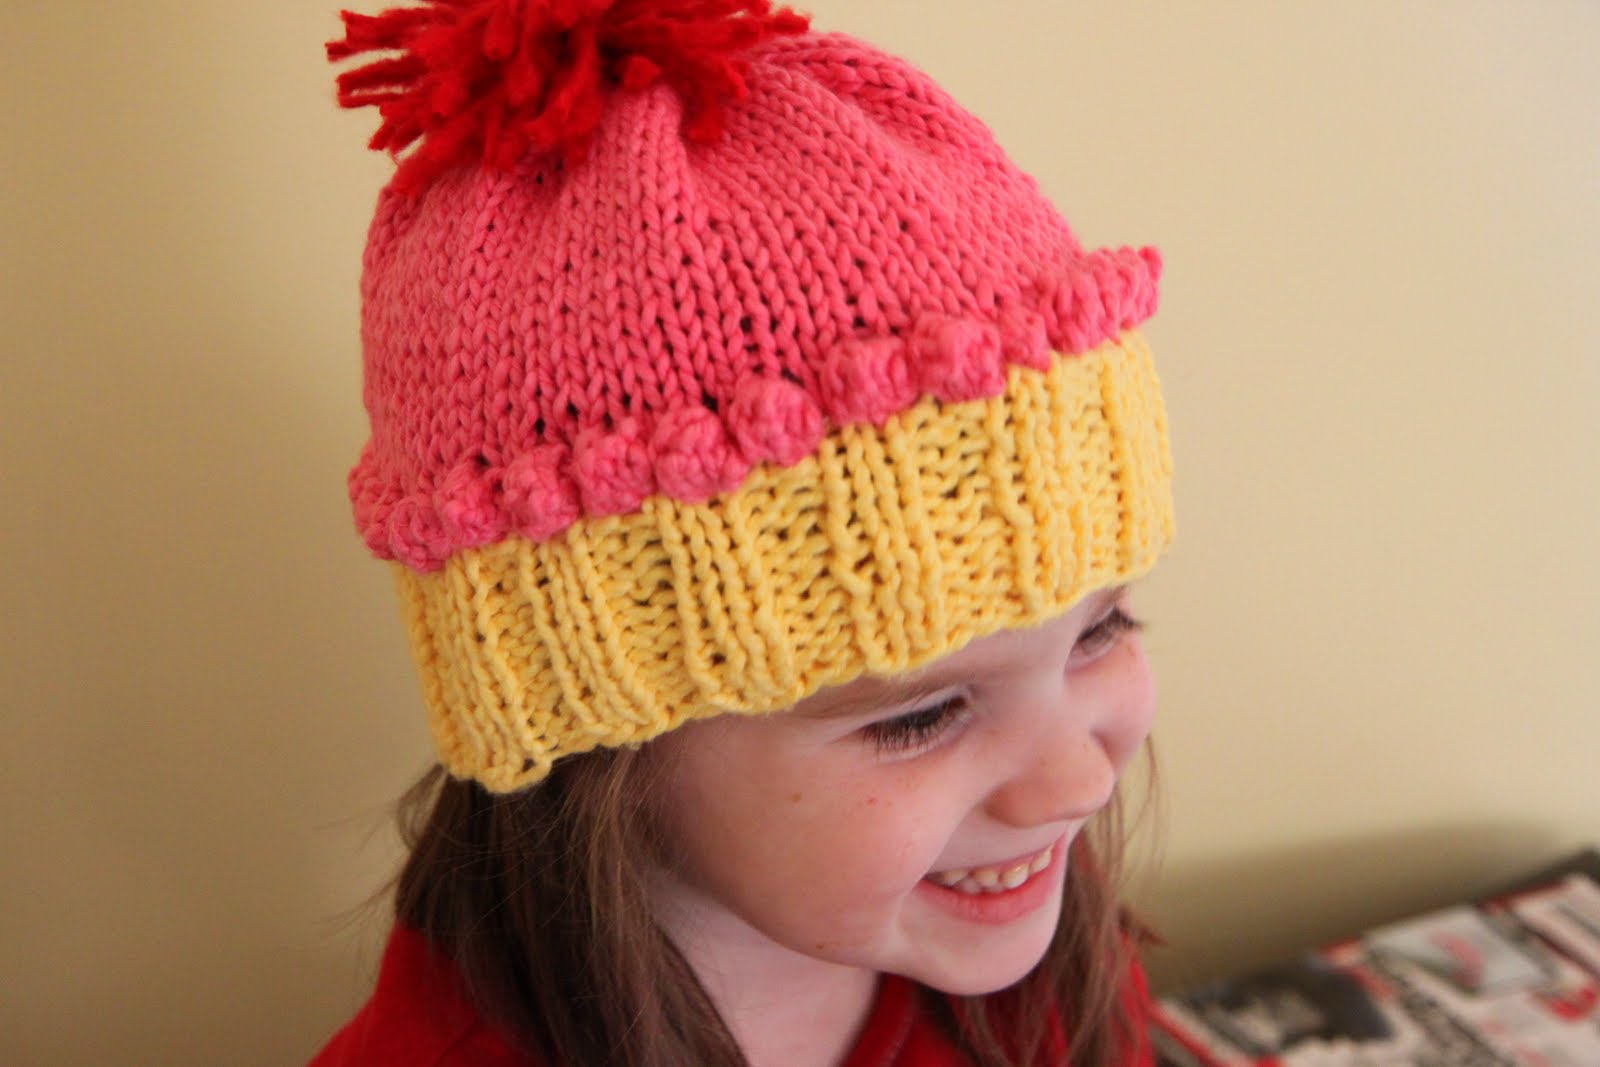
Cupcake Hat

Dulce Neck Cozy

Ruffled Shawl

Rainy Day or Snowy Day Scarf

Disclosure: The knitting book link is an affiliate link and is provided so you can locate the book quickly and easily. Feel free to order a book, but we encourage utilizing the library system and buying me some yarn instead.  Wouldn’t that just be so much more lovely?

What handmade gifts are you working on for the holiday season? Please share your ideas and links here!

The Summer of Knitted Hats

Tuesday, October 12th, 2010

Each year it seems that I have a theme to my knitting and this year was the summer of chemo caps as I shared in our Scraps of Life Giving entry on inexpensive ways to give back to your community. I started the summer out by spending about $25 in supplies and then tried to work my way through some of the yarn in my stash combined with super soft yarn that I thought would help keep cold heads warm and not be itchy.

My intention had been to knit with frantic fury and get as many cranked out as I could.  I managed to knit about fifteen hats this summer, in total, and distributed them to a couple of friends who were in need and the rest will be headed for the Patternworks drive at the end of the month. Although a bit short of the goal that I had hoped, I am still really proud and will continue to try and keep charity projects like this on my knitting needles as much as I can.

I was inspired by my mother-in-law and her mom, who always are doing some type of charity knitting and never cease to amaze me with their capacity to give what is on their knitting needles. If you are not a knitter, a knitted hat takes me about four hours of knitting (including the knitted embellishments) so it is a true labor of love to give something knitted to others.   They are always giving these precious gifts away and my mother-in-law shared the Patternworks charity with me so I could assist with the giving too.

Each hat was uniquely different and accessorized with what I had hoped would be a little bit of fashionable accessories. Emily gladly posed in each hat for me, but as the summer grew to a close, I could tell she was getting a little impatient for her turn. Even poor Ethan was recruited to try on girl hats for mama to get appropriate sizing for older kid’s heads and loudly complained about the itchy hat that he had from last year.

I had only learned to knit hats a year ago and had knitted a cute little Cupcake Hat for Emily and had attempted to knit a patterned hat for Ethan…which was horribly flawed. Even though I messed up a huge spot on it, he wore it all winter, wearing my big old flaw right in the front. Every. Single. Time.  It pained me.

This week, I made it my goal to get the children in newly knitted hats before the cold weather hit. Here are their sweet little hats that I made and some information about those patterns.

Pattern: Basic Roll-Brim Hat (Courtesy of Knitting for Peace book, a favorite in my book collection)

Needle Size: US 5 Needles

Yarn: Caron Simply Soft in Grey Heather (marked down to a mere $2.50 per skein)

Notes: This basic hat pattern was the first pattern that my mother-in-law used to teach us how to knit in the round. The hat originally calls for a US 7 size needle, but I have found that I am a very loose knitter and usually have to go down about two needle sizes for the sizing to fit on my hats.

This pattern is perfect for a beginner because once you have gotten your stitches cast on and made sure that nothing is twisted, all you do is knit around and around and it naturally creates the brim rolling that you see above. This basic hat pattern can be dressed up for a girl with simple embellishments or different styles of yarn or it can be done simply sweet and plain for a little boy.

Ethan pronounces this hat as awesome and we have it tucked in his bag for those cool days of fall and winter. This inexpensive yarn was perfect for a washable and soft hat that he can enjoy all year long.

Pattern: Toddler Republic Hat (free pattern) & Lydia Flowers (free pattern), the medium and small flowers only for a toddler hat

Needle Size: US 5 Needles (three sizes down from what the original pattern called for as I knit very loosely)

Yarn: Caron Simply Soft in Grey Heather (marked down to a mere $2.50 per skein & I was able to make this second one out of the same skein from her brother’s hat) & scrap Cotton Tots yarn in baby pink for the flower.

Notes: The Republic Hat pattern (adult version available in the side bar as a free PDF) is still my favorite pattern of all and I was so excited when I happened upon this Toddler Republic Hat version to make a mini-me version for my daughter. It truly is a dream pattern for anyone just beginning to create hats because the two inch brim is not knit in the round and then, after a small amount of binding off, you begin knitting in the round after the two inch brim. By creating a brim that is not knit in the round, it reduces your chances of getting your hat twisted on the circular needles and makes the whole process so much easier.

The Lydia Flower is my favorite knitted embellishment ever created because it adds that beautiful knitted touch to all of our hats. I noticed in the shops that hats that look handmade are adorned with knitted flowers and I am thrilled that I can actually make my own! Do I even have to mention the savings? Two beautiful hats for my kids made out of $2.50 worth of supplies? That is a huge savings!

Emily is in love with her hat. She is so in love with her hat that she wore it all day at school after I gave it to her and refused to take it off except for her school pictures that day. I fear what her hair looked like for that picture, but was feeling quite proud that I made something that she was so excited to show off.

The hat trend will continue because it is finally my turn! At the beginning of the summer, I visited The Yarn Gourmet in town to buy myself two beautiful skeins of fancy yarn. This is the first time I have ever bought “real” yarn and I treated myself as a reward after I made all the hats for everyone this summer. Just as the kids have felt a little impatient about getting a turn, I couldn’t wait to indulge in a turn for myself.

I am so excited to show you what I do with this yarn and then it will be back to the knitting agenda of creating handmade holiday gifts for family & friends.

********************************************

If you are just beginning the world of hats, these are the three things that really helped me have success getting comfortable with double-pointed needles and knitting in the round.

3 Things That Helped Me With Making Hats

1. Bamboo 16″ Circular Needles– These are an off-brand of bamboo needles, but had a wider cord than the kind that you buy in the store. This helped me so my stitches didn’t get twisted. Circular needles are expensive in the store ($8.50 per needle set). These were $24.98 for all of the sizes 0-15! What a steal! I applied my Swagbucks towa
rds Amazon gift cards to score these for free.

2. Bamboo 9″ Double Pointed Needles– Again, these are an off-brand needle and they were extremely rough so they held my stitches really well. As a beginner on these, these rough double pointed needles were key for me to get the hang of it without dropping stitches. It was a lot cheaper to buy these as a set and I did apply my Swagbucks towards the Amazon gift cards so I didn’t have to dip in my pocket to pay for them.

3. A Better Ring Marker- I was using the kind that you just slipped over the needles and was finding that I was losing my starting stitch marker for knitting in the round. My mother-in-law gave me the kind that slip onto the yarn and I put that at the beginning of my round. It was key to not losing my place and helped me stay on track with my pattern!

*******************

Disclosure: The links to books and supplies are affiliate links and are provided so you can locate what you need quickly and easily. Feel free to order a book, but we encourage utilizing the library system and buying me some yarn instead.  Wouldn’t that just be so much more lovely?

What crafts have you been working on? Feel free to share those links to your projects.

All Knitted Up: Knitted Gifts With a Purpose

Tuesday, February 16th, 2010

My knitting needles have been clicking at high speed these days with knitted gifts that needed to be turned around quickly. That being said, there is nothing more meaningful to me than knitting with a purpose. I love to have an intention that gives me the opportunity to focus on someone really important and make a gift to show them what they mean to me.

My girlfriend, Kathy Friend, has been such a gift to me.  She is the first person I call when I need help with a big event in my life. She has helped me find clothes that fit, she helps me feel more confident by guiding on me on good style choices, and she is my sounding board on the difficulties of working from home. She is my friend through and through. It is rare that you find someone that genuine in your life and I am so thankful for her friendship.

For over six years, Kathy and her husband have been trying to adopt a little girl named Anya from Russia. There has been much paperwork, many hurdles, and so many life lessons that they have garnered from this experience. After waiting this long, they are in Russia now to get their little girl. My heart skips a beat when I think about it.

I wanted to create a gift for Anya that would be meaningful and hopefully remind her of coming home.  I made another Bon Bon Baby Blanket but larger, that could be her travel blanket as they make the flight from Russia to America. It was done in all of the colors of the US flag as she comes to America, to live with her family that love her more than life itself.

Please keep the Friend family on your prayer list as they finish the final details of bringing Anya home. It is such a big moment of transition for all of them and I am so full of hope for this little family!

*******************

Welcome to America Travel Blanket

Pattern: Sweet Bon Bon Blanket by Suzanne Middlebrooks (available as a free download for Ravelry members)

Needle Size: US 9 Needles

Yarn: Lion Brand Homespun Candy Cane Red, Lion Brand Homespun Hepplewhite (used as the garter stitch section throughout the entire blanket), and Lion Brand Homespun Blue Sky Montana

Notes: Homespun yarn is definitely not my first choice when it comes to a baby blanket. For a travel blanket though, this yarn worked really well and created a beautiful design throughout the pattern with the mix of colors. If you were creating a baby blanket though, cotton yarn would definitely be my first choice!

This pattern is a great one for a beginning knitter and the only stitch you need to know is  the kfbf combination, which I found how to do on You Tube. Because of the width of this blanket (a cast on of only 96 stitches) it comes together very quickly and it makes a beautiful chevron pattern with a garter edge.

I stuck to the 96 stitch cast on and just made the blanket longer so it could be draped over her legs. My little Emily was a great helper and held my yarn for me as well as letting me use her as a model for travel blanket sizing.

I could not be more proud with how this turned out. It did take a lot longer to make then I had thought (four weeks almost), but I am so proud of the results!

I hope it will be something special for her and something that she will be able to snuggle up with for a long time. Welcome to America, Anya! We can’t wait to meet you!

*******************

When my I spoke to one of my girlfriends and found out that her mom was ill, I wanted to do something…  anything to help her.  For me, learning to knit was as much a gift to myself as it is a gift to others. I asked what color was her mother’s favorite and she shared with me that her mom really loved pink. I put my needles on a speed of eleven, and worked on this shawl for hours at a time until it was done. I wanted it to be there when she needed it most.

I wanted this prayer shawl to offer warmth and comfort while still being fashionable and something that I myself would wear. I went back to my favorite shawl pattern, “Alice’s Lace Shawl” by Alice Beck in the The Prayer Shawl Companion book.

For me, half of the beauty of a prayer shawl is in the details. It isn’t just the knitting that makes it beautiful, it is the personalization that is created for that special person. I found the beautiful cross charm at Michael’s in the jewelry section. It was $7.99, but I used my 40% off coupon. The yarn was marked down to $2.99 a ball and it took two balls to create.

I used ribbon from my ribbon stash to pull it together and printed a prayer out for her that came from the book that is highlighted above. It was printed on pink polka dotted paper that I already had in my craft supplies. Tucked in tissue, it was shipped Priority and sent to the sweet recipient to let her know she is being prayed for by someone who has yet to even meet her.


*******************

Pretty In Pink Lace Shawl

Pattern: Alice’s Lace Shawl by Alice Beck (from The Prayer Shawl Companion Book)

Needle Size: US 13 Needles

Yarn: Bernat Softee Chunky Solid in Antique Rose (2 Skeins)

Notes: Prayer shawls can be simple or complicated, but the idea behind them is that they are woven together with yarn and with prayer. As you create them, you pray for the person and ask God that the shawl can offer them comfort through difficult times.

I found a fantastic book on prayer shawls called The Prayer Shawl Companion by Janet Bristow & Victoria A. Cole-Galo. The book offered thirty-eight different patterns that could be used to create a unique prayer shawl for someone in need. In the pattern book, I chose, “Alice’s Lace Shawl,” because the pattern had only one row of pattern and then a row of purling and a row of knitting. It was simple enough that I could concentrate on prayer and complex enough that it created a scalloped edge with just enough lace, while still being warm.

This project took me six days of straight knitting every single moment that I had. The lace shawls that I created with Homespun Yarn knitted up much, much faster than this one, but they didn’t have any pink Homespun at Michael’s so I had to go with a less bulky yarn.

*******************

Disclosure: The knitting book link is an affiliate link and is provided so you can locate the book quickly and easily. Feel free to order a book, but we encourage utilizing the library system and buying me some yarn instead.  Wouldn’t that just be so much more lovely?

What crafts have you been working on? How do you benefit others with your crafting abilities?

Gifts You Can Make: Knitted Prayer Shawls

Tuesday, December 15th, 2009


I realize that not everyone can knit so I have kept my knitted gifts for last in this series. Many of my gifts this year have been knitted ones which is why I wanted to share with you a few of my favorite knitted gifts that I made. I hope that the gifts you can make series has inspired you in your gift-giving this year! In case you have missed our tutorials, I shared some hot drink mixes you could make, bath salts and soaks that can be mixed up in your kitchen, deliciously quick breads for festive giving, hand painted mugs that you paint with your children, and even a holiday wreath for your door. My hope is that some of these handmade gifts can keep your holiday budget on track and even become gift traditions each year.

Many churches offer a prayer shawl ministry and making prayer shawls has been on my list of things I would like to do to volunteer my time and talent towards those in need. This month though, I knew that I really wanted to make two special ones for two ladies in my life that need prayers and comfort this holiday season.

As you know, my grandfather passed away recently and the holidays are going to be a particularly difficult time for both my mother and grandmother. I knew that I wanted to do something special for them both that would honor my grandfather’s memory and offer some comfort to them.

Prayer shawls can be simple or complicated, but the idea behind them is that they are woven together with yarn and with prayer. As you create them, you pray for the person and ask God that the shawl can offer them comfort through difficult times.

I found a fantastic book on prayer shawls called The Prayer Shawl Companion by Janet Bristow & Victoria A. Cole-Galo. The book offered thirty-eight different patterns that could be used to create a unique prayer shawl for someone in need. In the pattern book, I chose, “Alice’s Lace Shawl,” because the pattern had only one row of pattern and then a row of purling and a row of knitting. It was simple enough that I could concentrate on prayer and complex enough that it created a scalloped edge with just enough lace, while still being warm.

This prayer shawl is knit on size fifteen needles and knitted with bulky yarn. With such large needles and with the bulkiness of the yarn, it only took me two or three evenings on the couch and a little knitting here and there between household chores to get these done. It is a faster project than it looks, I promise you!


I really wanted the shawls to be special so I went to Michael’s and visited the jewelry department where I found two tiny picture charms (for only $2.99 total) that could be used to embellish the shawls. We shrunk and printed my favorite picture of my grandfather and then I tied it onto the shawl with a little ribbon. The picture can be worn on the outside or can be worn next to the heart on the inside since the shawl pattern looks the same on both sides.

Each of the shawls was tied with red ribbon, which was my grandfather’s favorite color, and each included a prayer of comfort for them. I printed these on some scrapbook paper from my craft supplies and loved the antique look of the paper.


The prayer I chose came from the book and said this…

No Farther Than a Prayer

I wrap the prayers of warmth and love around
Your weary frame, praising, thanking God for
the gift of you as I pray your name.
Every stitch sends forth a plea that joy will fill
your soul. On and on the needles fly, making a
pattern of prayer gold.
The shawl takes on a holiness for prayer is
wrapped inside. It is so soft and warm, a place
where you can hide.
It becomes a prayer itself, this pain that you
endure. And it rises with love’s incense, sacred,
warm, and sure.
So as you wrap the shawl around may you feel
my presence there. I may not sit beside you but
I am no farther than a prayer.

Author Credit- Jean Quigley

If you would like to create a prayer shawl of your own, be sure to visit the official Prayer Shawl Ministry for a free prayer shawl pattern and instructions on how to complete a prayer shawl for someone who may need comfort this holiday season!

All Knitted Up: The Republic Hat & Cupcake Hat

Tuesday, December 1st, 2009

Double pointed needles have terrified me ever since I started knitting. About a year ago, I recorded a couple of episodes of Knitty Gritty that went through the in’s and out’s of double pointed needles. I can’t tell you how many times I have watched those same episodes over and over again.

For some, these are easy to learn. For me, this took a good few weeks of work to finally get the hang of it. I think I was intimidated more than anything. Knitting with three needles is so awkward to me, much like my first days of learning to knit were. For most hats though, they are a necessary evil and one that I was willing to tackle to move on to some fresh new projects.

I wanted to share with you a few of my latest hat creations that I am so proud of. I learned many new techniques through these hat projects and I can’t wait to share them with you!


Pattern: Cupcake Hat (@ Chili Con Yarne)

Needle Size: US 6 Needles

Yarn: Bernat Lemon Berry & Bernat Dark Pink Cotton Tots Yarn (clearance section of Hobby Lobby for $2.81 a ball!)

Notes: This hat took two tries before I figured out the sizing that I needed. There is such a thing as checking gauge, but I had already went two needle sizes down on the pattern so I figured I was safe. It turned out, I was wrong. The first one turned out to be a hat more appropriate for a 7 year old rather than a 4 year old. Lucky for me, my best friend has a daughter who is just that age so I am going to give her the first one.

To make the sizing perfect for my daughter (who must have a very small head or I knit extremely loose), I switched my needle sizing to size 6 (the original pattern called for size 8 needles) needles and decreased the cast on stitches to 72. That turned out to be the perfect size with this yarn and for my sweet little girl’s head.

I learned so much from this pattern. The thing I was extremely proud to have learned was how to make bobbles. I found a fantastic You Tube tutorial and used that to create this hat. I had also never made a pom pom before and that was super fun and easy! Below are the tutorials that I used to create this hat!

We love it so much that now I want to make another one in purple for her. A girl has to have great choices for her winter wardrobe and I absolutely love this cute hat!

Pattern:The Republic Hat (available in the right side bar as a free download in PDF from Nik’s Knits)

Needle Size: US 8 Needles

Yarn: I Love This Cotton! yarn in Vintage Teal & the bronze flower button was found at Hobby Lobby.

Notes: Again, I did not check my gauge (are you seeing a pattern here?) and figured out that I need to go down two needle sizes for every hat pattern I make. It seems the Clark family has small heads or I am a really loose knitter. Thanks to the adjustable button closure though, I just pulled it in tighter to adjust to my head sizing. In my opinion, thanks to this cute adjustable brim, this is an absolutely perfect hat for a beginner because you can tuck it in if you need to.

I loved this pattern so much that I decided to make a second one in winter white in the same I Love This Cotton! yarn (available for $2.99 a skein) at Hobby Lobby.

Here is my second hat made with the size 8 needles (instead of the size 10 above) and I cannot stop wearing it. Every single time I wear it someone asks me where I bought it. For my friends that know me, they ask if I will make them one. I have two more to create before Christmas for a couple of special people in our family. I love this hat to death and can’t say it enough that it is the perfect hat pattern to start with because it is super easy to NOT get those stitches twisted with the garter stitch brim.

3 Things That Helped Me With Making Hats

1. Bamboo 16″ Circular Needles– These are an off-brand of bamboo needles, but had a wider cord than the kind that you buy in the store. This helped me so my stitches didn’t get twisted. Circular needles are expensive in the store ($8.50 per needle set). These were $24.98 for all of the sizes 0-15! What a steal! I applied my Swagbucks towa
rds Amazon gift cards to score these for free.

2. Bamboo 9″ Double Pointed Needles– Again, these are an off-brand needle and they were extremely rough so they held my stitches really well. As a beginner on these, these rough double pointed needles were key for me to get the hang of it without dropping stitches. It was a lot cheaper to buy these as a set and I did apply my Swagbucks towards the Amazon gift cards so I didn’t have to dip in my pocket to pay for them.

3. A Better Ring Marker- I was using the kind that you just slipped over the needles and was finding that I was losing my starting stitch marker for knitting in the round. My mother-in-law gave me the kind that slip onto the yarn and I put that at the beginning of my round. It was key to not losing my place and helped me stay on track with my pattern!

Below are a few tutorials that I used that helped me with these patterns! I hope they will help you as much as they have helped me this last month!