Make a memory for your kids (and you!) with this fun summer activity!
This year has flown by for our family and it’s hard to believe summer is so quickly upon us.
Each year I’m more desperate to hang on to our summer and our memories together.
My kids are hitting the teen stages and I treasure each moment with them so much more as they get older than I had ever imagined.
I want to share with you a fun summer time capsule ornament that your children can hang on the holiday tree or can be the launching point of a fun family mealtime together this summer.
Have you ever had your kids create a time capsule?
I am telling you, it is so much fun and gives you a glimpse, as a parent, into what is important in their lives.
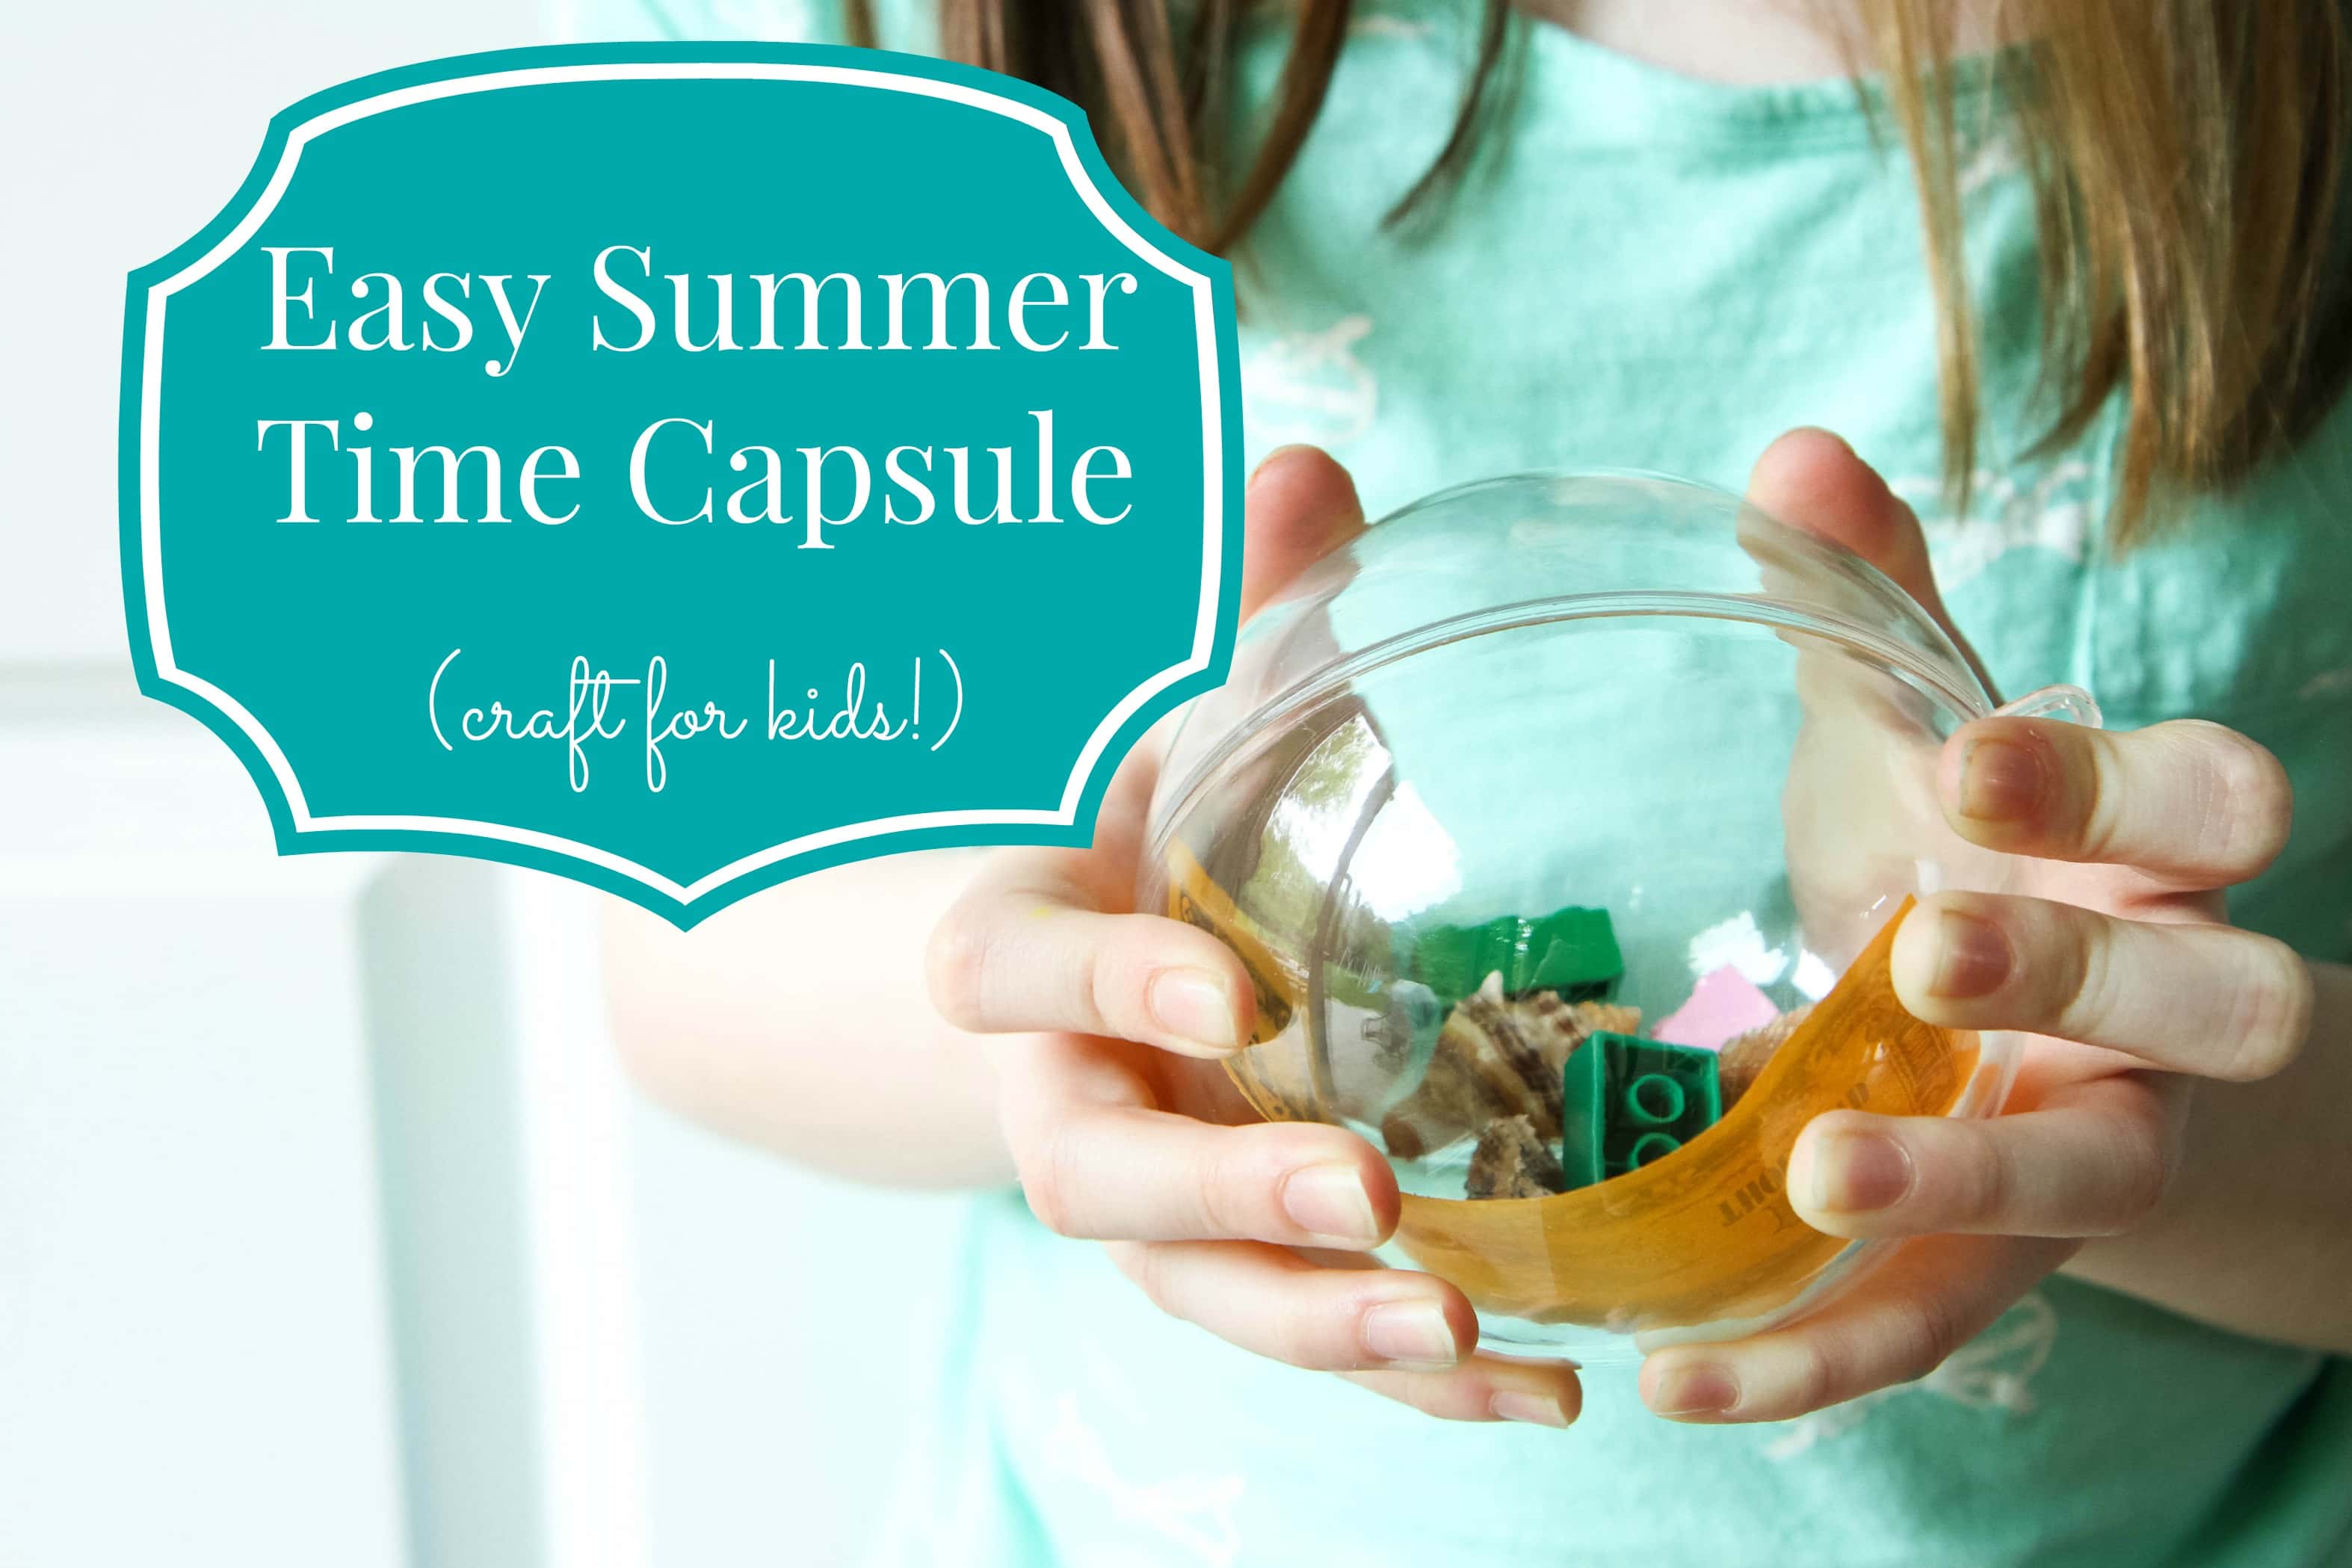
How to Make A Summer Time Capsule
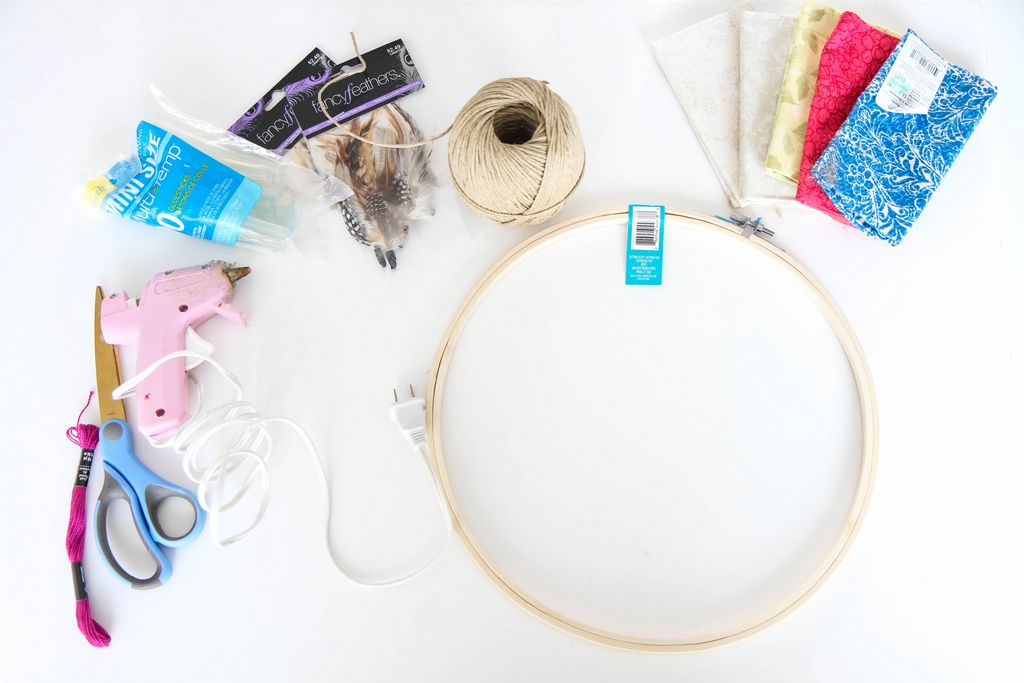
Supplies Needed
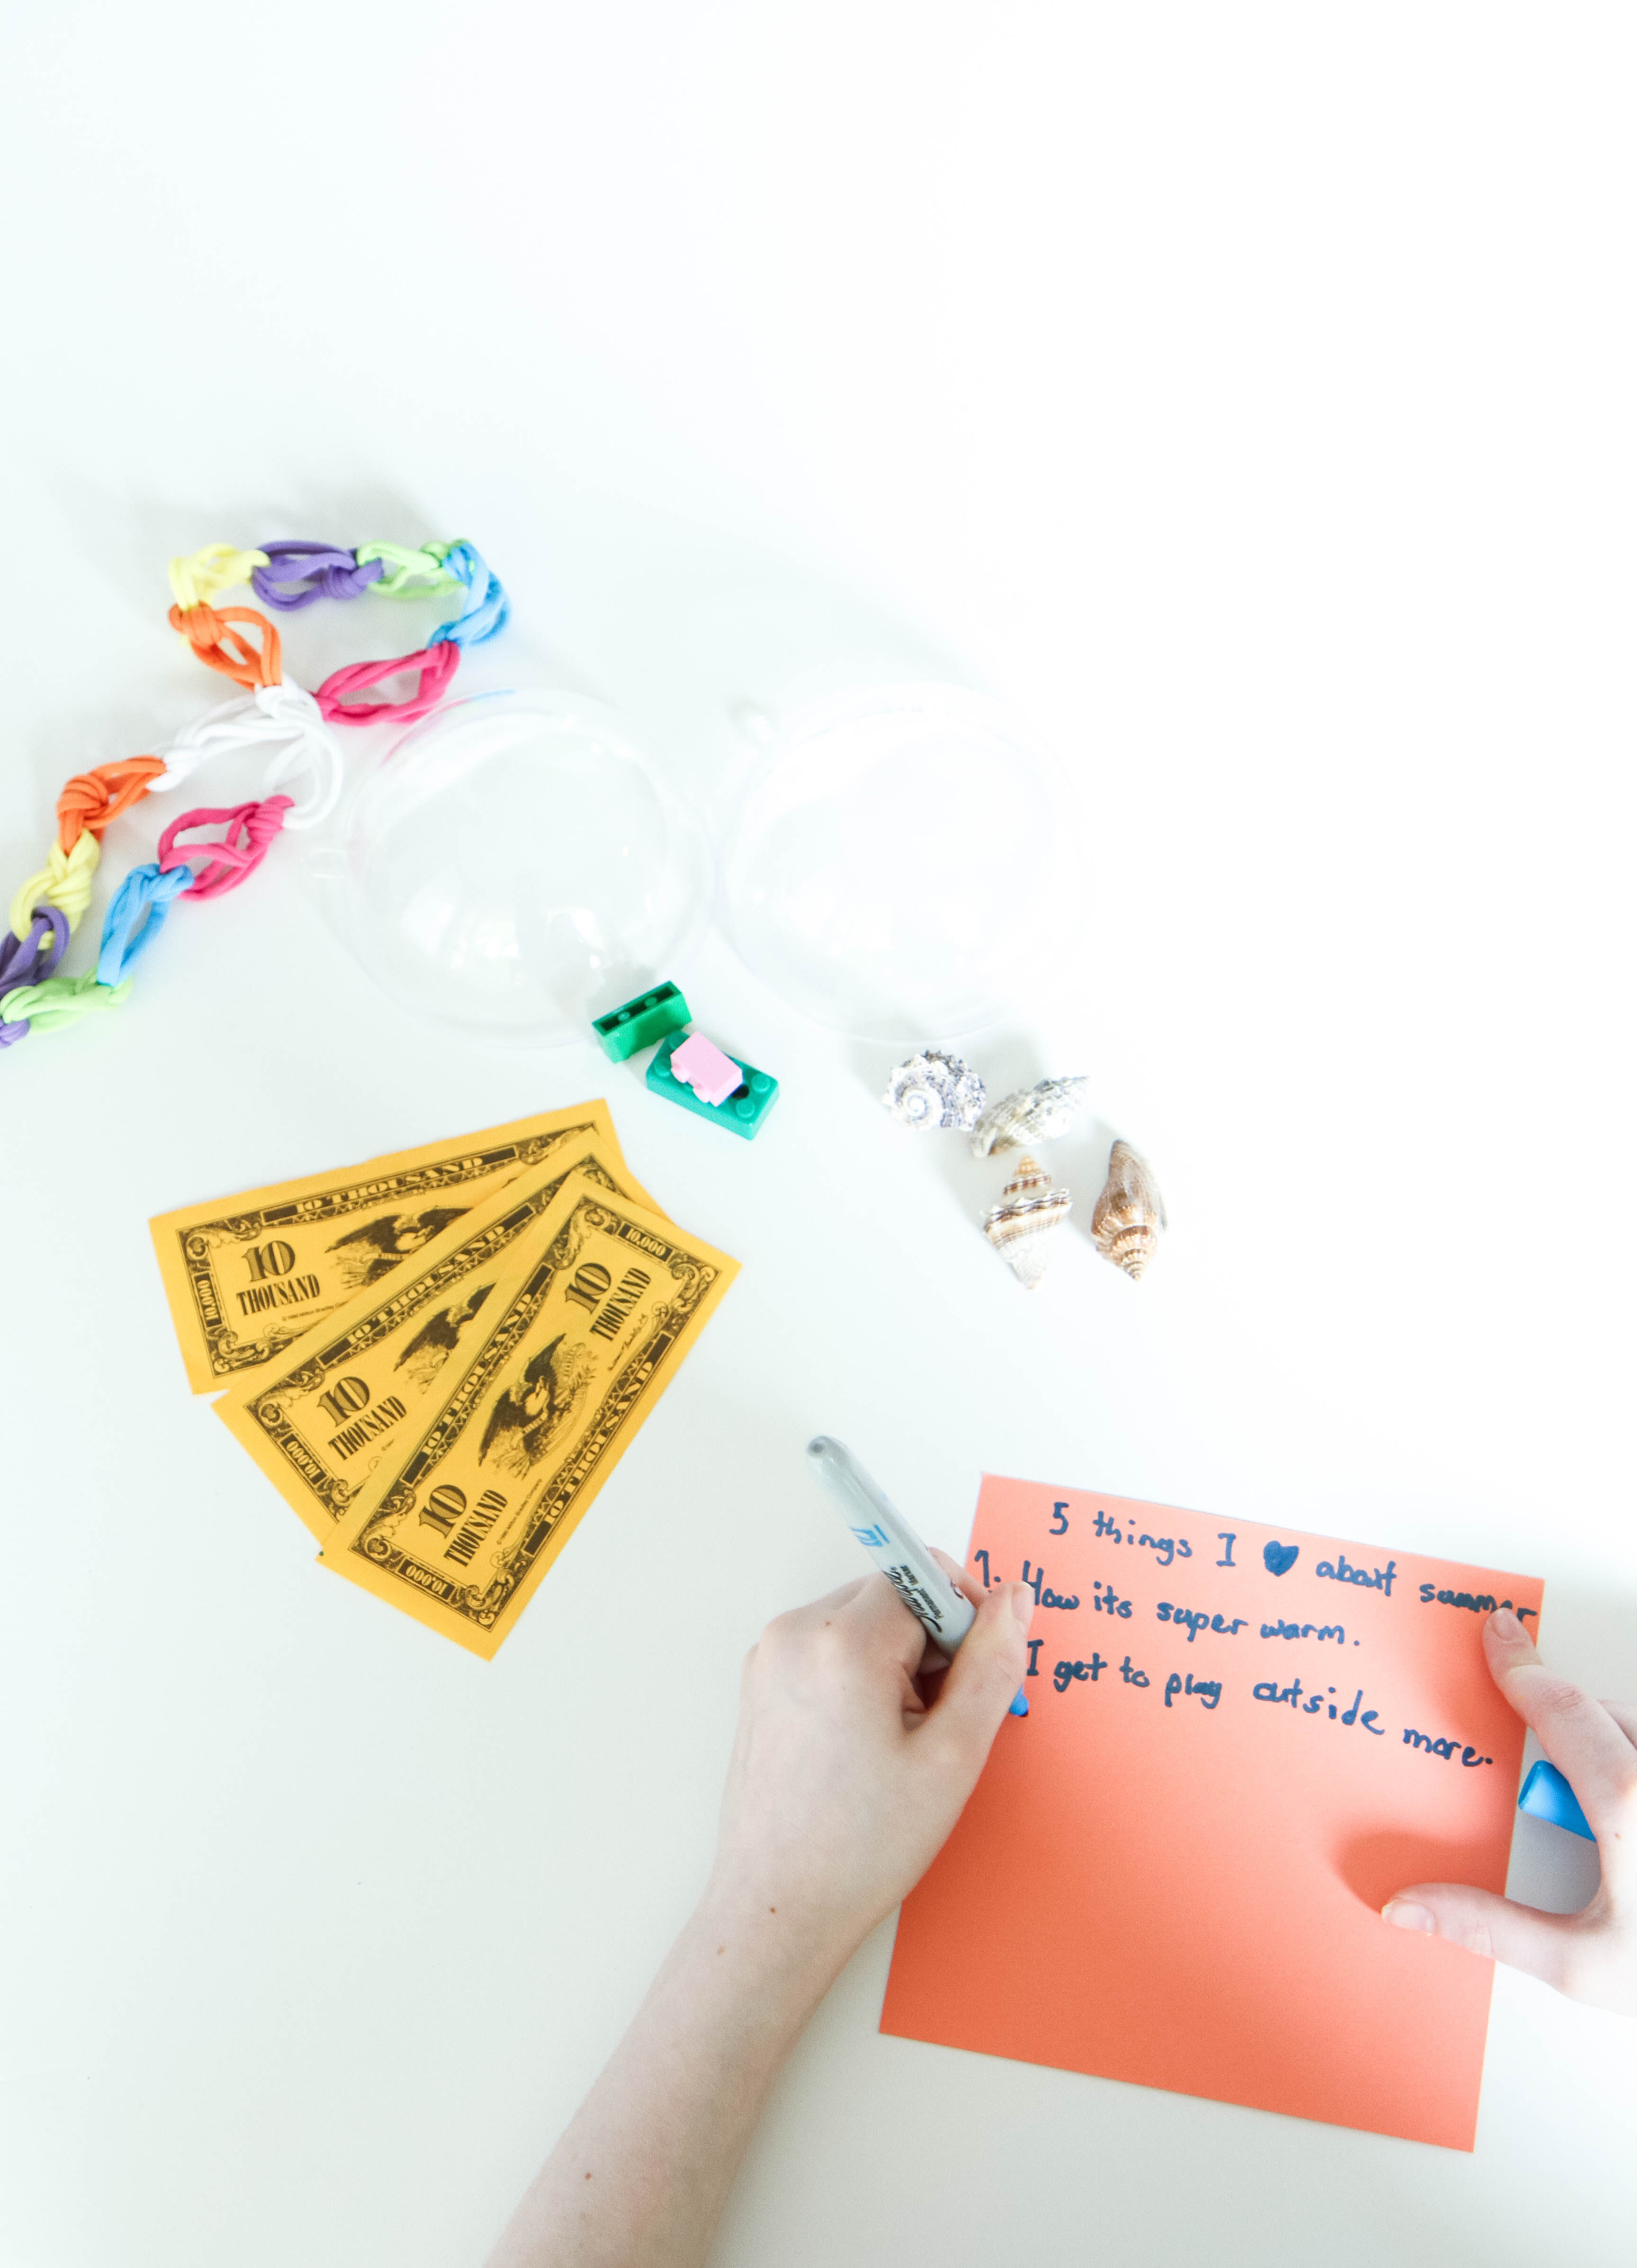
- 100mm Clear Acrylic Fillable Ornaments
- Your child’s favorite summertime trinkets collection
- Pen & Paper
- Permanent Marker
Directions
1. Tell your child at the beginning of the summer to begin gathering small items that represent their fun-filled summer!
To get them brainstorming, consider gathering a representation of their favorite crafts, board games, building activities (puzzles or building blocks), beach finds (pretty sand or shells), or items found on nature walks.
Tell them you want this capsule to really showcase what they were passionate about that summer so they can create a really important collection for their capsule.
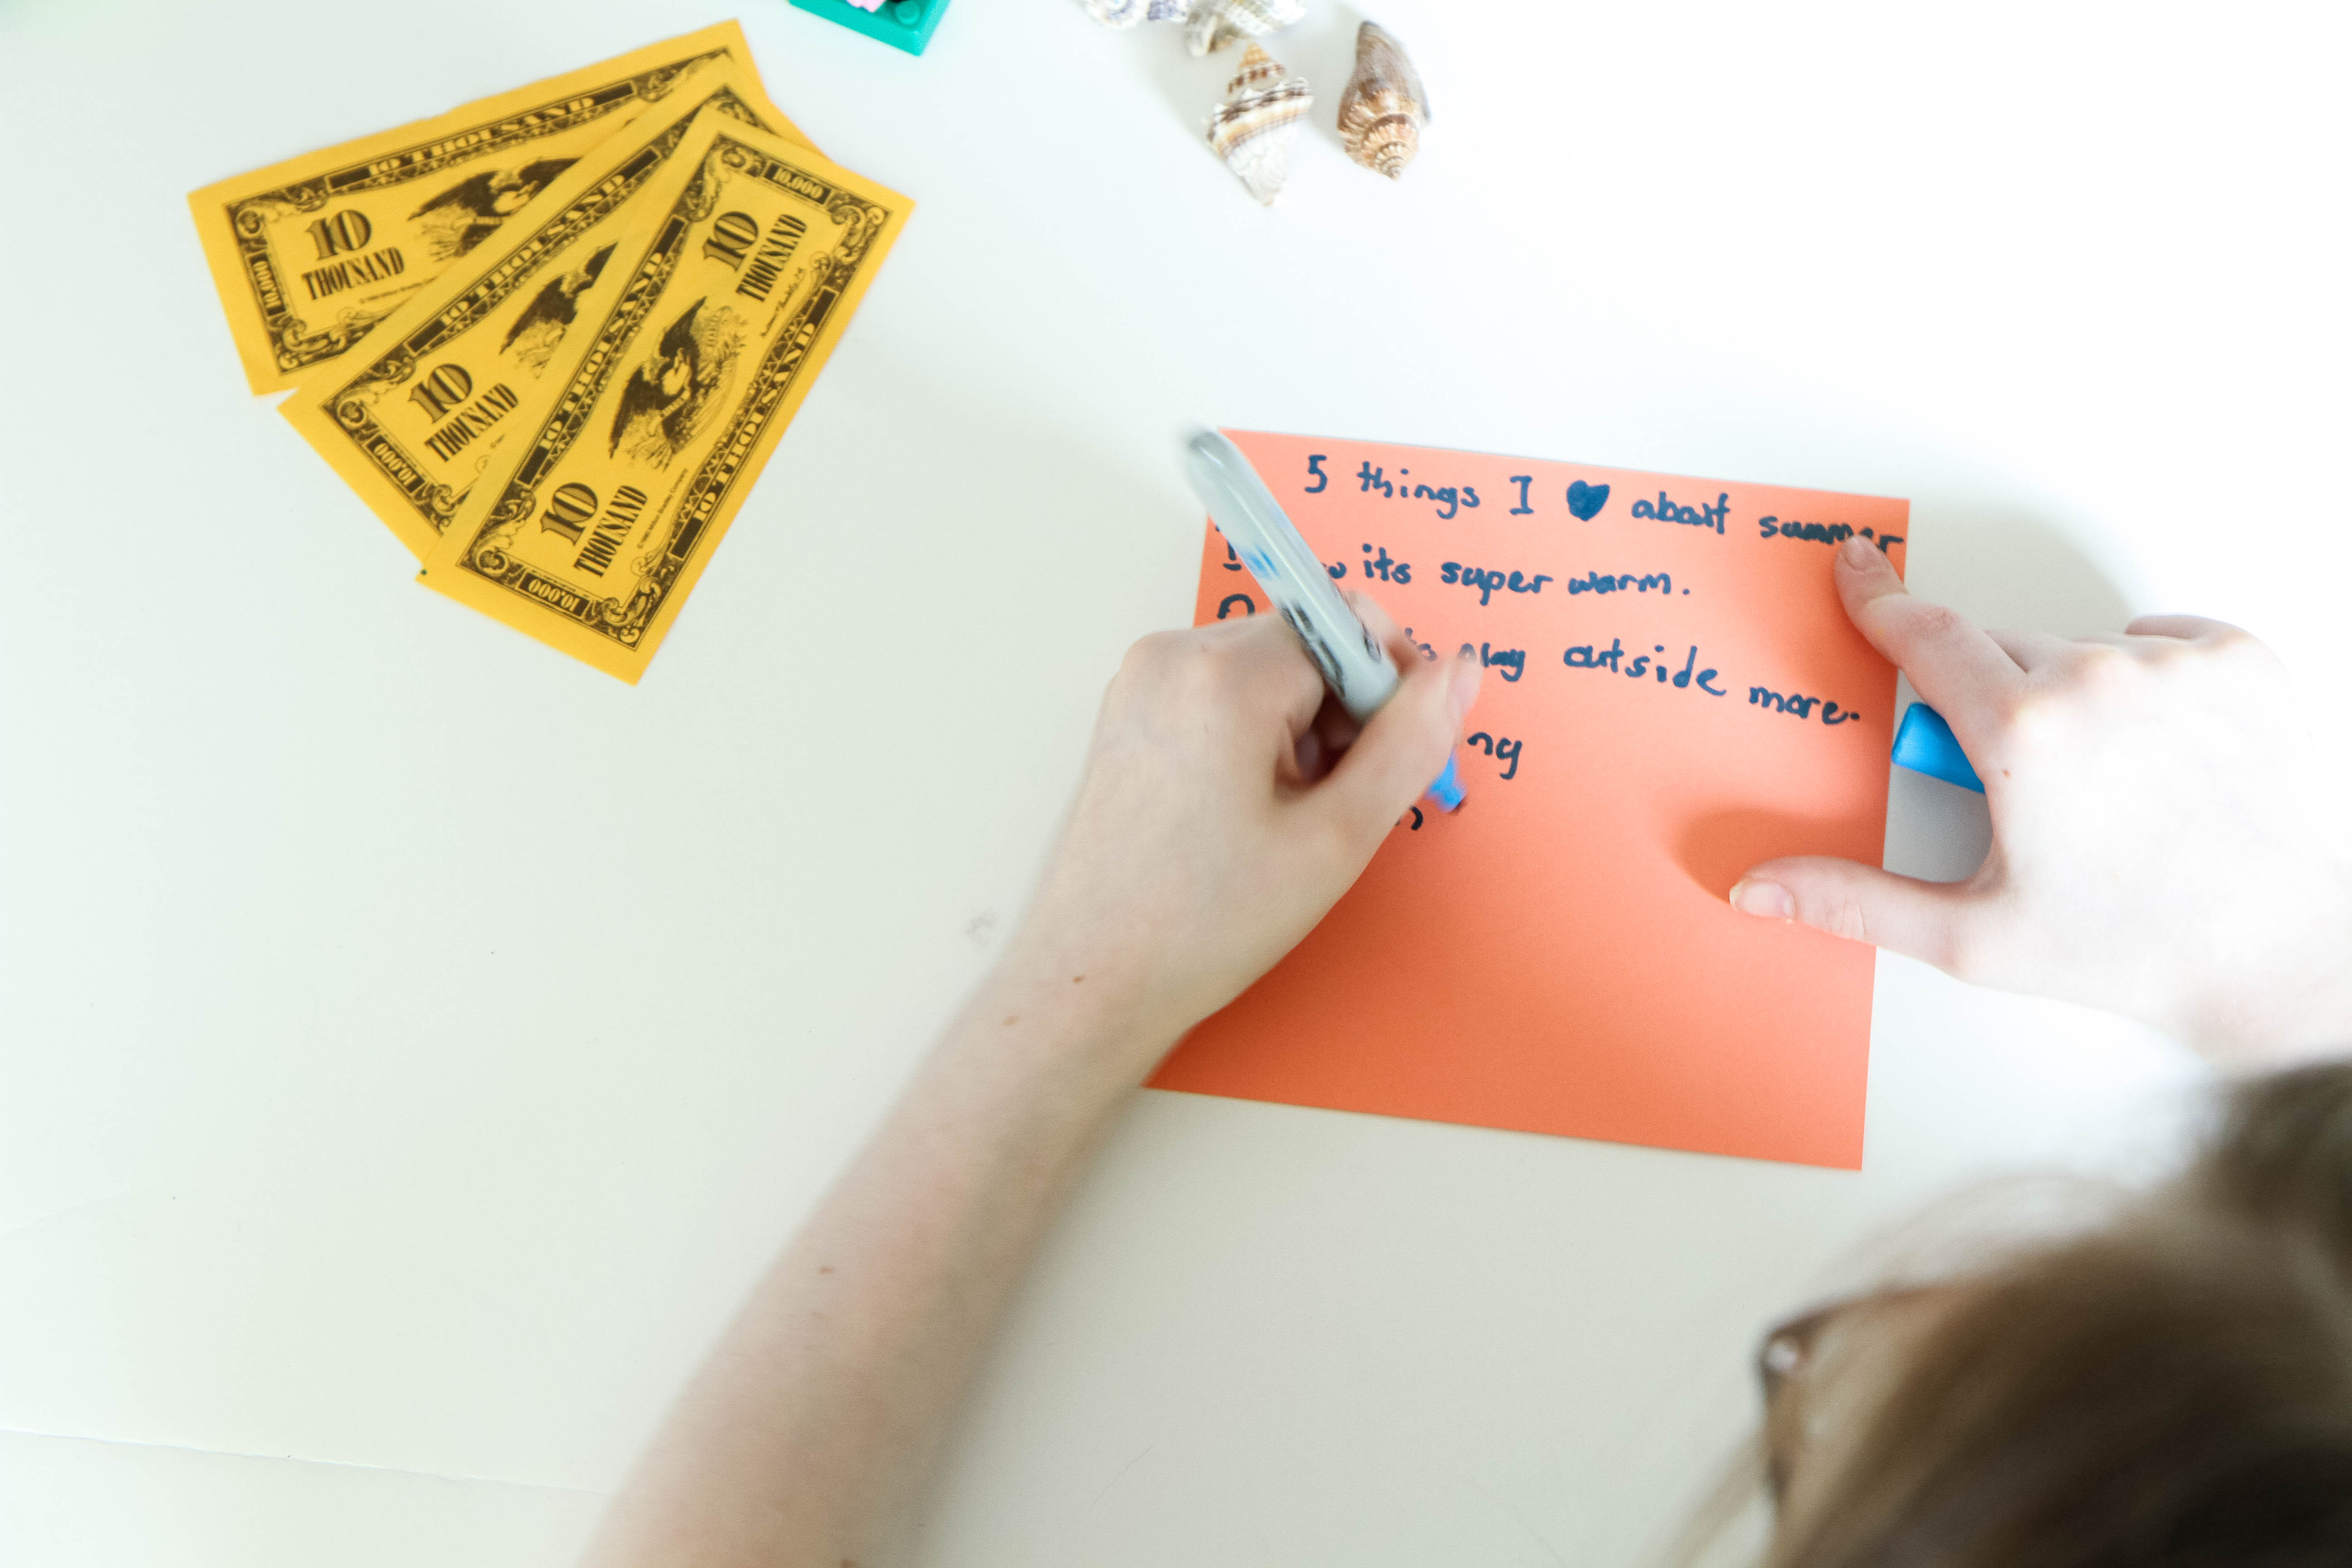
2. Have your child jot down 5 things that they love about summer.
Guide them with a gentle writing prompt to explain why they have included these items in their capsule to represent them.
For example, “I love seeing my mom cry when I take all of her money in Monopoly.” Of course, that would be YOUR child, not MY child (*ahem*).
Don’t forget to have them include the date somewhere on this sheet so you can keep track of the years!
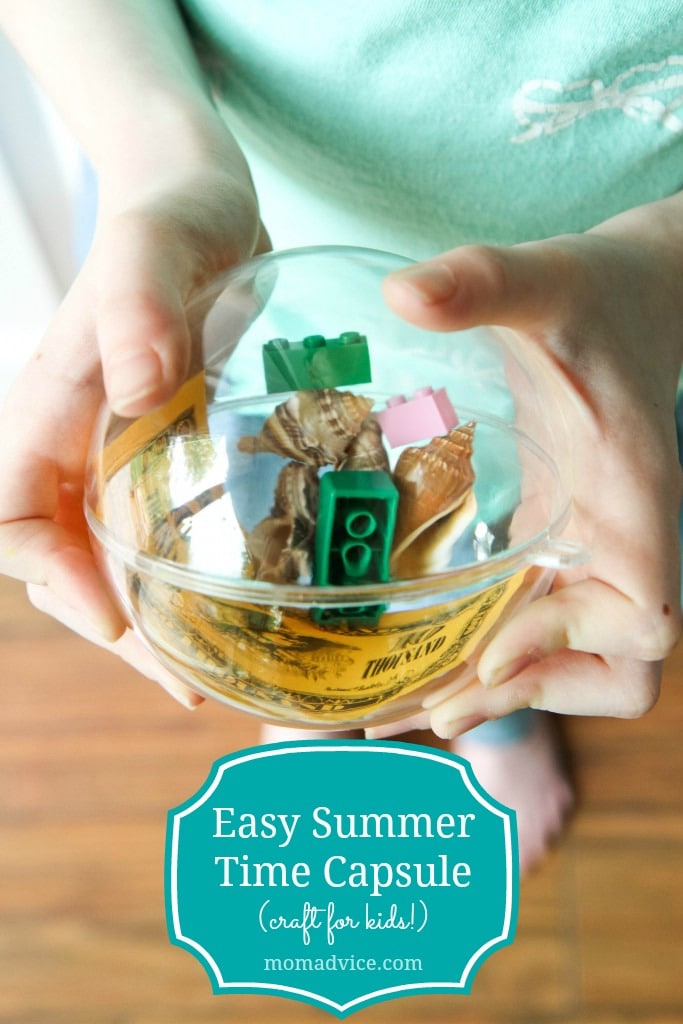
3. Fill an ornament with their trinkets and the facts about their summer.
Snap shut at the seams.
If you are concerned about longtime storage, you can secure with a little hot glue along the seams.
4. Use permanent marker to write your child’s name and the date somewhere on the ornament.
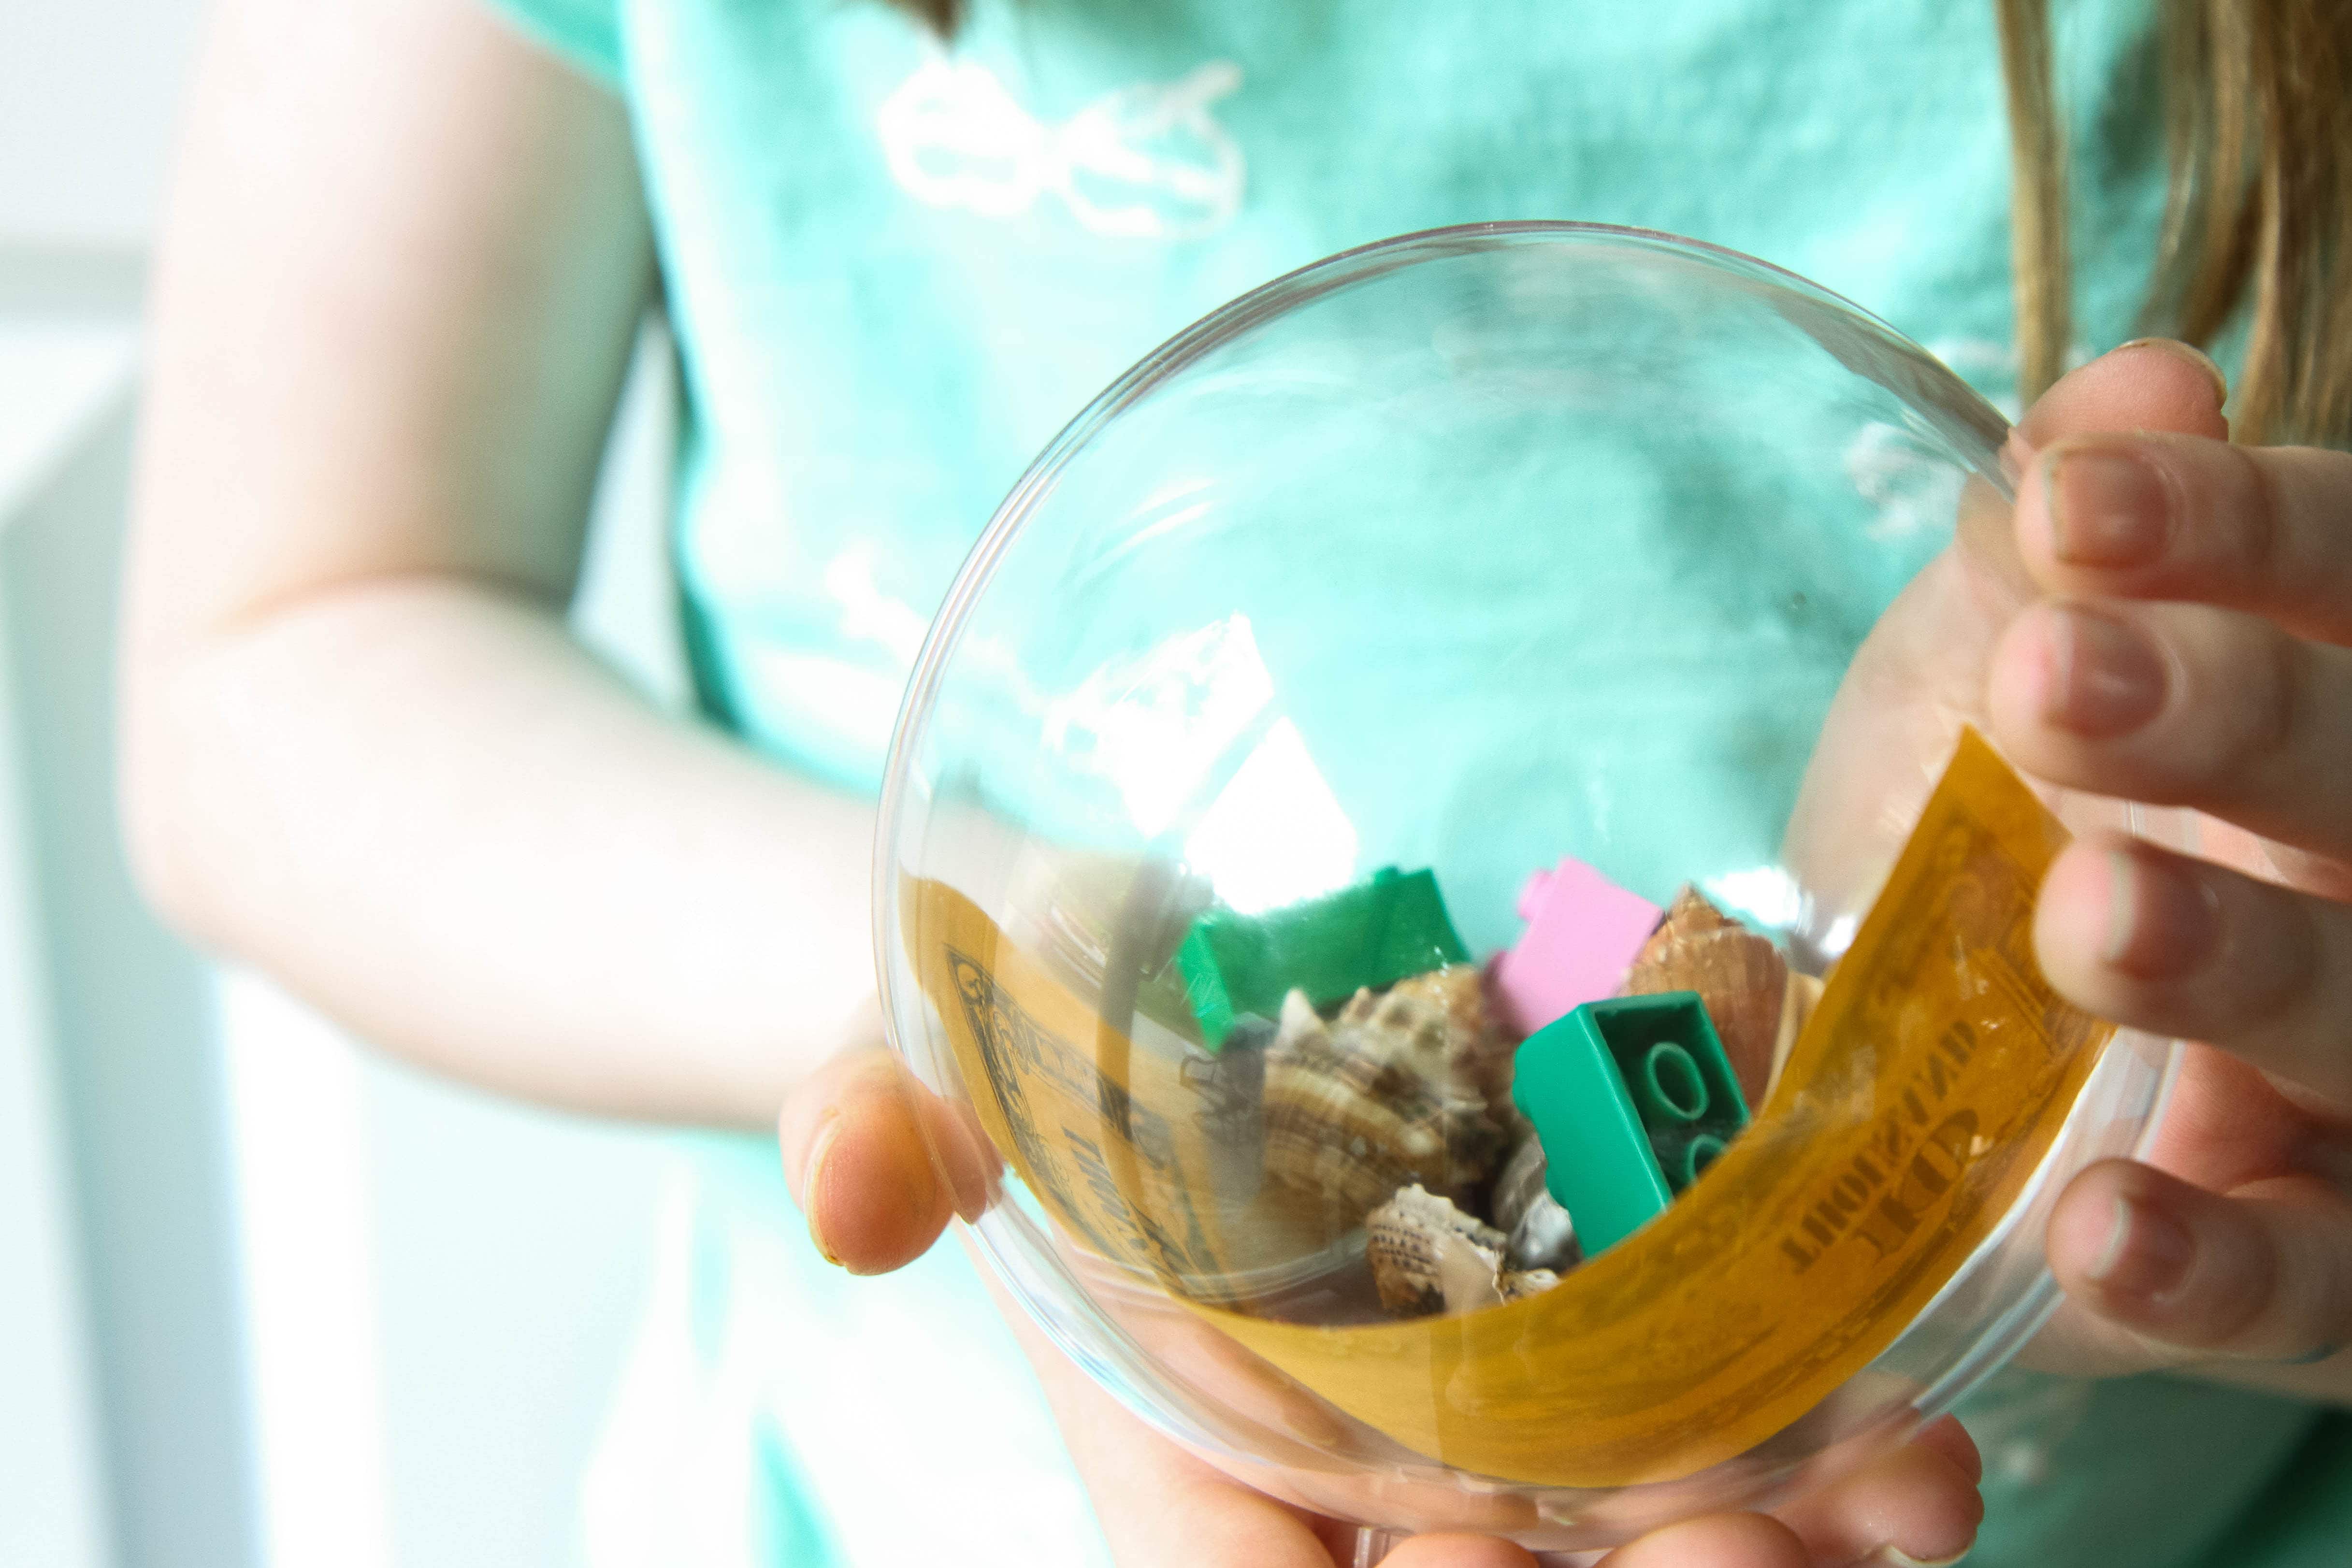
In our family, we are all about board games, building blocks, finding seashells at the beach, and my daughter has developed a strong love for finger knitting this year. I love this representation of who she is at nine!
Don’t let the time capsule fun end at summer.
We incorporated this same time capsule idea in our NYE celebrating as a family, but selected a few things that represented our favorite moments of the year.
Over a celebration dinner, we each twisted open our capsules to share our favorite moments together.
I remember that night well because I learned so much about my kids and some of the things they included surprised me.
I guarantee you will learn a lot during the big time capsule reveal and make some beautiful memories.
For a summer capsule, this same idea would be fun for a family s’more night or as a fun ending to a sundae party together.
Celebrate the end of summer in a new way and remember to get your kids thinking now because beautiful collections that represent them take time!
I hope you enjoy this fun craft together and please be sure to let us know if this becomes a part of your own family traditions as it has become such an integral part of ours!
*this post contains affiliate links- I only recommend what I love though!
Don’t miss these other great ideas from MomAdvice.com:


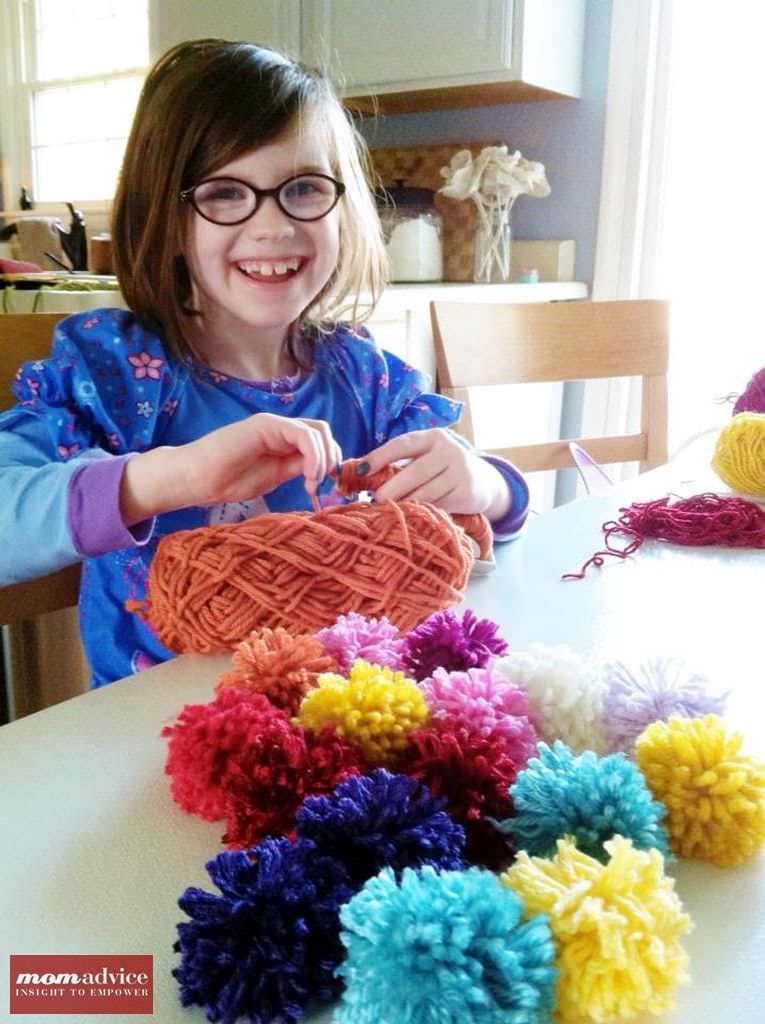
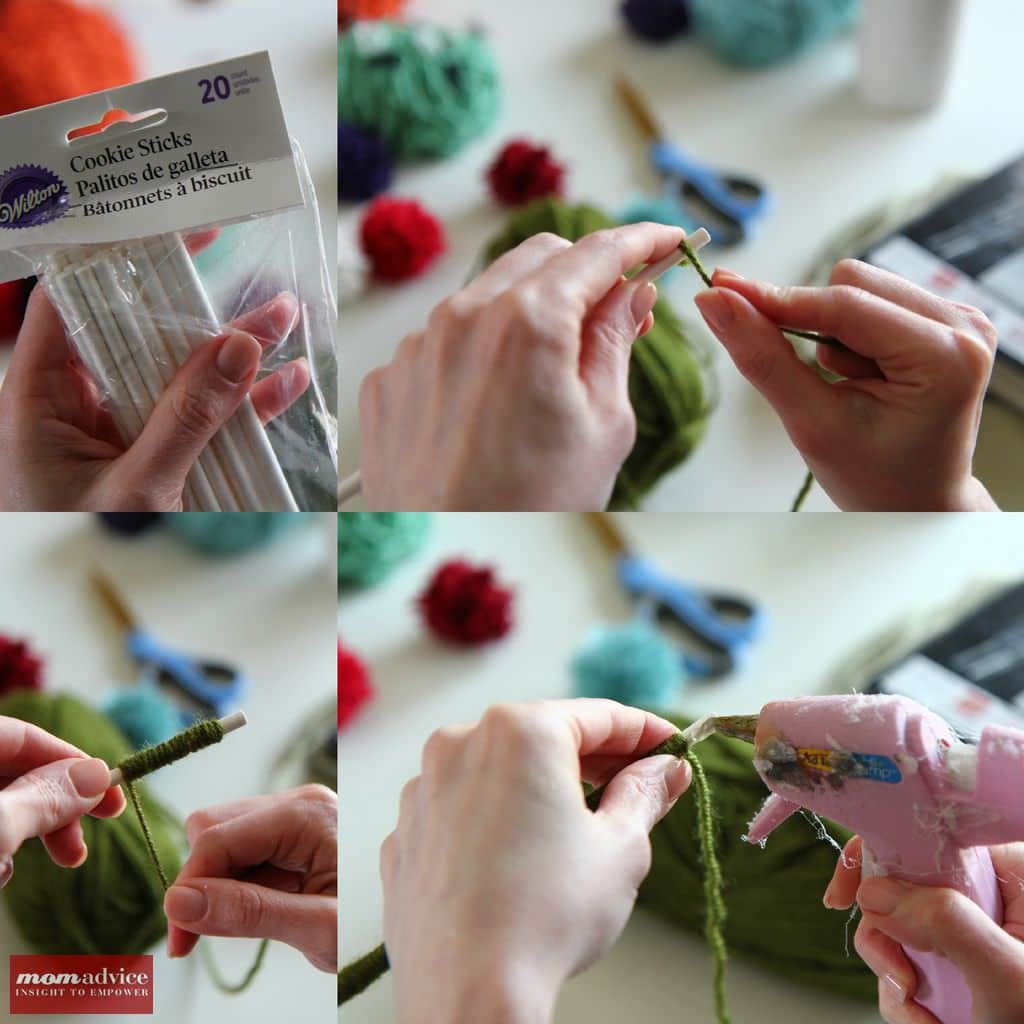
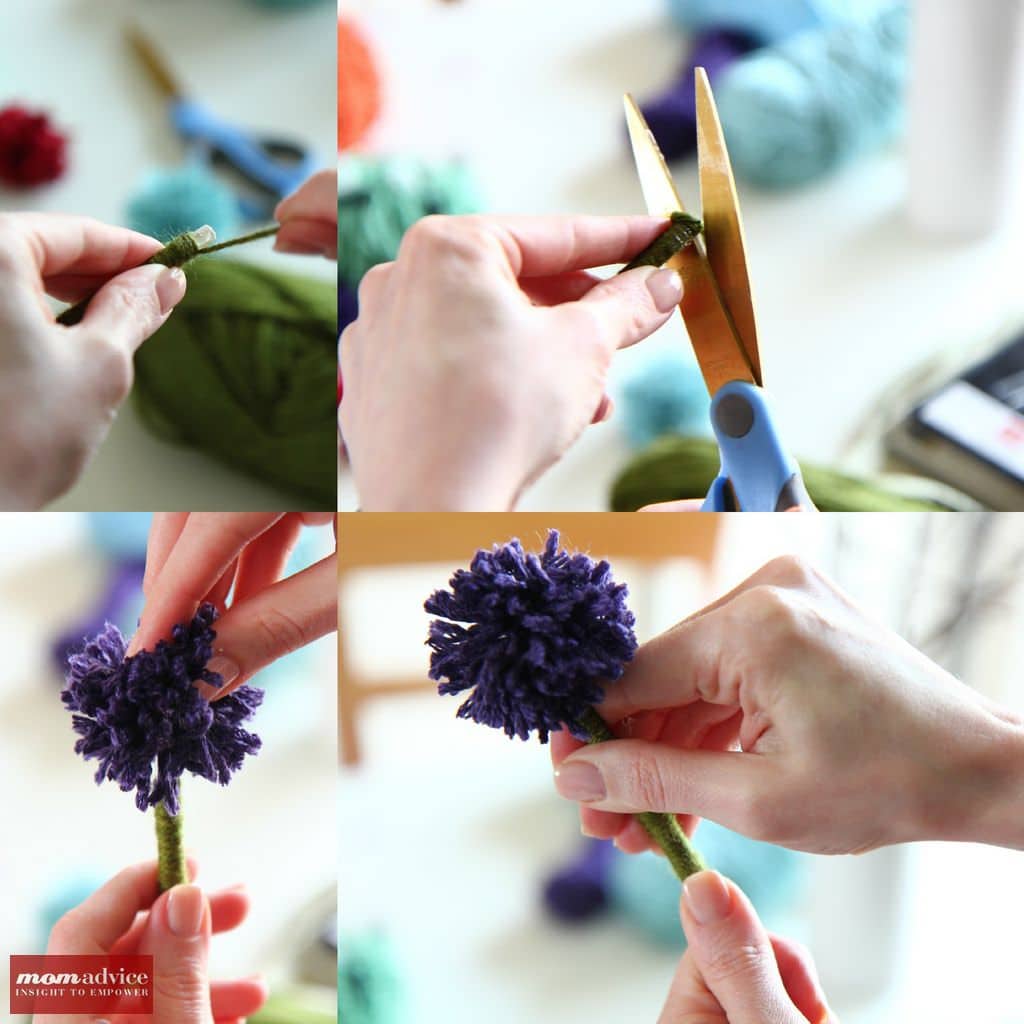
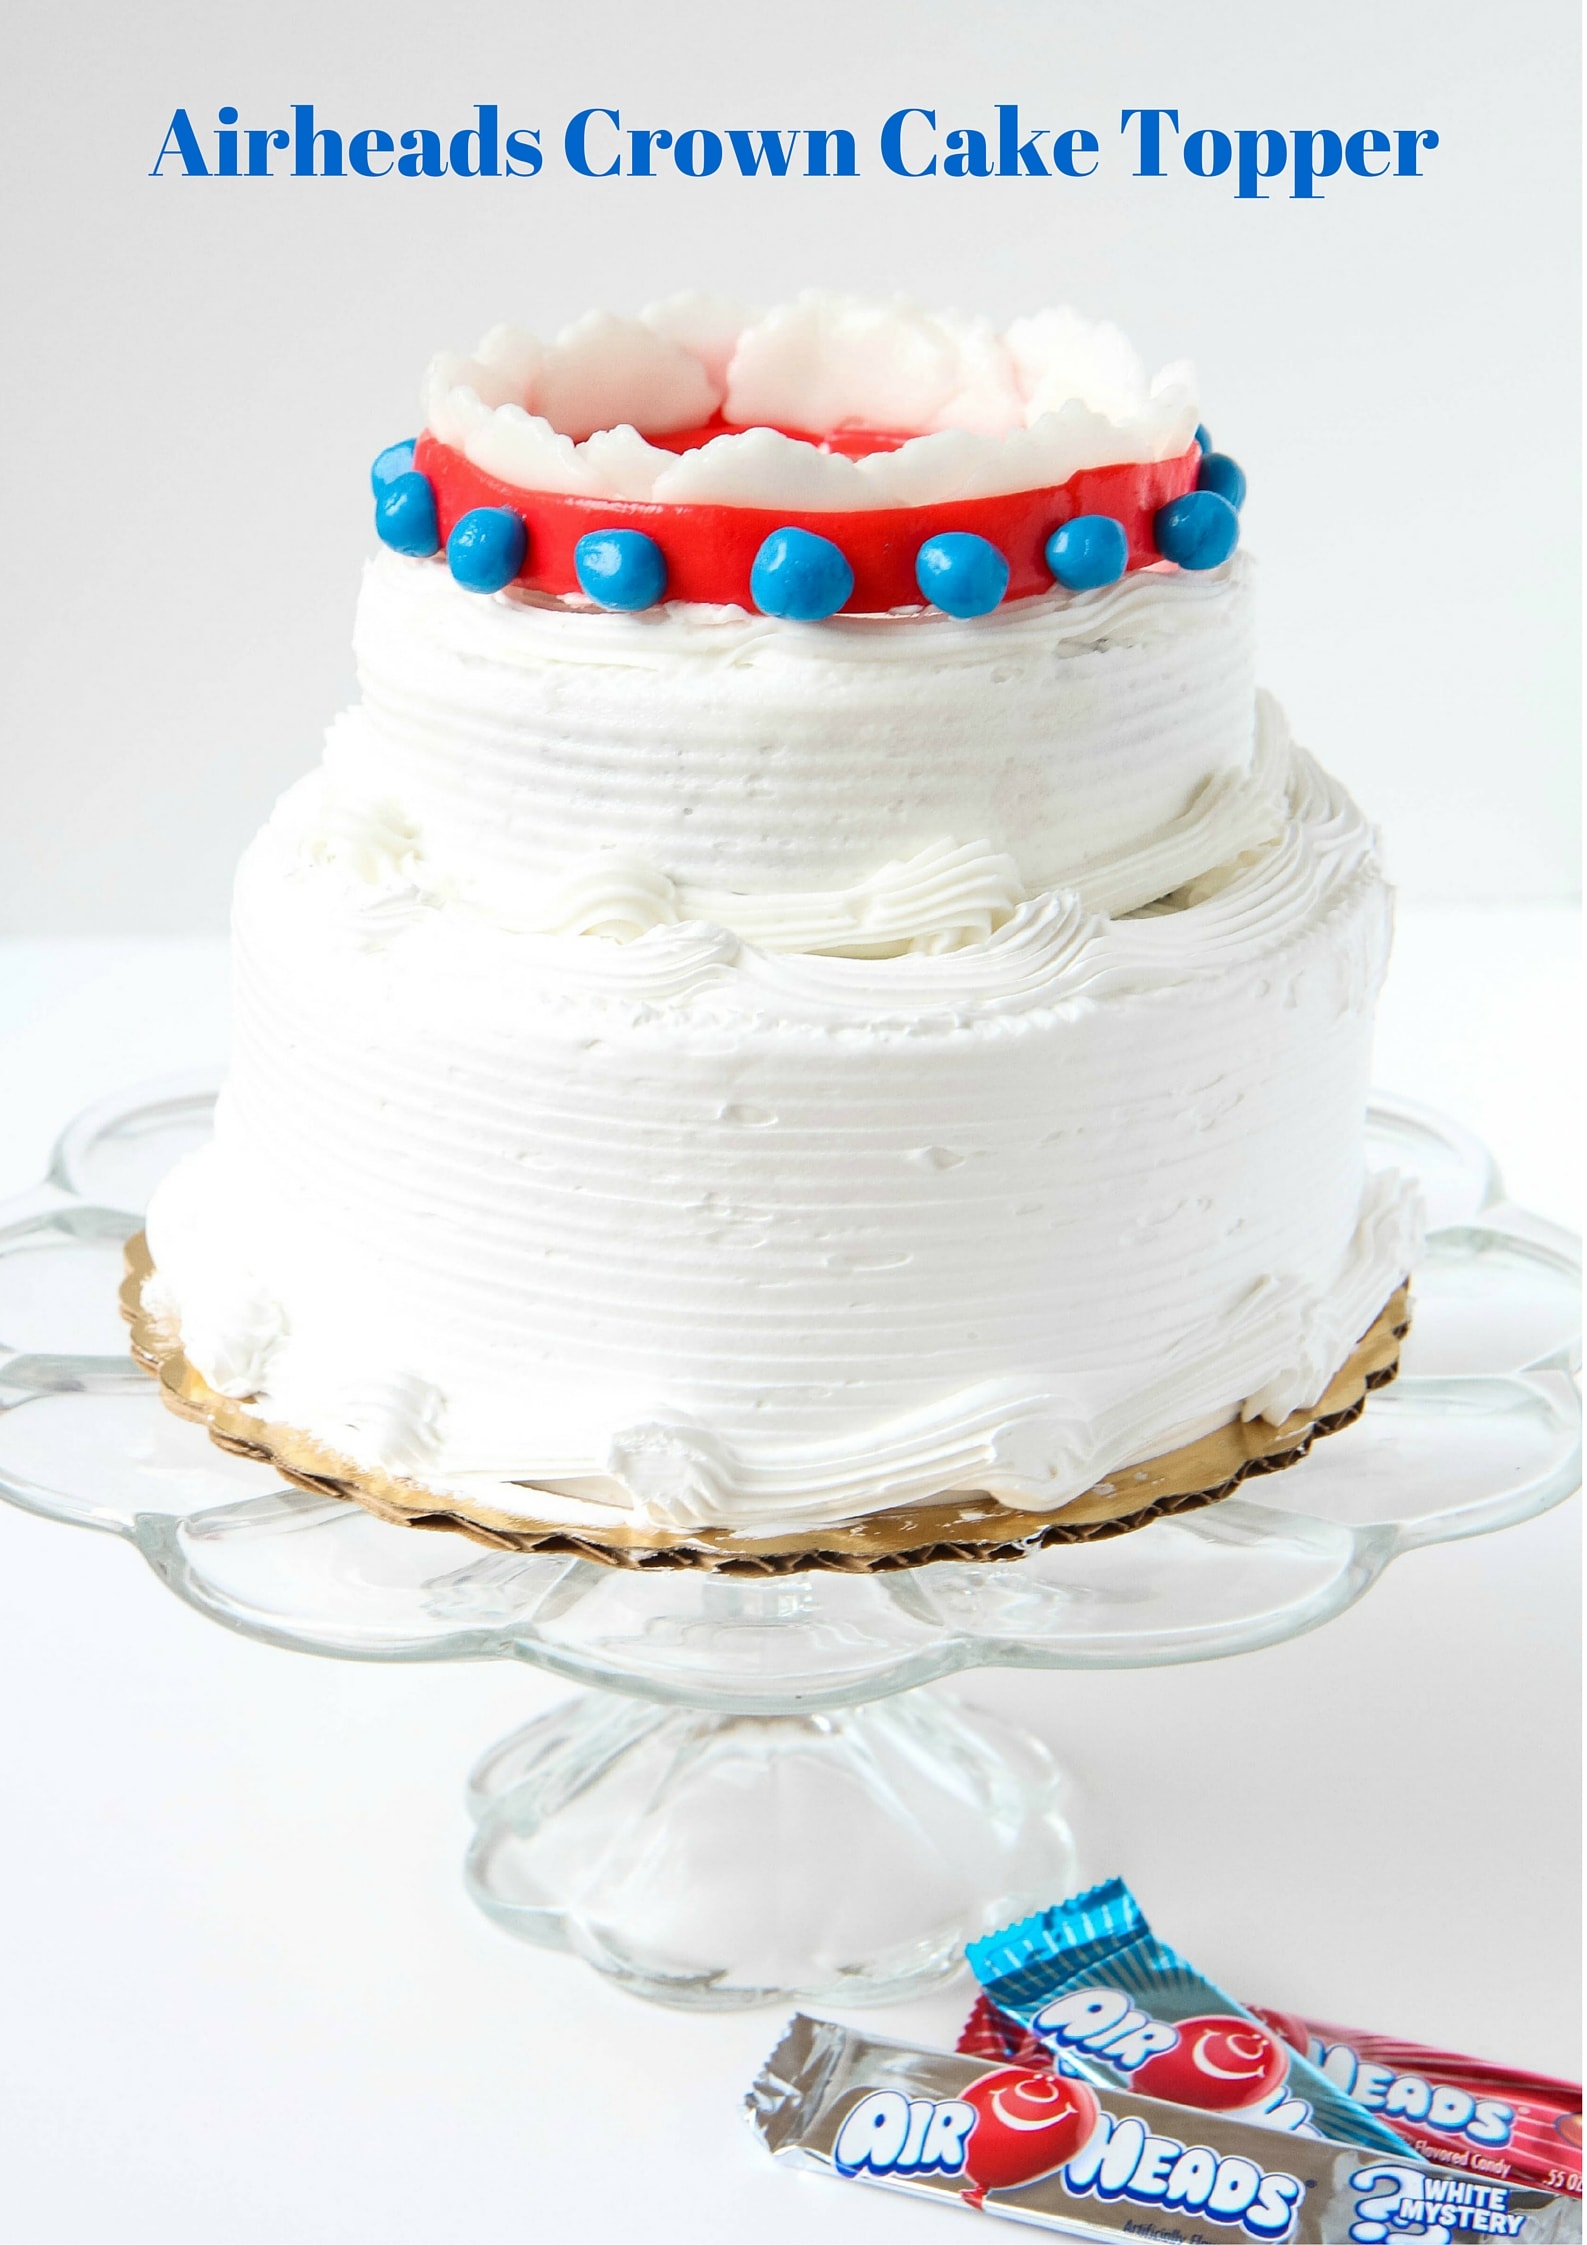
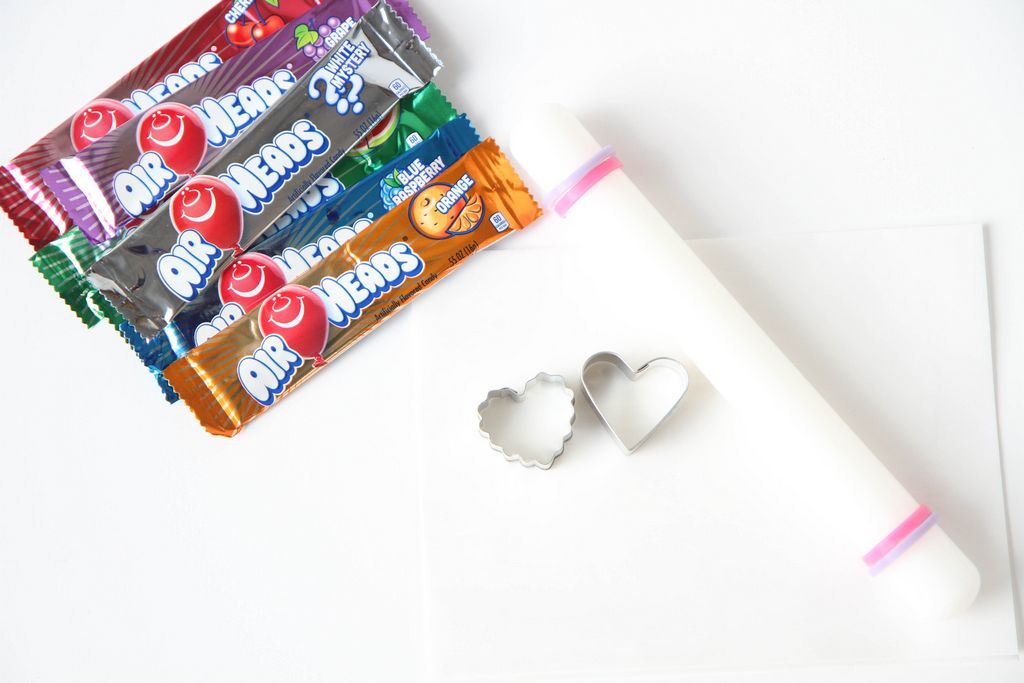
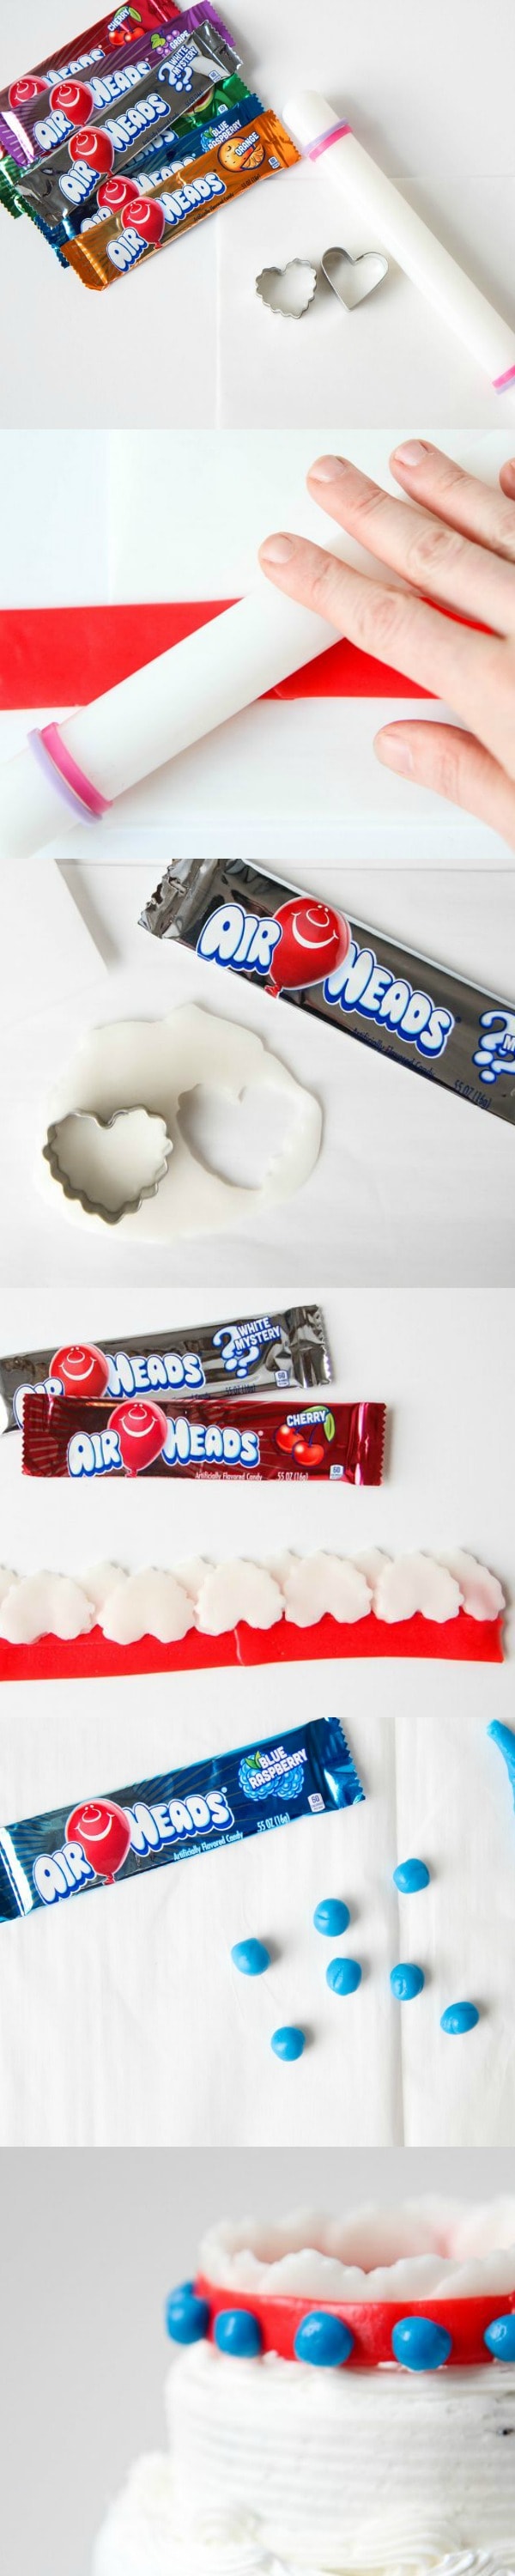
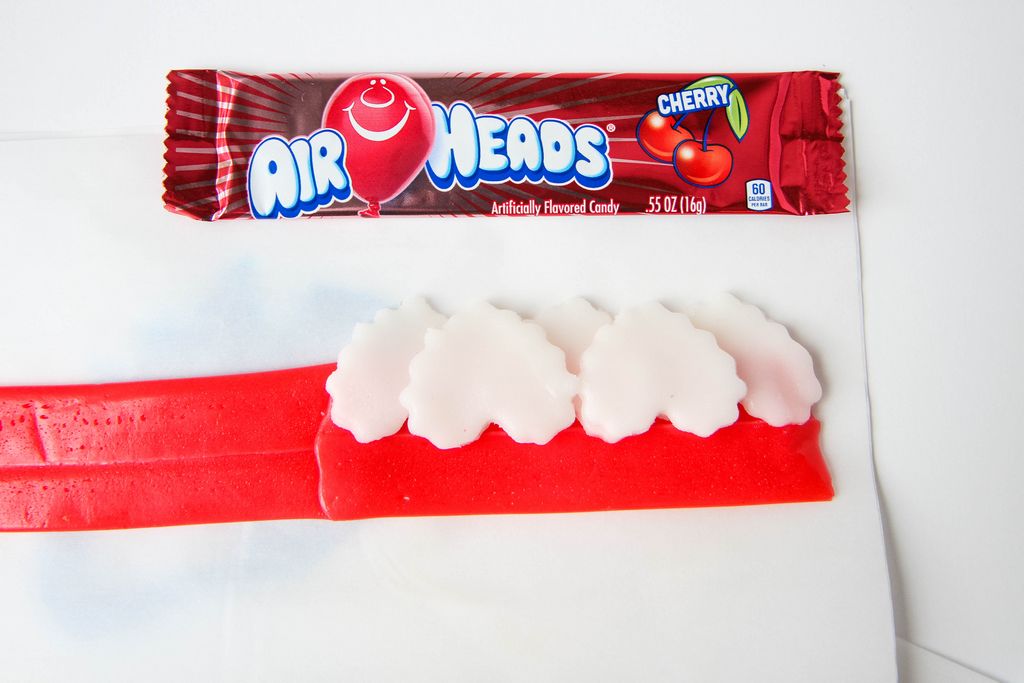
 That’s it!
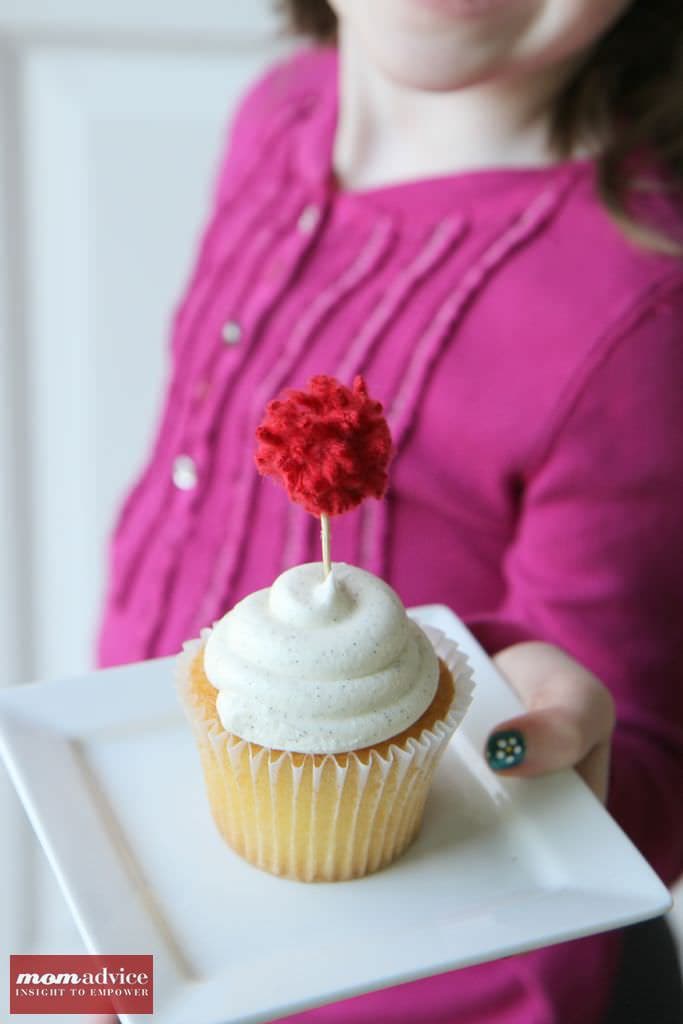
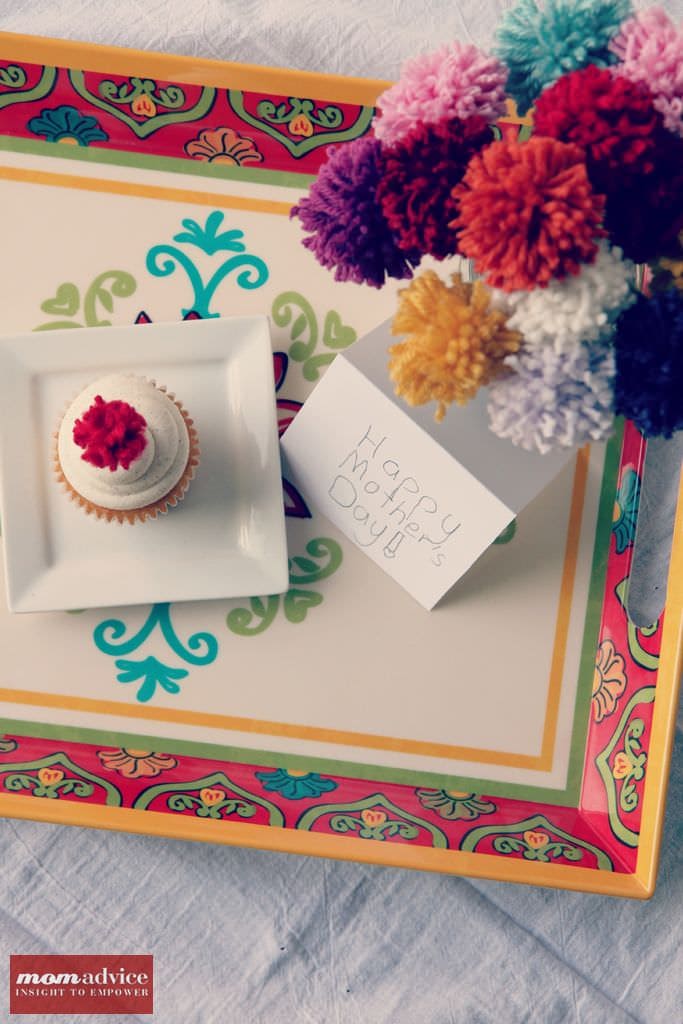
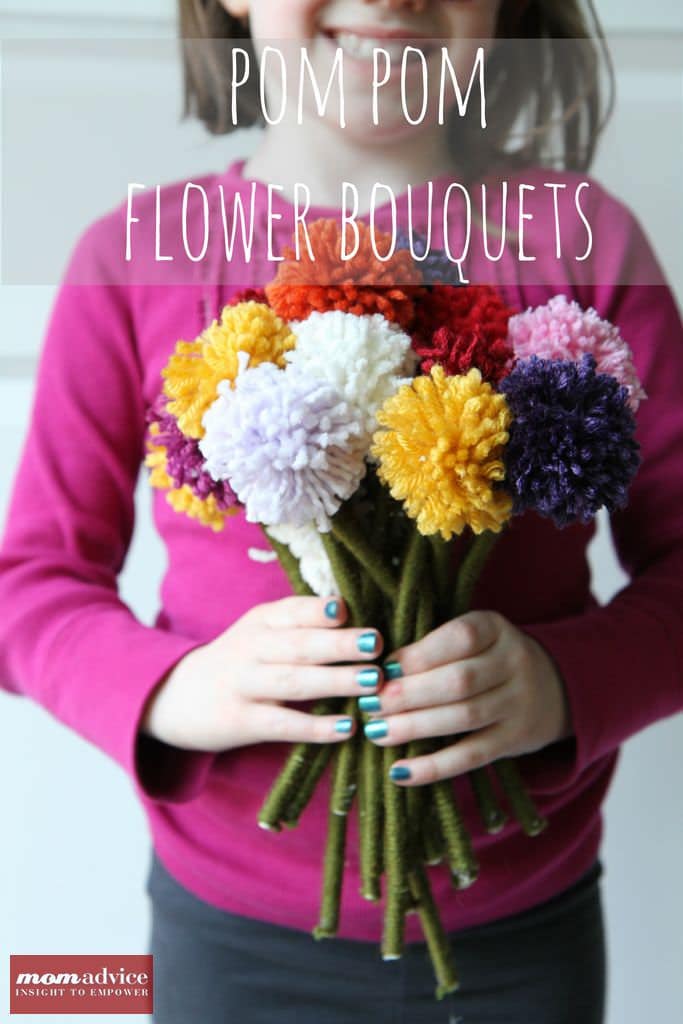
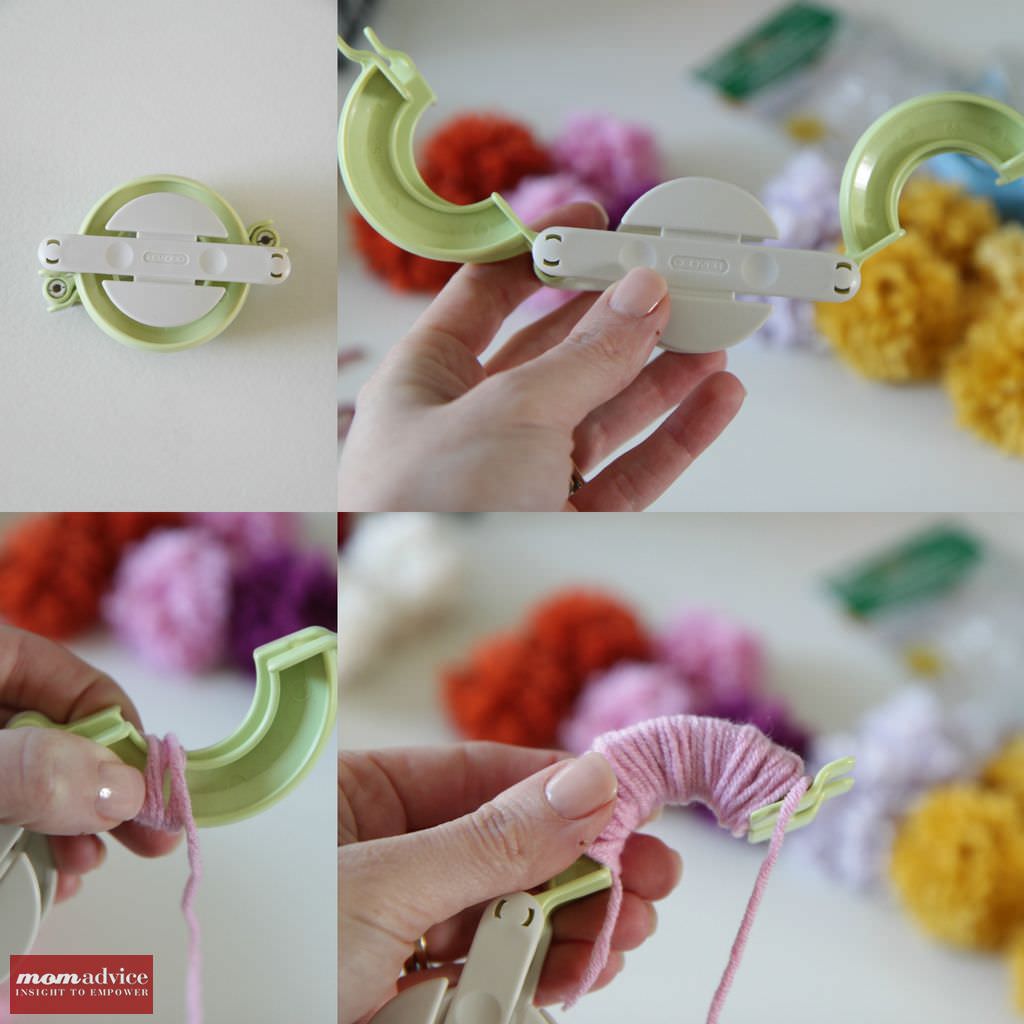
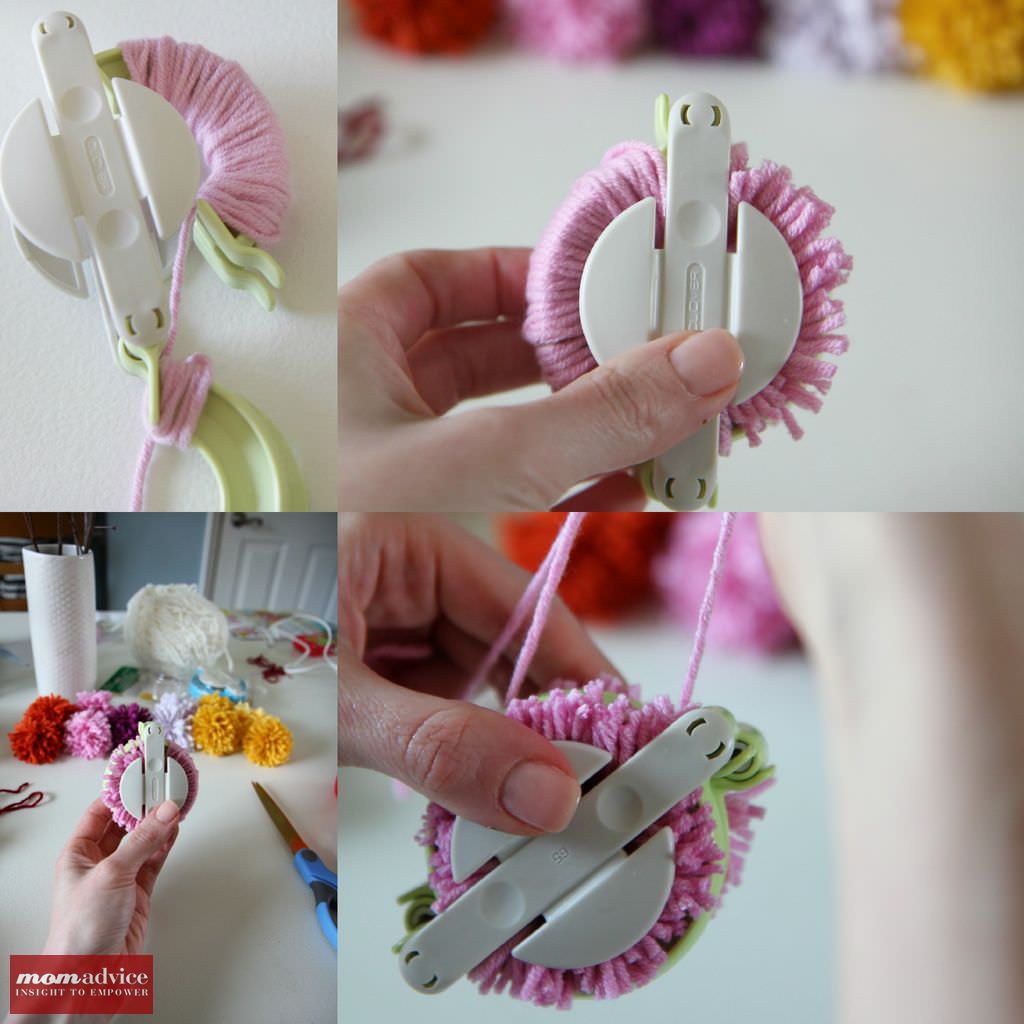
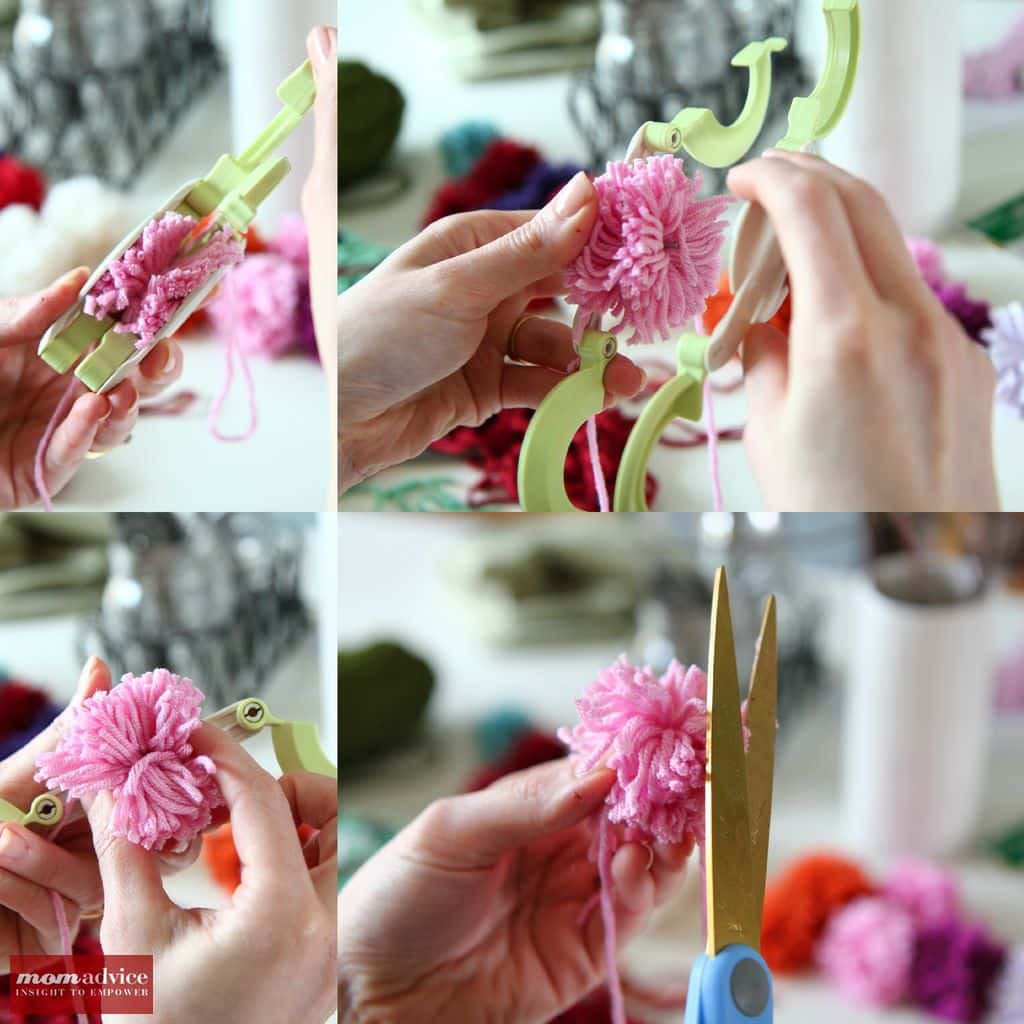
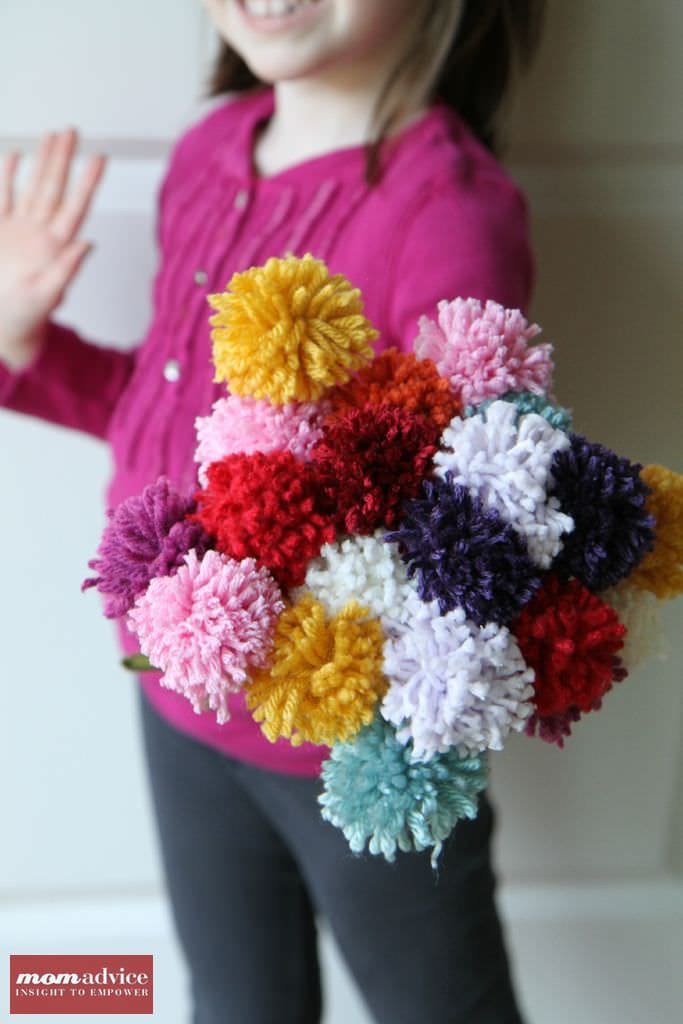
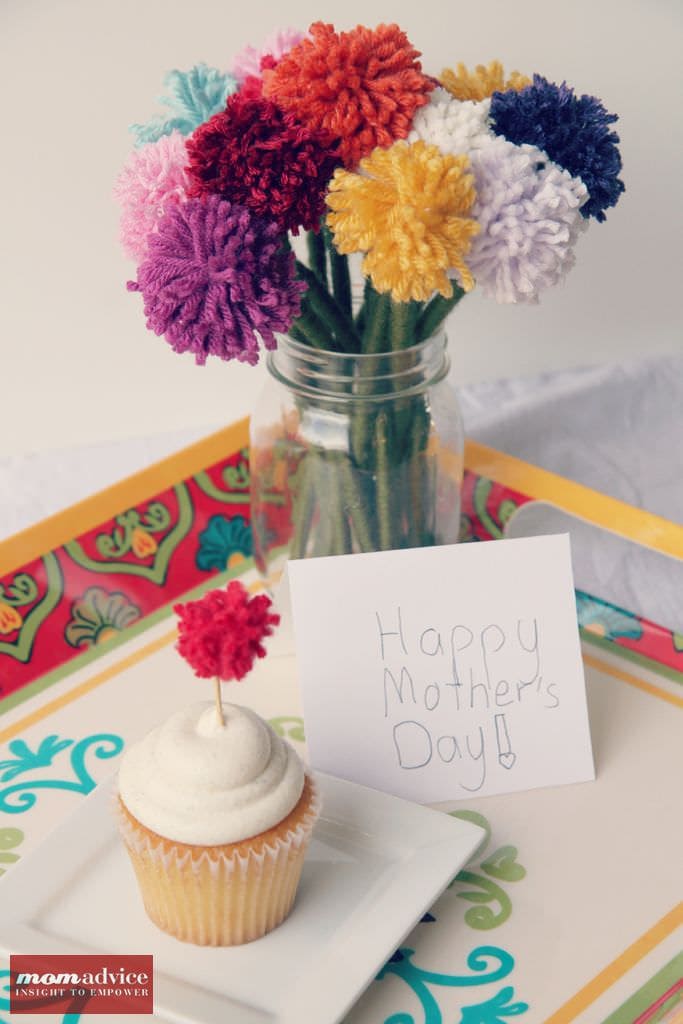 Who could resist a gift as sweet as this? Not only is it the perfect Mother’s Day gift, but it would make a sweet gift to celebrate any occasion. Pair these pom-pom posies with a gift certificate to pick up craft supplies for the crafty mom in your life.
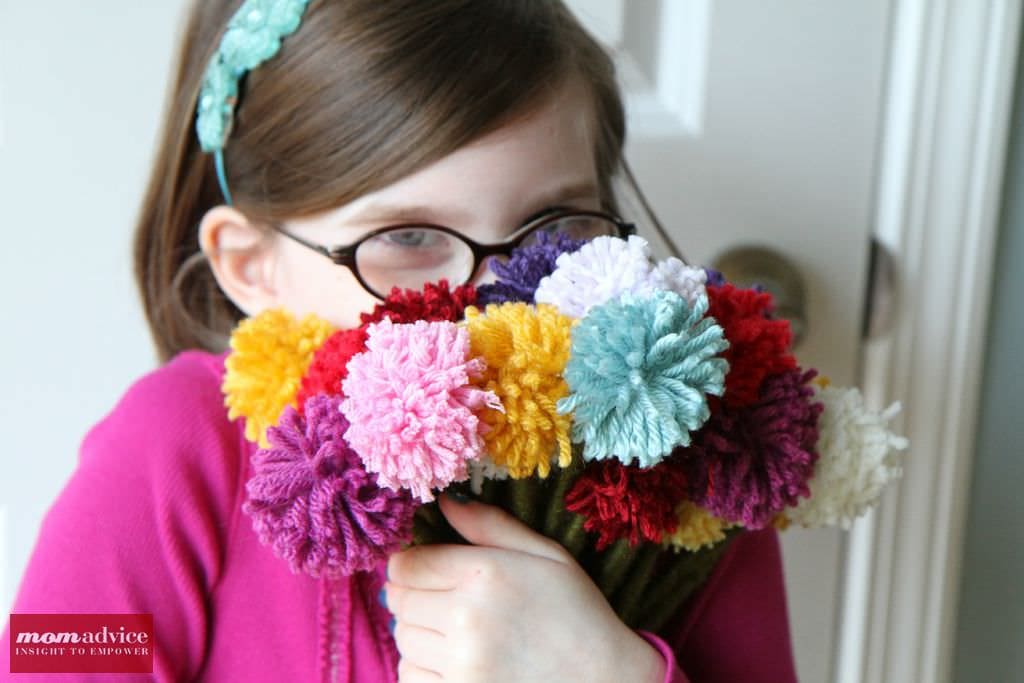


