Archive for the ‘DIY’ Category

DIY Breakfast Caddy

Monday, June 19th, 2017

DIY Breakfast Caddy for Car from MomAdvice.com

This blog was sponsored by Florida Department of Citrus. Thank you for supporting the companies that support our site!

Well, hello there! I hope your summer is off to a lovely start! We are trying to soak in as many carefree and unscheduled days as we can, but it is funny how life gets in the way of this. This week we tackled doctor’s appointments, the dentist, running a kid back and forth to a sleepover, and we are signing up for a couple of fun summer programs and camps that are happening around town.

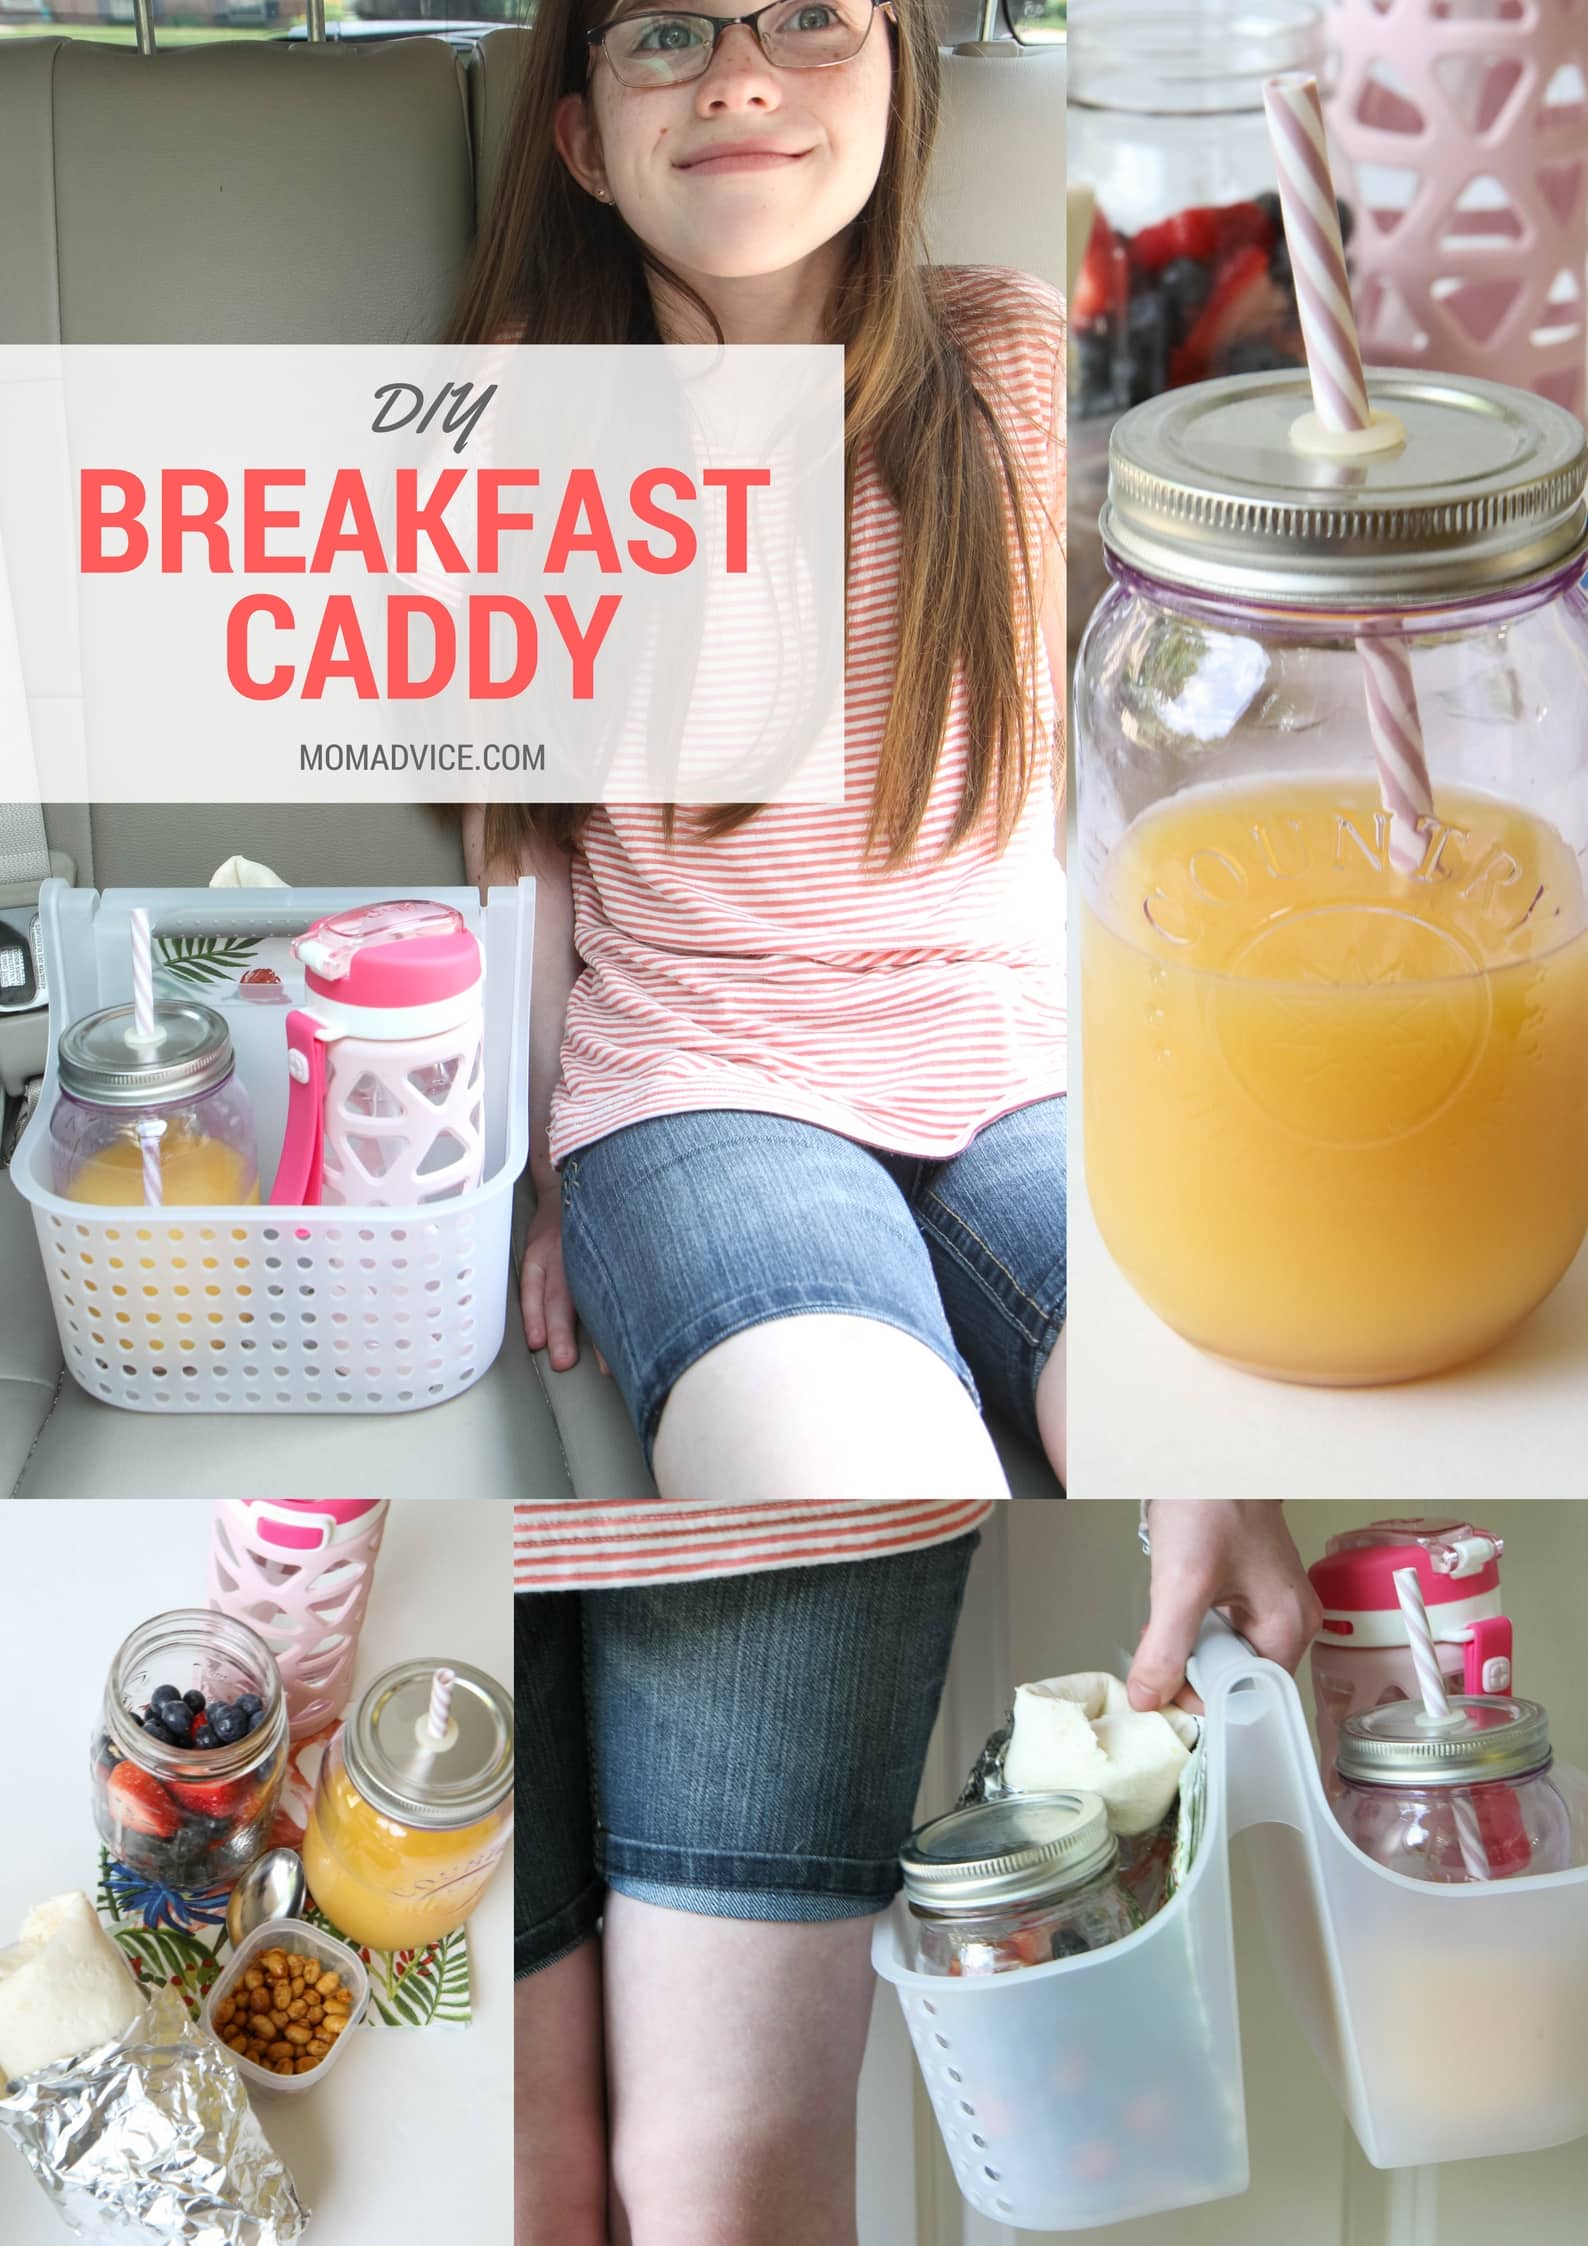
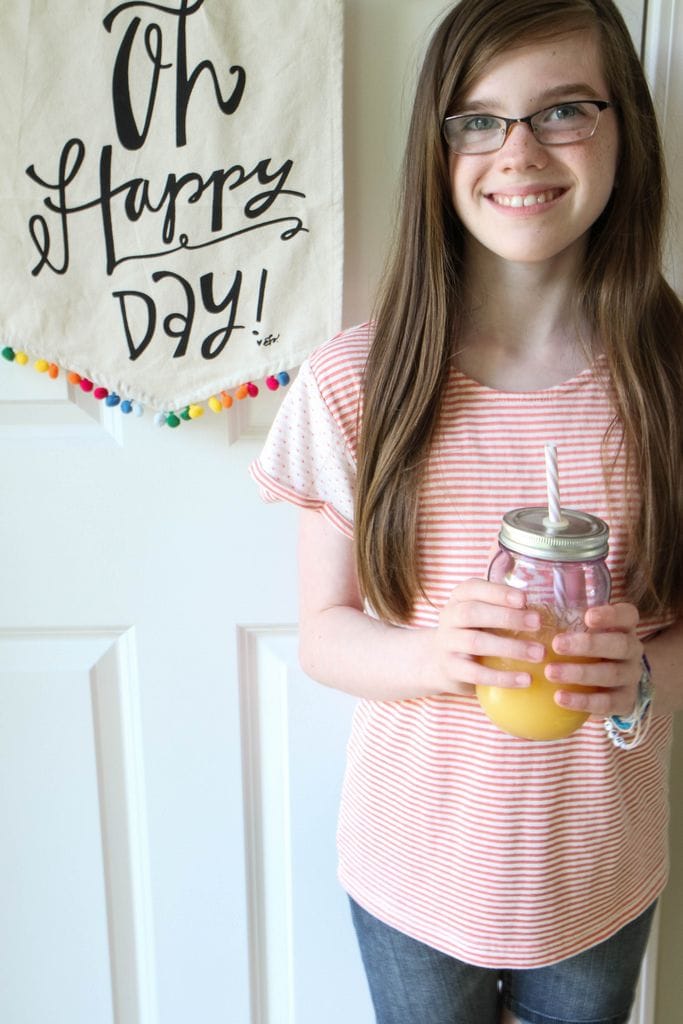
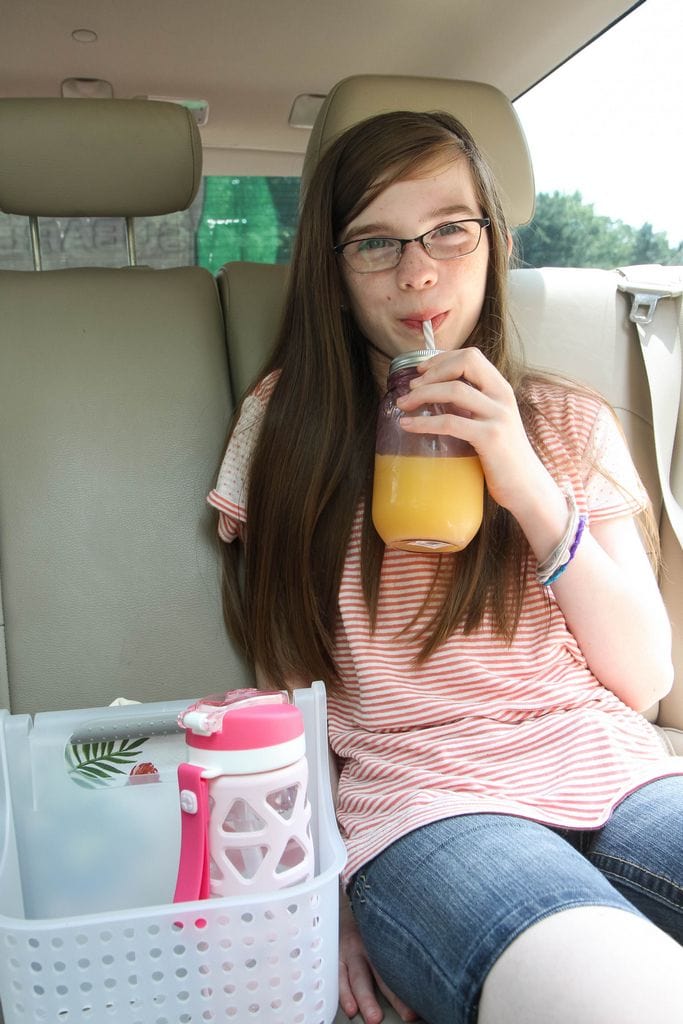
All of that leads to busy mornings so today I am partnering with  Florida Department of Citrus to show you how to enjoy your breakfast on-the-go, complete with a glass of Florida Orange Juice! We are sharing a breakfast caddy idea that you can assemble on the weekends to get your kids off to a great start, no matter what is on the to-do list!

I will admit, I got the inspiration for this from Pinterest where there were numerous pins of fast food meals in totes to make it easier for kids to eat their meals. I wanted to translate that idea into a healthy one that is perfect for busy mornings.

Supplies Needed

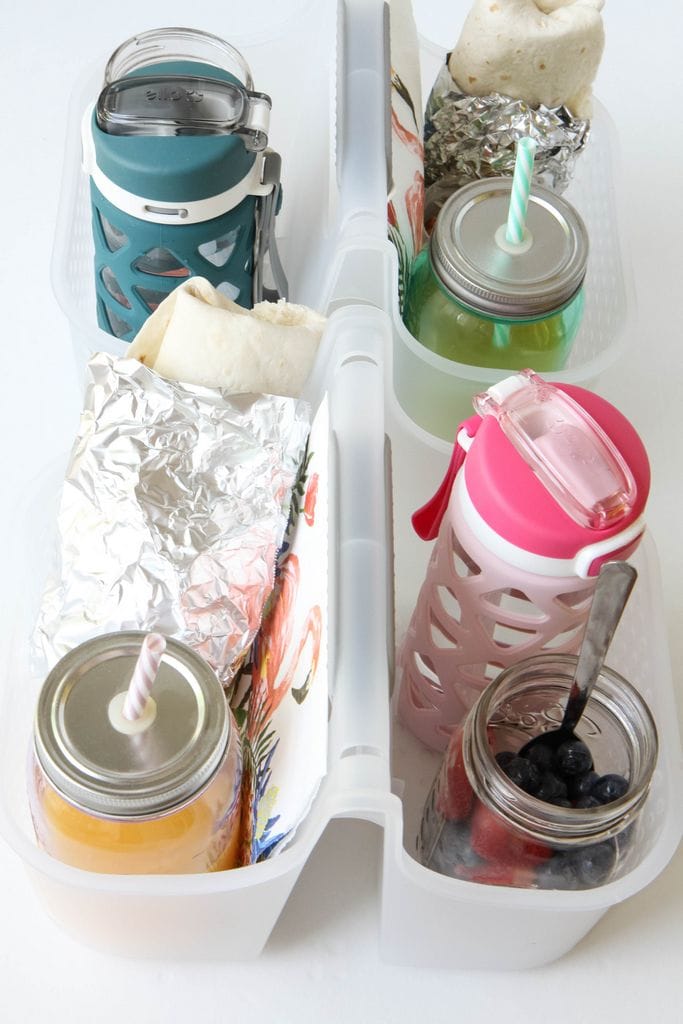
Lightweight Plastic Shower Caddy (exact, similar, similar)

Small Plastic Containers or Jars for Food Assembly

Drink Holder

Water Bottle

Food Supplies (as listed below)

DIY Breakfast Caddy for Car from MomAdvice.com

diy-breakfast-caddy-for-car-4

Directions for a DIY Breakfast Caddy

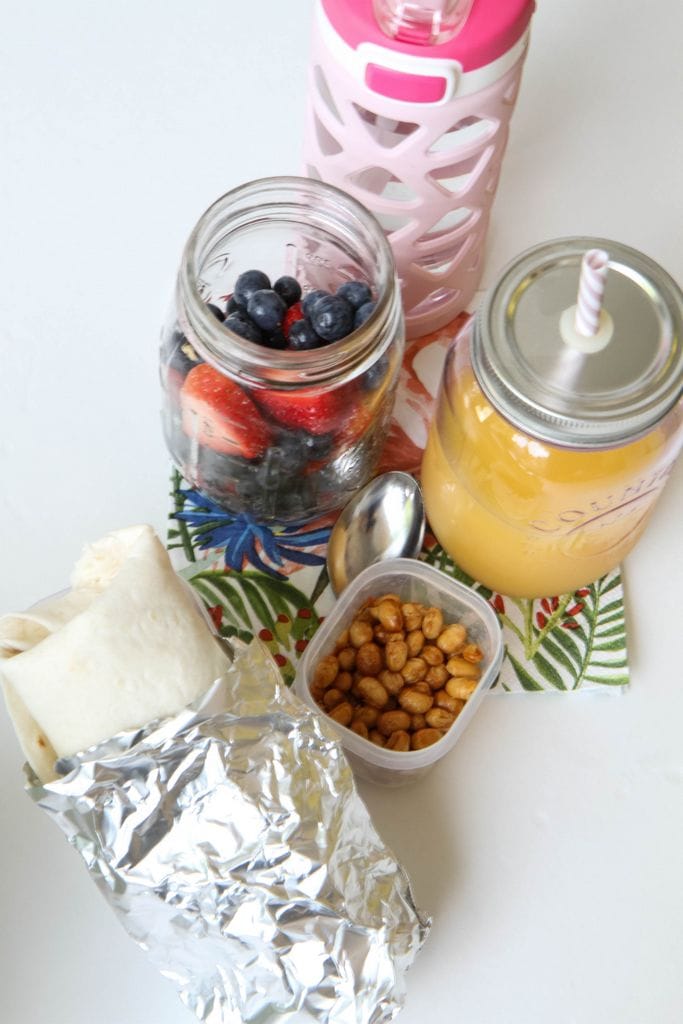
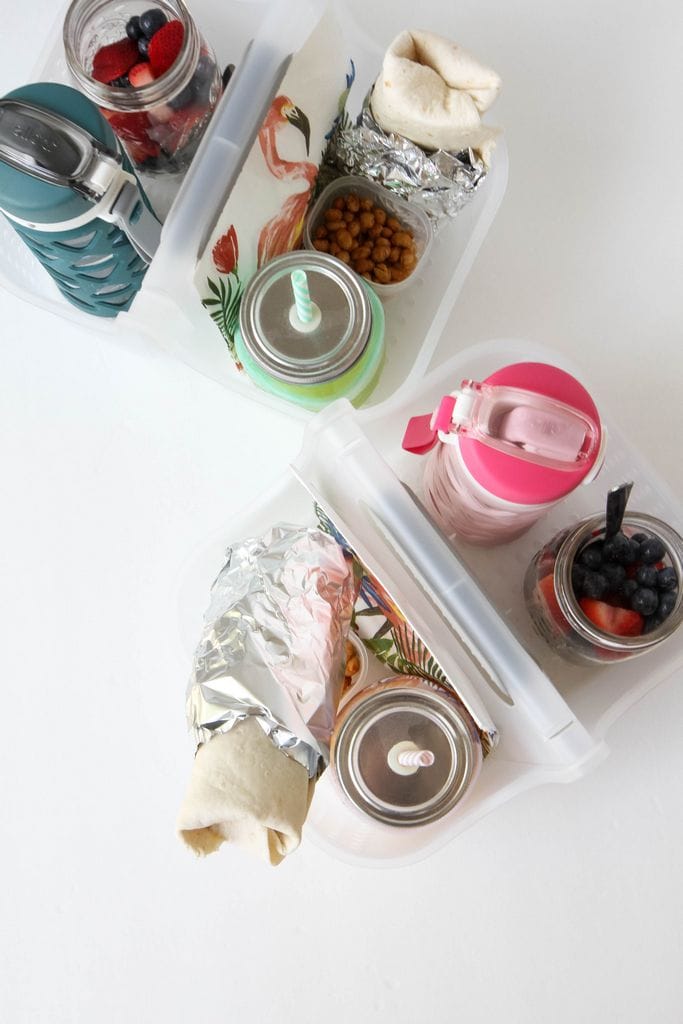
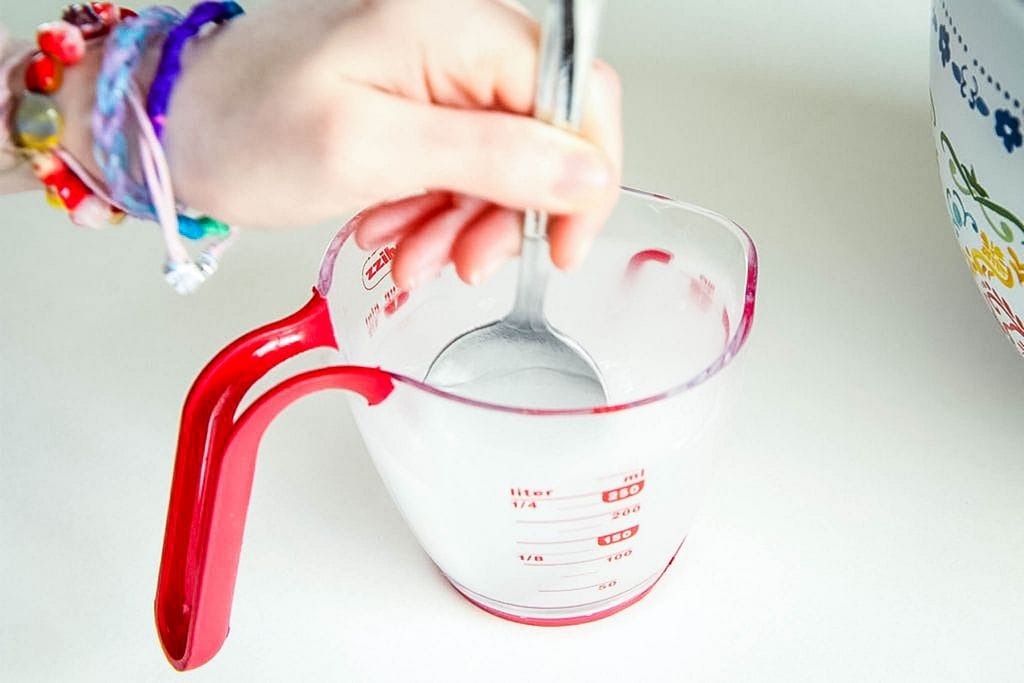
The beauty in this project is that you can fill your tote with whatever you think will help fuel your kids that day.  I can’t stress enough how much I LOVE these make-ahead burritos because they save me on many busy mornings in our house. Once heated, they can be wrapped in tin foil to keep them warm. Of course, if burritos aren’t your thing, a breakfast sandwich made on an English Muffin,  peanut butter on rice cakes (a favorite in our gluten-free home), or even a slice of frittata (try this one, or this one) can be other great options for the main course.

For fruit, I follow the rule that it must be in season and on sale that week to make it in our produce drawer. Today’s fruit selection are blueberries and strawberries in mason jars, but grapes, bananas, cantaloupe, or watermelon also make great options. You could also do a package of easy-to-eat veggies like baby carrots, celery sticks, or red & green peppers if you struggle to get your kiddos to eat fruit.

DIY Breakfast Caddy for the Car from MomAdvice.com

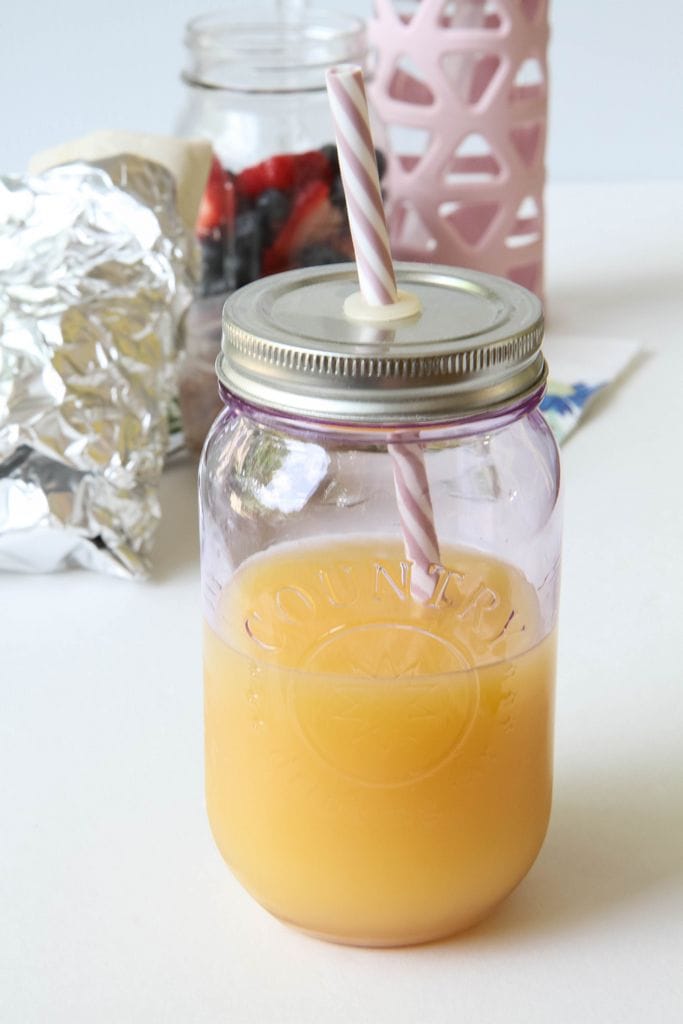
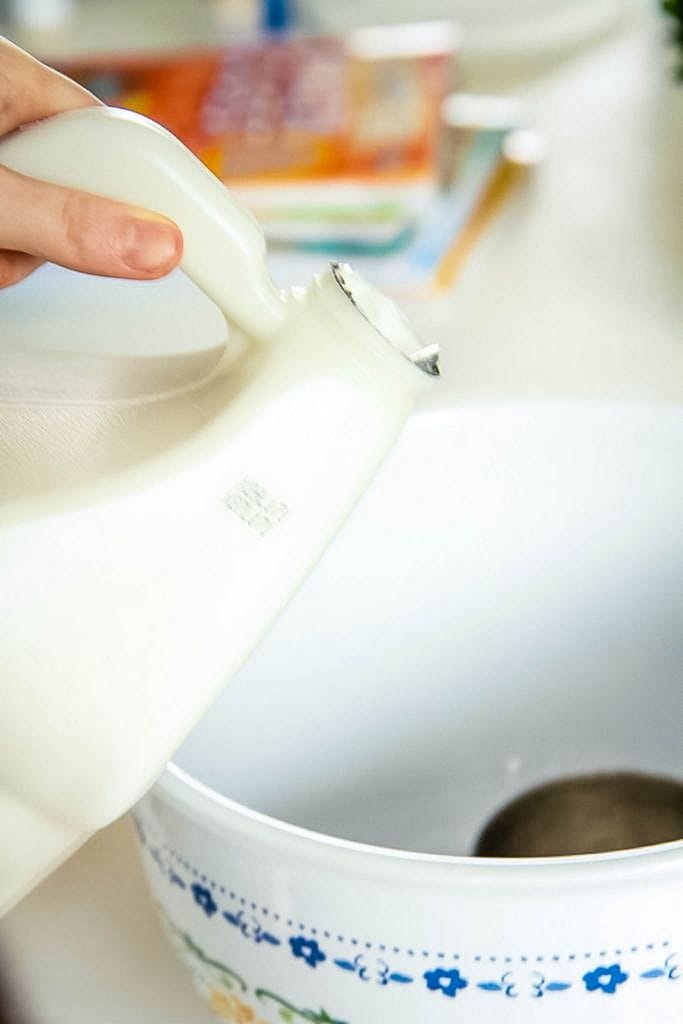
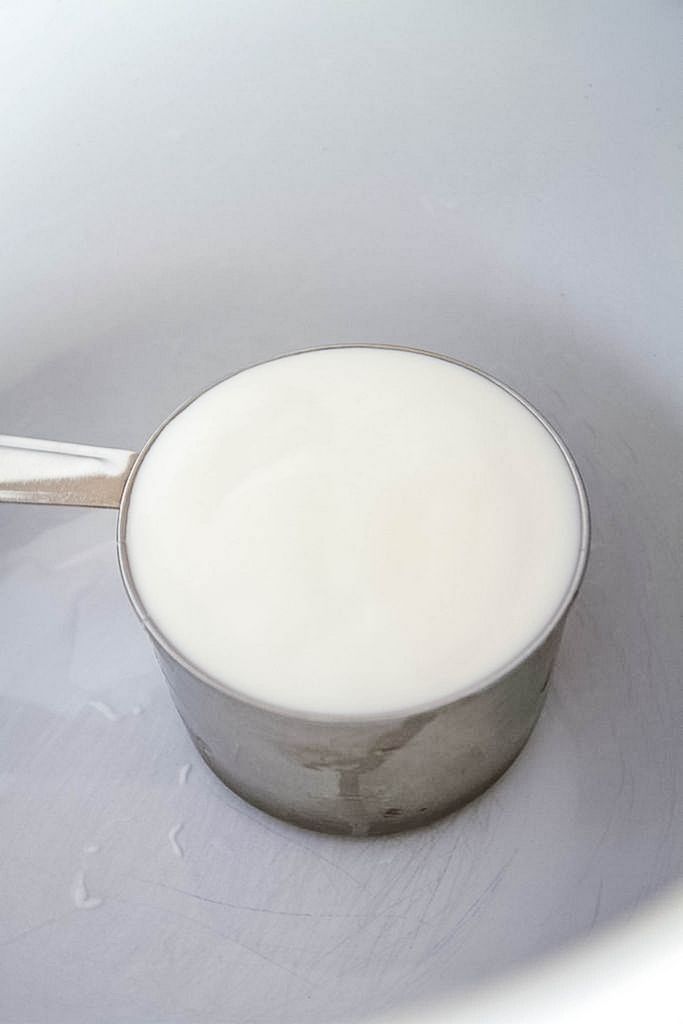
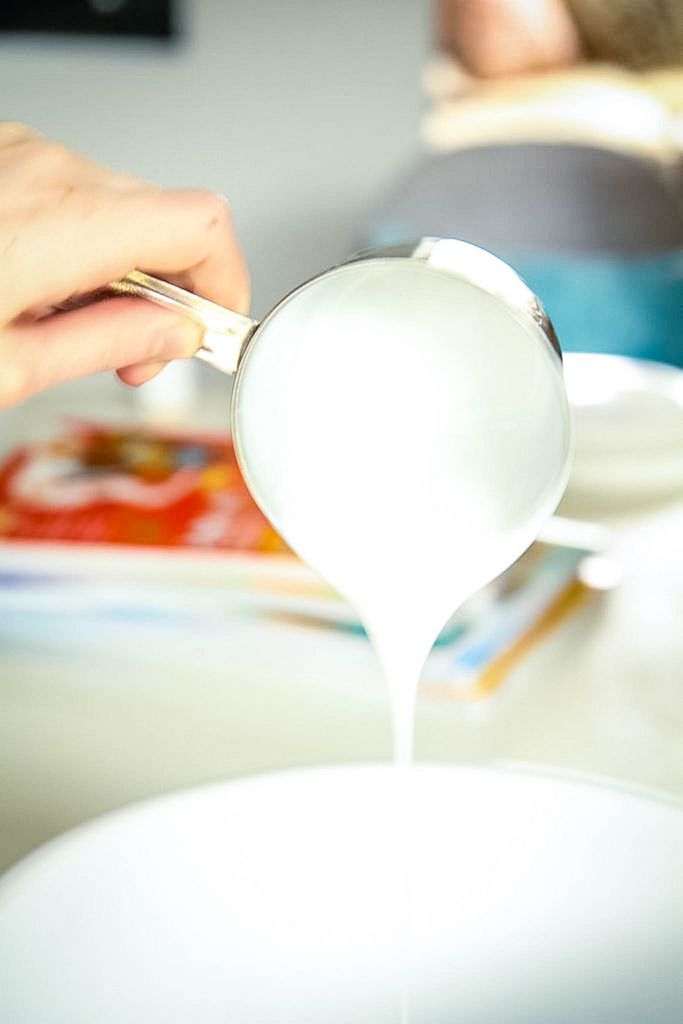
Of course, a surefire way to get your kiddo’s to consume fruit is a little juice, isn’t it? Did you know that an 8 oz. glass of 100% orange juice counts as one of your daily recommended servings of fruit? Pretty cool! Not only that, Florida Orange Juice provides 5 amazing nutrients in every glass: Taste, Vitamin C, Folate, Potassium and No Added Sugar.

Since mornings can be long in the car, I added toasted edamame in a small container for munching before or after our morning activities. You could also do nuts like almonds or cashews to add a healthy crunch to round out the meal or as a great in-between snack once hunger strikes again. You just know it will!

Oh, and don’t forget the water! It has been a scorcher out there so we are trying our best to stay hydrated. It’s also so nice to have a water bottle in case we forget it for the next thing on the agenda.

DIY Breakfast Caddy for the Car from MomAdvice.com

diy-breakfast-caddy-for-car-2

diy-breakfast-caddy-for-car-7

diy-breakfast-caddy-for-car-9

diy-breakfast-caddy-for-car-10

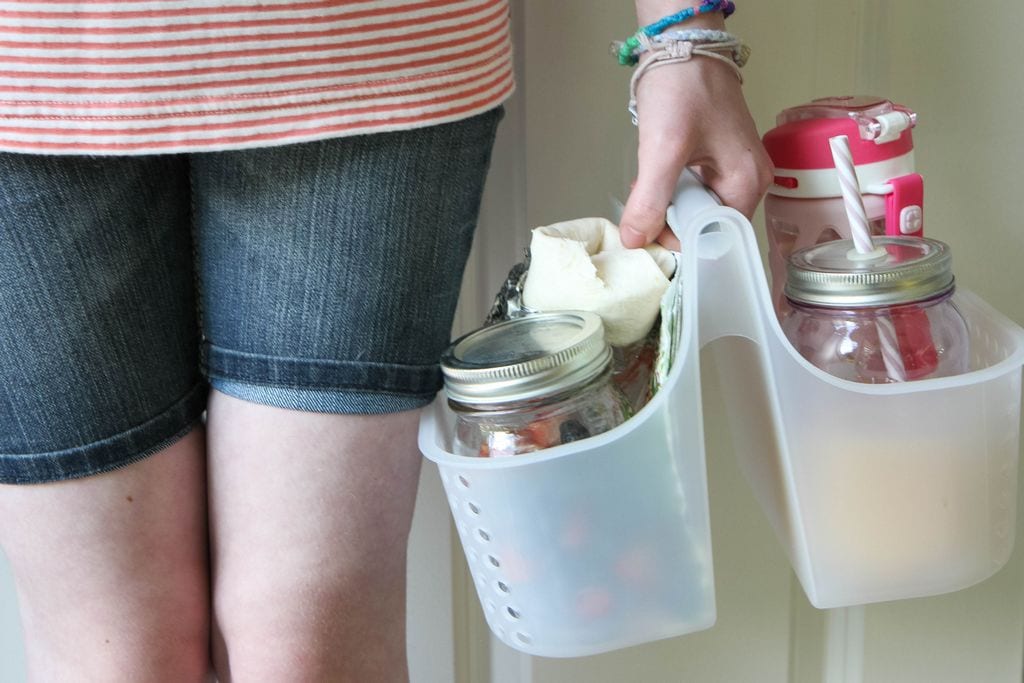
Wouldn’t this be so great for your next family trip too? I have a feeling that our mornings would start out a lot better on trip days if I had a few of these items prepped and ready to go in my fridge for our next adventure.

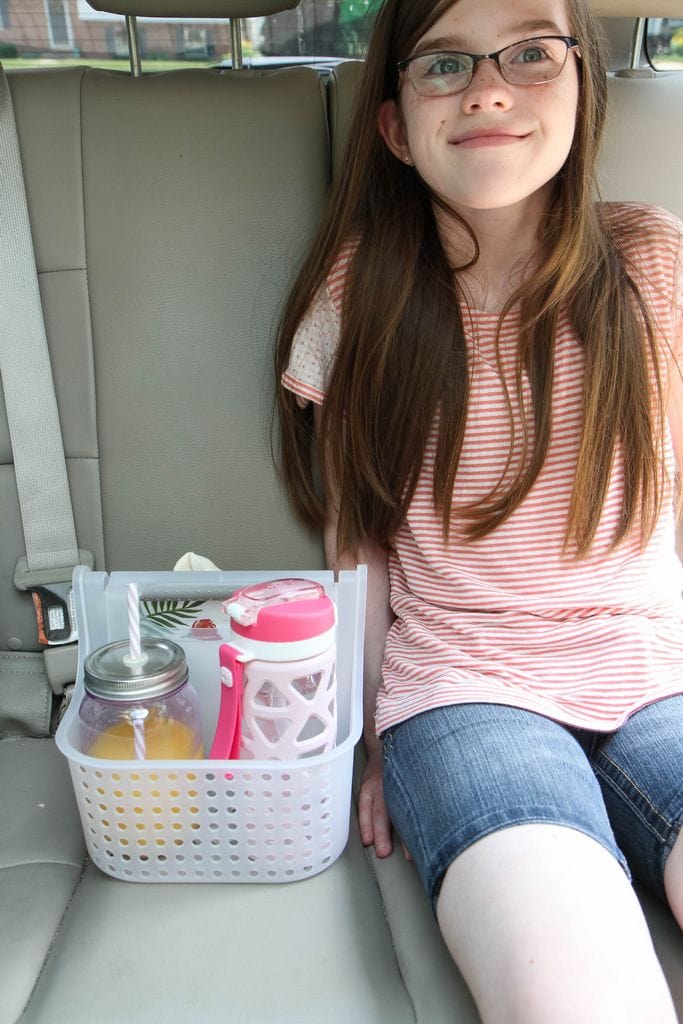
Well, we are all packed up and off to our next thing probably. I just want time to s-l-o-w down, but I blink and another summer is over. Do you feel that way too?

I hope this idea can be one you can use to fuel the family and maybe squeeze in a good chat with your kids while they are enjoying their breakfast on-the-go. I have, honestly, had some of my best talks with them in the rearview mirror. It is one of those ways that I have found it helps to keep an open dialogue between us as we navigate these new waters of being teens and tweens.

Thank you so much to Florida Department of Citrus for letting us share our fun little diy breakfast caddy with you. We hope you find this idea inspiring.

Cheers, mama, to surviving another summer!

PS- I hope that you made some room for some FLOJ in that mimosa over there!!

Love this idea? Be sure to visit these fun posts too!

Funny Faces Printables

Gluten-Free Orange Creamsicle Pancakes

Make-Ahead Sleepover Breakfast Buffet

Follow the rules below to enter to win a HUGE prize pack from Florida Department of Citrus today!! Follow the rules in the widget below- good luck!

a Rafflecopter giveaway

DIY Breakfast Caddy for Car from MomAdvice.com

This blog was sponsored by Florida Department of Citrus. Thank you for supporting the companies that support our site!

Pin It

How to Make the DIY Fluffy Slime Recipe With These Fluffy Slime Ingredients

Monday, April 17th, 2017

How to Make the DIY Fluffy Slime Recipe With These Fun Slime Ingredients Header

I am so excited to share these with you and showcase a fun new DIY recipe for making Fluffy Slime that will DEFINITELY be on our summer craft agenda this year multiple times. Making slime is a lot of fun and a great way to teach your children how to measure ingredients.

Summer Brain Quest Books

Summer Brain Quest workbooks are meant as a tool to help kiddos (and their teachers) to prevent “summer slide.”

Did you know that most students lose about two months of grade level equivalency in math, and many also lose reading achievement, during the summer?

Now Brain Quest joins the fight against it with workbooks targeting each summer between kindergarten and 6th grade.

As my own child is approaching her 6th grade year, we are so excited to get to work in these.

These smart books include a pull-out map that guides kids on a learning quest.

They fill in their route on the map by earning stickers for completing workbook pages as well as pursuing outdoor activities.

The map offers a choice of routes, allowing kids to customize their learning path and pursue what excites them most (extra math problems? more hands-on science?), and also encouraging them to jump around within the book to follow their curiosity.

I love that this structure helps them learn yet feels like a game!

They even hired the video game artist, Edison Yan, to make every book feel fresh and fun for kids!


Fluffy Slime Stretched Out

In honor of this launch, we thought we’d launch a little something of our own and make some Fluffy Slime to celebrate.

Homemade slimes are quite exciting at our middle school and I have heard there are even slime trades going on when kids mix up a batch.

There has been so much fluffy slime-making that there has even been a reported glue shortage throughout certain areas of the country.

Who knew slime was so dang cool?

Luckily, this diy craft is easy to execute with just a few simple ingredients. Keep in mind, everyone has their own take on slime and require different ingredients.

Some even have contact lens solution (saline solution), baking soda, sodium borate, or other ingredients.

This recipe, however, is simple, straightforward, and foolproof.

We wanted to show you how to make my fluffy slime recipe today which would be the perfect summer activity to do together and another fun way to break your kids out of that summer slump! If there is one thing I know as a mom it is that kids love slime.

How to Make the DIY Fluffy Slime Recipe With These Fluffy Slime Ingredients

Ingredients to Make Fluffy Slime
check out this diy slime recipe video for an additional quick tutorial


Ingredients & Supplies Needed

Elmer’s Washable Glue (this school glue size is the best bet so you don’t run out of your trusty white glue!)

Borax (Make sure a parent supervises and assists with this ingredient. Please note, borax and boric acid are not the same thing. You definitely want to have Borax for this slime recipe)

Shaving Cream (the cheap foaming kind, not the gel variety! look for sensitive skin options if you have a child with sensitive skin)

Water

Measuring cups, spoons, and bowl

Food coloring (optional)

Adding Fluffy Slime Ingredients

Measuring Borax for Fluffy Slime

Directions for Making Fluffy Slime

1. Measure one cup of hot water and mix this with 1 tablespoon of Borax.

Mix until these two ingredients are fully incorporated and the water turns clear.

THIS IS VERY IMPORTANT- reports of reactions to Borax are because it has not been properly diluted.

I recommend that the parents do this step to insure the safety of the slime.

Set aside.


Pouring the Glue for the Fluffy Slime

Measuring Glue for Fluffy Slime

Pouring Glue Into Fluffy Slime Mixture

2. Add one cup of glue to a large bowl and mix this with a 1/2 cup of water until it is fully incorporated.

Adding Shaving Cream to Fluffy Slime Recipe

Mixing Fluffy Slime Ingredients Together

3. Add shaving cream to the bowl (3 1/2 cups!) and mix together well.

Next, add a few drops of food coloring (we used red in our version) to add a pretty hue to your slime.

Once this is all mixed well, add a tablespoon of your Borax mixture and mix well.

If it is sticky add more Borax tablespoon by tablespoon until your slime pulls away from the mixing bowl and starts to form into a ball.

Our slime only required three tablespoons of our diluted Borax mixture before it pulled away into a ball!

Fluffy Slime Finished

Fluffy Slime Finished

Fluffy Slime Stretched Out

Fluffy Slime Finished

There you have it, folks. It’s time to play with slime for the summer.

We are so excited to share our DIY fluffy slime with our friends and to also share these Summer Brain Quest workbooks with you! Yay!

Here are some FAQ about Homemade Slime

What is the best way to store my homemade slime?

There are several strategies for storage and, by far, the easiest and cheapest storage option is a plastic bag. You will want to add the slime into the bag and make sure to take out all the air in the baggie before completely sealing. 

If you choose to put it in a plastic container, you will want to make sure that your slime JUST FITS so that you can keep as much air out of the container as possible. If you can’t find the proper storage size container, you can add a sheet of plastic wrap to the top of your slime to keep the moisture locked in. 

What if my my slime dries out?

Isn’t that just the worst? Have you heard of slime activator? Check out these options because this is an easy way to restore the texture of your slime without going to a lot of trouble. Slime activators can also be an excellent way to get kids to make slime all on their own. 

If you don’t want to buy a slime activator, consider adding a couple of drops of antibacterial gel to your slime to help it reconstitute.

What can I mix into my homemade slime?

Honestly, the possibilities are just endless for making your own eye-catching version. Check out these slime kits for some really fun options. 

Wouldn’t these slime kits also make excellent birthday gifts?

What if I want to share my slime with friends?

Aren’t crafts so much more fun when you can share them with friends? I highly recommend that you give these containers as a great storage option. Basically, you can have a little slime in your backpack wherever you go.

How long does homemade slime last?

This answer is entirely dependent upon how well you store it. As long as it isn’t smelly or moldy, or has completely hardened, you can still play with it. 

One way you can get your slime to last longer, particularly in the summer months, is to store it in an airtight plastic bag in your refrigerator. 

My child got slime all over our carpet. How do I remove slime from my floors?

The best way is to fill a spray bottle with one part vinegar to two parts water.  After removing as much of the slime out of the carpet, by hand, spray the carpet generously with this solution. Let it set for a few minutes and then begin blotting it with a paper towel until you have removed all the slime. If you still have staining, you can opt for a carpet cleaner product like this one to get out the rest.

My child got slime in their hair. How do I remove the slime from hair?

Did you know that you can buy a slime deactivator product? If you find you are running into a lot of slime mishaps, this is a great product to keep on hand. This deactivating product will take the slime right out of your carpet and hair with ease.

Day. Saved.

Hands in Fluffy Slime

You can learn more about Summer Brain Quest in the links below:

Visit their Official Site

Hang out on their blog Workman Blog

Follow @WorkmanPub on Twitter, Instagram, and Pinterest

Like @WorkmanPublishing on Facebook


This post was sponsored by Workman Publishing and Big Fat Notebooks. All thoughts and opinions are my own!


Don’t miss these other great posts from MomAdvice.com:

3-ingredient cloud dough recipe


Easy Summer Time Capsule Craft for Kids


Tips for Traveling with Kids


DIY Outdoor Movie

Happy slime making, friends!

How to Make the DIY Fluffy Slime Recipe With These Fun Slime Ingredients Header


Pin It

DIY Easter Egg Tree

Tuesday, April 4th, 2017

DIY Easter Egg Tree from MomAdvice.com

This post was created in partnership with Waverly Inspirations. Thank you for supporting the companies that support our site! 

Can you believe that Easter is just around the corner? Today I wanted to show you a fun centerpiece for your table that I created with a few acrylic paints and a fun item I found in the candy aisle! I’m showing you how to make this adorable DIY Easter Egg Tree that could be a fun craft to make for your home or a great alternative to egg dying if you have older kiddos!

DIY Easter Egg Tree from MomAdvice.com

DIY Easter Egg Tree from MomAdvice.com

Supplies Needed (all of these supplies can be found at Walmart!)

9″ styrofoam cone

1 package Whoppers Robin Eggs

Waverly Inspirations Acrylic Paints in Lagoon, Coral, & Sunshine (or whatever colors match your home interior)

Waverly Inspirations 4-piece wide brush set

1 package sheet moss

1 1/2 Waverly Ribbon

Hot Glue Gun

Hot Glue Sticks

Scissors

Cup with water, paper towels, and something to cover the surface while painting and prepping moss (I used a large trash bag)

How to Make a DIY Easter Egg Tree

DIY Easter Egg Tree from MomAdvice.com

1. Begin by covering your styrofoam cone with your sheet moss and CAREFULLY securing it with hot glue.

DIY Easter Egg Tree from MomAdvice.com

Keep in mind, these fibers do separate so you want to be careful where you put your fingers. Overlapping slightly, keep adding pieces of moss to the cone until you get to the top. I folded a small piece over to cover the tip of the cone and then worked my moss around it, much like I did with the scrappy fabric trees I made for the holidays.

DIY Easter Egg Tree from MomAdvice.com

2. Give your candy eggs a good coat of paint. I selected paint colors that matched our home in coral, blue, and a sunshine yellow. Don’t worry if you don’t get every spot on the eggs painted because you can paint them once they are more secure. Give these about fifteen minutes to dry and then attach them with hot glue to your tree, carefully spacing the colors out as best as you can. I ended up painting 12 of each color to cover my mossy tree.

3. Once you have attached the eggs securely, now you can touch-up the paint to make sure they are covered fully.

4. Finish with a little ribbon and glue your bow to the top of your tree.

DIY Easter Egg Tree from MomAdvice.com

DIY Easter Egg Tree from MomAdvice.com

The moss does have a tendency to shed so put a plate underneath to catch the debris and put this beauty on your dining table, an end table, or on your mantle. Isn’t that too cute?

I hope you have as much fun making this craft as we did! It’s been a true pleasure working with Waverly Inspirations this year and sharing the journey with you!

How about more craft inspiration from Waverly? Try these!

DIY No-Sew Reversible Chair Cushions

Fabric Wreath & Matching Garland

Fabric Bulletin Board Tutorial

Painting Pumpkins With Acrylic Paints

DIY No-Sew Hand Warmers

DIY Ottoman Serving Tray

15-Minute Scrappy Fabric Trees

Kid Craft: Easy Technique for Painting Gift Wrap

DIY Phone Charging Station

DIY Roll-Up Jigsaw Puzzle Mat

This post was created in partnership with Waverly Inspirations. Thank you for supporting the companies that support our site! 


Pin It

DIY Pom Pom Bunnies Craft

Monday, March 27th, 2017

DIY Pom Pom Bunnies Craft from MomAdvice.com

This post was created in partnership with Mirum Shopper. Thank you for supporting the companies that support our site! 

Today I’m partnering up with Dannon® Danimals® Smoothies and creating the cutest craft to celebrate spring! We are making diy pom pom bunnies from a few common items you have in your craft supplies and recycling those drink containers from our Danimals® Smoothies.

DIY Pom Pom Bunnies Craft from MomAdvice.com

Dannon® Danimals® Smoothies are conveniently snack-sized, sealed and ready to drink, so I love to keep these on hand especially on busy days where we are running from school straight to activities. It’s also good to know that these fun drinks do not contain high fructose corn syrup, no artificial colors or flavorings, and are a good source of Calcium and Vitamin D.

This seems to be a busy season of the school year for us as we close in on the end of the school year. It isn’t uncommon to be running from one thing to the next so I try to keep items like these on hand for days when a healthy snack is required between activities and pair it with a handful of almonds or baby carrots for an easy snack to enjoy on-the-go.

DIY Pom Pom Bunnies Craft from MomAdvice.com

danimals-smoothies-2

You can find these over in the dairy cooler at Walmart and right now their 12-pack is under $5!  To save even more, take advantage of this Ibotta offer for an additional dollar off. This coupon can be used on either the 12-pack or you can really stock up for your family and snag an 18-pack for these upcoming busy days.

You can try all the fun flavors from Rockin’ Raspberry® to Strawberry Explosion® to Wild Watermelon®!

DIY Pom Pom Bunnies Craft from MomAdvice.com

These containers also happen to be the perfect size for upcyclying into fun crafts so today I wanted to use these containers to make adorable Pom Pom Bunnies for Spring! This would be so fun for a classroom for a quick snack and craft time to celebrate the Easter season.

DIY Pom Pom Bunnies Craft from MomAdvice.com

Supplies Needed

1 Dannon® Danimals® Smoothies Container (make sure to rinse this out well)

White or Gray Cotton Yarn and a scrap of contrasting color for the bow tie

Wiggly eyes

Pink colored pom

1.5″ foam ball (over by the floral supplies)

Straight Pins

Glue

1 piece of white felt

Medium Pom-Pom Maker (or you can make a pom-pom with a few items around your house)

Scissors

How to Make a DIY Pom-Pom Bunny

DIY Pom Pom Bunnies Craft from MomAdvice.com

1. Remove the packaging from your Dannon® Danimals® Smoothies Container carefully with scissors.

2. Place the styrofoam ball on top and push in to secure. Please note, if you don’t want the styrofoam to show, you can wrap the ball in yarn first and then place on top. Also  if you want it to stay in place you can add a little hot glue around this to make sure it is completely secure.

3. If you have never used a pom-pom maker before, you can see my pom-pom tutorial for full instructions. Using a straight pin, pin the pom-pom to the front of the styrofoam ball to make the bunny’s face.

DIY Pom Pom Bunnies Craft from MomAdvice.com

4. Glue your pink nose and eyes to the front of your pom-pom.

5. Cut out your felt ears, pinch these at the bottom, and then use the pins again to pin these ears to the top of the head.

6. Finish with a bow tie around the neck.

DIY Pom Pom Bunnies Craft from MomAdvice.com

DIY Pom Pom Bunnies Craft from MomAdvice.com

DIY Pom Pom Bunnies Craft from MomAdvice.com

How cute is that? This would be such a fun preschool craft for Spring! I hope this tutorial inspires you to snag some Danimals® Smoothies from your local Walmart to keep on hand for these busy days with our kids and don’t forget to print that coupon for some additional savings!

This post was created in partnership with Mirum Shopper. Thank you for supporting the companies that support our site! 

Pin It

3-Ingredient Cloud Dough With WeeSchool (FREE- Limited Time!)

Monday, March 6th, 2017

3-ingredient cloud dough recipe from MomAdvice.com

This post was created in partnership with WeeSchool. All opinions are my own. Thank you for supporting the companies that support our site! We need this exact call to action language early in the post: Download the WeeSchool App here by June 1 and you can register for free, lifetime access to all premium WeeSchoool content and features.

Although much of the mothering I have done for my kids has felt instinctual, I found many challenges and had a lot of anxiety about them meeting certain milestones. My son, for example, had a significant delay in speech and sensory issues in his early years. I had no idea to help him and relied upon a community program that provided at-home guidance to help teach me how to help him overcome these hurdles.

I, honestly, have no idea what our life would have looked like if we had not had early intervention, and I attribute much of his academic success to these programs that intervened and helped guide us.

Now my kids are getting older, but I still recognize the importance and need for early intervention for other families. That is why I am SO incredibly and genuinely excited to share with you about a new app called WeeSchool that you must download ASAP.

It is, truly, like having a family educator right at your disposal to help guide you to help your child succeed.

WeeSchool App Milestones Month by Month

As you can see, this app gives you a quick at-a-glance look at what key milestones your child should be reaching each month. Play Plans are provided that help guide your child to reach those milestones.  These allow you to play smarter with your child with a list of recommended activities, toys, books and music.

In fact, it is the first-ever curriculum for babies from birth to age 3 that can help you learn how to play smart with your baby.

This helps you to not only track the milestones, but to support you and your baby in the process. WeeSchool wants to enrich your daily routines by creating activities you can do with your child, providing guidance on practical toys to support milestones, and even books on the different milestones you are working toward with your baby.

WeeSchool App Journal

Imagine going to the pediatrician with your child’s milestones marked and even a photo to document those moments to share with your family and friends. I can’t imagine how reassuring it would have been to come armed like this for my doctor. Could we have flagged our son and gotten him help sooner if we had something like this? I, truly, believe we could! This is a transformative tool for new parents.

Get a FREE Membership to WeeSchool Today!!

I am so excited that WeeSchool is offering our readers a free premium membership! Parents can sign up until June 1, 2017 to become a Charter Member and receive lifetime access to all Premium WeeSchool content and features!


3-Ingredient Cloud Dough from MomAdvice.com

3-Ingredient Cloud Dough from MomAdvice.com

3-Ingredient Cloud Dough from MomAdvice.com

If there was one thing I learned from our early childhood intervention classes that we did with our son, it was the power in creating from things you already have. In honor of today’s partnership with WeeSchool, I wanted to share with you this easy 3-ingredient Cloud Dough recipe that you can make for your kids! This fluffy dough is a great sensory activity for kids and is so fun to play with that even adults want to get on the action.

Sensory stimulation is so important to a child’s neurological development, and playing with this simple and safe flour mixture offers a pleasant (even therapeutic) sensory experience. Playing with cloud dough also encourages fine-motor development as your wee one explores and creates using tiny hands, delighting in the tactile wonderfulness of this unique medium.

Pair this with items from your kitchen drawers like measuring cups, spoons, ice cream scoops, silicone cupcake molds, or cookie cutters.

We are using Tempera Powder Paint to create the vivid hue in this dough because it blends so easily into this recipe. If you are worried about your child ingesting it, feel free to leave the color out of this one!

3-Ingredient Cloud Dough from MomAdvice.com

3-Ingredient Cloud Dough
Prep time:
Total time:
Serves: 8 cups
Ingredients
  • 8 cups all-purpose flour
  • 1 cup vegetable oil
  • A spoonful or two of Powdered Tempera Paint (order online or check a teacher’s supplies store/craft store)
  • Large Plastic Container with Lid for Storage
Instructions
  1. Measure flour directly into container.
  2. Add a spoonful or two of powdered tempera paint and mix well with a wooden or metal spoon.
  3. Add vegetable oil and mix well until it is fully incorporated.
  4. Store in an airtight lidded container for up to one month.

3-ingredient-cloud-dough-recipe


 I hope you can take a moment to download this amazing app and mix up a little cloud dough to keep your kiddos busy! Download the WeeSchool App here by June 1 and you can register for free, lifetime access to all Premium WeeSchool content and features.

This post was created in partnership with WeeSchool. Thank you for supporting the companies that support our site! 


Pin It

Fabric Flower Wreath for Spring

Wednesday, March 1st, 2017

Fabric Flower Wreath for Spring from MomAdvice.com

This post was created in partnership with Waverly Inspirations. Thank you for supporting the companies that support our site! 

You will rarely come to my house and not find a wreath on the door, but I must admit that my DIY wreaths (after MANY years of use) are looking a little shabby. Working with Waverly Inspirations was just the push I needed this month to spruce up my front door. This fabric flower wreath tutorial is just what you need to get your door ready for spring. If you haven’t made fabric flowers before, I’ve got you covered with a step-by-step picture tutorial.

I am a big fan of recycling and reusing my craft materials so I cut all of the materials off this DIY yarn wreath and reinvented it into a spring wreath. Six years ago I purchased that straw wreath for $4 and it is STILL going strong.

Pretty amazing!

Also, if you have ever priced out purchasing a wreath, you know how much you are saving by making your own for your front door.

Today I wanted to put some of their fresh spring fabric to work to wrap and decorate our wreath. Although I will be doing these fabric flowers with a needle and thread, they can also just as easily be pulled together with a little hot glue. The best part? This is a craft you can do while getting in a good Netflix binge.

This craft was cranked out with a little American Crime Story. PS- LOVING it.

Fabric Flower Wreath for Spring from MomAdvice.com


Supplies Needed (all of these supplies can be found at Walmart!)

1/2 yard of two (or more!) Waverly Inspirations Fabric in coordinating patterns

Straw Wreath (whichever size fits your door the best!)- leaving the plastic intact on the wreath to cut down on the mess.

Needle and strong thread

1 piece of cardstock and a circular object (I used an oatmeal canister) to create your flower template

Straight Pins

Fabric Rotary Cutter (or you can use scissors)

Rotary Mat

Pinking Shears

How to Make a Spring Fabric Flower Wreath

Fabric Flower Wreath for Spring from MomAdvice.com

1. Begin by cutting fabric into 1 1/2″ strips with scissors or a rotary cutter. Wrap the fabric around the wreath, securing with straight pins. Once you come to the end of a strip, simply overlap with the next strip to try to camouflage those pins. Repeat this until the entire wreath is covered and set this aside.

How to Make Fabric Flowers from MomAdvice.com

2. Using a round object in your home for a template, trace a circle on cardstock to create your template for your fabric. The larger the diameter of the item, the larger your flower so size it according to your wreath or how dramatic you want to go!

3. With pinking shears, cut 9 fabric circles for each fabric flower you will be making. I made five of these flowers (that means 45 cut circles) for my wreath. In floral design, it is always advised to go with an odd number to create a good design for your project so I stuck to the odd number of 5.

4. With one fabric circle as a base, begin creating the petals for your flower by folding a circle in half and then in half again (it will look like a little triangle)  and aligning it to the fabric circle. Using your needle and thread (or a glue gun) secure this in place with a stitch. Repeat all the way around the flower for the base of these petals.

How to Make Fabric Flowers from MomAdvice.com

5. Layer another layer of petals on top and finish with the last one being in the center and swirled, as it would in a rose. Tie off and cut the end of your thread to finish these. Using a straight pin, pin your flower into place and then repeat with the rest of the flowers.

Fabric Flower Wreath for Spring from MomAdvice.com

Fabric Flower Wreath for Spring from MomAdvice.com

Fabric Flower Wreath for Spring from MomAdvice.com

You guys! I’m in LOVE! This is such a fun pop of color on my door, cost practically nothing, and I can switch out materials with the seasons if I get bored. I hope you love it as much as I do and feel inspired to make a wreath of your own.

My door is awfully happy this month!

Fun Wreath Ideas from MomAdvice.com

Want to try some other DIY wreaths? Check out these tutorials for decking your door!

diy peep wreath

easy burlap wreath tutorial

how to make a yarn pom pom wreath 

handmade autumn burlap wreath

fabric wreath with matching garland

yarn wreath for all seasons (fun felt flower tutorial on that one!)

How about more craft inspiration from Waverly? Try these!

DIY No-Sew Reversible Chair Cushions

Fabric Wreath & Matching Garland

Fabric Bulletin Board Tutorial

Painting Pumpkins With Acrylic Paints

DIY No-Sew Hand Warmers

DIY Ottoman Serving Tray

15-Minute Scrappy Fabric Trees

Kid Craft: Easy Technique for Painting Gift Wrap

DIY Phone Charging Station

DIY Roll-Up Jigsaw Puzzle Mat

Fabric Flower Wreath for Spring from MomAdvice.com

This post was created in partnership with Waverly Inspirations. Thank you for supporting the companies that support our site! 

Pin It

DIY Teacher Survival Kit Gift (FREE Printable!)

Thursday, February 2nd, 2017

DIY Teacher Survival Kit Gift (FREE Printable!) from MomAdvice.com

This post was sponsored by MARS, Inc and American Greetings. Thank you for supporting the companies that support our site!

Valentine’s Day is the perfect excuse to show someone how much you love them. Often my default for Valentine’s giving is for my family, but this holiday I’m challenging you to think outside of the box and consider someone else special in your life.

How about a little love, for example, for one of your incredible teachers?

I can’t imagine how challenging their job is to come and be the encourager, discipliner, educator, and hero to our children. Day in and day out, they are a positive force in helping our kids succeed and I am so grateful for the molding and shaping they do. What a gift that they share their time and talent each and every day.

I wanted to create a fun DIY Teacher Survival Kit filled with fun supplies with things that would be useful throughout their day, as well as some fun treats to indulge in for a much deserved break. I am sure it goes without saying, but our teachers often use their own funds to keep their classrooms stocked so I love to periodically send along little gifts. This teacher survival kit is not only meant to offer a small indulgence for their hard work, but it also provides little things like note pads, antibacterial wipes, bandages, and other useful items that they might need at their desk.

How to Make a DIY Teacher Survival Kit

DIY Teacher Survival Kit Gift (FREE Printable!) from MomAdvice.com

Supplies Needed (all found at Walmart- check here to find your closest store!)

1 clear plastic container with lid (the dimensions on my container are 15″L x 11 1/2″W x 3 1/4″ H)

Dove® Milk Chocolate Heart Tin

Antibacterial Wipes Drink Mixes (lemonade, coffee, cocoa, etc..)

Small First-Aid Kit

Lip Balms

Small Candle Mouthwash

Lint Roller

Stain Stick or Pen

Pain Reliever

Immunity Boosters

Notepads and Sticky Notes

Check out the American Greetings Valentines Day card selection at your local Walmart, to find Valentine’s Days cards for anyone and everyone special in your life!

(scroll down for your FREE printable label!)

DIY Teacher Survival Kit Gift (FREE Printable!) from MomAdvice.com


DIY Teacher Survival Kit Gift (FREE Printable!) from MomAdvice.com

DIY Teacher Survival Kit Gift (FREE Printable!) from MomAdvice.com

Directions for DIY Teacher Survival Kit Gift

1. Go to your local Walmart and visit the storage container section of the store first to select a container for your project. Having this first will help guide you as you make your selections to fit in your kit. Fill the container as you go with all of your purchases to make this Valentine’s gift special for your favorite teacher with the supplies list I have provided.

2. Assemble your container with your purchases, placing the Dove® Milk Chocolate Heart Tin in first to build your supplies around it.

3. Print our Teacher Supplies Kit label out for the top (link below). You will need to do just a tiny bit of trimming around it to trim off a little of the negative space on this one. Remove the sticker from the backing and secure it to your container.

4. Finish this project with a heartfelt message for your teacher to let them know how special they are.

DIY Teacher Survival Kit Gift (FREE Printable!) from MomAdvice.com

DIY Teacher Survival Kit Gift (FREE Printable!) from MomAdvice.com

DIY Teacher Survival Kit Gift (FREE Printable!) from MomAdvice.com

I can’t think of a teacher that wouldn’t appreciate a gift like this. I am thankful every single day for the teachers that are shaping my kid’s minds. As I see them blossom into such kind and thoughtful people, I know I can attribute it to their excellent influence.

Consider this Valentine’s Day the perfect opportunity to thank a teacher in your life!

Download Your Teacher Survival Kit Label (click the link below!)

Free Teacher Survival Kit Label

This post was created in partnership with MARS, Inc and American Greetings. Thank you for supporting the companies that support our site! 


Pin It

DIY Phone Charging Station

Monday, January 2nd, 2017

DIY Phone Charging Station from MomAdvice.com

This post was created in partnership with Waverly Inspirations. Thank you for supporting the companies that support our site! 

A  new year typically brings along new organizing techniques in our home. We have been struggling with keeping track of phone chargers, remembering where we left these poor devices to charge, and figuring out a system that doesn’t require taking up my valuable counter space. I decided I wanted to create a phone charging station that could house all of these devices and be our new landing spot for our home.

This DIY phone charging station is made out of a jewelry armoire and, not only will it house all these phones, it can also be the perfect organizing spot for keys, sunglasses, watches/Fitbit devices, & a place to keep those gift cards we got for the holidays. Wait until you see how we make the most of this little piece!

I also wanted to add a unique touch to this station with some of the beautiful Waverly Inspirations Fabric that I was sent this month. I have never added fabric to a furniture piece before, but not only is it super easy, it also adds a gorgeously unique detail that makes an inexpensive piece look a little more high end. It’s been on my craft bucket list to try this and now I want to add this special touch to a few more pieces in our home.

DIY Phone Charging Station from MomAdvice.com

DIY Phone Charging Station from MomAdvice.com

Supplies Needed (all of these supplies can be found at Walmart!)

Jewelry Armoire (you can browse all the options here)

Waverly Inspirations Fabric  (I used the 100% cotton duck fabric available at the store)

Waverly Chalk Paint in a coordinating color (I am using Agave)

Mod Podge

Paint brushes & Foam Brush

Fabric Rotary Cutter (or you can use scissors or a razor blade for trimming)

Rotary Mat

Drill

Scrap Wood

Screws

Surge Protector

DIY Phone Charging Station from MomAdvice.com

How to Make a DIY Phone Charging Station

1. Begin by assembling your jewelry armoire, but leave all of your knobs off the fronts of the drawers for now.

2. Using your chalk paint and a small paint brush, paint all of the knobs with a coat of chalk paint. Set aside to dry and then add a second layer of paint.

DIY Phone Charging Station from MomAdvice.com

DIY Phone Charging Station from MomAdvice.com

DIY Phone Charging Station from MomAdvice.com

3. Using the front of your drawer as a guide, cut the fabric carefully and as closely as possible, around the drawer. Repeat with all of the other drawers.

4. Before you attach your fabric to the drawer front, make sure any loose threads and lint are removed from the piece (I went over mine with a lint roller to make sure the surface is clean). Dip your foam brush in the Mod Podge and add a thin layer of glue on the front of the drawer. Carefully line the fabric up on the front of the drawer. Once again, add a layer of Mod Podge OVER the fabric, making to seal all along the edges and across all the fabric. Repeat on all the drawers and then repeat with a second layer.

5. Add your painted knobs on the front of the drawers.

DIY Phone Charging Station from MomAdvice.com

DIY Phone Charging Station from MomAdvice.com

6. Drill holes in the back of your drawers and then a hole in the back of the piece. The size and amount of holes needed will depend entirely on how many devices you have and how wide your charger end is.

7. On the bottom of the unit, attach a scrap piece of wood that can be used to attach your surge protector. We attached the surge protector with a couple of screws to mount this scrap wood.

DIY Phone Charging Station from MomAdvice.com

DIY Phone Charging Station from MomAdvice.com

DIY Phone Charging Station from MomAdvice.com \ DIY Phone Charging Station from MomAdvice.com

DIY Phone Charging Station from MomAdvice.com

DIY Phone Charging Station from MomAdvice.com


I realized after we took the pictures how much it could benefit from a little dusting with all our drilling we were doing.

Stretch your imagination a bit for that part as we are still dismantling our home from all these festivities!

I wonder if you are in the same boat today?

Seriously, how cute is this fun diy phone charging station to act as an inexpensive organizing solution for a small space? I decided to tie in those painted handles with a little color on the trim of this piece.  I really think the paint and fabric details really make this piece feel really unique and I love how practical this is for helping everyone stay organized!

A huge thank you to my hubby for his assistance on this DIY.

There is nothing like crafting in your pajamas and coffee with someone you love!

Do you want more craft inspiration from Waverly? Try these!

DIY No-Sew Reversible Chair Cushions

Fabric Wreath & Matching Garland

Fabric Bulletin Board Tutorial

Painting Pumpkins With Acrylic Paints

DIY No-Sew Hand Warmers

DIY Ottoman Serving Tray

15-Minute Scrappy Fabric Trees

Kid Craft: Easy Technique for Painting Gift Wrap

This post was created in partnership with Waverly Inspirations. Thank you for supporting the companies that support our site! 


Kid Crafts: Easy Techniques for Painting Gift Wrap

Monday, December 12th, 2016

Easy Techniques for Painting Gift Wrap from MomAdvice.com

This post was created in partnership with Waverly Inspirations. Thank you for supporting the companies that support our site! 

You may recall that last year I decided to buy a lifetime of kraft paper for wrapping our holiday gifts. It should come as no surprise that we are still using this giant roll of gift wrap in our house. I have found it is a useful item to have on hand, for all of life’s occasions,  and there is so much that you can do with kraft paper to make your gifts unique.

I also consider pretty gifts to be part of the decorating so it thrills me to come up with new ways to use the same paper each year. I love these gorgeous detail under the tree.

As a crafter, I really never got into acrylic paints until this year. It has been so much fun trying new crafts with these fun paints. I love discovering something that I have walked by for years in the craft aisle and finding my own uses for them!

Today  I wanted to come up with some creative ideas to get kids on the action of decorating the paper as a fun winter craft. I love screen-free activities with them so I thought this would be a fun one that you could have them create, even after the holiday season.

There are so many beautiful hues that you could mix and match any hue that you like. I have a big crush on a metallic Rose this year so I am demonstrating this craft with Waverly Inspirations Metallic & Glitter paint offerings in Rose Quartz (in the Metallic) and Rose Gold (in the Glitter paints!) for a pretty modern look.

Easy Techniques for Painting Gift Wrap from MomAdvice.com


3 Fun Painting Projects for Kids to DIY Your Gift Wrap

Easy Techniques for Painting Gift Wrap from MomAdvice.com

Supplies Needed (all of these supplies can be found at Walmart!)

kraft paper

Rubber Stamps

Small Ornaments (just the inexpensive ones that come in a tube!)

Waverly Inspirations Ribbon

Waverly Glitter & Metallic Paints (in stores)

Paint Brush

Plastic Cups, Bowls, or a Plate for Paints

Directions for Fun Painting Techniques

Make sure to cut off a section that will be generous enough to cover at least one gift.

Easy Techniques for Painting Gift Wrap from MomAdvice.com

Easy Techniques for Painting Gift Wrap from MomAdvice.com

Stamp Your Paper

Pour a small amount of your paint into a disposable cup, plate, or bowl. Using your paintbrush, brush the paint on in an even layer and then place stamp down and pull directly up to try to get as clean of a design as possible. Repeat across the paper or combine this with other designs for more variety. You want to use the Waverly Inspirations Metallic Paints with this technique because the glitter paint doesn’t create that clean image like the metallic paint.

If you don’t have rubber stamps in your craft supplies, you can use odds and ends around your home for stamping. Shapes can be cut into the ends of potatoes, you can cut up sponges into shapes, the eraser end of  a pencil can make adorable polka dots, the edge of a disposable cup can create rings, or a cork could create a dotted technique. This is a great opportunity for your child to explore painting in fun ways.

Easy Techniques for Painting Gift Wrap from MomAdvice.com

Easy Techniques for Painting Gift Wrap from MomAdvice.com

Create Glittered Swirls

If your child lacks the eye-hand coordination for stamping, give them a paintbrush and let them add swirls to the paper.  Paint strokes are layered in glitter thanks this fun glitter paint. I found with this one, it was best to have a fully loaded brush to bring out both the color and the glitter. Repeat your swirls throughout the paper or have your child come up with their own abstract design.

Easy Techniques for Painting Gift Wrap from MomAdvice.com

Easy Techniques for Painting Gift Wrap from MomAdvice.com

Easy Techniques for Painting Gift Wrap from MomAdvice.com

Add Painted Embellishments

Acrylic paints are so fun and make many inexpensive items look high end with modern color choices. Inexpensive ornaments can be painted in coordinating colors and tied on with string to your package. While the rubber stamps are out, stamp up your own diy gift cards on white cardstock and trim with ric-rac scissors or put your own creative spin on the tags. Finish your gift with a beautiful bow.

Easy Techniques for Painting Gift Wrap from MomAdvice.com

how-to-decorate-gift-wrap-with-acrylic-paints-4864

I hope your kiddos enjoy this boredom buster! I am the queen of craft stockpiling so I have tons of paints, ornaments, and gift wrap (BOY, DO I HAVE GIFT WRAP!) to keep the kids busy on our next snow day.

Do you want more craft inspiration from Waverly? Try these!

DIY No-Sew Reversible Chair Cushions

Fabric Wreath & Matching Garland

Fabric Bulletin Board Tutorial

Painting Pumpkins With Acrylic Paints

DIY No-Sew Hand Warmers

DIY Ottoman Serving Tray

15-Minute Scrappy Fabric Trees

This post was created in partnership with Waverly Inspirations. Thank you for supporting the companies that support our site! 

Pin It

Scrappy Fabric Trees in Just 15 Minutes

Thursday, December 1st, 2016

Scrappy Fabric Trees in Just 15 Minutes from MomAdvice.com

This post was created in partnership with Waverly Inspirations. Thank you for supporting the companies that support our site! 

I love adding a few homemade touches to our home each year for the holidays and especially those items that can be repurposed in a variety of ways.  For example, one year for Valentine’s Day I made a festive tree from cupcake liners and it got lots of love during that season. Perhaps, a bit TOO MUCH love (ahem!) as they began to wilt and wrinkle.  The beauty in that project though,  and in today’s project,  is that the materials were pinned to the same styrofoam base which allows you the opportunity to reuse this same tree year after year in brand new ways.

I wanted to create some festive holiday fabric trees to fill an empty space in one of our corners so I created this easy 15-minute fabric tree that is so simple that you could have your kids even do it for a holiday craft.  I just know you are going to love these fabric trees as much as I do and I’m really loving the finishing touches on this one with a fabric pom-pom and a touch of shimmer on the edges.

How to Make a Scrappy Fabric Tree

Scrappy Fabric Trees in Just 15 Minutes from MomAdvice.com

Supplies Needed (all of these supplies can be found at Walmart!)

2 kinds of Waverly Inspirations Fabric in coordinating fabrics (I used the 100% cotton duck fabric available at the store)- this craft does not require a lot of fabric so even 1/4 yard should be plenty!

Small or Large Clover Pom Pom Maker (I used the large option for my trees)

Styrofoam Cones (any size!)

Straight Pins

Waverly Glitter Paint (in stores)

Paint Brush

Directions for Scrappy Fabric Trees

Scrappy Fabric Trees in Just 15 Minutes from MomAdvice.com

1. Begin by cutting into the long-side of your fabric by an inch or an inch and half. Once you have your cut, begin pulling the fabric with your own bare hands (ROAR!!! TAKE OUT THOSE HOLIDAY FRUSTRATIONS HERE AND IMPRESS YOUR KIDS WITH YOUR HULK STRENGTH!) and ripping it all the way down until this strip of fabric is completely separated from the fabric. If you have any loose strings (and you will!) pull them off the strip before beginning the next step.

2. Take this strip and pin it along the bottom edge of the cone to cover the styrofoam core.

3. With the remainder of your fabric strip, begin cutting notches into it, as evenly as possible, as I have shown above in the picture. Do this down the entire length of your fabric.

4. Starting at the very bottom, and layering over that first layer we laid, begin wrapping the tree, cutting once it has met the other side, and pinning into place.

Scrappy Fabric Trees in Just 15 Minutes from MomAdvice.com

4. Continue doing this layering over each layer to cover those pins and also staggering the pieces so that each layer has a little leaf peeking through. Do this until you get to almost the top of the tree. You may need to cut and repeat this process again if you have run out of material to work with. REPEAT HULK MOVES.

5. Once you get close to the top of tree, rip another strip of fabric and use that to cover the top of the tree as I have shown you in the picture. You want to criss-cross the material so that you don’t have any of that styrofoam cone showing. Now wrap more of your layers over that to disguise the pins and to continue the ruffling on the tree.

6. In your other fabric, tear a 1/2″ strip just as you did with the tree, but this time we are going to be making a pom-pom out of it. If you have not used the Clover Pom-Pom Maker before you are going to love it. It’s very easy to use and I have a great step-by-step tutorial if you are new to pom-pom making. When making this, take care to not wrap numerous times or get the material so thick that you are unable to cut it. Just a nice even layer down each side should work. Cut the pom pom out and then use another fabric strip to tie it tight to secure.

Scrappy Fabric Trees in Just 15 Minutes from MomAdvice.com

7. Pin your pom-pm to the top and check to see if you need one more layer underneath to complete the tree. I liked adding just one more ruffle to finish.

8. Using your Waverly glitter paint and a tiny paintbrush, dip the paintbrush in the glitter paint and paint just the edges of the torn fabric on the pom-pom and on the tree to add a finishing shimmer.

Scrappy Fabric Trees in Just 15 Minutes from MomAdvice.com

Scrappy Fabric Trees in Just 15 Minutes from MomAdvice.com

Why make one when you can make three?

I’m in love!

The best part is that you can switch these materials out with the seasons and make this same object look different from season to season. Who knows? You just might see these out again around Valentine’s Day with a brand new look on the site!

Do you want more craft inspiration from Waverly? Try these!

DIY No-Sew Reversible Chair Cushions

Fabric Wreath & Matching Garland

Fabric Bulletin Board Tutorial

Painting Pumpkins With Acrylic Paints

DIY No-Sew Hand Warmers

DIY Ottoman Serving Tray

This post was created in partnership with Waverly Inspirations. Thank you for supporting the companies that support our site! 

Pin It