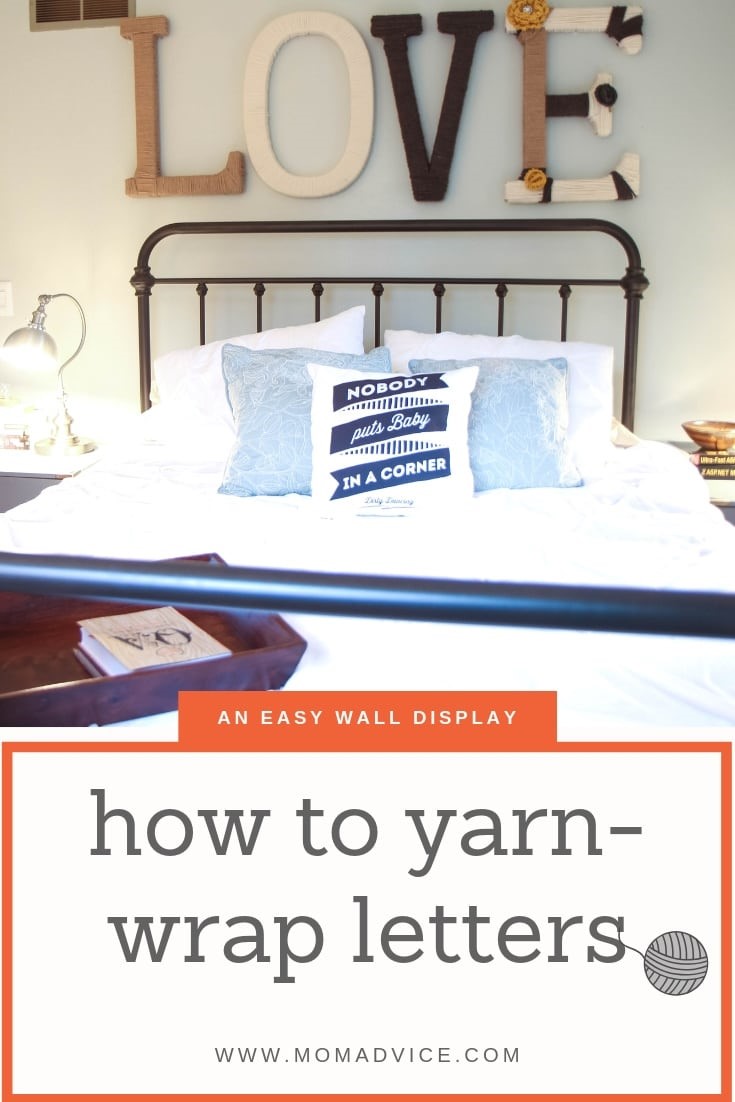
Create a beautiful wall display with letters and scrap yarn. This Anthropologie-inspired craft really adds a beautiful element to any home. This tutorial will show you step-by-step how to achieve a wall display of your own!
There are a few decorations in our home that have stood their test of time and the wall display in our bedroom remains one of those tried-and-true craft projects that I still love today.
I love to create projects that can be great stash-busters for the knitter AND a great yarn project for someone who doesn’t knit, but would love to have those textures in their home. Today’s project requires zero knitting skills and is simple enough that you could yarn-wrap those letters with your child.
I can’t wait to show you how easy it is to make this yarn display for a wall in your home.
Additions to my home, like these, really bring that Anthropologie shopping experience right in my home. It is, in fact, a lot of the inspiration for the crafts I try to do around here!
Let’s get started!
How to Yarn-Wrap Letters
Supplies Needed
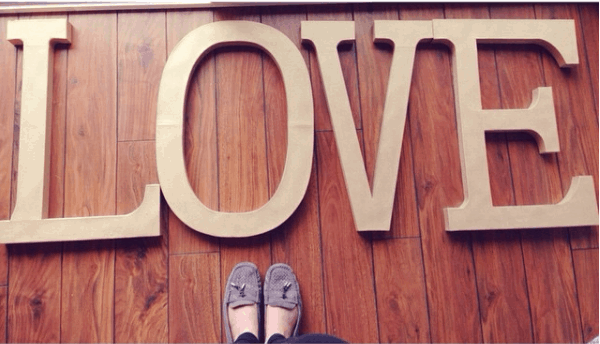
23.5” paper mache letters that spell LOVE (or your word of choice)
6 skeins of bulky yarn (the back of the packaging should tell you the weight of the yarn)
Scissors
Hot Glue/Tape, or even a Thumbtack for securing yarn in place
Large Package of clear 3M hooks for damage-free mounting
Directions
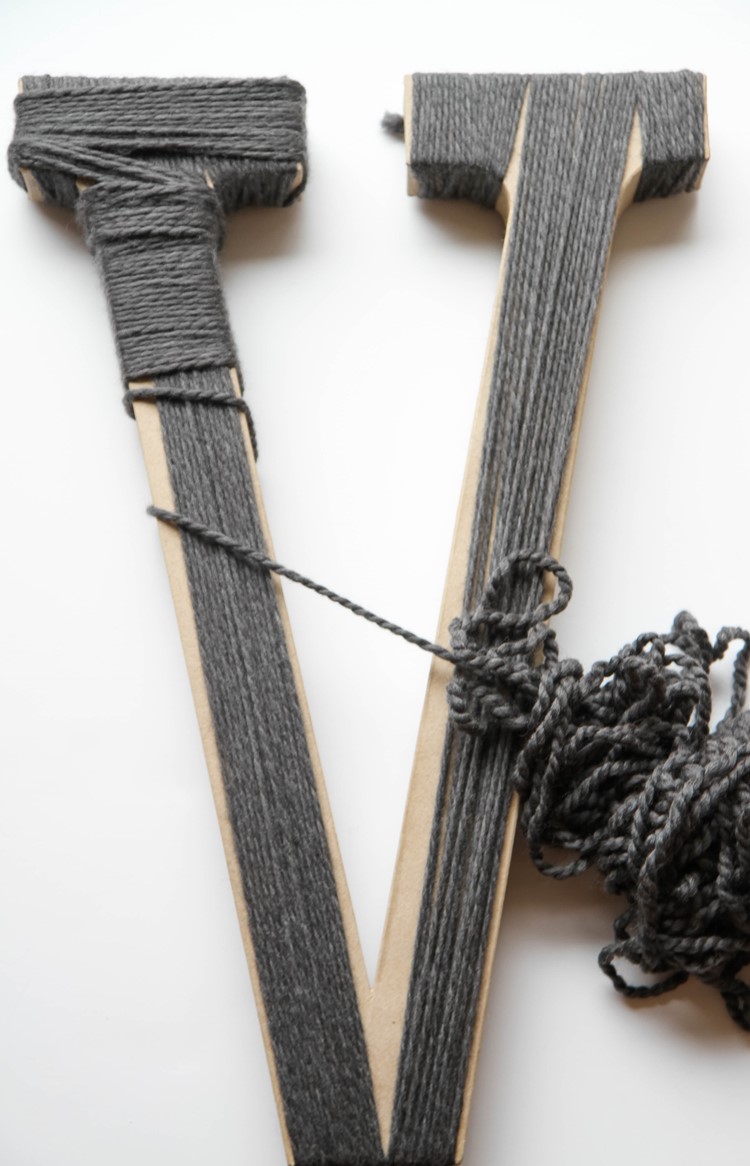
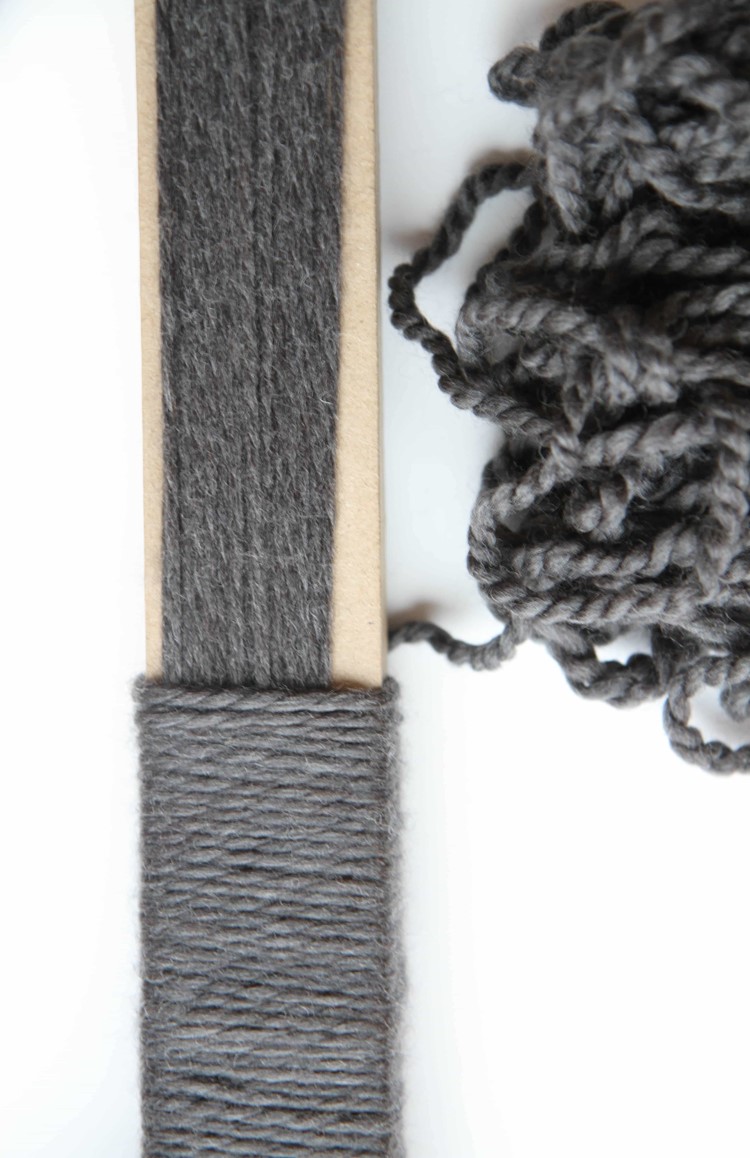
To begin, grab a skein of yarn and begin wrapping your letters in one direction (I started going up and down first).
Do your best to cover the letter in that direction and feel free to cut and secure yarn on the back as you go to cover the entire letter.
You can begin and end the securing of your yarn with a thumbtack, a piece of clear tape, or a little dab of hot glue.
Once you have covered the letter to the best of your ability, now begin wrapping the yarn in the other direction.
Navigating around detailed corners will be tricky. Don’t be afraid to stop and start the yarn to wrap the letters. I found that the corners were a bit bulkier to try to cover, but no one will notice that.
For the last letter, utilize all the ends of each of your skeins to create a scrappy letter from the three colors used in your L,O, and V.
I tried to layer the colors in places, securing again with a little hot glue, tape or thumbtacks for starting and finishing these wrapped places.
I also added a few knitted accessories to my last letter. The same idea could be achieved with fabric, interesting buttons, or purchased accessories. The possibilities are limitless and can fit your own style.
To mount them, I used clear 3M hooks, and used a razor blade to cut an “X” in the back of the cardboard letter to create a spot to hide the hook internally. Some of the letters could be mounted with just one hook (like the O) while others require d two or three hooks to secure.
The best part is that you can move your letters around or remount the hooks if you struggle with getting everything level.
These won’t damage your walls and when you get tired of this display, you can remove them and try something else.
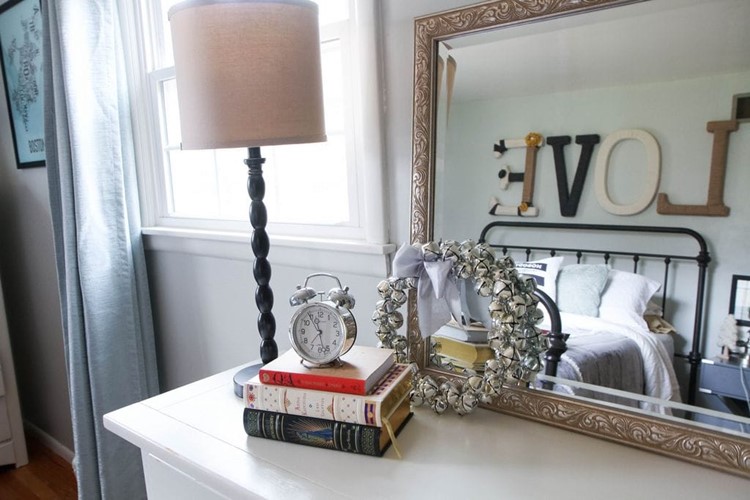

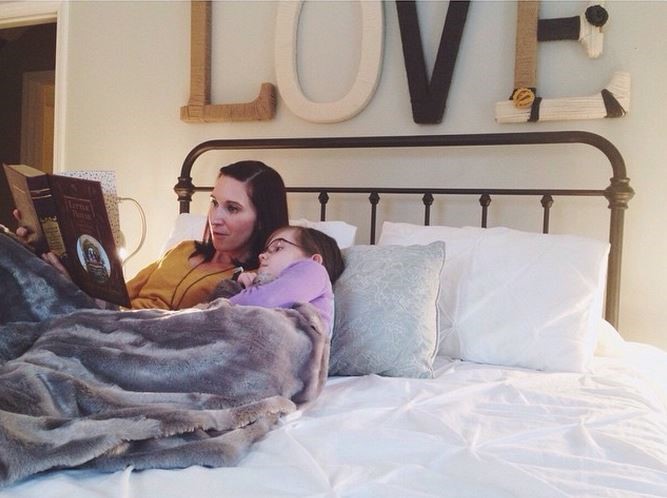
As you can see from my giant display, I tend to go all out when I tackle projects like this, but you could definitely use smaller letters and thinner yarn to make this display of LOVE on a smaller scale.
Anybody else want to curl up and read Little House with me?
Love this yarn project? We have SO many more fun ways to use yarn on the site!
This is one of those projects that you can make all your own and I hope you share your interpretation with us! xo
This post contains affiliate links.