
This post was created in partnership with Waverly Inspirations. Thank you for supporting the companies that support our site!
I am so excited to share with you these DIY No-Sew Reversible Chair Cushions I made today for our kitchen. While we have loved the aesthetics of our metal chairs in our kitchen, some of the bony bottoms in this house haven’t wanted to spend too much time in them. Lest you feel lead astray, it is not my rear that is struggling, thanks to a healthy dose of Sir Mix-A-Lot genes. I just get to hear from other people in my house about their discomforts.
Since I don’t sew pillows (and struggle with exactness and measuring of materials) I wanted to create these DIY chair cushions to comfy up your metal chairs AND I wanted that seat cushion to be able to have two prints so we could switch them around. This great idea is so easy to execute and no sewing machine is even required. Not only does this give you two choices, but if you get tired of the print, you can reuse your cushion materials inside and recover them again with a fresh print.
I don’t want to brag, but I also think these are SUPER cute too!
Don’t think of these as just an accessory for metal dining chairs though. I have found that these seat cushions can also double as bench cushions for our outdoor picnic table benches too.
Want a longer cushion? Use this tutorial to make gorgeous bench seat cushions that span the width of your benches. Thanks to their lightweight materials and how thin they are, these are also great to transport to any picnic gathering…somewhere else or even in your own backyard. With coordinating throw pillows, you have everything you need to make seating in your home feel beautifully cohesive.
Grab your glue guns and let’s get to work!
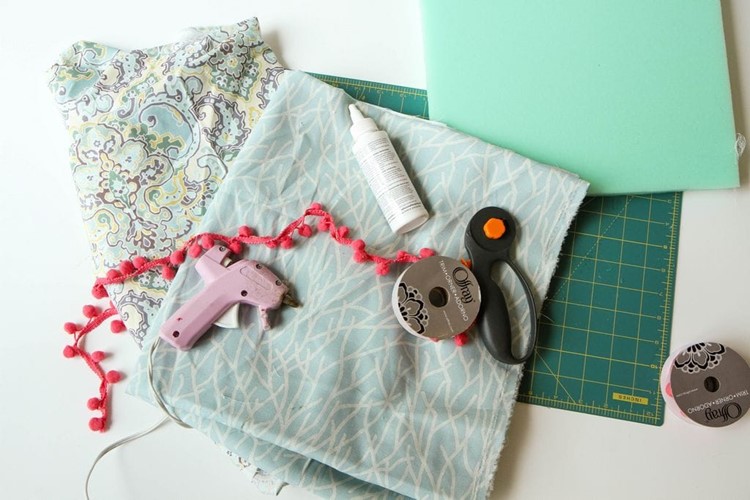
Supplies Needed (everything including these gorgeous fabrics are found at Walmart!!)
Your choice of matching Waverly Inspirations Fabric (measure the dimensions of your chairs to figure out your yardage)
Trim (I purchased two yards for each chair, but this will also depend on your own chair size!)
Fabric Glue
Fabric Rotary Cutter
Rotary Mat
Hot Glue Gun & glue sticks
Foam Cushion
Scissors
Directions for No-Sew Chair Cushions
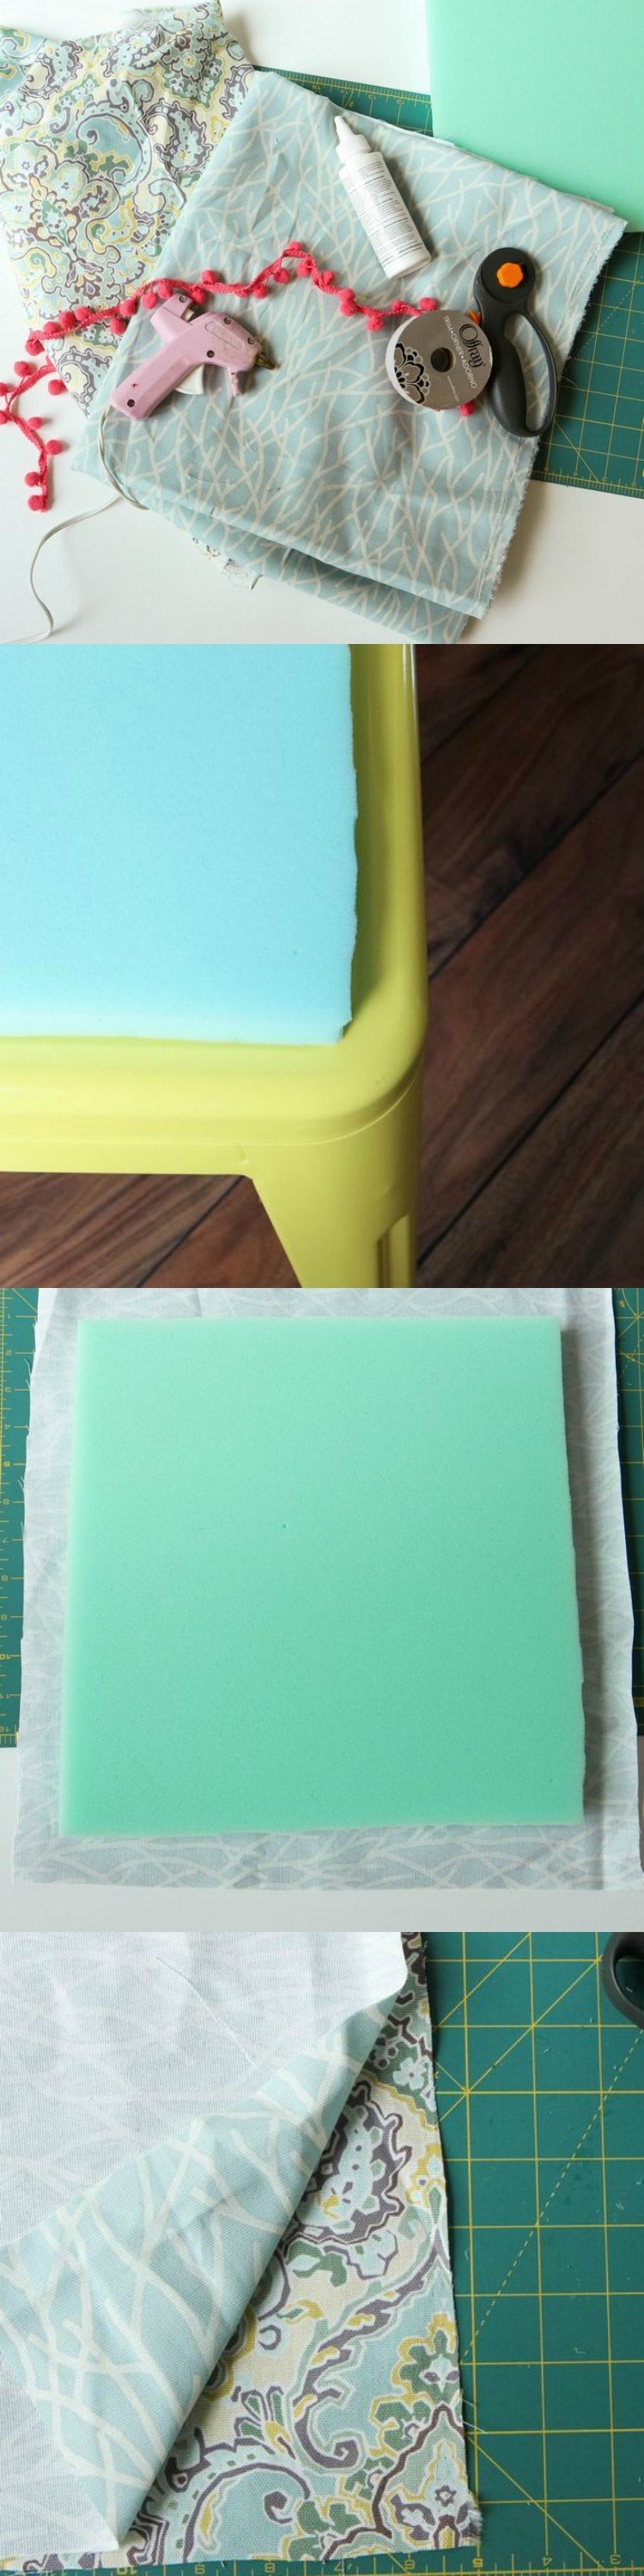
1. Begin by placing a large piece of parchment over your chair seat to create a template of the sizing of the seat of your chair. Mine had a lip that outlined around it that I followed for tracing. Cut this out and use this as your guide for cutting your foam. Using scissors, cut to the size of your template (Note- if you are worried about your template holding up, you can trace it on heavier paper and then use that as your guide).
2. Grab one of your fabrics and place the foam cushion on top. Cut (with your rotary cutter and on your mat) around the cushion, giving yourself 2″ of wiggle room around the cushioning. Repeat this same step with your second piece of fabric.
3. Now it is time to glue your pieces. You want one fabric with the print out and one fabric on top with the print in. We will be turning these inside out once they are dry so you want to be sure your fabric is facing the correct direction. Also be mindful what direction your print is going so you can repeat that on each cushion.
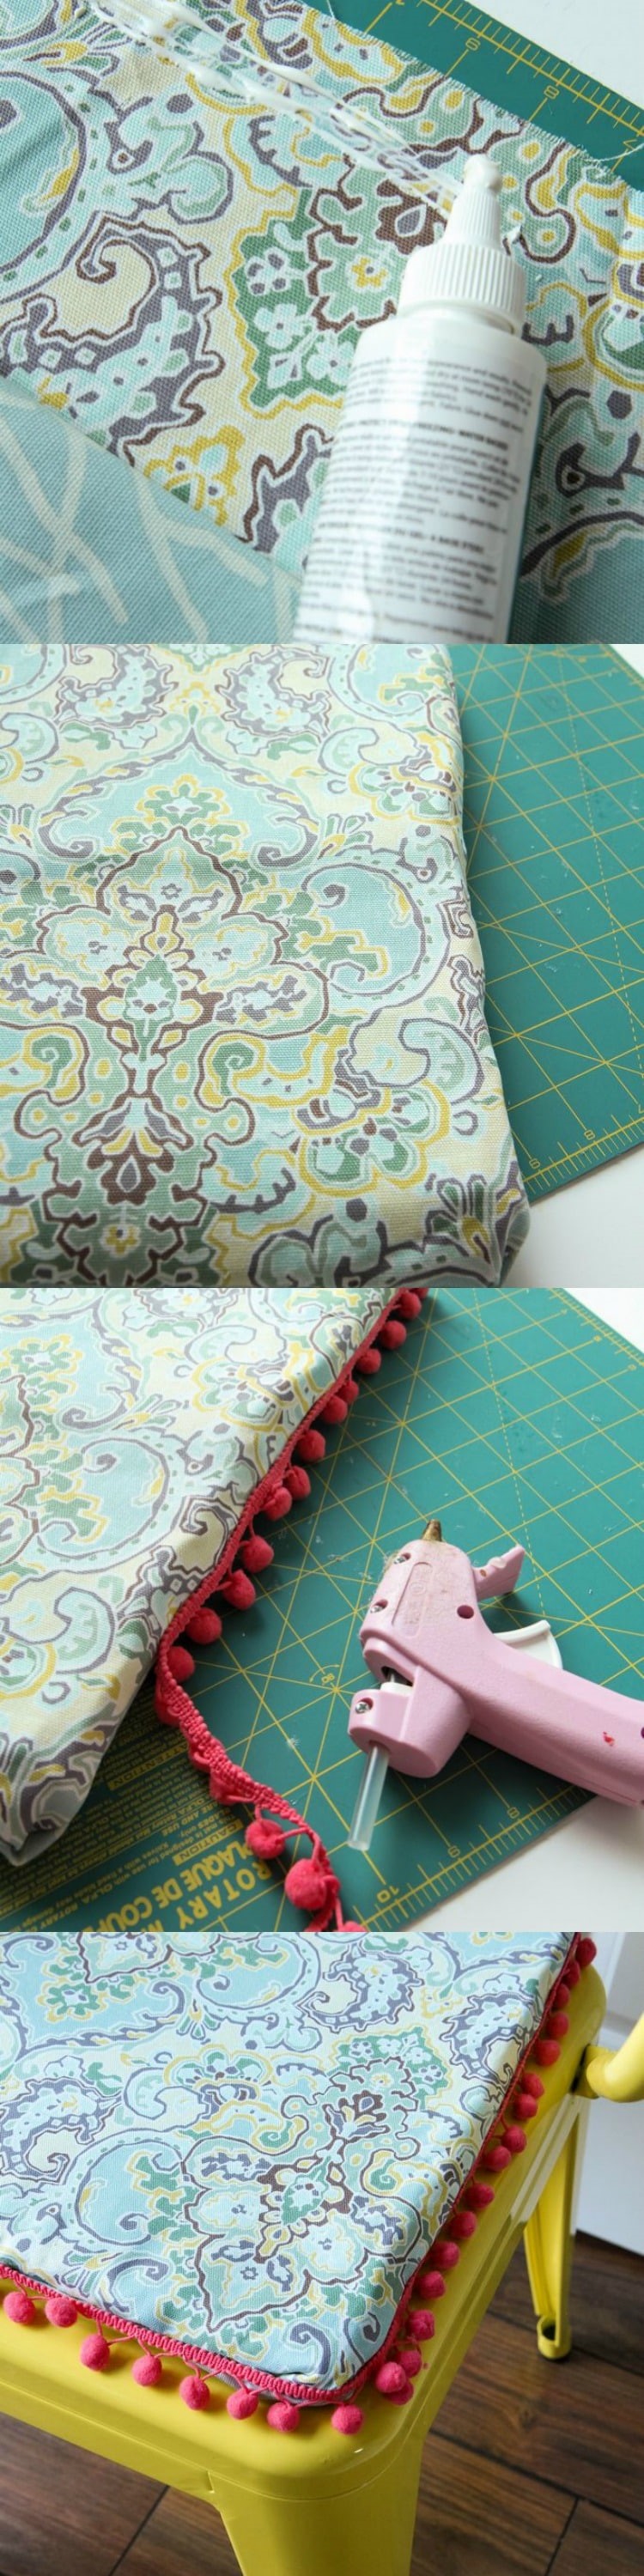
4. Using your fabric glue, glue around the entire square, leaving an opening to slide in your cushion on one side. Repeat this on all of your cushions. Set the cushions aside and let them dry for 24 hours.
5. The next day, carefully open up and turn the cushion covers to the right side. Slide your foam cushion in and then either sew the opening with a needle and thread or (this is my lazy girl way!) line up the fabrics folding it in to match and hot glue that seam shut.
6. Grab your trim and carefully apply your hot glue and then secure your trim. Do this all the way around your cushion. If you have any excess, line the cushion up and figure out where to secure a tie (or two!) for it. You can either secure this to the cushion with a bit of hot glue or you can grab a heavy thread and needle and stitch it to the back.
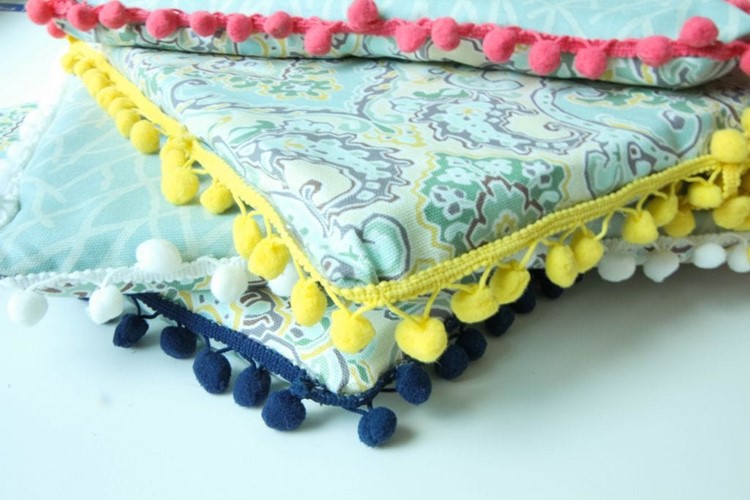
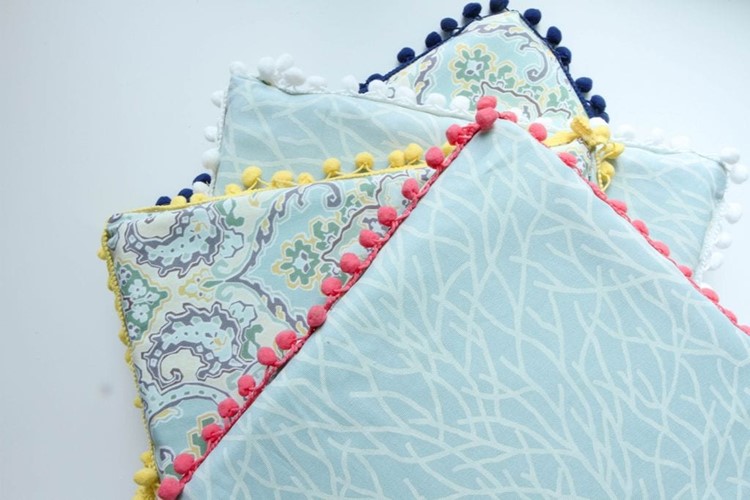
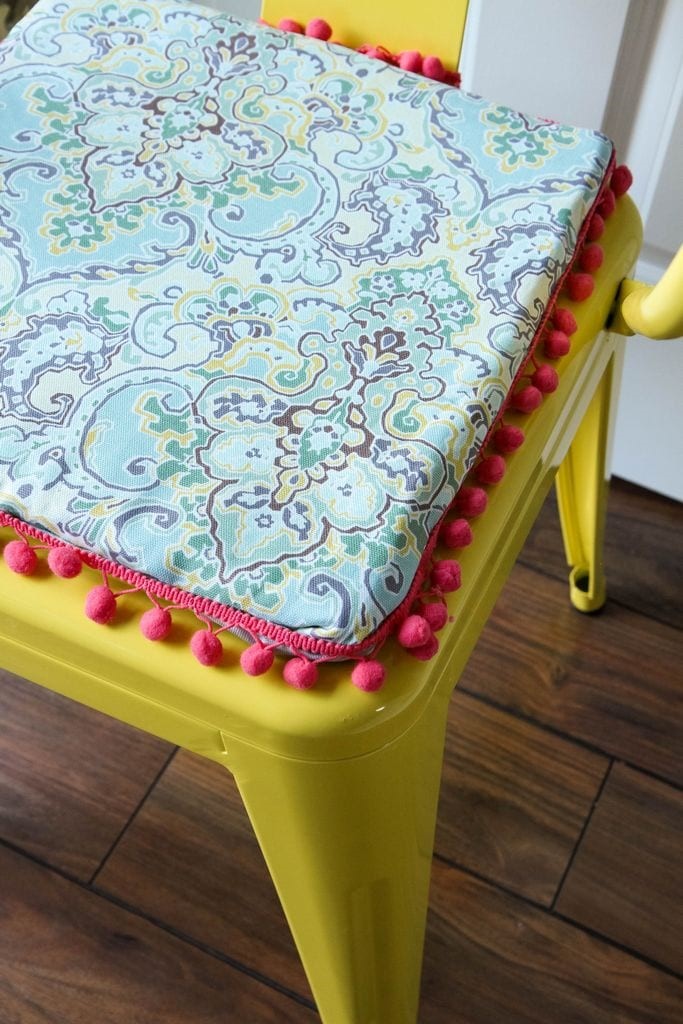
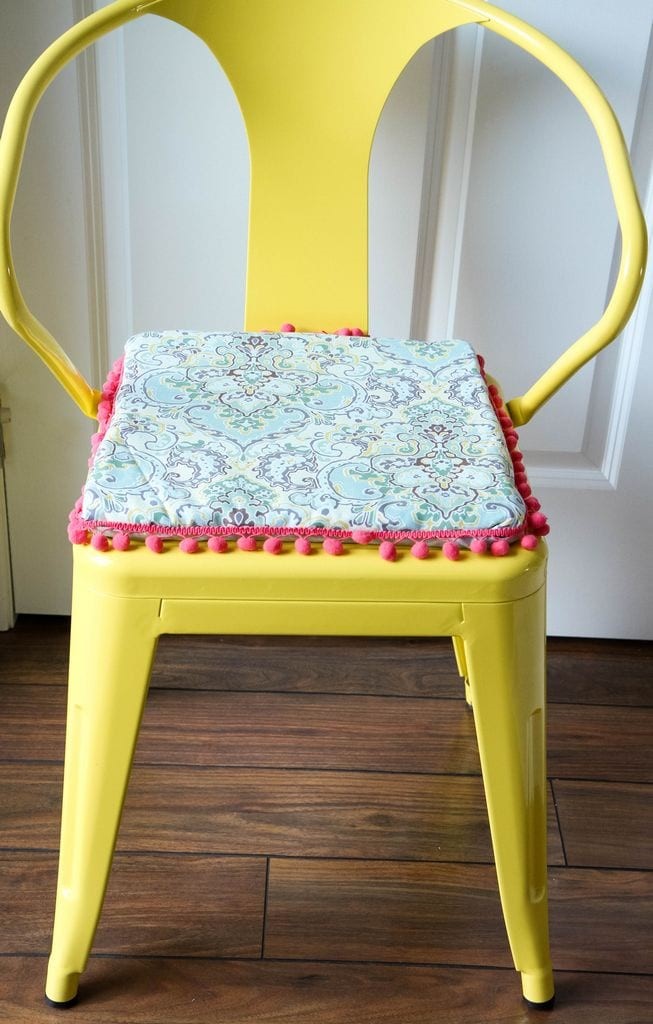

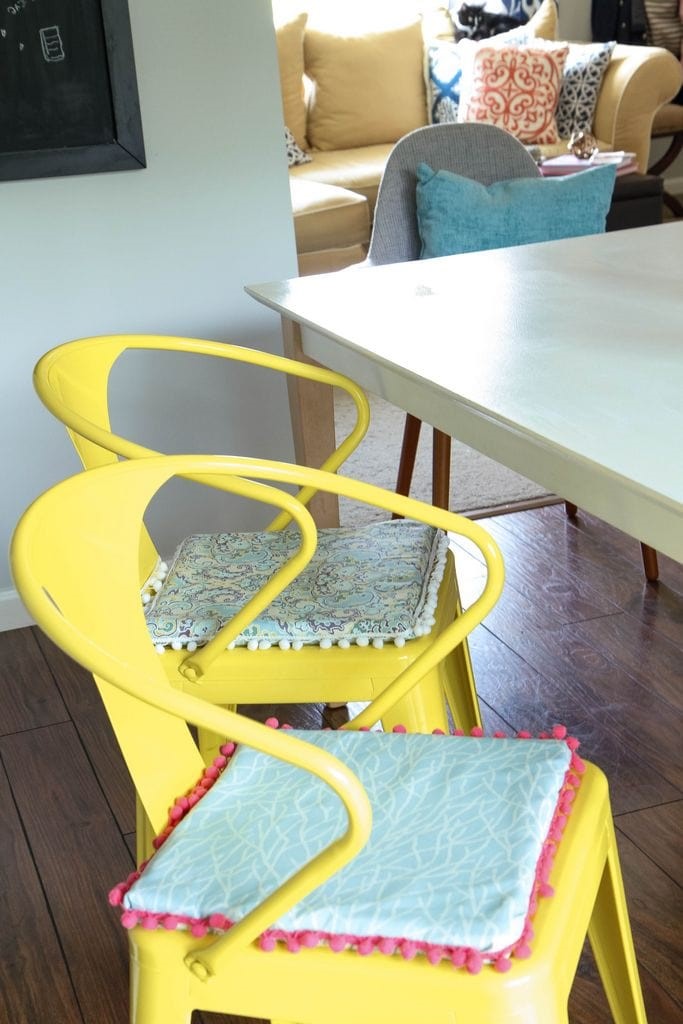
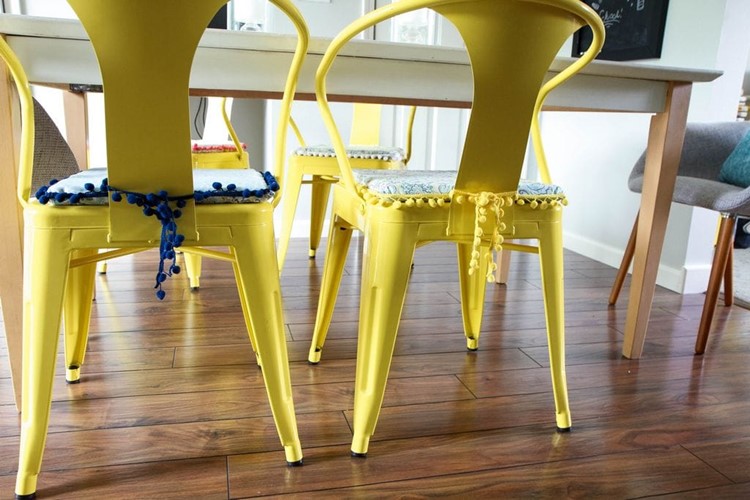
I hope these fun cushions bring your bony butts as much joy as they have to our house. We all agree that this also warms up the space a bit and makes it feel a little more homey. I added these coordinating pillows to the end chairs to add a little more warmth to them.
Do you want more fabric craft inspiration? Try these!
How to Make a Blanket Scarf
Fabric Wreath & Matching Garland
Fabric Bulletin Board Tutorial
This post was created in partnership with Waverly Inspirations. Thank you for supporting the companies that support our site!