When I was a kid one of my favorite treats in the world was an apple pie that they served at a fast food restaurant in town.
The flaky crust in a pocket filled with the warm apple filling was the perfect comfort food to me and it always seemed to be the perfect amount to satisfy my sweet tooth craving.
Clearly, I am no food snob when it comes to the humble pie whether it is from a box in the grocery store or a local diner.
Just give me ALL THE PIE.
It should come as no surprise that my children adore pie like their mother so I wanted to create a treat for them that would be deemed one of the coolest after school snacks I have made to date.
Of course, we are creating the only pie worth making, at least according to our household.
For us, it is the incredible pumpkin pie that truly brings together the flavors of fall in every delicious bite and makes it feel like Thanksgiving… even if it really is just another boring Monday.
Of course, I have a little secret in the refrigerator now that I am a busy mom.
These little treats couldn’t be easier to prepare thanks to store-bought pie crust that saves me a lot of time on treats (and dishes).
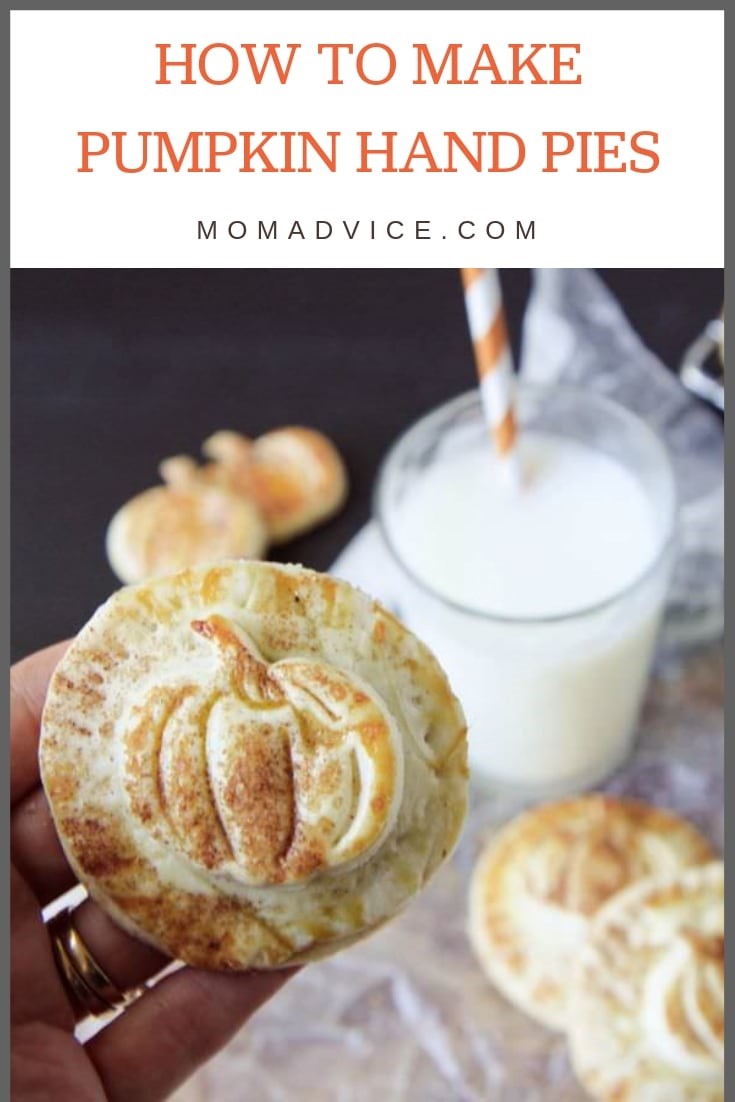
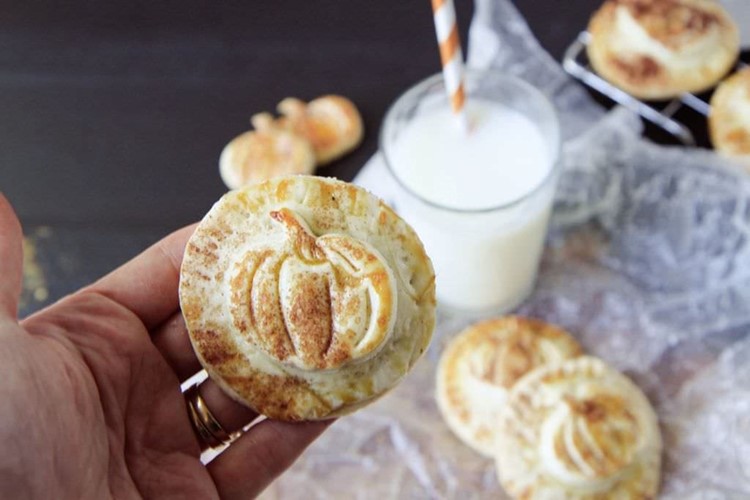
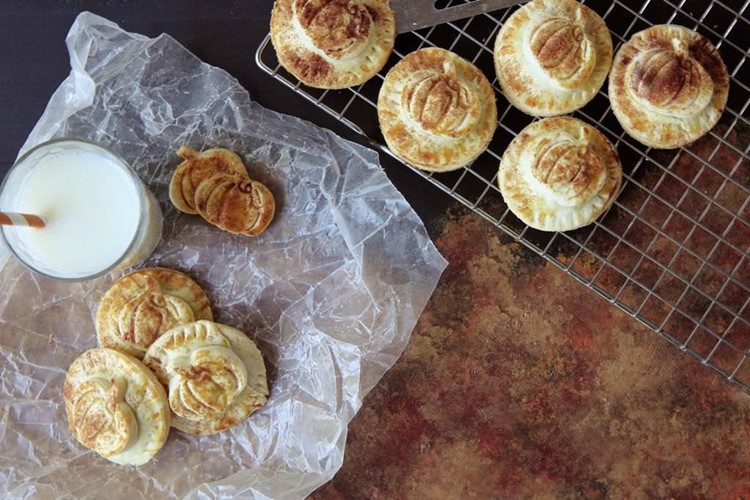
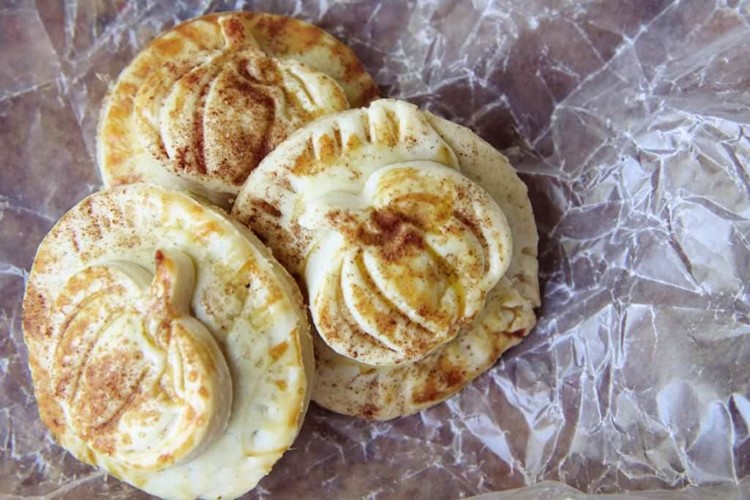
With a little pumpkin shape placed on top of each delicate pie and dusted with cinnamon and sugar, this treat looks impressive, but can be pulled together in a matter of minutes.
These would be just perfect for a fun Halloween lunchbox treat or to celebrate the season any other day of the week! Best of all, since the filling calls for just a cup of pumpkin puree, it is the perfect way to use up a leftover can that might be taking up space in your refrigerator.


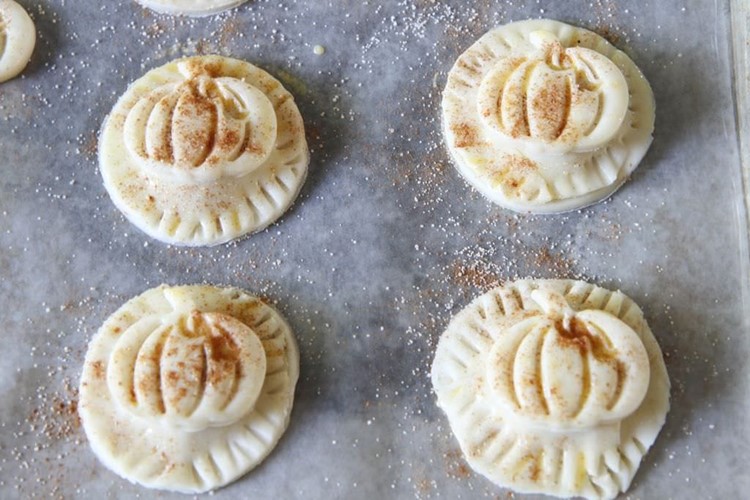
If you haven’t made a hand pie before, it couldn’t be easier. You can use a floured cup as a circle cutter or a biscuit cutter to cut out your circles. Add a tablespoon of your filling to the tops of each of your circles and then add an identical circle on top to pull the pie together. To make sure everything is secure, I seal and add pretty scores with a fork.
Want to make it even easier? Can I recommend this handy gadget?
It’s amazing for making lunchbox sandwiches too! I promise, you will get a lot out of it!
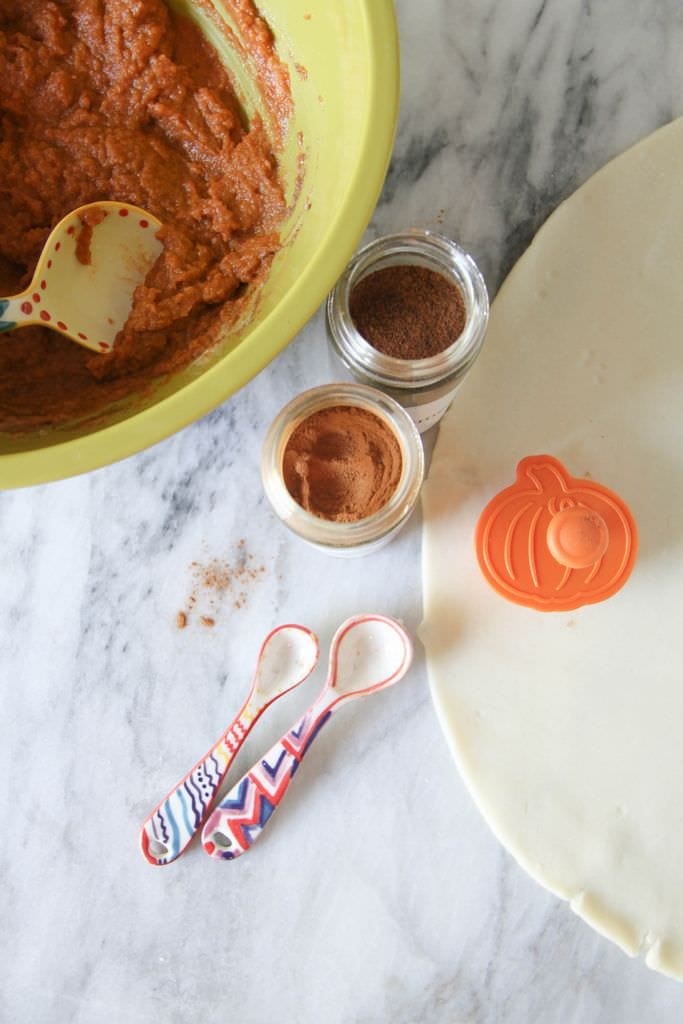
To add a little decoration, I love to buy seasonal decorative pie cutters that add a little detail to the edge of my pies, decorative edible touches to a dessert table for the holidays, and happen to add the perfect detail to these hand pies.
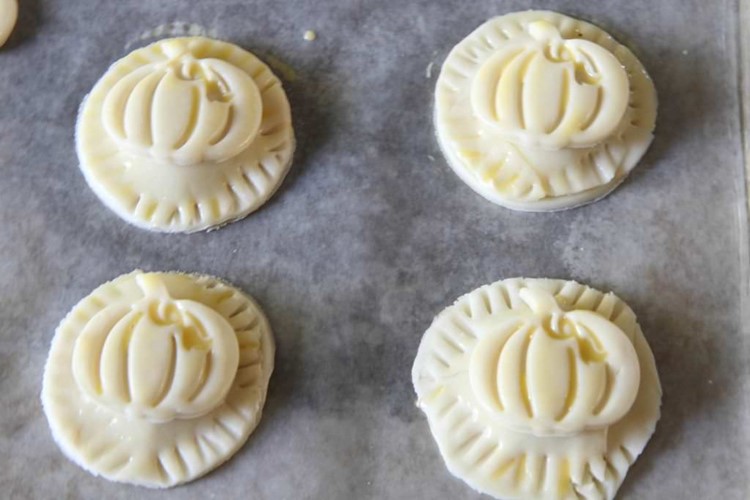
To secure these adorable pumpkins, I brushed the pies with an egg wash and then rested this on top, brushing again lightly with the egg wash.
It adds a beautiful touch and shine to the crust and makes these pretty pies into a little work of art.
I hope you can share these treats with someone you love this month and I look forward to sharing more fun fall ideas with you on the blog. Looking for a traditional pumpkin pie for the whole gang? I can’t recommend this tried-and-true recipe enough!
Don’t want to make pie at all?
I feel you.
Check out these ideas for decorating those store-bought pies!
Speaking of more fun fall projects, scroll below the recipe for a few of my ABSOLUTE FAVES!!
Pumpkin Hand Pies Recipe
Prep time:
Cook time:
Total time:
This fun semi-homemade treat has all of your favorite pumpkin pie flavors in a single size version. Be sure to snag [url href=”https://rstyle.me/n/c9yyh2wky6″ target=”_blank”]some fun pie cutters[/url] to really make these festive! Need to make these gluten-free? No problem! Simply switch your prepared pie crust to a gluten-free version!
- 1 cup pumpkin puree
- 3/8 cup brown sugar
- 1/2 teaspoon cinnamon
- 1/4 teaspoon nutmeg
- 1 tablespoon heavy cream
- 2 packages prepared pie crust (make sure to bring this to room temperature)
- 1 egg
- Cinnamon and sugar to garnish
- Optional: [url href=”https://amzn.to/2pOSbRj” target=”_blank”]This handy tool[/url] and [url href=”https://rstyle.me/n/c9yyh2wky6″ target=”_blank”]decorative pie cutters[/url]
- Preheat the oven to 350°F.
- In a mixing bowl, mix together the pumpkin, brown sugar, spices and heavy cream. Set aside. Unroll your room temperature pie crusts. Using a 2 1/2 inch biscuit cutter or the opening of a drinking glass as your guide, cut out your circles. Remember, however many you can cut out of your first pie crust, you will want to try to do the same amount on the next pie crust to create your toppers. The amount you can get will depend on your circle size that you are punching out.
- Place your first half of your circles on a parchment paper lined cookie sheet.
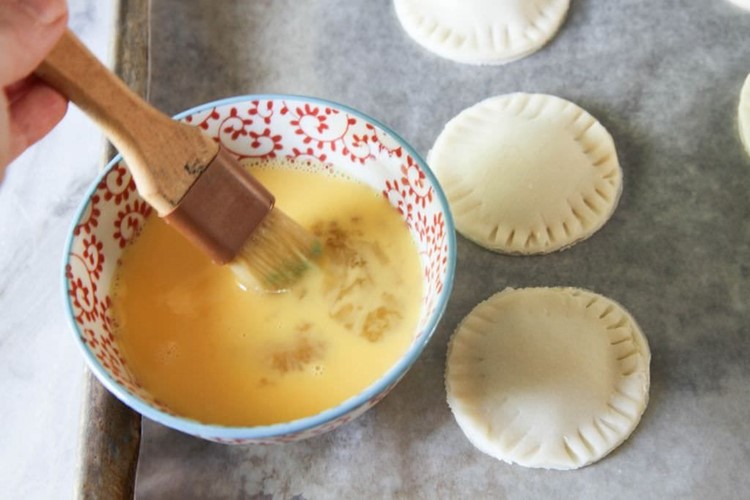
- Add in about a tablespoon pie filling, then place a dough circle on top. Press together with your fingers to seal them. Then use your fork to seal and create a pretty edge to the pie.
- Whisk one egg in a small bowl and then brush on top of the dough.
- Finish with a sprinkle of cinnamon and sugar. Bake for about 20 minutes or until golden brown. Serve with a big glass of milk or a dollop of whipped cream for a sweet treat!
3.4.3177
here are a few of our most popular fall projects on the site right now!
this post contains affiliate links!

Pin It