Longtime readers may remember that we were attempting to redo our backyard patio ourselves. Yeah, we have still been working on it up until this past weekend. Two solid days of back-breaking-cursing-ourselves-for-starting-something-so-stinking-hard-my-wife-won’t-stop-
nagging-me-until-it’s-done-work. Yeah, good times, good times. Don’t you wish you were my spouse about now? Nope! Me either!
First, let’s start with some before pictures and I will share some of our woes and dilemmas with redoing our space.
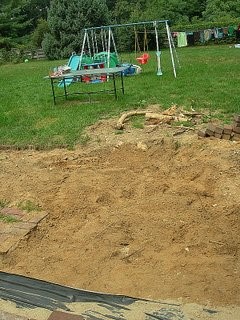
When we moved into our house, there was a giant tree that was right next to a bricked patio that had been there from the very first owner. That tiny beautiful tree turned into a giant enormous tree that began to uproot the patio, creating an unsafe spot to hang out and was horrible to entertain on.
We paid to have the tree removed and the stump ground. What we did not expect was the difficulty that we would have placing a new patio on this space because the stump was ground, but the roots were still there. And the roots? Yes, those roots were giant trees that were just as difficult to work around as the space. This giant pile of dirt was creating a damper on my outdoor entertaining and my kids loved playing in it…which created a ton of laundry for me.
 We ripped out the entire patio except for the very beginning of it because it was all uneven, but many of the bricks were broken and crumbling so we were worried how big we could make our patio if we only had a few bricks to work with.
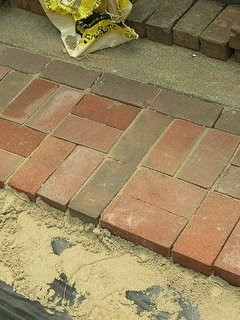
Lucky for us, Ryan’s family renovated their patio and offered us their bricks so Ryan decided to make a design from their old brick and our old brick to equal a fabulous new patio. We loved the design, but the work was very tedious because the bricks were two different sizes. Basically, it made for difficult and unpleasant work BUT it was practically free except for the labor and the fresh sand.
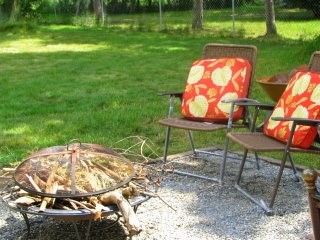
 Now I can tour my yard with a lot less embarrassment. Here was my solution for (with the help of my husband’s hard labor) the giant dirt pile. The root system was axed as much as we could and we leveled the dirt and outlined it with some of our free brick. We covered the dirt with pebble and moved our fire pit to this area. Two chairs were purchased for $29.99 from the Martha Stewart line and two outdoor pillows for $12.99 each (also from the Martha Stewart line at K-Mart) to complete this look. These chairs are wicker, but can fold to be stored in our shed or can be easily moved to the dining area for extra seating. I picture a lot of time in the evenings with my husband in these chairs! Not pictured was a small glass table that I got for drink holding or as an extra spot to put a tray on when dining outside for twenty dollars.
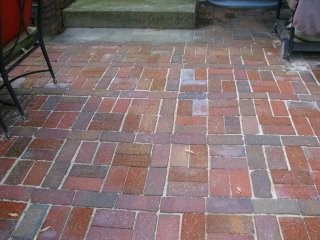 Here is what the bricking looks like on the finished patio. The two bricks made a beautiful design with their different colors. I just love how it turned out and I know my husband is really proud too.
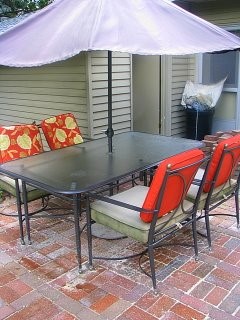
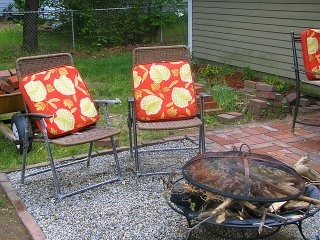
 Please ignore the trash can in the corner- we are still cleaning up from all of the hard work. Here is our dining area which has been relocated to the side to create more room on the patio for playing and drawing with our chalk.
The patio set was already owned, but my cushions were showing their age. I did do a deep-cleaning on these and let them enjoy some time in the sun. I didn’t want to spend all my money on cushions so I replaced the back cushions and will replace the bottom cushions next summer. These kept me on budget, but also freshened up the patio set.
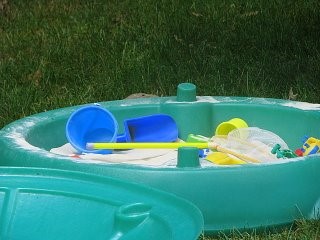 Now the kids can play in this instead of the dirt pile. How refreshing! It will certainly save me some time on laundry, but not on floor sweeping.
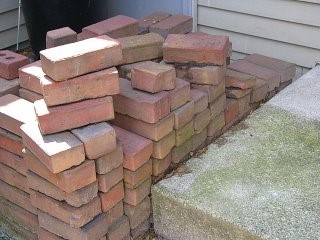 And now I can nag my husband about moving these, which are leftover brick from our project. I am sure we can think of some things to do with these, but he asked me not to nag him for a few days until he can recover from this project.
That concludes our backyard tour- I can’t wait to hear what you think!