Archive for the ‘Celebrations’ Category

7 Tips for Hosting a Successful Book Club

Tuesday, June 19th, 2018

7 tips for a Successful Book Club from MomAdvice.com Thanks to my sponsor St Martin’s Press, I’m sharing about Kristin Hannah’s newest page-turner!

I joined my first book club when my children were small and I remember both how rewarding it felt to use my brain again and the challenges of carving time out to read. The beauty in being a part of that group though was that it pushed me to read books that were outside of my typical genre.

Historical fiction, for example, had never been on my radar until I joined a club.

Ironically, it is now my favorite genre.

Have you thought about hosting a book club? I have had the pleasure of hosting a local group and an online group and today I wanted to share 7 tips and strategies I’ve found for hosting a successful book club.

7 Tips for Hosting a Successful Book Club

1. Create Your Book Club Circle

Book clubs can be an opportunity to cultivate existing friendships or an opportunity to widen your net. If you don’t have an existing set of close friends, this can be a great way to get to know people from other contexts of your life.  Consider starting a group through your church, with your neighborhood friends, a mom’s group, with your coworkers,  your gym buddies, or as a way to get to know other moms at your child’s school.

Keep in mind, this club does not need to be just women either because men can add another dynamic to your book club discussions. If you have couples that you love to spend time with, for example, consider asking if they might like to meet up monthly for dinner and a book chat. I know that some of my best book discussions have happened when enjoying an evening with friends.

2.  Have an Organized Kickoff Meeting

The quickest way for a book club to fizzle out is to not have a plan and get your members involved.  With everyone’s busy schedules, it can be difficult to get a committed group and keep them committed for an entire year (or more).

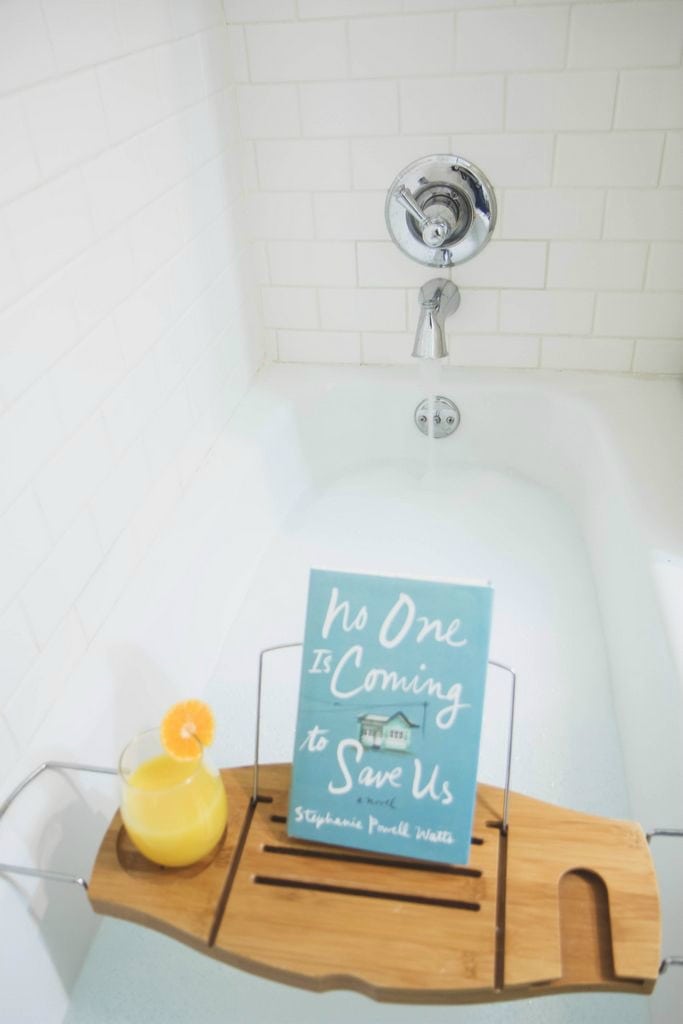
In the past, our mimosa kickoff usually starts in September, once the kids have headed back to school. With a little more time in our schedules (sort of), it gives us a chance to regroup and make book selections. I ask each member to come with a book in mind and a month that they would like to host our chat. Allowing each person to make a selection and host gives everyone a chance to feel a part of things and allows the group leader to just micromanage the logistics.

7 Tips for Hosting a Success Book Club from MomAdvice.com

7 Tips for Hosting a Success Book Club from MomAdvice.com

3. Pick Books That Can Sustain a Discussion

The best books that we have talked about have meat to them and naturally cultivate an incredible discussion. Books with shallow plots are probably better for your beach bag than your book club discussion.

Stumped for a book selection this year?

Can I make a great recommendation for you?

As I disclosed earlier, I am partnering with St. Martin’s Press to share about Kristin Hannah’s latest novel and I TRULY believe this is a perfect pick for your book club reading.

I , honestly, would read anything Kristin Hannah writes, but her last few books have been among my favorite. The Great Alone is a contemporary coming-of-age story that is set in the seventies in rural Alaska.  In this story, a former POW father comes home from the Vietnam War completely mentally changed from his experiences there. His behavior and decision-making is wildly erratic and when a property becomes available in rural Alaska, he decides that they should seize the opportunity to live off the grid and make a different life for themselves.

Braving harrowing and life-threatening conditions is what it is all about and thirteen-year-old Leni is caught in the middle of it all as they attempt to carve a new life in the wild frontier.

Living off the grid is not all it is cracked up to be and neither is surviving the difficult Alaska winters.  Hannah writes so eloquently about this impossible marriage and the honest struggle of a Vietnam veteran.

As you can see, from my description alone, this has so many elements for discussion. The plot brings on the challenges of PTSD in veterans, what it is like to live with a mentally ill family member, homesteading (and if YOU could survive it), and if you would stay with your partner if they were putting your family through a potentially life-threatening lifestyle.

When I say that books have to have meat for discussion, you can be assured that there would be MUCH to talk about with, The Great Alone.

Look for books like these where the description alone showcases what kinds of ideas you could discuss in your book chats.

4. Don’t Be Afraid of Controversial Plots

One thing I have worried about is picking books that have controversial plots that might make people feel uncomfortable. What has surprised me though is that these are usually our very best discussions and that it is, truly, okay to have different viewpoints.

The way I lead these discussions though is that I ask that things are said with kindness and love, even if you don’t necessarily agree with one another. In an online discussion, I can swiftly delete comments that aren’t said with kindness, but that is a bit more tricky in an in-person book club.

Even in these tricky moments though, leading by asking everyone to be kind has always been a successful way to start a thoughtful conversation and I have never had any issues after stressing this importance.

It can be scary leading a controversial discussion, but I was surprised how it changed people’s viewpoints or hearing about someone’s personal story and why it made them feel differently than me. A recent discussion of a story on immigration, for example, lead to people sharing how it completely changed their viewpoint on the deportation process.

It makes me wish we had more kind and honest talks and how they could bring compassion to our discussions.

5. Prepare For Your Discussion

Discussion questions are so helpful to have, especially when first beginning your chats. I have found that selecting books with discussion questions already in place can be extremely helpful and relieve a lot of stress on leading a talk. The Great Alone, for example, already has a great discussion outlined for you.

I try to not limit our discussions to just outlined questions though. If it is a historical fiction book, for example, it helps to look up the true stories and images from that time in history. Reading or finding author interviews that explain why the author decided to write a book can also add a lot to a discussion.

6.  Have Each Host/Hostess Decide How They Want to Host

7 Tips for a Successful Book Club from MomAdvice.com

7 Tips for a Successful Book Club from MomAdvice.com

7 Tips for a Successful Book Club from MomAdvice.com

7 Tips for a Successful Book Club from MomAdvice.com

I am happiest when I am entertaining our friends and family. It brings me great joy to share my table with them and feed them my food. Since this book is set mostly outdoors, I set up our outdoor table for a discussion.

It doesn’t have to be complicated though. This meat and cheese board, for example, is a fun way to share food with your book club friends without even cooking.

Sharing book club in the morning? Change the charcuterie board to a bagel board and load it with bagels and toppings.

The truth is, most people don’t love entertaining. It may bring them great stress, they may hate cooking, or they may be juggling a huge plate of craziness and can’t possibly add one more thing to their plates.

I GET IT.

Let each host/hostess decide how, where, and when works for them.

Food is not required to have a gathering.

Cooking is not required to have a gathering.

Opening YOUR home up is not required to have a gathering.

Allow each person to choose their style of hosting however or wherever they want to do it.

Book club should be fun and not stressful!

7. It’s All Too Much? Try an Online Club!

Painfully introverted? Haven’t found your people? Working full-time? New to town? Homeschooling? Single mom? Full plate?

Adding one more thing to your agenda can be an impossible task when you already have so much going on. Online book clubs can be an incredible option for someone that desires a book club, but just can’t make that happen in their day-to-day life.

You can join the free MomAdvice Book Club and be a part of a monthly discussion all year long!

The Great Alone by Kristin Hannah

The Great Alone is available in stores now and is highly recommended for your next book club chat!

To learn more:

Visit Macmillan.com

Like Kristin Hannah on Facebook

Follow St. Martin’s Press on TwitterFacebook, and Instagram

Do you have a tip for hosting a successful book club? Let me know in the comments below!

Thanks to my sponsor St Martin’s Press. All thoughts and opinions are my own.

Pin It

5 Ways to Make Self-Care a Priority Around the Holidays

Monday, December 18th, 2017

5 Ways to Make Self-Care a Priority Around the Holidays

This blog was sponsored by Florida Department of Citrus. Thank you for supporting the companies that support our site!

The holidays, while lovely, can be a stressful time of year. I don’t know about you, but each day has been filled with a running to-do list, a million activities, and a lot of food preparation.

Oh, and science fair.

For the love.

I will confess that I have NEVER had an issue with self-care, but I will also confess that my idea of self-care has evolved so much over the years.

Today I wanted to share with you 5 ways I make self-care a priority around the holidays and I would love to hear how you make self-care a priority in your life.

Take a “Sick Day” Once a Week

An epiphany came to me the last time I got sick. I spent an entire day at home sleeping, but wished that I was able to have a day like that when I was well and could really enjoy it. I decided to implement a once-a-week “sick day,” where I allow myself to enjoy a day just for me.

On this day, I rarely get out of my pajamas, I read all day, watch my favorite shows, don’t check email, take a nap, and indulge in crafty classes to allow space for creativity. In the evening, I do not do housework or make dinner (thank you, loads of leftovers!).

It is my FAVORITE day of the week and, believe me, if anyone interferes with mom’s “sick day,” it has to be moved to another day. I crave this day to myself.

5 Ways to Make Self-Care a Priority Around the Holidays

5 Ways to Make Self-Care a Priority Around the Holidays

Indulge in a Rewarding Soak

Is anybody else crazy about magnesium and all of its benefits on the body? Adding an Epsom soak to my daily routines has been incredibly beneficial to my body AND to my mental health. Did you know that stress can be a cause of magnesium deficiency, and a lack of magnesium tends to magnify the stress reaction, worsening the problem?

The holidays can be a particularly stressful time on our bodies and contribute towards deficiencies.

In studies, adrenaline and cortisol, byproducts of the “fight or flight” reaction associated with stress and anxiety, were associated with decreased magnesium (source).

I don’t know about you, but that sounds a lot like me around the holidays!

To get the benefits add two cups of Epsom salts to your bath and soak for 15-20 minutes in warm water. While you are doing this, combine it with other healthy habits:

Meditate- Add an app like Headspace to your phone and use this time to deeply breathe and meditate. They have a ten-day free beginner program that you can use to give meditation a try. This is the perfect time to give it a spin!

Add a Smart Beverage to Your Routine- Coffee can dehydrate the body so try replenishing it with a glass of Florida Orange Juice. While you soaking in your magnesium, you can also be enjoying a glass of Florida Orange Juice. Every glass (the recommended daily intake of Florida OJ is eight ounces for adults) of Florida Orange Juice has the Amazing Five. In just one glass you have Taste, Vitamin C, Folate, Potassium and No Added Sugar. Fancy it up with a slice of orange and serve in a pretty glass to add to the experience.

Read a Book- When people ask me how I’m able to read so many books, I have to say that these soaks have been where I have done some of my best reading. A book tray has been a smart investment for this bookworm and it feels like I’m really escaping when I can dive into a little fiction.

5 Ways to Make Self-Care a Priority Around the Holidays

Add Small Indulgences to Your Daily Routines

Wrapping, cooking, organizing, and cleaning are things we are all doing to prepare for the holidays. There is no reason that these routines can’t be coupled with small indulgences though, that can make the experience a little more pleasurable. I love to upgrade my boring routine to-do list items with something that brings me joy.

Wrapping gifts?

Why not belly-laugh to ELF while you are wrapping!

DIY Orange Sugar Scrub

Doing dishes?

Add a jar of this diy orange scrub (recipe below) to your agenda and give your hands a little pampering.

Cleaning the house?

Snag an audiobook from your library, strap on some wireless headphones and your fanny pack (this is TOTALLY what I do) and listen to a great book while you clean.

Pairing something that’s pleasurable with something that is not makes tasks like these much more bearable!

Marco Polo App

Make Time for People

This is the season where we can get really swept away with spending and shopping. It has a tendency to pull us away from the heart of what the season is about and into a frenzy of bad spending. In fact, an alarming number of shoppers are still trying to pay off their debt from holiday shopping last year. Instead of giving so much, what if we all just spent more time on each other.

Don’t have time? I have the perfect solution!

The Marco Polo app, shared with me by my sister, is my new favorite way to communicate with the people I love. It’s essentially a video walkie talkie that allows you to send a video back and forth to talk to each other, but doesn’t require you to hop on FaceTime or Skype at the same time. When schedules are impossible to coordinate, this can be an amazing solution for a busy mom.

I now talk and see my sister and best friend every day and even have virtual wine dates with my girlfriends in town. You can even do big group video chats if you can’t schedule a coffee together! How cool is that?

I consider time with good friends and family to be an essential part of my self-care, especially as a work-at-home mom.

Focus on people, not presents!

Rethink Your Idea of Self-Care

The last thing that I want to say is that self-care is much more than these acts.  I linked to this article in my notebook and I still am thinking about it. Self-care is setting healthy limitations that require self-discipline, setting healthy boundaries in relationships, not loading our calendar up so we get run down, and ridding our life of things that are negative or drain us.
Self-care means going to bed on time, giving yourself unscheduled spaces during the day, not going overboard on the food and drinks of the season, and saying no (even if we have to experience FOMO).

Did you notice that everything in this list is FREE? Self-care isn’t a treat yo’self experience that costs a lot, it is making time and space for things that help you feel emotionally and physically balanced! 

Thank you to the Florida Department of Citrus for letting me share about these tips with you! Be sure to make Florida OJ a part of your daily routines to help boost your immune system during this fun season!
DIY Orange Sugar Scrub from MomAdvice.com

DIY Orange Sugar Scrub[url href=”undefined”][img src=”http://momadvice.com/blog/wp-content/uploads/2017/12/diy-orange-sugar-scrub.jpg” width=”735″ height=”1102″ class=”aligncenter size-full” title=”DIY Orange Sugar Scrub from MomAdvice.com”][/url]
Recipe Type: Beauty
Prep time:
Cook time:
Total time:
This DIY Orange Sugar Scrub is a wonderful self-care treat for your hands and body! Thank you to Florida Department of Citrus for sponsoring this fun DIY!
Ingredients
  • 1 cup of Sugar
  • 1/2 cup of Coconut Oil
  • 1 teaspoon Orange Essential Oil ([url href=”http://amzn.to/2j6vEM4″ target=”_blank”]like this[/url])
Instructions
  1. In a saucepan, heat the coconut oil over low heat, until it is melted.
  2. In a large bowl, mix sugar, melted coconut oil, and a teaspoon of orange essential oil until fully combined.
  3. Scoop into a mason jar (the one in the picture has been doubled) and store with an airtight lid.
  4. When using, scoop a small amount into your hands, scrub gently (allowing the sugar to exfoliate), rinse, and pat dry.

This blog was sponsored by Florida Department of Citrus. Thank you for supporting the companies that support our site!

This blog was sponsored by Florida Department of Citrus. Thank you for supporting the companies that support our site!

Pin It

Homemade Vanilla Chai Tea Mix in a Jar

Tuesday, August 22nd, 2017

DIY Vanilla Chai Tea Mix from MomAdvice.com


Are you as ready for fall as I am?

As soon as the weather starts turning, I start thinking of all the things that I love about autumn.

The crisp leaves, the cool air, my cozy slippers, flannel sheets, and warm drinks.

In fact, sipping warm drinks with a good book is one of my all-time favorite fall activities.

My favorite warm drink is chai and I look forward to making this each and every year for our family. Is it your favorite too? I love to have homemade chai tea mix in a jar on hand for sipping or for sharing with a good friend.

I am sure you have seen that the drink mixes can be quite expensive, but mixing up a batch of this DIY Vanilla Chai mix for yourself can help to keep your pockets nice and warm with a little extra money.

Most of the spices, dry creamer, and dry milk are already stocked in my pantry or can be found easily on the baking shelves at our local grocery store.

The only additions I usually have to run out and get is the instant tea and powdered vanilla creamer.

When I see a sale on these ingredients, I stock up so I don’t run out in the colder months.

We tend to go through this mix rather quickly because it is such a hit over here.

To make the batch more smooth, instead of gritty, I process everything through my blender.

I first mix all of the white ingredients in my blender (milk, sugar, creamer, vanilla creamer).

I dump those in a plastic container and then I mix up all the brown ingredients (tea and spices).

I pour this on top in the plastic container, seal the lid and give it a good shaking to incorporate or mix it up with a spoon.

If you have a large food processor, you may be able to process it all together, but if you have a blender it is best to do this in divided batches.


DIY Vanilla Chai Mix in a Jar from MomAdvice.com


Not only is this drink mix wonderful for yourself, but mixing up a batch of this and tucking some of it in a mug would be a wonderful gift to give to someone special in your life.

I often rely on this easy mix in a jar for a teacher or bus driver gift because it is always a hit.

Who wouldn’t want a jar of that in their pantry?

If you are sharing this one with your kids, be sure to look for a mix like this.

You’ll have to trust me on that one since I have made that mistake a few times (*ahem*)

I hope you enjoy this recipe as much as I do- please let me know what you think!


Home-made Vanilla Chai Tea Mix from MomAdvice.com

Homemade Vanilla Chai Tea
 
Prep time:
Total time:
Mix up this easy recipe for Vanilla Chai to keep in your pantry to enjoy throughout the cooler months. This is also a great gift mix to share with family and friends.
Ingredients
  • Homemade Vanilla Chai Tea Mix
  • 1 cup nonfat dry milk powder
  • 1 cup powdered non-dairy creamer
  • 1 cup French vanilla powdered non-dairy creamer
  • 2 ½ cups white sugar
  • 1 ½ cups unsweetened instant tea
  • 2 tsp ground ginger
  • 2 tsp ground cinnamon
  • 1 tsp ground cloves
  • 1 tsp ground cardamom
  • 1 tsp nutmeg
  • 1 tsp allspice
  • ¼ tsp white pepper
Instructions
  1. Combine all ingredients in a food processor and blend until it is a fine powder. Add two-three tablespoons of mix to 8 ounces of hot water or milk.
 

DIY Vanilla Chai Tea Mix recipe from MomAdvice.com


Love this mix? Check out my hot cocoa mix with an ingredient that just might surprise you!


Amy's Famous Cocoa Mix


You might also love this link to some of my favorite copycat DIY Starbucks Drinks 


33 Copy-Cat Starbucks Drinks


or this great roundup of fall drinks– yum! 


Fabulous Fall Drinks MomAdvice.com

What is your favorite autumn/winter drink? Do you have any recipes to share for your favorite drink mixes?


Other great ideas for Autumn


How to Tie a Blanket Scarf for Fall from MomAdvice.com

Blanket Scarves for Fall


Hidden Pocket Scarf DIY

No Sew Hidden Pocket Scarf


Slow cooker Candles

DIY Slow Cooker Pumpkin Spice Candles


Easy Homemade Gluten-Free Pumpkin Bread

Homemade Gluten-free Pumpkin Bread

DIY Apple Wreath Tutorial for Fall

Monday, August 21st, 2017

DIY Apple Wreath Tutorial from MomAdvice.com

This blog was sponsored by Westcott. Thank you for supporting the companies that support our site!

I’m back to crafting today (all the jazz hands!) and I’m SO excited to share a fun apple wreath tutorial to freshen up your front door for fall, but I’m even more excited to share with you a secret that I’ve been keeping for the past couple of months.

Westcott, our sponsor today, has launched a new Mini Hot Glue Gun and Hot Glue Pen.

A  hot glue pen, you say?

Yes!

Westcott Hot Glue Gun Pen

Let’s talk about the Mini Hot Glue Guns first. The Mini Hot Glue Gun comes in two versions, high temp (this baby reached up to 400 degrees Fahrenheit) and low temp (that can reach up to 170 degrees Fahrenheit).  What makes these a little different are the smart features that I’ve always wished my glue gun had and I know you will appreciate too.

This has a non-stick tip (!!!) and the nozzle changes color from blue to red so you know when it is ready to use. No guessing and burning yourself checking it anymore! It also has been ergonomically designed to help your hands stay comfortable for all your crafting time.

Westcott Hot Glue Gun Pen

Since I have so much joint pain, I haven’t been crafting as much as I used to. This new Hot Glue Pen though is incredible and helps with your precision and accuracy when you are doing detailed projects. This one also turns colors to indicate when it is ready and it offers a finger trigger right on top to help you dispense glue in a more controlled way.

I have joked that our entire house is held together with a glue gun so I was MORE THAN HAPPY to spread the good news about these new products! You can read more over here and also check out their new site for Westcott Creativators.

How about we take these for a test drive and craft up a beautiful diy apple wreath for your home, to share with a teacher, or a fun wreath to hang to celebrate back to school?

DIY Apple Wreath Tutorial from MomAdvice.com

Supplies Needed

14″ styrofoam wreath form (or your own preferred size)

60-80 mini foam apples (I used 80 on mine to make it full)

24-30 feet of Mesh Burlap

Westcott Hot Glue Gun Pen or Mini Hot Glue Gun (low temp is great for gluing together plastic and styrofoam)

Hot glue sticks

1-2 Pins to secure on the back

DIY Apple Wreath Tutorial from MomAdvice.com

 Directions to Make an Apple Wreath

1. Begin by wrapping burlap around the styrofoam wreath form. Once the entire wreath is wrapped in burlap, secure with a couple of pins to keep the burlap tight.

DIY Apple Wreath Tutorial from MomAdvice.com

DIY Apple Wreath Tutorial from MomAdvice.com

DIY Apple Wreath Tutorial from MomAdvice.com

2. Heat up your Westcott Hot Glue Gun Pen and wait for the tip to turn red, to indicate that it is hot and ready. Begin securing these foam apples all around your burlap wreath, taking your time holding each of these to the burlap until they are secure. Be sure to tilt them in different directions, covering the entire top of the wreath. You can then leave the wreath as is or you can add another layer on top in between the first layer apples. I loved the dimension of two levels on this wreath so I added an extra round of apples to finish my wreath.

DIY Apple Wreath Tutorial from MomAdvice.com

3. Finish by hanging your wreath on a door. I looped a little twine on the back through the holes in the burlap to finish this wreath!

DIY Apple Wreath Tutorial from MomAdvice.com

DIY Apple Wreath Tutorial from MomAdvice.com

I hope you have fun making a wreath of your own, for yourself or for your favorite teacher! This is such an easy craft to make and can be enjoyed throughout the fall season. Thank you to Westcott for all the hot glue gun fun! I’m so excited to work on future projects with this smartly designed craft tool!


This blog was sponsored by Westcott. Thank you for supporting the companies that support our site!

DIY Easter Egg Tree

Tuesday, April 4th, 2017

DIY Easter Egg Tree from MomAdvice.com

This post was created in partnership with Waverly Inspirations. Thank you for supporting the companies that support our site! 

Can you believe that Easter is just around the corner? Today I wanted to show you a fun centerpiece for your table that I created with a few acrylic paints and a fun item I found in the candy aisle! I’m showing you how to make this adorable DIY Easter Egg Tree that could be a fun craft to make for your home or a great alternative to egg dying if you have older kiddos!

DIY Easter Egg Tree from MomAdvice.com

DIY Easter Egg Tree from MomAdvice.com

Supplies Needed (all of these supplies can be found at Walmart!)

9″ styrofoam cone

1 package Whoppers Robin Eggs

Waverly Inspirations Acrylic Paints in Lagoon, Coral, & Sunshine (or whatever colors match your home interior)

Waverly Inspirations 4-piece wide brush set

1 package sheet moss

1 1/2 Waverly Ribbon

Hot Glue Gun

Hot Glue Sticks

Scissors

Cup with water, paper towels, and something to cover the surface while painting and prepping moss (I used a large trash bag)

How to Make a DIY Easter Egg Tree

DIY Easter Egg Tree from MomAdvice.com

1. Begin by covering your styrofoam cone with your sheet moss and CAREFULLY securing it with hot glue.

DIY Easter Egg Tree from MomAdvice.com

Keep in mind, these fibers do separate so you want to be careful where you put your fingers. Overlapping slightly, keep adding pieces of moss to the cone until you get to the top. I folded a small piece over to cover the tip of the cone and then worked my moss around it, much like I did with the scrappy fabric trees I made for the holidays.

DIY Easter Egg Tree from MomAdvice.com

2. Give your candy eggs a good coat of paint. I selected paint colors that matched our home in coral, blue, and a sunshine yellow. Don’t worry if you don’t get every spot on the eggs painted because you can paint them once they are more secure. Give these about fifteen minutes to dry and then attach them with hot glue to your tree, carefully spacing the colors out as best as you can. I ended up painting 12 of each color to cover my mossy tree.

3. Once you have attached the eggs securely, now you can touch-up the paint to make sure they are covered fully.

4. Finish with a little ribbon and glue your bow to the top of your tree.

DIY Easter Egg Tree from MomAdvice.com

DIY Easter Egg Tree from MomAdvice.com

The moss does have a tendency to shed so put a plate underneath to catch the debris and put this beauty on your dining table, an end table, or on your mantle. Isn’t that too cute?

I hope you have as much fun making this craft as we did! It’s been a true pleasure working with Waverly Inspirations this year and sharing the journey with you!

How about more craft inspiration from Waverly? Try these!

DIY No-Sew Reversible Chair Cushions

Fabric Wreath & Matching Garland

Fabric Bulletin Board Tutorial

Painting Pumpkins With Acrylic Paints

DIY No-Sew Hand Warmers

DIY Ottoman Serving Tray

15-Minute Scrappy Fabric Trees

Kid Craft: Easy Technique for Painting Gift Wrap

DIY Phone Charging Station

DIY Roll-Up Jigsaw Puzzle Mat

This post was created in partnership with Waverly Inspirations. Thank you for supporting the companies that support our site! 


Pin It

DIY Pom Pom Bunnies Craft

Monday, March 27th, 2017

DIY Pom Pom Bunnies Craft from MomAdvice.com

This post was created in partnership with Mirum Shopper. Thank you for supporting the companies that support our site! 

Today I’m partnering up with Dannon® Danimals® Smoothies and creating the cutest craft to celebrate spring! We are making diy pom pom bunnies from a few common items you have in your craft supplies and recycling those drink containers from our Danimals® Smoothies.

DIY Pom Pom Bunnies Craft from MomAdvice.com

Dannon® Danimals® Smoothies are conveniently snack-sized, sealed and ready to drink, so I love to keep these on hand especially on busy days where we are running from school straight to activities. It’s also good to know that these fun drinks do not contain high fructose corn syrup, no artificial colors or flavorings, and are a good source of Calcium and Vitamin D.

This seems to be a busy season of the school year for us as we close in on the end of the school year. It isn’t uncommon to be running from one thing to the next so I try to keep items like these on hand for days when a healthy snack is required between activities and pair it with a handful of almonds or baby carrots for an easy snack to enjoy on-the-go.

DIY Pom Pom Bunnies Craft from MomAdvice.com

danimals-smoothies-2

You can find these over in the dairy cooler at Walmart and right now their 12-pack is under $5!  To save even more, take advantage of this Ibotta offer for an additional dollar off. This coupon can be used on either the 12-pack or you can really stock up for your family and snag an 18-pack for these upcoming busy days.

You can try all the fun flavors from Rockin’ Raspberry® to Strawberry Explosion® to Wild Watermelon®!

DIY Pom Pom Bunnies Craft from MomAdvice.com

These containers also happen to be the perfect size for upcyclying into fun crafts so today I wanted to use these containers to make adorable Pom Pom Bunnies for Spring! This would be so fun for a classroom for a quick snack and craft time to celebrate the Easter season.

DIY Pom Pom Bunnies Craft from MomAdvice.com

Supplies Needed

1 Dannon® Danimals® Smoothies Container (make sure to rinse this out well)

White or Gray Cotton Yarn and a scrap of contrasting color for the bow tie

Wiggly eyes

Pink colored pom

1.5″ foam ball (over by the floral supplies)

Straight Pins

Glue

1 piece of white felt

Medium Pom-Pom Maker (or you can make a pom-pom with a few items around your house)

Scissors

How to Make a DIY Pom-Pom Bunny

DIY Pom Pom Bunnies Craft from MomAdvice.com

1. Remove the packaging from your Dannon® Danimals® Smoothies Container carefully with scissors.

2. Place the styrofoam ball on top and push in to secure. Please note, if you don’t want the styrofoam to show, you can wrap the ball in yarn first and then place on top. Also  if you want it to stay in place you can add a little hot glue around this to make sure it is completely secure.

3. If you have never used a pom-pom maker before, you can see my pom-pom tutorial for full instructions. Using a straight pin, pin the pom-pom to the front of the styrofoam ball to make the bunny’s face.

DIY Pom Pom Bunnies Craft from MomAdvice.com

4. Glue your pink nose and eyes to the front of your pom-pom.

5. Cut out your felt ears, pinch these at the bottom, and then use the pins again to pin these ears to the top of the head.

6. Finish with a bow tie around the neck.

DIY Pom Pom Bunnies Craft from MomAdvice.com

DIY Pom Pom Bunnies Craft from MomAdvice.com

DIY Pom Pom Bunnies Craft from MomAdvice.com

How cute is that? This would be such a fun preschool craft for Spring! I hope this tutorial inspires you to snag some Danimals® Smoothies from your local Walmart to keep on hand for these busy days with our kids and don’t forget to print that coupon for some additional savings!

This post was created in partnership with Mirum Shopper. Thank you for supporting the companies that support our site! 

Pin It

Gluten-Free Cookies and Cream Cake

Tuesday, March 14th, 2017

Tracking Pixel
Gluten-Free Cookies and Cream Cake from MomAdvice.com

This post was created in partnership with Bob’s Red Mill. Thank you for supporting the companies that support our site! 

Gluten-free baking has always been very intimidating to me and I did my best for a long time to avoid it all costs. Unfortunately, with three people in our house advised to eating gluten-free, I was pushed into the gluten-free baking trenches for our family. I’m not ambitious enough to spend time mixing up my own mixes and that is why I’m excited to share with you about Bob’s Red Mill Gluten Free 1-1 Baking Flour.  Today I’m sharing this easy recipe for a Gluten-Free Cookies and Cream Cake with all the flavor minus the gluten.

Did I mention no tricky mixing of flours or trying to perfect recipes that are already in your recipe box? Yup, Bob’s Gluten-Free 1-to-1 Baking Flour is perfectly formulated for baked goods with terrific taste and texture with no additional modifications on your part.

Gluten-Free Cookies and Cream Cake from MomAdvice.com Gluten-Free Cookies and Cream Cake from MomAdvice.com

Gluten-Free Cookies and Cream Cake from MomAdvice.com

In our family, it is a tradition to make the birthday boy or girl a homemade cake to celebrate their day. My husband’s birthday was the perfect excuse to mix up a yummy cake with Bob’s Gluten-Free Flour. This rich batter is filled not only with a healthy dose of cocoa powder, but it gets a double chocolate whammy from the crushed gluten-free cookies and cream cookies that are folded right into it.

My secret weapon in any chocolate dessert is a little bit of coffee to enhance those rich chocolate flavors. I had my daughter taste the batter before the addition of coffee and after and we both agreed that it makes a really big difference in the smoothness of the flavor.

I know I don’t have to tell busy moms this, but coffee is certainly magic.

Gluten-Free Cookies and Cream Cake from MomAdvice.com

I’ve played around with a lot of gluten-free flour mixes in our kitchen, since our family’s diagnosis, and I can confidently say that this is the first blend that I’ve tried that I can taste no difference between the all-purpose flour and this gluten-free mix. There is no mealy texture or that sense that something is just off about the mix. The cake baked up as light and puffy as any cake prepared with all-purpose flour would.

For someone who lacks gluten-free baking confidence, this blend has given me the urge to bake again and I’m already dreaming of how else I can put this blend to work for our special treats. Have no doubts that you will see many of them on the site in the upcoming months!

Gluten-Free Cookies and Cream Cake from MomAdvice.com

Gluten-Free Cookies and Cream Cake from MomAdvice.com

Gluten-Free Cookies and Cream Cake from MomAdvice.com

Can we talk about the frosting for just one minute? MORE cookies are folded into this whipped cream cheese frosting and adds the jazz hands to this chocolate cake. Ths homemade frosting elevates and lightens the cake with it’s tangy flavor. Also, because there are not enough cookies in this, I added more cookies on top for decorating so you can have a snack in between bites.

We toted this cake to the restaurant to celebrate my husband’s birthday this year, in all her shining glory.

As we sat there eating, he leaned into me to say, “I keep thinking people are looking at me because it’s my birthday. I just realized that they are looking at your cake.”

Yup, it’s a showstopper.

A rousing song of happy birthday and slices shared with all at our table (and a few not at our table because CAKE), and we still had half a cake left once it had all been distributed. We offered the other half to the kitchen staff and it made me so happy to see it being sliced and enjoyed by everyone.

For several years, I worked as a waitress and I remember those long days worked for tips. It’s why we always try to go the extra mile when we dine out and this was just one more way we could show our appreciation for those who care for us.

Homemade cakes really do bring people together and I couldn’t stop the goofy grin on my face from seeing everyone enjoy this sweet treat, as I carried my empty cake stand home. My husband also left with the same grin, after a great meal shared with family and our new friends. He really felt celebrated this year.

Please add this cake and Bob’s Gluten Free 1-1 Baking Flour to your menu planner and grocery list. I promise, you won’t ever miss the gluten in this rich and delicious cookies and cream cake. This is a cake that’s meant to be shared so find a way to make that happen too. I bet you’ll gain a few new friends in the process!

Gluten-Free Cookies and Cream Cake
Recipe Type: Dessert
Prep time:
Cook time:
Total time:
Serves: 8
A gluten-free cookies and cream cake perfect for celebrating all of life’s occasions!
Ingredients
  • 2 cups [url href=”http://bit.ly/2kkxTgB” target=”_blank”]Bob’s Red Mill Gluten Free 1-to-1 Baking Flour[/url]
  • 3/4 cup unsweetened cocoa
  • 2 cups granulated sugar
  • 1 1/2 teaspoons baking powder
  • 1/2 teaspoon baking soda
  • 1 teaspoon kosher salt
  • 3 large eggs, plus 1 egg yolk
  • 1 cup unsalted butter, melted
  • 1 cup buttermilk
  • 2 tablespoons strong brewed coffee
  • 1 1/2 cups finely crumbled gluten-free chocolate sandwich cookies
  • 1 stick butter, softened
  • 2 (8-ounce) packages cream cheese, softened
  • 1 pinch salt
  • 1 teaspoon vanilla extract
  • 3 3/4 cups confectioners’ sugar
  • 1 1/2 cups finely crumbled gluten-free chocolate sandwich cookies
Instructions
  1. Preheat the oven to 350 degrees F. Spray two (9-inch) cake pans with cooking spray and dust with gluten-free flour.
  2. In a large bowl, using a hand-held mixer combine the flour, cocoa, sugar, baking powder, baking soda, and salt. Add the eggs and egg yolk, 1 at a time, and beat until well mixed, then add in the melted butter. Mix well to combine. Next, add the buttermilk and coffee and beat until smooth. Fold in the crumbled cookies with a wooden spoon.
  3. Pour the batter evenly into the cake pans and bake until a toothpick inserted in the center of the cake comes out clean, approximately 30-33 minutes. Remove from the oven and cool, on a rack, in the pans for 5 minutes. Turn the cakes out onto a rack and let cool completely.
  4. In a large bowl with an electric mixer, blend the butter and cream cheese until smooth, about 3 minutes. Add the salt and vanilla. Add in the confectioners’ sugar, 1/2 cup at a time, until smooth. Beat in the crumbled cookies.
  5. Once the cake has fully cooled, add a layer of frosting on the top of one cake layer and then stack the second one on top. Finish with more frosting on top. This recipe yields enough to also frost the sides of the cake, if you desire. Finish with more cookies (whole or crushed) to add decoration to the top of your cake.

Gluten-Free Cookies and Cream Cake from MomAdvice.com

This post was created in partnership with Bob’s Red Mill. Thank you for supporting the companies that support our site! 

Pin It

5 Minute Treat: Shamrock Pretzel Pops

Friday, March 3rd, 2017

5 Minute Treat: Shamrock Pretzel Pops from MomAdvice.com


St. Patrick’s Day is just around the corner and today I wanted to share with you a sweet little treat idea that is no-bake, made in just five minutes, and can be customized to your child’s own dietary needs.

Do you know why we celebrate St. Patrick’s Day? Every year on March 17, the Irish and those of us that are Irish-at-heart across the world observe this day together, but many don’t know the origin of the holiday. What began as a religious feast day for the patron saint of Ireland has become an international festival celebrating Irish culture with parades, dancing, special foods and a lot of green food.

Each year I try to come up with a sweet treat for my kids to celebrate the holiday. We have celebrated with homemade Shamrock Shakes and ate a delicious Rainbow Cake in a Jar complete with Cloud Frosting.

As my kids get older, we seem to get busier so I wanted to share a treat that any busy mom could prepare or that your older children could prepare with a little supervision from you. The best part about these is that this is a treat that you can create for your gluten-free child by utilizing you favorite gluten-free mini pretzel. Rolos and plain M&M’s are also gluten-free treats, but always make sure that you check the back of the bag since seasonal candies can affect the factory line and introduce allergens that are not typically present.

5 Minute Treat: Shamrock Pretzel Pops from MomAdvice.com

How to Make Shamrock Pretzel Pops

5 Minute Treat: Shamrock Pretzel Pops from MomAdvice.com

Supplies Needed

1 bag of plain M&M’s (have your child help you sort all the green ones out for this treat)

1 bag of mini pretzels (regular or gluten-free)

1 bag of Rolos

Wilton Lollipop Sticks

Parchment Paper

5 Minute Treat: Shamrock Pretzel Pops from MomAdvice.com

Directions

1. Preheat your oven for 350 degrees. Line a baking sheet with parchment paper and assemble your pretzels into a clover shape as shown above.

2. Add a Rolo in the center of each of your clovers. Gently take your cookie sheet over to your oven and slide your cookie sheet into the oven. Bake for 3 minutes, or until the Rolo has just begun to melt.

3. Pull out the cookie sheet and carefully insert a lollipop stick in through the Rolo while carefully placing an M&M in the center. Repeat until finished. It’s important to do this step while they are still warm, as these harden quickly once they cool.

4. Allow them to cool fully before removing from the cookie sheet and carefully peel them off of the parchment paper. Ta-da! Treats for everyone!

5 Minute Treat: Shamrock Pretzel Pops from MomAdvice.com


5 Minute Treat: Shamrock Pretzel Pops from MomAdvice.com

5 Minute Treat: Shamrock Pretzel Pops from MomAdvice.com

I just love the simplicity and festivity of this adorable treat. My kids loved it too and it was a fun way for this Irish-at-heart family to celebrate this fun holiday!

Pin It

Fabric Flower Wreath for Spring

Wednesday, March 1st, 2017

Fabric Flower Wreath for Spring from MomAdvice.com

This post was created in partnership with Waverly Inspirations. Thank you for supporting the companies that support our site! 

You will rarely come to my house and not find a wreath on the door, but I must admit that my DIY wreaths (after MANY years of use) are looking a little shabby. Working with Waverly Inspirations was just the push I needed this month to spruce up my front door. This fabric flower wreath tutorial is just what you need to get your door ready for spring. If you haven’t made fabric flowers before, I’ve got you covered with a step-by-step picture tutorial.

I am a big fan of recycling and reusing my craft materials so I cut all of the materials off this DIY yarn wreath and reinvented it into a spring wreath. Six years ago I purchased that straw wreath for $4 and it is STILL going strong.

Pretty amazing!

Also, if you have ever priced out purchasing a wreath, you know how much you are saving by making your own for your front door.

Today I wanted to put some of their fresh spring fabric to work to wrap and decorate our wreath. Although I will be doing these fabric flowers with a needle and thread, they can also just as easily be pulled together with a little hot glue. The best part? This is a craft you can do while getting in a good Netflix binge.

This craft was cranked out with a little American Crime Story. PS- LOVING it.

Fabric Flower Wreath for Spring from MomAdvice.com


Supplies Needed (all of these supplies can be found at Walmart!)

1/2 yard of two (or more!) Waverly Inspirations Fabric in coordinating patterns

Straw Wreath (whichever size fits your door the best!)- leaving the plastic intact on the wreath to cut down on the mess.

Needle and strong thread

1 piece of cardstock and a circular object (I used an oatmeal canister) to create your flower template

Straight Pins

Fabric Rotary Cutter (or you can use scissors)

Rotary Mat

Pinking Shears

How to Make a Spring Fabric Flower Wreath

Fabric Flower Wreath for Spring from MomAdvice.com

1. Begin by cutting fabric into 1 1/2″ strips with scissors or a rotary cutter. Wrap the fabric around the wreath, securing with straight pins. Once you come to the end of a strip, simply overlap with the next strip to try to camouflage those pins. Repeat this until the entire wreath is covered and set this aside.

How to Make Fabric Flowers from MomAdvice.com

2. Using a round object in your home for a template, trace a circle on cardstock to create your template for your fabric. The larger the diameter of the item, the larger your flower so size it according to your wreath or how dramatic you want to go!

3. With pinking shears, cut 9 fabric circles for each fabric flower you will be making. I made five of these flowers (that means 45 cut circles) for my wreath. In floral design, it is always advised to go with an odd number to create a good design for your project so I stuck to the odd number of 5.

4. With one fabric circle as a base, begin creating the petals for your flower by folding a circle in half and then in half again (it will look like a little triangle)  and aligning it to the fabric circle. Using your needle and thread (or a glue gun) secure this in place with a stitch. Repeat all the way around the flower for the base of these petals.

How to Make Fabric Flowers from MomAdvice.com

5. Layer another layer of petals on top and finish with the last one being in the center and swirled, as it would in a rose. Tie off and cut the end of your thread to finish these. Using a straight pin, pin your flower into place and then repeat with the rest of the flowers.

Fabric Flower Wreath for Spring from MomAdvice.com

Fabric Flower Wreath for Spring from MomAdvice.com

Fabric Flower Wreath for Spring from MomAdvice.com

You guys! I’m in LOVE! This is such a fun pop of color on my door, cost practically nothing, and I can switch out materials with the seasons if I get bored. I hope you love it as much as I do and feel inspired to make a wreath of your own.

My door is awfully happy this month!

Fun Wreath Ideas from MomAdvice.com

Want to try some other DIY wreaths? Check out these tutorials for decking your door!

diy peep wreath

easy burlap wreath tutorial

how to make a yarn pom pom wreath 

handmade autumn burlap wreath

fabric wreath with matching garland

yarn wreath for all seasons (fun felt flower tutorial on that one!)

How about more craft inspiration from Waverly? Try these!

DIY No-Sew Reversible Chair Cushions

Fabric Wreath & Matching Garland

Fabric Bulletin Board Tutorial

Painting Pumpkins With Acrylic Paints

DIY No-Sew Hand Warmers

DIY Ottoman Serving Tray

15-Minute Scrappy Fabric Trees

Kid Craft: Easy Technique for Painting Gift Wrap

DIY Phone Charging Station

DIY Roll-Up Jigsaw Puzzle Mat

Fabric Flower Wreath for Spring from MomAdvice.com

This post was created in partnership with Waverly Inspirations. Thank you for supporting the companies that support our site! 

Pin It

DIY Teacher Survival Kit Gift (FREE Printable!)

Thursday, February 2nd, 2017

DIY Teacher Survival Kit Gift (FREE Printable!) from MomAdvice.com

This post was sponsored by MARS, Inc and American Greetings. Thank you for supporting the companies that support our site!

Valentine’s Day is the perfect excuse to show someone how much you love them. Often my default for Valentine’s giving is for my family, but this holiday I’m challenging you to think outside of the box and consider someone else special in your life.

How about a little love, for example, for one of your incredible teachers?

I can’t imagine how challenging their job is to come and be the encourager, discipliner, educator, and hero to our children. Day in and day out, they are a positive force in helping our kids succeed and I am so grateful for the molding and shaping they do. What a gift that they share their time and talent each and every day.

I wanted to create a fun DIY Teacher Survival Kit filled with fun supplies with things that would be useful throughout their day, as well as some fun treats to indulge in for a much deserved break. I am sure it goes without saying, but our teachers often use their own funds to keep their classrooms stocked so I love to periodically send along little gifts. This teacher survival kit is not only meant to offer a small indulgence for their hard work, but it also provides little things like note pads, antibacterial wipes, bandages, and other useful items that they might need at their desk.

How to Make a DIY Teacher Survival Kit

DIY Teacher Survival Kit Gift (FREE Printable!) from MomAdvice.com

Supplies Needed (all found at Walmart- check here to find your closest store!)

1 clear plastic container with lid (the dimensions on my container are 15″L x 11 1/2″W x 3 1/4″ H)

Dove® Milk Chocolate Heart Tin

Antibacterial Wipes Drink Mixes (lemonade, coffee, cocoa, etc..)

Small First-Aid Kit

Lip Balms

Small Candle Mouthwash

Lint Roller

Stain Stick or Pen

Pain Reliever

Immunity Boosters

Notepads and Sticky Notes

Check out the American Greetings Valentines Day card selection at your local Walmart, to find Valentine’s Days cards for anyone and everyone special in your life!

(scroll down for your FREE printable label!)

DIY Teacher Survival Kit Gift (FREE Printable!) from MomAdvice.com


DIY Teacher Survival Kit Gift (FREE Printable!) from MomAdvice.com

DIY Teacher Survival Kit Gift (FREE Printable!) from MomAdvice.com

Directions for DIY Teacher Survival Kit Gift

1. Go to your local Walmart and visit the storage container section of the store first to select a container for your project. Having this first will help guide you as you make your selections to fit in your kit. Fill the container as you go with all of your purchases to make this Valentine’s gift special for your favorite teacher with the supplies list I have provided.

2. Assemble your container with your purchases, placing the Dove® Milk Chocolate Heart Tin in first to build your supplies around it.

3. Print our Teacher Supplies Kit label out for the top (link below). You will need to do just a tiny bit of trimming around it to trim off a little of the negative space on this one. Remove the sticker from the backing and secure it to your container.

4. Finish this project with a heartfelt message for your teacher to let them know how special they are.

DIY Teacher Survival Kit Gift (FREE Printable!) from MomAdvice.com

DIY Teacher Survival Kit Gift (FREE Printable!) from MomAdvice.com

DIY Teacher Survival Kit Gift (FREE Printable!) from MomAdvice.com

I can’t think of a teacher that wouldn’t appreciate a gift like this. I am thankful every single day for the teachers that are shaping my kid’s minds. As I see them blossom into such kind and thoughtful people, I know I can attribute it to their excellent influence.

Consider this Valentine’s Day the perfect opportunity to thank a teacher in your life!

Download Your Teacher Survival Kit Label (click the link below!)

Free Teacher Survival Kit Label

This post was created in partnership with MARS, Inc and American Greetings. Thank you for supporting the companies that support our site! 


Pin It