Archive for the ‘Sides’ Category

Gluten-Free Meatball Sub Game Day Appetizer

Monday, October 5th, 2015

Gluten-Free Meatball Sub Game Day Appetizer from MomAdvice.com

*This post is sponsored by Walmart. Thank you for supporting the companies that support this site!

Gluten-free and game day parties? Oof. Not fun, friends, not fun at all! I have learned a lot about social engagements like this though and know the best defense to any social gathering is to carry around my own dishes and drinks so I never go hungry or thirsty again. You will rarely see this girl without her own food!

Game day food is delightfully rich and comforting which is why I love it so darn much.  Today I wanted to create an appetizer that echoed those feelings of comfort and what could be more comforting than a pile of homemade meatballs? This meatball sub appetizer is gluten-free, but I promise you would never know it. It’s got everything I love in a meatball sub simply minus the bread.

Gluten-Free Meatball Sub Game Day Appetizer from MomAdvice.com

I’ve made meatballs a lot over the years (here is one of our favorite dinner dishes that we created together using my standard meatball recipe), but this was my first time trying to create a meatball without the addition of breadcrumbs or panko. With a blend of turkey sausage and ground turkey, I then mixed in fresh parsley, parmesan cheese, a little tomato sauce, and two eggs to bind it all together. I have a cookie dough scoop that I used to make sure all the meatballs were roughly the same size (and so they would fit on my toothpick).

These meatballs are a little more delicate without the breadcrumb binder so I baked them on a parchment-lined cookie sheet so that they would lift easily and not fall apart. Not only does this help the meatball hold its shape, but it also helps cut down your kitchen clean-up time. I would call that a game day win!

Gluten-Free Meatball Sub Game Day Appetizer from MomAdvice.com

Canned crushed tomatoes, garlic, salt, and a dash of sugar yield a vibrant sauce to nestle this appetizer in. I have tried a million different brands of canned crushed tomatoes over the years and I swear by the Great Value brand ones at Walmart. I don’t know why, but it always yields the best pizza sauce for me! I try not to use anything else.

What’s Your Favorite Game Time Recipe?

Are you feeling inspired? Do you have an incredible dish that everyone looks forward to on game days? Walmart happens to be running a GameTime Recipe contest and would love for you to post a photo of your favorite game time recipe on Instagram or Twitter using #WalmartMVPContest. By doing this, you will be entered to win a trip to LA to go to the YouTube studios to have a pre-Superbowl party and create content with some big YouTube stars. How cool is that? Read here for all the official rules! Need some inspiration? Check out all of the great GameTime Recipes that have been posted!
In the meantime, I hope you will enjoy this gluten-free game time creation I have created for you!
Gluten-Free Meatball Sub Game Day Appetizer from MomAdvice.com

Gluten-Free Meatball Sub Game Day Appetizer from MomAdvice.com

Gluten-Free Meatball Sub Game Day Appetizer from MomAdvice.com

Gluten-Free Meatball Sub Game Day Appetizer
Prep time:
Cook time:
Total time:
Serves: 33 meatballs
Ingredients
  • 1 pound ground turkey
  • 1 pound Italian turkey sausage
  • 1/4 cup Parmesan cheese
  • 1/4 cup parsley
  • 1/4 cup tomato sauce
  • 2 eggs
  • Salt and pepper
  • 2 packages baby mozzarella balls (over in the specialty cheese cooler by the deli)
  • 1 can crushed tomatoes
  • 2 tablespoons olive oil
  • 2 teaspoons minced garlic
  • 1 teaspoon sugar
  • 1 teaspoon salt
  • toothpicks
Instructions
  1. In a medium bowl, stir together the ground turkey, parsley, eggs, Parmesan cheese, garlic, salt & pepper, and tomato sauce. Stir gently to combine.
  2. Make your meatballs the standard size and place them on a parchment-lined baking sheet.
  3. Bake at 400 degrees for ten to fifteen minutes (this size took 12 minutes).
  4. Meanwhile, in a pot heat olive oil and add your minced garlic, cooking for just one minute.
  5. Add your crushed tomatoes, the remainder of your small can of tomato sauce, sugar, and salt. Allow this to simmer for ten minutes.
  6. Once the meatballs are done, ladle the sauce into a deep dish or bowl. Skewer one mozzarella ball and one meatball on a toothpick and nestle in the sauce. Serve hot.

As a participant in the Walmart Moms Program, I’ve received product samples and compensation for my time and efforts in creating this post. All thoughts and opinions are my own.


Hard Boiled Eggs In The Oven Recipe

Monday, September 21st, 2015

Hard Boiled Eggs In The Oven Recipe Header

Want hard boiled eggs fast? Try this oven method for baking eggs for deviled eggs, Easter eggs, egg salad, or a simple protein-packed snack. Make perfect hard boiled eggs fast with this smart Alton Brown approved method.

Have you ever prepared hard boiled eggs in the oven?

I had seen the tutorials floating around Pinterest, but I gave this method a spin while meal prepping for our busy week.

These are the perfect hard boiled eggs for an afternoon snack or for a quick lunch with chopped veggies and I can’t wait to show you how easy this method is.

Although I rely usually on my Instant Pot, you are limited to just a dozen at a time.

It does seem kind of crazy to bake your eggs, but this is a great way to make a lot of eggs for your week or for your Easter egg decorating.

Hard Boiled Eggs In The Oven Recipe Placed in Muffin Tin

Make Hard Boiled Eggs in the Oven Recipe

Here is the thing, results seem to vary on success with baking your hard boiled eggs in the oven and it’s a good idea to give these a test run in your oven with just a couple of eggs rather than wasting an entire dozen. 

What Can Improve My Experience Baking Hard Boiled Eggs?

Hard Boiled Eggs In The Oven Recipe

Get an Oven Thermometer

I am telling you that one of the best gadgets you can buy, if you are not getting consistently good results with baking in your oven, is an inexpensive oven thermometer.

I have had ovens, in apartment rentals, that were fifty degrees off or more. I could have saved myself a lot of tears and burnt dishes if I would have known that this cheap little gadget could improve the results in my cooking in a dramatic way.

Try Different Temperatures

Once you know that your oven temperature is correct (or how to gauge it if isn’t) try baking the eggs at 325 degrees first.

If your eggs are not to your liking, increase the temperature to 350 degrees.

Hard Boiled Eggs In The Oven Recipe in Ice Water

Stop the Brown Spots

Brown spots can develop on your egg from resting in the muffin tins, particularly with a dark muffin tin like the one I am showing in this picture.

Although the spots don’t really bug me, you can prevent them by using a silicone muffin pan, baking in a mini muffin tin, or lining your muffin tin with liners, tin foil.

Wildly I have also heard that cotton pads/balls can offer a buffer between your egg and the bottom of the pan. Alton Brown, in fact, actually recommends placing the eggs directly on your oven racks and skipping the muffin tin altogether.

I’d love to hear your thoughts on that one and if you have any success with it.

Make Peeling Easier

Did you know that fresh eggs can actually be more difficult to peel? We have discovered peeling the eggs is so much easier with eggs that have been in our fridge at least a week.

Hard Boiled Eggs In The Oven Recipe Storing

How Should I Store My Eggs?

Once you have your week’s worth of eggs, how the heck do you store them?

I read a lot of advice on this one when we prepared our eggs!

Ideally, you want to keep these in their shell since it acts a barrier to bacteria and it helps them last longer too.

Within the shell, you can eat these safely for up to seven days (although they never last that long in our house!!).

Hard Boiled Eggs In The Oven Recipe Finished Yolks

 Peeled hard-boiled eggs can be stored in the refrigerator in a bowl of cold water to cover for about five days (change the water daily) or in a sealed container without water (cover the eggs with damp paper towels) for the same length of time.

We store ours in their shell since I am worried about the bacteria factor.

I also ended up stumbling on this egg storage method for our fridge so we started doing that instead.

How Do I Cook Hard Boiled Eggs on the Stove Top If I Don’t Love the Oven Method?

My mom was always a big fan of this stovetop method and I love that you don’t need a gadget to make it happen!

Place eggs in a large pot of water and cover them with an inch of water (cold). cover the pan with a lid and listen for boiling water. When the water has come to a boil, let it boil over high heat for 6-7 minutes. Remove these with a slotted spoon and give them the same ice water bath treatment as you do for the oven method.

Hard Boiled Eggs In The Oven Recipe
 
Recipe Type: Breakfast
Author: MomAdvice.com
Prep time:
Cook time:
Total time:
Serves: 12 or more servings
Want hard boiled eggs fast? Try this oven method for baking eggs for deviled eggs, Easter eggs, egg salad, or a simple protein-packed snack. Make perfect hard boiled eggs fast with this smart Alton Brown approved method. This quick method is perfect for big-batch make-ahead preparation of hard boiled eggs. Be sure to read the post for additional tips for success.
Ingredients
  • 1 dozen eggs or more (preferably, older eggs that have been in your fridge for one week or more)
Instructions
  1. Preheat oven to 325 degrees
  2. Put 1 egg in each of 12 muffin cups.
  3. Bake in preheated oven for 25-30 minutes.
  4. Plunge baked eggs in a large bowl of ice water until cooled completely, about 10 minutes.
  5. Remove the room temperature eggs with a slotted spoon and store in your refrigerator for up to a week.


As an Amazon Associate I earn from qualifying purchases.

Love these tips? Here are a few other great make-ahead meal prep ideas for your week!

How to Make Perfect Brown Rice in Your Rice Cooker from MomAdvice.com how to make perfect brown rice in your rice cooker

How to Make Quinoa in the Rice Cooker how to make quinoa in your rice cooker

Roast Frozen Chicken in Bulk roast frozen chicken in bulk for your week

Instant Pot Shredded Chicken from MomAdvice.com instant pot shredded chicken for all your recipes

Happy cooking, friends!

Make Hard Boiled Eggs in the Oven Recipe Header


Pin It

Make-Ahead Breakfast Burritos

Friday, September 11th, 2015


Make ahead  and freeze these breakfast burritos from MomAdvice.com


Here’s one of our favorite breakfasts that helps our mornings run smoother – easy burritos that can be pulled from the freezer whenever you need them. It doesn’t hurt that they’re delicious and customizable, too!


Make-Ahead Breakfast Burritos

Back-to-School requires a lot of planning and getting back on track with a healthy breakfast is one thing I want to work on this year.

Today I wanted to show you a recipe for Make-Ahead Breakfast Burritos that can be made ahead and also created for your gluten-free or dairy-free family members.  

One batch of these freezer breakfast burritos can yield 15-18 burritos, depending on how you stuff  ’em, and they are filled with everything your kids need to start their day on the right foot.

I am partnering with Walmart on this back-to-school idea today so you can snag all the supplies you need right at their store.


Make-Ahead Breakfast Burritos


What I love about these burritos is that they are not only filled with fresh whole foods, but also that they are inexpensive to create.

With kitchen staples like eggs, cheese, potatoes, and tortillas, it is likely you already have a few things on hand for this back-to-school breakfast.

Create an assembly line of ingredients in the kitchen and have your kids jump in on the fun.


The potatoes are tossed in paprika and garlic powder for a tasty topping to the eggs.

I love a little Italian turkey sausage, red peppers, and cheddar or colby cheese for these burritos.

You can create your own flavor combinations or consider clearing out items from the fridge and making a unique combination all your own.


Make-Ahead Breakfast Burritos


Be careful to not overstuff the burritos so they can be wrapped easily and place them on a parchment-lined cookie sheet to place in the freezer until frozen.

Once these are frozen you can tuck them in a freezer bag and just grab them when you need them.

Do you know how to wrap a burrito?

 If not, I love this tutorial for perfectly wrapped breakfast burritos!


Make-Ahead Breakfast Burritos


With one kid in middle school (GASP!) and a daughter who prefers not to eat in the morning, I am hoping that these burritos will be the perfect way to get them motivated to eat a healthy breakfast.

Just grab one from the freezer and wrap it in a dampened paper towel for the microwave for three minutes (flip it halfway through).

Wrap in foil and let them eat them on the way to the bus or in route to school.  

These also make a great after school snack,  after sports activities, or an impromptu dinner with their pals while doing homework.

To make them dairy-free substitute the cream with almond milk (which is what we did) and add a vegan cheese to them or leave them cheeseless.

For a gluten-free burritos, Walmart offers this option in their stores.

We hope you love this delicious breakfast as much as we did.

We have already started raiding our make-ahead breakfast burritos for quick lunches this week.

I am shocked how beautifully these reheat and taste.

There are no excuses why you can’t tackle a healthy breakfast.

Be sure to check out my recipe for Slow Cooked Honey Crisp Apple Oatmeal for another fun breakfast treat!


Make-Ahead Breakfast Burritos

Make-Ahead Breakfast Burritos
 
Recipe Type: Breakfast
Prep time:
Cook time:
Total time:
Serves: 18
A make-ahead breakfast burrito that you can tuck in your freezer for a healthy breakfast, snack or meal.
Ingredients
  • 2 tablespoons olive oil
  • coarse salt and freshly ground pepper
  • 3 large russet potatoes, peeled and diced
  • 1 teaspoon garlic powder
  • 1/2 teaspoon paprika
  • salt & pepper
  • 1 lb Italian Turkey Sausage
  • 1 dozen eggs
  • 2 tablespoons cream (or milk substitute)
  • 1 red bell pepper, cored and diced
  • 1/2 pound cheese of your choice (or vegan cheese)
  • 18 tortillas, soft-taco size (8-inch), whole-wheat, flour, or gluten-free tortillas
Instructions
  1. To roast potatoes, preheat your oven to 475 degrees. Line a cookie sheet with parchment paper. Drizzle diced potatoes with oil and season with salt, pepper, paprika, and garlic powder. Toss the potatoes together to evenly coat in oil and seasonings, and spread out into a single layer on the parchment. Roast until browned on the bottom and tender, about 20-25 minutes.
  2. Brown your sausage. Once it is cooked through, set aside in a large bowl, leaving about a 2 tablespoons of drippings in the pan for the eggs.
  3. In a medium bowl, whisk the eggs with the cream (or milk substitute) and pour into the sausage skillet. Cook over medium heat until just set, stirring as needed. season with salt and pepper and stir to combine, and transfer to the bowl with sausage.
  4. In the same skillet, cook your red peppers over medium heat until fragrant and softened, about 10 minutes.
  5. Make an assembly line- tortilla, cheese, followed by a small handful of potatoes and a scoop of the egg/sausage mixture. Roll the tortilla up.
  6. For freezing, place burritos on a wax- or parchment-lined baking sheet and place in the freezer until firm, at least an hour. Transfer to large freezer bags and keep frozen for up to one month.
  7. For reheating, place a frozen burrito in a dampened paper towel and microwave for three minutes, turning halfway through.
 
Recipe Adapted From: Dinners For Winners


Easy freezer recipe for breakfast burritos from MomAdvice.com


Make ahead and freeze this easy breakfast burritos from MomAdvice.com


walmart_mom_disclaimer


Meal Prep: Breakfast Sandwiches Recipe from MomAdvice.com

Make Ahead and Freeze Breakfast Sandwiches


DIY Breakfast Caddy

DIY Breakfast Caddy


Applesauce Cinnamon Breakfast Muffins

Honey Sweetened Applesauce Cinnamon Breakfast Muffins


Quinoa Berry Breakfast Bowls

Quinoa Berry Breakfast Bowls

Pin It

21 Easy Slow Cooker Meals

Thursday, August 13th, 2015

Slow cooker meals are always a cornerstone of our family’s meal plans since it’s so convenient to have dinner cooking while you’re away (or breakfast cooking while you sleep!). Which makes it perfect to republish this article full of slow cooker meal ideas for our Focus on Meal Planning M Challenge. I hope you enjoy seeing these recipes again!

21 Easy Slow Cooker Meals from MomAdvice.com

I have a confession to make. I am addicted to my slow cooker! And so I’m sharing 21 of our favorite slow-cooker meal recipes that you can create and enjoy all month long. These recipes are a few of our tried and trues over the years on MomAdvice and will make your week go oh-so-much smoother!

I believe that the slow cooker can be every mother’s (or father’s!) best friend. What could be easier than throwing in a few ingredients, plugging it in, and then going about your day, without the worries of needing to figure out what everyone is going to eat for dinner?

Ninja Cooker

Truth be told, I have moved up in the slow cooking world and am now madly in love with my Ninja Cooker. I use it almost daily and love that I don’t have to dirty my stove or skillets to brown my meat anymore. I would definitely add that one to your next holiday wish list! You can read more of my thoughts on that over here.

In honor of this kitchen gadget, I have put together a month’s worth of meals using your slow cooker. Each of these meals will have a recipe and tips for making your dinner hour go more smoothly. Keep in mind that many of the recipes accommodate six to eight people so you may be able to cover (at least) a month’s worth of meals.

Slow Cooker Honey Bourbon Chicken Wings

Slow Cooker Honey Bourbon Wings


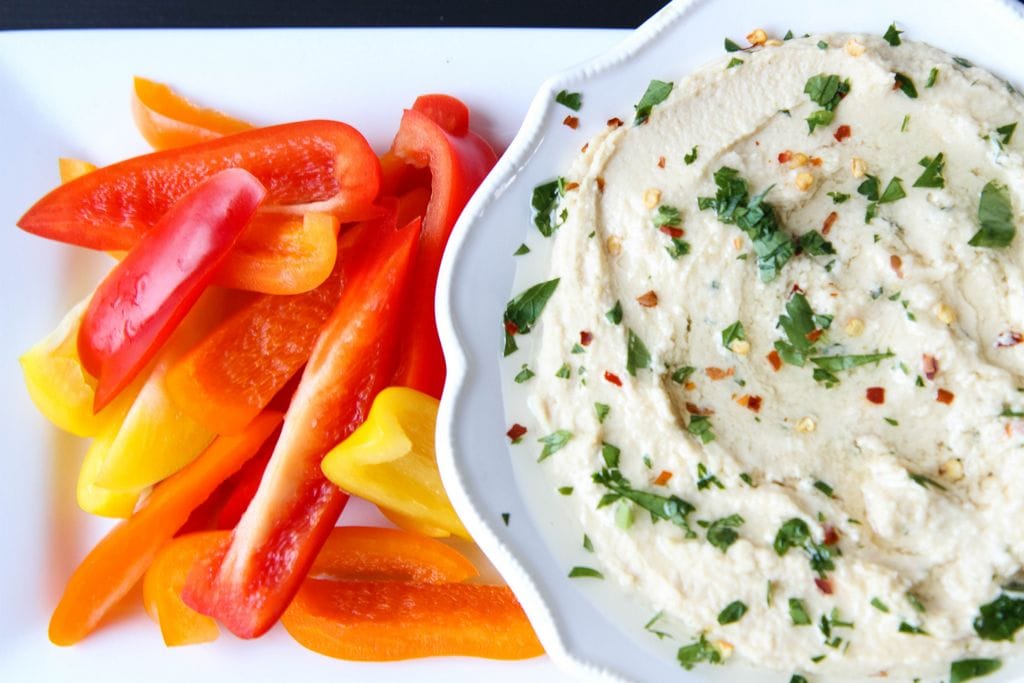
Side Ideas- Fresh veggies & blue cheese dressing for dipping, steamed broccoli, and fresh fruit.

Slow Cooker Stuffed Green Pepper Soup

Stuffed Green Pepper Soup

Side Ideas- Pumpkin Cornbread Muffins & Salad

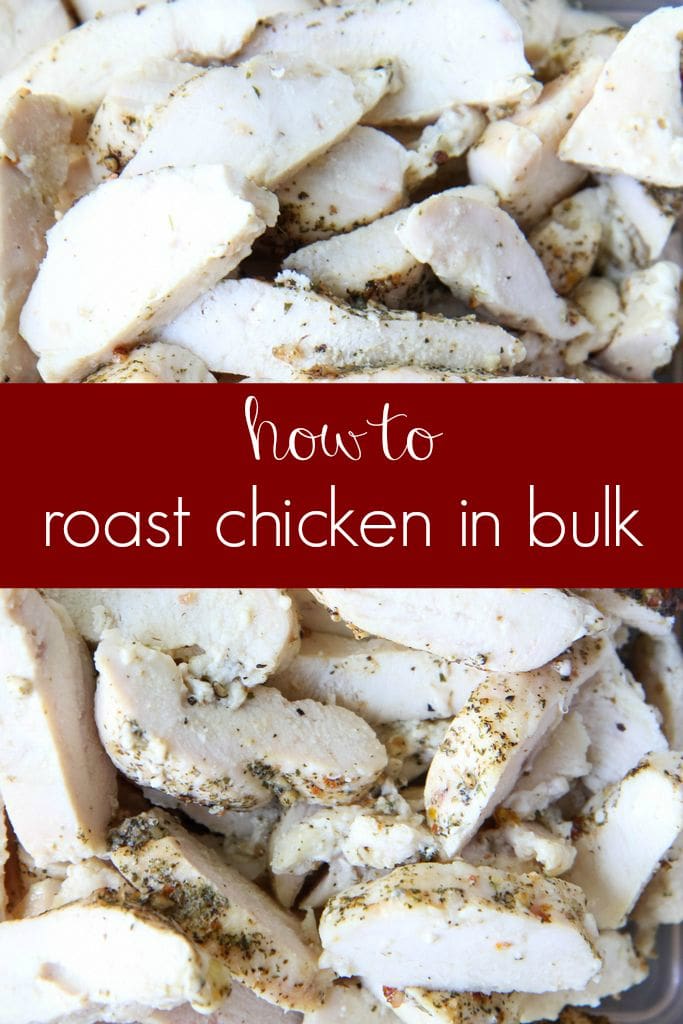
 Sticky Chicken Recipe

1 tbsp salt

2 tsp paprika

2 tsp dried oregano leaves

2 tsp dried thyme leaves

1 tsp pepper

1 tsp garlic salt

3 lb roasting chicken

1 cup chopped onion

In a small bowl, combine all ingredients except chicken and onion. Rub herb mixture inside and outside of chicken. Place in food storage bag; seal bag. Refrigerate overnight. Remove chicken from bag; stuff with onion. Place in crockpot on low 6-8 hours; high 2-4 hours. Chicken juices should run clear and chicken reaches 180*. Let stand 15 minutes before carving.

Side Ideas- Mashed Potatoes & Corn

Pot Roast Italiano

Pot Roast Italiano


Side IdeasRoasted Green Beans & Orzo Pasta
Tortellini & Turkey Divine

 Tortellini & Turkey Divine

1 1/2 pounds Italian sausage turkey

2 clove garlic– minced

2 small onions– chopped

2 cans whole peeled tomatoes- 16 ounce cans

1 1/4 cups dry red wine

5 cups beef broth

1/2 teaspoon dried basil

1/2 teaspoon dried oregano

2 zucchini- sliced

1 green bell pepper- chopped

3 tablespoons chopped fresh parsley

1 package cheese-filled tortellini


In a large pot, cook sausage over medium heat until brown. Remove with a slotted spoon, and drain on paper towels. Drain fat from pan, reserving 3 tablespoons. Cook garlic and onion in reserved fat for 2 to 3 minutes. Stir in tomatoes, wine, broth, basil, and oregano. Transfer to a slow cooker, and stir in sausage, zucchini, bell pepper, and parsley. Cover, and cook on Low for 4 to 6 hours. Bring a pot of lightly salted water to a boil. Cook pasta in boiling water until al dente, about 7 minutes. Drain water, and add pasta to the slow cooker. Simmer for a few minutes, and season with salt and pepper before serving.

Side Ideas- Salad & Fresh Fruit

Slow Cooked Italian Beef

Italian Beef Sandwiches

Side Ideas- Oven Fries & Apple Slices

Sloppy Joes

 Side Ideas- Tortilla Chips & Carrot Sticks

Pumpkin Chili

Pumpkin Chili

Side Ideas- Pumpkin Cornbread Muffins & Fresh Fruit

Slow Cooker Beef Stew

Slow Cooker Beef Stew

2 pounds beef stew meat – cubed

2.5 cups carrots

2.5 cups potatoes

1 cup celery

1 can diced tomatoes – with the juice poured in

1 can beef broth

1 cup water

1 tsp ground mustard

3 sprigs rosemary

Put beef in a zipper bag with a 1/4 cup of flour and toss to coat. Brown the meat in a skillet and place on the bottom of the crock pot. Coarsely chop vegetables and place on top of the meat. Pour in the can of diced tomatoes with juice, can of beef broth, water, and ground mustard. Place sprigs of rosemary on top and cook on high for four hours or on low for six to eight hours.

Side Ideas-  Make your own salad bar!

Slow Cooked Apple Oatmeal

Slow Cooked Honeycrisp Apple Oatmeal


Side Ideas-  Create your own oatmeal toppings bar and serve with green smoothies.

3-Ingredient Chicken Tacos

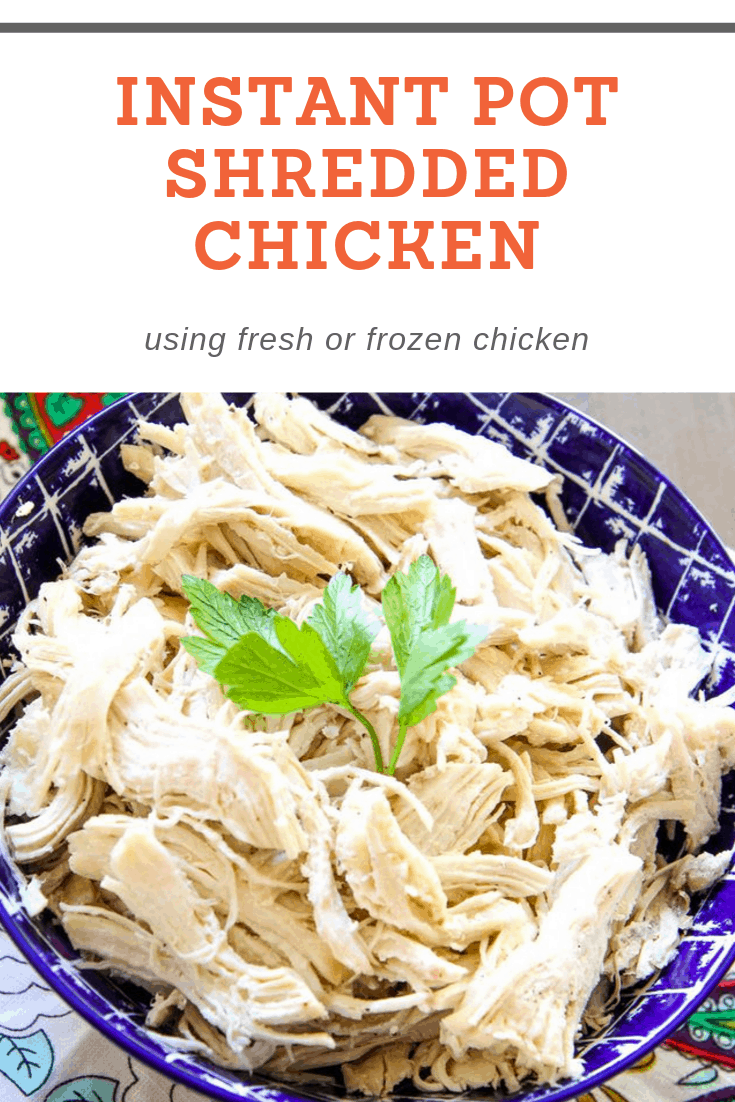
3-Ingredient Slow Cooked Chicken Tacos

1 package taco seasoning mix

1 cup chicken broth

1 pound chicken breasts – boneless & skinless frozen chicken breasts

Dissolve taco seasoning into chicken broth. Place chicken breasts in slow cooker and pour broth over them. Cook on LOW for 5 hours. With two forks, shred the chicken meat into bite-size pieces. Serve with your favorite taco toppings.

Side Ideas- Roasted Corn Salsa With Tortilla Chips

Slow Cooker Spaghetti Sauce

Slow Cooker Spaghetti Sauce

1 package Italian Turkey Sausage – mild

2 cans crushed tomatoes

1 can petite diced tomatoes

1 can tomato paste

½ cup beef broth

Brown the turkey sausage in a large skillet. Place cooked sausage in the bottom of the slow cooker. Pour over the sausage all of the other ingredients, including any of your own Italian seasonings. Cook sauce on low for six hours or on high for three to four hours. Serve over your favorite pasta.

Pulled Pork Stuffed Sweet Potatoes

Pulled Pork Stuffed Sweet Potatoes


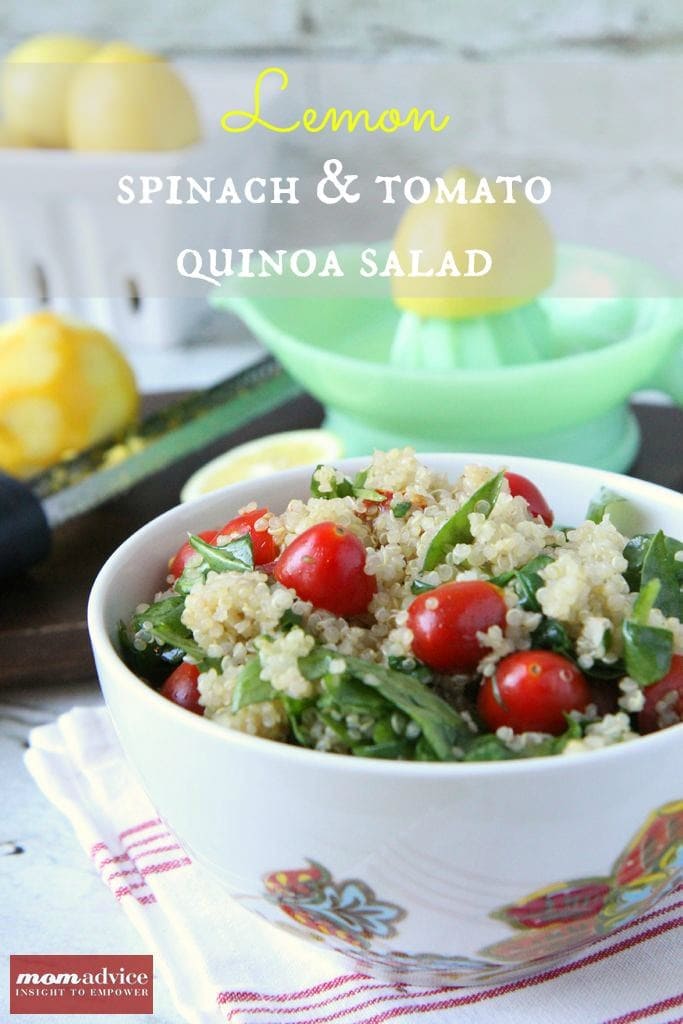
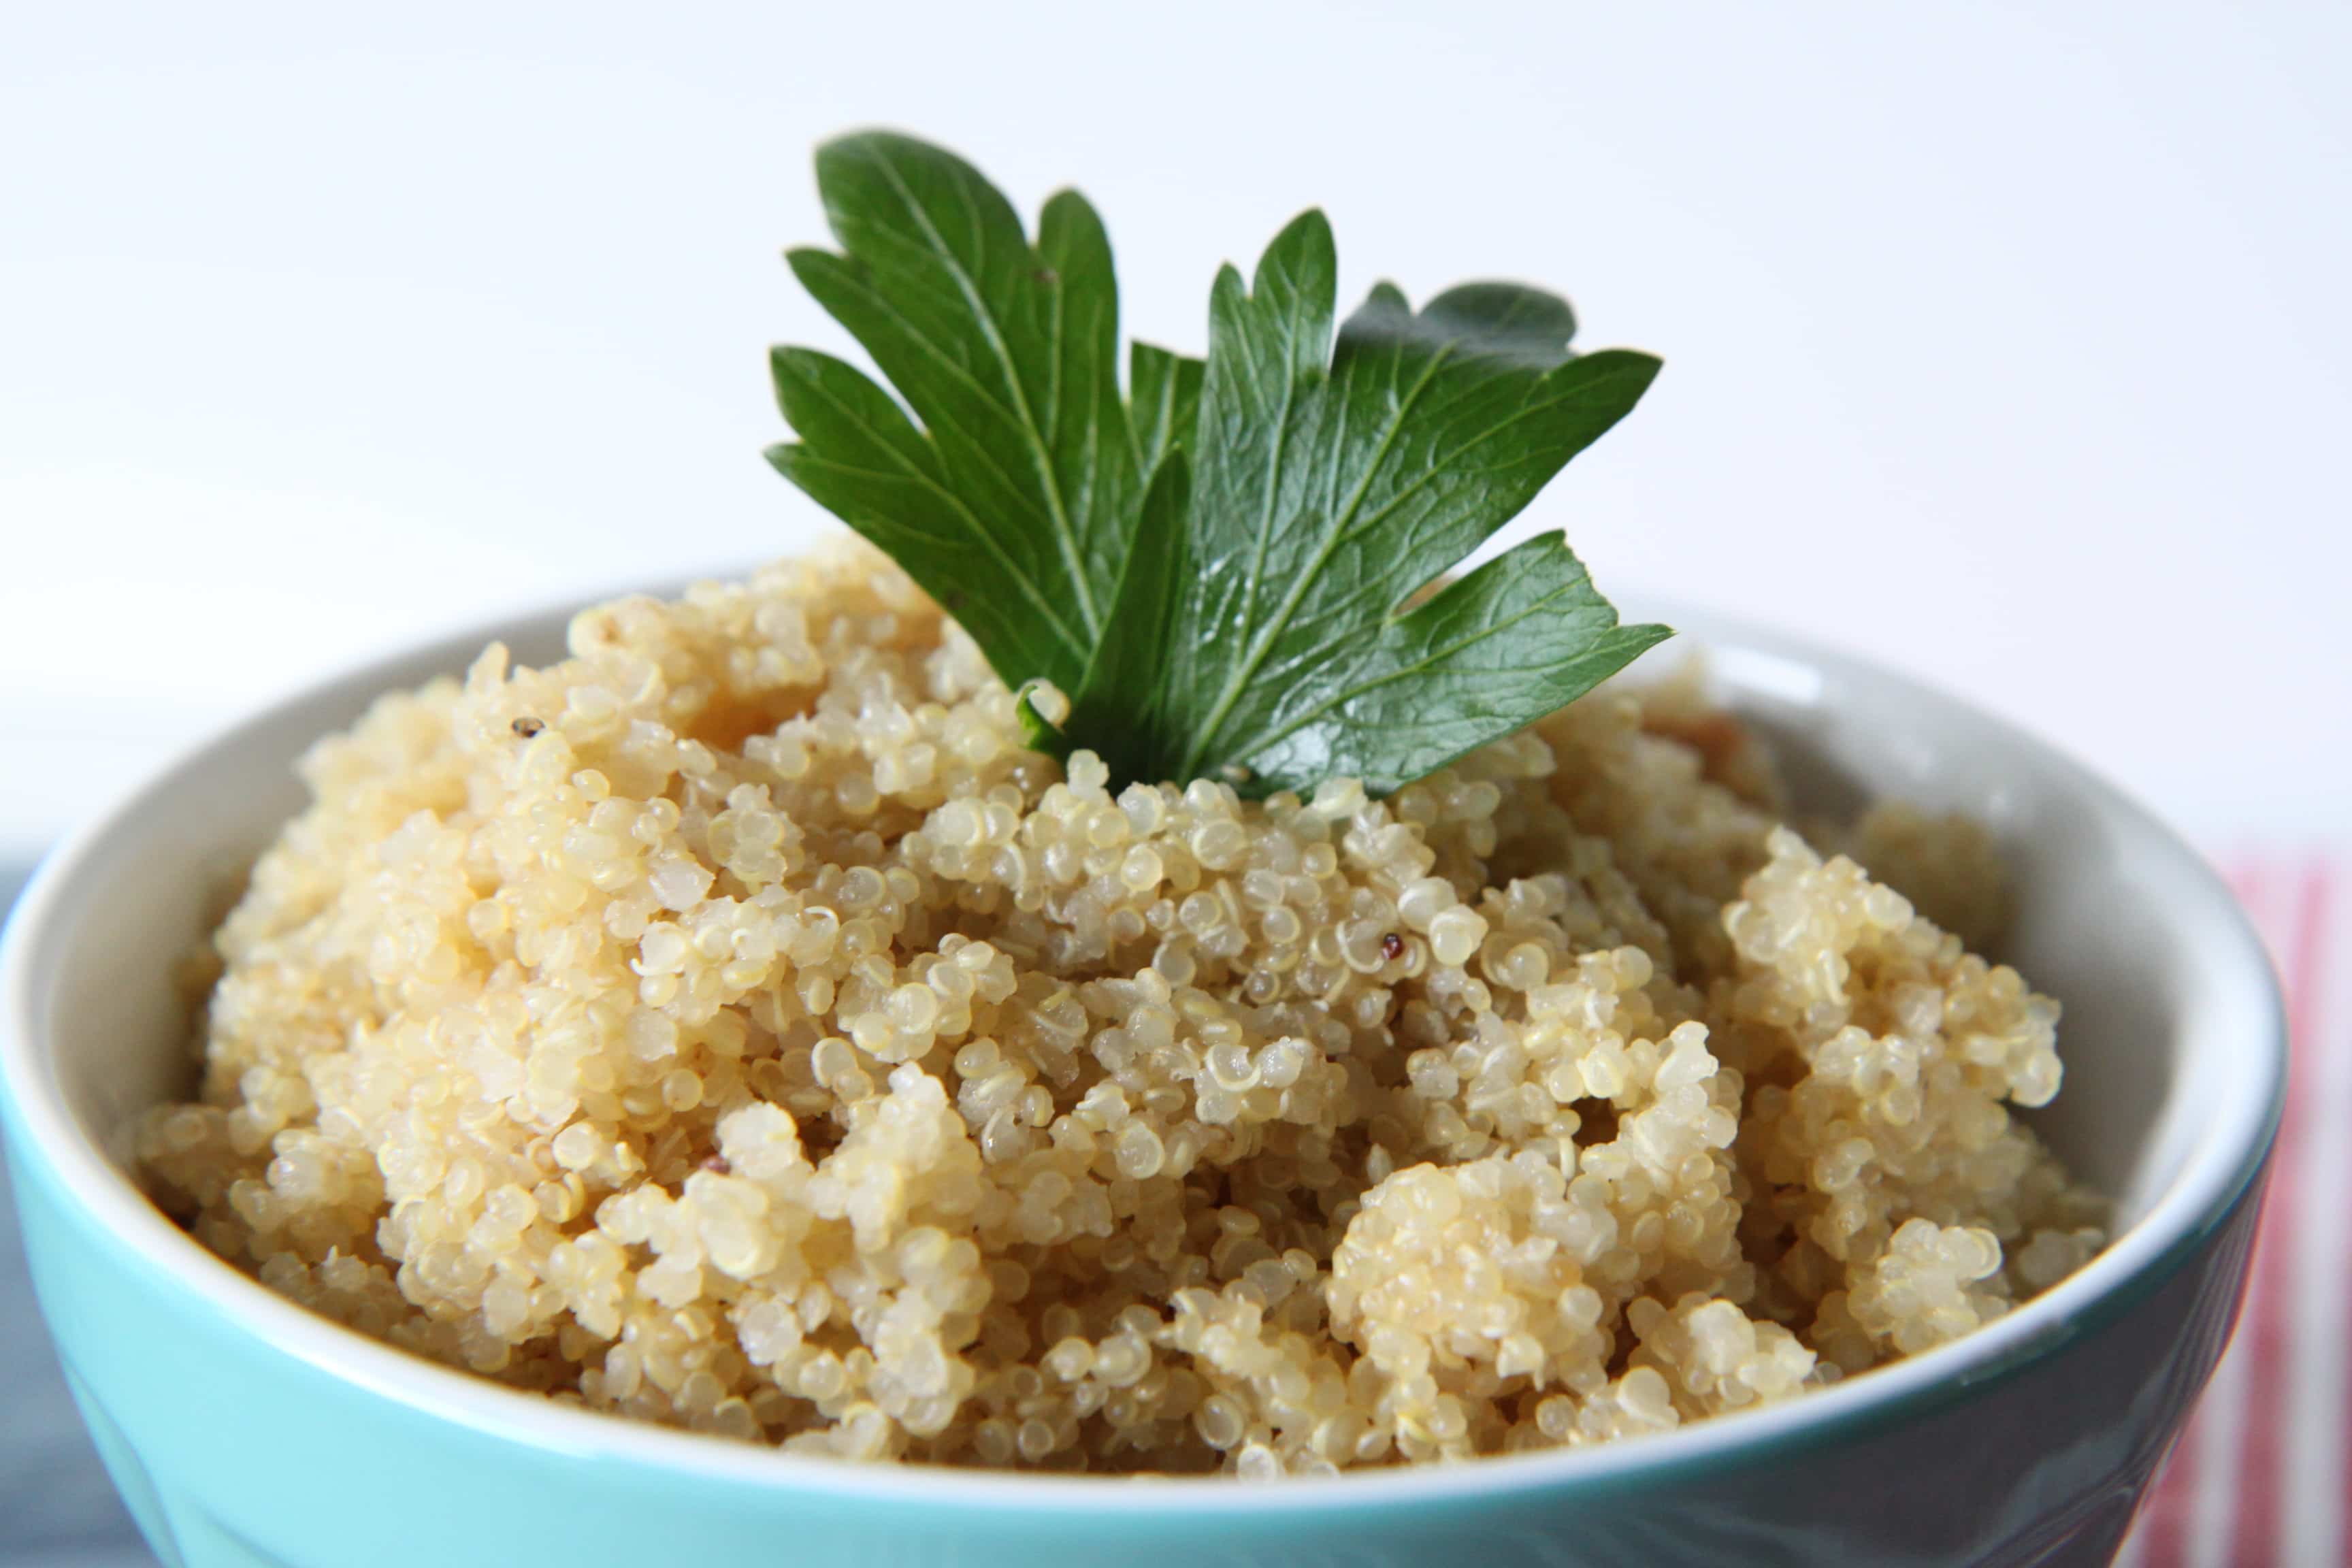
Side Ideas- Lemony Spinach & Tomato Quinoa Salad & Carrot Sticks

Mongolian Beef

 Mongolian Beef 


Note- to make this in your slow cooker, brown the beef and then heat all the ingredients together on LOW for four hours.

Side Ideas- Brown Rice & Steamed Broccoli

Slow Cooker Chicken BBQ Sandwiches


Side Ideas- Shoestring Oven Fries & Carrot Sticks

Taco Soup

1 pound ground turkey

1 can chili beans with liquid

1 can kidney beans with liquid

1 can whole kernel corn with liquid

2 cans diced tomatoes

1 can tomato sauce

2 cups water

1 package taco seasoning mix

In a medium skillet, cook the ground beef until browned over medium heat. Drain & set aside. Place the ground beef, chili beans, kidney beans, corn, tomato sauce, water, diced tomatoes, & taco seasoning mix in a slow cooker. Mix to blend and cook on Low setting for eight hours.

Side Ideas-  Roasted Corn Salsa With Tortilla Chips

Chicken Italiano

Chicken Italiano


Side Ideas- Spaghetti & a DIY Salad Bar

 Breakfast Casserole

Note- I recommend doing this one using this technique to prevent burning and even cooking.

1 pound turkey sausage – sweet or spicy

1 teaspoon mustard powder

1/2 teaspoon salt

4 eggs, beaten

2 cups milk

6 slices white bread – toasted and cut into cubes

8 ounces shredded Cheddar cheese

Crumble sausage and cook thoroughly. Drain meat. In a large bowl, mix all ingredients together evenly. Place the casserole in the fridge overnight. In the morning put in the slow cooker for four hours on high or six hours on low.

Side Ideas- Fresh Fruit & Grapefruit Halves

Gluten-Free Orange Chicken

Orange Chicken


Note to make this in your slow cooker, brown the chicken and then heat all the ingredients together on LOW for two-four hours.

Side Ideas- Brown Rice & Steamed Broccoli

Chicken Lasagna Florentine

2 cans cream of chicken soup – (10-3/4-oz) reduced-fat, reduced-sodium, undiluted

1 package frozen chopped spinach, thawed, and squeezed dry (10 ounces)

9 oz chicken – diced cooked chicken (two small or one large boneless skinless chicken breast)

8 oz sour cream – low-fat

1 cup milk

2 oz grated parmesan – (1/2 cup)

1/3 cup onion – chopped

1/2 tsp salt

1/4 tsp black pepper

1/8 tsp ground nutmeg

9 uncooked lasagna noodles

1 cup mozzarella cheese – (4 oz) shredded part-skim

Combine first 10 ingredients in large bowl.

Spread about 1/4 cup sauce in bottom of a 5-quart slow cooker coated with cooking spray. Add 3 uncooked lasagna noodles, breaking noodles in half as necessary to fit slow cooker. Spread one-third of chicken mixture over noodles, sprinkle with 1/3 cup mozzarella. Layer 3 more noodles, half of remaining chicken mixture, and 1/3 cup mozzarella. Top with remaining noodles and chicken mixture; sprinkle with remaining 1/3 cup mozzarella cheese.

Cover with lid; cook on high-heat setting 1 hour. Reduce to low-heat setting; cook 5 hours or until pasta is done.

Side Ideas- Roasted Green Beans & Grapes


Slow Cooker Lemon Chicken

3 pound chicken – whole or pieces

1 tsp dried oregano

½ teaspoon dried rosemary

garlic cloves – minced

2 tablespoons butter

¼ cup sherry wine or chicken broth

¼ cup lemon juice

Wash chicken; pat dry; season chicken generously with salt and pepper; sprinkle half of oregano, rosemary and garlic inside cavity of chicken; melt butter in frying pan and brown chicken; transfer to slow cooker or crockpot; sprinkle with remaining oregano, rosemary and garlic; add sherry to frying pan and stir to loosen brown bits; pour into slow cooker. Cover, cook on low for 7 hours; add lemon juice and cook 1 more hour (total of 8); transfer chicken to cutting board; skim fat from juices and serve over chicken.

Side Ideas- Have two slow cookers? Try our easy Slow Cooker Mashed Potatoes!

Feel free to share your favorite slow cooker recipes below! I’d love to add them to our list!

This post contains affiliate links.

Smart Pool Snack Ideas

Tuesday, July 21st, 2015

Smart Pool Snack Ideas from MomAdvice.com

If you live at the pool like we do in the summer, you won’t want to miss today’s post over on the Wild Oats blog. After years of pool days, we have learned a few things about the best snacks to pack and we are sharing them on the blog today.

Whether you love sweet or salty, there is a snack for you on today’s list! I can’t wait to hear what your winning pool snack combination is!

Head on over to the Wild Oats blog to get the scoop on the best snack ideas for the pool!

Pin It

Pizza Quinoa Mushrooms

Tuesday, July 14th, 2015

Pizza Quinoa Mushrooms from MomAdvice.com

*This post is sponsored by Wild Oats.  Thank you for supporting the companies that support this site!

There is not much that I miss since going gluten-free except the convenience of eating anywhere where I want without worry.

In fact, there is only one food that I really and truly miss…

Pizza.

Pizza Quinoa Mushrooms

I have blogged about our weekly pizza night together that has been a family tradition for many years. I can admit it,  I miss the days of sitting down and sharing a pizza with my kids. For awhile, our pizza nights lapsed- making pizza for everyone else and me eating a cardboard version of it just wasn’t in the cards at first. The only way that I can explain it is that it was a time of mourning for me. Others echo me when they say that they were blue to find out that they needed to make diet switches. It is like a little part of your life has changed and won’t be the same again.

Luckily, substitutions can be made with gluten-free crusts, but they often lack the flavor of that soft, doughy variety. I still make them on occasion, but I wouldn’t say gluten-free pizza is my favorite thing.

Portobello mushrooms, hollowed and inverted, can make a delicious substitute for an expensive gluten-free crust (and they also double as a mean burger!).  I love the meaty taste of these and I love how they can stand up to baking and grilling in the summer season.  When baked, a little drizzle of olive oil and a dusting of salt & pepper, creates a delicious fun base to your pizza. I would say that these trump a gluten-free crust any day and they are made with whole foods that you can be proud of!

Pizza Quinoa Mushrooms

This girl is no stranger to quinoa and we have talked about easy ways to prepare it on the Wild Oats blog. Of course, quinoa plain over and over again can be a little boring so to bring the pizza flavor into this dish, we incorporate Wild Oats Basil and add tomato flavor into the quinoa. When mixed in, it tastes like a protein-packed pizza sauce.

If you are vegan or dairy-free, the quinoa can be cooked in veggie broth and the cheese can be switched with a vegan cheese.

These are all the flavors I love about pizza without the belly ache. It’s a pizza that you can really feel good about for your whole family.

No need to be sad about that pizza night anymore- I’ve got you covered! You can snag all these fun products from Wild Oats (an affordable organic option) from Walmart!

Pizza Quinoa Mushrooms

Pizza Quinoa Mushrooms
Prep time:
Cook time:
Total time:
Serves: 2 servings
All the pizza flavor you love without the guilt! This gluten-free pizza is a fun way to get in your veggies and protein with a delicious pizza sauce.
Ingredients
  • 4 extra-large portobello mushrooms, stems and gills removed
  • Olive Oil
  • Salt and pepper to taste
  • 3/4 c. uncooked Wild Oats quinoa, rinsed thoroughly
  • 1 (8 oz.) can tomato sauce
  • 2 garlic cloves, minced
  • 1/4 teaspoon Wild Oats dried basil
  • 1/4 teaspoon Wild Oats dried oregano
  • 1/2 teaspoon Wild Oats onion powder
  • 3/4 cup shredded mozzarella cheese
  • Fresh Italian Parsley
Instructions
  1. Preheat oven to 400ºF.
  2. Spray a baking sheet with cooking spray. Drizzle olive oil on the tops and bottoms of your portobello mushrooms . Season well with salt and pepper. Bake for 10 minutes.
  3. While the mushrooms are baking, cook the quinoa according to package directions.After the quinoa is prepared, stir in the tomato sauce, garlic, basil, oregano, and onion powder. Season to taste.
  4. After 10 minutes, remove the baking sheet from the oven and flip the mushrooms over. Make sure to remove any liquid inside that may have cooked out to help prevent having a soggy pizza.
  5. Divide the quinoa mixture into the mushrooms, then top each one with cheese. Return the baking sheet to the oven and bake for 10 minutes more.
  6. Finish with a sprinkling of fresh Italian parsley.


Get to know Wild Oats!

Check out Wild Oats on their blog,  Facebook, Instagram, Twitter, &Pinterest.

 * This post is sponsored by Wild Oats. Thank you for supporting the companies that support this site!

Pin It

4th of July Flag Fruit Dessert Tray

Thursday, June 18th, 2015

4th of July Flag Fruit Dessert Tray

*This post is sponsored by Walmart. Thank you for supporting the companies that support this site!

One of my favorite celebrations is 4th of July and today I wanted to share with you a fast & easy 4th of July fruit dessert platter you or your kids can make into a flag to celebrate the holiday.  

This is an easy and festive 4th dish and I have to say that this delivers on the red, white, & blue.


4th of July Flag Fruit Dessert Tray

4th of July Flag Fruit Dessert Tray

Since I am gluten-free, I often have to bypass the dessert trays.

As an adult, it is not a big a deal.

As a child, the dessert table is EVERYTHING, especially when it comes to holiday feasting.

I wanted to create this cute tray just for them and I found these glutino gluten-free yogurt covered pretzels are not only a fantastic way to add the white we needed for our stripes, but they also are highly addictive and delicious.

You can certainly make your own white chocolate covered pretzels, if you are feeling ambitious, but these cut down on the time invested in creating our cute tray!


4th of July Flag Fruit Dessert Tray


Flag cupcake picks can be a great way to festively pick up a berry (or ten).

 I found these at a local party supplies store and they are an adorable touch to a festive spread.


4th of July Flag Fruit Dessert Tray


I think the best part about this tray is that it is not only relatively healthy, but it is also a tray that you can confidently create and know it will get eaten.

After a big cookout, light desserts are a wonderful addition to the table for snacking on.

Have too many desserts on your table?

Save this to serve up during the fireworks.

It will be gone before it even gets dark enough to see them!

Check out the instructions below on how many supplies you need to put this tray together!

4th of July Dessert Tray /MomAdvice.com

4th of July Flag Fruit Dessert Tray
 
Prep time:
Total time:
Serves: 8 servings
A fast & festive gluten-free fruit dessert tray your guests will flip for.
Ingredients
  • 2 pints strawberries trimmed, rinsed, and dried
  • 1 pint blueberries, rinsed
  • 2 packages of glutino yogurt-covered pretzels (or white chocolate regular pretzels, if not going gluten-free on this tray)
Instructions
  1. On a 9×13 cookie sheet, place a small clear plastic (or glass) square container of berries to create your blue flag corner.
  2. Now alternate the red berries and white pretzels in stripes until you have filled your tray.


While you are here, these are a few more of my favorite 4th of July ideas on MomAdvice! xo


Cupcake Pick 4th of July Wreath

Make a 4th of July wreath out of cupcake picks (world’s easiest festive touch!)


Celebrating 4th of July Heroes With Your Kids

Teach your kids about the REAL 4th of July Heroes (the reason we all celebrate!)


Diy Family-Friendly Bar Cart

Turn a tool cart into a bar cart for the 4th (adorable girl not included!)


DIY slow Cooker Citronella Candles

Keep the bugs away with DIY Citronella Candles (made in your slow cooker!)


Red, White, & Blueberry Trifle

Make a Red, White, & Blueberry Trifle (another light & easy dessert!)


3-ingredient Watermelon Granita

Wow your guests with this Watermelon Granita (just 3-ingredients!)


Watermelon Coconut Lime Smoothies #recipe via momadvice.com

Or blend up leftover watermelon into this Watermelon Lime & Coconut Ice (I love leftovers!)


Blueberry Sangria Lemonade

Make a festive Blueberry Sangria Lemonade for toasting the holiday (cheers and cheers again!)


Berry Quinoa Parfaits

Leftover berries? Turn them into a protein-packed Berry Quinoa Parfait.


Greek Quinoa Salad

Everyone loves a good salad! Greek Quinoa Salad is yummy and gluten-free (winning!)


Lemony Spinach & Tomato Quinoa Salad

Why have one salad when you can have two? Lemony Spinach & Tomato Quinoa Salad is delicious (even at room temperature!)


Caprese Pasta Salad #recipe via MomAdvice.com

I am all about the caprese so this Pasta Caprese Salad really fits the 4th of July bill! (can be made gluten-free with a pasta substitute)


5-ingredient Caprese Pork Chops

Did someone say caprese? These 5-ingredient Caprese Chops would be delicious on the grill.


The World's Best Steak Marinade

Feeling Fancy? Try the World’s Best Steak Marinade (it makes cheap cuts taste gourmet!)


Restaurant-Style Steak Recipe

Rained out? Restaurant-Worthy Steak on the stove. In your face, rain!


4th of July Dessert Tray from MomAdvice


walmart_mom_disclaimer

Pin It

Grilled Brussels Sprouts

Monday, June 15th, 2015

Grilled Brussels Sprouts from MomAdvice.com

*This post is sponsored by Wild Oats.  Thank you for supporting the companies that support this site!

Grilling season is in full swing and I couldn’t be happier. What could be better than dining outside, keeping your kitchen clean, and providing a great meal (with leftovers for the week) in the process? Each year I vow to try my grill in a new way and this year I wanted to try some new ways to grill vegetables. Today I am partnering up with Wild Oats and sharing an easy veggie side dish you can create with just Brussels Sprouts, a few of your favorite dried and fresh spices, and a couple of other basic pantry ingredients.

Brussels Sprouts are one of my favorite veggies in the world.  In winter, I love to roast them until the taste resembles a decadent plate of french fries. For the summer months though, I love to keep my kitchen nice and cool so I wanted to figure out a different way I could make them. I decided to try them on our outdoor grill and see if the results would be just as tasty. Guess what? It didn’t disappoint.

Grilled Brussels Sprouts from MomAdvice.com

Wild Oats offers a variety of delicious organic dried spices that you can use on your grilled veggies this summer.  Have you seen these jars in your local Walmart store? It’s a great value and I love the dried spices, particularly when the garden isn’t in full swing or to mix even with the fresh herbs we have on hand. For these Brussels Sprouts you can add a little paprika for a smoky flavor, or chili powder for a little heat, or dress them up simply with a little Italian seasoning blend which pairs perfectly with the fresh garlic we have in this recipe.

Grilled Brussels Sprouts from MomAdvice.com

Although I love the charred bits on my Brussels Sprouts, I do like to protect them with a double layer of foil to prevent them from getting really burnt. The length of time you cook them really depends on your own personal taste. I like mine to have a nice crunch still so 10-12 minutes is a good amount of time for me. If you prefer a softer veggie, 15-18 minutes should do the trick! Keep in mind, these are a great one to prep the night before for a party and tuck in your fridge for your events. How awesome is that?

If you are interested in trying your veggies some new ways this summer, I love this technique for grilling the corn right in their husks, or you can add a rich layer of herb butter on the corn before grilling, we love these three-cheese grilled potatoes for a fun side with our steaks, and grilled tomato bread with prosciutto is an awfully impressive starter to any outdoor feast!

Grilled Brussels Sprouts from MomAdvice.com

Grilled Brussels Sprouts
Prep time:
Cook time:
Total time:
Serves: 4 servings
A fast & easy way to create an elegant side dish without the dishes! Grilled Brussels Sprouts are a crowd-pleaser and can be spiced just the way you like!
Ingredients
  • 2 lbs. Brussels sprouts, trimmed and cut in half
  • 2 garlic cloves, smashed
  • 2 tablespoons extra virgin olive oil
  • 2 teaspoon apple cider vinegar
  • 1/4 teaspoon of your favorite Wild Oats died spice (chili, paprika, or Italian seasoning- just to name a few!)
Instructions
  1. Tear off two 14-inch sheets of foil; fold each in half to make a double layer. Place half of veggie mixture in even layer in center of one sheet.
  2. Top with single sheet of foil and fold up edges to form a rectangular pouch (about 9″ by 6″). Crimp edges tightly until well sealed. Repeat with remaining foil and mixture.
  3. Place on the grill (10-12 minutes yields a great crunch or 15-18 minutes for a softer veggie) and cook until done.

 Get to know Wild Oats!

Check out Wild Oats on their blog,  Facebook, Instagram, Twitter, &Pinterest.

 * This post is sponsored by Wild Oats. Thank you for supporting the companies that support this site!

Easy Rice Cooker Quinoa

Saturday, June 13th, 2015

Easy Rice Cooker Quinoa from MomAdvice.com

A couple of years ago, quinoa wasn’t even on my radar as a food that I would want to eat. Once I went gluten-free though, it became necessary to really explore foods that I hadn’t considered before and the absence of so many of my go-to carbs made this option seem rather appealing.

In all honesty, since changing my diet to gluten-free, it has become my favorite pantry staple that I have used to create delicious, protein-packed dishes that my whole family loves.  In the summer months, in particular, quinoa is perfect for your summer salads because it can be eaten hot, cold, or room temperature.

Wild Oats thankfully offers a variety of delicious quinoa options that you can find on your local Walmart shelves. Today I want to share a little bit about what quinoa is and some tips for preparing it!

Head on over to the Wild Oats blog to get the scoop on how to make quinoa in your rice cooker today!

Pin It

Roasted Garlic Hummus

Monday, April 20th, 2015

Roasted Garlic Hummus from MomAdvice.com

*This post is sponsored by Wild Oats.  Thank you for supporting the companies that support this site!

I am so excited to be joining in as a contributor with Wild Oats this year and to get the opportunity to share with you about this company as an affordable organic offering at Walmart stores. I will be sharing ideas each month over on their blog as well as sharing a monthly offering here showcasing a fresh dish that you can create in your own kitchen that is delicious and gluten-free! Be sure to check out my first post on their blog sharing my delicious Baked Pecan Chicken Tenders recipe that is my new favorite salad topper.

I am sure everyone has a bucket list of things they would love to learn to create in their kitchen. Hummus has been one of those things that I usually buy pre-packaged that I have always thought to myself, “I bet you could make that…and cheaper too!” Inspired by the Wild Oats Chickpeas on my store shelves, I knew that this was a sign that I should attempt this dish in my kitchen.

Roasted Garlic Hummus from MomAdvice.com

Making homemade hummus is so ridiculously easy that I am embarrassed it took me years to finally attempt this in my kitchen. Hummus can be made in a variety of flavors, but one of the flavors I love the most is the garlic hummus. To take this pantry staple to another level though, I roasted it in my oven with a little olive oil to create a deeper, richer flavor. Once the garlic is roasted, it is just a matter of whirling these chickpeas in your food processor along with spices, tahini, lemon juice, and a little water until you get the consistency you are after.

Where the heck is tahini in the grocery aisle? Good question (says the girl who visited many aisles where tahini was not). It is typically in the international foods aisles of stores or can be found at international markets, but can also be found in weird and random places like next to the olives in you standard grocery store.  Really, ask your grocer if you aren’t sure and don’t let a little thing like I don’t know how to say tahini or I don’t know what tahini looks like stop you from making this amazing dish. The best part is how long tahini lasts in your fridge so you can buy this and enjoy hummus all summer long. And you will. Because once you try this recipe, you will realize that homemade hummus really IS the best hummus to eat and you will be stockpiling those cans of chickpeas so you can enjoy this easy appetizer anytime you get the craving for it. Amen.

Roasted Garlic Hummus from MomAdvice.com

Roasted Garlic Hummus
Cuisine: Side
Author: Adapted from Cooking Classy
Prep time:
Cook time:
Total time:
Serves: 4
Once you try homemade hummus, you will never go back. Make this easy dish with canned chickpeas from Wild Oats.
Ingredients
  • 1 large head garlic
  • 2 1/2 Tbsp olive oil, divided
  • 1 (15 oz) can Wild Oats chickpeas, drained
  • 3 Tbsp fresh lemon juice
  • 3 Tbsp tahini
  • 1/2 tsp salt, or to taste
  • 1/4 tsp ground cumin
  • 2 – 3 Tbsp water
  • Chopped fresh parsley and red pepper flakes, for garnish
Instructions
  1. Preheat oven to 400 degrees. Cut about 1/4-inch from top of garlic to expose tops of cloves for roasting.
  2. Place garlic head on a sheet of foil and drizzle 1 1/2 tsp olive oil evenly over top of garlic. Wrap foil up around garlic and roast 35 – 45 minutes until golden brown on a cookie sheet. Remove from oven and allow to cool.
  3. To your food processor add chick peas, lemon juice, tahini, salt and cumin then pulse mixture 2 minutes. Scrape down sides and bottom of food processor, add remaining 2 Tbsp olive oil, set aside 3 – 4 cloves of the garlic and add remaining (about 10 – 11) to food processor. Pulse 1 minute, then add water and pulse 1-2 minutes longer.
  4. Plate hummus, make indentation in center and add 1 – 2 Tbsp more olive oil to taste (optional), then chop remaining roasted garlic cloves and sprinkle over top, sprinkle with parsley and red pepper flakes.
  5. Serve with fresh veggies or gluten-free crackers. Store in refrigerator in an airtight container.

Slightly adapted from Cooking Classy 

What is one dish that has been on your cooking bucket list? Anything you have tried with success that you were surprised about! Feel free to share here!

*This post is sponsored by Wild Oats.  Thank you for supporting the companies that support this site!


Pin It