Archive for the ‘Drinks’ Category

Homemade Mint Truffle Coffee Creamer

Monday, February 27th, 2012

I can admit that I am a coffee addict. Coffee without good coffee creamer though makes me a little sad. My refrigerator is usually fully stocked for lots of coffee sipping, but I also love knowing that I can whip up a batch of homemade coffee creamer in my blender if I run out. Homemade coffee creamer is one of those recipes that you will find yourself relying upon when you have impromptu guests or when your grocery day is nowhere in sight.

The big joke in our house is that everyone is always praying that I run out of coffee creamer so that I will go to the grocery store. Frankly, we could run out of all of our food and as long as I still can have a good cup of coffee in the morning, then I am pretty much set for the entire day. I will just make do with what we have until the creamer runs out. About seven years ago, I ran across this recipe for making coffee creamer out of pantry ingredients. This was probably a very sad day in our house for the rest of the family because now I never have to go the grocery store.

Before I figured out how to make my Homemade Peppermint Mocha Drinks, I relied upon this delicious coffee creamer to satisfy my Peppermint Mocha cravings at home. This Homemade Mint Truffle Coffee Creamer has all of those elements that I love- chocolate, mint, and a rich creaminess. Of course, the creamer recipe can be modified for those of us that like to add half a cup of coffee creamer to every cup of their coffee to make the recipe more calorie conscious. Simply replace your regular sweetened condensed milk with the fat-free version and use skim milk instead of a fuller fat version of milk.

The recipe includes adding Peppermint Coffee Syrup to your creamer, but that is something that is easy to create with pantry ingredients and the recipe is available on the site. You certainly don’t have to create the peppermint syrup yourself, although it is really easy to do and made from pantry ingredients.  Simply call ahead to your favorite Starbucks joint and ask if they have a spare bottle of Peppermint Syrup that you can buy or if they can order it for you. Split a bottle with a friend if you don’t picture yourself using the whole bottle or save it for this summer to make my favorite DIY Peppermint Mocha Frappes that I make with frozen coffee ice cubes in the summer months.

Below I have provided a few other variations on this coffee creamer recipe to help you create other delicious coffee creations in your kitchen.

Homemade Mint Truffle Coffee Creamer
Recipe Type: Drink
Author: Recipezaar.com
Prep time: 5 mins
Total time: 5 mins
Serves: 12
Skip the store the next time you run out of your favorite coffee creamer and whip up this easy homemade creamer made from pantry ingredients.
Ingredients
  • 1 can sweetened condensed milk
  • 1 1/2 cups nonfat milk (or you can use prepared powdered milk)
  • 3 Tablespoons unsweetened cocoa
  • 3 Tablespoons peppermint coffee syrup (see above for a link to our homemade version)
Instructions
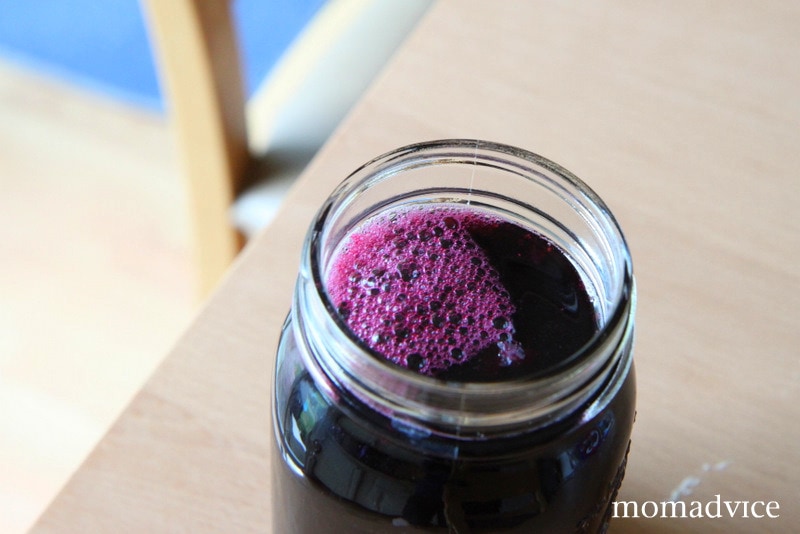
  1. Blend all ingredients together in your blender.
  2. Pour into a mason jar or your old coffee creamer dispenser. This creamer will keep up to two weeks in your fridge.
  3. Variations:
  4. French Vanilla Creamer- omit cocoa and peppermint syrup & add 1 tablespoon vanilla.
  5. Chocolate Almond Creamer-omit peppermint syrup and add 1 teaspoon almond extract.
  6. Amaretto Creamer- omit cocoa & peppermint & add ½ teaspoon cinnamon and 1 teaspoon almond extract.)

I am participating in Mouthwatering Mondays at A Southern Fairytale.

Are you a coffee creamer addict too? What does your favorite cup of coffee look like?

Pin It

“Save Your Green” Green Smoothie

Monday, February 13th, 2012

Everywhere I turn, I am seeing green smoothie recipes. Green smoothies have filled my blog reader and my Pinterest wall. My girlfriend first jumped on the green smoothie bandwagon and I shortly followed behind her. We would chat in the mornings, trying different fruits, different ratios, and then deciding the order that everything should go into the blender for the perfectly blended drink. Yes, our conversations tend to be quite fascinating only to us. That being said, I became hooked on green smoothies and I feel so much better about my day if I have had one of these in the morning.

That being said,  I did not want to spend our entire grocery budget on green smoothie ingredients or run from store to store to get ingredients that I couldn’t find at my usual store. Sure, I want to be healthy, but I also like to stay under my grocery budget. I decided to create my own version of this smoothie using ingredients I could find at ALDI Supermarket.

I always hate to list prices for items because they can become out-of-date by tomorrow, but I do want to share with you the rough cost of the items I found at the store.

Flat Leaf Spinach (9 ounces)- $1.69

Vanilla Soy Milk (half gallon)- $2.39

Mandarin Oranges (3 pounds)- $2.49

Fage Greek Yogurt (17.6 ounces)- $1.99

Bananas- $.45 per pound

Frozen Strawberries (2 pounds)- $3.49

It is hard to estimate the price per smoothie because items like the yogurt go quickly while other ingredients (like the fruit) can last for a couple of weeks for me. Regardless, I love that I can make one of these green smoothie creations on my budget and not have to shop for more obscure or expensive ingredients.

Why would anyone ever want to drink a green smoothie? It is packed full of fruits and vegetables that can be the perfect workout treat or a fun way to start your day. I worried that the smoothies would taste like spinach, but the spinach blends right into the fruits and I can’t taste it all once it has been blended well. As a busy mom trying to get my kids on the bus every morning, I don’t make eating breakfast a priority. Doesn’t coffee count as a healthy breakfast? This smoothie is helping me do better about putting good things in my body while we are getting ready for the day.


A few years ago, I decided to make the investment into a blender that would really last after burning up my blender every summer making the kids slushies and other frozen treats. My Krups blender is going on its third year with me and has been one of the wisest investments for smoothie creations in my kitchen. If you use your blender often, I encourage you to get one that has some power behind it especially when blending ice and frozen fruits like this smoothie.

After trying different variations of layering, I find the spinach pulls in the best when it rests in the middle. On the bottom I pour my soy milk, my Greek yogurt, my frozen strawberries, and my ice. Next I put in my layer of spinach. I add a banana and a segmented orange or clementine to the top. This seems to be the best technique for smooth spinach blending for me. You may want to experiment in your own blender and see what works best for you.

This smoothie makes a really giant smoothie for me and one small smoothie for my daughter for our breakfast in the morning. When my daughter brought home her, “sh” words from her kindergarten class, my husband handed it to me and proclaimed that I have officially brainwashed my children. She thinks her green smoothie is a “sh…ake.”

I love this child.

You will love this smoothie. I hope it transforms your morning as much as it has transformed mine!

“Save Your Green” Green Smoothie
Recipe Type: Drink
Author: Amy Allen Clark
Prep time: 5 mins
Cook time: 2 mins
Total time: 7 mins
Serves: 2
A green smoothie made from inexpensive ingredients to jump start your day!
Ingredients
  • 1 cup vanilla soy milk
  • 1/2 cup plain or vanilla Greek yogurt
  • 4 ice cubes
  • 5 frozen strawberries
  • 2 cups fresh spinach
  • 1/2 a banana
  • 1 orange or clementine, peeled and segmented
  • 1 tablespoon honey (optional, but can help add sweetness)
Instructions
  1. Place ingredients in your blender as listed.
  2. Pulse or use the ice crush feature on your blender to break down the ice and frozen fruit.
  3. Blend well.

Have you jumped on the green smoothie bandwagon? What are your tricks and ingredients for making your signature green smoothie?

Linking up to Mouthwatering Mondays on A Southern Fairytale


Pin It

Homemade Gingerbread Latte

Monday, December 5th, 2011

I absolutely love anything that has gingerbread flavors in it and I had a reader request that I share a recipe for their favorite Starbuck’s treat, the delicious Gingerbread Latte. Always up for a challenge, I went on a search for a recipe for this yummy Gingerbread Latte treat to create at home.

This drink tastes like gingerbread itself and is filled with ginger, molasses, and cinnamon within the gingerbread syrup you create for your latte. I found that if I mixed the latte together with the syrup and let it sit for a minute or two and then stirred it again, that the flavors came together more fully than if I drank it right away as the spices seemed to blend in better.

This gingerbread coffee syrup does not look like the usual simple syrup gingerbread coffee syrup that I had originally thought I would create. To me, the most important flavor is the molasses in the gingerbread though and without it, I don’t think it would taste like a true gingerbread treat. If you are looking for a simple syrup version though, I found this Gingerbread Coffee Syrup that would fit the bill beautifully.

So this holiday season whether you are sipping a Peppermint Mocha, a Salted Caramel Mocha, a Pumpkin Spice Latte, or this little version of a Gingerbread Latte, I hope you enjoy saving a little extra cash and can enjoy these homemade treats to unwind with during this busy time of year.

Recipe:

Homemade Gingerbread Latte

Ingredients:

1 cup milk, steamed
1 cup very strong coffee (4 tablespoons coffee grounds to 1 cup of hot water, I prepared this in my French Press, but you can brew a strong drip pot if you prefer)
1 tablespoon white sugar (can omit if you prefer a drink that is less sweet)
1 tablespoon gingerbread syrup (you can use the recipe provided below)
Whipped cream (optional)
Ground Cloves (sprinkled for topping, optional) or Festive Sprinkles (sprinkled for topping, these just aren’t optional)

Directions:

Prepare your hot water in a kettle. Add four tablespoons of your favorite coffee grounds to your French Press. Pour 1 cup of hot water over them and allow the coffee to steep for four minutes while you prepare the other ingredients.

In a pot, heat up one cup of milk until it is steaming. Froth the milk with a wire whisk or an immersion blender until it is nice and foamy.

In your coffee cup, add your coffee syrup and white sugar. Pour your coffee over the gingerbread syrup & sugar and then stir well with a spoon until the gingerbread syrup dissolves and the spices are incorporated well. Pour the milk foam over the top of the coffee/mocha mixture and stir again to incorporate. Allow it to merry together for a minute or two and then mix once more. Top with whipped cream and festive sprinkles or a dusting of ground cloves.

Drink.

Be Merry.

Note- This is just a base recipe that can be played with to your own tastes and preferences. It is meant to be personalized depending on how you like your latte!

Prep Time: 5 minutes

Total Time: 5 minutes

Serving Size: 1

This Gingerbread Syrup is thicker than a traditional simple syrup so this can be stored in a jar rather than a pour spout container. The molasses combined with the brown sugar, ginger, and cinnamon make it a rich and decadent treat to add to your latte.

This Gingerbread Syrup would make a fantastic gift to give to a friend or loved one. Place this syrup in a jar and tie with festive ribbon. In a basket add your syrup, coffee, and a shaker of festive sprinkles, along with this recipe. So easy and a great way to start anyone’s day.

Recipe:

Homemade Gingerbread Coffee Syrup

Ingredients:

1/2 cup molasses
1/4 cup brown sugar
1/2 teaspoon baking soda
1 teaspoon ground ginger
3/4 teaspoon ground cinnamon

Directions:

In a jar, mix together your molasses, brown sugar, baking soda, ground ginger, and ground cinnamon until well incorporated. You can store this mixture in a jar in the refrigerator for two to three weeks.

Prep Time: 5 minutes

Total Time: 5 minutes

Serving Size: 8-10 drinks

Recipe Source: Latte courtesy of MomAdvice, Gingerbread Syrup from AllRecipes.com

Pin It

8 Inspirational Recipes for the Blueberry Season

Tuesday, July 26th, 2011

8 Inspirational Recipes for the Blueberry Season

Blueberry season is upon us and today I wanted to share with you our favorite blueberry creations that you can use those fresh picked berries for. Our family is looking forward to an evening of picking this week and these are the recipes that we will be using to create our favorite blueberry dishes.

blueberry pancakes 2

A pancake laced with fresh handpicked blueberries seems the perfect occasion to break out the old griddle and spatula for a fun and inexpensive weeknight meal. These blueberry pancakes are a delicious way to use a few of those berries and I promise that they will be a hit with your family too!

I love that with this batter it is encouraged to mix the batter up ahead of time and allow it to rise for a bit on the counter. What happens is that this seemingly unimpressive batter is magical as it puffs up beautifully once placed on the griddle. Once poured on the griddle, I sprinkle the blueberries into each pancake individually as they become golden. The pancakes are then served with a little syrup and another generous handful of fresh berries on top.

Recipe:  Blueberry Pancakes

Blueberry Iced Tea Syrup

Making homemade syrups for drinks is something that I love to keep in our refrigerator to fancy up a glass of iced tea or a mug of coffee. Making homemade syrups does not take a lot of time, but it can make a regular glass of iced tea go from a standard glass to a fantastical gourmet treat.

This is a my favorite recipe for making Blueberry Drink Syrup that can be added to your iced tea, your coffee, or even your margarita! Whatever gets you going in the morning, I promise not to judge!

Recipe: Blueberry Drink Syrup

Blueberry Muffins

It is the berry season and nothing says summer to me like a big blueberry muffin. These blueberry muffins are laced with the juice and zest of one lemon, which cuts through the sweetness and makes a perfect balance of flavors. I dust these with raw sugar and they make a fantastic snack to eat and to share with neighbors and friends.

Recipe: Lemony Blueberry Muffins

Blueberry Cobbler

Last year I decided to give a blueberry cobbler a try for a book club meeting and this recipe pulled together so easily that I shared it that evening and then later, as a special birthday treat for my mom. With all of the ingredients coming straight from the pantry, it was a fun and frugal dish to share and everyone I shared it with really seemed to enjoy it. If you are looking for a fast and satisfying dish to bring to your next gathering, I highly recommend this delicious blueberry cobbler for a perfect way to end any meal.

Recipe: Fresh Blueberry Cobbler

Blueberry Muffin Cake

Looking for a recipe for a few blueberry haters in your family? This is the one that is sure to convert them and just a peek inside this cake shows why anyone can eat it. The cake only has one cup of blueberries in the whole thing. This handful of berries makes a beautiful stripe down the middle and adds just the right balance of blueberries and cake instead of the overwhelming amount of berries that can be in other cakes and muffins.

The blueberries are suspended in the batter with the help of a little reserved cake mix and a quick toss to coat them. The cake mix has added flavor boosts from the addition of cinnamon, vanilla yogurt, and a little vanilla pudding mix. The resulting cake is moist and absolutely perfect. This is truly my favorite blueberry recipe and I promise it will be yours too!

Recipe: Blueberry Muffin Cake

Blueberry Pancake Syrup

It is amazing how sugar, water, a little vanilla, and fresh berries make such an incredible difference on a plain old waffle, but this blueberry pancake syrup proves that simple ingredients can create something outstanding.

The burst of flavor, the happy dance in my mouth, and the smacking of lips at the table make me so incredibly joyful when we eat this syrup over our waffles. The berries coat the waffle perfectly and add a little sweetness to my waffles without a sugary overkill.

This is really and truly a fantastic indulgence that takes about the same amount of time to cook as it does to make up a batch of waffles. Fast and delicious!

Recipe: Blueberry Pancake Syrup

Berry Trifle

One thing I have wanted to try is a trifle and for my son’s birthday this year, I had the perfect opportunity!  With berries in season and a store-bought angel food cake, this dish isn’t only affordable, but easy too!

The white chocolate pudding set this trifle apart from any other I have ever eaten because it adds a richness and unexpected layer into this berry trifle. Not only does this dish taste rich, but it is perhaps one of the lightest desserts I have ever made where I felt full and satisfied, while feeling like I indulged.  Of course anything with pudding, cake, and berries is a winner in my book.  I would highly recommend giving this recipe a try for your next get together!

Recipe: Red, White, & Blueberry Trifle

How to Freeze Blueberries

After all of this inspiration, if you still have some berries left, I highly recommend the Cook’s Illustrated technique for freezing your berries for optimal flavor. I tried this last year and last month we ate berries that tasted like they had been freshly picked after almost a year of storage.

In years past, I just threw the berries on a cookie sheet, froze them, and then tossed them into marked bags for later consumption. Cook’s Illustrated is my Bible for cooking and they claim that the best consistency for blueberries is if they have been frozen with sugar. They froze six different kinds of fruit, tried seven different methods of freezing on each fruit, stuck them in the freezer for six months, and then tasted them. I certainly don’t have the time or inclination to take on a task like that and that is why I absolutely love Cook’s Illustrated!

If you are worried about the sugar, it is just meant to help keep the fruit’s shape and texture. When you want to eat the berries, you just rinse the sugar off and enjoy the optimal taste of the fruit.

Freeze Blueberries in 3 Easy Steps

Our collection of recipes continues to grow! While I have you here, here are four more fun ideas to try this year!

Baked Blueberry Doughnuts

Baked Blueberry Doughnuts With a Lemon Glaze

Blueberry Sangria Lemonade

Blueberry Sangria Lemonade

Healthy Banana Blueberry Muffins

Healthy Blueberry Banana Muffins

Fruit Infused Water Recipes

Healthy Fruit Infused Waters

Quinoa-Berry Breakfast Bowls

Quinoa-Berry Breakfast Bowls (sub with blueberries)

What are your favorite blueberry recipes? How do you freeze your berries? Feel free to share links and recipes here for even more inspiration for our readers!

Pin It

Bubbly Raspberry Lemonade

Monday, June 27th, 2011

I love sweet and refreshing summertime drinks and this raspberry lemonade fit both of those bills perfectly.  As we celebrated Father’s Day last weekend with our family, I decided to make my Presto Pesto Pasta Con Pollo, a tossed salad, french bread, and I wanted a fun drink to round out the dinner.  This concoction was something I dreamed up out of a few items I found at our grocery store. A little pink lemonade, a little raspberry white grape juice, a lot of Sprite, and a little vodka (should you so choose). Each cup was filled with a few fresh raspberries and a colored straw, which my kids loved doing in preparation for the big dinner.

Tart, sweet, bubbly, fancy, and fun. Our dinner guests all agreed that these were magical. A second round was ordered all around and complimented our light summer dinner perfectly.

Recipe:

Bubbly Raspberry Lemonade

Ingredients:

1 (12 ounce) can frozen pink lemonade

1 (12 ounce) can frozen white grape raspberry juice

5 cans Sprite

1 can vodka (or you can substitute with an extra can of Sprite for a mocktail)

Juice of two limes

1 pint fresh raspberries

Directions:

Mix all ingredients together in a large pitcher.  Serve over ice and garnish with extra raspberries.

Prep Time: 5 minutes

Total Time: 5 minutes

Serving Size: 12 servings

What is your favorite summertime drink? Please feel free to share a link to those recipes!

Iced Coffee the Cold Brew Way

Tuesday, March 30th, 2010

I have a few weaknesses in my life- pretty yarn, delicious books, lovely shoes…and coffee, coffee, coffee!  In the winter, I crave a hot drink to warm my hands. In the summer, it is an entirely different story and I want a delicious iced coffee  to keep me cool while I dream of exotic vacations and escaping the reality of my mountains of laundry and cranky children. Does coffee let you escape too?

As the Indiana weather has begun to make it’s way towards Spring, I was anxious to finally give the cold brewed coffee technique a try from the New York Times.  This winter, I saved my Swagbucks and decided to buy myself a treat… a French Press that I could use in the evening for my decaf coffee. When Rachel highlighted her own cold brew technique using a French Press on Small Notebook (and then featured here), I had to put my little gadget to work and see what all of the fuss was about.

Traditionally, when I use my French press, I heat the water in my teapot and then add it to the grounds, steep it for about four minutes, and then plunge it to push the grounds down. With the cold brew technique, you just do everything wrong. You put in the grounds, add cold water, don’t plunge it for an entire night, add more water, and then finally plunge it for your iced brew. To be honest, it looks like really watery coffee sludge and you wonder if you just wasted your coffee and a moment of effort to pull it together.

I then poured it and mixed mine up with almost half skim milk and a generous little shake of caramel coffee syrup and excitedly went in for a taste. The taste? Coffee perfection! There is no bitterness and no coffee edge at all.  It just tastes like a delicious coffee that you would get at the fancy coffee joints, but only costs pennies versus dollars!

After I made a coffee for myself, the next day I made one for my grandmother. If you don’t believe me that it was good, perhaps seeing the two of us ladies rushing over to Target that-very-instant to buy a French press so she could easily replicate the coffee at home, our fun discussion dissecting the recipe and what could be done with it, and then talking about how delicious it was for an hour just might convince you.

Really though, a French press is not required for this technique, in fact, you could just use a coffee filter and a jar, if you don’t want to make the purchase. If you are in the market to buy one, I recommend one that has a second mesh filter around the lip (as pictured above) to give your coffee an extra strain. Should you use the medium grind coffee, as recommended by the manufacturer, you might not need this additional strainer as much. If you are like me though and choose to use the coffee you already use every other day of the week (which is most definitely not always freshly ground) then that extra little strainer might come in handy. The one pictured here is the BonJour Hugo ($19.12).

As an aside, I have made my own coffee syrups and also have bought them. It really depends on how motivated you are, but I love to have a variety of them when I have my girlfriends over for coffee. I am all about the coffee shop experience on a pauper’s budget, and syrups are one of those things that make my coffee brewed at home feel a little more special.

The best deal I have found on them has been at the wholesale club. Our local Sam’s Club (our area does not offer a variety of wholesale clubs, unfortunately for price comparison purposes) offers a 25.4 ounce container of gourmet coffee syrups for $4.42. Basically, for the price of one of those expensive caramel coffees, you can make a few dozen of them. The prices in the grocery store typically are much higher so if you are going to buy them, definitely put your membership card to work on this purchase and peruse the aisles for affordable coffee too!

**********************

Cold-Brewed Iced Coffee (Recipe Courtesy of The New York Times)

1/3 cup ground coffee (medium-coarse grind is best)

Milk (optional).

In a jar, stir together coffee and 1 1/2 cups water. Cover and let rest at room temperature overnight or 12 hours. Strain twice through a coffee filter, a fine-mesh sieve or a sieve lined with cheesecloth. In a tall glass filled with ice, mix equal parts coffee concentrate and water, or to taste. If desired, add milk.

For the French press: Place 1/3 cup of ground coffee in the bottom and add 1 1/2 cups water. Allow to sit overnight without pushing down the plunger. The next morning, add 1 more cup of water. Add milk as desired and coffee syrup as desired. Stir and serve.

For more great coffee tips and tricks for savings, be sure to visit, “A Frugal Mom’s Guide to Good Coffee.”  I told you, I am so passionate about this topic!

**********************

To clean your French press– Keeping your French press clean is quick and easy. First, dump the grounds in your trash can and not down your sink. You may want to trust me on this, but even with the best garbage disposals it can create a big mess and clog your drain. I use a spoon and scoop as much as I can out of the bottom before giving it a wash.

Most French presses can be placed into the dishwasher for easy cleaning on the top rack. If you are worried though, don’t hesitate to give it a quick wash by hand (using just a tiny bit of dish soap). For the unbreakable plastic variety, a little shake of baking soda and water is an ideal way to get it clean. Allow it to air dry or gently towel dry it, if you are trying to avoid the spotting. However you clean it, put it to good use and make it earn its keep in your cupboards!

What are some ways that you save on your coffee experience? Any tips or tricks for cutting the cost on your daily brew?

Boxed Wine: An Eco and Wallet-Friendly Choice

Sunday, March 14th, 2010

Wine Glasses for Boxed Wine

While we both love wine, we don’t necessarily desire the same kind of wine. I am a girl that gravitates more towards a good Chardonnay while my husband is a Merlot fan. Considering we are the only two wine drinkers in the house, the wine would sometimes go to waste because it was not used in the time span it should have. To me, there is nothing worse than throwing money down the drain so I have been looking into other options.

A few months ago, I was watching the Today Show and they had a wine expert on to discuss the comeback of the boxed wine. “Boxed wine? Blech!” I thought. The expert continued on though to point out that these wines have come a long way and that they are a great affordable option for families.

We decided to put this theory to the test and began buying and sampling boxed wines instead. I even had the good fortune to receive a few boxes for my review from a couple of great wine companies, which helped add perspective on the different varieties that are available for families.

Why are boxed wines a better value and better for the environment?

Your Wine Lasts Longer– Remember the scenario that I shared about where I was dumping wine down the drain? Well, that doesn’t usually happen when you buy boxed wine. The wine is stored in a Mylar bag with a spout attached. When you pour from the spout the bag acts as a vacuum, which means the wine doesn’t oxidize. An opened box can last for four weeks rather than spoiling in just a day or two.

Boxed Wine is Better for the Environment– Top wine producers are trying to reduce their carbon footprint — that is, the amount of carbon dioxide emitted in the transportation of wine —and selling the beverage in alternative, lighter packaging instead of heavier glass is one way that they can make that change. These boxes of wine are ideal with some boxes reducing waste by nearly 90 percent of the equivalent bottle.

It Saves Space & Is a Hit at Parties- I took a box of wine to my Bunco night and it was the first thing to go on the table of wines. While some might consider it tacky, that pour spout is quite handy and makes filling your wine glass a breeze. These boxes can hold four bottles or more, but take up a lot less room. If you are short on space or you need something to bring to your next party, I highly recommend the boxed wine alternative.

Wine for Cooking Is Right at Your Fingertips- Many of the dishes I make call for wine in them and these boxes of wine are a cook’s best friend. I no longer have to open a bottle for a dish and let it go to waste, I can now just pour it right out of the box and it costs a lot less than the wine I was buying to cook with.

Boxed Wine is Much More Affordable– You can get a box of wine for a far lower cost than you could get in a bottle. Check the side of the box to see how many bottles are contained within it and then divide that to get your cost per bottle. Some of the best boxed wines I sampled cost roughly $5-6 a bottle, making it much more affordable than even the sale prices on bottled wines.

Top Picks

Now that I have hopefully convinced you that it is a better deal, here are my top picks for best boxed wines on the market.

Of all of the wines that I sampled, the Black Box wines were consistently the best of the best. The Cabernet Sauvignon & Merlot are the best that they offer and they are elegantly packaged. The Cabernet Sauvignon has received a Double Gold award and the Merlot was listed in the Top Ten Best Buys by Wine Enthusiast. Best of all, this one was available at our local Walmart and I have also heard that Sam’s Club members can get it for an even lower price. If I was just venturing into the world of boxed wines, the Black Box wines would be a great place to start.

Banrock Station Chardonnay is one of the best bangs for the buck and they now offer their wine in a 3L (the equivalent of four bottles) box. This Chardonnay is an excellent deal for the money and is recommended as a great budget-friendly wine by Wine Enthusiast Magazine. Of all of the wines that Banrock Station offers, their Chardonnay is by far the best and is a great wine to bring to parties and a night in with friends. Even someone who is not a wine expert will recognize the hint of green apple and the crisp taste that comes through in the Chardonnay. This wine is particularly great for Pinot fans because this wine seems to mimic many of the flavors you would find in a good Pinot.

Hardys Stamp offers a variety of great tasting budget-friendly boxed wines. While we were not a fan at all of their boxed Riesling, I can say that I truly loved the Merlot. Hardys Stamp Shiraz is also well-known for offering a rich and full flavor. Epicurious shares that the Shiraz, “evokes warm blueberry pie, with hints of vanilla ice cream and toasty American oak, and just enough tannin to balance the ripe berries.” Overall, I would definitely recommend sampling the red wines that are offered by Hardys Stamp because the flavor was such a great surprise and will now be added to my top list of the best of the best in the boxed wine market.

One wine that I really wanted to pass the test was the Target Wine Cubes. We tried several different wines from Target and I just was left feeling disappointed. I loved the chic packaging and I certainly spend enough time in Target to want to pick it up there, but these wines were definitely not my favorite. If you are going to pick up a box of wine at Target, go for the Pinot Grigio because it is the best that they offer. In 2007, the Wine Cube Pinot Grigio won a double gold medal at the San Francisco International Wine Competition. Again, I love the packaging on the product, but the wines just weren’t my favorite.

If you are a wine drinker, I would definitely recommend giving boxed wines a try! Once I started sampling boxed wines, we have never gone back to the wines in the bottle. I can’t wait to continue our adventures in tasting and I look forward to more boxed wine products from future companies.

Pin It

Protein Packed Strawberry & Banana Smoothies

Monday, October 12th, 2009

While my kids have been enjoying Thrifty Banana Cream Pie Smoothies with their peanut butter toast for breakfast, I have started making smoothies for myself as my post-workout treat!

Yes, I am proud to say that my 30 day exercise challenge is turning into a way of life for me. I have continued to try and exercise three to five days a week, but this last month I started to feel like I needed something to help keep my blood sugar level. I headed over to to the nutritional supplement store and picked up a container of Strawberry Creme whey protein to add to my smoothies.

Buying smoothies can be expensive, but making smoothies at home can be inexpensive. Not only am I saving by working out at home, but I have my own smoothie bar upstairs in my kitchen to keep expenses down.

I freeze my banana slices in a shallow dish and then scoop them into a freezer bag to add to these smoothies. I can buy a large container of low-fat strawberry yogurt at Walmart (Great Value Brand) for $1.89. This large container has enough in it for eight smoothies! The protein powder is $14.99 at The Vitamin Shoppe, but contains enough protein for 30 smoothies. After some tough calculator-crunching, I know that I can make a protein-packed delicious treat for roughly eighty cents! I would love to see where you can find a large smoothie for that price!

The protein powder is an added expense, but one that definitely leaves me feeling fuller for longer. Fitness Magazine had a great article this last month entitled, “Alternative Energy,” focusing on the protein hype because fit women are now the fastest growing market for sports nutrition products. They covered everything from those expensive protein-packed bars to gels and the protein shakes.

How much protein does your body need to support an active lifestyle? Well, some mixes contain 40-50 grams, but ideally women only need 20-30 grams. According to this figure, you might want to check the back of the containers to insure you are getting the proper amount of protein and not just extra calories!

Despite sharing that a lot of protein is a lot of hype and can be satisfied by our normal healthy diets, it concluded that whey-protein powder is absorbed into your system more quickly than other forms of protein, which makes it useful in muscle recovery.

This scoop of protein powder has helped a lot with keeping my blood sugar levels steady and has even been a nice snack instead of reaching for a bag of chips. For me, it works, and is a fantastic reward for completing a workout. Paired with a favorite read or a soak in the tub, it is something that makes me look forward to the completion of my workout. You could say that our blender is now one of our most used appliances!


Protein Packed Strawberry & Banana Smoothies

1/2 cup sliced ripe banana
1/2 cup low-fat or non-fat strawberry yogurt
1/2 cup milk
4 ice cubes
1 scoop of strawberry-flavored protein powder

Arrange banana slices in a single layer on a baking sheet, and freeze until firm (about 1 hour). Place frozen banana and remaining ingredients in a blender. Process until smooth.

What do you eat after you work out? Do you buy alternative protein products to feed your active lifestyle? I would love to hear your perspective on this!

Banana Cream Pie Smoothies

Tuesday, September 22nd, 2009

Banana Cream Pie Smoothie (Courtesy of Cooking Light Magazine, makes 2 servings or 4 smaller servings)

1 cup sliced ripe banana (about 1 large)
1 cup vanilla low-fat yogurt
1/2 cup 1% low-fat milk
2 tablespoons whole wheat graham cracker crumbs (about 1/2 cookie sheet- we have been omitting this ingredient)
1 tablespoon nonfat dry milk
1/2 teaspoon vanilla extract
3 ice cubes (about 1/4 cup)
Graham cracker crumbs (optional)

Arrange banana slices in a single layer on a baking sheet, and freeze until firm (about 1 hour). Place frozen banana and remaining ingredients in a blender. Process until smooth. Sprinkle with graham cracker crumbs. Serve immediately.

Blueberry Syrup for Coffee or Iced Tea

Tuesday, September 22nd, 2009

Blueberry Syrup for Coffee or Iced Tea

4 cups fresh blueberries
2 cups water
1 cup sugar

Place blueberries in a saucepan with water. Bring to a boil, reduce heat and simmer 10 minutes. Set sieve or colander lined with cheesecloth or paper towel over a bowl and pour in the blueberry mixture. Gently press out the juice with a spoon or by twisting the cheesecloth. Discard the pulp and measure the juice into saucepan. Add 1/2 cup sugar for each cup of juice and cook over medium heat, stirring until sugar is dissolved. Bring to a boil and cook 2 minutes. Chill and pour into covered jar. Store in refrigerator. Add two tablespoons to each glass of prepared iced tea or coffee. Stir well.