My favorite drink in the summertime is iced coffee, but I don’t love the price tag that comes with the iced coffees from our coffee shops.
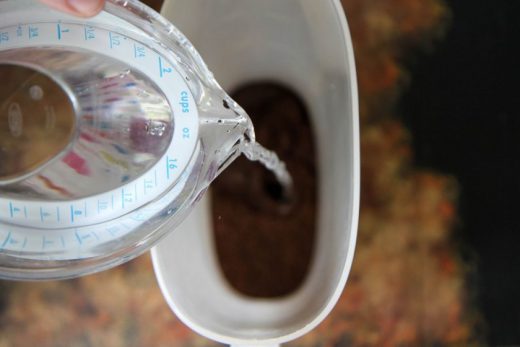
Thankfully, I discovered how to cold brew my coffee and make the perfect iced coffee at home.
This month on my site I am showing you how I cold brewed my coffee and today we tackle how to make the perfect iced coffee just for you by adding your own favorite flavor combinations.
Start With a Great Base
You can add lots of flavor to your coffee, but if it isn’t great coffee to start with then you will be disappointed in the results no matter how many flavors you add to it.
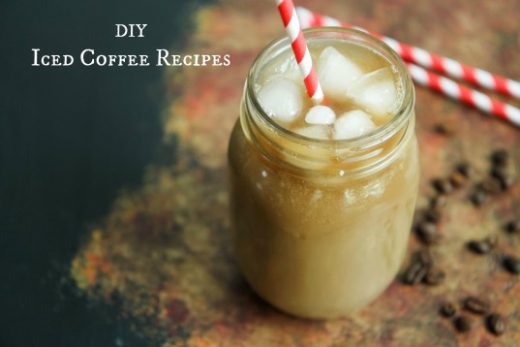
Top It With Your Favorite Milk or Milk Substitute
The biggest struggle for me when purchasing my coffee out is the milk substitute offerings.
Almond milk is my go-to choice for my coffee, but most coffee shops don’t offer this as an option, yet another reason why I love making my coffee at home.
Experiment with different milk types like almond milk, soy milk, coconut milk, half-and-half.
You can even try something new like a delicious Vietnamese coffee tradition by adding some sweetened condensed milk for a decadent treat.
I prefer a half to half ratio on coffee to milk especially since the cold brew method yields a strong concentrate for your coffee drinking needs.
Add Your Flavored Syrups
Have you ever made your own simple syrups?
It really could not be easier and these are great not only to have on hand for your morning coffee (hot or cold), but also for fresh summer cocktails.
The process of creating these is a simple one.
Simply mix equal parts sugar and water in a saucepan, heat until your sugar dissolves, then add your favorite flavorings to create your syrup.
I store these cooled syrups in my fridge in mason jars for whenever the iced coffee mood strikes me.
Here are a few of my favorite winning combinations:
Vanilla Coffee Syrup
1 cup water
1 cup sugar
1 vanilla bean, split lengthwise
1 teaspoon vanilla extract
Combine the sugar and water in a small saucepan. Scrape the seeds from the vanilla bean into the pan and throw in the pod. Heat the mixture over medium-high, stirring occasionally, until the sugar has dissolved. Reduce the heat to low and let simmer, about 10-15 minutes. Remove from the heat, discard the vanilla bean pod and stir in the vanilla extract. Let cool. Store in the refrigerator.
Caramel Syrup
¾ cup sugar
½ cup water
¼ cups caramel sauce
Combine the sugar, water and caramel sauce in a small saucepan. Heat the mixture over medium-high, stirring occasionally, until the sugar has dissolved and the mixture is smooth. Remove from the heat and let cool. Store in the refrigerator.
Peppermint Syrup
1 cup sugar
1 cup water
2 teaspoons peppermint extract
In a small saucepan, bring sugar and water to a boil. Reduce heat to medium and stir constantly until sugar is dissolved. Stir in the peppermint extract. Cool to room temperature and store in a glass jar in the refrigerator.
Finish With A Dusting of Cinnamon
A sweet and simple dusting of cinnamon is the perfect way to finish this yummy treat. Wild Oats Cinnamon is one of my own pantry staples and adds that fancy coffee shop touch at a price that is just right!
I hope these ideas inspire you to try something new with your coffee today!
Don’t miss these other great ideas on MomAdvice.com:
As I shared with you, when I attended college I lived on junk & convenience food and I had the inevitable “Freshman 15,” to prove it from my bad eating habits throughout the year. I only wish I knew how great I would have felt and how much better I would have performed if I had stocked my fridge with healthy options.
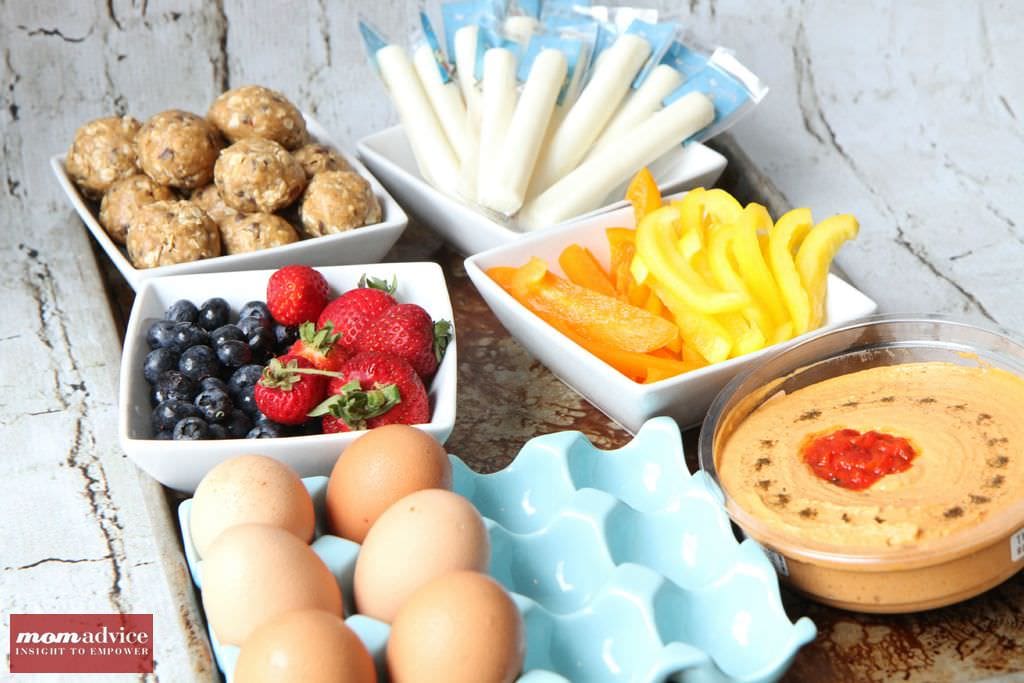
Now I know that there are healthy ideas for stocking your refrigerator – whether it’s a dorm sized mini-fridge, your first apartment fridge, or the huge family-sized fridge many of us graduate to – and I’m making sure that my kids do know that the foods that are good for your body are easy to keep on hand, too. In this healthy fridge makeover, I’m sharing easy ways to keep good-for-you foods within reach along with a recipe for a quick to make no-bake energy bite that you can mix up in a bowl for easy snacks on-the-go that both kids and adults love.
Eggs- Eggs are the perfect food for starting your day out right or for a healthy late night snack. Did you know that you can prepare an egg easily in the microwave with no special equipment at all? Simply spray or grease a bowl to prepare it and crack two eggs in it with a tablespoon of milk and whisk well with a fork. Place your bowl of eggs in the microwave and cook for one minute. Give it another little scramble with your fork and then cook for thirty second intervals, until your eggs reach the desired consistency. That’s it! Don’t forget that you can add your own fun add-ins to this versatile food like chopped up veggies, cheeses, or meats.
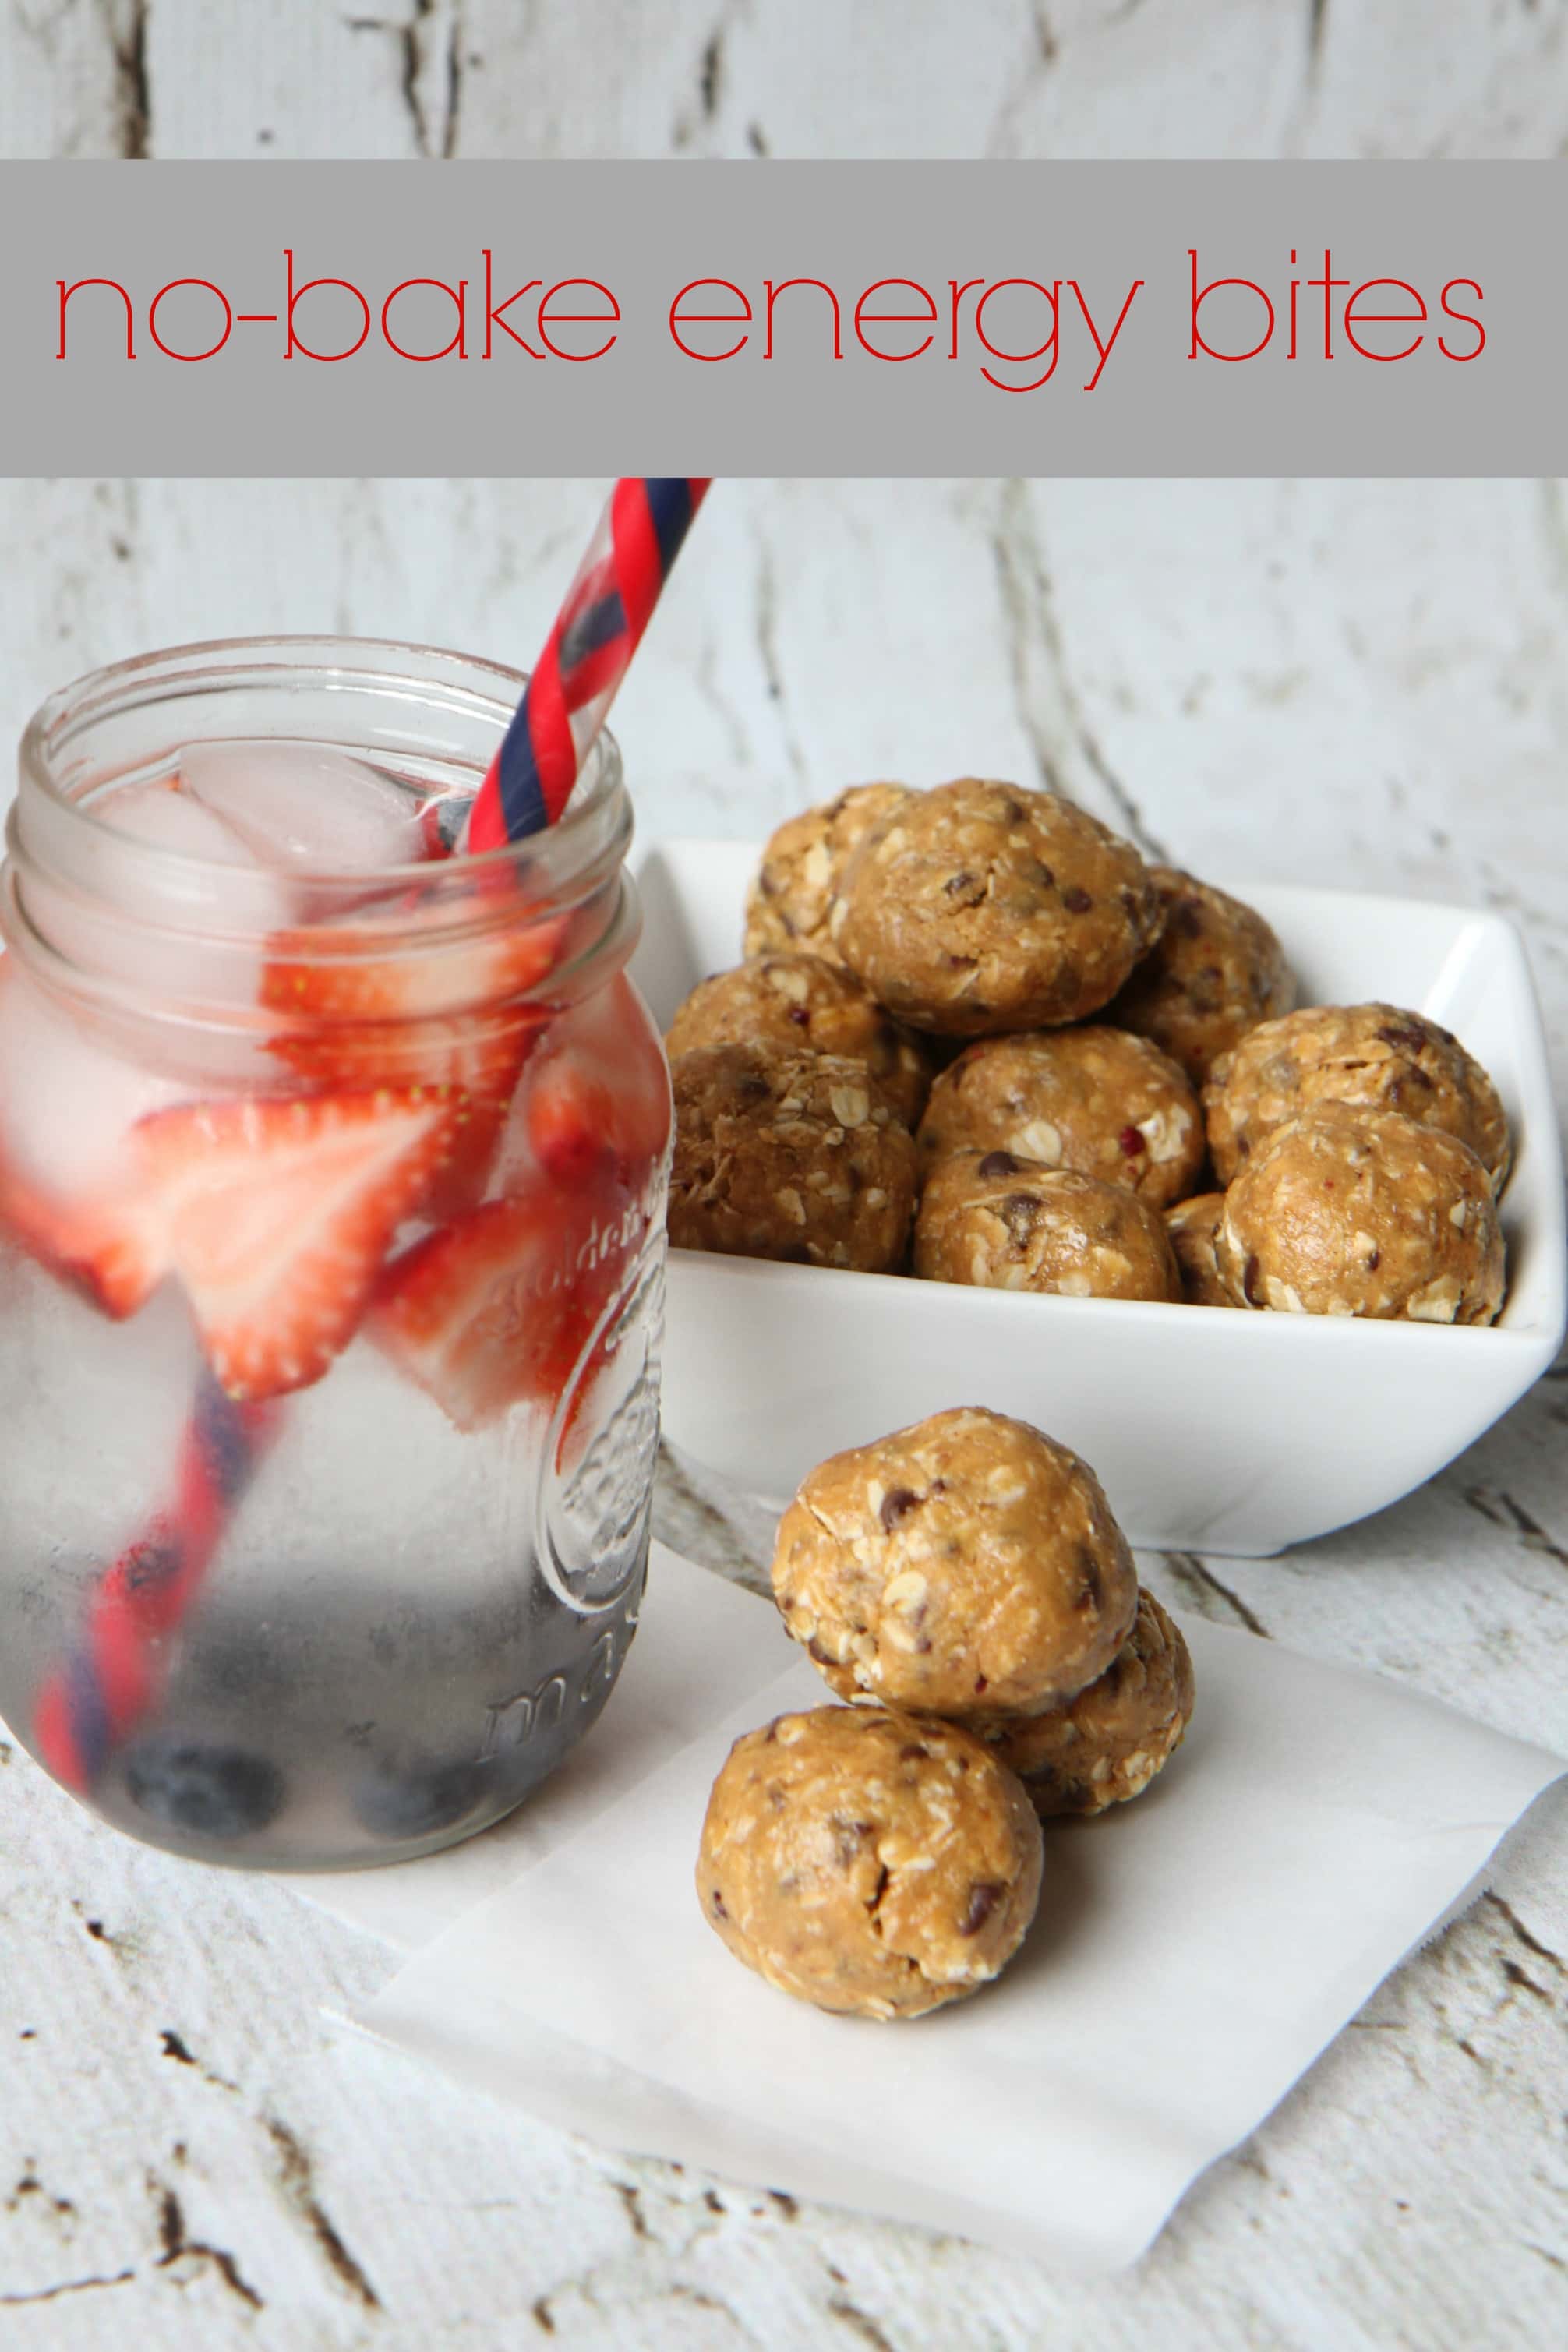
Berries- Berries are a great item to keep on hand to eat as a side, to grab by the handful for a quick snack, mixed in with a cup of Greek yogurt, or as a topper to a bowl of instant oatmeal in the morning. Cut berries can also be added to a water bottle and then allowed to steep overnight to create a healthy & inexpensive infused water.
Veggies- Cut veggies are the perfect item to have on hand for a quick and healthy snack. Some of my favorites for snacking are peppers (in every color), carrot sticks, celery sticks, & cauliflower. Pair these veggies with your favorite dips like a nut butter with celery or dip them in hummus for an easy snack.
Nut Butters & Nuts- Nothing is quicker or easier than keeping a package of nuts on hand for snacking. Did you know that you can even freeze nuts? Grab an extra package and store it in your freezer, up to six months, to make sure they don’t go rancid. Try a new variety like almonds, pistachios, walnuts, hazelnuts, peanuts, or cashews for a little variety. These can also be added to bowls of instant oatmeal in the morning or mixed into a salad for a crunch topping.
Nut butters are great for an accompaniment to celery or cut apples. My own favorite nighttime snack is peanut butter on a slice of whole grain toast with a glass of almond milk before I go to bed. It’s a satisfying and inexpensive snack!
Hummus- There are many different flavors and varities now of hummus and it is the perfect snack or spread to add to pitas or even smeared as a topping for your favorite sandwich. My favorite variety is the Red Pepper Hummus with sliced cucumbers or pita for an effortless snack.
String Cheese- String cheese is one of those grab-and-go snacks that I love to keep on hand in our fridge. Chop these up to add to your eggs to add a little cheesiness to your egg dishes without investing in bags of shredded cheese or wrap cheese with whole grain bread and a little deli meat into a “sushi” roll for a quick sandwich that can make lunches special.
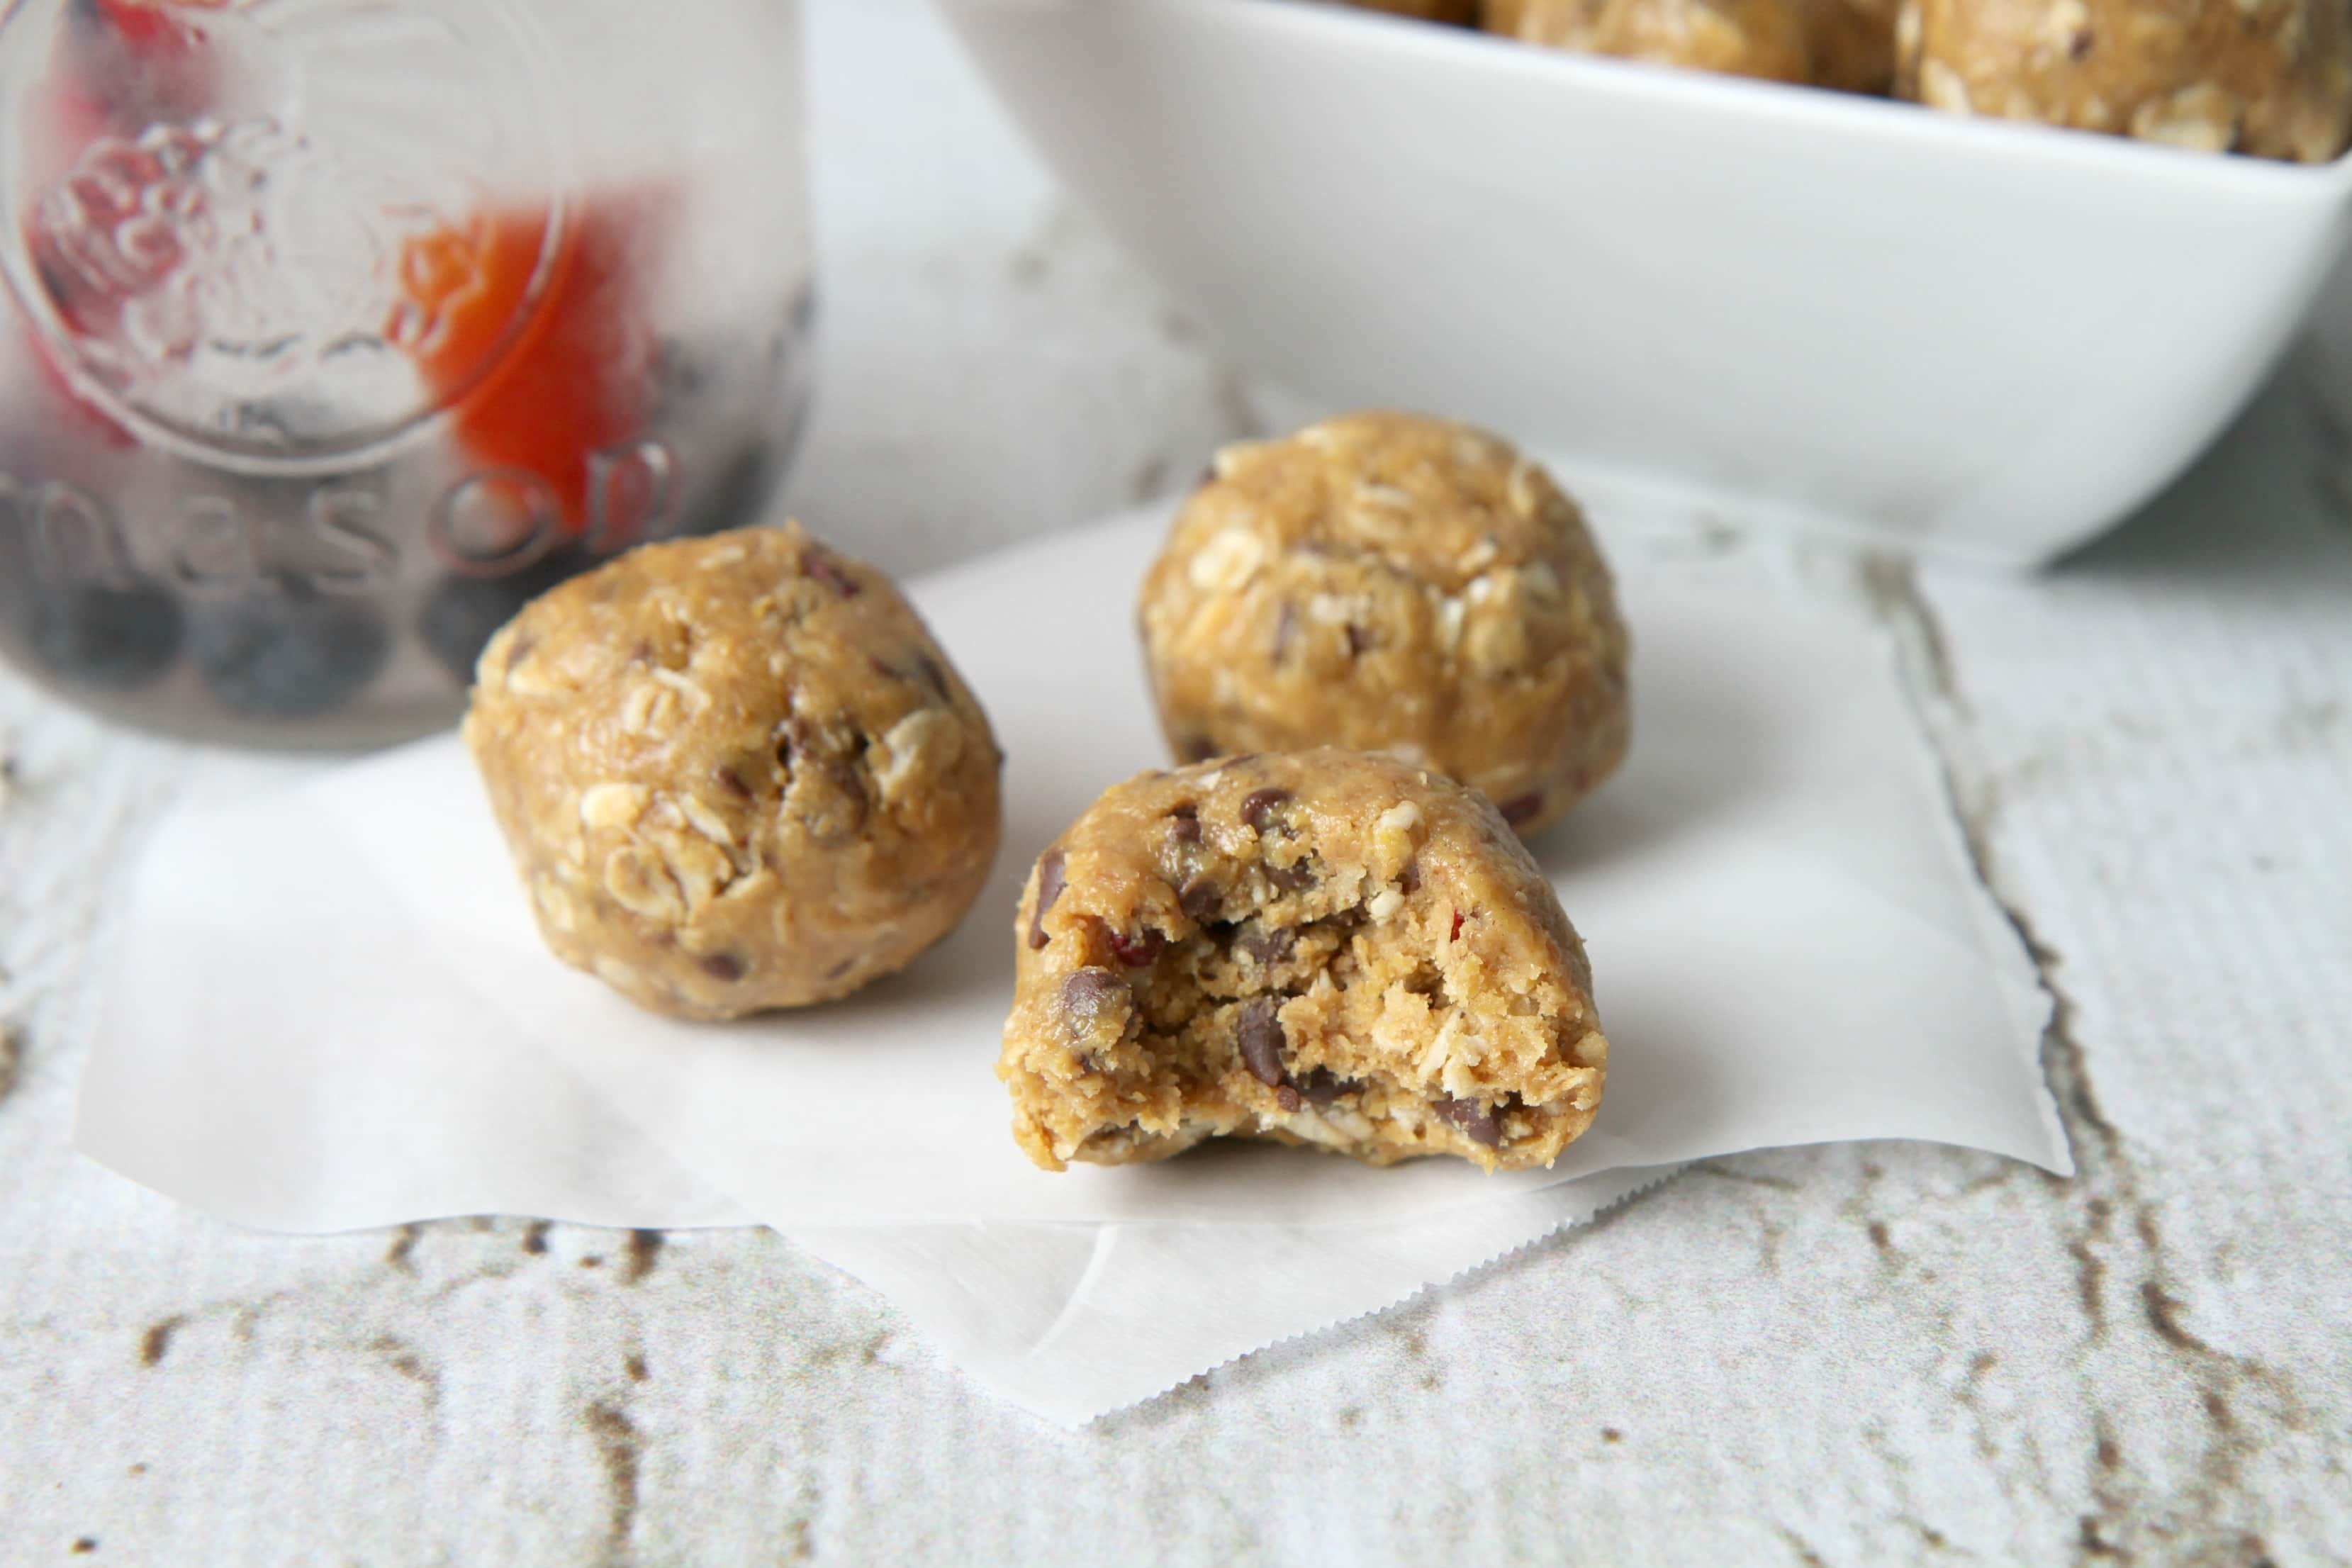
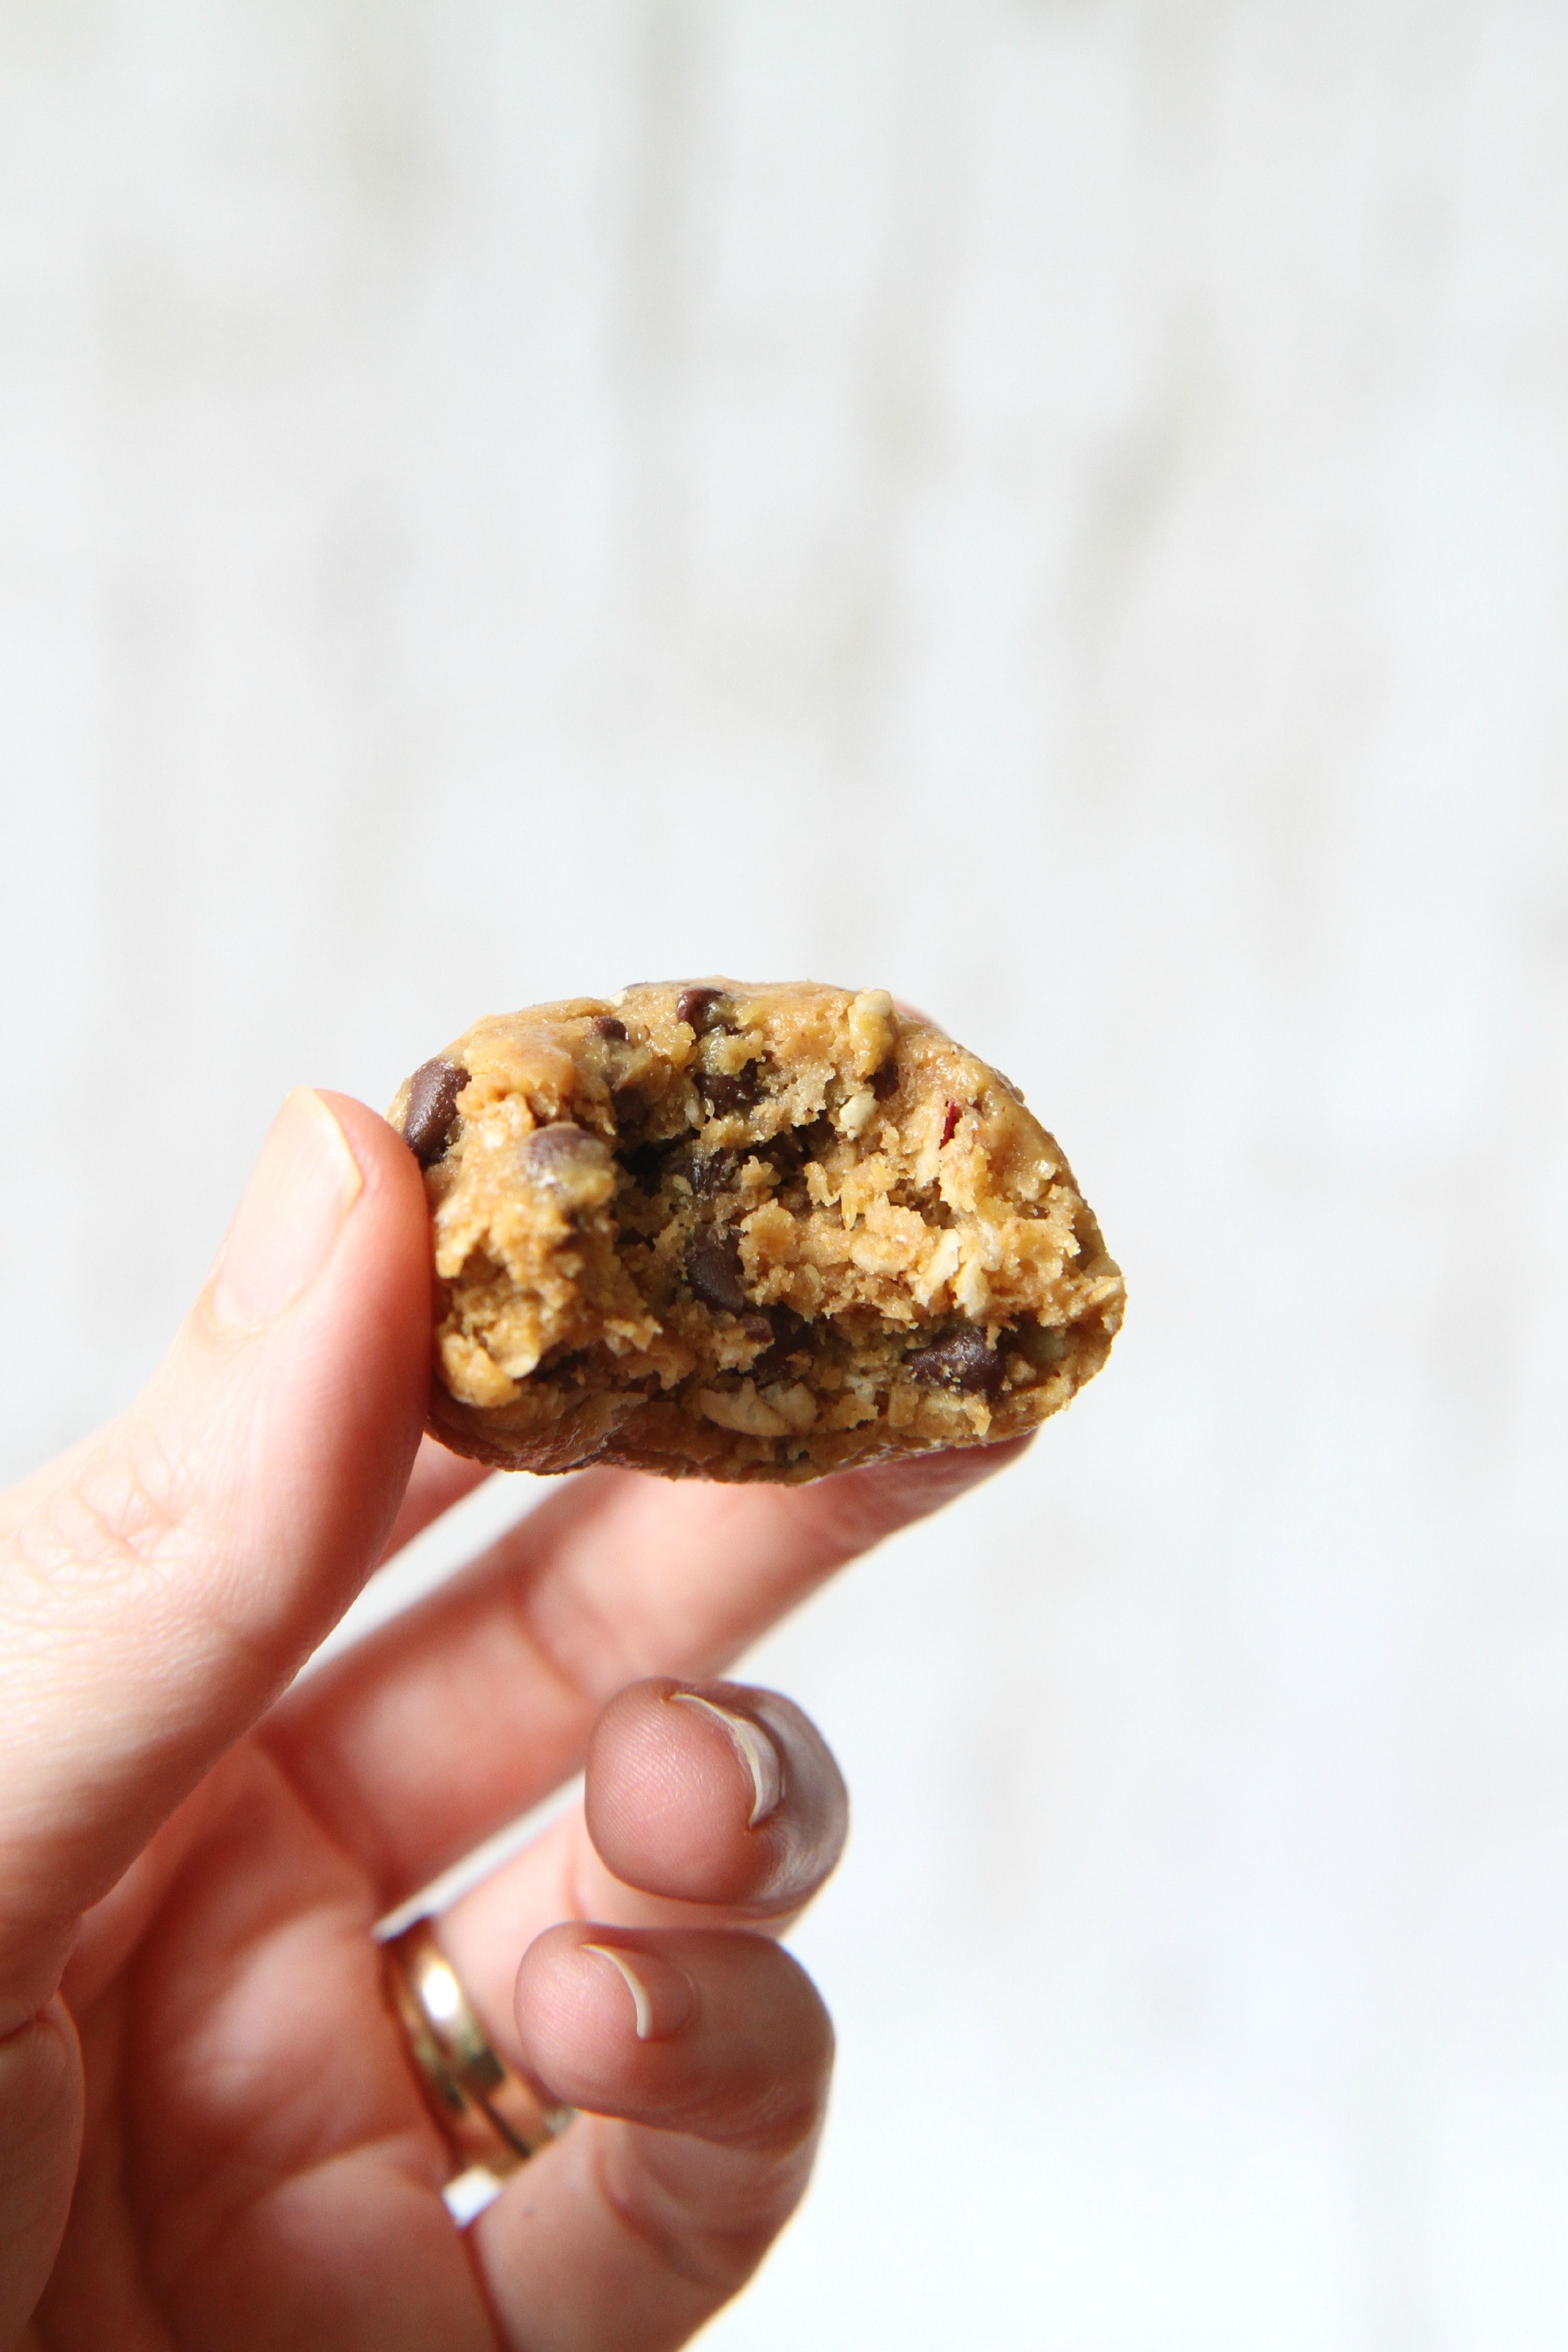
Energy Bites- No-bake energy bites are a fun snack to have on hand when you are craving a treat with a little sweetness. We all adore these at my house! The best part is that they don’t require an oven or mixer, making these an easy treat to make…and to eat! Did I mention it tastes an awful like cookie dough too? Yum!
No-Bake Energy Bites
Recipe Type: Snack
Author: Amy Clark
Prep time:
Total time:
Serves: 12-16 bites
Ingredients
1 cup oatmeal
1/2 cup peanut butter (or other nut butter)
1/3 cup honey
1 cup wheat germ
1/2 cup ground flaxseed
1/2 cup mini chocolate chips
1 teaspoon vanilla
Pinch of salt
Instructions
Mix everything above in a medium bowl until thoroughly incorporated.
Let chill in the refrigerator for half an hour.
Once chilled, simply roll into balls.
Store these in an airtight container and keep refrigerated for up to one week.
This was originally published in March of 2013 and goes so well with our focus on health that I thought you’d enjoy it again – it’s one of my favorite ways to start the day!
I’m always looking for filling & satisfying breakfast recipes and these quinoa-berry breakfast bowls fit the bill perfectly. A mixture of quinoa and steel cut oats offer a hearty combination for a breakfast that will fill you up and give you the energy you need to tackle your day.
If you are not familiar with quinoa, you are missing out on a filling and satisfying protein-packed food. Quinoa, pronounced (KEEN-wah) is a very nutritious gluten-free seed that originates from the Andean region of South America. Quinoa is a fantastic source of protein, contains all eight amino acids, is a good source of dietary fiber, contains B Vitamins, and iron. Though it is smaller than rice, barley, farro and bulgur, quinoa looks like a grain, thanks to its neutral coloring and hard exterior. In reality, it is actually a seed that originates from the cousin of the spinach plant. When cooked, these seeds expand rapidly and significantly, become tender but chewy and expel spirals that boast the slightest crunch. My favorite preparation of this delicious food can be found in my tutorial on how to cook quionoa in your rice cooker.
Steel-cut oats are essential grains which are full of nutritional value, rich in B-vitamins, calcium, protein and fiber while low in sodium and unsaturated fat. In fact, just one cup of steel-cut oats contains 8g of fiber. Steel-cut oats are whole grain groats, the inner portion of the oat kernel, which have been cut into two or three pieces rather than flattened.
With quinoa and steel cut oats in one bowl, you have a winning combination for a great way to start your morning.
Top your quinoa-oat bowls with any of your favorite oatmeal toppings. I love the combination of berries and toasted slivered almonds, but if the pantry is lean that day, I rely on walnuts and dried berries.
I prepared my oats with almond milk, giving it a great calcium boost and it adds even more protein to my breakfast bowl. You can prepare this with whatever your favorite milk is or whatever your family typically drinks.
This makes enough for two large bowls or four smaller bowls. Store leftovers shortly after preparing. The leftovers can be reheated in your microwave and thinned with a little milk.
If you make a double batch, you will have enough for all week long. I prepare these on Saturday mornings when I have a little more time and reap the rewards of my labor throughout the week.
You know the phrase, “a watched pot never boils.” Really, not the case with these. Keep an eye on these all the time and make sure you have a generous pot to prepare them in because these bubble up and boil over pretty easily.
Quinoa-Berry Breakfast Bowls
Recipe Type: Main
Author: Adapted from Camille Styles
Prep time: 5 mins
Cook time: 35 mins
Total time: 40 mins
Serves: 4
A protein packed breakfast bowl made from quinoa and steel cut oats and topped with fresh berries and nuts.
Ingredients
3/4 cup steel cut oats
pinch of salt
1/4 cup quinoa
3 cups water
3/4 cup milk of your choice
1/2 teaspoon vanilla extract
2 tbsp maple syrup
Toppings (whatever you favorite topping combination is)
Instructions
In a large saucepan, combine steel-cut oats, salt and water. Bring to a boil, then reduce heat and simmer, partially covered, for 15 minutes without stirring.
Rinse quinoa well in a fine-mesh sieve.
Drain and add quinoa to the oats, give it a quick stir, then partially cover and simmer for 10 more minutes.
Add 1/2 cup milk and add vanilla to your saucepan. Stir gently to combine and cook for an additional 10 minutes.
Spoon into a serving bowl and top with remaining milk, maple syrup and toppings.
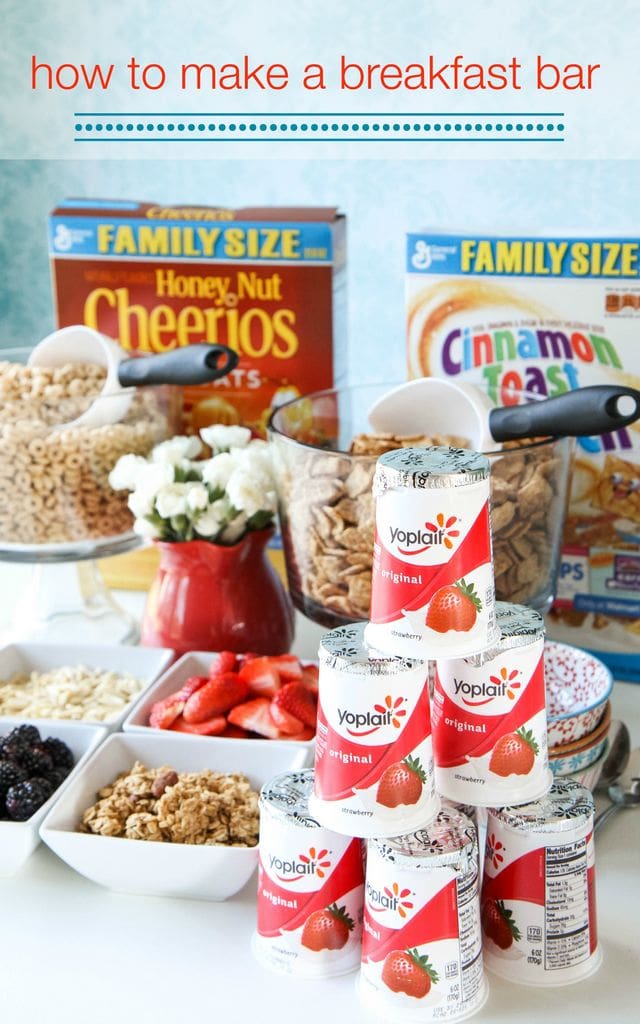
We have come to the age of slumber parties and epic sleepovers in our home. If you were anything like me when I was a child, you just couldn’t wait to wake up and find out what would be for breakfast. Making a breakfast bar can be a fun way to serve a large group whether it is your child’s birthday or simply an easy way to entertain guests for the morning. I am partnering with Walmart today to show off a cute display for creating a breakfast bar in your home.
My favorite sleepover when I was a kid involved a huge display of toppings for our waffles and pancakes. I remember as a child delighting in all of the options and I still have that delight even as an adult. Now as mom, I love creating a self-service bar of choices for our meals where everyone can customize their own meals to their own tastes.
Breakfast, in particular, as a buffet is a great idea so that guests can sleep in and then come and create their breakfast whenever they are ready, eliminating the need for you to all be around the table at the same exact time.
Even on busy school mornings, I find that this option would work beautifully since we all arrive at the table at different times. By prepping the toppings ahead, you can save time in the morning and really enjoy that cup of coffee.
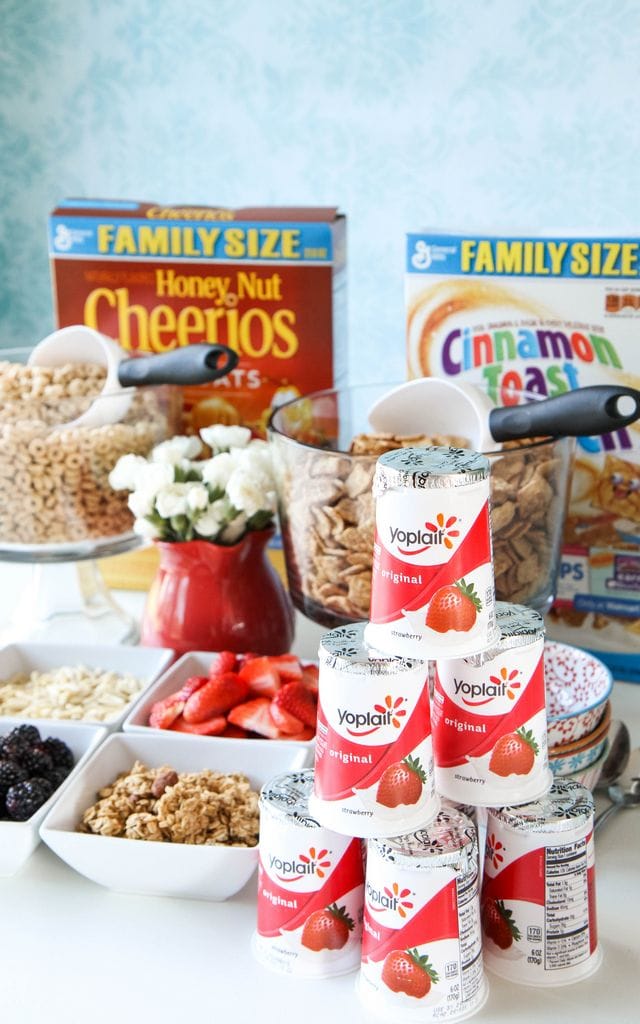
Here are some of my suggestions for creating a beautiful and easy breakfast bar spread!
Make Serving Easy With Scoops & Trifle Bowls
Ditch the cereal boxes for an elegant display utilizing clear glass trifle bowls and an inexpensive all-purpose scoop. Give your guests choices by providing more than one selection of cereal.
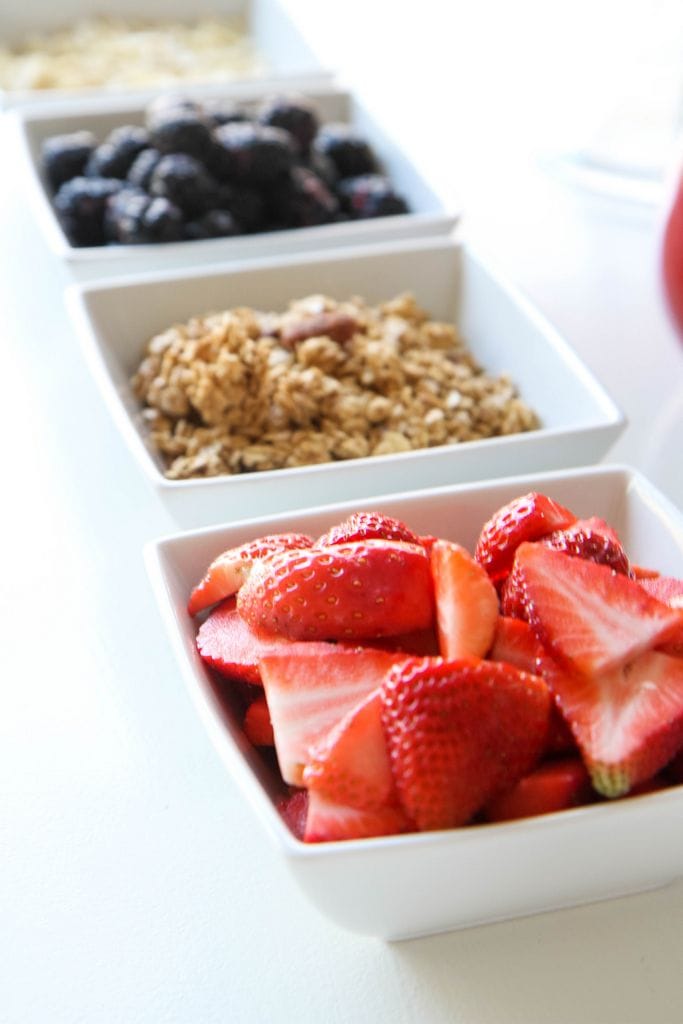
Create a Simple Toppings Bar
I love to provide a variety of toppings so everyone can make their bowl their own. Fresh strawberries, blackberries, or blueberries can be a wonderful fresh topper. Dried fruits, slivered almonds, or crunchy walnuts can also add variety to your toppings bar. Make an easy batch of granola (I love this vanilla-scented granola or this easy honey nut granola) and add this to the mix for another crunchy layer. Remember to take advantage of what fruits are in-season to make sure you get the most bang for your buck.
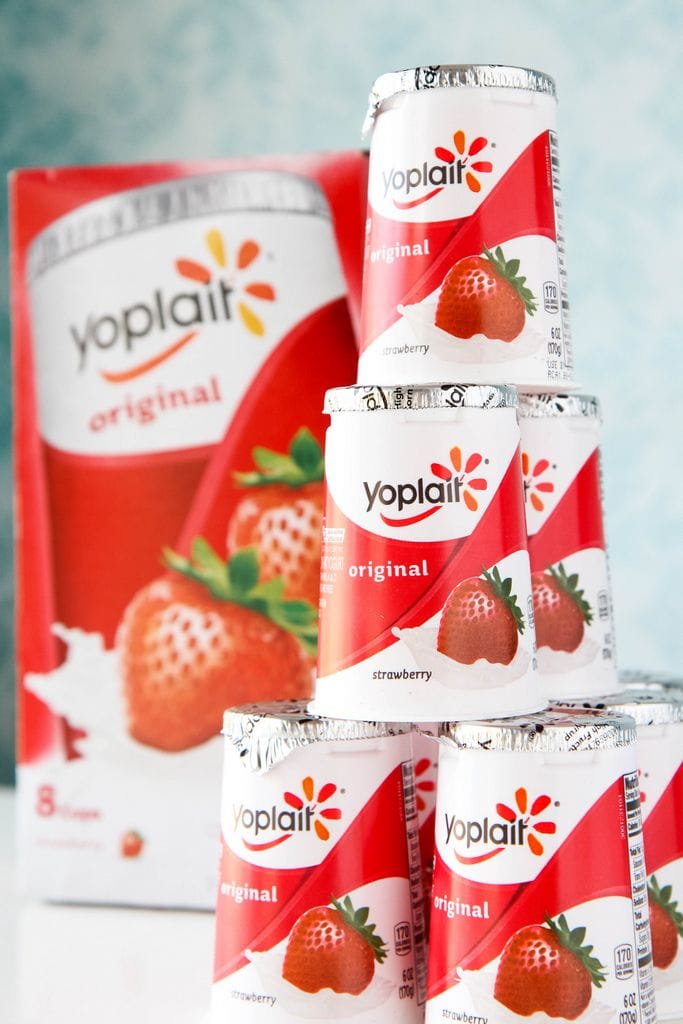
Add a Gluten-Free Option
As someone who is gluten-free, I love when there are options for me. Yogurt can be a delicious option and give your guests a chance to also create their own bowl utilizing the delicious toppings you have provided for your breakfast buffet. I like to keep small bowls handy to pour the yogurt out into and giving me room to really layer on the fruit, nut, and granola toppings, just as I would do with cereal. Make sure that you are using gluten-free oats if making your own granola or purchase gluten-free prepared granola if purchasing them.
Make a Pretty Display
If there is one investment that I am glad I have made over the years, it has been in classic white dishes. Display your toppings in pretty bowls and add an inexpensive bouquet of flowers to the center of your breakfast bar. Even if the ingredients are not all homemade, you can still make things feel pretty and upscale with a few inexpensive additions and beautiful plating.
I hope these ideas inspired you for your breakfast. Whether it is a weekday rush or a leisurely morning with out-of-town guests, the breakfast bar can be an easy way to serve a meal!
Now that school is in full gear, I like to make sure to feed my children nourishing breakfasts to keep them alert and energized throughout the day. Although I educate my children at home, there are still quite a few days during our school week that we need to head out early. Wether it’s for our co-op days, horse riding lessons, exploration days, or other field trips, a quick, on the go healthy breakfast is a must.
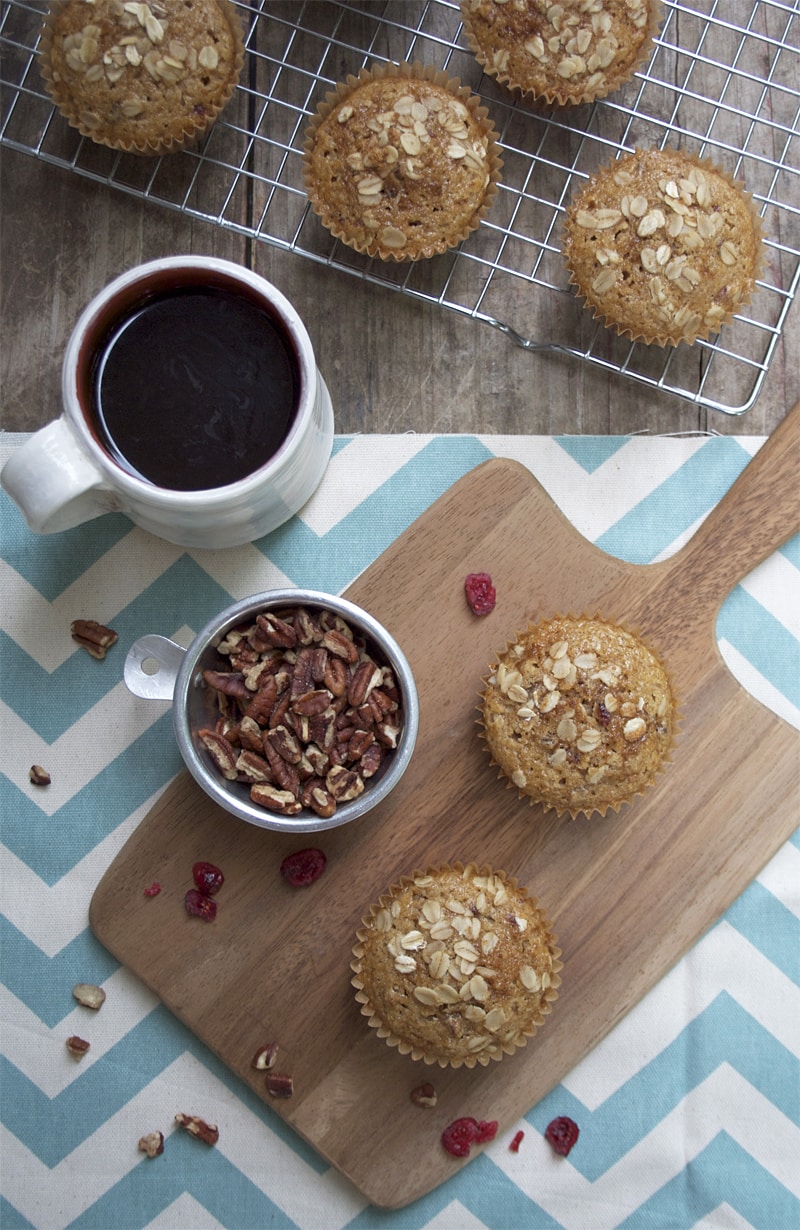
For days like these I enjoy baking breakfast muffins that are a cinch to make and travel beautifully.
What I love about breakfast muffins is that you can be pretty flexible with them by adding a variety of nutrient dense ingredients of your liking, making them a great healthy food to serve to your family in the morning. I usually like to add oats, nuts, seeds, and a variety of wet and dried fruits or vegetables to up their nutrient content. In my home, I don’t use very much white sugar; instead, I opt for natural sweeteners like honey, pure maple syrup, coconut palm sugar, and fruit to gently sweeten my breakfast muffins. This, too, adds additional vitamins and minerals.
As I shared with you earlier this year, I’ve grown to really enjoy using einkorn flour in my home. Einkorn flour is more nutritious than modern varieties of wheat. It’s high in thiamin, fiber, and a number of b vitamins. It also contains a significant amount of the the powerful antioxidant, lutein. As compared to modern varieties of wheat, it’s higher in protein and has a lower percentage of nutrient loss during processing. As you can tell, these breakfast muffins are not just tasty but healthy too!
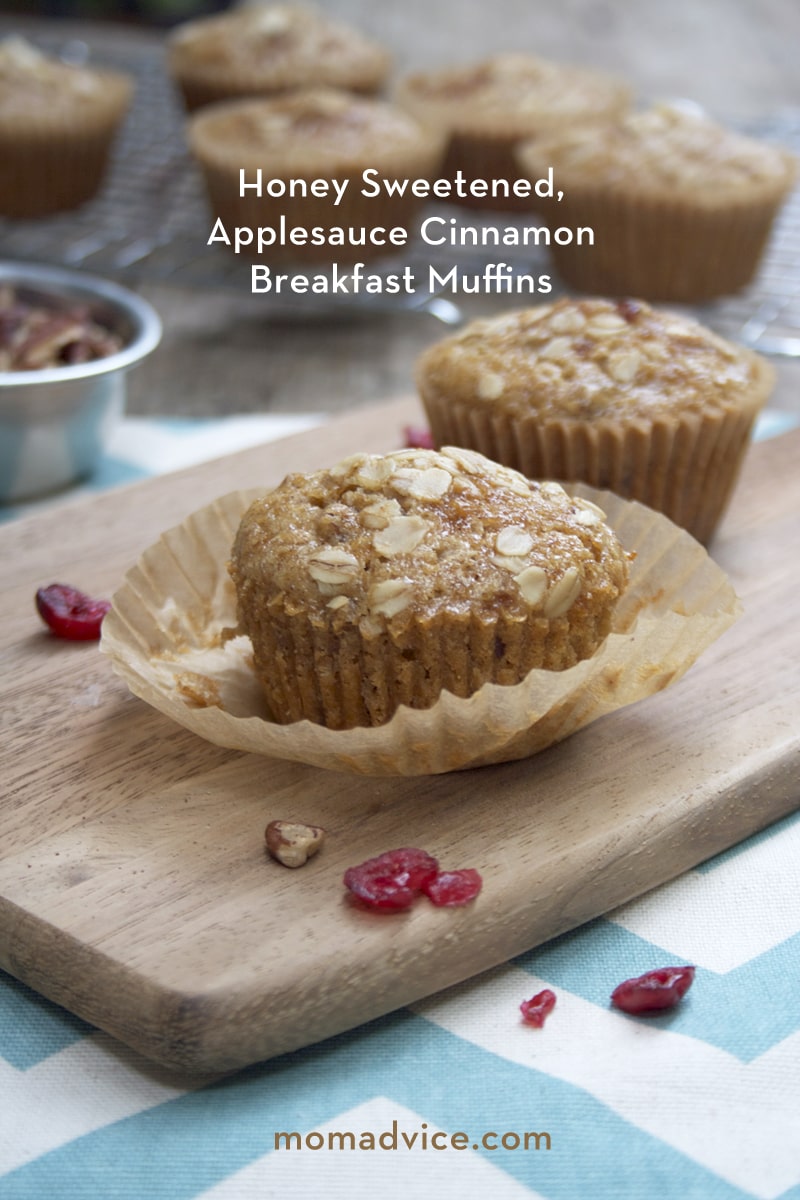
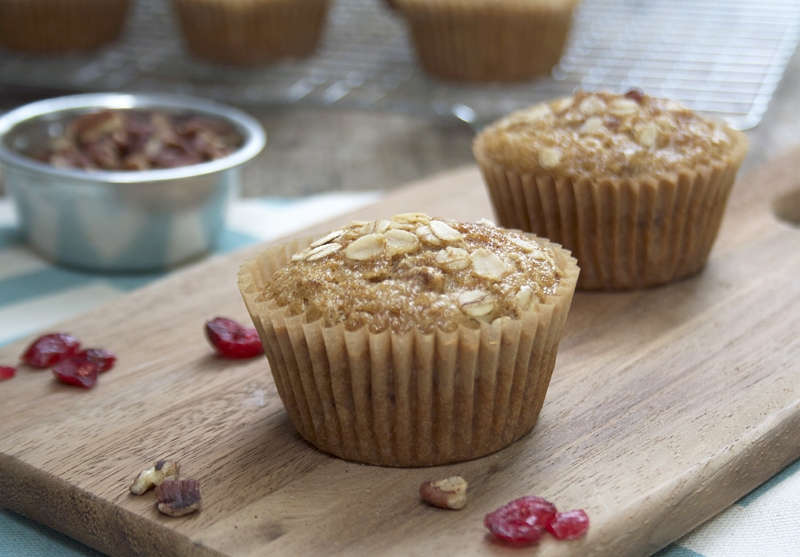
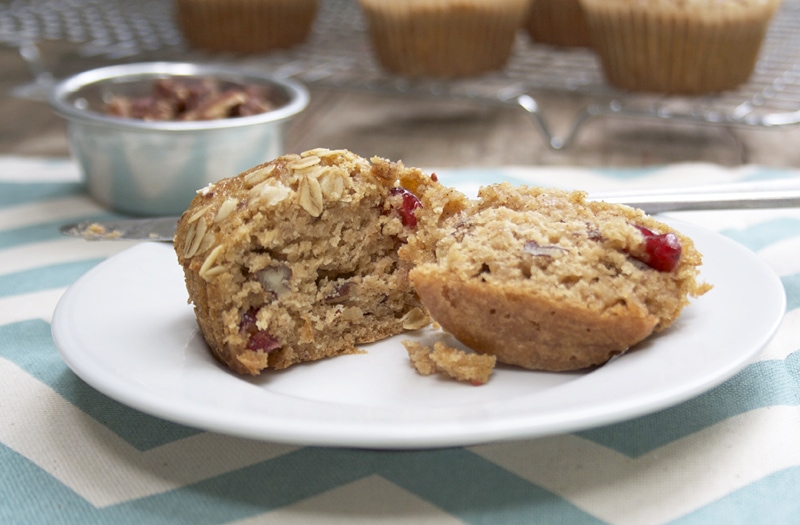
Now that apples are in high season, I decided to make a batch of honey sweetened, applesauce cinnamon muffins. Really, these are so easy to make and they turn out delightfully moist so that they will keep well for a few days on the counter or can be frozen to be eaten throughout the week. In addition to the applesauce I also added pecans and cranberries for good nutritional measure. I think once you bake these, you’ll find that they are perfectly sweet, moist, and just the right size to grab on the go!
Also, these muffins are great to add to your children’s lunches or served as an after school snack!
Honey Sweetened, Applesauce Cinnamon Muffins. Perfectly sweet, moist, and just the right size to grab on the go!
Ingredients
1 1/2 cups einkorn flour
1/2 tsp baking soda
1 tsp ground cinnamon
1/2 tsp ground ginger
1/2 tsp salt
1/2 cup (1 stick) butter, just barely softened
1/2 cup honey
1 cup applesauce
1 egg
1 tsp pure vanilla extract
1/2 cup chopped pecans
1/4 cup dried cranberries
Instructions
Preheat your oven to 350F. Line a muffin pan with 12 paper liners and set aside.
In a small bowl, whisk together the flour, baking soda, cinnamon, ginger, and salt.
In the bowl of a stand mixer, fitted with the paddle attachment, mix the butter, honey, applesauce, egg, and vanilla extract on medium-high speed for 3 minutes.
After 3 minutes, lower the speed to low, and 1/3 cup at a time, add the flour until just mixed. Do not overmix.
Gently, fold in the pecans and cranberries.
Divide the batter evenly among the 12 muffin cups. Bake at 350F for 20-22 minutes or until a toothpick inserted into the middle of a muffin comes out clean.
3.2.2708
Do you enjoy baking breakfast muffins? Tell me, have you ever had an applesauce cinnamon muffin? Please share with us in the comments below your favorite muffin to make for your family.
I am so excited that my book club was chosen to participate in a This Is Where I Leave You book club before the film hits the big screen on September 19th. When I was asked to participate, I had heard of Jonathan Tropper, but had never read one of his books before. I can honestly say that if you are wanting to add a little sparkle and hilarity to your book club discussion, This Is Where I Leave You is the book for you.
I read this book in a record two days and my husband kept finding me with it in some state of crying-laughing almost every moment I read it. Although he isn’t much of a reader, I handed it to him and said, “You must read it.” Each night when I crawl into bed, I hear random laughing and snorting on his side of the bed. It is that kind of book that you finish and hand off to someone else so you can laugh about it together.
When their father passes away, four grown siblings, bruised and banged up by their respective adult lives, are forced to return to their childhood home and live under the same roof together for a week, along with their over-sharing mother and an assortment of spouses, exes and might-have-beens. Confronting their history and the frayed states of their relationships among the people who know and love them best, they ultimately reconnect in hysterical and emotionally affecting ways amid the chaos, humor, heartache and redemption that only families can provide—driving us insane even as they remind us of our truest, and often best, selves.
In this story, each of the siblings are told that it is their father’s dying wish for them to sit shiva together as a family. The irony is that their father is an atheist who made it known he didn’t believe in religion, but with their mother’s persuasion, she manages to get their family together under one roof for one week. With no escaping each other and a lot of time to reflect on life and the choices they have made, it really makes for some hilarious moments of family dysfunction at its best. What I loved about this story more than anything is the message that even when they drive us crazy, we will always love our family.
I love it in the way that I loved the movie Bridesmaids- so wrong and so right. Raunchy, hilarious, laugh-out-loud funny, heartwarming, and so perfectly pitched. I would highly recommend this one for fans of Arrested Development as it reads just like my favorite episodes of the early seasons of the Bluth family. The crazy family dramas are always my favorites and this family does not disappoint in the craziness department. For better or worse, they are family, with all that history and messiness and love.
Love stories told from male authors sometimes fall short for me, but that was not the case in this one. Tropper does such a fantastic job of sharing what a failing marriage looks like, what it would feel like to lose the love of your life (interweaving old stories of the couple and new), and how one can find love again. Even in the darkest of moments of this marriage, Tropper finds a way to bring the hilarity into even the depressing situations of losing your life partner.
Since the movie will be hitting the big screen on September 19th, I hosted our book club to read the book and then we plan to make an outing to see the book on the big screen. Sometimes it is difficult to find a book that we all like, but this one fit the bill perfectly for our group and we used the time to have a delicious brunch together and celebrate the kids heading back-to-school.
After seeing the trailer, I already know that this is going to be one of my favorite movies this year. I have to say that after reading the book, the film could not have been more perfectly cast and I kept seeing these actors in these roles even as I read the book. Many times the movies just don’t live up to the books, but I can already tell that this one won’t be the case.
TIWILY Boozy Brunch Ideas
Here are some delicious brunch options for a fun morning with your girlfriends that are some of my favorite when I am entertaining. I am selecting these because they can be made before everyone arrives so that you can really enjoy book club with your friends. You will also find a fun drink I have created just for your book club that you can sip while chatting about the book.
In the theme of the book and all the food that is brought to the family as they sit shiva, you could also make your friends bring you brunch dishes potluck style in excessive abundance, taking the pressure off of you as the hostess.
Perhaps you could even pass some of these recipes on to them and ask them to make them for you.
It just seems like something awkward that the Foxman family might try in the book.
What is a book club without a good discussion? LAME. Here are some of my favorite book club questions that I gathered for our discussion together!
TIWILY Book Club Questions
1. What was your first impression of Judd’s wife, Jen? Because you see her almost entirely from Judd’s perspective, was there any chance to see her as a sympathetic character before Judd finds her so? Do you think that Judd and Jen have a chance at salvaging their relationship, with or without a baby girl to raise?
2. Discuss Judd’s mother and her relationship with each of her children. Do you think that Hillary Foxman was truly a bad mother? Was there any real irony in her being a child-rearing guru? What was your opinion of her character?
3. Most of the characters in this novel struggle against living up to an ideal established either by themselves or by a friend, family member, or spouse. Judd fails to be the perfect husband, brother, and son; Jen fails to be the perfect wife; Wendy fails to be the perfect mother and Alice fails to become a mother at all. Mort and Hillary Foxman, it turns out, fail their children spectacularly in some ways while succeeding in others. What do the lives of these characters reveal to us about perfectionism, ideals, and our expectations for ourselves and others?
4. For all of their faults, is the Foxman clan a likeable group of people? What makes them an endearing group of people? Who did you like the most, and who did you find the least appealing, and why? Were there any characters you would have liked to see developed further?
5. Clearly, Judd is an adult, yet this book can also be seen as a delayed coming-of-age story. What does Judd learn in the end about himself and his role in helping to create the world in which he finds himself?
6. Discuss Judd Foxman, the novel’s protagonist, from his very ironic and dry sense of humor (shared also by his brothers and sister), to his anger and vulnerability regarding his wife’s infidelity, to his conflicted emotions regarding his immediate family. What was your first impression of the protagonist/narrator of this novel? What did you find the most engaging aspect of his character? Did you find any aspect of him off-putting?
7. What comment is Tropper making about the role of trauma and tragedy in our lives? Almost every character in this book suffers or has suffered: Phillip from his neglected/overindulged childhood; Judd from his wife’s infidelity; Horry from his brain damage; Paul from the Rottweiler attack; Wendy from her unhappy marriage; and Alice from her infertility. What does their unhappiness, and the way each person copes with that unhappiness, teach us?
Be sure to head to the theaters to see This Is Where I Leave You on September 19th!
Share your own book club and hashtag it with #TIWILY #TIWILYbookclub
In honor of the movie, I am hosting a giveaway today for one (1) $50 Visa gift card and a copy of the book so you can enjoy reading the book and then catch the film in theaters September 19th! Please follow instructions in the Rafflecopter below to enter to win by September 12th! One winner will be chosen at random! a Rafflecopter giveaway
Caramel Apple Sangria
Recipe Type: Drinks
Prep time:
Total time:
Serves: 8
Nothing screams the Fall season like caramel apples. This recipe is just 4 simple ingredients and perfect for your next get together!
Ingredients
1 bottle of Pinot grigio
1 cup caramel flavored vodka
6 cups apple cider
2 medium apples, cored and chopped
Instructions
Stir the wine, vodka, and apple cider together in a large pitcher or serving container.
Add the chopped apples to the pitcher, or to individual glasses.
Serve the sangria over ice.
3.2.2708
*This post is sponsored by Warner Bros. Pictures. All thoughts and opinions are my own.
I am excited to share with you that I have partnered with Mrs. Butterworth today for a fun family prize pack giveaway and to share about their sweet-stakes they are hosting for their fans through April 30th! Lucky for us, I am not only giving away a prize pack for our MomAdvice readers, but I am showing you a fun new recipe you can try to put that wonderful prize pack to work in your kitchen.
This month, Mrs. Butterworth’s has teamed up with Busch Gardens to generate some more fun around the dinner table. They have launched a Family Fun Sweet-stakes where you can enter to win a trip to one of the Busch Garden parks. You can read all about their fun contest here! This contest inspired me so much that I knew I had to head to my kitchen and create something in honor of it.
I have always been a syrup-loving girl. For years, we have made it a family tradition to indulge in, what we lovingly call, “Jazzy Sunday.” Jazzy Sunday amounts to throwing on a few jazz records and making waffles and pancakes drenched in syrup for a delicious Sunday brunch.
With eating gluten-free, I have found that it takes a lot of practice to replicate my favorite pancake and waffle recipes. I began to think about the fluffiest waffles I had ever made and it was an overnight waffle recipe that my best friend shared with me years ago. I started wondering if I could replicate this with a gluten-free waffle recipe. Low and behold, after a few experiments, I found it is possible to make fluffy-as-air waffles with the overnight technique of warm milk, frothy yeast, and easy all-purpose gluten-free flour.
The batter is still dense, but it yields a fluffy waffle that no one will ever know is missing the gluten. When topped with fresh berries and Mrs. Butterworth’s Syrup, it is truly a Sunday treat that will make your own, “Jazzy Sunday,” complete.
In honor of this fun contest, Mrs. Butterworth’s gave me a Family Fun Breakfast Kit that include goodies from Mrs. Butterworth’s and Busch Gardens, as well as jungle animal-themed pancake pans, perfect for the explorer in the family. If you don’t win it here though, they will also be giving away a Family Fun Breakfast kits every two weeks during this contest so there are some great chances you can win there too!
Enter our giveaway of one Family Fun Breakfast Kit using our Rafflecopter widget below and let us know one of your favorite breakfast traditions and LIKE Mrs. Butterworth’s for an additional entry! I will be selecting one winner on April 3rd so be sure to get those entries in! Grab the recipe for Gluten-Free Overnight Waffles below!
A light, fluffy, and super delicious overnight waffle recipe that is also gluten-free!
Ingredients
2 1/4 cups milk (or dairy substitute)
2.25 teaspoons yeast
1 teaspoon sugar
1 teaspoon salt
1/2 cup butter (1 stick)
2 cups all-purpose gluten-free flour (I used Better Batter in this)
2 eggs, beaten
1/4 teaspoon baking soda
2 teaspoons vanilla, gluten-free
Instructions
Warm milk and butter in a medium saucepan over low heat just until the butter melts.
Remove from the heat and allow to cool. Once to a lukewarm temperature, add dry yeast and sugar to the milk and let sit until the yeast is bubbly, about 5 minutes.
Pour the liquid into a large container with a tight fitting lid.
Add the salt and flour, mixing until smooth.
Cover tightly and keep at room temperature overnight (don’t refrigerate).
When you are ready to cook the waffles, preheat waffle griddle, stir in the beaten eggs, baking soda and vanilla.
Pour 2/3 cup of the batter on the griddle (or enough to cover the surface) and bake until golden.
Serve with fresh fruit and Mrs. Butterworth’s Syrup.
If there is one thing this girl loves, it is pancakes. Today I am sharing a recipe for gluten-free pancakes that taste as light and fluffy as our gluten-filled variety, but are perfect for creating for those who cannot tolerate gluten.
Fluffy gluten-free pancakes are easier to create than you might think, it just requires the right measurements, a good flour, and a little milk on hand if your batter gets too thick. Before we made the switch to gluten-free, I loved to throw wheat germ into our hearty wheat-filled pancake. No wonder I felt so awful after our Sunday brunches!
Now we have substituted our wheat love-fest with flax seed in our pantry for our pancakes and energy bites, a deliciously healthy addition to just about anything, and still get that taste and texture that I love. As with all my favorite pancake recipes, it is laced with cinnamon and vanilla while these pancakes get their sweetness from a little honey.
When I first discovered that I had to go gluten-free, my best friend recommended a book called, “Gluten-Free on a Shoestring.” (affiliate link) I treated myself to the cookbook for Christmas and loved that the author relied upon one all-purpose mix to make almost all of her recipes.
I placed my first order for Better Batter after reading it and started testing recipes with this cup-for-cup substitute shortly after buying it. None of us could believe how good everything had tasted and with very little adjustments in our favorite family recipes.
I immediately wrote the company and asked if they might be interested in a partnership. I truly believe in their product and how it can help beginner gluten-free chefs overcome their difficulties with baking. Not only did they send me some products for our recipes, but they also are offering valuable coupon codes for our readers to try their flour too.
Not only does the flour perform well, but it is much more affordable than other flours on the market. You can even buy their product in bulk to snag additional savings.
What are the Ingredients In This Flour?
The flour I have featured today is an an all-purpose flour substitute that you can use as a cup-for-cup substitute in your recipes. The packaging states that it contains: Rice flour, brown rice flour, tapioca starch, potato starch, potato flour, xanthan gum, and pectin (lemon derivative). It is the blend of these flours that makes it such a great performer in baking recipes. I hope that helps!
How Can I Save Money On This Flour?
I truly believe you will love this flour and am so excited that Better Batter is sharing some coupon codes with our readers to help them save even more. This month you can use the coupon code XNF6EBYK4JRT for $8 off ANY SIZE ORDER.
That’s right, I said ANY SIZE!
I hope you can take advantage of the savings and can enjoy a stack of these delicious pancakes in your home!
Gluten-Free Pancakes
Recipe Type: Breakfast
Author: Amy Clark
Prep time:
Cook time:
Total time:
Serves: 4
You won’t even miss the gluten with this delicious pancake recipe. Be sure to double your recipe so you can enjoy these all week long!
Ingredients
2 cups Better Batter All-Purpose Flour
1 teaspoon baking powder
1 teaspoon baking soda
2 tablespoons flax (optional)
1 teaspoon cinnamon
1 teaspoon salt
2 teaspoons vanilla extract
2 tablespoons honey
2 eggs, lightly beaten & at room temperature
6 tablespoons unsalted butter, melted and cooled
2½ cups milk (or milk substitute)
Instructions
Heat your griddle or nonstick pan and coat generously with butter.
In a large bowl, place the flour, baking powder, baking soda, flax, cinnamon, and salt in and whisk to combine.
Create a well in the center of the dry ingredients, and add the eggs, butter and milk, one at a time, blending well after each addition. Add vanilla and honey and continue to mix until the batter comes together and there are no lumps.
Working quickly, ladle the pancake batter on the griddle surface, and allow to sit until bubbles begin to appear on the surface (2 to 3 minutes). Flip and continue cooking for another 1 to 2 minutes, or until the underside is browned.
Remember that your batter thickens as it stands and may require more milk to keep your batter in a pourable consistency.
If there is one thing you know our family loves it is doughnuts. In honor of the upcoming Olympics, I am sharing a delicious gluten-free baked doughnut recipe that you can bake up as a treat for those opening ceremonies. This gluten-free doughnut recipe is as easy to put together as our other wonderful doughnut recipes and are so fun to decorate for the holiday.
Today’s project is sponsored by Walmart. Almost everything you need for this project can be found at their store!
One thing you will need to create these doughnuts is a doughnut pan. When I first started baking doughnuts, you had to order an item like this online and through specialty shops. Now you can find it right on the shelves at Walmart, in the same aisle as your cookie sheets & baking pans. The price on their Wilton doughnut pans is $7.19. I have two of them because most recipes yield 10-12 doughnuts and it saves me time in the kitchen. These two pans have paid for themselves over and over again for our occasional sweet weekend treat!
Because I am new to gluten-free baking, I am using a gluten-free all-purpose mix to save me time in the kitchen. I bought a batch of Better Batter for my pantry and I have found that it is yielding impressive results for all of my baking needs. Buying it online from the company in bulk has saved me some money and storage in my pantry, thanks to not needing to buy multiple flours to blend. The bonus is that this mix does contain the Xanthan gum right in it. If your mix does not contain this, you will need to add that ingredient separately.
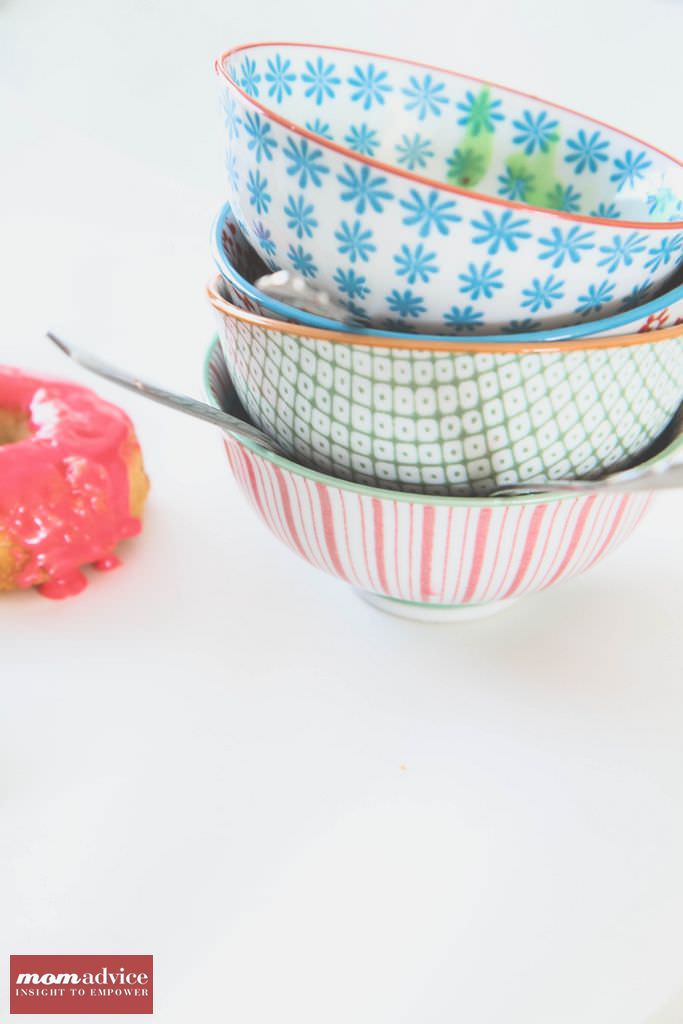
These doughnuts are light, fluffy, & sweet. The first things my kids remarked on was the spice in them. Although there is just a pinch of nutmeg, this ingredient really pulls through in the doughnut. For non-Olympic doughnut events, a sprinkle of powdered sugar on these is a delightful morning treat.
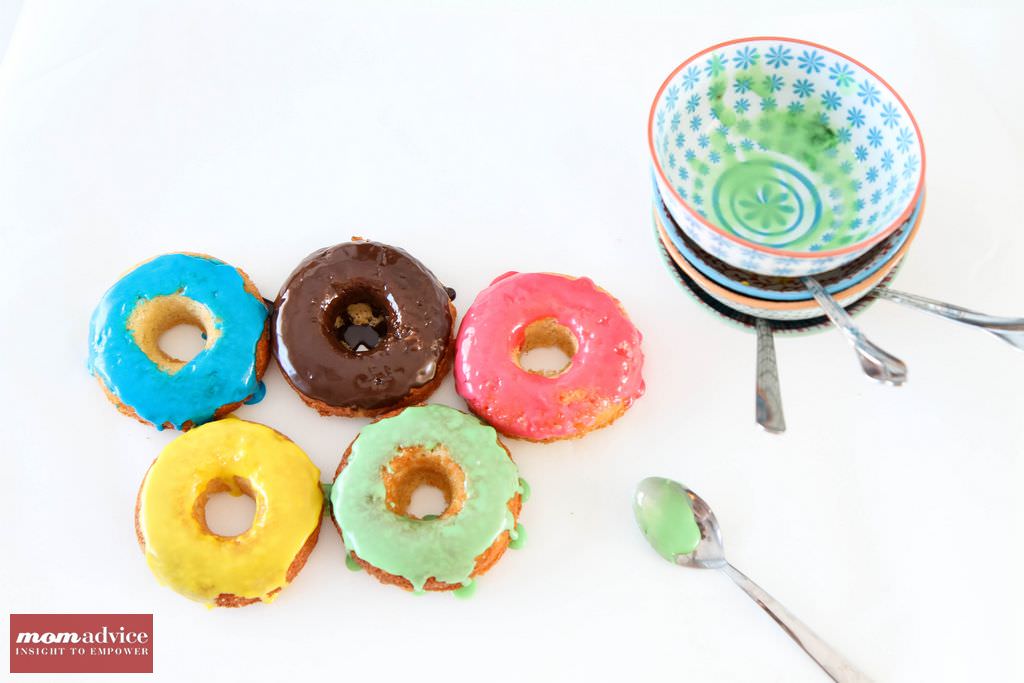
To make your Olympic-themed glazes, I simply made one batch of my favorite glaze and then added food coloring to each dish to reach the desired color. To achieve your black, if you are just working with a standard set of food colorings, equal portions of blue, yellow, and red will help achieve the color you are after.
Looking For More Fun Ideas to Celebrate the Olympics? Let’s take a peek at some more fun (and frugal!) ideas!
What could be sweeter than receiving an Olympic medal? How about an Olympic Medal filled with a cookie? AlphaMom offers this sweet little Olympic craft to do with your little ones. Stumped for a cookie idea? I highly recommend an Oatmeal Chocolate Chip Sea Salt Cookie for your medal filling!
Dress up a white t-shirt to dress up for the Olympic games. with a simple painted ring pattern on an inexpensive thrift store shirt, this is a craft that is easy enough to do with kids of all ages. Kate’s Creative Space offers this fun craft idea to her readers to celebrate the games.
What child doesn’t dream of carrying around their very own Olympic torch. Hoosier Homemade showcases a fun craft that you can do to create your very own Olympic torch made from some commonly found items at your local craft store.
Why not throw a party for your family or for a group of families to celebrate the Olympics? A Small Snippet has you covered with everything from patriotic foods to great Olympic game ideas to play together, to fun ideas for decorations that don’t cost a lot.
If hitting your craft store for supplies to make an Olympic torch isn’t in your budget, this Olympic Torch from The Idea Room is made from common items you have in your home and recyclables. These torches are made from a paper plate, a paper towel roll, and red & gold tissue paper. This is one that even the smallest child can do. Be sure to lift these high and participate in your own round of fun family Olympic games.
Even moms can jump in on the Olympic excitement with this cute craft, from Remarkably Domestic, for an Olympic Rings Necklace. This necklace is made from simple rings covered in Chinese knotting cord to create those Olympic rings everyone loves so much. This would be a fun craft to do while watching your favorite games this year!
However you celebrate the Olympic games this year, I hope this post inspires you for your Olympic game watching!
Gluten-Free Olympic Doughnuts
Recipe Type: Breakfast
Author: Adapted from Food & Wine Magazine
Prep time:
Cook time:
Total time:
Serves: 10
These gluten-free doughnuts are so easy to make and can be a fun snack to share while watching the opening ceremony this year!
1 cup sugar (next time I may adjust to 3/4 cup sugar)
2 teaspoons baking powder
1/4 teaspoon nutmeg
1/2 teaspoon salt
2 large eggs, at room temperature
1/4 cup canola oil
1/2 cup whole milk
1 teaspoon vanilla
1 cup confectioners sugar
2 tablespoons hot water
1/2 teaspoon vanilla, butter, or almond extract
Betty Crocker Food Coloring Set (over in the baking aisle)
Instructions
Preheat the oven to 350º and spray two nonstick 6-cavity doughnut pans with nonstick cooking spray.
In a large bowl, whisk the flour with the sugar, baking powder, nutmeg and salt
In a medium bowl, whisk the eggs with the oil and milk until smooth; add to the flour mixture and whisk until combined.
Spoon the batter into 10 cavities of the prepared doughnut pans until about three-quarters full. Bake for 18 to 20 minutes, until a toothpick inserted in the center of a doughnut comes out clean.
Let the doughnuts cool.
In a bowl, mix together the confectioners sugar, hot water, and flavoring. Divide the glaze into five bowls and create your colors for the doughnuts. Dip or spoon the glaze over the doughnuts and allow the glaze to harden.
Can I say that you are in for one of the biggest treats ever? Shaina, from Food For My Family, is one of my foodie idols and I cannot believe she is going to be sharing her voice here on MomAdvice as a regular contributor! Her photos are always a delight for the eyes and her whole foods philosophy on a budget is just why I selected her to share with you.
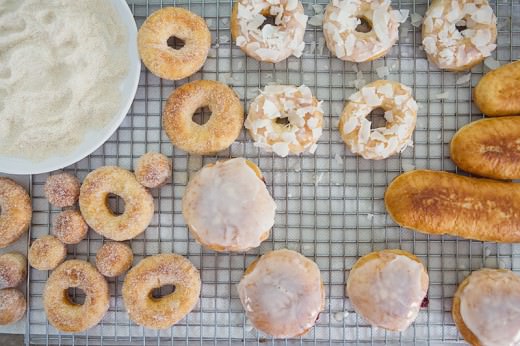
I can count on one hand the number of times we’ve gone out for doughnuts in any given year. It’s a once-in-a-while treat, a special outing. There’s something about walking into a doughnut shop, the bell on the door tinkling after you. In a case behind the glass you find soft fried dough rolled in sugar crystals or glazed with a sparkling gleam, the warm air carried under your nose with the distinct softness of melting sugar and browning dough.
Doughnuts are winter foods, best consumed when frosty air is blowing outside. A doughnut and a cup of coffee or cocoa somehow makes the world feel warmer, the walls lean in a bit tighter to hug you in the center of this pocket of comfort you’ve created.
It was this idea, this contentedness that I chased on a day off school with my kids. Doughnuts are all about waiting and patience, but the payoff at the end is worth every second it takes to get there.
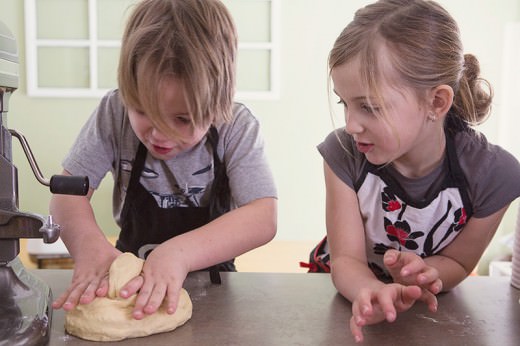
We gathered in the kitchen, all arms and hands and bodies huddled around the mixer, each measuring and dumping one ingredient after another to form the dough, soft and supple. In our hands we worked it before tucking it away as they went to play. Soon it was time for the shaping, and with a special cutter in hand, they each formed the rings and placed them on a baking sheet so we could again wait as they puffed in their warmed-oven home.
When the time came, in a bit of oil we fried each one to a golden perfection, our home instantly mirroring that doughnut shop smell. Small fingers ran through sugar as doughnut holes were rolled until coated. We stirred together glazes and dipped them in before sprinkling them with all manner of pantry goodies, licking the drips from fingertips.
Tips for doughnuts with your kids:
Have them measure and mix.
Teach little arms how to knead.
Rolling balls and cutting doughnuts is a fun and exciting job.
Leave the frying to the big kids and the adults.
Decorating is definitely a kid-approved job.
Eating is a family affair.
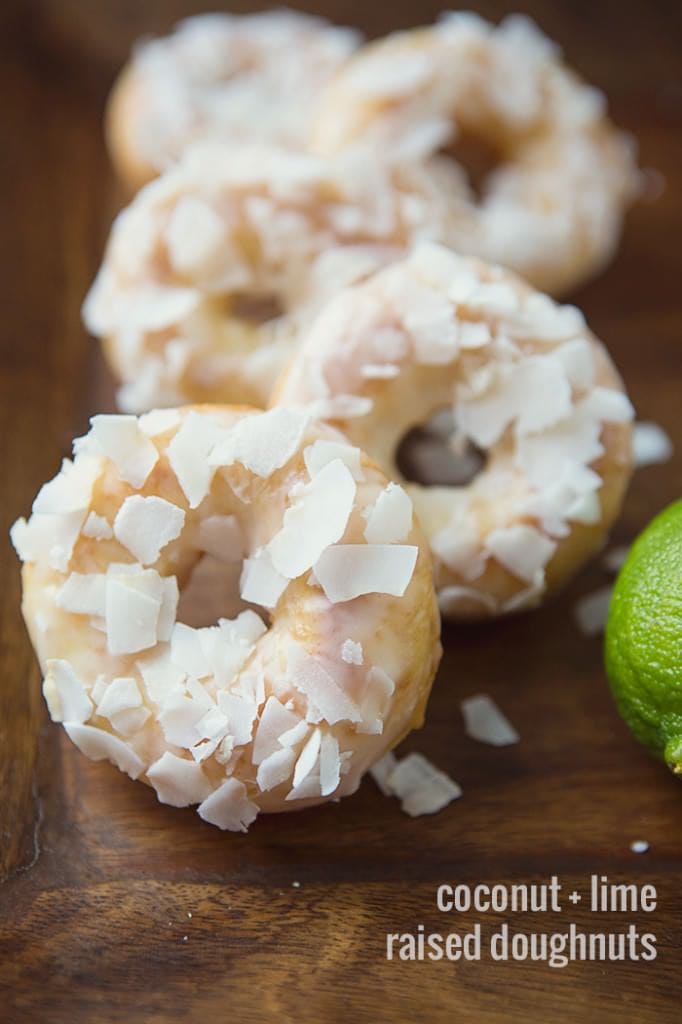
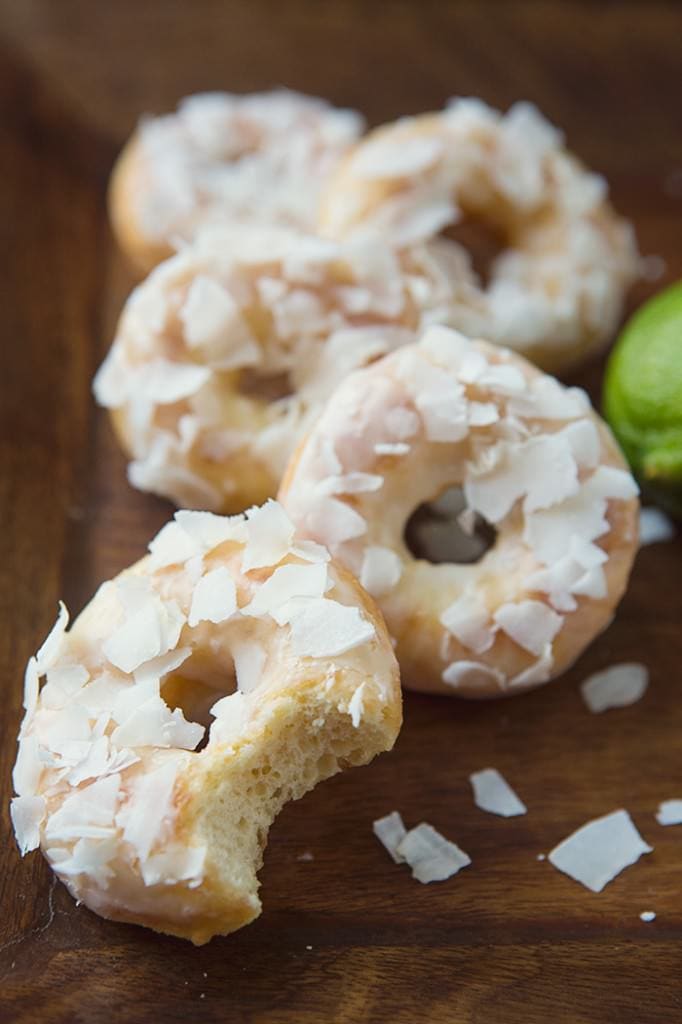
These doughnuts are dipped in a lime-kissed glaze and covered in crisp coconut flakes. You can simply roll slightly cooled doughnuts in granulated sugar for a more classic take, or you could get fancy and make filled doughnuts and long johns with this same dough recipe.
Coconut Lime Raised Doughnut Recipe
Recipe Type: breakfast, dessert
Author: Shaina Olmanson
Serves: 10
Raised doughnuts with a lime-kissed glaze, sprinkled with coconut flakes.
Ingredients
5 tablespoons water
1/3 cup buttermilk, room temperature
1 egg, room temperature
5 tablespoons melted butter
1 teaspoon vanilla extract
4 cups all-purpose or einkorn flour
1/4 cup granulated sugar
1 teaspoon salt
2 1/4 teaspoons yeast
16 ounces organic palm oil or other oil for frying
1 cup powdered sugar
2-3 teaspoons lime juice
1/2 cup unsweetened coconut flakes
Instructions
In a large bowl or the bowl of a stand mixer, combine the water, buttermilk, egg, melted butter, and the vanilla. Beat until well mixed.
Add in the flour, sugar, salt, and yeast, and mix with your hands or using a dough hook on the stand mixer until a soft dough forms. Remove the dough from the bowl and knead 10 – 11 times for the dough to come together.
Return the dough in the bowl and cover with a towel or piece of plastic wrap. Place the bowl in a warm place to rise until the dough is doubled. Cut 20 or so 4-5″ squares of parchment paper while you wait.
Once the dough has doubled, remove it from the bowl and roll it to about 1 1/2″ thick. Cut 3-4″ rings from the dough. Place each ring on a small square of parchment. Place the dough rings on baking sheets and cover loosely. Place doughnuts holes 3-4 on each piece of parchment.
Once all the doughnuts have been cut and covered, let them rise for at least one hour until they have puffed considerably.
In a high-sided, heavy-bottomed pan heat the oil to 350º F. Once the oil is hot, add in the doughnuts, about four at a time. Fry for 2-3 minutes per side, until golden brown.
Remove the doughnuts to a baking rack to drain and cool slightly.
In a shallow bowl, mix together the powdered sugar and the lime juice, starting with 2 teaspoons until a thick but still fluid consistency is reached. Dip the top of each doughnut into the glaze. Immediately sprinkle with coconut flakes and allow to set.


 When I first discovered that I had to go gluten-free, my best friend recommended a book called, “


