Archive for the ‘Breakfast’ Category

Spinach and Turkey Bacon Skillet Dish

Monday, November 21st, 2016

Spinach and Turkey Bacon Skillet Dish from MomAdvice.com

This post is sponsored by Honeysuckle White. All thoughts and opinions are my own! 

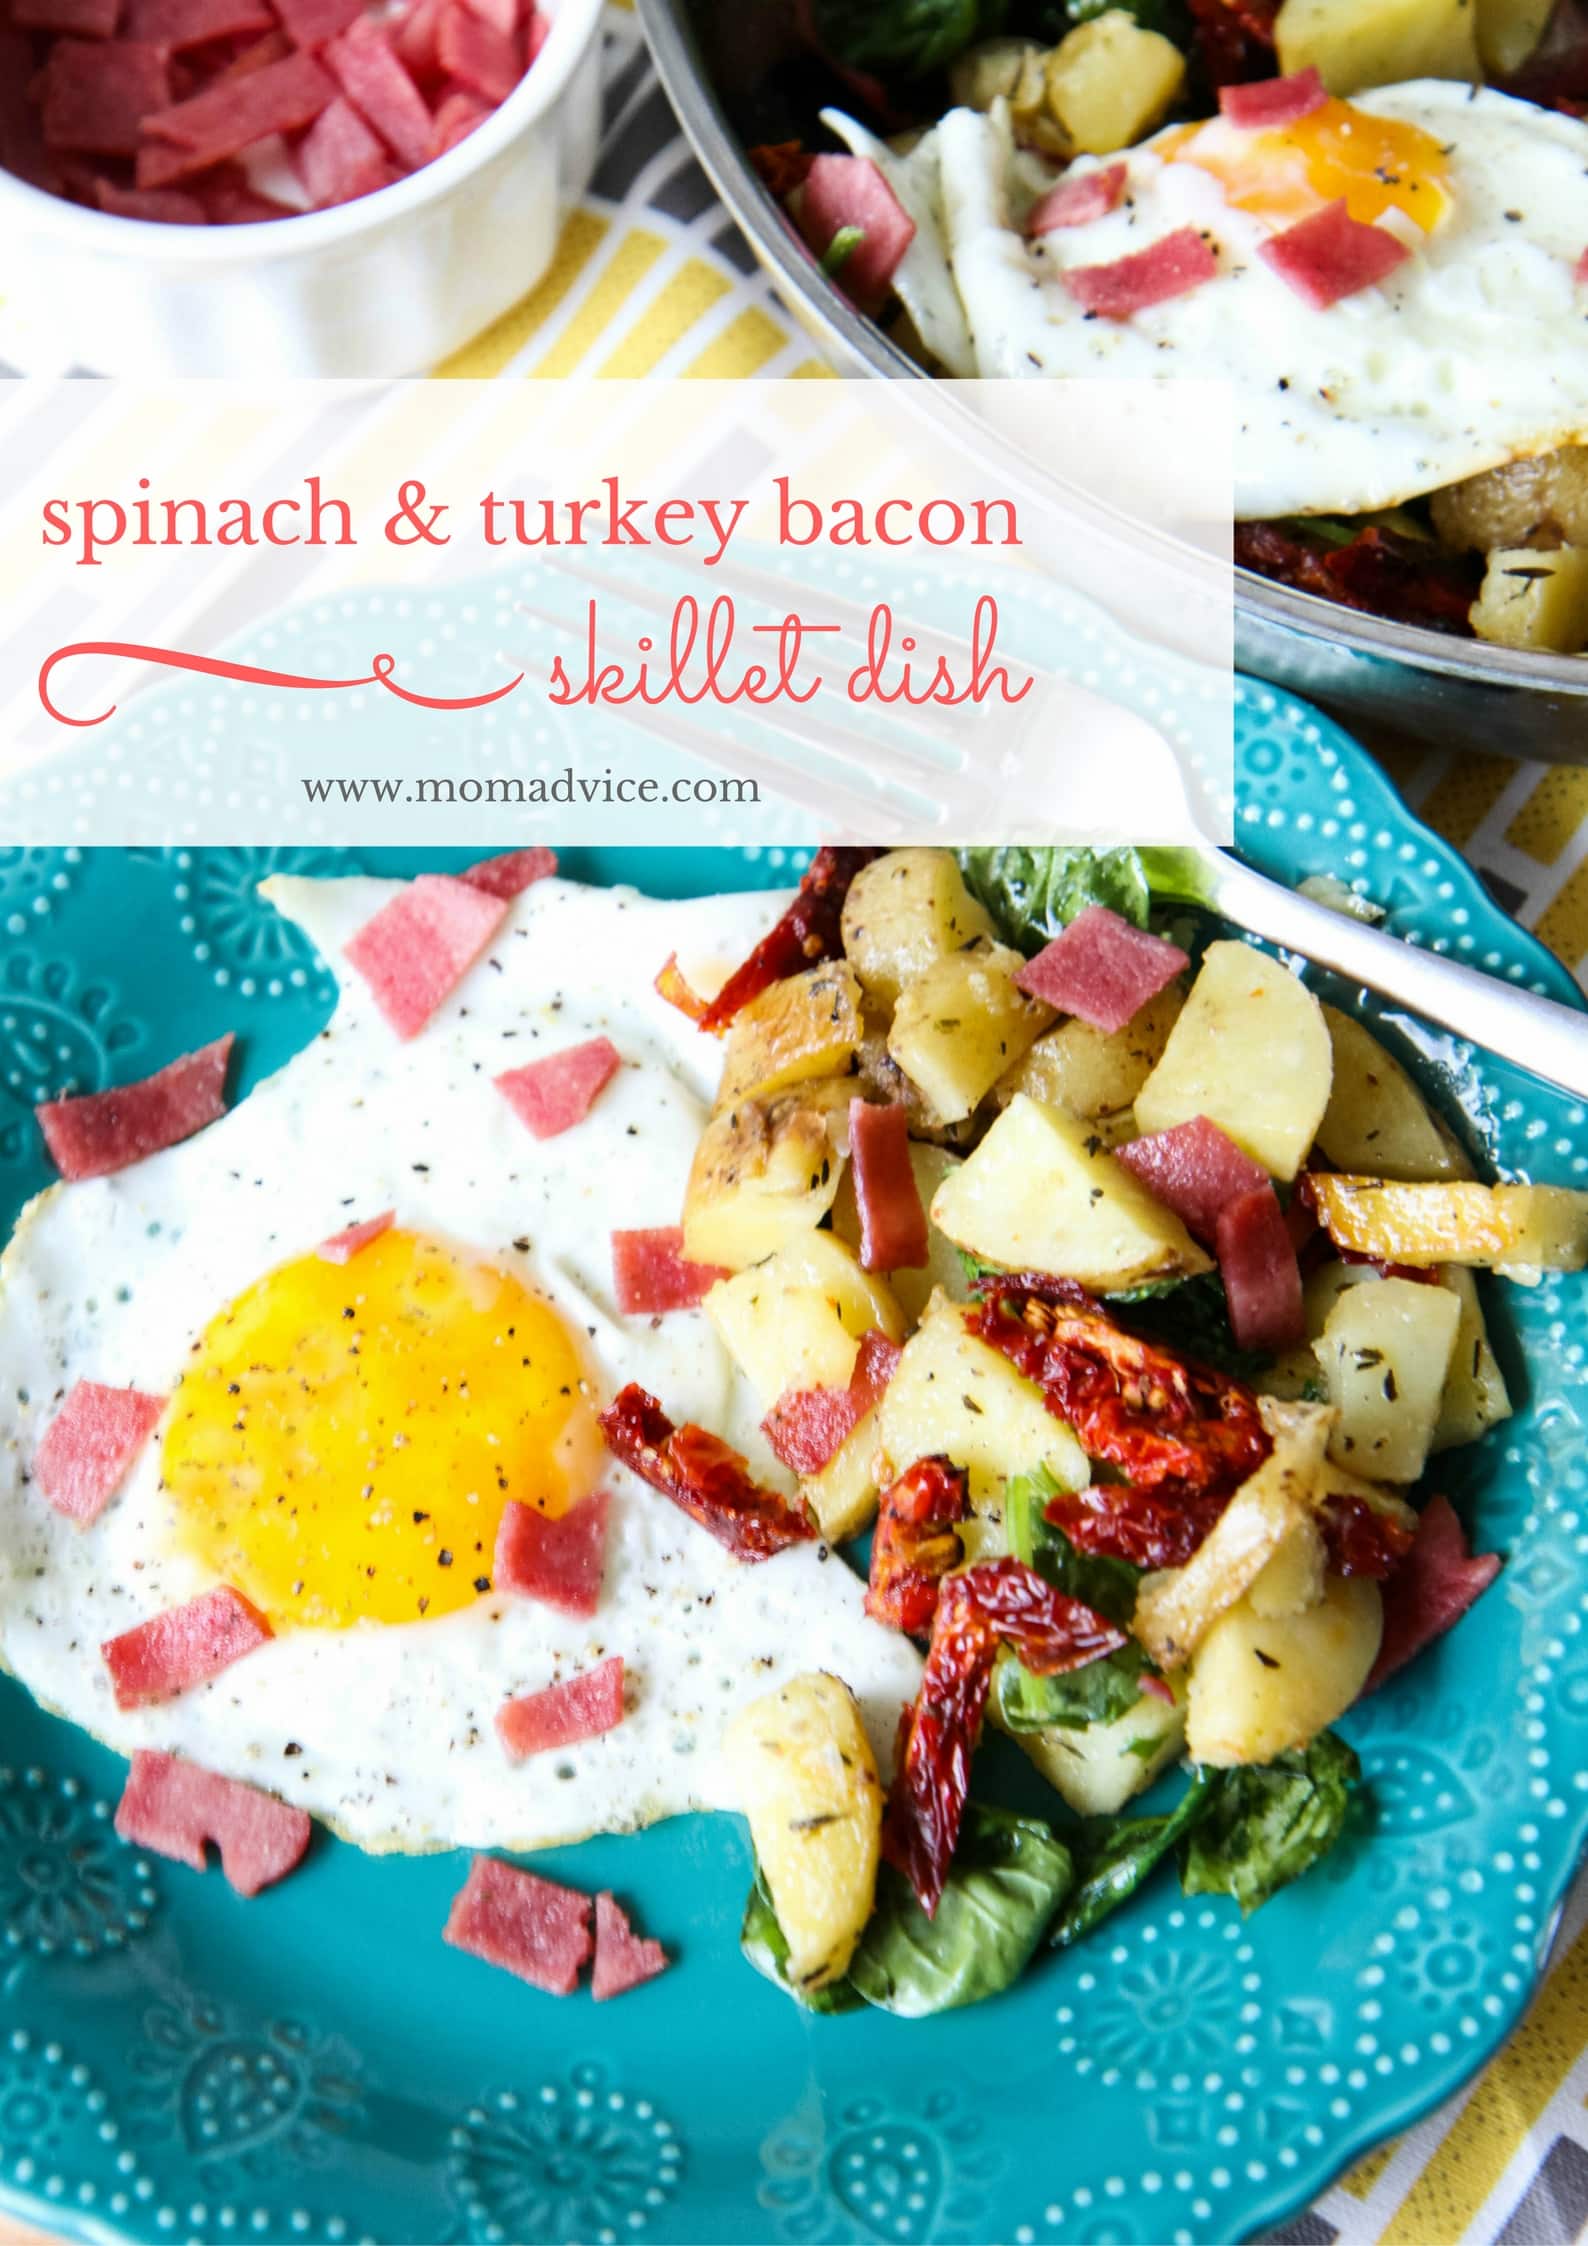
“I could eat breakfast for every meal,” is a common phrase spoken in our house. For us, breakfast is a feast that should be enjoyed anytime of the day and a sweet luxury when indulged in at our favorite restaurants. Simple ingredients like eggs, potatoes, and bacon all feel elevated though when combined into an elegant skillet dish and these are dishes I choose most often when we go out for a family brunch.

Why do I feel I have to go out to eat to enjoy a skillet dish?

Well, I don’t feel that way anymore!

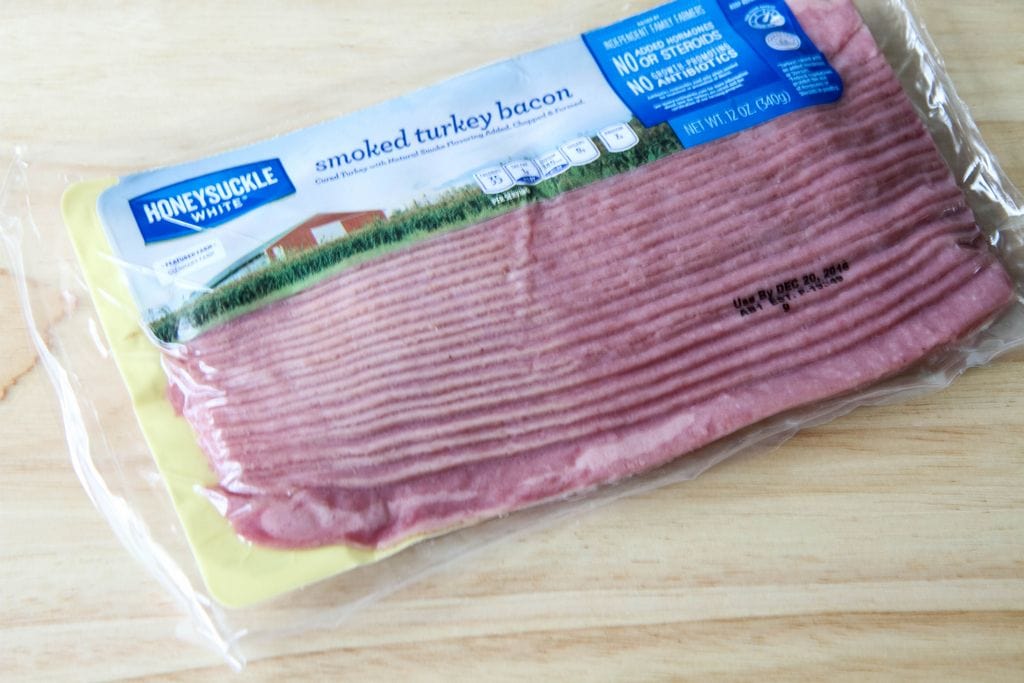
There is no need to spend a fortune dining out when you can enjoy this breakfast treat at home! Today’s recipe is created in partnership with with Honeysuckle White as we put their delicious Smoked Turkey Bacon to work in this beautiful Spinach & Turkey Bacon Skillet Dish. Thanks to their commitment to keep their products affordable for their consumers, all while retaining the highest quality meats, this entire skillet dish will cost you less than one meal out.

Spinach and Turkey Bacon Skillet Dish from MomAdvice.com

One of the reasons I really love these skillet dishes is that this can be a great way to put leftover ingredients to work in your kitchen. Thanksgiving season, as we have discovered, is when our fridge is loaded with odds and ends that need to be used. Last night’s roasted potatoes, for example, can be used as the base in your skillet. Odds and ends from your produce drawer, like mushrooms or spinach, can be woven into your potato base. Goat, parmesan, cheddar, or blue cheese can also be added for a creamy element.

One thing that I bet you not to sacrifice  though is the salty addition of the bacon for a perfect finishing touch on your dish.

Turkey bacon is a great way to get that salty addition, but with 50% less fat in your dish, giving you all the flavor without all the guilt.

If you are gluten-free, you’ll be happy to know that this bacon is a gluten-free product. It also contains no added hormones or steroids and no growth-promoting hormones. They even let you virtually meet the farmers on their products so you can get to know exactly where your meat is coming from.

Spinach and Turkey Bacon Skillet Dish from MomAdvice.com

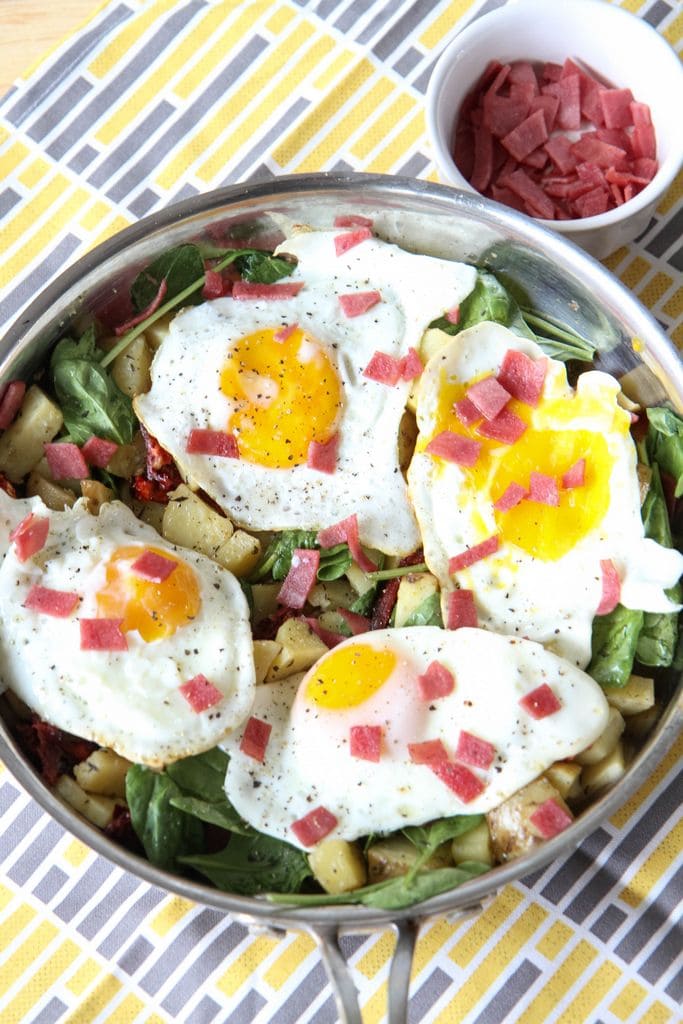
One of my favorite food combos is spinach and sun-dried tomatoes and I thought the addition of these would compliment this dish perfectly. To save time, look for bags of already julienned sun-dried tomatoes to save you some chopping time in the kitchen.

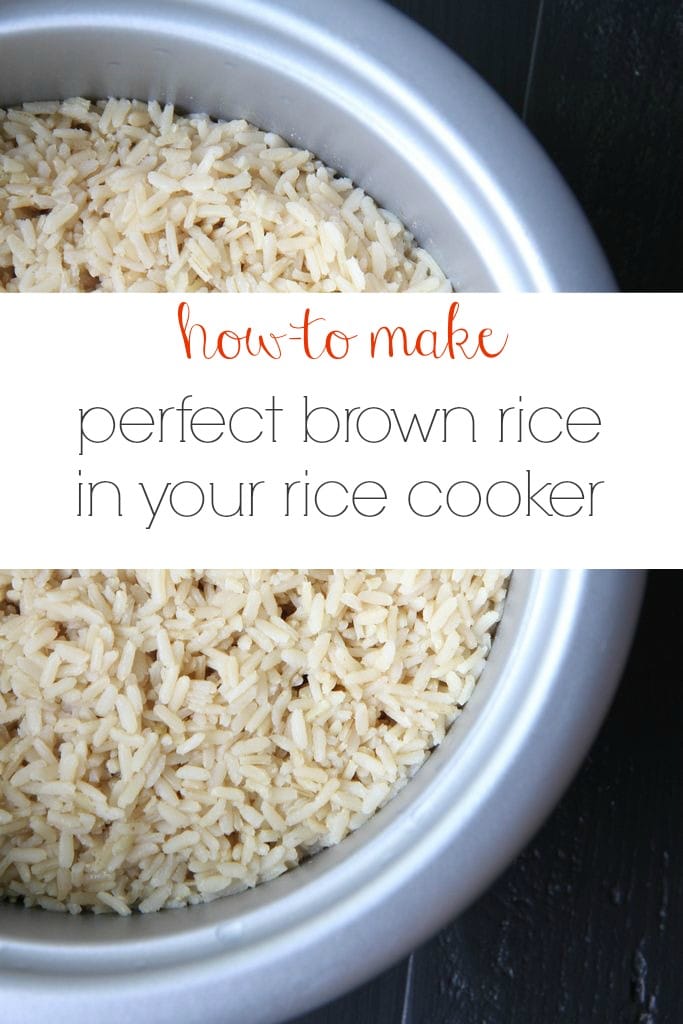
To save even more time on this dish, I’ve discovered that my Instant Pot is an incredible gift for making quick work of cooking potatoes for the week. Simply add a cup of water to the bottom of the pot, pierce your potatoes (I put in as many as I can fit!), lock the lid, and cook on manual pressure for 10 minutes. I then quick release the pressure and dice up the potatoes for our dishes or  make delicious baked potatoes out of them by finishing them in the oven for 15-20 minutes at 450 degrees, slathered in olive oil and rolled in kosher salt!

If you don’t have a pressure cooker, you can still make quicker work by starting those potatoes in the microwave, a technique that we have used often in our house. Once again, just prick the potatoes and then microwave on high for five minutes. Give them a few minutes to cool, and then you can start chopping them into cubes for your skillet.

I hope this dish inspires you to create your own skillet dish in the kitchen and, perhaps, put a few of those delicious Thanksgiving leftovers to work in a skillet of your own.

For more great turkey inspiration, be sure to check out my Slow Cooker Thanksgiving Turkey that I also created this month!


Spinach and Turkey Bacon Skillet Dish from MomAdvice.com

Spinach and Turkey Bacon Skillet Dish
Recipe Type: Breakfast
Prep time:
Cook time:
Total time:
Serves: 4 servings
Serve this healthy skillet dish packed with veggies and protein for your next brunch with any combination of odds and ends in your refrigerator. This recipe is a gluten-free crowd pleaser!
Ingredients
  • 2 russet potatoes, scrubbed (skin left on)
  • 3 slices Honeysuckle White Smoked Turkey Bacon
  • 1 tablespoon extra-virgin olive oil
  • 3 cups baby spinach
  • 1/2 cup sun-dried tomatoes, julienned
  • 1/8 teaspoon salt
  • 4 large eggs
  • Freshly ground pepper
Instructions
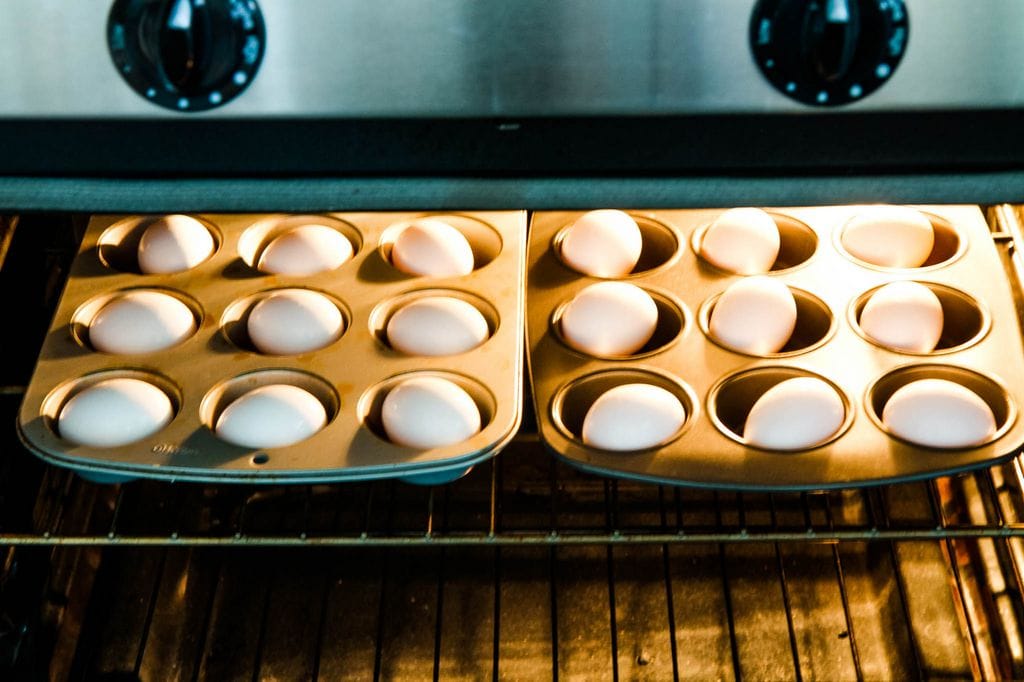
  1. Prick potato in several spots in a fork; microwave on High for 4 minutes. Let cool for 5 minutes, then chop into 1/2-inch cubes.
  2. Meanwhile, cook bacon over medium-high heat in a skillet until crisp (following directions on packaging for timing). Remove the bacon from the skillet, but leave the bacon drippings in the pan. Add oil, diced potatoes, and sun-dried tomatoes and cook, stirring frequently, until the potatoes are browned, about 5 minutes. Add spinach; stir to combine and just wilt, about 1 minute. Season with salt.
  3. Make 4 wells in the center of the hash and crack one egg into each well. Reduce the heat to medium and cook until the eggs are partially set, 2 to 3 minutes. Cover with a lid and cook until the eggs whites are completely set, 1 to 2 minutes. Chop the bacon and sprinkle on top. Garnish with a generous grinding of pepper.

This post is sponsored by Honeysuckle White. All thoughts and opinions are my own!


Pin It

How To Make Smoothie Bowls

Monday, September 19th, 2016

Make Your Own DIY Smoothie Bowl Tutorial


How to Make Smoothie Bowls Tutorial

This post is sponsored by Mamma Chia.  Thank you for supporting the companies that make this site possible! 

I am always on the hunt for great post-workout snacks that can keep me fueled throughout the day.  

Today I wanted to share with you how to make two delicious smoothie bowls and I am pairing them with a fun new drink from Mamma Chia, called Chia Energy Beverages, that you can now find on Walmart shelves.  

Doesn’t that sound like a delicious pairing?


Mamma Chia at Walmart


I always struggle with finding new things at the store so, in case you are on the hunt, I wanted to show you where you can find them at Walmart.

These drinks can be found in the produce section at the front of the store.  

Our drinks were on full display on the top shelves and come in 4 flavors: Grape Power, Cherry Charge, Blackberry Blast, & Raspberry Razz.

These drinks are the first beverage that combine chia with the energy of guayusa.

For those of us with a coffee addiction (ahem!), these are a great way to get energy for the day without that caffeine crash.

Caffeine crashes are THE WORST.


Chocolate Cherry Smoothie Bowl from MomAdvice.com

As you know, I have been struggling with my health and I am really committed to eating better so that I can improve how I feel. The founder of Mamma Chia, Janie Hoffman, was also struggling with many debilitating autoimmune disorders and found a great deal of relief from adding chia into her diet. Her mission was to share that gift with others so that they can experience the health benefits too. I also love that the company donates a portion of their proceeds to support farmers, community groups, & organizations that build healthy, local food systems. 

It makes you feel doubly good about your purchase!

Today I thought I would incorporate the power of chia, not only in our drink, but as a topping in a healthy smoothie bowl.

Chia is actually considered a superfood because chia seeds are rich in omega-3’s, fiber, protein, and essential vitamins and minerals.

They also help you to sustain energy levels naturally while helping you stay fuller longer.

Today we are topping our smoothie bowls with chia.

If you haven’t had a smoothie bowl before, you are in for a treat.

I understand that many fancy-schmancy breakfast joints serve these now.

How lucky are you that you can save some money and make these at home for a fraction of the cost?

Let me share two recipes for smoothie bowsl with you and don’t forget to stick around to the bottom of this post for our giveaway with Mamma Chia- yay! 

Chocolate Cherry Smoothie Bowl from MomAdvice.com

Chocolate Cherry Smoothie Bowl from MomAdvice.com

The idea is to make the smoothie thicker (make sure you have a powerful blender for this one) by using less liquid to create a thicker consistency.

The fun part is the layering of delicious additions on top.

On this Chocolate Cherry Bowl, I have topped it with fresh raspberries, toasted coconut, & more chia.

Try any combination of flavors you like though!

Chocolate Cherry Smoothie Bowl from MomAdvice.com

Chocolate Cherry Smoothie Bowl
 
Author: MomAdvice.com
Prep time:
Total time:
Serves: 1-2 bowls
Smoothie bowls make the perfect snack or breakfast. Top with your favorite oatmeal toppings or try our suggestions for a healthy start to your day.
Ingredients
  • ½ cup frozen banana
  • 1 cup frozen cherries
  • ½ cup almond milk
  • ¼ cup avocado
  • 1/4 plain greek yogurt
  • 1 tbsp unsweetened cocoa powder
  • Toppings: toasted coconut, berries, chia
Instructions
  1. Combine all smoothie bowl ingredients in your blender and blend until smooth.
  2. Pour into a bowl and top with your favorite toppings
 

Raspberry Smoothie Bowl from MomAdvice.com

Raspberry Smoothie Bowl from MomAdvice.com

Raspberry Smoothie Bowl from MomAdvice.com

I love berry anything and I loved pairing a Raspberry Smoothie Bowl with the delicious flavor of the Chia Energy Blackberry Blast drink. I still wanted some of the chocolate flavor in this one so I topped it with a chocolate granola, and chia.  The vibrant hue from the raspberries in this one make such a pretty bowl, don’t they?

This is certainly a powerful motivator to get my workout done so I can enjoy this snack when I get home.

Raspberry Smoothie Bowl from MomAdvice.com

Raspberry Smoothie Bowl
 
Author: MomAdvice.com
Prep time:
Total time:
Serves: 1-2 bowls
Give me all the berries! This Raspberry Smoothie Bowl is packed with berries and can be topped with crunchy granola, chia, and more berries for a fun post-workout treat.
Ingredients
  • 1/2 cup frozen raspberries
  • 1 frozen banana
  • 1/4 of an avocado
  • 1/2 tsp vanilla
  • 1/2 cup almond milk
  • Toppings: granola, raspberries, blueberries, and chia
Instructions
  1. Place all smoothie ingredients in a blender and blend until smooth.
  2. Pour into a bowl and top with your favorite toppings.
 

Mamma Chia Energy Beverages

Today I’m giving away to one lucky winner a $50 prize pack from Mamma Chia that will include one each of the Mamma Chia’s new organic Chia Energy Beverages and some of their other delicious products. Please enter the giveaway in the widget below and I hope this post inspires you to give these new drinks a try!

a Rafflecopter giveaway

Raspberry Smoothie Bowl from MomAdvice.com

This post was sponsored by Mamma Chia.  Thank you for supporting the companies that make this site possible! 


Raspberry Smoothie Bowls


Sign up for the MomAdvice newsletter 


Looking for more breakfast ideas?


Meal Prep: Breakfast Sandwiches Recipe from MomAdvice.com

Make Ahead Breakfast Sandwiches


Mango Coconut Green Smoothie recipe

Mango Coconut Green Smoothie


Make-ahead breakfast burritos

Make-Ahead Breakfast Burritos


Sleepover Breakfast Buffet

Make-Ahead Sleepover Breakfast Buffet

Pin It

Slow Cooker Creamy Coconut Oatmeal (& Tips for Perfect Slow-Cooked Oats)

Thursday, August 25th, 2016

slow-cooker-creamy-coconut-oatmeal-5

It’s become an embarrassing pattern of mine to make a resolution every year to be better about eating breakfast. Each time, I start on the path towards healthy eating. However, as life becomes fuller and mornings more hectic, I find that eating a good breakfast often gets pushed to the side.

This year, I discovered how invaluable my slow cooker was in creating a beautiful, hot breakfast for my entire family that I could serve in the morning and enjoy for mornings to come. I could also serve it as a midday pick-me-up or as a healthy late- night snack. The discovery might seem a bit old-fashioned, but a batch of oatmeal is a great way to start the day. This isn’t just any old oatmeal though—this oatmeal is made from delicious steel cut oats.

What’s the difference between rolled oats and steel cut oats? Well, a part of it is their structure and the other part is the way that our body digests them. While both contain whole grain oats, they are processed differently. Rolled oats are steamed, rolled, steamed again and toasted, ending up as thin flakes. Steel cut oats are made from oat kernels that have been chopped into thick pieces.

The reason steel cut oats are so awesome is because they digest more slowly than rolled ones, leaving you fuller longer. Like all other grains in whole or cracked form, steel cut oats rank lower on the glycemic index than rolled oats. This just means that it takes longer for digestive enzymes to reach the starch inside the thicker pieces, slowing down its conversion to sugar. For me, those highs and lows are some rough stuff, and I’ve found that a bowl of steel cut oats keeps my blood sugar much steadier.

I make a variety of different oatmeal recipes in my slow cooker and have found one thing to be consistent no matter what kind I make. Can I let you in on my little secret? I absolutely hate cleaning the slow cooker after making oatmeal. I also hate that the oats can get crusty pretty quickly on the edges, yielding a less than creamy bowl even when I have the perfect liquid ratios.

How to make slow cooker oatmeal

Let me share my secret that yields the most perfect and creamy bowl you can imagine and it is probably something you already have in your kitchen:

1. Find an oven-safe dish that fits inside of your slow cooker and fill that dish with all of your ingredients for your oatmeal.

2. Fill a measuring cup with water and pour the water around your dish, just to about the halfway point. This creates a warm water bath (a lot like those candles we made this summer) and helps your oatmeal to cook more evenly yet remain delightfully creamy.

3. Put a lid on the slow cooker (no need to double lid) and set it to cook for eight hours. It’s okay if your slow cooker switches to “warm” in the night. Thanks to your water bath, your oats will not get overcooked, but stay hot until you wake up!

slow-cooker-creamy-coconut-oatmeal

Once you have that perfect bowl of oatmeal, you can add your favorite toppings to it or create a quick toppings bar of ingredients for the week. For this Creamy Coconut Oatmeal recipe, I found the taste of rich blackberries and toasty almonds to be a delightful way to top it!

Slow Cooker Creamy Coconut Oatmeal (& Tips for Perfect Slow-Cooked Oats)
Recipe Type: Breakfast
Prep time:
Cook time:
Total time:
Serves: 4-6
Ingredients
  • 2 cups steel cut oatmeal (no substitutions)
  • 1 can full fat coconut milk
  • 8 cups water
  • 1 tablespoon vanilla extract
  • 2 tablespoons organic cane sugar (can omit if topping with brown sugar)
  • 1 pinch of salt
Instructions
  1. Place all ingredients in your Kenmore slow cooker as I have shown you above.
  2. Cook on low for eight hours.
  3. Serve with your favorite oatmeal toppings like berries, dried fruits, nuts, granola, nut butters, coconut, brown sugar, cinnamon, or additional milk for topping.

 I can’t wait to hear what you think about this technique for perfectly cooked oatmeal and hope you can get the year started out right with this easy breakfast option!

Pin It

Make-Ahead Sleepover Breakfast Buffet

Monday, June 20th, 2016

Make-Ahead Sleepover Breakfast Buffet from MomAdvice.com

When I was a little girl, one of my favorite sleepovers ever included a beautiful breakfast buffet for us in the morning. The parents got up early to make stacks of waffles and laid out a variety of toppings to make our own waffle creation. It was the stuff that little girl’s dreams are made of,  piled high with whipped cream, strawberries, and unlimited syrup.

I want to be that mom who rises early and makes these sleepover dreams come true, but often I am the mom dragging her tail out of bed after telling the kids to PLEASE, FOR THE LOVE, GO TO SLEEP IT IS THREE IN THE MORNING mom.

Are you her too?

That’s why I wanted to create a REALISTIC buffet that can be made in advance so you can just stumble into kitchen, put everything on the table, and curl up with a cup of coffee in bed with a little sweet silence.

Make-Ahead Sleepover Breakfast Buffet from MomAdvice.com

Today I am partnering with  Florida Department of Citrus to show you how to make this fun make-ahead sleepover breakfast buffet table complete with glasses of  FLOJ for everyone at the party.  Although waffle parties are fun, I wanted to create a healthy breakfast complete with a glass of Florida Orange Juice that provides 5 amazing nutrients in every glass for our guests. Not only are we loading our table with fresh fruit, but we are also getting, in just one single 8-ounce glass of 100% orange juice,  our daily recommended serving of fruit! Winning!

Make-Ahead Sleepover Breakfast Buffet from MomAdvice.com

Make-Ahead Sleepover Breakfast Buffet from MomAdvice.com

Instead of spending your morning flipping pancakes, take a peek at my make-ahead recipe for breakfast burritos. This recipe yields eighteen delicious burritos and you can even make them gluten-free with the use of a gluten-free wrap. They are filled with eggs, turkey sausage, spiced potatoes, and cheese- yum!

Make these ahead and tuck them in your fridge or use these instructions for popping them in the freezer until the morning. The beauty in this one is that no matter what time they rise, each person can have a hot breakfast!

Make-Ahead Sleepover Breakfast Buffet from MomAdvice.com

I made a simple breakfast bar with burrito toppings like olives, sour cream tomatoes, avocado, salsa, and sriracha. You can just chop and set this in the fridge on a cookie sheet for the big morning.  

Make-Ahead Sleepover Breakfast Buffet from MomAdvice.com

Make-Ahead Sleepover Breakfast Buffet from MomAdvice.com

Make-Ahead Sleepover Breakfast Buffet from MomAdvice.com


After warming their burritos, they can fill it with all of their favorites or simply put the toppings on top and dig in with a knife and fork.

Putting this spread together took me under an hour, even with all the chopping, and the best part is that I got to enjoy a hot cup of coffee even with a house full of kids. WINNING!

Thank you so much to Florida Department of Citrus for letting us share a make-ahead buffet with you. Be sure to kick back a glass of FLOJ for us and may your bedhead game be as strong as your coffee.


This blog was sponsored by Florida Department of Citrus. Thank you for supporting the companies that support our site!

Make-Ahead Smoothie Packets For Your Freezer

Tuesday, March 15th, 2016

Make-Ahead Smoothie Packets For Your Freezer from MomAdvice.com.

There are a few great gifts I give myself in the morning. The first, is to rise an hour earlier than necessary to get in an uninterrupted hour of reading (BLISS!). The second is to always program my coffeemaker the night before so I wake up to a fresh brew (HEAVEN!). The third? Packing my freezer with smoothie packets that make creating a morning smoothie filled with greens and fruits incredibly easy and practically effortless (WINNING AT LIFE).

I posted about my make-ahead smoothie packets on Instagram and got a lot of questions about it. Something I have come to think of as a weekly routine really sparked a lot of questions about my recipe, what the smoothie looked like, and what to do for fruit substitutions.  I thought it deserved its own little post because it has become a very vital part of my morning routines and sets a good foundation for healthy eating the rest of the day.

Not only does this strategy save you time in the morning, but it also puts ripe fruit to work and is a great way to utilize spinach before it goes bad making the most of every grocery dollar. I never waste a banana in our house or any greens anymore because they always have a home. If I have run out of frozen berries, I just add the rest of these ingredients into a packet and get them ready for my next grocery day when I can get the frozen fruit to add to it. As someone trying to reduce their food waste, this has been an awesome use for those often tossed items.

Also, if you buy smoothies regularly, you know they are not cheap. A typical smoothie around these parts (said in my best Midwest accent) is around $4-6. Even if bought weekly, that can add up fast!

Here were a few of your questions for me! 

Make-Ahead Smoothie Packets For Your Freezer from MomAdvice.com.

Do you store these packets in the freezer and for how long?

Yup, I recommend freezing in quart-sized freezer storage bags and making sure to push out any air in the bags to keep these ingredients as fresh as possible. I would recommend using these in one month for optimum flavor.

How many smoothies do these packets make?

I drink an enormous smoothie in the morning (24 ounces)  and my daughter has the size I am showing you in the cup below and this packet with my recipe I have listed makes enough for that. For “normal” people, maybe it might make three, but this is my breakfast, people, and I’m a big eater.  I got one of these for me to help make toting these in the car a little easier since I drink these on the way to the gym in the morning. I also have this giant water bottle from the same company and it has improved how much water I intake as well as my healthy smoothie habit for breakfast. I have been happy how they have held up (over a year now!) compared to some other insulated cups I have tried.

Do you blend these with milk or use a milk substitution?

My stomach can’t process a lot of dairy so I use unsweetened almond milk in mine. I do use Greek yogurt though (either vanilla or unsweetened) and that doesn’t seem to bother me. You can definitely use milk, soy milk, or coconut milk if you would prefer. I’m a big fan of the flavor of the almond milk!

Make-Ahead Smoothie Packets For Your Freezer from MomAdvice.com.

Can I make these without spinach? I don’t think my kids will drink these if they are green!

I just want to show you how very slightly these are tinged with green when you only add a cup or so of spinach to them. Additionally, if I am really concerned an extra handful of frozen blueberries cancels out all other colors so sometimes if I am really generous with the blueberries, these look more blue.

Make-Ahead Smoothie Packets For Your Freezer from MomAdvice.com.

Are you using frozen spinach? Frozen berries? What does the spinach look like when it is frozen?

Here is a packet that has been frozen for three weeks and this is what it looks like. The spinach is fresh spinach (I don’t want to hassle with the frozen stuff- personal preference), the berries are frozen, and the bananas are fresh. I like to cut the bananas in half to help them break down a little easier in the blender. As you can see, the spinach looks almost the same as it did when I threw it in there.

The bananas may brown over time, but they will still taste the same. As rapidly as we go through these though, I have rarely even seen that happen.

By freezing these fruits and veggies, you eliminate the need for ice in your smoothie which creates a much creamier consistency and a smoothie that holds together longer. Sometimes I will make these in the morning and pop one in the fridge for my daughter for her afternoon snack. It always looks just like I had just made it. When I add water or ice, it tends to separate and grosses her out.

Should I flash freeze any of the ingredients?

If you aren’t familiar with flash freezing, I do this a lot with foods for our freezer. Typically, I fan whatever I am freezing out on an open parchment paper lined cookie sheet, freeze just until frozen, and then toss in a bag.

I experimented with this and here is what I will say about that. You can cut the bananas in half and flash freeze and they will stay separated, making it easier to pour into your blender and it is really great. It’s an extra step though. My lazy freezer routine is to cut them in half right in the bag, freeze (where they tend to fuse back together) and then smack the bag as hard as I can on the counter until they loosen from each other while I listen to the political crap insight on NPR. It’s kind of like a therapy session. You can do it whichever way fits your lifestyle best.

What kind of protein powder do you use? What can I use if I am vegan or dairy-free?

When I was dairy-free, I experimented with a lot of terrible protein powders so I can honestly tell you this is the only brand that I really liked that was plant-based. Now that I’m not dairy-free, I just purchase the store brand protein powder at our local grocery store in a vanilla flavor. Like I said, we had to try a few before we found the ones we liked best and I always try to keep my eyes peeled for a sale to maximize the savings. The goal is to keep this as a frugal routine for us.

What kind of blender do you have?

I have had the same blender for probably eight years or so and, unfortunately, they don’t make mine anymore. When mine bites the bullet, I will probably invest in this one because I have heard they last forever. In order to blend up these fruits, you really need to have a high powered blender though. If you have a $20 blender, it will burn out your motor. I say this because I did it. Twice. Invest in a good blender and it will more than pay for itself, I promise you!

I can’t eat bananas. Do you have any recommendations for substitutions for my smoothie?

I really liked this advice!

Make-Ahead Smoothie Packets For Your Freezer from MomAdvice.com.

Do your kids really like these? My kids are really picky!

They really do and so do I.  My daughter was a terrible breakfast eater, like her mother, and I worried a lot that she wasn’t eating enough to be fueled for her day at school. This is what she “eats” and she stays full until lunchtime. If she is running late, it is something that can be finished while she waits for her bus. Fun straws are always a great addition to this morning treat especially when first pitching this idea to your kids. She says it tastes like a milkshake.

For me, it’s been an incredible way to get fueled before I workout. Working out on an empty stomach isn’t a good idea for someone with low blood sugar. Eating something too heavy made me feel like I was going to be sick. These smoothies are a great option to be fueled without a lot of heaviness in my stomach. Sometimes I drink half and pop it in the fridge until I get done exercising and finish the other half when I’m done.

I hope these tips are helpful and I hope you love these as much as our family does!

Make-Ahead Smoothie Packets For Your Freezer from MomAdvice.com.

Make-Ahead Smoothie Packets For Your Freezer
Prep time:
Total time:
Serves: 2 large servings
Freeze a packet of fruit and veggies to save time in the mornings making your smoothies. Feel free to experiment with your own flavor combinations with fruits (especially anything that might be ripe!)
Ingredients
  • 1 banana (cut in half- see freezing tips above)
  • 5 frozen strawberries
  • 1 handful of frozen blueberries
  • 1 cup fresh spinach
  • 1/2 cup vanilla or plain Greek yogurt
  • 1 1/2 cup unsweetened almond milk (or your favorite milk)
  • 1 scoop vanilla protein powder (see recommendation above)
Instructions
  1. In a quart-sized bag prepare 1 banana, strawberries, blueberries, and spinach in a freezer bag. Repeat this process for a week’s worth of smoothies. Freeze for up to 30 days.
  2. When making your morning smoothie, remove packet from the freezer and place in blender. Add almond milk, yogurt, and protein powder.
  3. Blend well. Serve.

 Do you have a favorite smoothie routine or recipe? Feel free to leave it in our comments below!

This post contains affiliate links. I only recommend what I love though- pinky promise!

Pin It

Mango Coconut Green Smoothie

Thursday, February 18th, 2016

I’m so honored to have my friend, Liz of The Lemon Bowl, sharing this amazing smoothie recipe with us today!

Make your breakfast healthy with this Mango Coconut Green Smoothie recipe!

Hi friends! I’m Liz from The Lemon Bowl and I am honored to be guest posting today for the beautiful and crazy talented Amy. As a healthy recipe blogger and busy mom of two young boys, I love creating easy recipes made from simple ingredients.

I don’t know about you but we love smoothies in our house. Not only are they a great way to use up fruits and veggies that are a little past their prime but they are literally a meal in a glass.

Coconut Mango Green Smoothie - perfect for a snack or breakfast.

Just in time for St. Patrick’s Day, this protein-packed Mango Coconut Green Smoothie is naturally sweetened and has no artificial coloring. Made with creamy coconut milk, juicy mango and sweet bananas, your entire family will love this healthy and delicious smoothie.

Whether you make it for breakfast, an after-school snack or dessert, just promise me you’ll make it.

Your straw is waiting.

Healthy, delicious & easy - Mango Coconut Green Smoothie recipe for snack time or breakfast.

Mango Coconut Green Smoothie
Author: Liz Della Croce for MomAdvice.com
Prep time:
Total time:
Serves: 1 serving
Juicy mango and creamy coconut milk add delicious flavor to this healthy and delicious smoothie packed with vitamins and nutrients.
Ingredients
  • 1 cup sliced mango – fresh or frozen
  • ½ banana
  • ⅓ cup [url href=”http://www.amazon.com/Thai-Kitchen-Pure-Coconut-13-66-Ounce/dp/B000GZYARS/ref=sr_1_3?ie=UTF8&qid=1362923575&sr=8-3&keywords=coconut+milk+light” target=”_blank”]coconut milk – light[/url]
  • 1 scoop [url href=”http://www.amazon.com/Biochem-100%25-Protein-Vanilla-Ounce/dp/B0017ODT0Q/ref=sr_1_1?s=hpc&ie=UTF8&qid=1362923609&sr=1-1&keywords=vanilla+protein+powder+biochem” target=”_blank”]vanilla protein powder[/url]
  • 1 tablespoon [url href=”http://www.amazon.com/Chia-Seed-16-oz-Pkg/dp/B005P0G8VK/ref=sr_1_2?s=hpc&ie=UTF8&qid=1362923631&sr=1-2&keywords=bobs+red+mill+chia” target=”_blank”]chia seeds[/url] + extra for garnish
  • 2 cups spinach
  • handful ice
Instructions
  1. Place all ingredients in a high speed blender and puree until smooth.
  2. To prepare glass, pour ¼ cup or so of chia seeds on a plate. Run the rim of a glass under running water then carefully dip the top of the glass onto the plate until the rim is covered in chia seeds.
  3. Pour the smoothie into the glass and serve.
Notes
If you are working with frozen fruit you may need to add a bit of liquid to get the smoothie blending – I like to add water or a bit more coconut milk to reach the desired consistency.[br][br][b]Nutrition Information[/b][br]Serving size: 1 glass Calories: 391 Fat: 14.9 g Saturated fat: 7.2 g Unsaturated fat: 7.7 g Trans fat: 0 Carbohydrates: 58.2 g Sugar: 33.1 g Sodium: 145 mg Fiber: 16.5 g Protein: 17.1 g Cholesterol: 0 mg


Pin It

Pumpkin Nut Quinoa Breakfast

Wednesday, September 30th, 2015

Perfect for the fall and for our M Challenge Focus on Better Mornings, I’m republishing this easy breakfast of pumpkin flavored quinoa with yummy sugared pecans because it will definitely help get your day off to a great start!

Pumpkin Nut Quinoa Breakfast
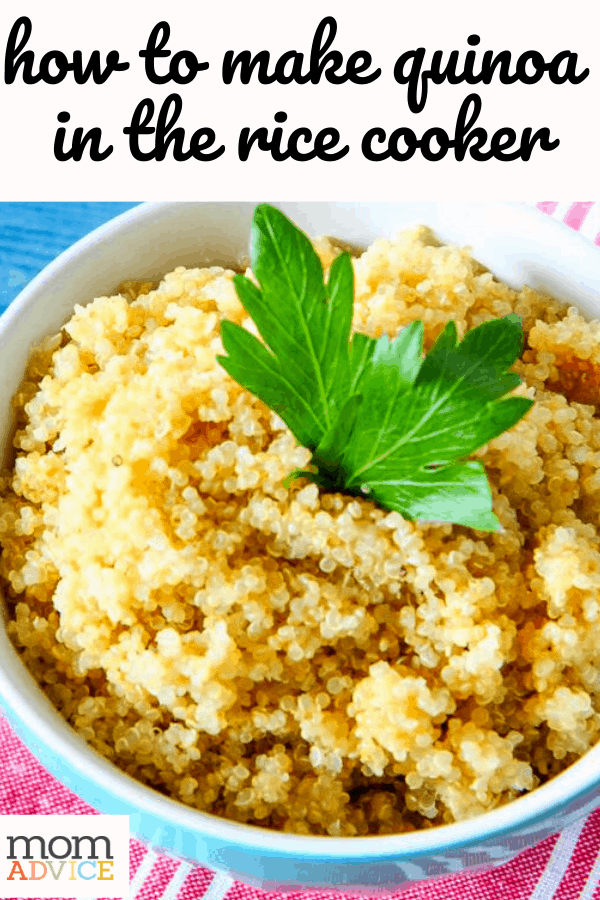
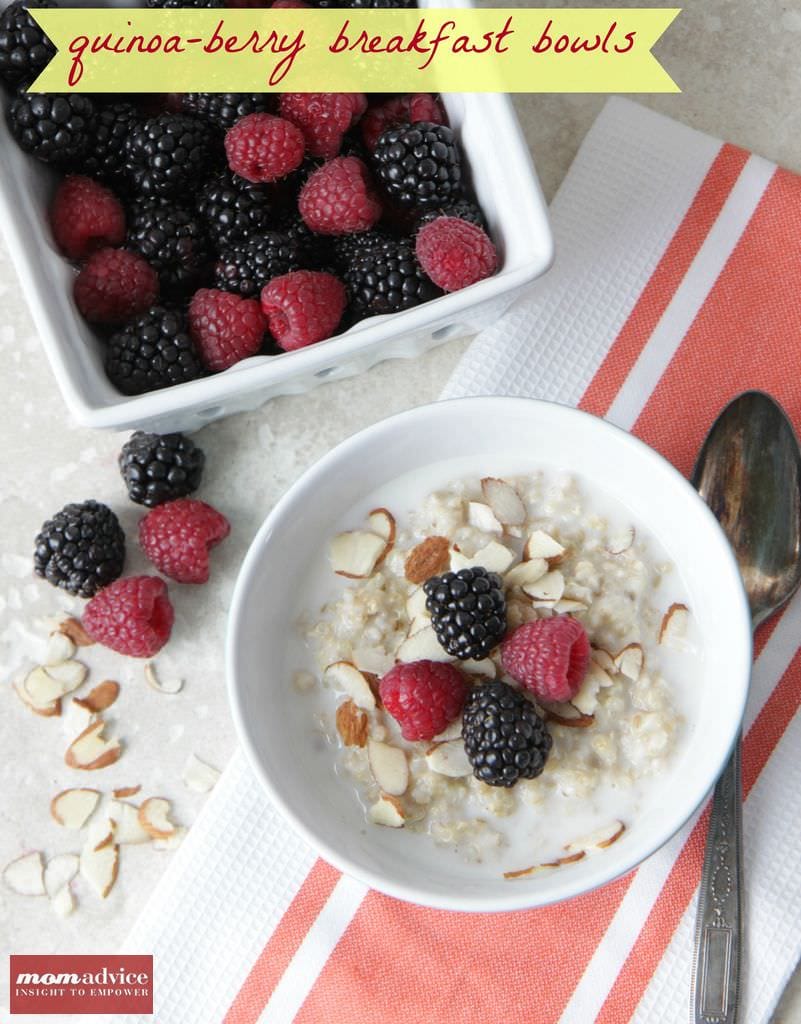
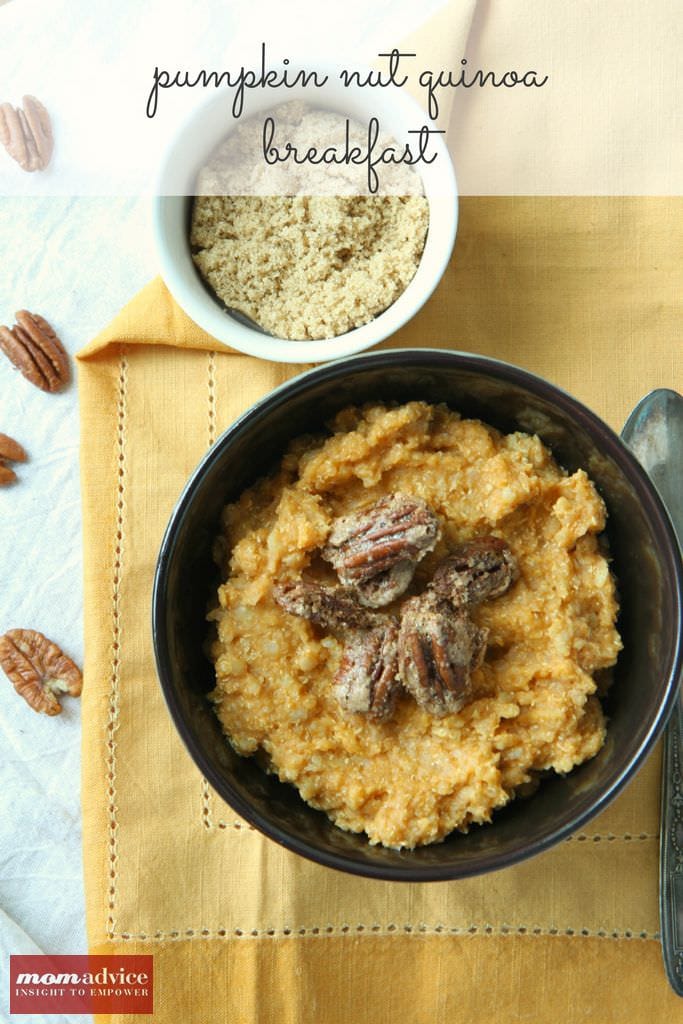
I can’t think of two ingredients I am loving more than pumpkin and quinoa right now. This recipe is a deliciously satisfying pairing of pumpkin and quinoa together in this Pumpkin Nut Quinoa Breakfast. The best part is the fun topping addition of sugared pecans that make this dish such a standout!

Pumpkin Nut Quinoa Breakfast

Over this past year I have showcased lots of fun recipes to try with quinoa from basic preparation to summer salads to breakfast bowls to stuffed peppers. What you might not know though is that there is another variety of quinoa that you can purchase for your baking and breakfast needs. Quinoa flakes remind me of Cream of Wheat in their texture, but they are packed with loads of protein. They can be found at natural food stores and are often available in both a boxed variety or can be purchased in the bulk section of the store.

Last winter I became addicted to these quinoa flakes for a hot breakfast bowl. I dressed mine up simply with a little stevia, maple syrup, and almond milk, but I wanted to try another spin with this ingredient for the Fall.

Pumpkin Nut Quinoa Breakfast
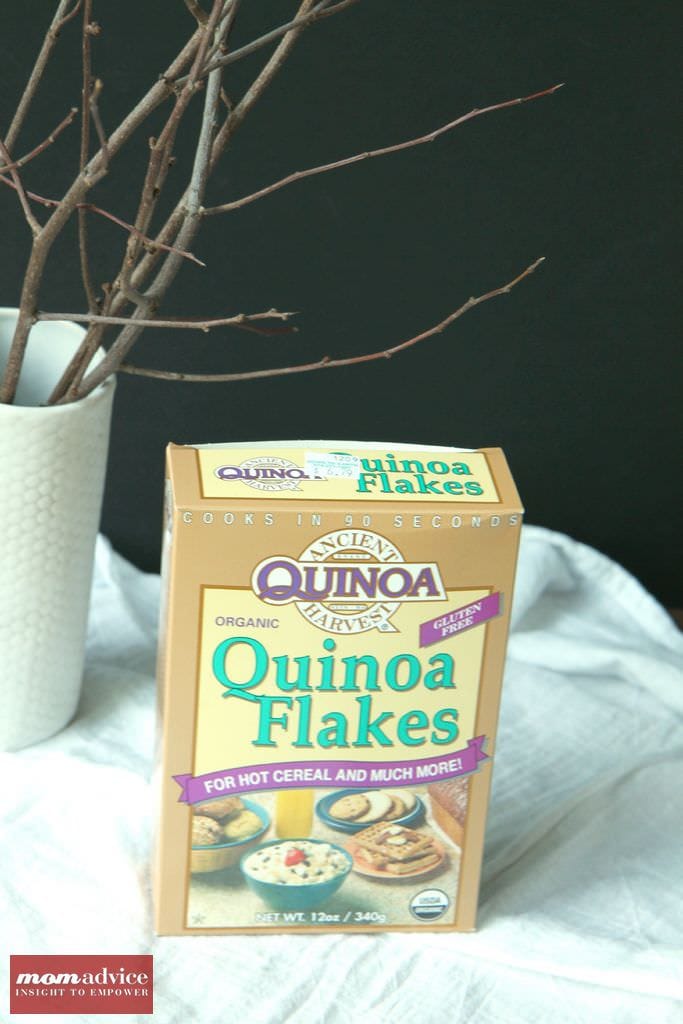
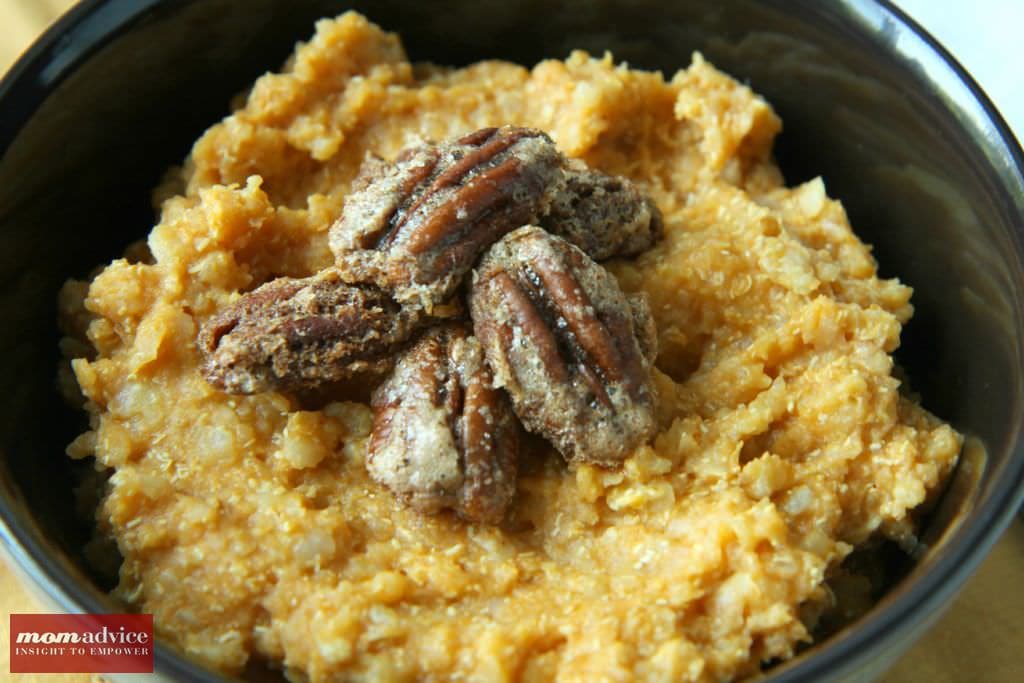
This recipe for Pumpkin Quinoa can be modified to your own dietary needs. I prepared mine with almond milk, but you can use regular milk too. The nuts are tossed in cinnamon, cloves, and nutmeg and a little egg white. They remind me a lot of these
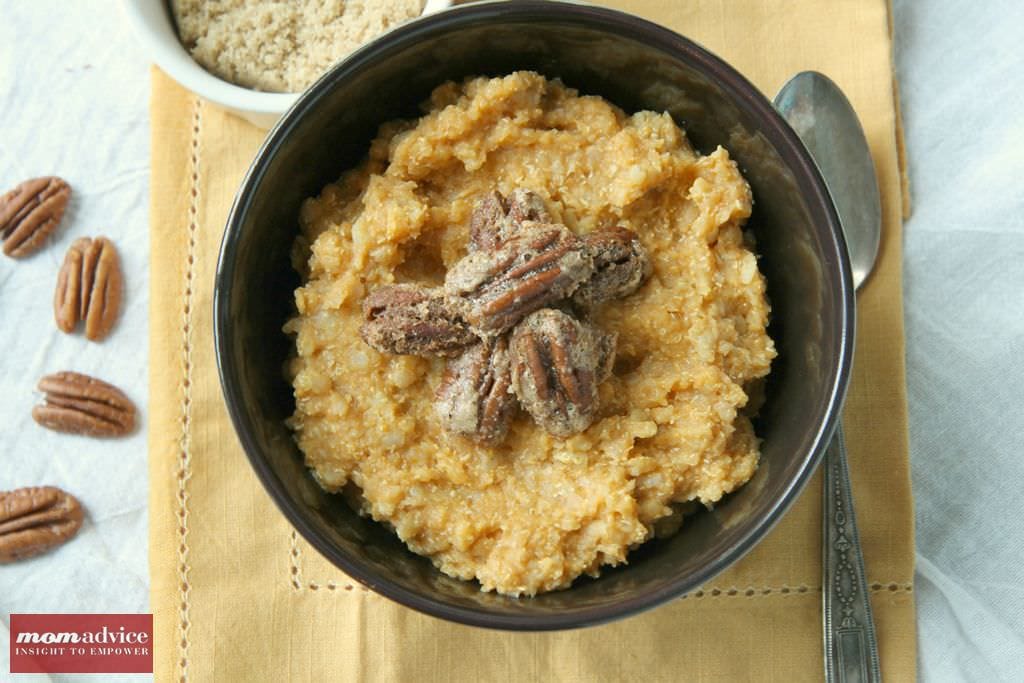
 Sugar & Spice Nuts that I love to share around the holidays.

If you are vegan, try substituting the egg white with 2-3 tablespoons of water and 1 tablespoon of flax, mixed well, to coat the nuts. For those living gluten-free, no modifications need to be made! It is one of those recipes that is easy to modify for your family!

I hope you enjoy this recipe as much as I did. I reheat my leftovers in the microwave and add a little milk to thin them out again. This is a great one to tuck in your fridge for a hot breakfast all week long!

Pumpkin Nut Quinoa Breakfast

Pumpkin Nut Quinoa Breakfast
Recipe Type: Breakfast
Author: Adapted from Deliciously G-Free by Elisabeth Hasselbeck
Prep time:
Cook time:
Total time:
Serves: 4
A deliciously gluten-free dish that can be enjoyed on Fall mornings. This pumpkin quinoa is packed with protein and has added flavor & texture from the amazing sugared pecans that adorn it.
Ingredients
  • 1/4 cup granulated sugar
  • 1/2 teaspoon ground cinnamon
  • 1 teaspoon cornstarch
  • Pinch of Salt
  • 1/4 teaspoon ground cloves
  • 1/4 teaspoon ground nutmeg
  • 1 egg white (see above for vegan substitution)
  • 1/4 teaspoon vanilla extract
  • 1 cup pecan halves
  • 1 3/4 cup water
  • 1 3/4 cup milk (or milk substitute)
  • 1 1/3 cups quinoa flakes
  • 1 cup canned pumpkin
  • 1/4 cup half-and-half (or additional milk substitute)
  • 1/4 cup light brown sugar
Instructions
  1. Preheat the oven to 300 degrees. Line a rimmed baking sheet with parchment paper.
  2. Place the sugar, cinnamon, cornstarch, salt, ground cloves, and ground nutmeg in a plastic bag, seal the bag, and shake to mix.
  3. Pu tthe egg white and vanilla in a bowl, and beat until slightly foamy. Add the pecans and stir to coat them well. Using a slotted spoon, lift the pecans out the bowl and transfer them to the bag of sugar and spices. Shake, making sure the pecans are well coated with the seasoning. Spread the pecans out on the prepared baking sheet, and bake for 30 minutes. Remove from the oven and let them cool on the baking sheet.
  4. Meanwhile, place the water and milk in a large saucepan and bring to a boil. Add the quinoa flakes and reduce the heat to medium. Cook for 5-10 minutes, until the liquid has decreased by half and the mixture is thick.
  5. Combine the pumpkin and the half-and-half (or milk substitute) in a small bowl and whisk until smooth. Swirl the pumpkin into the quinoa and sprinkle with the brown sugar. Divide among four bowls, sprinkle with nuts, and serve immediately.

Source: Deliciously G-Free (affliliate)

Looking for more things to do with the rest of the can of pumpkin? Be sure to check out these 11 pumpkin recipe ideas for your Fall cooking!


Pin It

Hard Boiled Eggs In The Oven Recipe

Monday, September 21st, 2015

Hard Boiled Eggs In The Oven Recipe Header

Want hard boiled eggs fast? Try this oven method for baking eggs for deviled eggs, Easter eggs, egg salad, or a simple protein-packed snack. Make perfect hard boiled eggs fast with this smart Alton Brown approved method.

Have you ever prepared hard boiled eggs in the oven?

I had seen the tutorials floating around Pinterest, but I gave this method a spin while meal prepping for our busy week.

These are the perfect hard boiled eggs for an afternoon snack or for a quick lunch with chopped veggies and I can’t wait to show you how easy this method is.

Although I rely usually on my Instant Pot, you are limited to just a dozen at a time.

It does seem kind of crazy to bake your eggs, but this is a great way to make a lot of eggs for your week or for your Easter egg decorating.

Hard Boiled Eggs In The Oven Recipe Placed in Muffin Tin

Make Hard Boiled Eggs in the Oven Recipe

Here is the thing, results seem to vary on success with baking your hard boiled eggs in the oven and it’s a good idea to give these a test run in your oven with just a couple of eggs rather than wasting an entire dozen. 

What Can Improve My Experience Baking Hard Boiled Eggs?

Hard Boiled Eggs In The Oven Recipe

Get an Oven Thermometer

I am telling you that one of the best gadgets you can buy, if you are not getting consistently good results with baking in your oven, is an inexpensive oven thermometer.

I have had ovens, in apartment rentals, that were fifty degrees off or more. I could have saved myself a lot of tears and burnt dishes if I would have known that this cheap little gadget could improve the results in my cooking in a dramatic way.

Try Different Temperatures

Once you know that your oven temperature is correct (or how to gauge it if isn’t) try baking the eggs at 325 degrees first.

If your eggs are not to your liking, increase the temperature to 350 degrees.

Hard Boiled Eggs In The Oven Recipe in Ice Water

Stop the Brown Spots

Brown spots can develop on your egg from resting in the muffin tins, particularly with a dark muffin tin like the one I am showing in this picture.

Although the spots don’t really bug me, you can prevent them by using a silicone muffin pan, baking in a mini muffin tin, or lining your muffin tin with liners, tin foil.

Wildly I have also heard that cotton pads/balls can offer a buffer between your egg and the bottom of the pan. Alton Brown, in fact, actually recommends placing the eggs directly on your oven racks and skipping the muffin tin altogether.

I’d love to hear your thoughts on that one and if you have any success with it.

Make Peeling Easier

Did you know that fresh eggs can actually be more difficult to peel? We have discovered peeling the eggs is so much easier with eggs that have been in our fridge at least a week.

Hard Boiled Eggs In The Oven Recipe Storing

How Should I Store My Eggs?

Once you have your week’s worth of eggs, how the heck do you store them?

I read a lot of advice on this one when we prepared our eggs!

Ideally, you want to keep these in their shell since it acts a barrier to bacteria and it helps them last longer too.

Within the shell, you can eat these safely for up to seven days (although they never last that long in our house!!).

Hard Boiled Eggs In The Oven Recipe Finished Yolks

 Peeled hard-boiled eggs can be stored in the refrigerator in a bowl of cold water to cover for about five days (change the water daily) or in a sealed container without water (cover the eggs with damp paper towels) for the same length of time.

We store ours in their shell since I am worried about the bacteria factor.

I also ended up stumbling on this egg storage method for our fridge so we started doing that instead.

How Do I Cook Hard Boiled Eggs on the Stove Top If I Don’t Love the Oven Method?

My mom was always a big fan of this stovetop method and I love that you don’t need a gadget to make it happen!

Place eggs in a large pot of water and cover them with an inch of water (cold). cover the pan with a lid and listen for boiling water. When the water has come to a boil, let it boil over high heat for 6-7 minutes. Remove these with a slotted spoon and give them the same ice water bath treatment as you do for the oven method.

Hard Boiled Eggs In The Oven Recipe
 
Recipe Type: Breakfast
Author: MomAdvice.com
Prep time:
Cook time:
Total time:
Serves: 12 or more servings
Want hard boiled eggs fast? Try this oven method for baking eggs for deviled eggs, Easter eggs, egg salad, or a simple protein-packed snack. Make perfect hard boiled eggs fast with this smart Alton Brown approved method. This quick method is perfect for big-batch make-ahead preparation of hard boiled eggs. Be sure to read the post for additional tips for success.
Ingredients
  • 1 dozen eggs or more (preferably, older eggs that have been in your fridge for one week or more)
Instructions
  1. Preheat oven to 325 degrees
  2. Put 1 egg in each of 12 muffin cups.
  3. Bake in preheated oven for 25-30 minutes.
  4. Plunge baked eggs in a large bowl of ice water until cooled completely, about 10 minutes.
  5. Remove the room temperature eggs with a slotted spoon and store in your refrigerator for up to a week.


As an Amazon Associate I earn from qualifying purchases.

Love these tips? Here are a few other great make-ahead meal prep ideas for your week!

How to Make Perfect Brown Rice in Your Rice Cooker from MomAdvice.com how to make perfect brown rice in your rice cooker

How to Make Quinoa in the Rice Cooker how to make quinoa in your rice cooker

Roast Frozen Chicken in Bulk roast frozen chicken in bulk for your week

Instant Pot Shredded Chicken from MomAdvice.com instant pot shredded chicken for all your recipes

Happy cooking, friends!

Make Hard Boiled Eggs in the Oven Recipe Header


Pin It

Make-Ahead Breakfast Burritos

Friday, September 11th, 2015


Make ahead  and freeze these breakfast burritos from MomAdvice.com


Here’s one of our favorite breakfasts that helps our mornings run smoother – easy burritos that can be pulled from the freezer whenever you need them. It doesn’t hurt that they’re delicious and customizable, too!


Make-Ahead Breakfast Burritos

Back-to-School requires a lot of planning and getting back on track with a healthy breakfast is one thing I want to work on this year.

Today I wanted to show you a recipe for Make-Ahead Breakfast Burritos that can be made ahead and also created for your gluten-free or dairy-free family members.  

One batch of these freezer breakfast burritos can yield 15-18 burritos, depending on how you stuff  ’em, and they are filled with everything your kids need to start their day on the right foot.

I am partnering with Walmart on this back-to-school idea today so you can snag all the supplies you need right at their store.


Make-Ahead Breakfast Burritos


What I love about these burritos is that they are not only filled with fresh whole foods, but also that they are inexpensive to create.

With kitchen staples like eggs, cheese, potatoes, and tortillas, it is likely you already have a few things on hand for this back-to-school breakfast.

Create an assembly line of ingredients in the kitchen and have your kids jump in on the fun.


The potatoes are tossed in paprika and garlic powder for a tasty topping to the eggs.

I love a little Italian turkey sausage, red peppers, and cheddar or colby cheese for these burritos.

You can create your own flavor combinations or consider clearing out items from the fridge and making a unique combination all your own.


Make-Ahead Breakfast Burritos


Be careful to not overstuff the burritos so they can be wrapped easily and place them on a parchment-lined cookie sheet to place in the freezer until frozen.

Once these are frozen you can tuck them in a freezer bag and just grab them when you need them.

Do you know how to wrap a burrito?

 If not, I love this tutorial for perfectly wrapped breakfast burritos!


Make-Ahead Breakfast Burritos


With one kid in middle school (GASP!) and a daughter who prefers not to eat in the morning, I am hoping that these burritos will be the perfect way to get them motivated to eat a healthy breakfast.

Just grab one from the freezer and wrap it in a dampened paper towel for the microwave for three minutes (flip it halfway through).

Wrap in foil and let them eat them on the way to the bus or in route to school.  

These also make a great after school snack,  after sports activities, or an impromptu dinner with their pals while doing homework.

To make them dairy-free substitute the cream with almond milk (which is what we did) and add a vegan cheese to them or leave them cheeseless.

For a gluten-free burritos, Walmart offers this option in their stores.

We hope you love this delicious breakfast as much as we did.

We have already started raiding our make-ahead breakfast burritos for quick lunches this week.

I am shocked how beautifully these reheat and taste.

There are no excuses why you can’t tackle a healthy breakfast.

Be sure to check out my recipe for Slow Cooked Honey Crisp Apple Oatmeal for another fun breakfast treat!


Make-Ahead Breakfast Burritos

Make-Ahead Breakfast Burritos
 
Recipe Type: Breakfast
Prep time:
Cook time:
Total time:
Serves: 18
A make-ahead breakfast burrito that you can tuck in your freezer for a healthy breakfast, snack or meal.
Ingredients
  • 2 tablespoons olive oil
  • coarse salt and freshly ground pepper
  • 3 large russet potatoes, peeled and diced
  • 1 teaspoon garlic powder
  • 1/2 teaspoon paprika
  • salt & pepper
  • 1 lb Italian Turkey Sausage
  • 1 dozen eggs
  • 2 tablespoons cream (or milk substitute)
  • 1 red bell pepper, cored and diced
  • 1/2 pound cheese of your choice (or vegan cheese)
  • 18 tortillas, soft-taco size (8-inch), whole-wheat, flour, or gluten-free tortillas
Instructions
  1. To roast potatoes, preheat your oven to 475 degrees. Line a cookie sheet with parchment paper. Drizzle diced potatoes with oil and season with salt, pepper, paprika, and garlic powder. Toss the potatoes together to evenly coat in oil and seasonings, and spread out into a single layer on the parchment. Roast until browned on the bottom and tender, about 20-25 minutes.
  2. Brown your sausage. Once it is cooked through, set aside in a large bowl, leaving about a 2 tablespoons of drippings in the pan for the eggs.
  3. In a medium bowl, whisk the eggs with the cream (or milk substitute) and pour into the sausage skillet. Cook over medium heat until just set, stirring as needed. season with salt and pepper and stir to combine, and transfer to the bowl with sausage.
  4. In the same skillet, cook your red peppers over medium heat until fragrant and softened, about 10 minutes.
  5. Make an assembly line- tortilla, cheese, followed by a small handful of potatoes and a scoop of the egg/sausage mixture. Roll the tortilla up.
  6. For freezing, place burritos on a wax- or parchment-lined baking sheet and place in the freezer until firm, at least an hour. Transfer to large freezer bags and keep frozen for up to one month.
  7. For reheating, place a frozen burrito in a dampened paper towel and microwave for three minutes, turning halfway through.
 
Recipe Adapted From: Dinners For Winners


Easy freezer recipe for breakfast burritos from MomAdvice.com


Make ahead and freeze this easy breakfast burritos from MomAdvice.com


walmart_mom_disclaimer


Meal Prep: Breakfast Sandwiches Recipe from MomAdvice.com

Make Ahead and Freeze Breakfast Sandwiches


DIY Breakfast Caddy

DIY Breakfast Caddy


Applesauce Cinnamon Breakfast Muffins

Honey Sweetened Applesauce Cinnamon Breakfast Muffins


Quinoa Berry Breakfast Bowls

Quinoa Berry Breakfast Bowls

Pin It

21 Easy Slow Cooker Meals

Thursday, August 13th, 2015

Slow cooker meals are always a cornerstone of our family’s meal plans since it’s so convenient to have dinner cooking while you’re away (or breakfast cooking while you sleep!). Which makes it perfect to republish this article full of slow cooker meal ideas for our Focus on Meal Planning M Challenge. I hope you enjoy seeing these recipes again!

21 Easy Slow Cooker Meals from MomAdvice.com

I have a confession to make. I am addicted to my slow cooker! And so I’m sharing 21 of our favorite slow-cooker meal recipes that you can create and enjoy all month long. These recipes are a few of our tried and trues over the years on MomAdvice and will make your week go oh-so-much smoother!

I believe that the slow cooker can be every mother’s (or father’s!) best friend. What could be easier than throwing in a few ingredients, plugging it in, and then going about your day, without the worries of needing to figure out what everyone is going to eat for dinner?

Ninja Cooker

Truth be told, I have moved up in the slow cooking world and am now madly in love with my Ninja Cooker. I use it almost daily and love that I don’t have to dirty my stove or skillets to brown my meat anymore. I would definitely add that one to your next holiday wish list! You can read more of my thoughts on that over here.

In honor of this kitchen gadget, I have put together a month’s worth of meals using your slow cooker. Each of these meals will have a recipe and tips for making your dinner hour go more smoothly. Keep in mind that many of the recipes accommodate six to eight people so you may be able to cover (at least) a month’s worth of meals.

Slow Cooker Honey Bourbon Chicken Wings

Slow Cooker Honey Bourbon Wings


Side Ideas- Fresh veggies & blue cheese dressing for dipping, steamed broccoli, and fresh fruit.

Slow Cooker Stuffed Green Pepper Soup

Stuffed Green Pepper Soup

Side Ideas- Pumpkin Cornbread Muffins & Salad

 Sticky Chicken Recipe

1 tbsp salt

2 tsp paprika

2 tsp dried oregano leaves

2 tsp dried thyme leaves

1 tsp pepper

1 tsp garlic salt

3 lb roasting chicken

1 cup chopped onion

In a small bowl, combine all ingredients except chicken and onion. Rub herb mixture inside and outside of chicken. Place in food storage bag; seal bag. Refrigerate overnight. Remove chicken from bag; stuff with onion. Place in crockpot on low 6-8 hours; high 2-4 hours. Chicken juices should run clear and chicken reaches 180*. Let stand 15 minutes before carving.

Side Ideas- Mashed Potatoes & Corn

Pot Roast Italiano

Pot Roast Italiano


Side IdeasRoasted Green Beans & Orzo Pasta
Tortellini & Turkey Divine

 Tortellini & Turkey Divine

1 1/2 pounds Italian sausage turkey

2 clove garlic– minced

2 small onions– chopped

2 cans whole peeled tomatoes- 16 ounce cans

1 1/4 cups dry red wine

5 cups beef broth

1/2 teaspoon dried basil

1/2 teaspoon dried oregano

2 zucchini- sliced

1 green bell pepper- chopped

3 tablespoons chopped fresh parsley

1 package cheese-filled tortellini


In a large pot, cook sausage over medium heat until brown. Remove with a slotted spoon, and drain on paper towels. Drain fat from pan, reserving 3 tablespoons. Cook garlic and onion in reserved fat for 2 to 3 minutes. Stir in tomatoes, wine, broth, basil, and oregano. Transfer to a slow cooker, and stir in sausage, zucchini, bell pepper, and parsley. Cover, and cook on Low for 4 to 6 hours. Bring a pot of lightly salted water to a boil. Cook pasta in boiling water until al dente, about 7 minutes. Drain water, and add pasta to the slow cooker. Simmer for a few minutes, and season with salt and pepper before serving.

Side Ideas- Salad & Fresh Fruit

Slow Cooked Italian Beef

Italian Beef Sandwiches

Side Ideas- Oven Fries & Apple Slices

Sloppy Joes

 Side Ideas- Tortilla Chips & Carrot Sticks

Pumpkin Chili

Pumpkin Chili

Side Ideas- Pumpkin Cornbread Muffins & Fresh Fruit

Slow Cooker Beef Stew

Slow Cooker Beef Stew

2 pounds beef stew meat – cubed

2.5 cups carrots

2.5 cups potatoes

1 cup celery

1 can diced tomatoes – with the juice poured in

1 can beef broth

1 cup water

1 tsp ground mustard

3 sprigs rosemary

Put beef in a zipper bag with a 1/4 cup of flour and toss to coat. Brown the meat in a skillet and place on the bottom of the crock pot. Coarsely chop vegetables and place on top of the meat. Pour in the can of diced tomatoes with juice, can of beef broth, water, and ground mustard. Place sprigs of rosemary on top and cook on high for four hours or on low for six to eight hours.

Side Ideas-  Make your own salad bar!

Slow Cooked Apple Oatmeal

Slow Cooked Honeycrisp Apple Oatmeal


Side Ideas-  Create your own oatmeal toppings bar and serve with green smoothies.

3-Ingredient Chicken Tacos

3-Ingredient Slow Cooked Chicken Tacos

1 package taco seasoning mix

1 cup chicken broth

1 pound chicken breasts – boneless & skinless frozen chicken breasts

Dissolve taco seasoning into chicken broth. Place chicken breasts in slow cooker and pour broth over them. Cook on LOW for 5 hours. With two forks, shred the chicken meat into bite-size pieces. Serve with your favorite taco toppings.

Side Ideas- Roasted Corn Salsa With Tortilla Chips

Slow Cooker Spaghetti Sauce

Slow Cooker Spaghetti Sauce

1 package Italian Turkey Sausage – mild

2 cans crushed tomatoes

1 can petite diced tomatoes

1 can tomato paste

½ cup beef broth

Brown the turkey sausage in a large skillet. Place cooked sausage in the bottom of the slow cooker. Pour over the sausage all of the other ingredients, including any of your own Italian seasonings. Cook sauce on low for six hours or on high for three to four hours. Serve over your favorite pasta.

Pulled Pork Stuffed Sweet Potatoes

Pulled Pork Stuffed Sweet Potatoes


Side Ideas- Lemony Spinach & Tomato Quinoa Salad & Carrot Sticks

Mongolian Beef

 Mongolian Beef 


Note- to make this in your slow cooker, brown the beef and then heat all the ingredients together on LOW for four hours.

Side Ideas- Brown Rice & Steamed Broccoli

Slow Cooker Chicken BBQ Sandwiches


Side Ideas- Shoestring Oven Fries & Carrot Sticks

Taco Soup

1 pound ground turkey

1 can chili beans with liquid

1 can kidney beans with liquid

1 can whole kernel corn with liquid

2 cans diced tomatoes

1 can tomato sauce

2 cups water

1 package taco seasoning mix

In a medium skillet, cook the ground beef until browned over medium heat. Drain & set aside. Place the ground beef, chili beans, kidney beans, corn, tomato sauce, water, diced tomatoes, & taco seasoning mix in a slow cooker. Mix to blend and cook on Low setting for eight hours.

Side Ideas-  Roasted Corn Salsa With Tortilla Chips

Chicken Italiano

Chicken Italiano


Side Ideas- Spaghetti & a DIY Salad Bar

 Breakfast Casserole

Note- I recommend doing this one using this technique to prevent burning and even cooking.

1 pound turkey sausage – sweet or spicy

1 teaspoon mustard powder

1/2 teaspoon salt

4 eggs, beaten

2 cups milk

6 slices white bread – toasted and cut into cubes

8 ounces shredded Cheddar cheese

Crumble sausage and cook thoroughly. Drain meat. In a large bowl, mix all ingredients together evenly. Place the casserole in the fridge overnight. In the morning put in the slow cooker for four hours on high or six hours on low.

Side Ideas- Fresh Fruit & Grapefruit Halves

Gluten-Free Orange Chicken

Orange Chicken


Note to make this in your slow cooker, brown the chicken and then heat all the ingredients together on LOW for two-four hours.

Side Ideas- Brown Rice & Steamed Broccoli

Chicken Lasagna Florentine

2 cans cream of chicken soup – (10-3/4-oz) reduced-fat, reduced-sodium, undiluted

1 package frozen chopped spinach, thawed, and squeezed dry (10 ounces)

9 oz chicken – diced cooked chicken (two small or one large boneless skinless chicken breast)

8 oz sour cream – low-fat

1 cup milk

2 oz grated parmesan – (1/2 cup)

1/3 cup onion – chopped

1/2 tsp salt

1/4 tsp black pepper

1/8 tsp ground nutmeg

9 uncooked lasagna noodles

1 cup mozzarella cheese – (4 oz) shredded part-skim

Combine first 10 ingredients in large bowl.

Spread about 1/4 cup sauce in bottom of a 5-quart slow cooker coated with cooking spray. Add 3 uncooked lasagna noodles, breaking noodles in half as necessary to fit slow cooker. Spread one-third of chicken mixture over noodles, sprinkle with 1/3 cup mozzarella. Layer 3 more noodles, half of remaining chicken mixture, and 1/3 cup mozzarella. Top with remaining noodles and chicken mixture; sprinkle with remaining 1/3 cup mozzarella cheese.

Cover with lid; cook on high-heat setting 1 hour. Reduce to low-heat setting; cook 5 hours or until pasta is done.

Side Ideas- Roasted Green Beans & Grapes


Slow Cooker Lemon Chicken

3 pound chicken – whole or pieces

1 tsp dried oregano

½ teaspoon dried rosemary

garlic cloves – minced

2 tablespoons butter

¼ cup sherry wine or chicken broth

¼ cup lemon juice

Wash chicken; pat dry; season chicken generously with salt and pepper; sprinkle half of oregano, rosemary and garlic inside cavity of chicken; melt butter in frying pan and brown chicken; transfer to slow cooker or crockpot; sprinkle with remaining oregano, rosemary and garlic; add sherry to frying pan and stir to loosen brown bits; pour into slow cooker. Cover, cook on low for 7 hours; add lemon juice and cook 1 more hour (total of 8); transfer chicken to cutting board; skim fat from juices and serve over chicken.

Side Ideas- Have two slow cookers? Try our easy Slow Cooker Mashed Potatoes!

Feel free to share your favorite slow cooker recipes below! I’d love to add them to our list!

This post contains affiliate links.