Archive for the ‘My Work’ Category

Gluten-Free Cookies and Cream Cake

Tuesday, March 14th, 2017

Tracking Pixel
Gluten-Free Cookies and Cream Cake from MomAdvice.com

This post was created in partnership with Bob’s Red Mill. Thank you for supporting the companies that support our site! 

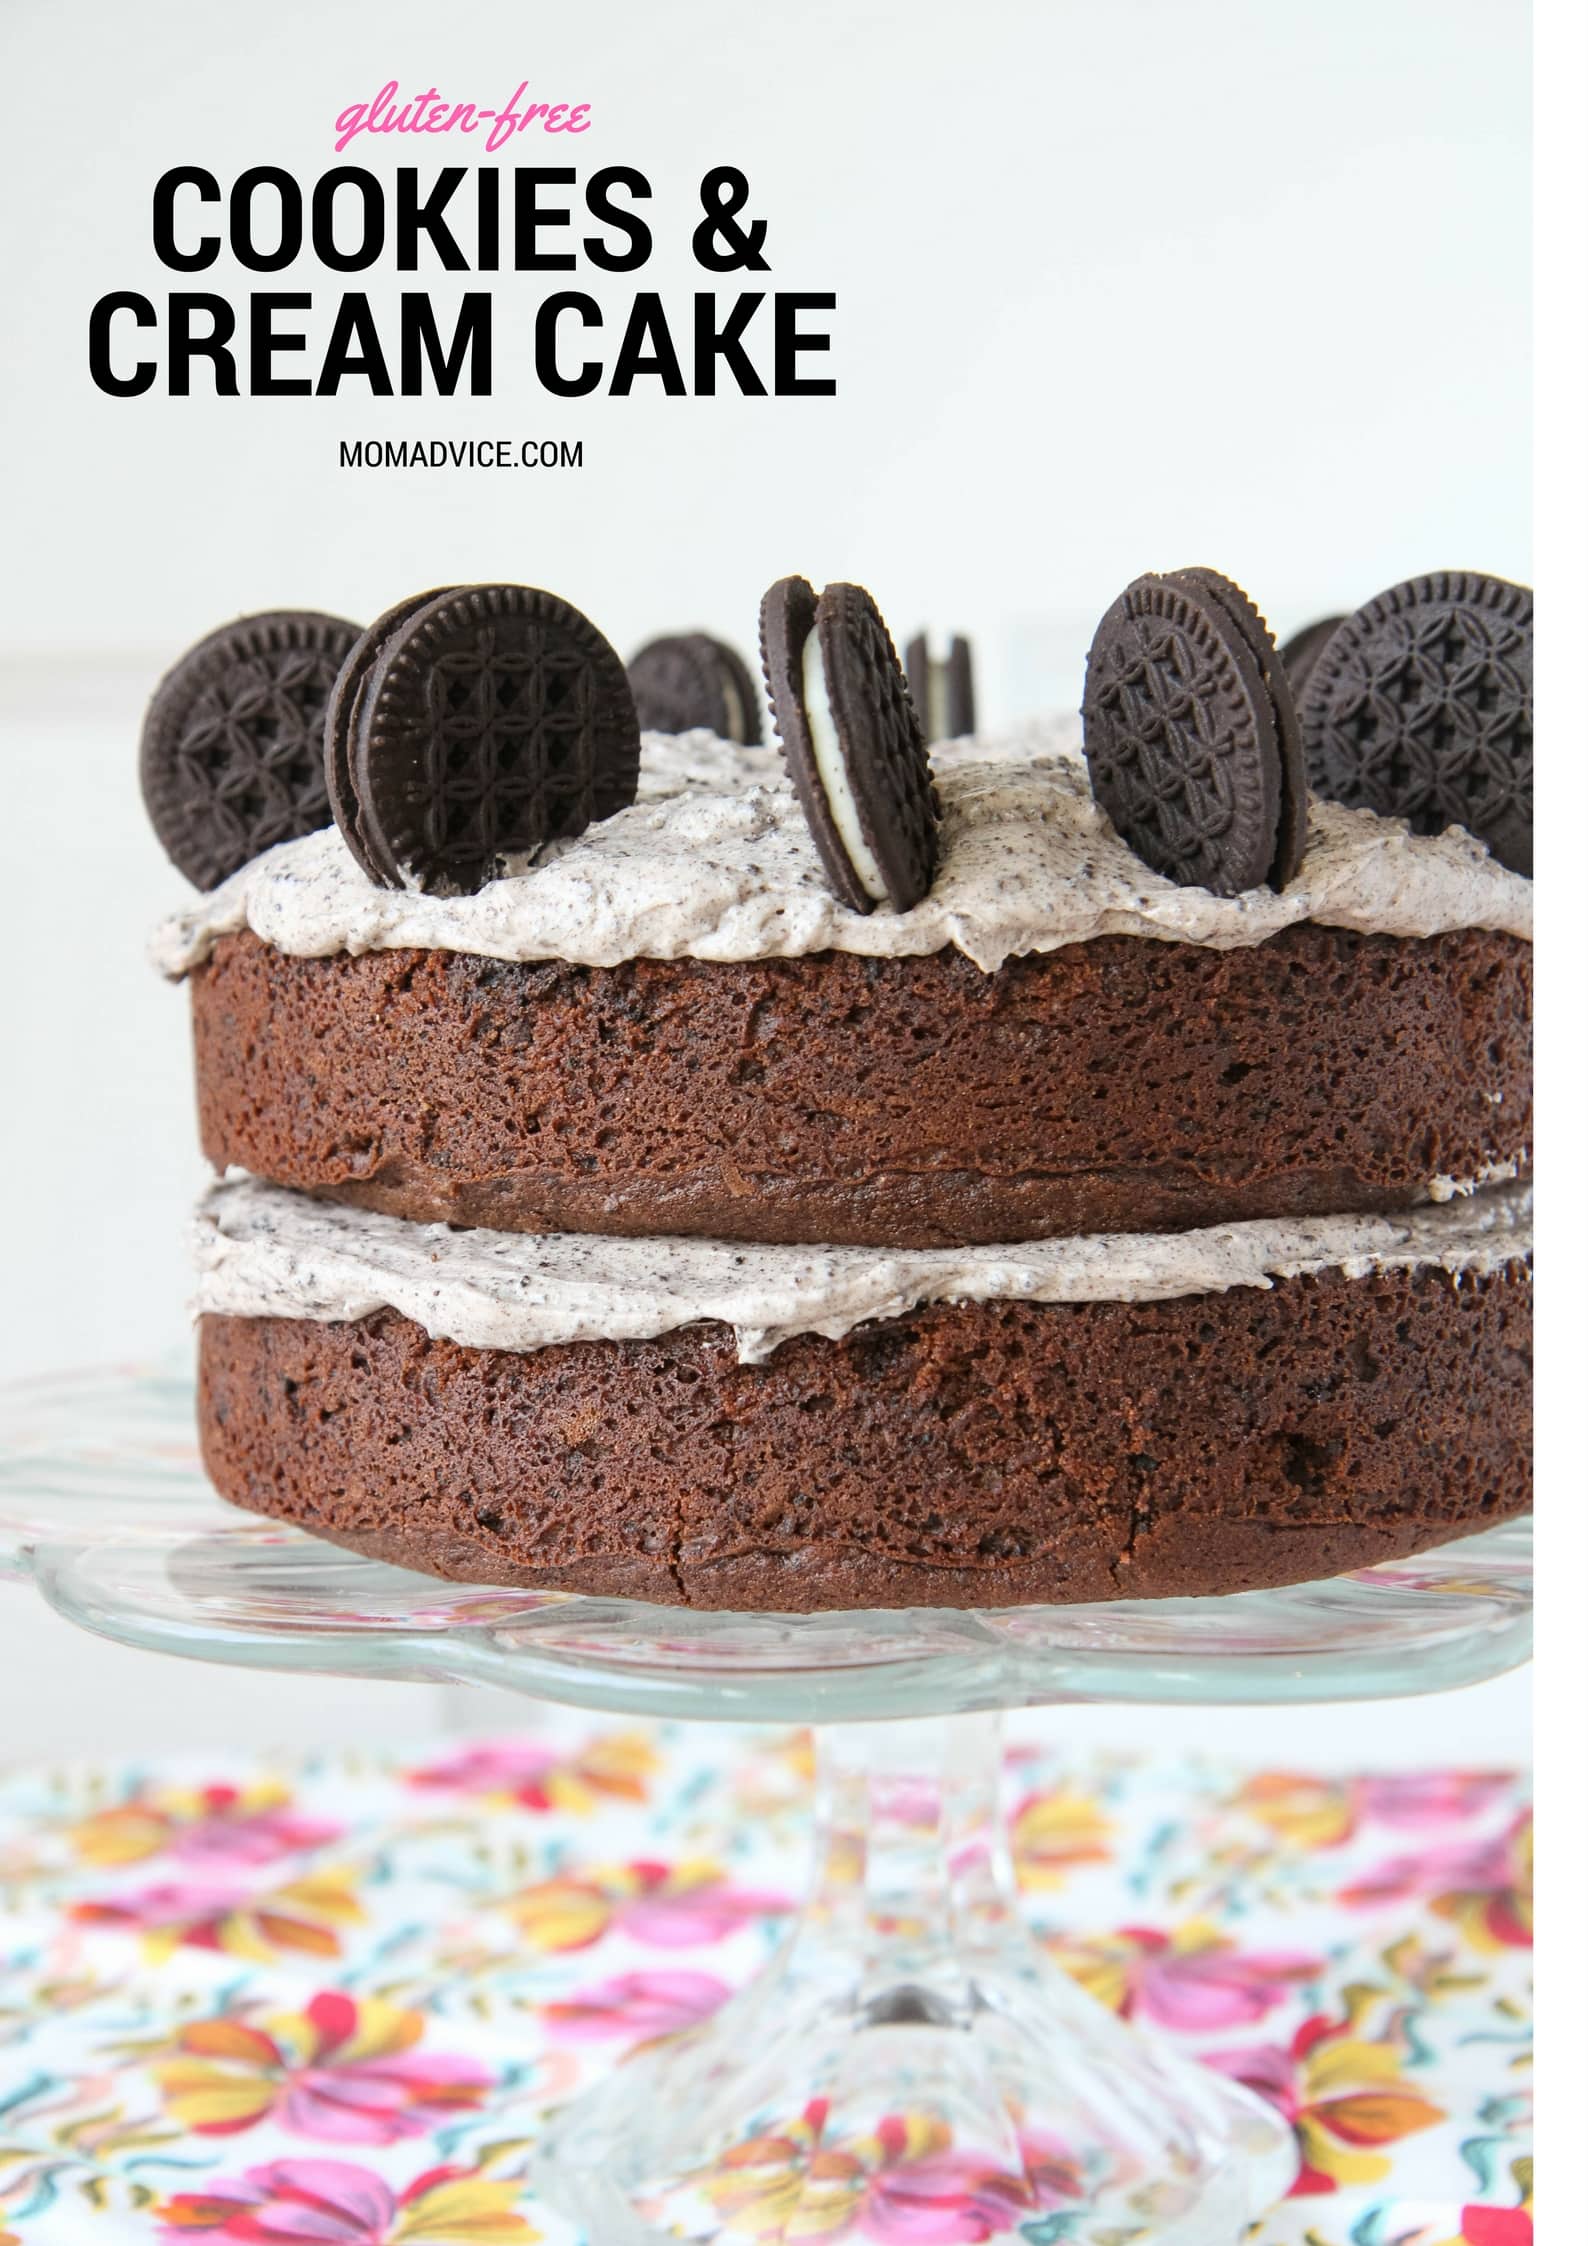
Gluten-free baking has always been very intimidating to me and I did my best for a long time to avoid it all costs. Unfortunately, with three people in our house advised to eating gluten-free, I was pushed into the gluten-free baking trenches for our family. I’m not ambitious enough to spend time mixing up my own mixes and that is why I’m excited to share with you about Bob’s Red Mill Gluten Free 1-1 Baking Flour.  Today I’m sharing this easy recipe for a Gluten-Free Cookies and Cream Cake with all the flavor minus the gluten.

Did I mention no tricky mixing of flours or trying to perfect recipes that are already in your recipe box? Yup, Bob’s Gluten-Free 1-to-1 Baking Flour is perfectly formulated for baked goods with terrific taste and texture with no additional modifications on your part.

Gluten-Free Cookies and Cream Cake from MomAdvice.com Gluten-Free Cookies and Cream Cake from MomAdvice.com

Gluten-Free Cookies and Cream Cake from MomAdvice.com

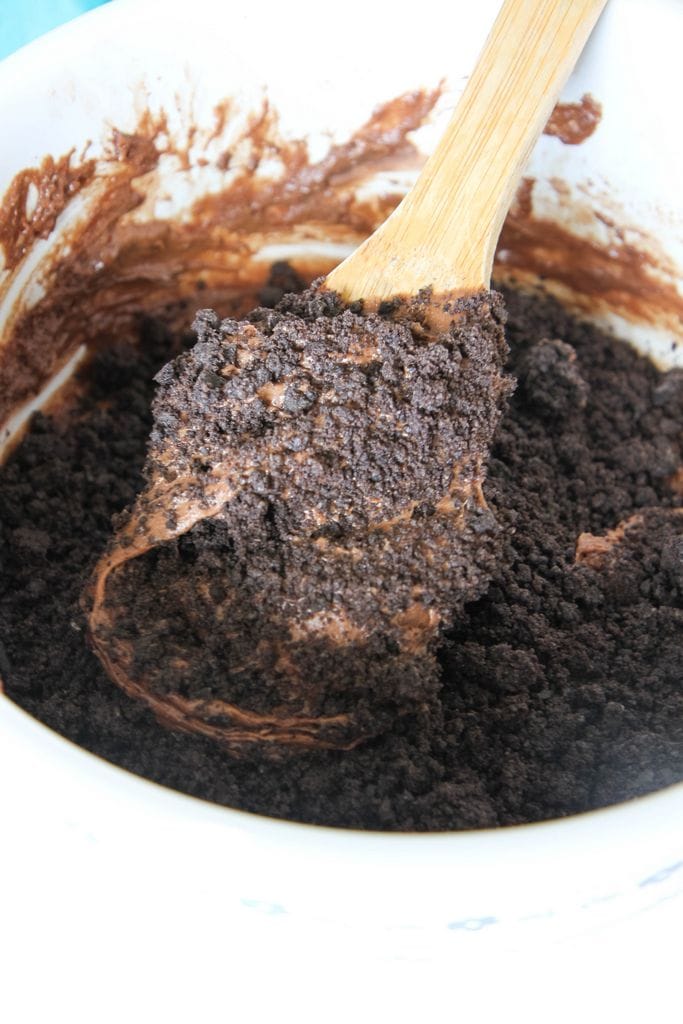
In our family, it is a tradition to make the birthday boy or girl a homemade cake to celebrate their day. My husband’s birthday was the perfect excuse to mix up a yummy cake with Bob’s Gluten-Free Flour. This rich batter is filled not only with a healthy dose of cocoa powder, but it gets a double chocolate whammy from the crushed gluten-free cookies and cream cookies that are folded right into it.

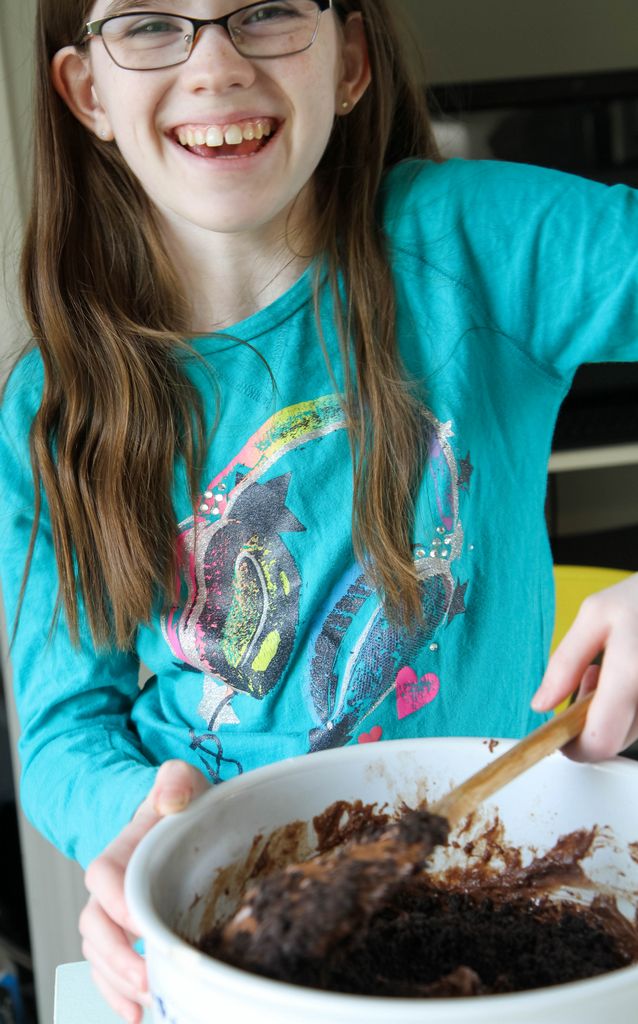
My secret weapon in any chocolate dessert is a little bit of coffee to enhance those rich chocolate flavors. I had my daughter taste the batter before the addition of coffee and after and we both agreed that it makes a really big difference in the smoothness of the flavor.

I know I don’t have to tell busy moms this, but coffee is certainly magic.

Gluten-Free Cookies and Cream Cake from MomAdvice.com

I’ve played around with a lot of gluten-free flour mixes in our kitchen, since our family’s diagnosis, and I can confidently say that this is the first blend that I’ve tried that I can taste no difference between the all-purpose flour and this gluten-free mix. There is no mealy texture or that sense that something is just off about the mix. The cake baked up as light and puffy as any cake prepared with all-purpose flour would.

For someone who lacks gluten-free baking confidence, this blend has given me the urge to bake again and I’m already dreaming of how else I can put this blend to work for our special treats. Have no doubts that you will see many of them on the site in the upcoming months!

Gluten-Free Cookies and Cream Cake from MomAdvice.com

Gluten-Free Cookies and Cream Cake from MomAdvice.com

Gluten-Free Cookies and Cream Cake from MomAdvice.com

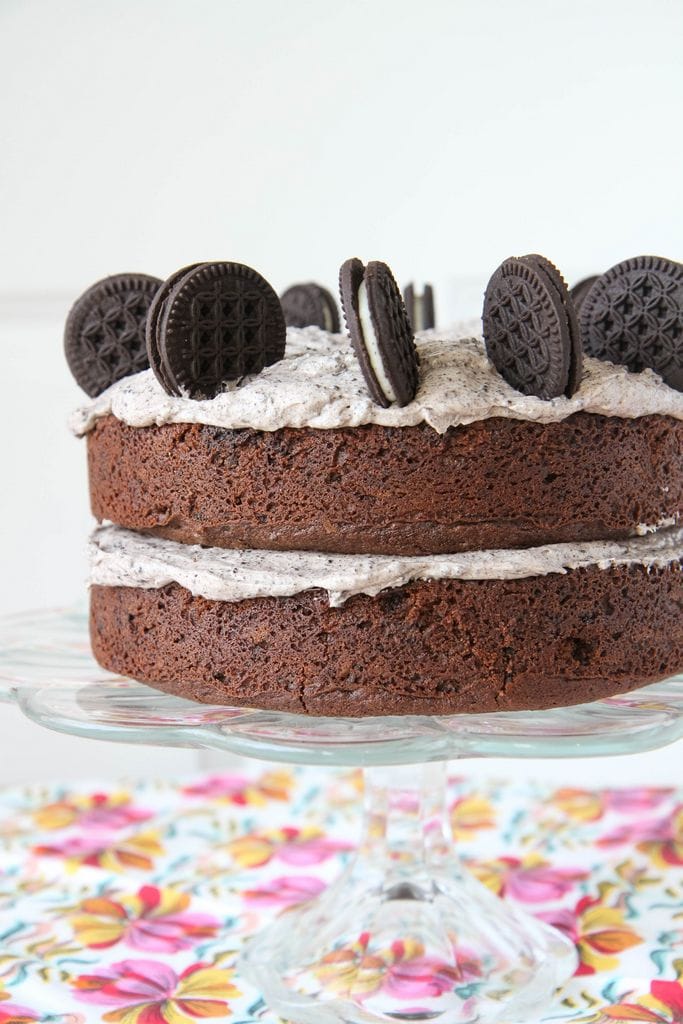
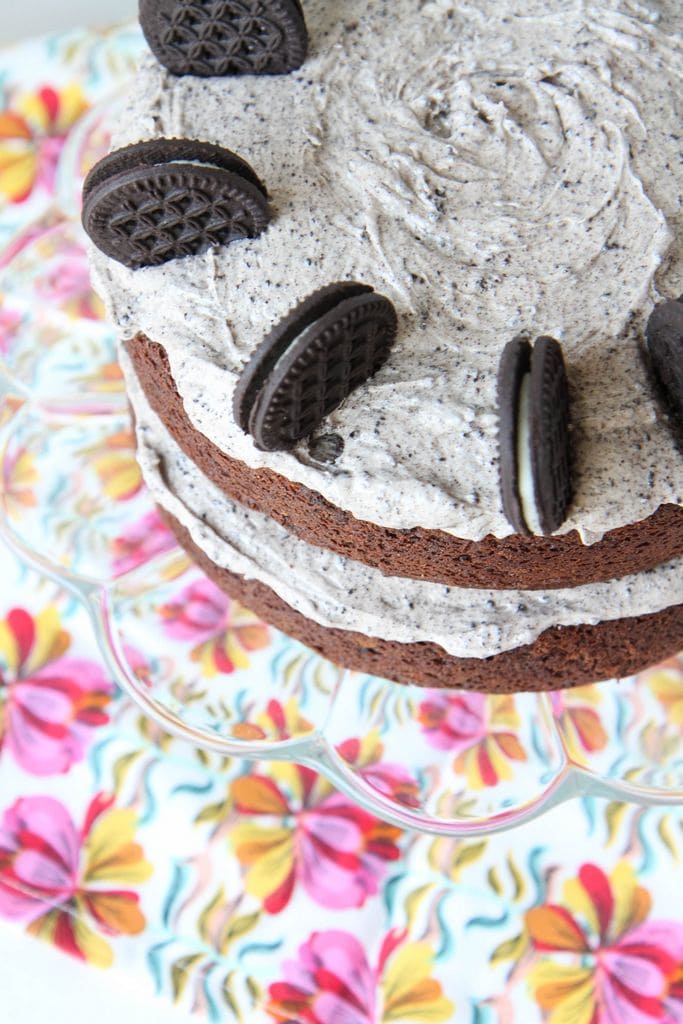
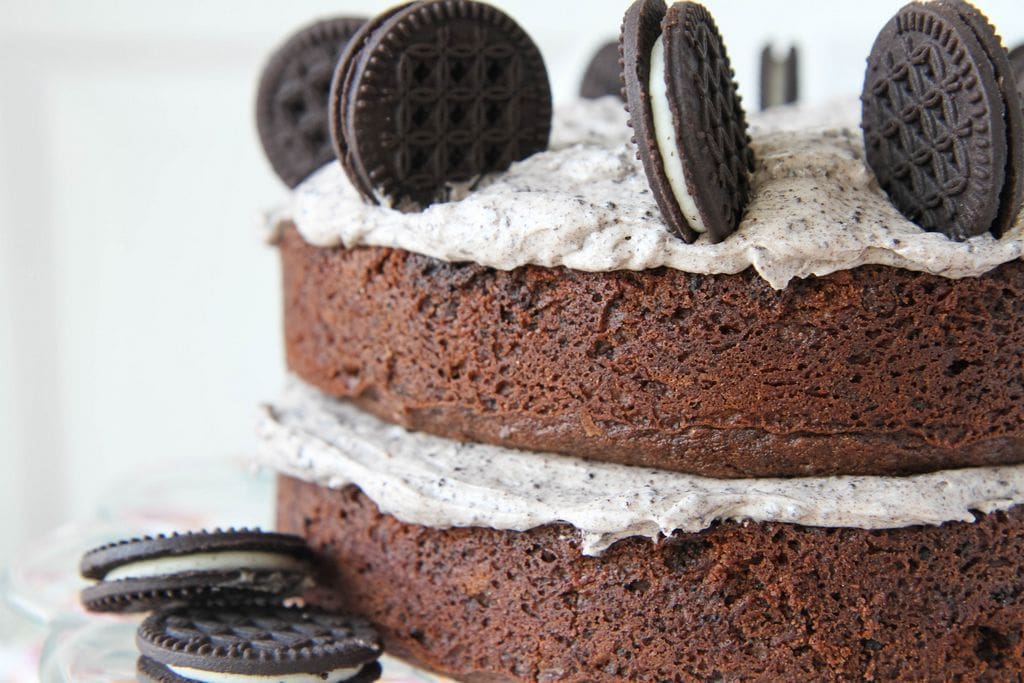
Can we talk about the frosting for just one minute? MORE cookies are folded into this whipped cream cheese frosting and adds the jazz hands to this chocolate cake. Ths homemade frosting elevates and lightens the cake with it’s tangy flavor. Also, because there are not enough cookies in this, I added more cookies on top for decorating so you can have a snack in between bites.

We toted this cake to the restaurant to celebrate my husband’s birthday this year, in all her shining glory.

As we sat there eating, he leaned into me to say, “I keep thinking people are looking at me because it’s my birthday. I just realized that they are looking at your cake.”

Yup, it’s a showstopper.

A rousing song of happy birthday and slices shared with all at our table (and a few not at our table because CAKE), and we still had half a cake left once it had all been distributed. We offered the other half to the kitchen staff and it made me so happy to see it being sliced and enjoyed by everyone.

For several years, I worked as a waitress and I remember those long days worked for tips. It’s why we always try to go the extra mile when we dine out and this was just one more way we could show our appreciation for those who care for us.

Homemade cakes really do bring people together and I couldn’t stop the goofy grin on my face from seeing everyone enjoy this sweet treat, as I carried my empty cake stand home. My husband also left with the same grin, after a great meal shared with family and our new friends. He really felt celebrated this year.

Please add this cake and Bob’s Gluten Free 1-1 Baking Flour to your menu planner and grocery list. I promise, you won’t ever miss the gluten in this rich and delicious cookies and cream cake. This is a cake that’s meant to be shared so find a way to make that happen too. I bet you’ll gain a few new friends in the process!

Gluten-Free Cookies and Cream Cake
Recipe Type: Dessert
Prep time:
Cook time:
Total time:
Serves: 8
A gluten-free cookies and cream cake perfect for celebrating all of life’s occasions!
Ingredients
  • 2 cups [url href=”http://bit.ly/2kkxTgB” target=”_blank”]Bob’s Red Mill Gluten Free 1-to-1 Baking Flour[/url]
  • 3/4 cup unsweetened cocoa
  • 2 cups granulated sugar
  • 1 1/2 teaspoons baking powder
  • 1/2 teaspoon baking soda
  • 1 teaspoon kosher salt
  • 3 large eggs, plus 1 egg yolk
  • 1 cup unsalted butter, melted
  • 1 cup buttermilk
  • 2 tablespoons strong brewed coffee
  • 1 1/2 cups finely crumbled gluten-free chocolate sandwich cookies
  • 1 stick butter, softened
  • 2 (8-ounce) packages cream cheese, softened
  • 1 pinch salt
  • 1 teaspoon vanilla extract
  • 3 3/4 cups confectioners’ sugar
  • 1 1/2 cups finely crumbled gluten-free chocolate sandwich cookies
Instructions
  1. Preheat the oven to 350 degrees F. Spray two (9-inch) cake pans with cooking spray and dust with gluten-free flour.
  2. In a large bowl, using a hand-held mixer combine the flour, cocoa, sugar, baking powder, baking soda, and salt. Add the eggs and egg yolk, 1 at a time, and beat until well mixed, then add in the melted butter. Mix well to combine. Next, add the buttermilk and coffee and beat until smooth. Fold in the crumbled cookies with a wooden spoon.
  3. Pour the batter evenly into the cake pans and bake until a toothpick inserted in the center of the cake comes out clean, approximately 30-33 minutes. Remove from the oven and cool, on a rack, in the pans for 5 minutes. Turn the cakes out onto a rack and let cool completely.
  4. In a large bowl with an electric mixer, blend the butter and cream cheese until smooth, about 3 minutes. Add the salt and vanilla. Add in the confectioners’ sugar, 1/2 cup at a time, until smooth. Beat in the crumbled cookies.
  5. Once the cake has fully cooled, add a layer of frosting on the top of one cake layer and then stack the second one on top. Finish with more frosting on top. This recipe yields enough to also frost the sides of the cake, if you desire. Finish with more cookies (whole or crushed) to add decoration to the top of your cake.

Gluten-Free Cookies and Cream Cake from MomAdvice.com

This post was created in partnership with Bob’s Red Mill. Thank you for supporting the companies that support our site! 

Pin It

3-Ingredient Cloud Dough With WeeSchool (FREE- Limited Time!)

Monday, March 6th, 2017

3-ingredient cloud dough recipe from MomAdvice.com

This post was created in partnership with WeeSchool. All opinions are my own. Thank you for supporting the companies that support our site! We need this exact call to action language early in the post: Download the WeeSchool App here by June 1 and you can register for free, lifetime access to all premium WeeSchoool content and features.

Although much of the mothering I have done for my kids has felt instinctual, I found many challenges and had a lot of anxiety about them meeting certain milestones. My son, for example, had a significant delay in speech and sensory issues in his early years. I had no idea to help him and relied upon a community program that provided at-home guidance to help teach me how to help him overcome these hurdles.

I, honestly, have no idea what our life would have looked like if we had not had early intervention, and I attribute much of his academic success to these programs that intervened and helped guide us.

Now my kids are getting older, but I still recognize the importance and need for early intervention for other families. That is why I am SO incredibly and genuinely excited to share with you about a new app called WeeSchool that you must download ASAP.

It is, truly, like having a family educator right at your disposal to help guide you to help your child succeed.

WeeSchool App Milestones Month by Month

As you can see, this app gives you a quick at-a-glance look at what key milestones your child should be reaching each month. Play Plans are provided that help guide your child to reach those milestones.  These allow you to play smarter with your child with a list of recommended activities, toys, books and music.

In fact, it is the first-ever curriculum for babies from birth to age 3 that can help you learn how to play smart with your baby.

This helps you to not only track the milestones, but to support you and your baby in the process. WeeSchool wants to enrich your daily routines by creating activities you can do with your child, providing guidance on practical toys to support milestones, and even books on the different milestones you are working toward with your baby.

WeeSchool App Journal

Imagine going to the pediatrician with your child’s milestones marked and even a photo to document those moments to share with your family and friends. I can’t imagine how reassuring it would have been to come armed like this for my doctor. Could we have flagged our son and gotten him help sooner if we had something like this? I, truly, believe we could! This is a transformative tool for new parents.

Get a FREE Membership to WeeSchool Today!!

I am so excited that WeeSchool is offering our readers a free premium membership! Parents can sign up until June 1, 2017 to become a Charter Member and receive lifetime access to all Premium WeeSchool content and features!


3-Ingredient Cloud Dough from MomAdvice.com

3-Ingredient Cloud Dough from MomAdvice.com

3-Ingredient Cloud Dough from MomAdvice.com

If there was one thing I learned from our early childhood intervention classes that we did with our son, it was the power in creating from things you already have. In honor of today’s partnership with WeeSchool, I wanted to share with you this easy 3-ingredient Cloud Dough recipe that you can make for your kids! This fluffy dough is a great sensory activity for kids and is so fun to play with that even adults want to get on the action.

Sensory stimulation is so important to a child’s neurological development, and playing with this simple and safe flour mixture offers a pleasant (even therapeutic) sensory experience. Playing with cloud dough also encourages fine-motor development as your wee one explores and creates using tiny hands, delighting in the tactile wonderfulness of this unique medium.

Pair this with items from your kitchen drawers like measuring cups, spoons, ice cream scoops, silicone cupcake molds, or cookie cutters.

We are using Tempera Powder Paint to create the vivid hue in this dough because it blends so easily into this recipe. If you are worried about your child ingesting it, feel free to leave the color out of this one!

3-Ingredient Cloud Dough from MomAdvice.com

3-Ingredient Cloud Dough
Prep time:
Total time:
Serves: 8 cups
Ingredients
  • 8 cups all-purpose flour
  • 1 cup vegetable oil
  • A spoonful or two of Powdered Tempera Paint (order online or check a teacher’s supplies store/craft store)
  • Large Plastic Container with Lid for Storage
Instructions
  1. Measure flour directly into container.
  2. Add a spoonful or two of powdered tempera paint and mix well with a wooden or metal spoon.
  3. Add vegetable oil and mix well until it is fully incorporated.
  4. Store in an airtight lidded container for up to one month.

3-ingredient-cloud-dough-recipe


 I hope you can take a moment to download this amazing app and mix up a little cloud dough to keep your kiddos busy! Download the WeeSchool App here by June 1 and you can register for free, lifetime access to all Premium WeeSchool content and features.

This post was created in partnership with WeeSchool. Thank you for supporting the companies that support our site! 


Pin It

Fabric Flower Wreath for Spring

Wednesday, March 1st, 2017

Fabric Flower Wreath for Spring from MomAdvice.com

This post was created in partnership with Waverly Inspirations. Thank you for supporting the companies that support our site! 

You will rarely come to my house and not find a wreath on the door, but I must admit that my DIY wreaths (after MANY years of use) are looking a little shabby. Working with Waverly Inspirations was just the push I needed this month to spruce up my front door. This fabric flower wreath tutorial is just what you need to get your door ready for spring. If you haven’t made fabric flowers before, I’ve got you covered with a step-by-step picture tutorial.

I am a big fan of recycling and reusing my craft materials so I cut all of the materials off this DIY yarn wreath and reinvented it into a spring wreath. Six years ago I purchased that straw wreath for $4 and it is STILL going strong.

Pretty amazing!

Also, if you have ever priced out purchasing a wreath, you know how much you are saving by making your own for your front door.

Today I wanted to put some of their fresh spring fabric to work to wrap and decorate our wreath. Although I will be doing these fabric flowers with a needle and thread, they can also just as easily be pulled together with a little hot glue. The best part? This is a craft you can do while getting in a good Netflix binge.

This craft was cranked out with a little American Crime Story. PS- LOVING it.

Fabric Flower Wreath for Spring from MomAdvice.com


Supplies Needed (all of these supplies can be found at Walmart!)

1/2 yard of two (or more!) Waverly Inspirations Fabric in coordinating patterns

Straw Wreath (whichever size fits your door the best!)- leaving the plastic intact on the wreath to cut down on the mess.

Needle and strong thread

1 piece of cardstock and a circular object (I used an oatmeal canister) to create your flower template

Straight Pins

Fabric Rotary Cutter (or you can use scissors)

Rotary Mat

Pinking Shears

How to Make a Spring Fabric Flower Wreath

Fabric Flower Wreath for Spring from MomAdvice.com

1. Begin by cutting fabric into 1 1/2″ strips with scissors or a rotary cutter. Wrap the fabric around the wreath, securing with straight pins. Once you come to the end of a strip, simply overlap with the next strip to try to camouflage those pins. Repeat this until the entire wreath is covered and set this aside.

How to Make Fabric Flowers from MomAdvice.com

2. Using a round object in your home for a template, trace a circle on cardstock to create your template for your fabric. The larger the diameter of the item, the larger your flower so size it according to your wreath or how dramatic you want to go!

3. With pinking shears, cut 9 fabric circles for each fabric flower you will be making. I made five of these flowers (that means 45 cut circles) for my wreath. In floral design, it is always advised to go with an odd number to create a good design for your project so I stuck to the odd number of 5.

4. With one fabric circle as a base, begin creating the petals for your flower by folding a circle in half and then in half again (it will look like a little triangle)  and aligning it to the fabric circle. Using your needle and thread (or a glue gun) secure this in place with a stitch. Repeat all the way around the flower for the base of these petals.

How to Make Fabric Flowers from MomAdvice.com

5. Layer another layer of petals on top and finish with the last one being in the center and swirled, as it would in a rose. Tie off and cut the end of your thread to finish these. Using a straight pin, pin your flower into place and then repeat with the rest of the flowers.

Fabric Flower Wreath for Spring from MomAdvice.com

Fabric Flower Wreath for Spring from MomAdvice.com

Fabric Flower Wreath for Spring from MomAdvice.com

You guys! I’m in LOVE! This is such a fun pop of color on my door, cost practically nothing, and I can switch out materials with the seasons if I get bored. I hope you love it as much as I do and feel inspired to make a wreath of your own.

My door is awfully happy this month!

Fun Wreath Ideas from MomAdvice.com

Want to try some other DIY wreaths? Check out these tutorials for decking your door!

diy peep wreath

easy burlap wreath tutorial

how to make a yarn pom pom wreath 

handmade autumn burlap wreath

fabric wreath with matching garland

yarn wreath for all seasons (fun felt flower tutorial on that one!)

How about more craft inspiration from Waverly? Try these!

DIY No-Sew Reversible Chair Cushions

Fabric Wreath & Matching Garland

Fabric Bulletin Board Tutorial

Painting Pumpkins With Acrylic Paints

DIY No-Sew Hand Warmers

DIY Ottoman Serving Tray

15-Minute Scrappy Fabric Trees

Kid Craft: Easy Technique for Painting Gift Wrap

DIY Phone Charging Station

DIY Roll-Up Jigsaw Puzzle Mat

Fabric Flower Wreath for Spring from MomAdvice.com

This post was created in partnership with Waverly Inspirations. Thank you for supporting the companies that support our site! 

Pin It

Who is the CFO in Your Household?

Monday, February 6th, 2017

household-cfo

This post was created in partnership with Chase. Thank you for supporting the companies that support our site! 

The entrance of a new year often comes with a renewed focus towards financial goals and a quiet respite after all the holiday spending. Perhaps, you are dreaming of the same thing as me, to be a wiser spender and tracker of funds.

I am curious, as a busy mom, who holds the CFO reigns in your household and if you have found this role has evolved for your family over the years?

My husband and I have been married for sixteen years and I have always had the CFO duties in our house.

There are times where I am nailing it as a diligent tracker, an oh-no-you-didn’t-charge-me-that-much customer service caller, and a fierce barterer on rates.

As our life has gotten busier though, I am ashamed at how poorly I have been keeping up this role on top of every other hat I’m wearing.

I find myself, a negligent CFO who needs to get her ducks back in a row.

It’s not that I lack confidence with money; it is that I often feel like I lack time.

Chase Mastery recently ran a study called the, “Chase Generational Money Talks Study,” to see how this evolution of CFO has shifted through the generations. Much like me, they discovered that 78% of Millennial women agree they are able to make good financial decisions, even if they are new to them, compared to 71% of Gen X and 67% of the Boomer generation.

My Millennial confidence is great, but how can I implement better follow through for my family this year?

365-4

This year, as our Household CFO, I would like to focus on four goals with our finances!

Track My Money Better

I can admit that my first instinct is to grab my phone and do a little scrolling. If that instinct is already there, wouldn’t it be great to replace my social media time with a quick analysis of our family finances?

I’m a big fan of Mint as it does a really great job of tracking and helping you visualizes where your money is going, but I had fallen off the bandwagon with my daily tracking.

I am a nerd when it comes to pie charts and graphs so why not geek out a little bit over my morning coffee again? I am hoping this tool can help me to be a better monitor of our funds.

Removing Those Slow Leaks

It is so easy to get caught up in monthly memberships to things from our music to our television watching to our digital consumption to the gym memberships.

I really want to revisit where these slow leaks are happening and be serious about canceling the memberships to things we are not using. We can ALWAYS come back to these subscriptions, should we find we really miss them, but I’m wondering how many of these things we would truly miss.

Embracing No-Spend Weekends

I don’t have a lot of down time during the week, but I do on the weekends. What inevitably happens is that those periods of laziness often gets filled with online shopping, dining out, and boredom busting activities.

I want to start replacing those impulses with commitments to not spend on the weekend.  Making dinners together, playing board games, watching documentaries, and really enjoying my kids without spending money needs to be my new jam.

Talking About Our Financial Goals

The “Chase Generational Money Talks Study,” shared that couples often have conflicts regarding their household finances. Three-quarters of Millennials and GenXers have conflicts with their spouses over money, compared to 62% of Baby Boomers, the study found.

Although I believe the CFO roles have changed, I feel like conflict about money is something that has carried on for generations.

I’ve been lucky that we don’t have conflicts about money, but I can remember the difficulties and struggles when we were sinking in $13,000 of debt and how awful it felt to feel our financial future slipping away.

I want to always have an open dialogue with my spouse and I think we need to start talking about our retirement goals and figuring out what we can do now to prepare for our future.

To learn more about the Generational Money Talks series, you can watch it here:

A huge thank you to Chase for sponsoring this conversation today and spurring a much-needed conversation in our own home about our financial future!

Tell me, who holds the CFO reigns in your household and has this role evolved at all for your family? I’d love to hear!

This post was created in partnership with Chase. Thank you for supporting the companies that support our site!


DIY Teacher Survival Kit Gift (FREE Printable!)

Thursday, February 2nd, 2017

DIY Teacher Survival Kit Gift (FREE Printable!) from MomAdvice.com

This post was sponsored by MARS, Inc and American Greetings. Thank you for supporting the companies that support our site!

Valentine’s Day is the perfect excuse to show someone how much you love them. Often my default for Valentine’s giving is for my family, but this holiday I’m challenging you to think outside of the box and consider someone else special in your life.

How about a little love, for example, for one of your incredible teachers?

I can’t imagine how challenging their job is to come and be the encourager, discipliner, educator, and hero to our children. Day in and day out, they are a positive force in helping our kids succeed and I am so grateful for the molding and shaping they do. What a gift that they share their time and talent each and every day.

I wanted to create a fun DIY Teacher Survival Kit filled with fun supplies with things that would be useful throughout their day, as well as some fun treats to indulge in for a much deserved break. I am sure it goes without saying, but our teachers often use their own funds to keep their classrooms stocked so I love to periodically send along little gifts. This teacher survival kit is not only meant to offer a small indulgence for their hard work, but it also provides little things like note pads, antibacterial wipes, bandages, and other useful items that they might need at their desk.

How to Make a DIY Teacher Survival Kit

DIY Teacher Survival Kit Gift (FREE Printable!) from MomAdvice.com

Supplies Needed (all found at Walmart- check here to find your closest store!)

1 clear plastic container with lid (the dimensions on my container are 15″L x 11 1/2″W x 3 1/4″ H)

Dove® Milk Chocolate Heart Tin

Antibacterial Wipes Drink Mixes (lemonade, coffee, cocoa, etc..)

Small First-Aid Kit

Lip Balms

Small Candle Mouthwash

Lint Roller

Stain Stick or Pen

Pain Reliever

Immunity Boosters

Notepads and Sticky Notes

Check out the American Greetings Valentines Day card selection at your local Walmart, to find Valentine’s Days cards for anyone and everyone special in your life!

(scroll down for your FREE printable label!)

DIY Teacher Survival Kit Gift (FREE Printable!) from MomAdvice.com


DIY Teacher Survival Kit Gift (FREE Printable!) from MomAdvice.com

DIY Teacher Survival Kit Gift (FREE Printable!) from MomAdvice.com

Directions for DIY Teacher Survival Kit Gift

1. Go to your local Walmart and visit the storage container section of the store first to select a container for your project. Having this first will help guide you as you make your selections to fit in your kit. Fill the container as you go with all of your purchases to make this Valentine’s gift special for your favorite teacher with the supplies list I have provided.

2. Assemble your container with your purchases, placing the Dove® Milk Chocolate Heart Tin in first to build your supplies around it.

3. Print our Teacher Supplies Kit label out for the top (link below). You will need to do just a tiny bit of trimming around it to trim off a little of the negative space on this one. Remove the sticker from the backing and secure it to your container.

4. Finish this project with a heartfelt message for your teacher to let them know how special they are.

DIY Teacher Survival Kit Gift (FREE Printable!) from MomAdvice.com

DIY Teacher Survival Kit Gift (FREE Printable!) from MomAdvice.com

DIY Teacher Survival Kit Gift (FREE Printable!) from MomAdvice.com

I can’t think of a teacher that wouldn’t appreciate a gift like this. I am thankful every single day for the teachers that are shaping my kid’s minds. As I see them blossom into such kind and thoughtful people, I know I can attribute it to their excellent influence.

Consider this Valentine’s Day the perfect opportunity to thank a teacher in your life!

Download Your Teacher Survival Kit Label (click the link below!)

Free Teacher Survival Kit Label

This post was created in partnership with MARS, Inc and American Greetings. Thank you for supporting the companies that support our site! 


Pin It

Asian Turkey and Green Bean Sauté

Tuesday, January 10th, 2017

Asian Turkey and Green Bean Sauté from MomAdvice.com

This post was created in partnership with Honeysuckle White. Thank you for supporting the companies that support our site! 

One of my favorite dishes is a delicious green bean sauté spooned over a big platter of rice that I had discovered at my favorite Chinese restaurant. The crunchy green beans adds a fresh flavor and texture to contrast with the heartiness of the meat in this dish. You would think it would be bland, but the layers of salt and spice make it a flavorful dish that I crave often.

I can also admit that this highly addictive dish is usually ate in record time and I am always left wanting more.

Did anyone witness me slamming this dish in three seconds flat?

I hope not.

It has been on my cooking bucket list to create this dish at home to save some money and to indulge in it a little more regularly with wild abandon. What could be healthier than a big dose of veggies and protein to start your new year of cooking out right?

My partnership with Honeysuckle White seemed the perfect excuse to add this meal to our planner to share with you.

Riverhill Farms in Virginia

Riverhill Farms in Virginia

Riverhill Farms in Virginia

It has been a unique experience to now feel a deeper connection with our food this year, thanks to this fun partnership. I was invited out to Virginia to tour the River Hill Farms, one of the 700 independent family farmers that works with Honeysuckle White. Not only did we discover they are well-trained in animal handling practices, but they also happen to exceed the standards and they wanted to share that experience with us.

Glenn & Sheri Rhodes were so gracious to open up their farm to us and the pride they feel for the land and their animals was felt by all of us as we visited their gorgeous property.

I had absolutely no idea what to expect when I received the invitation and was so pleasantly surprised when we arrived at the beauty all around us. The farm was beautifully kept, the spaces were generous for the animals, and it is so good to know that the farm is committed to raising their turkeys without any growth-promoting antibiotics, hormones, or steroids.

As if that wasn’t lovely enough, Glenn made us all some good old-fashioned kettle corn that we shared over snacks and discussed his life’s work and the pride he has felt for his farm.

My great-grandfather was one of the hardest working farmers that I had ever known and I felt that same sense of warmth, family, and commitment to good work in both Glenn & Sheri. It felt a little like the summers that were spent on my grandparent’s porch after their long day of hard work and good food.

Asian Turkey and Green Bean Sauté from MomAdvice.com

As the new year begins, I know many are making resolutions like eating at home more and eating better food for your health. If you are trying to reach a weight-loss goal this year, it’s good to know that turkey has more protein, fewer calories, and less total fat and cholesterol than chicken. When mixed with this delicious combination of sauces and spices, you will also find that it increases the flavor and you may even forget that you are eating such a lean and smart protein.

This dish has A LOT of kick, thanks to the chili garlic sauce, but you can crank it down with less or add more for some FIRE in your tummy!

Asian Turkey and Green Bean Sauté from MomAdvice.com

Asian Turkey and Green Bean Sauté from MomAdvice.com

Asian Turkey and Green Bean Sauté from MomAdvice.com

I was looking forward to binging on these leftovers with a Netflix marathon, but once my kids dug into this, they seemed to be overcome by the same shovel-it-all-up-in-your-face-in-three-seconds struggle that I have.

No green bean was left behind which is an awesome rarity in our house.

How can I complain about that?

You must give this recipe a try and save your family loads of money on this delicious and healthy takeout dish made at home!  I have already added it to our menu planner again for this week and hope you enjoy this one half as much as we did! A huge thank you to Honeysuckle White for sharing a little behind-the-scenes on how their products are made and their commitment to delivering the best quality at the lowest price.

Asian Turkey and Green Bean Sauté
Prep time:
Cook time:
Total time:
Serves: 4 servings
Green beans and ground turkey are loaded up with delicious Asian flavors and served over rice for a healthy and delicious way to start your new year!
Ingredients
  • 2 cups medium-grain rice, uncooked
  • 1 tablespoon sesame oil
  • 3 cloves garlic, minced or crushed
  • 1 pound Honeysuckle White ground turkey
  • 1/2 tablespoon chili garlic sauce (this is spicy for us, increase or decrease to your own personal taste)
  • 2 tablespoons hoisin sauce
  • 1 teaspoon crushed ginger
  • 1 pound washed and trimmed green beans
  • 2 tablespoons soy sauce
  • 1 tablespoon rice vinegar
Instructions
  1. Prepare rice as directed on packaging.
  2. Place a separate skillet over medium heat. Add sesame oil, and sauté garlic for one minute. Remove from the pan and set aside.
  3. Add ground turkey to the skillet and sauté 3-5 minutes, until meat is mostly cooked, breaking the meat up with your spoon.
  4. In a small bowl mix together chili garlic sauce, hoisin sauce, ginger, and soy sauce and stir to coat. Pour this sauce over the ground beef and add back in the green beans, stirring to coat everything fully.
  5. Continue cooking over high heat for 7-9 minutes longer, stirring frequently, until beans are slightly tender.
  6. Stir in rice vinegar, and cook one minute longer. Serve over cooked rice.

This post was created in partnership with Honeysuckle White. Thank you for supporting the companies that support our site! 


Pin It

Boutique Workouts At Home (FREE Printable Fitness Tracker)

Tuesday, January 3rd, 2017

Boutique Workouts At Home (FREE Printable Fitness Tracker) from MomAdvice.com

This post was created in partnership with CycleCast. Thank you for supporting the companies that support our site! 

Many partnerships happen organically on the site and today’s post with CycleCast happened because I became a legit fan, sent them fan mail, and then they suggested partnering together to share about their app.

Last year, after a health diagnosis, my doctor advised no more pounding on my joints and switching to a lower impact cardio routine.

For most people, they might have been like, AWESOME, I don’t have to do that anymore!

For me, I wept.

I loved going to my cardio dance class, I loved the friendships I had made, and I loved the music so very much. I also really needed that endorphin rush that comes from a challenging cardio routine and I needed interesting music to keep me going.

My yoga studio membership has been great for building strength, but I had lost a lot of my cardio motivation. Rather than getting another gym membership (OUCH on the wallet!), I decided to research apps and a stationary bike to do my workouts at home.

When I found CycleCast, it changed my whole outlook on my new limitations.

Boutique Workouts At Home (FREE Printable Fitness Tracker) from MomAdvice.com

CycleCast offers spinning workouts tailored to your time limits and your favorite styles of music. You can select a class if you have 20, 45, or 60 minutes and then select a coach with your favorite music style.

The volume controls for the coaching and the music are separate (I will tell you more why I love that later) so you can clearly hear your coach as they offer helpful tips throughout your routine. You are guided through a warm up, a challenging workout (in and out of the saddle), and a guided cool down. The coaches also remind you throughout about your posture, hand placement, and when to take in some water.

Basically, it is like having a coach RIGHT THERE who pushes and encourages you throughout the entire workout.

Boutique Workouts At Home (FREE Printable Fitness Tracker) from MomAdvice.com

I’m obsessed with music and easily bored. I don’t have time to make a brand new playlist each time I workout, but this app does it for you! The music is KILLER and are such fun mixes that I often forget how hard I’m working.

Jonathan, my coach, doesn’t know me, but I LOVE HIM.

He has been a big encourager to me and the music is always incredible. I have never been disappointed in his guidance or the music.

Maybe your limitations have looked different than mine or maybe your challenges are different.

Are you intimidated to join a gym this year or struggling with your weight and don’t have the confidence to do it?

Are your kiddos still small and you can’t afford a membership and childcare?

Do you want to go, but there always seems to be a hurdle (sick kids, forgotten papers, appointments, working, etc..)?

I get it. I have these same things in my life.

Boutique Workouts At Home (FREE Printable Fitness Tracker) from MomAdvice.com

Maybe you love this idea, but you don’t have a bike! No worries! These are cheaper than you might think.

I found, this foldable bike  and it takes up a teeny amount of room and paid for itself in just a couple of months compared to the gym membership I had been eyeing. I then used their Ride Guide to help get my bike set up and to learn to position myself better in it.

I just put the app on my iPad or iPhone and I tuck it on the table next to me, using my wireless headphones for listening and to muffle my loud breathing.

Yup, I’m one of those.

This app costs $9.99 a month, but they give you a free 30-day trial to start. I started with the 30-day trial and fell in love with the workouts I got. How much are the classes at your gym? Probably a minimum of $10 each! I can’t believe you can do a whole month of classes for $10 through this app!

On average, I have been burning about 500 calories per 45 minute workout. I feel really good about that and I love that this is a low-impact way for me to build strength again.

Boutique Workouts At Home (FREE Printable Fitness Tracker) from MomAdvice.com

CycleCast has really given me a lot of my confidence back that I have been missing. I love being able to workout anytime I want and I love the coaching pushes me to work a little harder on my fitness goals.

Here is another secret that I must share….I use the app to KILL IT on my chores around the house. Thanks to the coaching volume being adjustable, I can silence my coach and just listen to the killer music that’s been mixed for these classes. I have used this to mow my lawn, shuttle my children, do my laundry, and clean my house.

I am not sure that’s what CycleCast had in mind, but I love it!

Boutique Workouts At Home (FREE Printable Fitness Tracker) from MomAdvice.com

To encourage you to reach your goals this year, we have a beautiful printable fitness tracker to help you set your goals for working out and hydration!  We hope this offers the encouragement you need to get back in the saddle and work on those fitness goals.

Get These Downloads

Download Your FREE 30-Day CycleCast Trial 

Download your Free Printable Fitness Tracker (printable designed by MJ from pars caeli) today! 

A huge thank you to CycleCast for partnering with me AND giving me a chance to get back to a solid cardio routine.

This post was created in partnership with CycleCast. Thank you for supporting the companies that support our site! 

DIY Phone Charging Station

Monday, January 2nd, 2017

DIY Phone Charging Station from MomAdvice.com

This post was created in partnership with Waverly Inspirations. Thank you for supporting the companies that support our site! 

A  new year typically brings along new organizing techniques in our home. We have been struggling with keeping track of phone chargers, remembering where we left these poor devices to charge, and figuring out a system that doesn’t require taking up my valuable counter space. I decided I wanted to create a phone charging station that could house all of these devices and be our new landing spot for our home.

This DIY phone charging station is made out of a jewelry armoire and, not only will it house all these phones, it can also be the perfect organizing spot for keys, sunglasses, watches/Fitbit devices, & a place to keep those gift cards we got for the holidays. Wait until you see how we make the most of this little piece!

I also wanted to add a unique touch to this station with some of the beautiful Waverly Inspirations Fabric that I was sent this month. I have never added fabric to a furniture piece before, but not only is it super easy, it also adds a gorgeously unique detail that makes an inexpensive piece look a little more high end. It’s been on my craft bucket list to try this and now I want to add this special touch to a few more pieces in our home.

DIY Phone Charging Station from MomAdvice.com

DIY Phone Charging Station from MomAdvice.com

Supplies Needed (all of these supplies can be found at Walmart!)

Jewelry Armoire (you can browse all the options here)

Waverly Inspirations Fabric  (I used the 100% cotton duck fabric available at the store)

Waverly Chalk Paint in a coordinating color (I am using Agave)

Mod Podge

Paint brushes & Foam Brush

Fabric Rotary Cutter (or you can use scissors or a razor blade for trimming)

Rotary Mat

Drill

Scrap Wood

Screws

Surge Protector

DIY Phone Charging Station from MomAdvice.com

How to Make a DIY Phone Charging Station

1. Begin by assembling your jewelry armoire, but leave all of your knobs off the fronts of the drawers for now.

2. Using your chalk paint and a small paint brush, paint all of the knobs with a coat of chalk paint. Set aside to dry and then add a second layer of paint.

DIY Phone Charging Station from MomAdvice.com

DIY Phone Charging Station from MomAdvice.com

DIY Phone Charging Station from MomAdvice.com

3. Using the front of your drawer as a guide, cut the fabric carefully and as closely as possible, around the drawer. Repeat with all of the other drawers.

4. Before you attach your fabric to the drawer front, make sure any loose threads and lint are removed from the piece (I went over mine with a lint roller to make sure the surface is clean). Dip your foam brush in the Mod Podge and add a thin layer of glue on the front of the drawer. Carefully line the fabric up on the front of the drawer. Once again, add a layer of Mod Podge OVER the fabric, making to seal all along the edges and across all the fabric. Repeat on all the drawers and then repeat with a second layer.

5. Add your painted knobs on the front of the drawers.

DIY Phone Charging Station from MomAdvice.com

DIY Phone Charging Station from MomAdvice.com

6. Drill holes in the back of your drawers and then a hole in the back of the piece. The size and amount of holes needed will depend entirely on how many devices you have and how wide your charger end is.

7. On the bottom of the unit, attach a scrap piece of wood that can be used to attach your surge protector. We attached the surge protector with a couple of screws to mount this scrap wood.

DIY Phone Charging Station from MomAdvice.com

DIY Phone Charging Station from MomAdvice.com

DIY Phone Charging Station from MomAdvice.com \ DIY Phone Charging Station from MomAdvice.com

DIY Phone Charging Station from MomAdvice.com

DIY Phone Charging Station from MomAdvice.com


I realized after we took the pictures how much it could benefit from a little dusting with all our drilling we were doing.

Stretch your imagination a bit for that part as we are still dismantling our home from all these festivities!

I wonder if you are in the same boat today?

Seriously, how cute is this fun diy phone charging station to act as an inexpensive organizing solution for a small space? I decided to tie in those painted handles with a little color on the trim of this piece.  I really think the paint and fabric details really make this piece feel really unique and I love how practical this is for helping everyone stay organized!

A huge thank you to my hubby for his assistance on this DIY.

There is nothing like crafting in your pajamas and coffee with someone you love!

Do you want more craft inspiration from Waverly? Try these!

DIY No-Sew Reversible Chair Cushions

Fabric Wreath & Matching Garland

Fabric Bulletin Board Tutorial

Painting Pumpkins With Acrylic Paints

DIY No-Sew Hand Warmers

DIY Ottoman Serving Tray

15-Minute Scrappy Fabric Trees

Kid Craft: Easy Technique for Painting Gift Wrap

This post was created in partnership with Waverly Inspirations. Thank you for supporting the companies that support our site! 


Word of Mouse (BOOK GIVEAWAY With a $50 Visa Gift Card!!)

Wednesday, December 14th, 2016

Word of Mouse for Middle Grade Kids from MomAdvice.com

This post was created in partnership with Jimmy Patterson Books. Thank you for supporting the companies that support our site! 

It should come as no surprise that when I was a kid, I was crazy about reading. There was nothing I looked forward to more than library day, spent curled up in an aisle with my nose in a book. I adored Beverly Clearly and the shenanigans of Ramona Quimby or those exciting adventures with Ralph & his motorcycle.  The books were wholesome and had fun illustrations that helped bring to life the stories that I had in my head. In fact, they were so memorably illustrated, I can still recall the words and pictures that I saw from all those years ago.

Good quality middle grade books with that charm and innocence have often been a challenge for our family. I long for my daughter to have the same sweet experiences that I have recalling those adventurous stories with good messages. I have relied a lot on the books of my own youth to share with her, but I am always on the hunt for new books that offer this kind of promise and messaging that so many of my own books had.

Word of Mouse for Middle Grade Kids from MomAdvice.com

Word of Mouse for Middle Grade Kids from MomAdvice.com

Word of Mouse for Middle Grade Kids from MomAdvice.com

That’s why I am so excited to share about a new book that came out this week called, Word of Mousethat I believe has all of that old-school charm with thoughtful messages from a rather familiar author. As a reader, I’m sure you have heard of James Patterson, but you might not know about all the good books he is trying to put out in the world for kids! He happens to be a tireless champion for the power of books and reading. In fact, he has created a new children’s book imprint, JIMMY Patterson, with a very simple mission: “We want every kid who finishes a JIMMY Book to say, ‘PLEASE GIVE ME ANOTHER BOOK.'”

This sweet story, written by James Patterson and Chris Grabenstein,  is about a blue mouse named Isaiah who has the ability to communicate and feel the same things as humans. He goes on a mission to rescue his mouse family and finds a clever assistant in a sweet girl named Hailey. As they partner together to help save Isaiah’s family, they find the beauty in true friendship together that transcends their own differences.

Each chapter begins with a quote from Isaiah that offers thoughtful advice for your middle grade reader to chew on.

One of the quotes we loved was, “Those who give have everything. Those who don’t have nothing at all.” 

Word of Mouse for Middle Grade Kids from MomAdvice.com

Word of Mouse for Middle Grade Kids from MomAdvice.com

We love giving to others and the happiness that comes from sharing what we have with those in need.  We all have taken up new projects this year that help benefit our community. The kids loved participating in a community project with their school to rake the yards of homes that surrounded their school’s campus. We ring bells for the Salvation Army through our church each holiday season. I picked up a weekly gig stocking and organizing food pantry shelves. I got the chance to help serve a holiday feast at a local women and children’s shelter this year.

Do you know how much this cost us?

Zero.

Do you know how much we get back?

An immeasurable amount.

It builds awareness for all the needs we could help meet.

It also builds awareness for the blessings we have.

These are the messages I like to see in the pages of my kid’s books and that is why I’m very proud to share about this new book with you.  This book is geared towards readers ages 8-12 and is beautifully illustrated by Joe Sutphin.

Today I get to host a fun giveaway where one lucky winner will receive a copy of Word of Mouse as well as a $50 Visa Gift Card! Please follow the rules in the widget below for entry!

a Rafflecopter giveaway

Thanks so much for entering and best of luck to each of you! To learn more about Word of Mouse, the author, and JIMMY Patterson Books, check out these links:

Word of Mouse

Visit JamesPatterson.com

Follow JIMMY Patterson Books on Twitter | Facebook | Instagram

Follow James Patterson on Twitter | Facebook | Instagram

Word of Mouse for Middle Grade Kids from MomAdvice.com

This post was created in partnership with Jimmy Patterson Books. Thank you for supporting the companies that support our site! 


Kid Crafts: Easy Techniques for Painting Gift Wrap

Monday, December 12th, 2016

Easy Techniques for Painting Gift Wrap from MomAdvice.com

This post was created in partnership with Waverly Inspirations. Thank you for supporting the companies that support our site! 

You may recall that last year I decided to buy a lifetime of kraft paper for wrapping our holiday gifts. It should come as no surprise that we are still using this giant roll of gift wrap in our house. I have found it is a useful item to have on hand, for all of life’s occasions,  and there is so much that you can do with kraft paper to make your gifts unique.

I also consider pretty gifts to be part of the decorating so it thrills me to come up with new ways to use the same paper each year. I love these gorgeous detail under the tree.

As a crafter, I really never got into acrylic paints until this year. It has been so much fun trying new crafts with these fun paints. I love discovering something that I have walked by for years in the craft aisle and finding my own uses for them!

Today  I wanted to come up with some creative ideas to get kids on the action of decorating the paper as a fun winter craft. I love screen-free activities with them so I thought this would be a fun one that you could have them create, even after the holiday season.

There are so many beautiful hues that you could mix and match any hue that you like. I have a big crush on a metallic Rose this year so I am demonstrating this craft with Waverly Inspirations Metallic & Glitter paint offerings in Rose Quartz (in the Metallic) and Rose Gold (in the Glitter paints!) for a pretty modern look.

Easy Techniques for Painting Gift Wrap from MomAdvice.com


3 Fun Painting Projects for Kids to DIY Your Gift Wrap

Easy Techniques for Painting Gift Wrap from MomAdvice.com

Supplies Needed (all of these supplies can be found at Walmart!)

kraft paper

Rubber Stamps

Small Ornaments (just the inexpensive ones that come in a tube!)

Waverly Inspirations Ribbon

Waverly Glitter & Metallic Paints (in stores)

Paint Brush

Plastic Cups, Bowls, or a Plate for Paints

Directions for Fun Painting Techniques

Make sure to cut off a section that will be generous enough to cover at least one gift.

Easy Techniques for Painting Gift Wrap from MomAdvice.com

Easy Techniques for Painting Gift Wrap from MomAdvice.com

Stamp Your Paper

Pour a small amount of your paint into a disposable cup, plate, or bowl. Using your paintbrush, brush the paint on in an even layer and then place stamp down and pull directly up to try to get as clean of a design as possible. Repeat across the paper or combine this with other designs for more variety. You want to use the Waverly Inspirations Metallic Paints with this technique because the glitter paint doesn’t create that clean image like the metallic paint.

If you don’t have rubber stamps in your craft supplies, you can use odds and ends around your home for stamping. Shapes can be cut into the ends of potatoes, you can cut up sponges into shapes, the eraser end of  a pencil can make adorable polka dots, the edge of a disposable cup can create rings, or a cork could create a dotted technique. This is a great opportunity for your child to explore painting in fun ways.

Easy Techniques for Painting Gift Wrap from MomAdvice.com

Easy Techniques for Painting Gift Wrap from MomAdvice.com

Create Glittered Swirls

If your child lacks the eye-hand coordination for stamping, give them a paintbrush and let them add swirls to the paper.  Paint strokes are layered in glitter thanks this fun glitter paint. I found with this one, it was best to have a fully loaded brush to bring out both the color and the glitter. Repeat your swirls throughout the paper or have your child come up with their own abstract design.

Easy Techniques for Painting Gift Wrap from MomAdvice.com

Easy Techniques for Painting Gift Wrap from MomAdvice.com

Easy Techniques for Painting Gift Wrap from MomAdvice.com

Add Painted Embellishments

Acrylic paints are so fun and make many inexpensive items look high end with modern color choices. Inexpensive ornaments can be painted in coordinating colors and tied on with string to your package. While the rubber stamps are out, stamp up your own diy gift cards on white cardstock and trim with ric-rac scissors or put your own creative spin on the tags. Finish your gift with a beautiful bow.

Easy Techniques for Painting Gift Wrap from MomAdvice.com

how-to-decorate-gift-wrap-with-acrylic-paints-4864

I hope your kiddos enjoy this boredom buster! I am the queen of craft stockpiling so I have tons of paints, ornaments, and gift wrap (BOY, DO I HAVE GIFT WRAP!) to keep the kids busy on our next snow day.

Do you want more craft inspiration from Waverly? Try these!

DIY No-Sew Reversible Chair Cushions

Fabric Wreath & Matching Garland

Fabric Bulletin Board Tutorial

Painting Pumpkins With Acrylic Paints

DIY No-Sew Hand Warmers

DIY Ottoman Serving Tray

15-Minute Scrappy Fabric Trees

This post was created in partnership with Waverly Inspirations. Thank you for supporting the companies that support our site! 

Pin It