A curated list of literary thrillers—where page-turning suspense meets rich prose, character depth, and thought-provoking themes that linger long after reading.
This week’s new book list dives into one of my all-time favorite genres: the beloved literary thriller. My reading tastes have certainly evolved over the years, and I’ve gone from devouring plot-driven stories to now seeking out novels with complex characters and layers that linger. There’s something about a great literary thriller that offers both a rush and a richness I keep coming back to, and now that my kids are grown, I have the mental space to really settle in.
What is a Literary Thriller?
Literary thrillers offer a rare breed—equal parts gripping suspense and literary finesse. These are the books that get your heart racing, but also make you linger over a beautifully crafted sentence or reflect on the knotty questions at the story’s core. I find they often offer readers more scene-setting, building atmosphere, and tension.
Where a typical “popcorn thriller” is engineered for pure, high-octane entertainment—think lightning-fast plots, short sentences, frequent paragraph breaks, shocking twists, and big-screen-ready action—literary thrillers invite a deeper engagement.
The thing that has always struck me is that popcorn thrillers, while delicious and sometimes just what I crave, they typically leave my brain as soon as I finish them. Literary thrillers, by contrast, stay with me.
If you love this book list, you can support my work through a one-time donation on Buy Me a Coffee or join our Patreon community for book fun all year long.Patrons will receive a free printable copy of the checklist for today’s book list for you to explore. The financial support helps us keep the lights on in our online space.
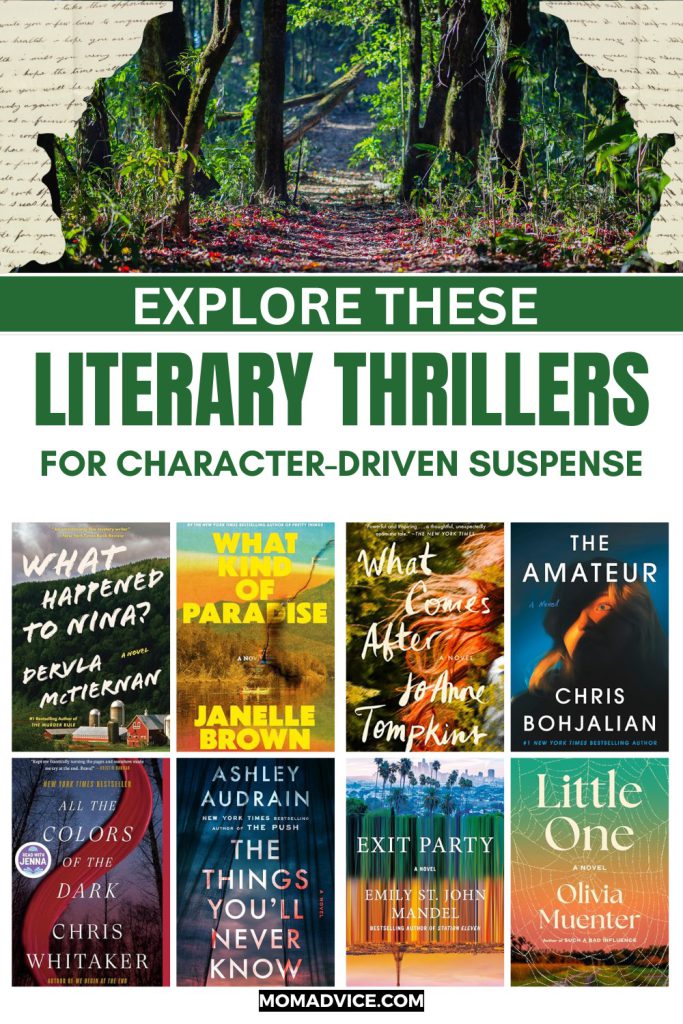
Literary Thrillers
Browse these 32 handpicked literary thrillers—details are purposely kept thin to preserve the surprises and twists that make these stories unforgettable. Happy reading, friends!

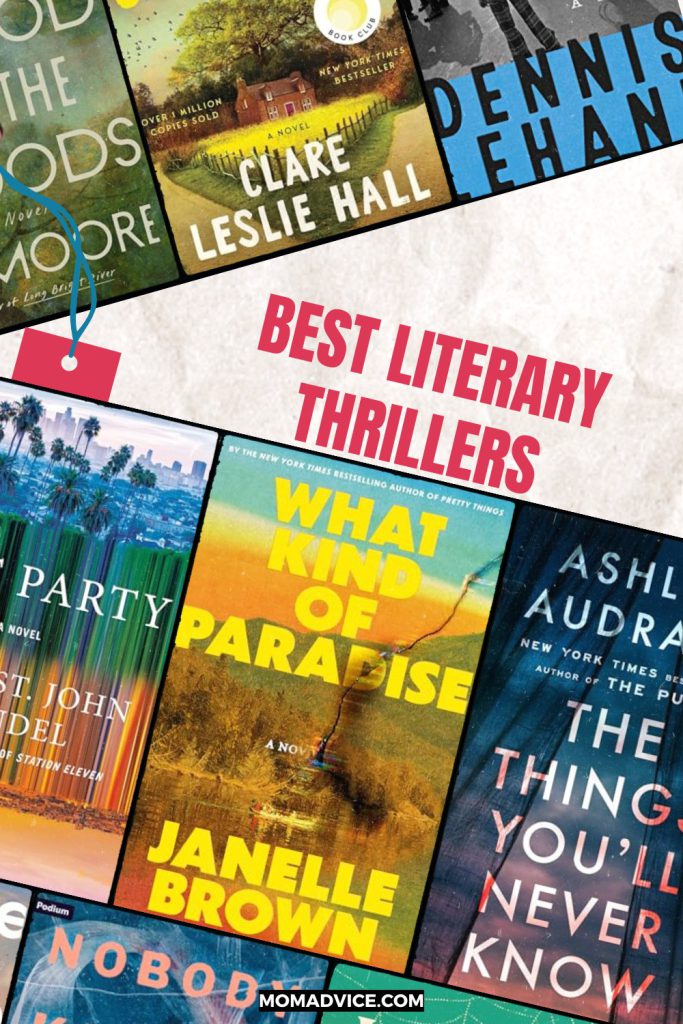
What Kind of Paradise by Janelle Brown
I am so proud to champion Janelle Brown as a MomAdvice Book Club author this month, and this book list is created in honor of that celebration.
Jane’s entire world is her father—until the day the outside world comes knocking. Raised in a remote Montana cabin, Jane has been sheltered from modern life, her days revolving around survival skills, philosophy books, and her father’s vision of a self-sufficient utopia. But when a laptop and modem breach their isolation, Jane’s curiosity about the world beyond those woods becomes impossible to ignore.
What begins as a trickle—a few lines of code, a new way of thinking—quickly becomes a tidal wave. As Jane unravels the mythology of her father’s paradise, she finds herself thrust into the chaos of 1990s San Francisco at the dawn of the digital age. The journey is both a physical escape and a psychological awakening, as the truth about her origins and her family’s secrets surface with devastating impact.
Brown’s novel is a masterclass in suspense and slow-burning character evolution. Through Jane’s eyes, we explore the uneasy marriage between technology and humanity, the longing for belonging, and the courage it takes to imagine a life outside the boundaries we inherit. Jane’s fight to claim her own future makes this a standout—equal parts thrilling and heartrending.
Related- Janelle Brown Interview (Book Gang Podcast)
Related- 2026 Book Club Books (JOIN NOW)
NEW LITERARY THRILLERS AND UPCOMING RELEASES

The Things You'll Never Know by Ashley Audrain
Fiona’s story begins at the moment of her death—she watches the ambulance take her body away, yet she’s still in her family’s home, unseen. As Fiona lingers in the shadows, her husband, children, and closest friends are left reeling, and suspicions swirl about what really happened.
Everyone, it seems, has secrets: a depressive husband, a fiercely loyal best friend, a distant sister, a precocious son, and Fiona herself. When her teenage daughter stumbles upon Fiona’s diary, a stunning betrayal is revealed, upending everything the family thought they knew.
Audrain’s daring, thought-provoking novel is as much a psychological puzzle as it is a ghost story. Through Fiona’s eyes, we witness the cost of performative womanhood, the tension between being good and being true, and the legacy of desires we keep hidden. Prepare for a haunting, layered read that will spark conversation long after you turn the last page.
Release Date- 12 January 2027

Exit Party by Emily St. John Mandel
From the acclaimed author of Station Eleven comes a mind-bending literary thriller that travels across fractured timelines and haunted memories.
In 2031, America is at war with itself—yet in Los Angeles, a moment of hope arrives: the Republic of California is declared, the curfew is lifted, and the city’s residents flock to a legendary party.
Ari, newly released from prison, enters the night with her friend Gloria just as a fragile new era begins. But as the celebration unfolds, it’s clear that not everyone should be there. Something goes terribly wrong, and the consequences ripple outward, irrevocably altering Ari’s sense of reality.
Years later, Ari is living in Paris, still haunted by that night and searching for answers. Mandel crafts a dazzling meditation on freedom and surveillance, the ache of lost love, and the cost of survival in a world that seems to be coming apart at the seams.
I am beside myself with excitement for this release!
Release Date- 15 September 2026

The Amateur by by Chris Bojalian
A single, tragic swing on a sweltering August day in 1978 sets the stage for Bojalian’s latest riveting literary thriller. When golf prodigy Mira Winston accidentally kills a caddy with a stray ball at her country club, what seems at first like a freak accident soon unravels a web of secrets that the privileged community would rather keep hidden.
Mira, just eighteen, finds herself at the center of suspicion—her history of recklessness, a forbidden relationship with a much older man, and her own mother’s buried secrets all come under the scrutinizing glare of investigators and neighbors alike.
Bojalian deftly captures the claustrophobia of a small, wealthy town on the brink, taking us from manicured greens to the harsh courtroom lights. The Amateur is propelled as much by its psychological depth as by its plot twists, as Mira’s search for comfort and absolution collides with society’s hunger for justice—or vengeance. I am so excited to have an ARC of this on my Kindle right now!
Release Date- 4 August 2026

Nobody Knows You're Here by Bryn Greenwood (KINDLE UNLIMITED)
Greenwood’s latest is her bleakest and most unflinching novel yet—one that burrows into society’s shadows and refuses to look away, but it is a compelling pick for the current political moment that we are in.
Beatrice, raised in the foster care system and accustomed to instability, thinks she’s been handed a lifeline when a kindly stranger offers her coffee and a job. Instead, she’s drugged, abducted, and forced to work as a nanny inside a trafficking operation. Her survival hinges on performing her new role—protecting others, even as she’s trapped herself.
Greenwood’s genius lies in the complexity she brings to this dark world. Beatrice’s isolation is so absolute that, at first, no one is truly searching for her. Yet amid the horror, slivers of connection—a makeshift book club, a meal shared, fleeting moments of warmth—offer glimmers of hope and humanity. The novel’s emotional gravity is relentless, yet it’s these flashes of resilience that make the reading experience bearable, even luminous.
This is not a novel for the faint of heart. Greenwood depicts the brutalities with frank, sometimes graphic honesty, and readers should be prepared for discomfort and moral complexity at every turn. The author's refusal to look away from the ugliest truths makes this an unforgettable, harrowing literary thriller.
If you aren’t prepared for such emotional terrain, The Reckless Oath We Made is my favorite from the author!

Little One by Olivia Muenter
Muenter delivers a haunting, dual-timeline literary thriller that explores the aftermath of life in a cult—and the struggle to trust your own memories when the past resurfaces.
Catharine, raised under the harsh control of her father’s so-called wellness commune, endures years of senseless food restrictions, punishing routines, and the constant pressure to prove devotion. The book’s depiction of disordered eating—rooted in the cult’s “wellness” regime—can be deeply challenging for readers who’ve struggled with eating disorders, but Muenter’s honesty makes Catharine’s cathartic journey all the more real.
Now, a decade after her escape, Catharine’s hard-won independence is upended when a journalist starts asking questions about the cult’s legacy. As old secrets threaten to emerge—including a possible memoir by her step-sister—Catharine is forced to confront what she left behind and what she’s still hiding.
The novel’s sense of place is palpable, from the oppressive commune to the quiet sanctuary of a public library where Catharine learns to build a new life. This thriller is a perfect fit for readers who crave character-driven mysteries and a strong sense of place.
Related- Olivia Muenter Interview (Book Gang Podcast)
Related- Influencer Books

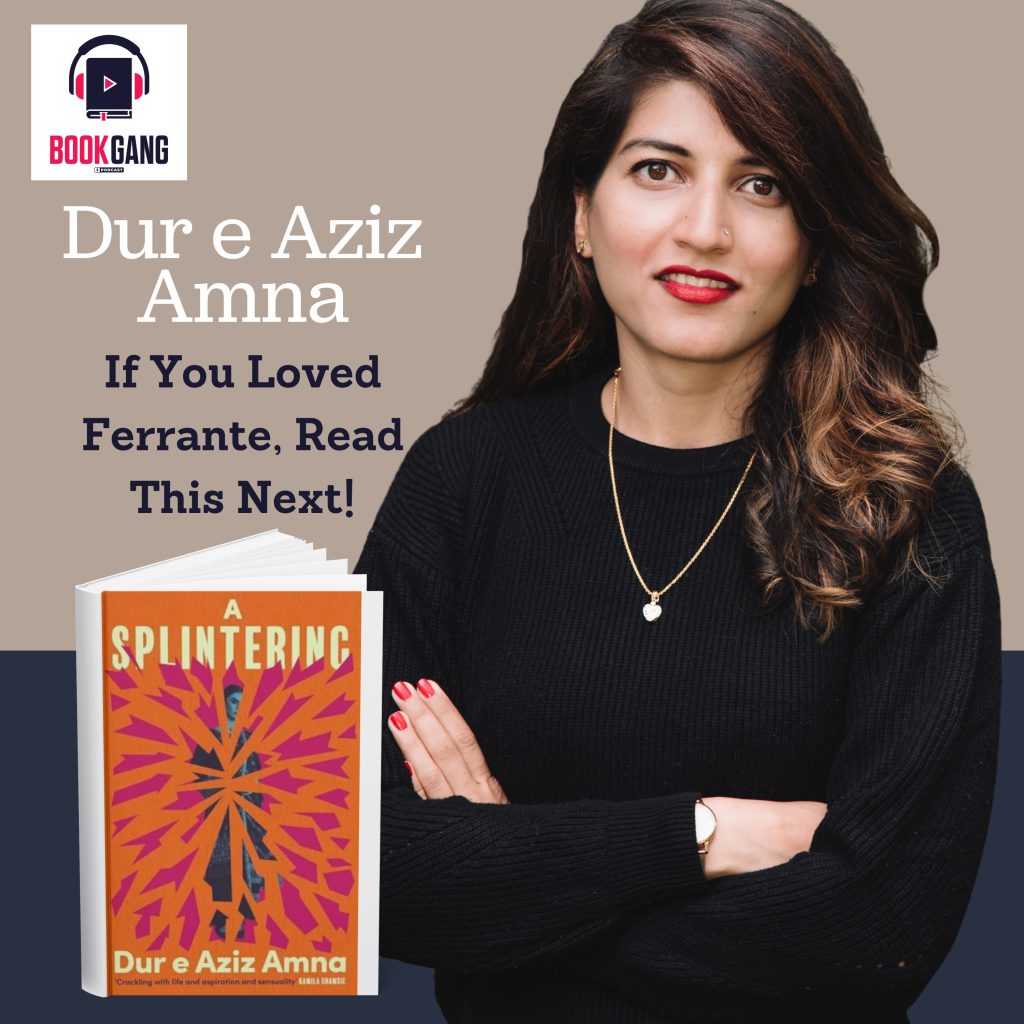
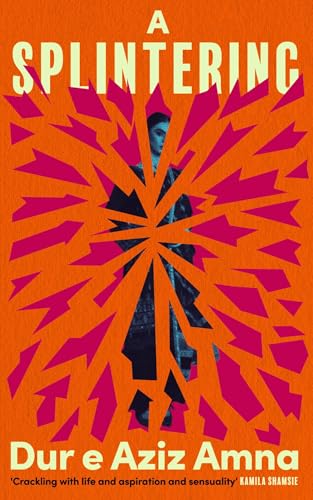
A Splintering by Dur e Aziz Amna
From the first lines, Amna’s fierce literary thriller pulls you close: “I wonder where to start. As I tell you my story, will you find it hard to empathise? I am what some call an unrelatable character, and I have done something unthinkable. But I implore you to listen. As the storyteller, I need you on my side. And we know that a story is only as good as its beginning. So let my story begin with rage.”
Tara grows up poor in rural Pakistan, desperate to escape both the poverty of her home and the weight of family expectations. Her brother, favored and cruel, holds power over the family, while Tara’s own ambitions make her an outsider. When she marries and moves to the city, Tara refuses to settle for a life of servitude and mediocrity.
Piece by piece, she forges her own path—trading dowry for braces, making bold choices about her body and identity, and clawing her way into elite circles with an unapologetic focus on survival.
What follows is a dark, propulsive meditation on class, ambition, and the price of reinvention. As Tara’s world expands, Amna’s crisp prose and relentless pacing keep melodrama at bay. I tore through this provocative, flawlessly paced novel in a single day.
Related- Dur e Aziz Amna Interview (Book Gang Podcast)
Related- South Asian Books
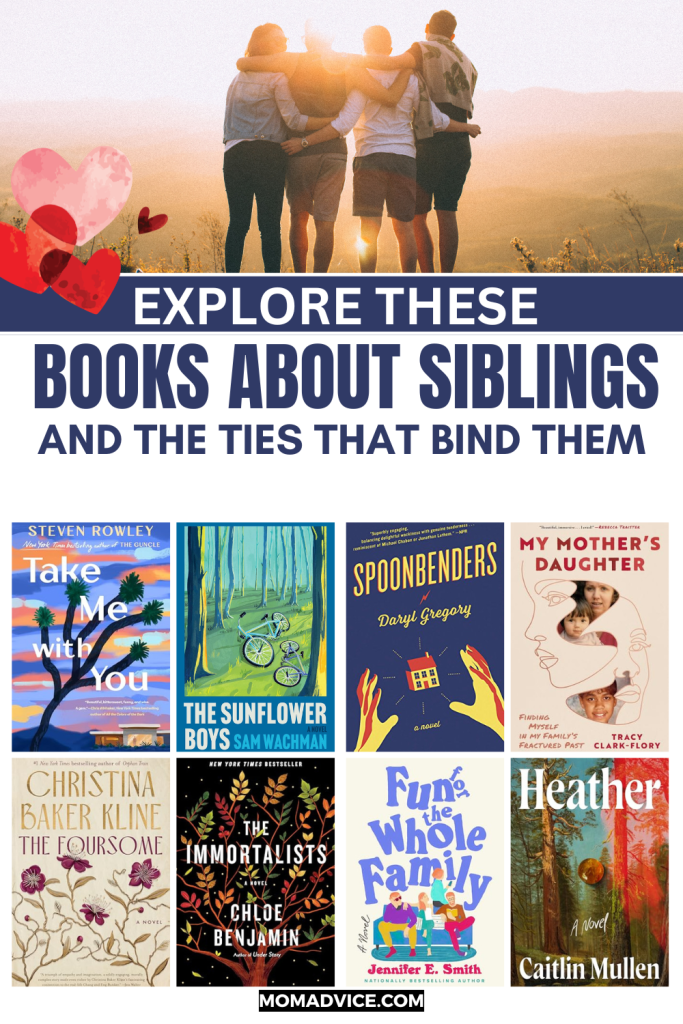
Related- Books About Siblings

Wild Dark Shore by Charlotte McConaghy
McConaghy’s latest brings readers to a remote island near Antarctica where Dominic Salt and his three children are caretakers of Shearwater, now home to the world’s largest seed bank—and little else. Their isolation is shattered when a mysterious woman, Rowan, washes ashore amid a devastating storm.
As the Salts nurse Rowan back to health, she becomes entwined in their lives, even as she holds back the reasons for her journey. Sabotaged radios and a freshly dug grave hint at danger lurking beneath the surface, and soon everyone must decide who to trust as the storms—and secrets—gather force.
McConaghy’s writing is spellbinding, blending dizzying beauty and ferocious love with page-turning suspense and unforgettable twists. Exploring what it means to belong, to protect, and to create something new in a world on the verge of disappearing, it’s a perfect fit for readers who crave atmospheric mysteries.
Related- Eco Fiction Books
Related- Atmospheric Books

Broken Country by Clare Leslie Hall
Hall’s book brought the plot twist that went viral. In this unforgettable blend of love story and literary mystery, Beth and her gentle husband Frank have built their lives on carefully buried secrets. But when a stray gunshot—meant for a dog chasing their sheep—sets off a chain of events, the past resurfaces in the form of Gabriel, Beth’s first love and the man who broke her heart.
As Gabriel returns to the village with his young son, old wounds are reopened and tensions in the close-knit community simmer. Beth is drawn back into Gabriel’s orbit, forced to reckon with tragedy, loss, and the dangerous secrets that still linger. When a local farmer is found dead, suspicion and jealousy ripple through the village, and Beth faces a choice between the woman she once was and who she’s become.
Hall’s narrative toggles seamlessly between past and present, delivering a sweeping love story laced with the taut pacing and twists of a thriller. The result is a stirring meditation on passion, the legacy of first love, and the explosive consequences of secrets left to fester. The ending is as shocking as it is satisfying—a masterfully crafted mystery that lingers long after the final page.
Related- Books With Good Plot Twists That Will Make Your Jaw Drop

The God of the Woods by Liz Moore
The God of the Woods is a sprawling, atmospheric literary mystery steeped in family secrets, missing children, and the haunting power of place. Set on the grounds of Camp Emerson in the 1970s, the story traces the disappearance of thirteen-year-old Barbara Van Lear—a rebellious child from a wealthy, troubled family—fourteen years after her brother vanished in the same woods.
Moore’s intricately layered narrative shifts through timelines and viewpoints, mirroring the disorienting labyrinth of the forest itself. As the search unfolds, family dynamics, a rookie female investigator, and the looming presence of a notorious serial killer add rich texture and tension.
While the ambitious structure and multiple perspectives can be challenging to track, Moore’s evocative prose and keen psychological insight reward patient readers. With its lush setting, complex characters, and subtle 1970s details, this novel delivers a haunting ode to the mysteries that bind and unravel families.

The Compound by Aisling Rawle
Rawle’s satirical literary thriller is set inside a dystopian reality show where survival means everything. Lily wakes up in a chic desert compound with nine other contestants, each of them fighting for daily essentials through a ridiculous prize-driven chore system. The dynamic is as cutthroat as it is absurd, with Rawle’s cheeky humor and sharp observations skewering both reality TV culture and our own hunger for comfort and spectacle.
As alliances shift and paranoia deepens, the women—sometimes hilariously indistinguishable, sometimes mirrors of each other—grapple with scarcity, power, and the creeping sense that the world outside might be worse than what they face inside.
The novel’s escalating stakes and diabolical third act make for a compulsively readable, unsettling experience that will have you reflecting on everything from pandemic-era shortages to the cost of performing for an audience. This is certainly not a book for every reader, but it will be a perfect fit for fans of social satire or for those who love to unpack the ways pop culture distorts our sense of reality.
Related- Speculative Fiction Books

Tilt by Emma Pattee
Tilt is a raw, propulsive literary thriller that I counted among my favorite reads last year. When a catastrophic earthquake strikes Portland, Annie—nine months pregnant and alone at IKEA—must embark on a perilous journey across a shattered city to reunite with her husband. Along the way, she reflects on her marriage, her dreams, and what it means to become a mother amid chaos.
Pattee’s singular voice makes every jolt of the pavement, every moment of exhaustion, feel achingly real. Annie’s journey is both physical and emotional, as she narrates to her unborn child, Bean, with humor, honesty, and vulnerability. The novel deftly blends survivalist tension with deeply human questions about hope, partnership, and resilience.
This novel will have you checking your emergency kit and hugging your loved ones closer. The ending is as bold and polarizing as the journey itself, but that’s exactly what makes Tilt such a memorable, high-stakes read.
It was a blast to talk through the book’s ending and Ariel Blake’s audiobook performance with the author on Book Gang.
BACKLIST LITERARY THRILLERS

What Happened to Nina? by
This unflinching literary thriller starts with the disappearance of a teenage girl after a hike with her boyfriend, setting off a missing persons case that quickly spirals into a national spectacle.
Both families are thrown into the harsh glare of public scrutiny—Nina’s desperate for answers, her boyfriend’s wielding resources and media savvy to shape the narrative in their favor. As smear campaigns and conspiracy theories swirl, McTiernan masterfully exposes the high cost of seeking truth in a world obsessed with true crime.
What sets this novel apart is how swiftly the central mystery is revealed, allowing the focus to shift to the raw, emotional fallout. Each chapter deepens our empathy for both families—no matter their power, privilege, or pain. The novel’s shifting perspectives invite us to question how quickly we judge, how media narratives can destroy, and how tragedy fractures even the strongest bonds.
If you like your thrillers thought-provoking and packed with moral complexity, this is a must-read. Book clubs will find endless material to discuss, from the ethics of true crime to the limits of parental love.

Your House Will Pay by Steph Cha
Inspired by the real-life events that ignited Los Angeles in the early 1990s, Cha's piercing literary thriller examines the aftermath of tragedy across two families and generations.
Drawing from the Rodney King beatings and the murder of Latasha Harlins, readers are given this compelling story from the dual perspectives of the victim’s brother and the daughter of the woman responsible—unflinchingly exploring the legacy of racial tension between the Black and Korean-American communities.
Through these two deeply human voices, Cha reveals the complexity of grief, anger, and hope that ripple through a city forever changed. The novel’s taut, 299-page narrative is a masterclass in empathy: challenging, immersive, and unwilling to offer easy answers.
Winner of the Los Angeles Times Book Prize, this novel is essential reading for anyone interested in crime fiction that wrestles with the most urgent questions of our time—and yielded such a thought-provoking conversation when we selected it for our 2024 MomAdvice Book Club chat.
Related- 2024 Book Club Books
Related- Best Literary Fiction Books

What Comes After by JoAnne Tompkins
If you love stories about the families we choose—and the unexpected ties that bind us—this powerful debut is one to add to your stack.
Isaac is mourning his son Daniel, suffering under the ache of loss and the isolating silence it brings. Next door, a single mother faces her own heartbreak after losing her child under very different circumstances.
When sixteen-year-old Evangeline arrives on Isaac’s doorstep, needing shelter and a meal, she fills an emptiness in his life he didn’t realize could be eased. As Isaac steps into a steadying role for Evangeline, her presence weaves together two grieving households. But Evangeline harbors secrets—ones that will ultimately bind these neighbors in surprising and deeply moving ways.
Told in beautifully woven alternating chapters, What Comes After is a haunting, satisfying 5-star page-turner that explores how tragedy can give rise to unexpected blessings. Tompkins’s depiction of quiet Quaker faith and the gentle strength of community offers a unique warmth and depth, making this a standout literary mystery about healing, hope, and second chances.
Related- Books About Faith and Churches

The Violin Conspiracy by Brendan Slocumb
Slocumb’s electrifying debut is a masterful blend of literary mystery and music’s divisive power to uplift and divide.
Growing up Black in rural North Carolina, Ray McMillian has always felt the odds are stacked against him. But he is a prodigy with a gift—and a dream to become a world-class violinist, no matter what stands in his way: his mother’s doubts, financial hurdles, and the ever-present racism of the classical music world.
Everything changes when Ray discovers the battered family fiddle he’s practiced on is actually a priceless Stradivarius. Suddenly, his dreams seem within reach, and Ray’s rise in the competitive world of classical music stirs hope and envy in equal measure.
But on the eve of the prestigious Tchaikovsky Competition, his violin is stolen, and a five-million-dollar ransom note is left in its place. This gripping novel put Slocumb on the map as he blends his work as a musician into the fibers of his stories.

A History of Wild Places by Shea Ernshaw
Earnshaw’s unforgettable novel brings Travis Wren, gifted with an uncanny ability to find missing people, who is hired to track down Maggie St. James, an author of haunting children’s books who has vanished. His search leads him deep into the mysterious, secluded commune of Pastoral—a place that may exist only in legend.
Years later, Theo, a member of Pastoral, stumbles across Travis’s abandoned vehicle beyond the commune’s borders. The community’s strict rules forbid anyone from leaving, for fear of a deadly disease they believe lurks outside. As Theo begins to question the world he’s always known, secrets about Pastoral and its inhabitants—including his own family—rise to the surface, threatening to unravel everything.
Ernshaw’s novel is a cinematic, twist-filled exploration of belief, isolation, and the stories we tell ourselves to survive. Each revelation delivers fresh chills, and the immersive writing style makes for a haunting reading experience you won’t soon forget.

The River by Peter Heller
Heller’s propulsive, atmospheric thriller about wilderness, friendship, and survival is on my backlist bucket list this year.
College friends Wynn and Jack embark on a canoe trip down the Maskwa River in northern Canada, hoping for days of leisurely paddling and nights under the stars. But when a distant wildfire forces urgency on their journey, they encounter a mysterious couple arguing on the riverbank—soon after, only the man is seen again, paddling alone.
What follows is a tense, beautifully rendered tale of trust, violence, and the elements, as Wynn and Jack are drawn into a mystery that tests their friendship—and their ability to survive.
Heller’s writing promises to capture the majesty and menace of the wild, blending lyrical prose with edge-of-your-seat suspense. I can’t wait to read this one!

All the Colors of the Dark by Chris Whitaker
Whitaker’s sweeping, propulsive literary mystery brims with heart, darkness, and unforgettable characters.
Set in small-town Missouri, the novel follows Patch, a boy born with one eye and a fierce sense of imagination—his mother teaches him to see himself as a pirate, turning hardship into adventure. His best friend, Saint, is his anchor, but a violent event fractures their childhood and sets Patch on a harrowing path.
After Patch is kidnapped while saving another girl from a serial killer, he survives by forging a bond with a fellow captive—learning her face by touch in the pitch darkness. Though Patch escapes, the girl is left behind, haunting him for decades to come. Whitaker’s story spans from the Vietnam War to the Clinton era, following Patch and Saint through trauma, love, and a riveting quest for redemption.
What sets this novel apart is its blend of literary craftsmanship and page-turning suspense: a cat-and-mouse police procedural, a nuanced friendship saga, and a gripping love triangle all wrapped in atmospheric, vividly rendered prose. Whitaker’s restraint and deep empathy make the story feel light on the page but heavy on the heart.
It was a joy to share this thriller with my Dad, who loved it as much as I did!
Related- My Top Celebrity Book Club Picks

Gone Girl by Gillian Flynn
Gone Girl remains one of Julia Whelan’s most memorable audiobook projects and for good reason. For years, writers and readers have been waiting for the next Gone Girl moment to take us by storm.
When Amy Dunne disappears on her fifth wedding anniversary, suspicion falls on her husband, Nick. As the police and media dig deeper, both Amy’s clever diary entries and Nick’s increasingly evasive behavior keep readers guessing: Is Nick a killer, or is something even more twisted at play?
Flynn’s mastery of unreliable narration, jaw-dropping twists, and pitch-black humor sets a new bar for the genre, offering readers a biting critique of modern relationships and media frenzy while remaining a gripping mystery.
This instant classic is a must-read for anyone who loves thrillers that keep you off balance until the very last page. I plan to revisit it this summer and see how it holds up in my reading life a second time around.

One's Company by Ashley Hutson (KINDLE UNLIMITED)
One's Company is one of those rare, utterly polarizing literary thrillers—destined to spark debate, delight, and discomfort in equal measure. After enduring a devastating trauma, Bonnie Lincoln longs to escape her own reality. Her chosen refuge? The world of the beloved 1970s sitcom Three’s Company. When a lottery win gives her the means, Bonnie painstakingly recreates every detail of the sitcom’s set and routines, living out each day as her favorite characters.
Hutson’s novel is both immersive and deeply unsettling. Readers watch as Bonnie loses herself in the comforting rhythms of sitcom life, even as cracks in her carefully constructed reality begin to show. Is the threat to her world real or imagined? What will happen if anyone—or anything—disrupts her fragile paradise?
Exploring the lengths we’ll go to avoid pain and the dangers of unresolved trauma, Bonnie is a protagonist who may frustrate or fascinate, and Hutson never shies away from her strangeness or the book’s inherent weirdness. For some, the lack of traditional character evolution will be a turnoff; for others, it’s precisely what makes this story unforgettable.
It thrilled me to be invited by Book Lounge by Libby to co-host an interview with Ashley Hutson and to dive deep into this uniquely crafted book.
Related- 2023 Book Club Books
Related- Best Books About Midlife
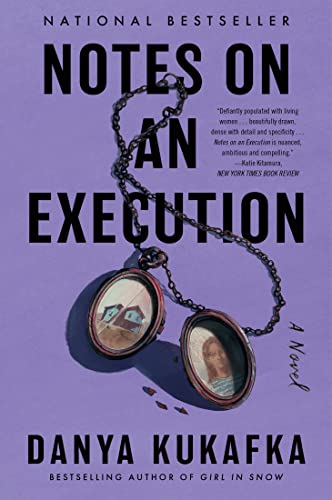
Notes on an Execution by Danya Kukafka
Notes on an Execution is a haunting, atmospheric thriller that I’ve never forgotten.
Ansel Packer awaits his execution, with just twelve hours left to reckon with the crimes that brought him to death row. But Kukafka’s genius is in shifting the lens—telling Ansel’s story through the women whose lives intersected with his: his mother, a detective, and a sister.
Each perspective adds fresh complexity to Ansel’s character, building a portrait that is far from one-dimensional and exploring the darkness that lives inside us all. Kukafka’s prose is both lyrical and chilling, drawing out the motivations, traumas, and secrets that shape the novel’s unforgettable characters.
This is a compulsive page-turner, brimming with psychological insight and timely questions about evil, empathy, and the stories we tell ourselves to survive. Book clubs will find endless discussion in its exploration of human nature, moral ambiguity, and the ripple effects of violence.
Related- Books to Get Out of a Reading Slump

Bright Young Women by Jessica Knoll
Jessica Knoll’s novel takes the true crime genre and turns it on its head, offering a fiercely compassionate, fictionalized account of the sorority house murders committed by a serial killer in 1978 Florida.
Rather than centering the killer, Knoll gives voice to the survivors—most notably Pamela Schumacher, the sorority president and a crucial witness, and Tina Cannon, a woman searching for her missing friend. As their paths cross in the pursuit of justice, Knoll humanizes the victims and exposes the failures of a justice system that all too often dismisses bright, ambitious women.
Knoll’s narrative is deeply empathetic, focusing on the strength, intelligence, and resilience of the women at the heart of this tragedy. The story is told through multiple points of view, and the audiobook’s multi-cast performance makes the overlapping timelines and perspectives sing. While the novel’s pacing is more contemplative than breakneck, the emotional payoff is worth every page.
Bright Young Women is a searing indictment of the ways women’s voices have been ignored in true crime—and a moving tribute to those who refuse to be silenced. It’s my favorite of Knoll’s work so far and a must-read for anyone who values stories that center survivors and challenge the genre’s conventions.
Related- Fictional Serial Killer Books
Related- Jessica Knoll Interview (Sundays With Writers Blog Series)

Small Mercies by Dennis Lehane
Small Mercies immerses readers in the blistering heat of Boston’s 1974 busing crisis, one of the city’s most volatile eras.
Mary Pat Fennessy is a tough, working-class mother trying to keep her head above water. When her teenage daughter vanishes on the same night a young Black man is found dead, Mary Pat launches a relentless quest for the truth, running headlong into the city’s criminal underbelly and the Irish mob—risking everything and refusing to back down.
Lehane masterfully interweaves a mother’s desperate love, the corrosive force of racism, and the explosive tension simmering in a fractured city. Offering readers a raw, enraging, and unforgettable experience, her determination to uncover what happened to her daughter exposes deep-seated secrets and upends the fragile status quo.
With its taut pacing and propulsive suspense, Lehane's literary thriller doesn’t flinch from the darkness at the heart of American history.
Related- Black History Month Books

These Silent Woods by Kimi Cunningham Grant
Grant’s writing is haunting, suspenseful, and deeply atmospheric—drawing readers into the remote Appalachian mountains where a father, Cooper, and his young daughter, Finch, live in complete isolation. Each year, a trusted friend brings critical supplies, but when he doesn’t arrive one winter, Cooper and Finch are forced to break their pattern of secrecy and self-reliance, risking exposure and opening old wounds.
As they venture out into the world, an unexpected visitor arrives, challenging everything Cooper has tried to protect. The novel masterfully weaves themes of forgiveness, trust, and the longing for connection—reminding us of our humanity even in the loneliest of places. Grant balances suspense with tenderness, creating a story that’s both a page-turner and an exploration of the complexities of love and redemption.
For audiobook lovers, Bronson Pinchot's narration is a true highlight and a fabulous way to engage with this moving story.

Strange Sally Diamond by Liz Nugent
Strange Sally Diamond is a dark psychological thriller that lingers long after the final page, where everything feels unexpected.
In the opening, Sally Diamond does something both horrific and oddly logical: she incinerates her father’s body, following his literal instructions to “throw him out with the trash.” When neighbors report the smell, Sally is drawn into a media storm, but this isn’t her first brush with headline news—though she doesn’t know it yet.
As Sally unravels her past through a series of letters from her father, shocking family secrets come to light, revealing a legacy that is both chilling and compulsively readable. What elevates this novel is the way Nugent’s touch for character shines—rather than relying on tired thriller tropes, she crafts a deeply original, fully realized protagonist and an unexpectedly touching found family.
The village’s support and Sally’s evolution are as memorable as the plot’s darkest twists.
Related- Found Family Trope Books

Bad Habits by Amy Gentry (KINDLE UNLIMITED)
Gentry’s novel offers a fiercely intelligent, darkly introspective reimagining of the campus thriller.
The story begins with two old high school friends—now a successful professor and the fiancée of a Hollywood filmmaker—unexpectedly reconnecting over drinks in a hotel bar. Their present-day successes mask a complicated, competitive history rooted in their time at an elite graduate program, where only one could claim a life-changing fellowship.
Standing apart for its beautifully fleshed-out characters and gorgeous, incisive prose, the narrative toggles between past and present as we witness the intense rivalry, shifting power dynamics, and the lengths each woman will go to outmaneuver the other for academic glory.
The ending is, as Hannah McKinnon described, truly “diabolical”—one that demands to be savored and shared. Fans of My Brilliant Friend and anyone who loves a thriller that lingers long after the final page will find much to admire here in this under-the-radar gem.
Related- Unforgettable Campus Novels

Rust & Stardust by T. Greenwood
Lolita remains one of the most controversial literary masterpieces, but it’s rooted in the real-life tragedy of a young girl’s stolen childhood.
In Rust & Stardust, T. Greenwood reimagines the harrowing 1948 kidnapping of Sally Horner—the true story that inspired Nabokov’s infamous novel—bringing hidden history into the light and giving voice to the girl too often silenced.
Eleven-year-old Sally’s ordeal begins with a stolen notebook and a predator posing as an FBI agent, convincing her desperate mother to let Sally join him on a “seaside holiday.” Instead, Sally is thrust into years of captivity and deception. Greenwood’s haunting, lyrical prose balances the darkness of Sally’s ordeal with glimmers of hope, as kind strangers along her journey offer fleeting moments of safety and humanity.
What makes Rust & Stardust so powerful is Greenwood’s unwavering care for Sally’s memory—never glorifying her abuser, never turning away from the brutal realities, and always centering Sally’s perspective. The result is a suspenseful, profoundly humane novel that reframes a notorious cultural story through compassion and meticulous research.
We were so lucky to share time with Tammy Greenwood discussing this one as a book club!
Related- 2025 Book Club Books

Defending Jacob by William Landay
Even if legal thrillers aren’t your usual fare, Defending Jacob is a suspenseful, emotionally wrenching novel you’ll want to add to your list.
Andy Barber, a respected district attorney, is drawn into a murder case at his son’s school—never suspecting his own son, Jacob, will be charged with the crime. As evidence mounts and Andy is forced off the case, he faces the impossible question: should he protect his child at all costs, or let the justice system decide Jacob’s fate?
Landay’s story is as much family drama as legal thriller, exploring the ache of ostracization, the devastation of suspicion, and the moral dilemmas parents face when loyalty and justice collide. The novel’s twisty plot and relentless tension will keep you reading late into the night, aching for both Jacob and his family.
It’s a perfect book club pick, inviting readers to ask themselves: how far would you go to protect your child?
Related- Family Drama Books

The Push by Ashley Audrain
The Push is the kind of thriller that burrows under your skin and lingers long after the last page. We follow Blythe, a new mother struggling to connect with her unusually difficult daughter, haunted by her own fraught upbringing. Audrain deftly explores the unsettling question: is Blythe’s fear of her child born from her own trauma, or is there truly something sinister at play?
What elevates this novel is its exploration of motherhood’s darker corners—how the wounds of generations past can echo through the present, warping our lives. The tension ratchets up with each chapter as tragedy strikes, leaving us to question the line between perception and reality.
This is a stay-up-all-night read, perfect for book clubs eager to debate the thorny territory of nature versus nurture. Prepare for sharp twists, haunting ambiguity, and a story that demands discussion.
Related- Best Page Turners About Motherhood
MODERN CLASSIC LITERARY THRILLERS

The Talented Mr. Ripley by Patricia Highsmith
Patricia Highsmith’s 1955 psychological thriller remains a touchstone of literary suspense—and the first in a five-book series featuring Ripley. Tom Ripley, a charming but deeply troubled young man, is sent to Italy to retrieve the wealthy and carefree Dickie Greenleaf. What begins as an innocent-seeming mission soon twists into obsession, envy, and deception.
Highsmith masterfully charts Tom’s descent from eager outsider to dangerously cunning con artist, keeping readers on edge as his fixation escalates and the stakes spiral out of control. The novel stands as an enduring exploration of amorality, identity, and the darkness that lurks beneath charm.
The Talented Mr. Ripley has inspired countless works about con artists and unreliable narrators. After finishing the book, check out the acclaimed 1999 film adaptation starring Matt Damon, Jude Law, and Gwyneth Paltrow, which brings Highsmith’s classic to a new generation of viewers and was a delight to share one afternoon with my daughter and to bask in these iconic performances.
Related- Captivating Books on Con Artists

The Secret History by Donna Tartt
Donna Tartt’s iconic debut is the definitive dark academia literary thriller—a sprawling, atmospheric novel that has influenced generations of writers and readers.
Narrated by Richard, a young man desperate to escape his troubled past, the story follows his immersion into an exclusive Classics program at a New England college. There, he’s drawn into a tightly knit group of brilliant, enigmatic students led by a morally ambiguous professor.
As the group’s obsession with ancient Greek philosophy deepens, they begin to push the boundaries between intellect and morality, their rituals spiraling into hedonism and, ultimately, violence. Tartt excels at building atmosphere and exploring the complicated motives that drive her characters, rewarding patient readers with rich insights and a slow-burning mystery that unravels through character rather than plot twists.
It’s a novel that lingers long after the final page, inviting debate and rereading—an essential for any fan of literary thrillers or the dark academia genre that I’m thankful to finally have under my belt!