From our diy/craft contributor, Sarah.
Oh, my! You are in for a big treat today because Sarah Milne, from Sarah M Style, is an amazing crafting and design genius and she is joining us each month to share her knowledge. I am so thrilled to introduce you to her today and I know that she has many fun printables and ideas for our homes and crafts that you are going to be looking forward to her featured post each month!
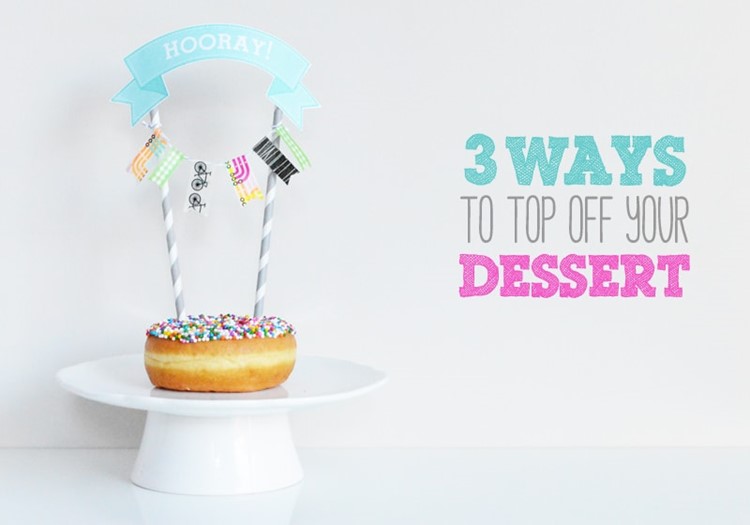
February and March are birthday months for the boys in my life. In February, my little guy turns two, and in March, my husband, well, let’s just say he’ll be much closer to 40 than 35. Whether it’s a homemade waffle birthday breakfast or a donut cake, we love our desserts around here! In my very first DIY and crafting post for MomAdvice.com, I’d like to show you three of my favorite ways to top off our sweet treats.
POM POM GARLAND
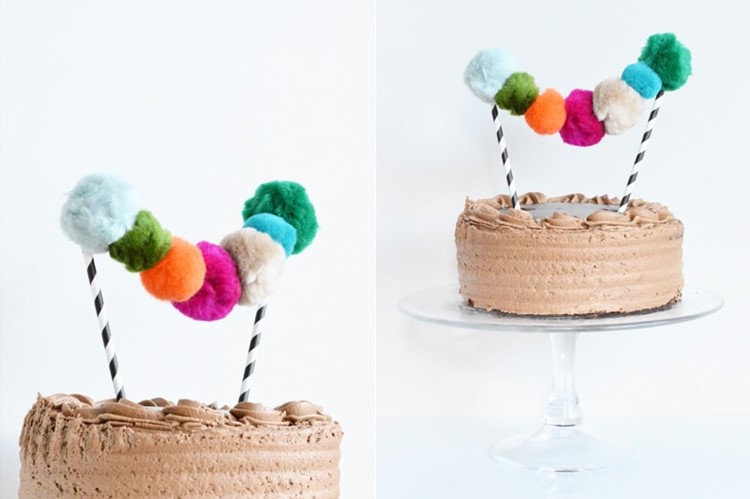
First, and my most fave, is this simple fuzzy and fluffy pom pom garland. Colourful and playful, it adds so much fun to your dessert. You could make this garland with tiny to large fuzzy pom poms or even craft your own poms out of yarn.
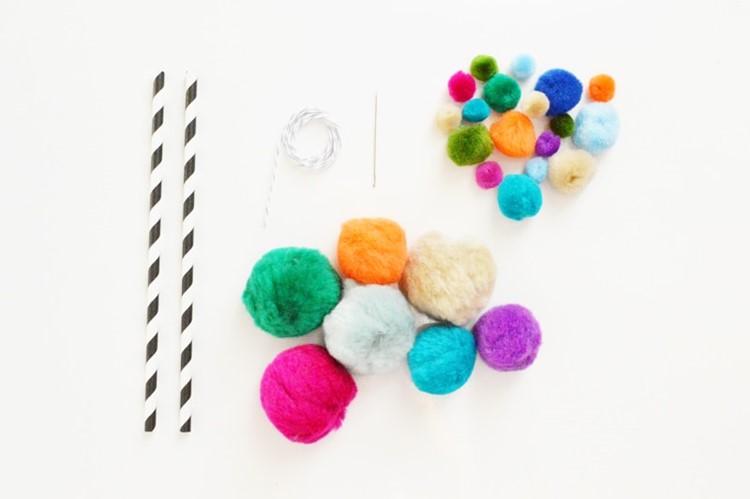
What you need.
Pom poms. Size and color of choice.
(I purchased an assorted bag from Michaels with my trusty weekly coupon.)
Twine or thread
Large needle
Scissors
Skewers, straws, small dowels
The how to.
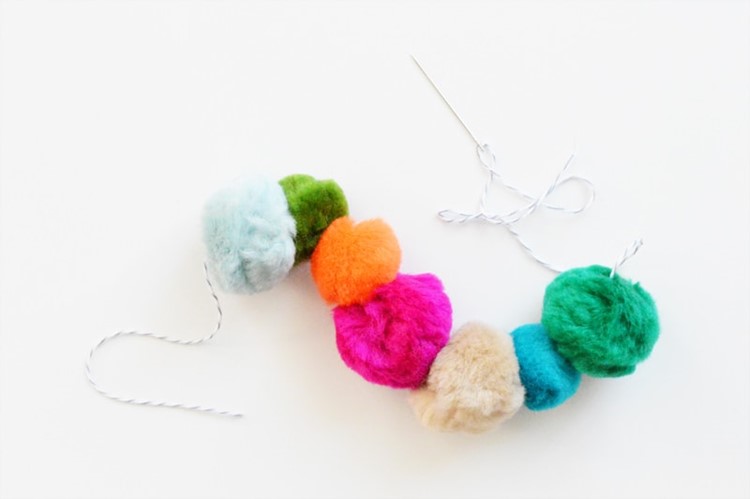
- On your crafting surface, arrange your pom poms in your desired order.
- Thread your needle. Begin to thread the first pom onto the twine. Be sure to leave at least 5 inches excess on the end.
- Thread each pom onto the twine. Space the poms a desired distance apart.
- Once you’ve completed adding your poms, tightly secure the twine to your stick using a double knot. Trim your twine.
- Tightly secure the other end to your second stick and trim.
- Insert into your sweet treat.
- Dig in!
CHALKBOARD TOPPERS
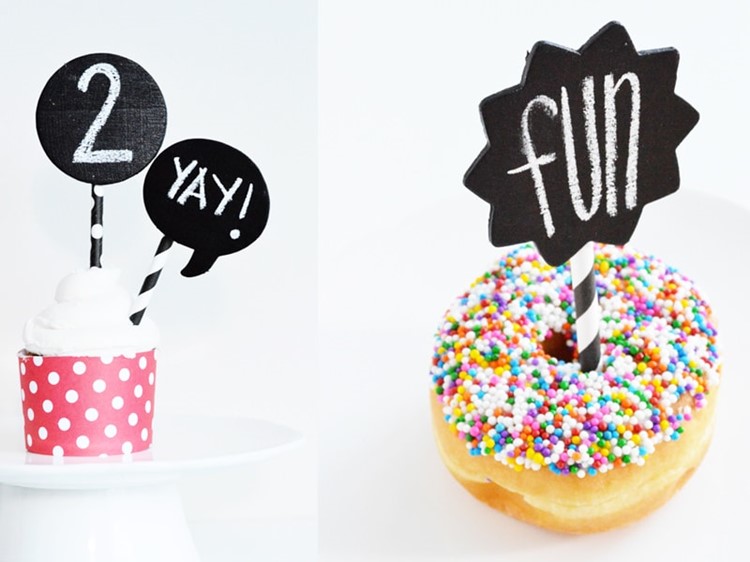
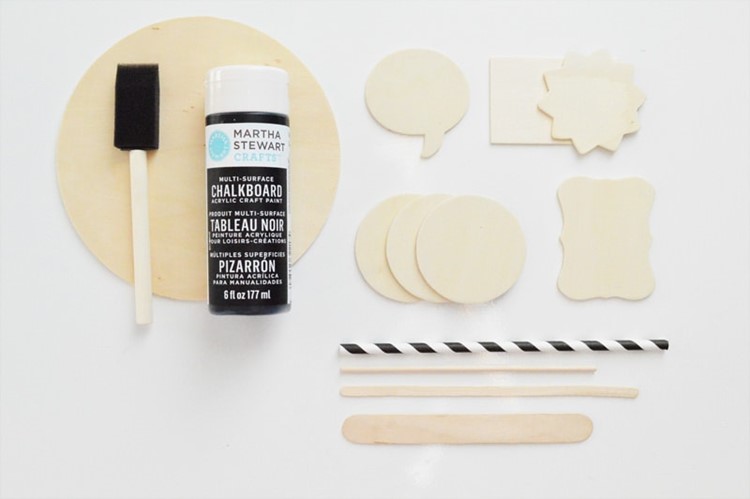
I love that these toppers can be reused throughout the year and for all types of celebrations from birthday breakfasts to report card day! I found these small wooden shapes for less than 50 cents at Michaels and gave them a triple coat of chalkboard paint.
What you need.
Wooden shapes
Straws, popsicle sticks, or small dowels
Chalkboard paint
Foam brush
Paper towel or newspaper
Hot glue gun and glue
Chalk
The how to.
- Protect your crafting surface with paper towel or newspaper.
- Paint your wooden shapes using the chalkboard paint. When using chalkboard paint for crafts, I use a minimum of 3 coats. Allow for drying time in between coats. It seems to dry quickly.
- Attach your wooden shapes to your stick using a dab of hot glue.
- Draw or decorate your chalkboard topper for your occasion.
- Insert into your sweet treat.
- Dig in!
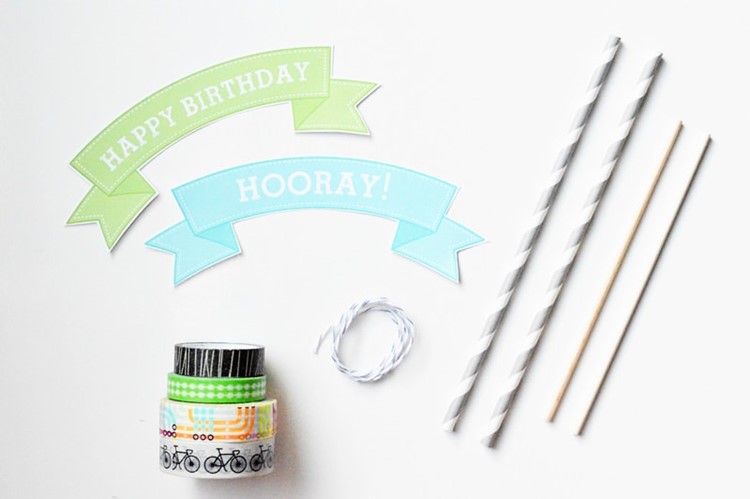
PAPER BANNER WITH WASHI GARLAND + FREE PRINTABLE
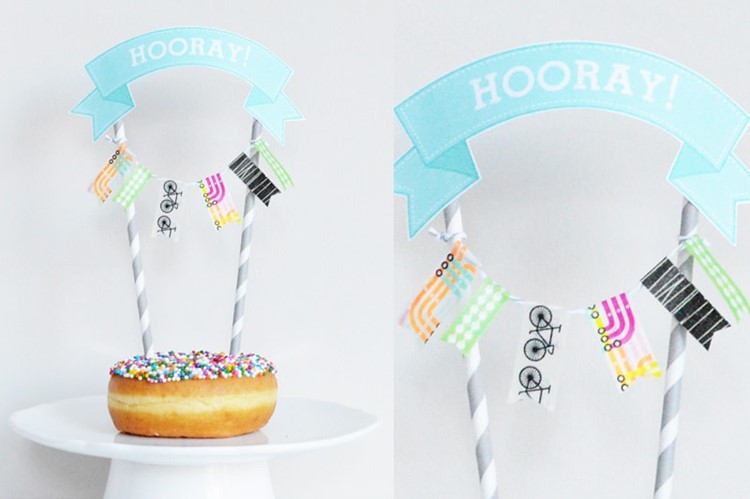
Washi tape is a huge trend right now – and there are limitless crafts you can muster with it! My go-to topper are washi garlands. Paired with a paper banner, it makes a super sweet addition to your treat. I’ve designed two free printable paper banners in 3 colors for your next occasion.
What you need.
A collection of favorite washi tapes
Twine
Skewers, straws or small dowels
Free printable paper banner: {Click to download} HOORAY! or HAPPY BIRTHDAY
The how to.
- Cut a 18 inch length of twine
- Cut your washi tape in equal or varied lengths and fold evenly over the twine, leaving 5 inches of vacant twine on each end.
- Print the free printable paper banner and trim.
- Secure your paper banner to the top of your sticks using a piece of washi or hot glue
- Below the paper banner, tightly secure your washi tape garland using a double knot or bow to each stick.
- Insert into your sweet treat.
- Dig in!
Grab Your Free Printables HERE:
DIY Happy Birthday Dessert Topper
DIY HOORAY! Dessert Topper
Pin It