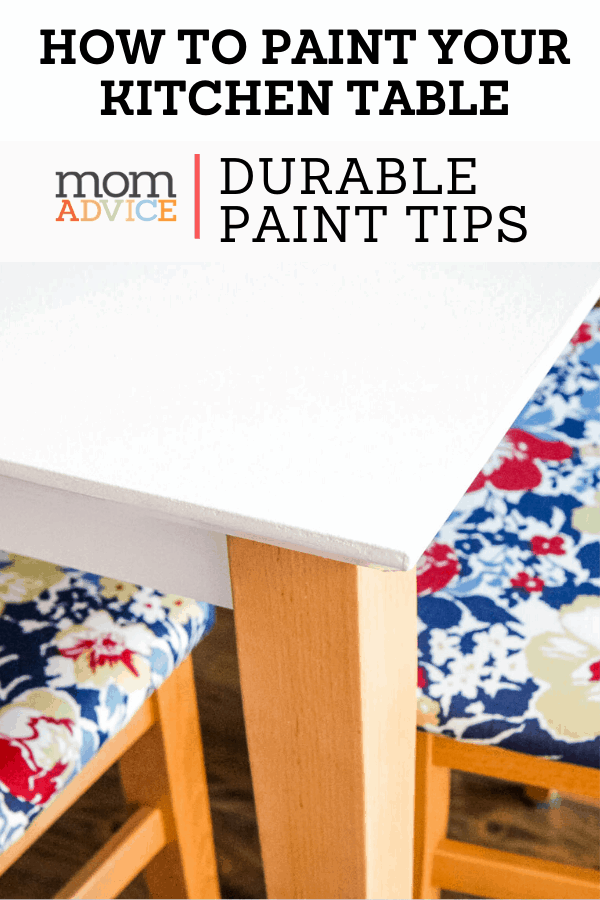
I never dreamed that I would ever paint my kitchen table when we bought it. For ten years though we abused it daily, it survived a brutal move with a terrible moving company, and the polyurethane coating never did look right after it was damaged in route to our house on the day we bought it. The table was loved to pieces, literally, and that is why we had to paint it.
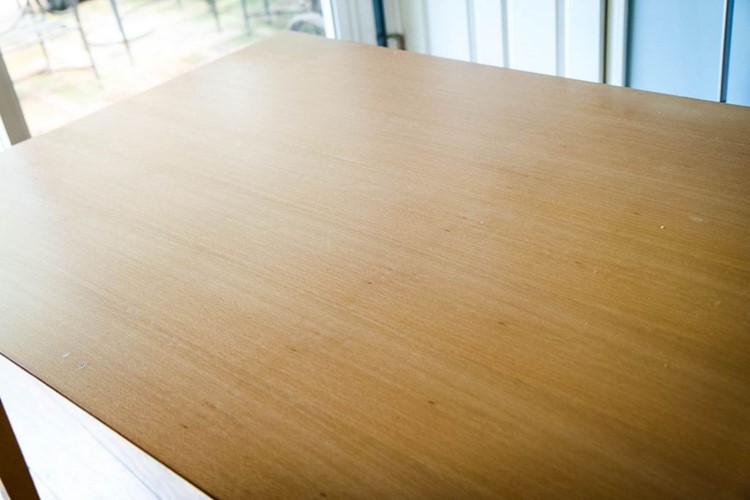
Passing through our kitchen, you might not have noticed the table’s beat-up appearance. From far away or cleverly covered with a tablecloth when it got really embarrassing, the table just didn’t look that bad.
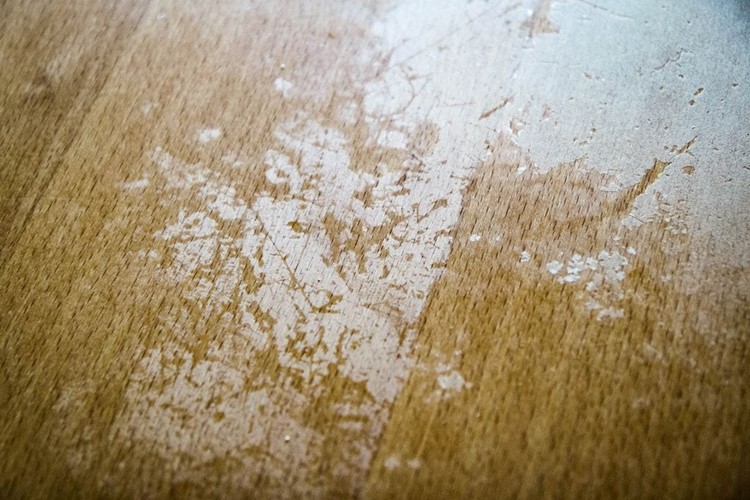
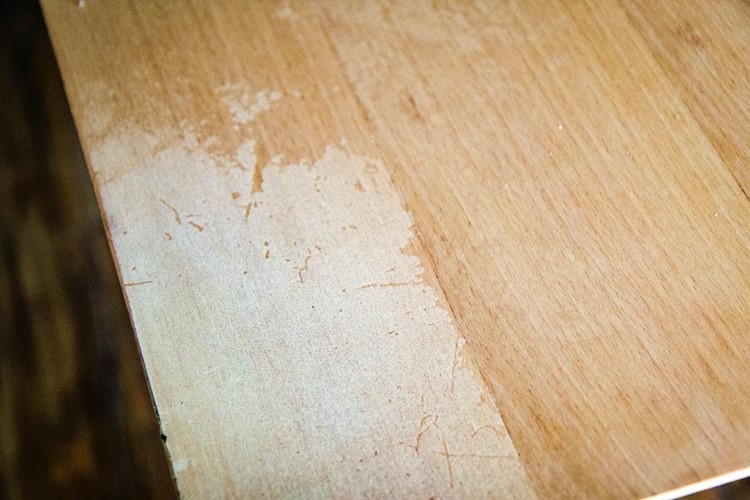
Upon closer inspection though, your eyes are assaulted with the damage that has happened to it. The polyurethane coating was flaking away, the ends were terribly damaged on the table, and a huge gash went right through the center of it that I never thought the table would ever recover from.
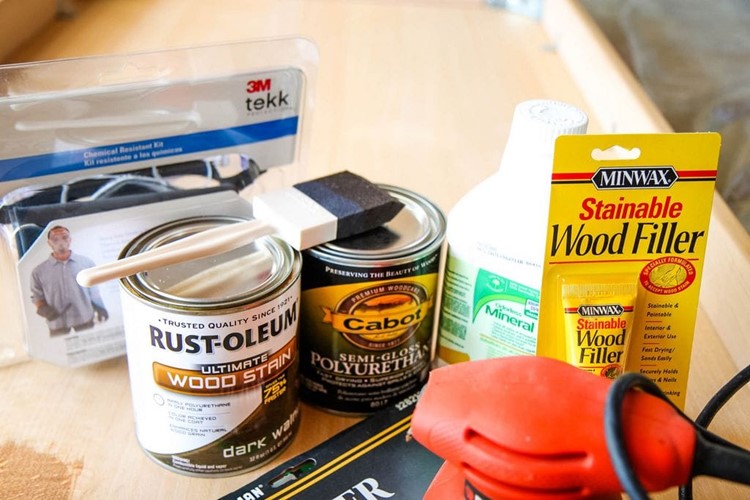
We decided that we would stain the table and restore the tabletop with a nice deep and rich color. We bought lots of supplies to stain the table and I couldn’t wait to get started.
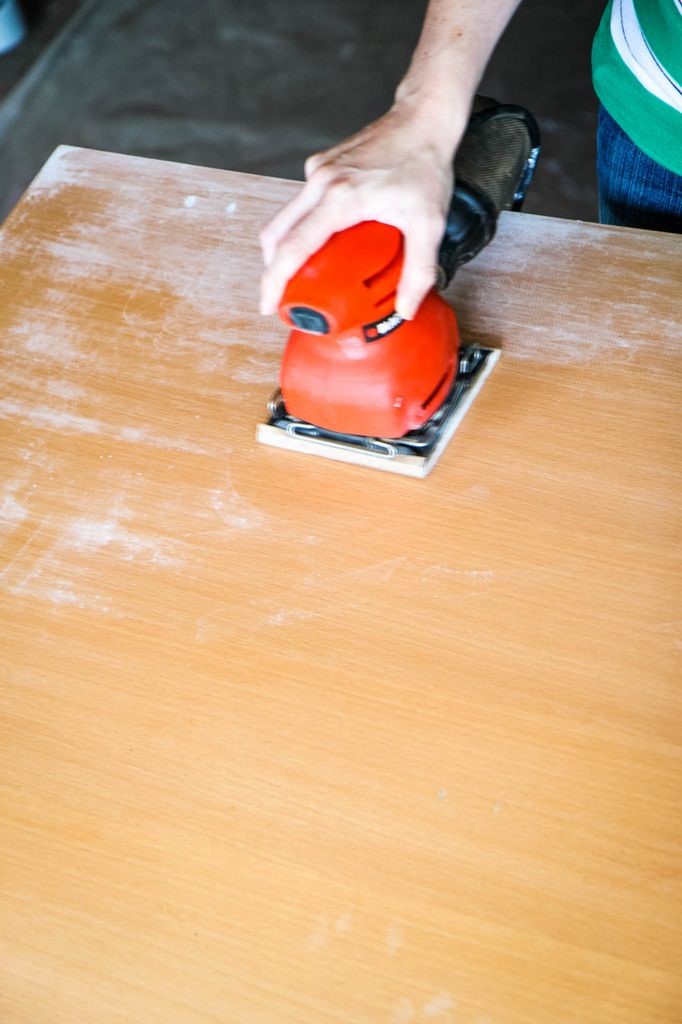
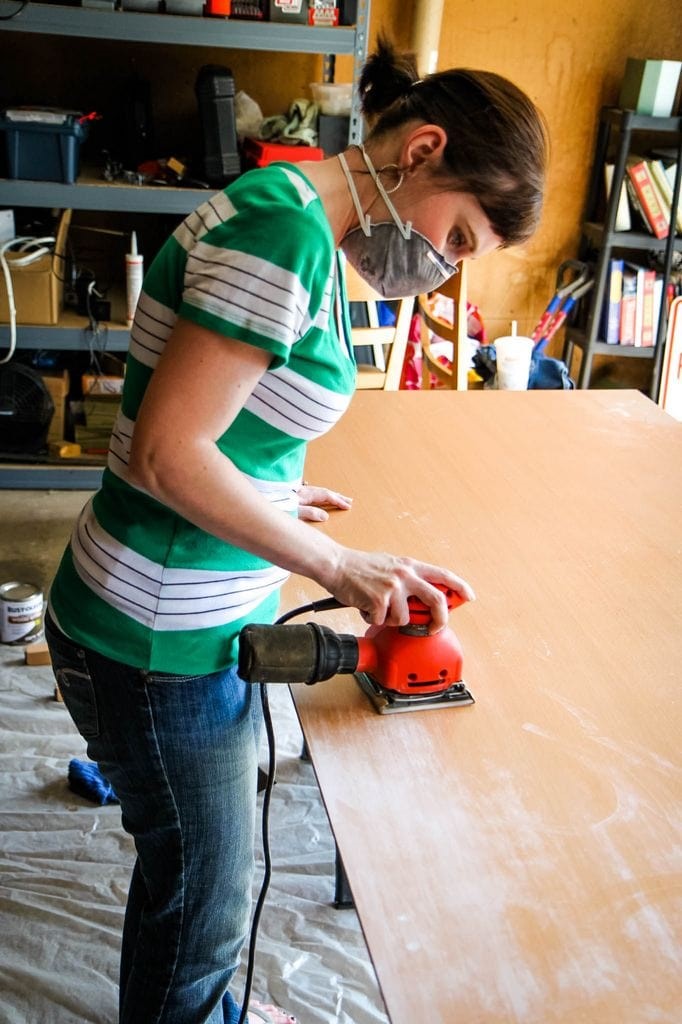
For two days I sanded the table to within an inch of its poor little life. The polyurethane coating remained. I bought polyurethane stripper and left it on the table for twenty-four hours. The polyurethane remained. I sanded the table more. The polyurethane remained.
I cried.
I rocked in the fetal position.
I kicked myself for starting a project that I didn’t feel as confident in.
I gave up.
We ate at a sad folding table and chairs for an entire week, only to discover this staining would not happen at my novice level of furniture staining.
At this point, I had nothing to lose.
We decided to paint the kitchen table.
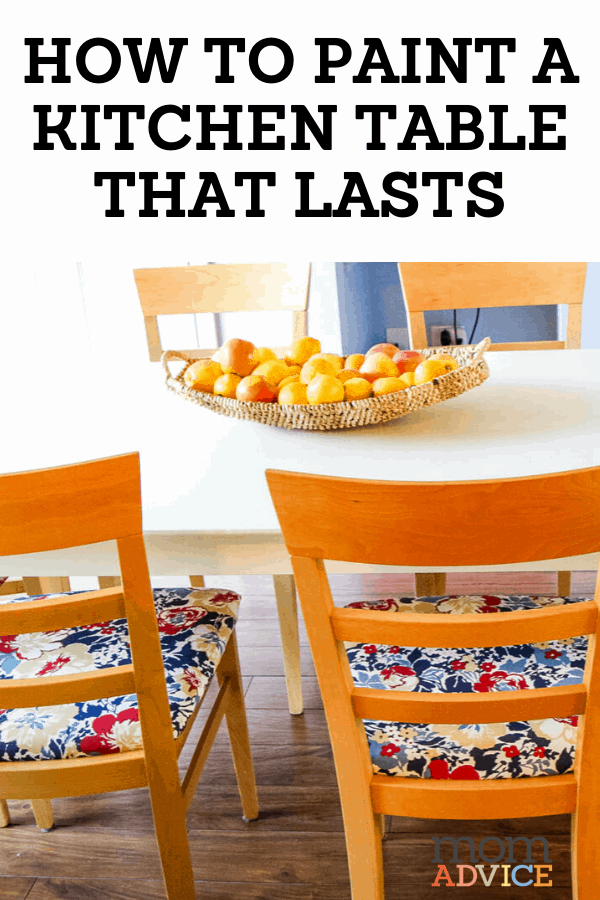
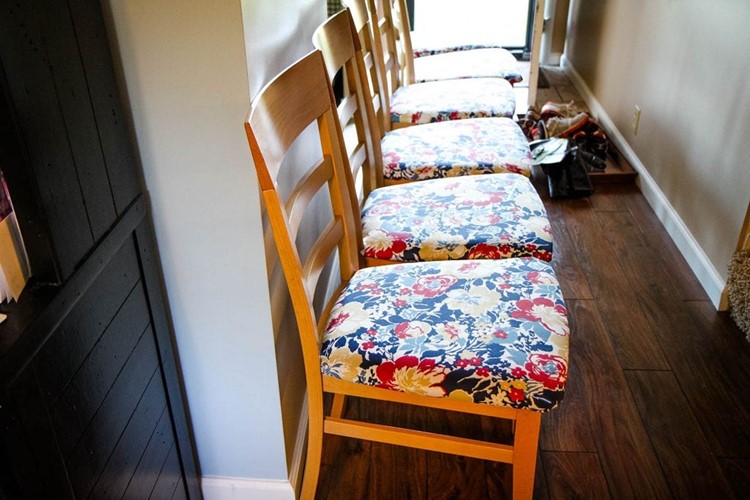
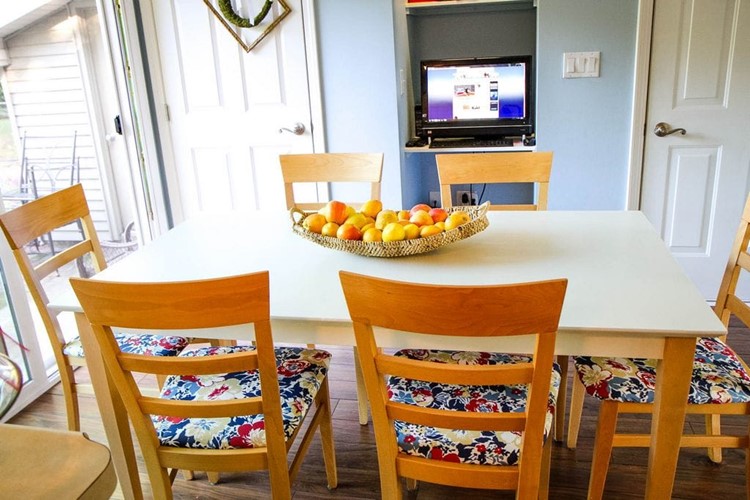
The chairs were in good condition other than a quick reupholster to the tired fabric that had been on them. The table legs also happened to be in decent condition so we made the decision to leave the table legs and chairs in their natural wood color (partly out of laziness and partly because we needed our kitchen table back) which definitely cut down on the work.
I am no expert on painting furniture so I consulted with my best friend who has been painting her furniture recently and the ever amazing and wildly talented Kate, from Centsational Girl, who has this amazing tutorial on how to paint furniture. Between the two of them, I felt a tad more confident than I did before.
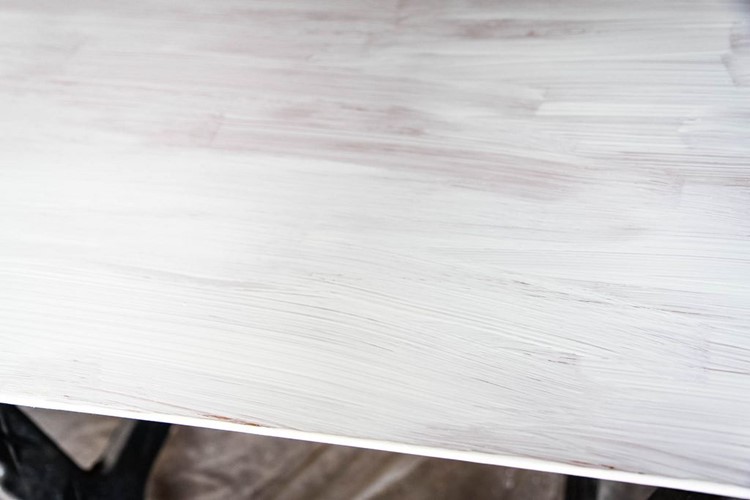
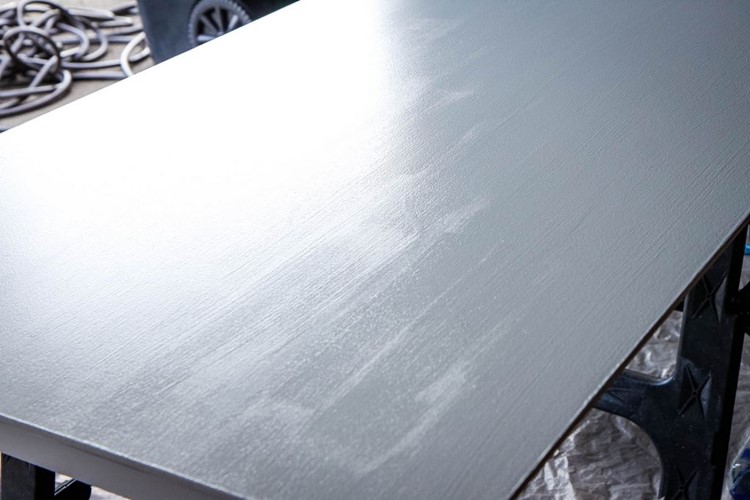
Once the table was sanded and wood filled in the spots that were really rough on the table, we applied two coats of the Zinsser Cover Stain Primer over the table. Between each coat, once the tabletop was fully dry, I gave it another good sanding and wiped it clean with a cloth. I had to admit, even with just the primer, the table was already looking better.
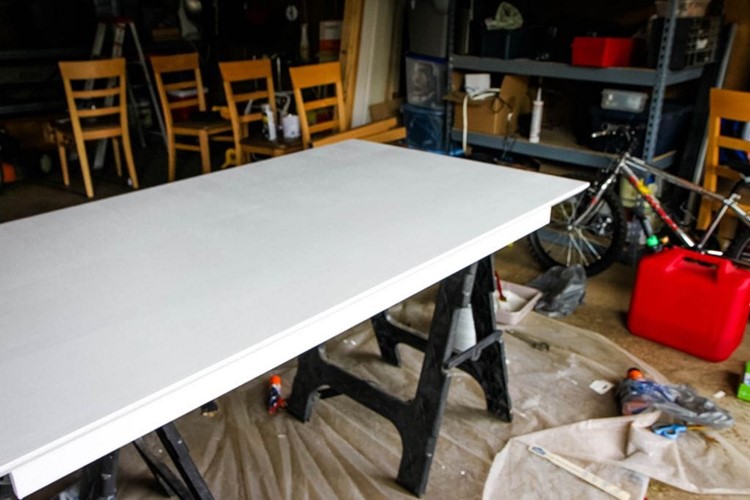
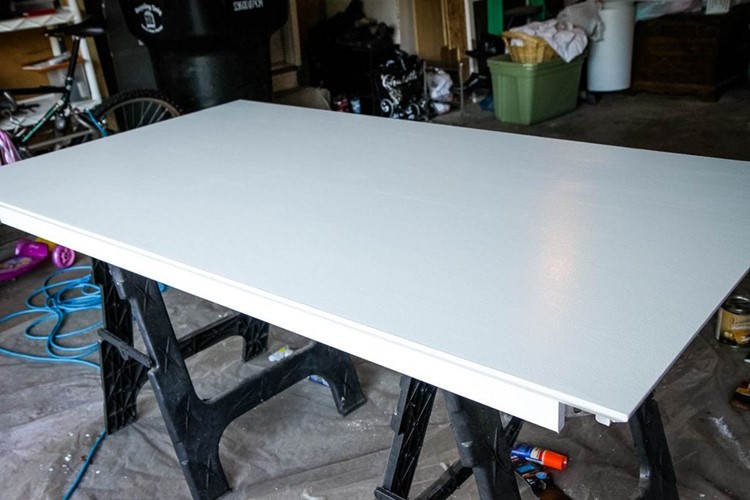
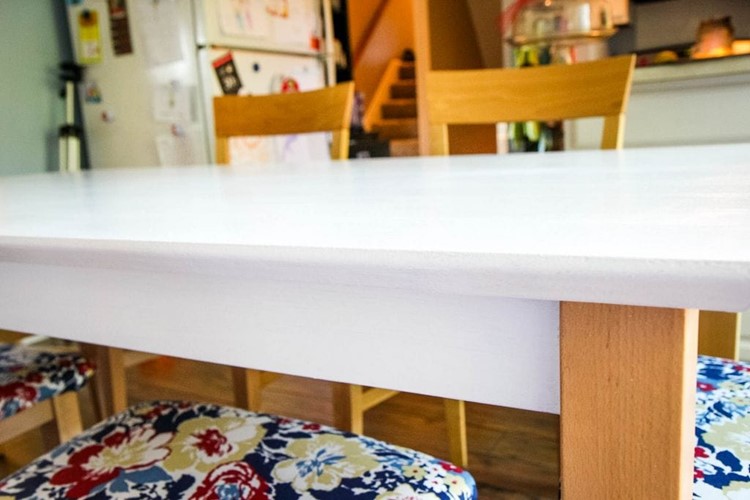
Once the primer was dry, I applied two coats of paint to the tabletop. 
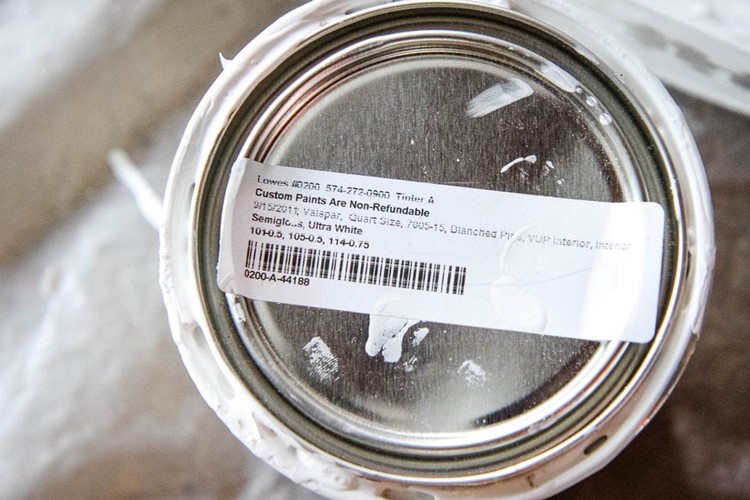
We wanted our tabletop to match our kitchen cabinets so we chose Valspar Blanched Pine (7005-15) for the shade of white we were looking for. Two coats of paint were applied to it. The first coat was applied with a brush and then the second coat, I used a roller and then used a brush to smooth out any roller marks.
I did take Kate’s recommendation and added Floetrol to the paint (as directed on the packaging) which really did seem to help cut down on the mistakes that I usually make when painting. This paint conditioner will definitely be used again when I tackle another painting project.
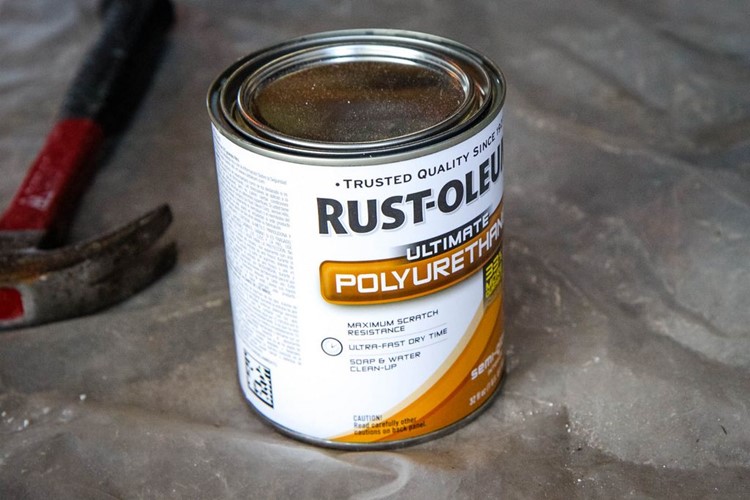
After the paint was dry, we then applied two heavy coats of polyurethane to the tabletop with an angled brush. We allowed the polyurethane to set on the tabletop for four days with no use. I think this was one of the hardest parts about the process, but we wanted to make sure that the tabletop would really be able to withstand our daily abuse once we brought it inside.
The table legs were reattached, the new-to-me chairs were slid under it. We were in business.
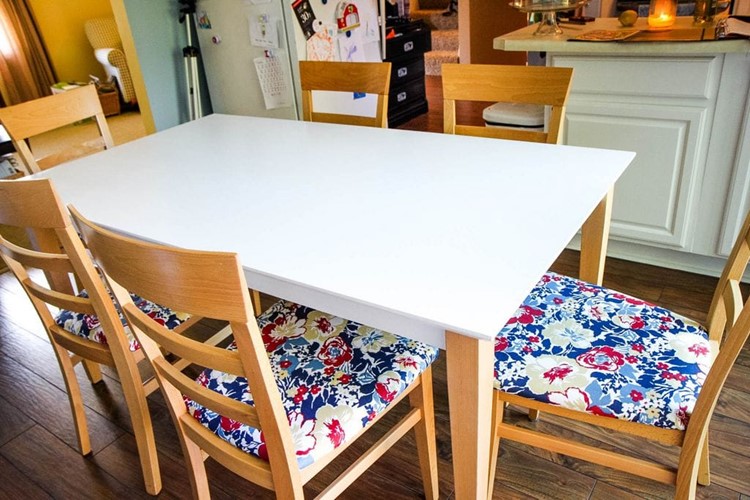
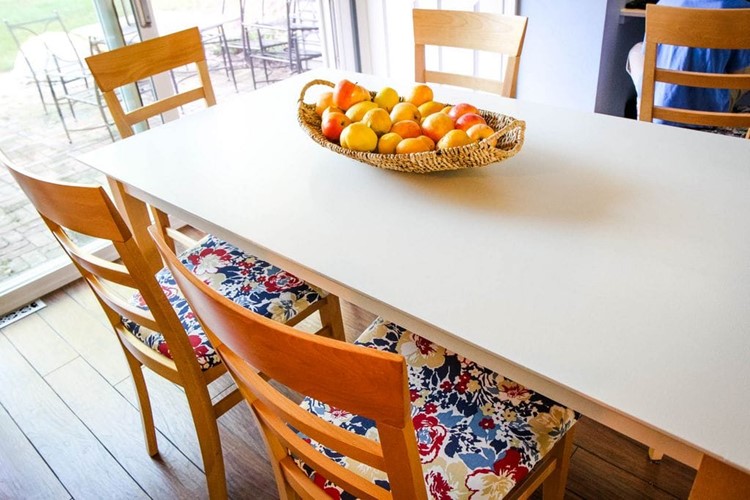
Here is our newly painted kitchen tabletop. It is not perfect, but we truly did the best we could to improve upon something we already owned.
I am so happy to have a tabletop that I don’t have to cover with a tablecloth. I am just hoping that this will be able to stand up to our daily use, but I will be happy if we can get a couple more years out of this set.
I will tell you a secret.
Every time I see a crumb on it, I start freaking out that paint is chipping.
A major freak out ocurred after the kids dined on pumpkin bread for snack one day.
I am wondering when I will get over that.
Perhaps, never.
For now, my husband is just thankful I am done with this project, I am thankful to have reclaimed the garage, and we are all thankful that we didn’t have to purchase a new set of furniture for this room.


It looks beautiful, Amy! Ties in great with the chairs and the rest of your kitchen!!
[Reply]
Amy Reply:
September 27th, 2011 at 12:45 pm
Aw, thank you so much, Leah! We are thrilled to have the project done and that it ended up tying our kitchen together so well! xo
[Reply]
It looks great! Very light and airy. You’ve given me some food for thought!
[Reply]
Amy Reply:
September 27th, 2011 at 12:44 pm
Thanks so much, Amy! We are just thankful to have it done!
[Reply]
I love that the legs and chairs are still the original wood color. Your kitchen is going to look like Spring all year round! That should help with any winter blahs that you experience. Well done!
[Reply]
Amy Reply:
September 27th, 2011 at 12:39 pm
Thanks so much, Ali! I think leaving those legs and chairs natural really cut down a lot of the work. I also won’t have to worry about those chipping too. Thanks so much for peeking!
[Reply]
VERY NICE WORK! wow. the white color goes great with your kitchen! if i would ever want to paint my table i know where to go
[Reply]
That looks awesome. Great job. Looks great with the chairs and the kitchen.
[Reply]
Amy Reply:
September 27th, 2011 at 12:44 pm
Thanks so much, Taryn! Be watching for a package from us for your new little bundle. I am just putting the finishing touches on it.
xoxo
[Reply]
Great job! It looks beautiful! You should have a really durable finish because of the primer and the poly. YAY!
[Reply]
Amy Reply:
September 27th, 2011 at 2:17 pm
Just the person that I was hoping would take a peek at this. Thanks so much, Kim!! xoxo
[Reply]
Looks great, Amy!
[Reply]
Amy Reply:
September 27th, 2011 at 2:17 pm
Thank you so much, Angie!!
[Reply]
Well done Amy! It looks beautiful!
[Reply]
Amy Reply:
September 27th, 2011 at 2:18 pm
Thanks, Ingrid, I am just so happy to be done with it. Now on to the next project around here!
[Reply]
I rescued a table from the curb this past summer(along with three chairs and a leaf) and have been using it in our soon-to-be gutted house. I’m thinking I can clean it up enough to keep around once our reno is through. Your tips will come in handy when I try to give it new life. Thanks; let us know how it holds up.
@KimMoldofsky
[Reply]
Amy Reply:
September 27th, 2011 at 7:39 pm
I will definitely let you know, Kim! I am hoping that with the two coats of poly on it that it will keep the table looking nice and fresh for awhile. Good luck with your table project!!
[Reply]
Great job Amy! It looks fresh and clean and cheerfull. Thanks for sharing.
[Reply]
Amy Reply:
September 27th, 2011 at 7:39 pm
Thank you so much, Lynn Maire!
[Reply]
The waiting is always the hardest part ( just like life I guess) I’m not very patient when waiting for pain or stain to dry…….your table and chairs look great !
[Reply]
It looks lovely Amy! I need to do mine as well-I think the only thing that can damage the finish on these things is the stuff you get on it by accident! Mine got nail polish remover (dropped the cotton ball and in a brain freeze moment sat the bottle onto the table…sigh)-took a perfect oval of finish clean off. LOL-so, now you know, nail polish remover will definitely take the finish off a table! Glad I could help! ;-D
[Reply]
I love how it turned out. So sorry you had such a struggle!
~Liz
[Reply]
Great job!! I have to redo my chairs and almost afraid to attempt… Its just not the seats but the whole chair… LOL Oh someday… Keep up the great work..
[Reply]
Amy Reply:
October 3rd, 2011 at 12:27 pm
Yes, we got lazy on the chair painting. That seems like a ton of work to me. I can imagine why that project is getting pushed off. Thanks so much for peeking at my upholstery project
[Reply]
Hi Amy, So glad to find your site! As a fellow home project tackler, I have been surfing the net for information on the best durable paint type (oil vs latex)for for my kitchen table project. I am wondering if you uses latex or oil and how well it is holding up?
By the way… your table looks Amazing!!:)
[Reply]
Amy Reply:
November 30th, 2011 at 10:15 am
Jodi- I just used a latex based paint on the table and it is holding up really well. If you aren’t experienced with oil paints, I understand they can be tricky to paint with, although they are more durable. This table still looks like the day I painted it! I hope that helps and good luck with your project!
[Reply]
Pingback: Honey Bun Cake | The Motherload
Hi Amy,
Your table does truly look beautiful! I am really wanting to do the same to our old kitchen table. In white as well, but I am wondering about water rings/stains. Do you find that you can put wet and hot things on the table, or will a coaster always be a necessity?
Thanks, Karri
[Reply]
Amy Reply:
June 6th, 2012 at 7:24 am
Karri-Ann- If you seal it, it should be good! We do not use coasters or anything and haven’t had any water rings or issues with the paint/sealer coming off. I hope that helps!
[Reply]
Do you have to sand the table down?
[Reply]
Amy Reply:
July 9th, 2012 at 12:34 pm
I would definitely sand it especially if it isn’t even or banged up like mine was! It will give the paint something to grip on to!
[Reply]
Thanks for the heads up on refinishing a table! My wife and I are looking at replacing our current round, four-place kitchen/dining table with a rectangular table that can seat six (or more). This is especially vital since we have another little one on the way and frequently have people over! Unfortunately, this isn’t the only project that will face me, since we have a half round hall table that’s been painted since the 60′s…Honey-do list keeps growing…
[Reply]
Pingback: Quick Kitchen Update; White paint a cheap table - Heroic
Thanks for this. Just yesterday we had the exact same revelation as you with our table — staining was not an option. This was not all wood. We have now painted and are getting ready to do the top coat. Thanks for the great tutorial!
[Reply]
Looks SO great!! You have givin me the courage to paint mine tomorrow. Thanks! I can assure you my ‘before’ pictures are much worse!! Haha!
[Reply]